

Narpult Smart Lock User Manual
User Manual
Powered by Narpult Smart
Customer Service:
service01@narpultsmart.com
for Narpult Smart Lock
Welcome to join family, please read this user manual before operating your smart
lock, and keep it for further reference.
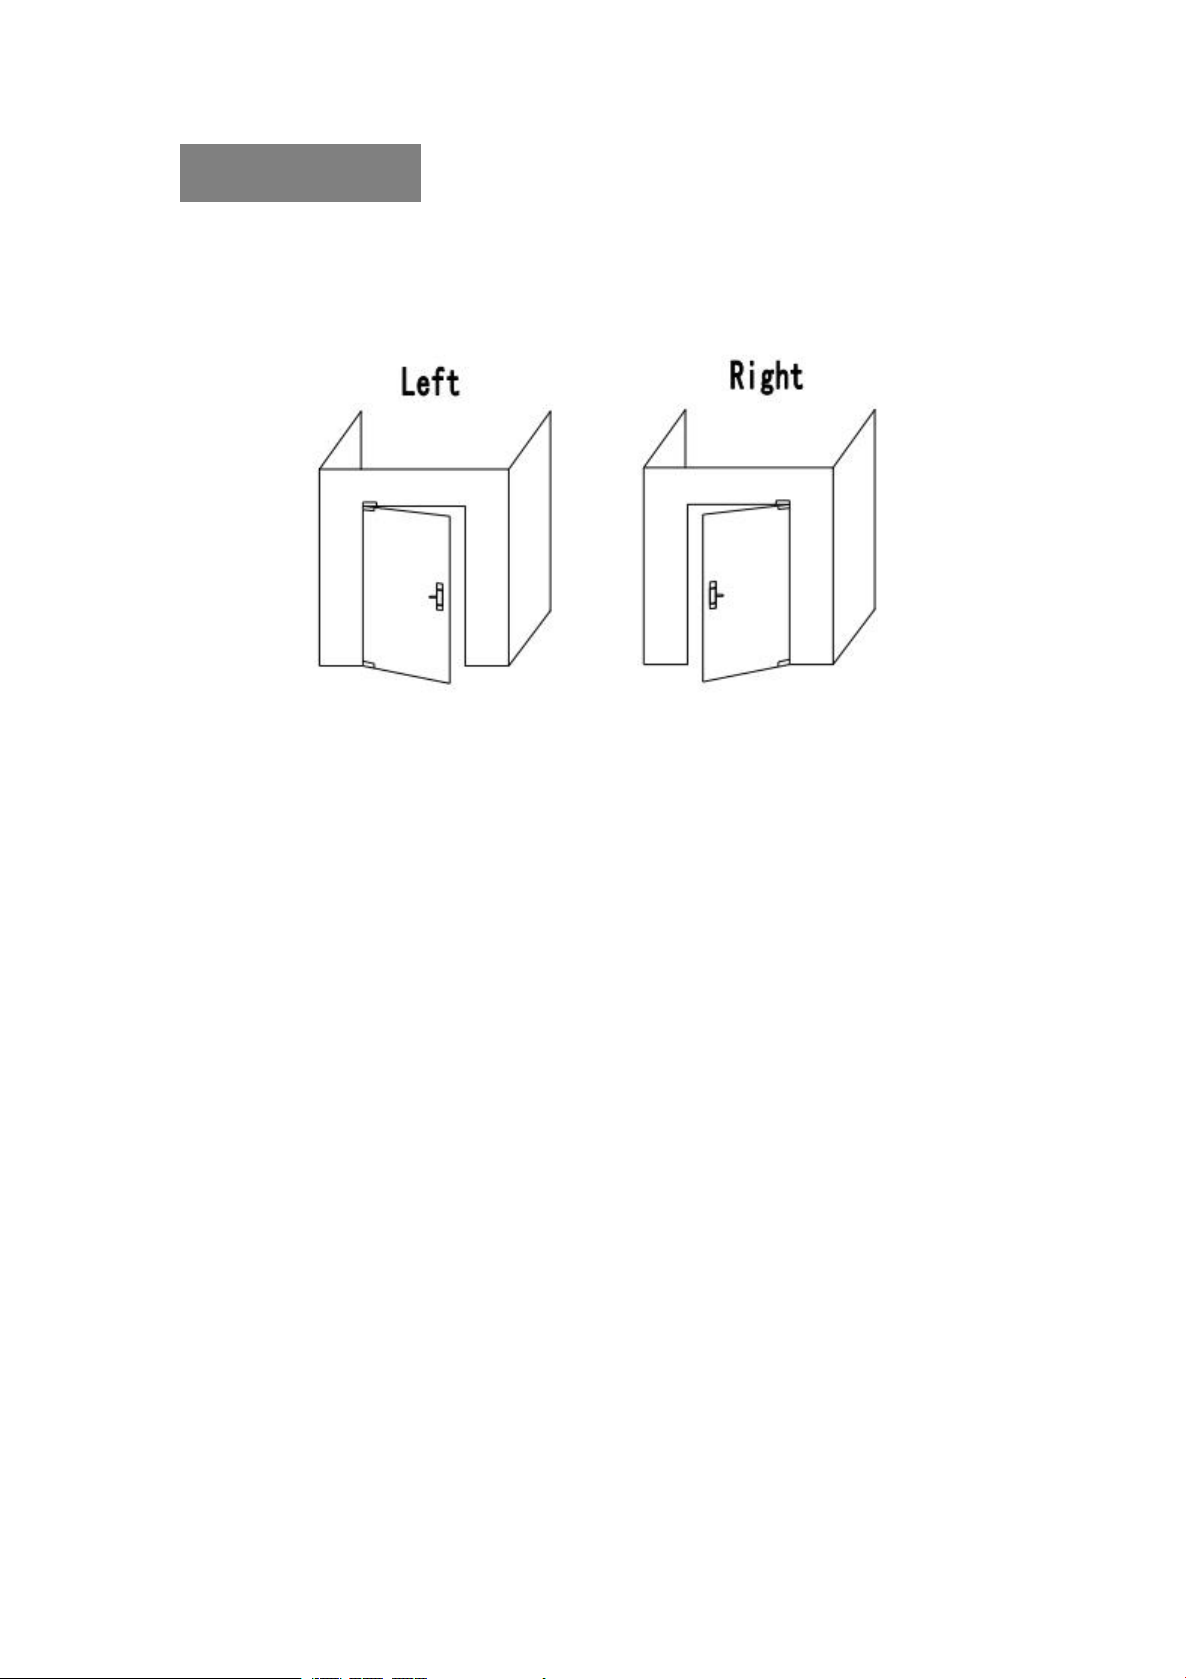
Warm Notice
There are some difference for Left-side or Right-side door, please
◎
check your door direction and switch the toggle switch to L/R.
We highly recommend you to scan the QR code below to watch the
◎
installation guide video before operation and also you can search for
Narpult Smart Lock to see it on youtube.com.
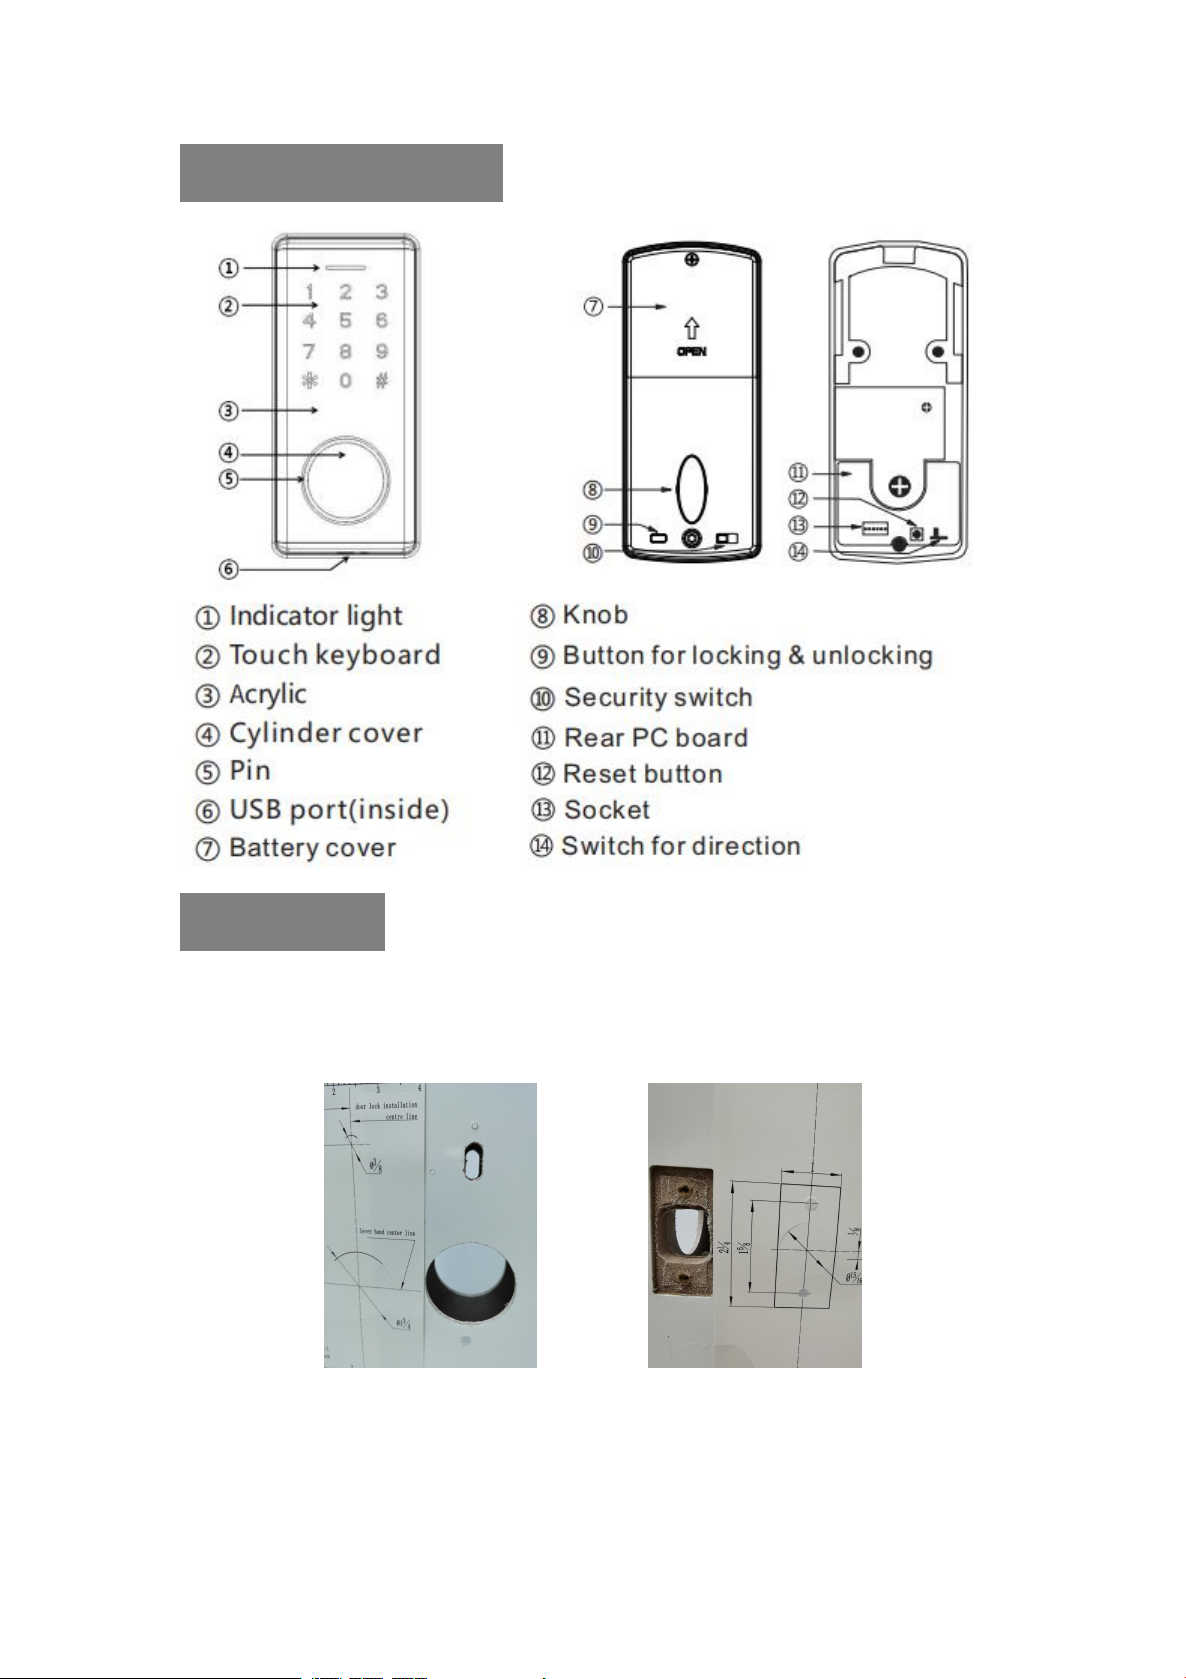
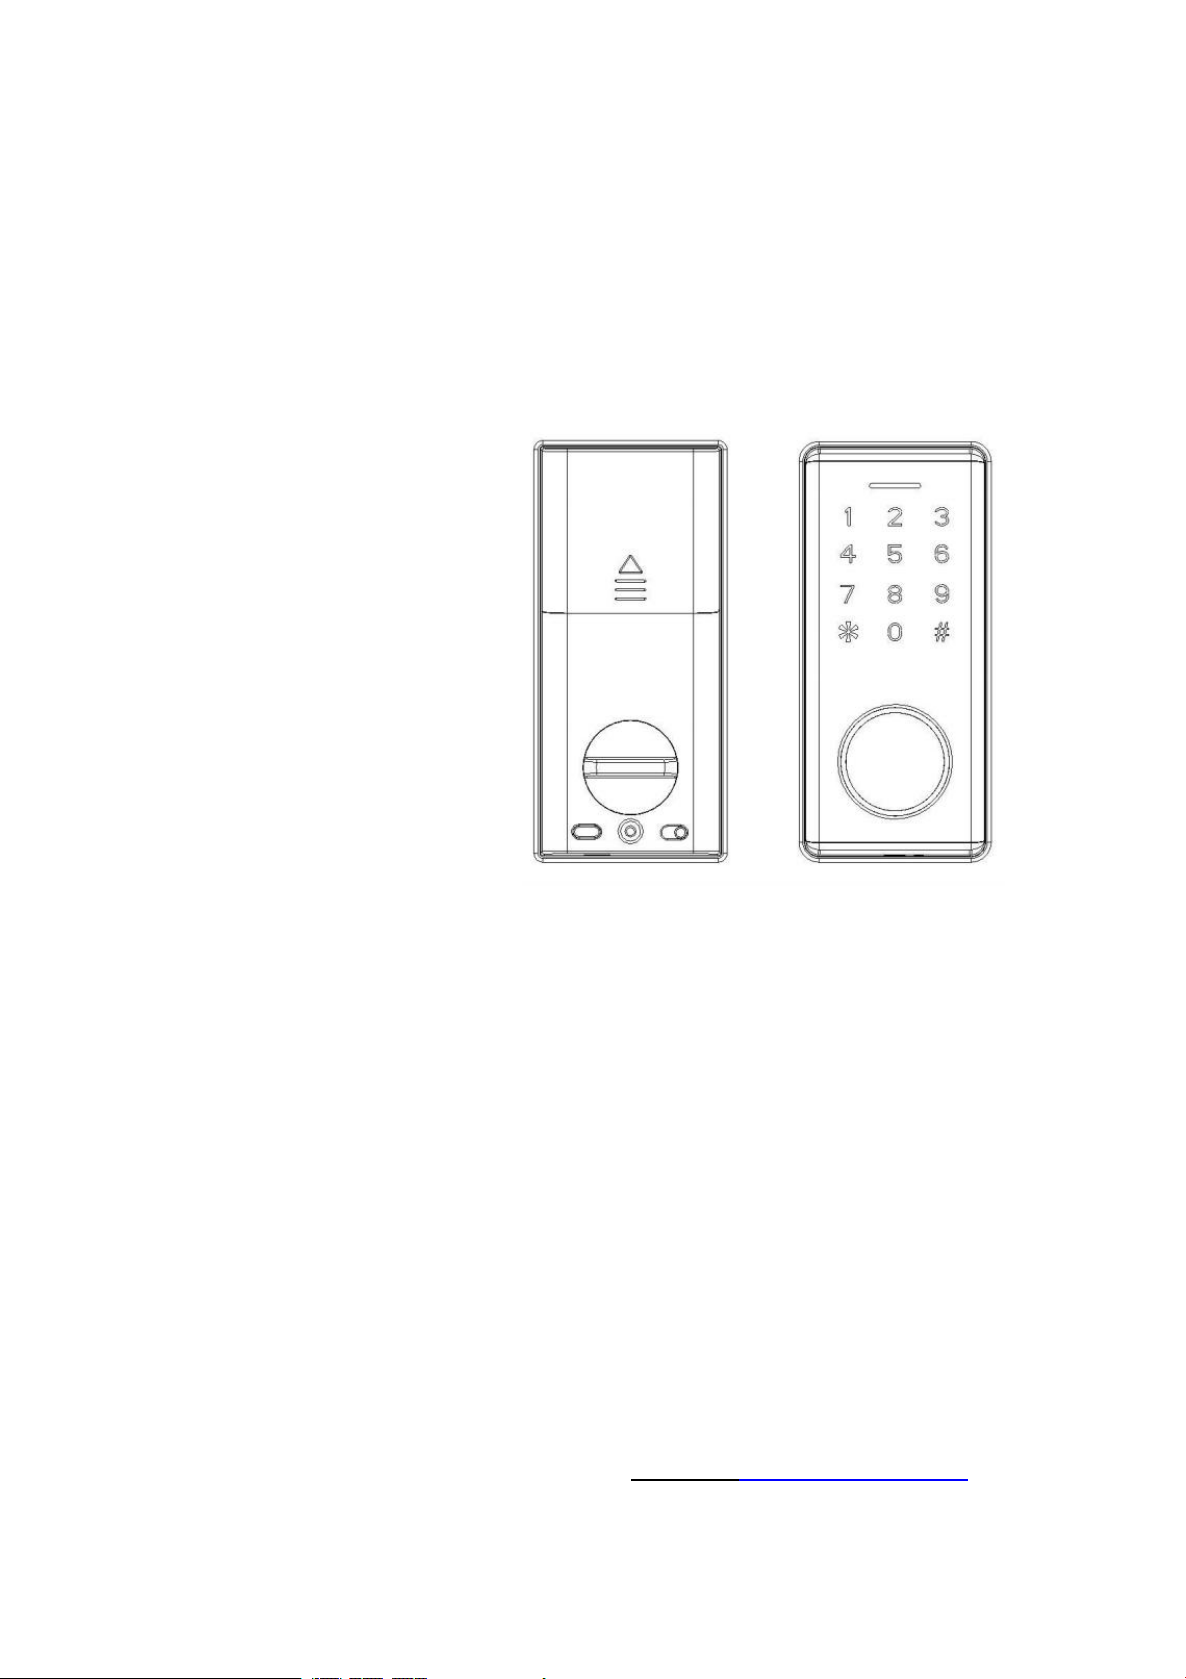
Product Structure
Installation
Step 1 Drill hole for your door
for Deadbolt for Latch
Step 2 Install strike
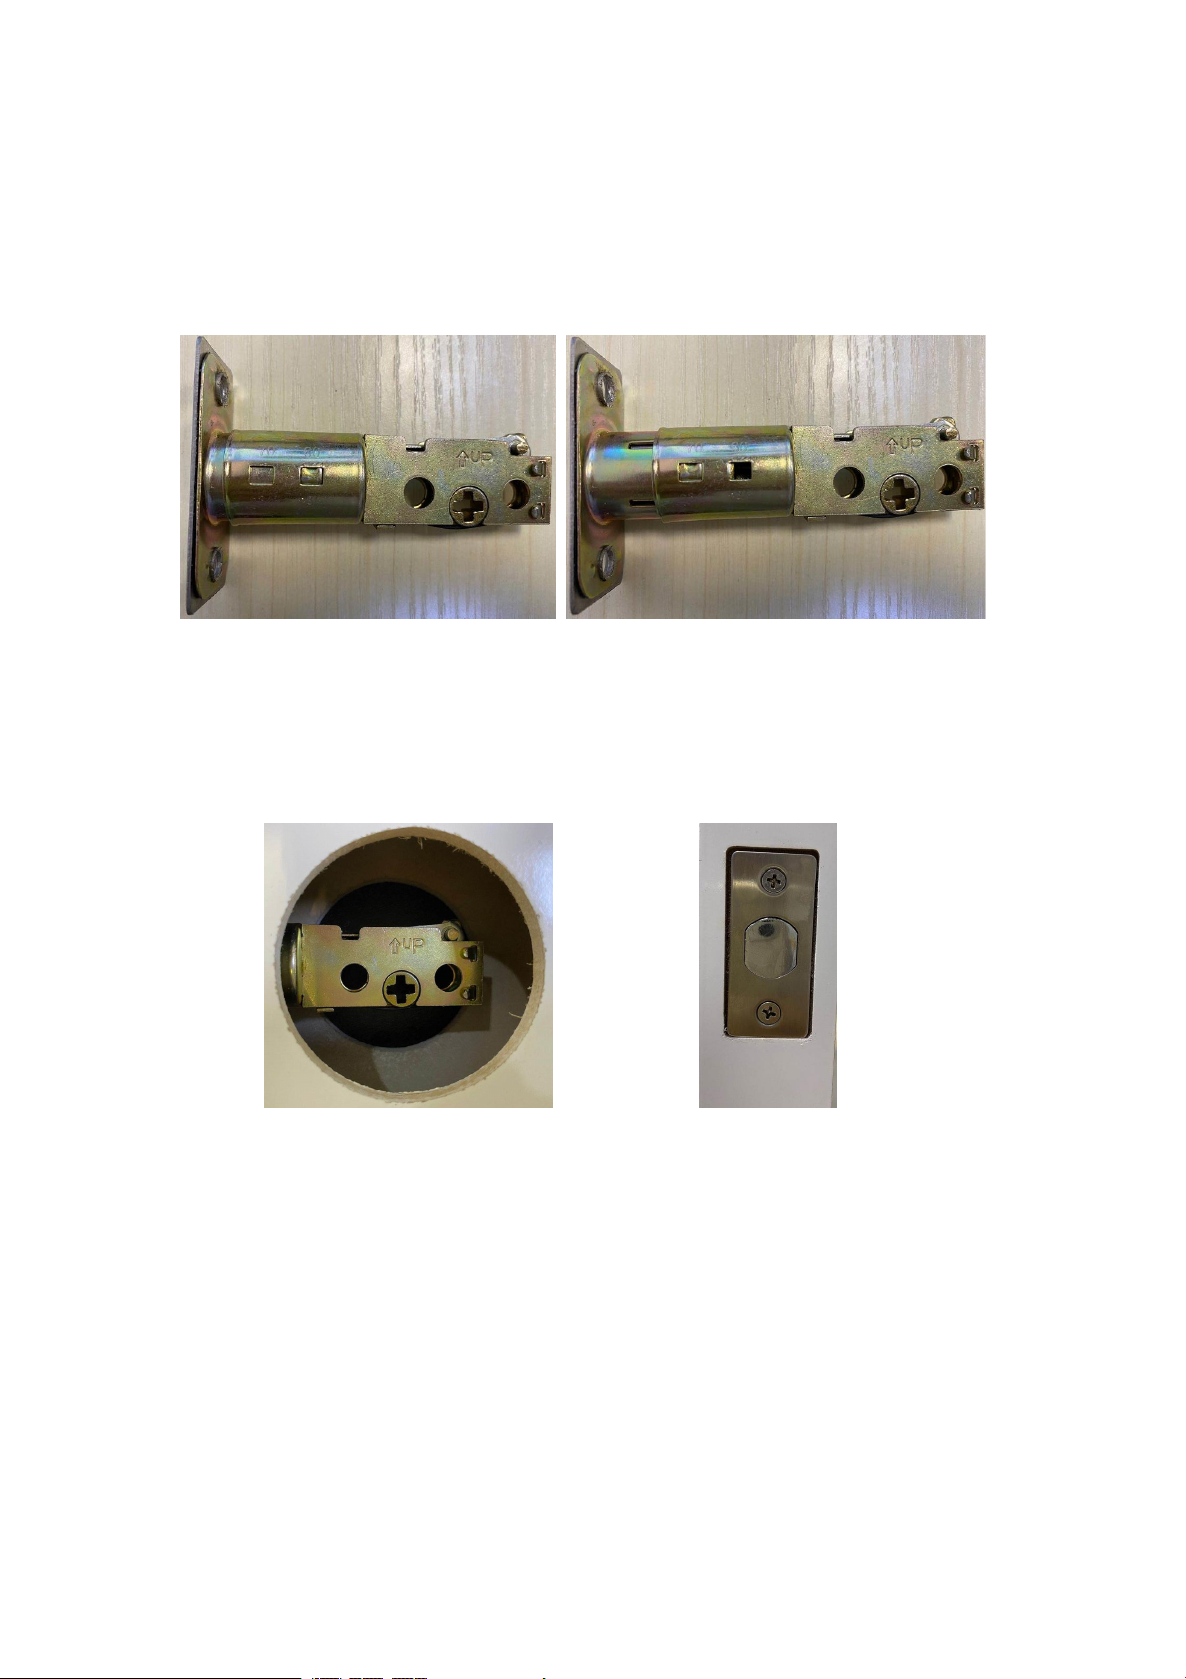
Step 3 Adjust latch
2-3/8'' (60mm) 2-3/4'' (70mm)
Step 4 Install Latch
'up' is upward Fix with pointed screws
Step 5 Install lock cylinder
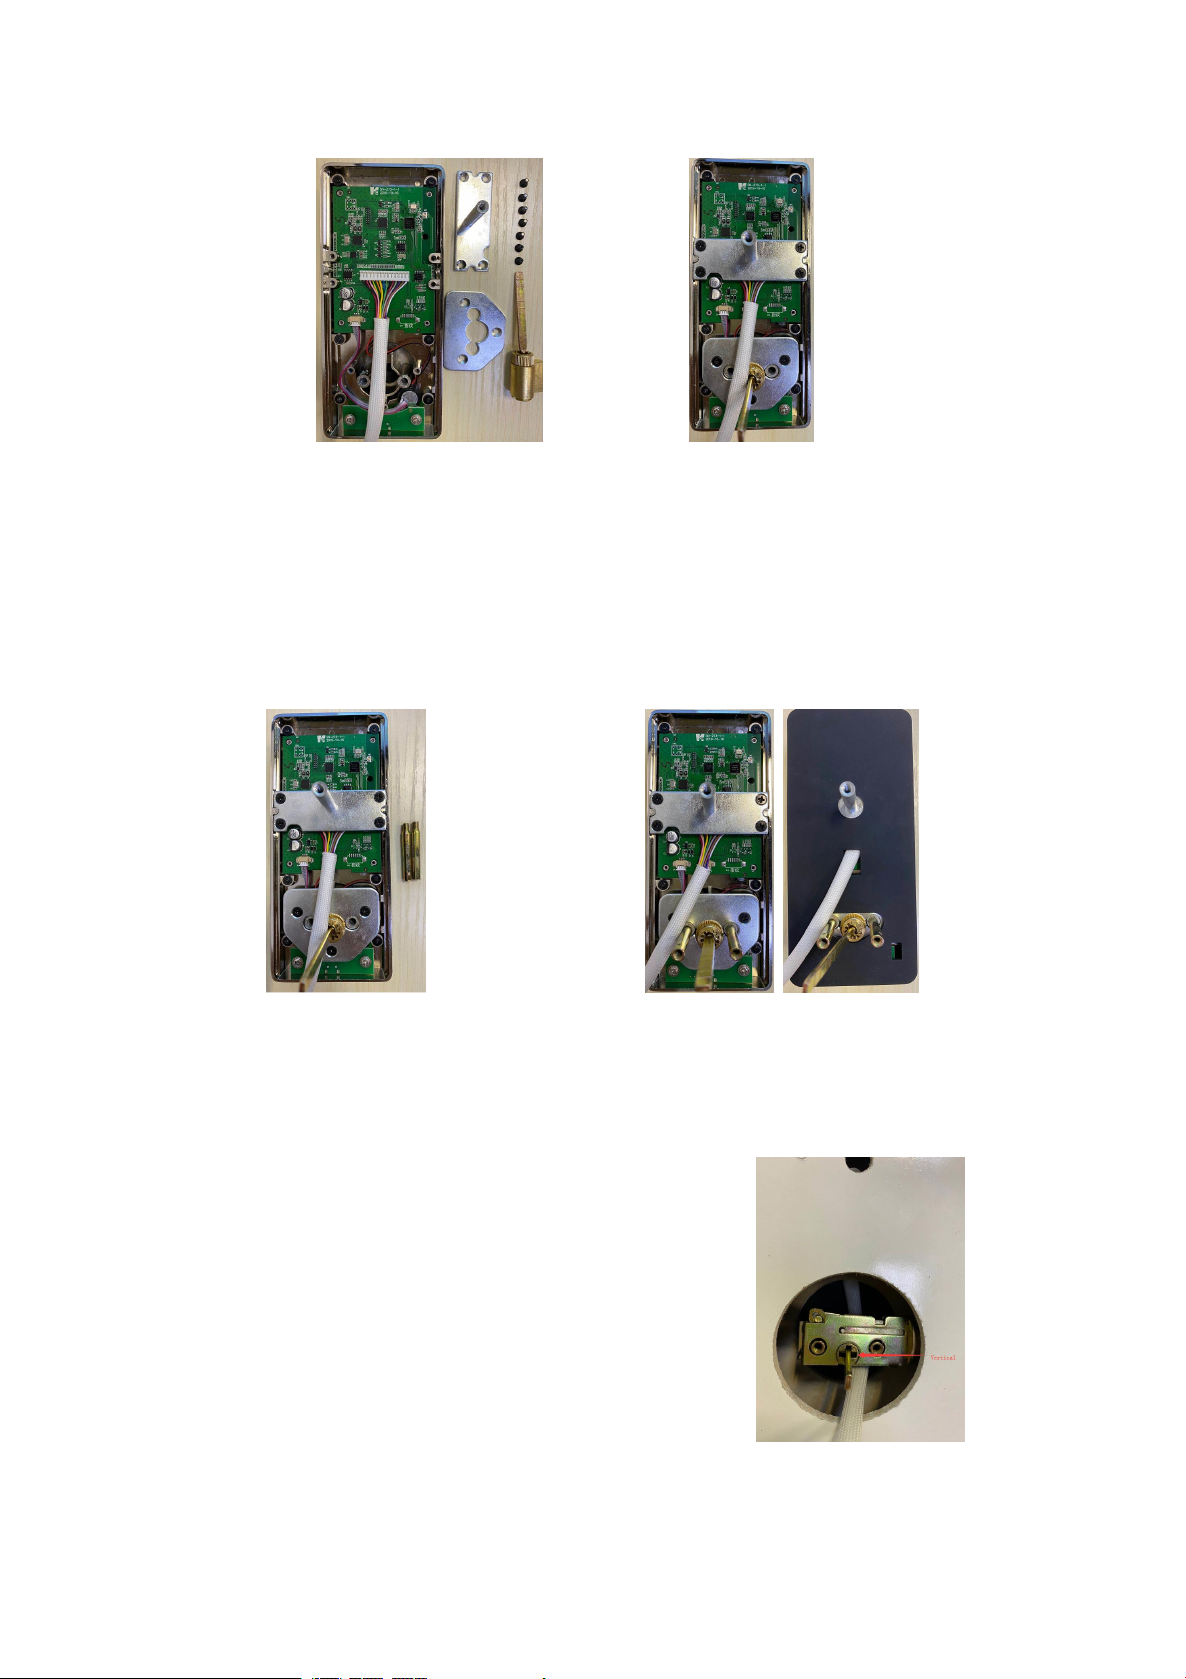
Ready to install Install completed
Step 7 Install Keypad
Please stay the pin of cylinder Vertical and insert
the keypad to the latch.
Step 6 Install screw pillar and cover the waterproof
silicone
Ready to install Install completed
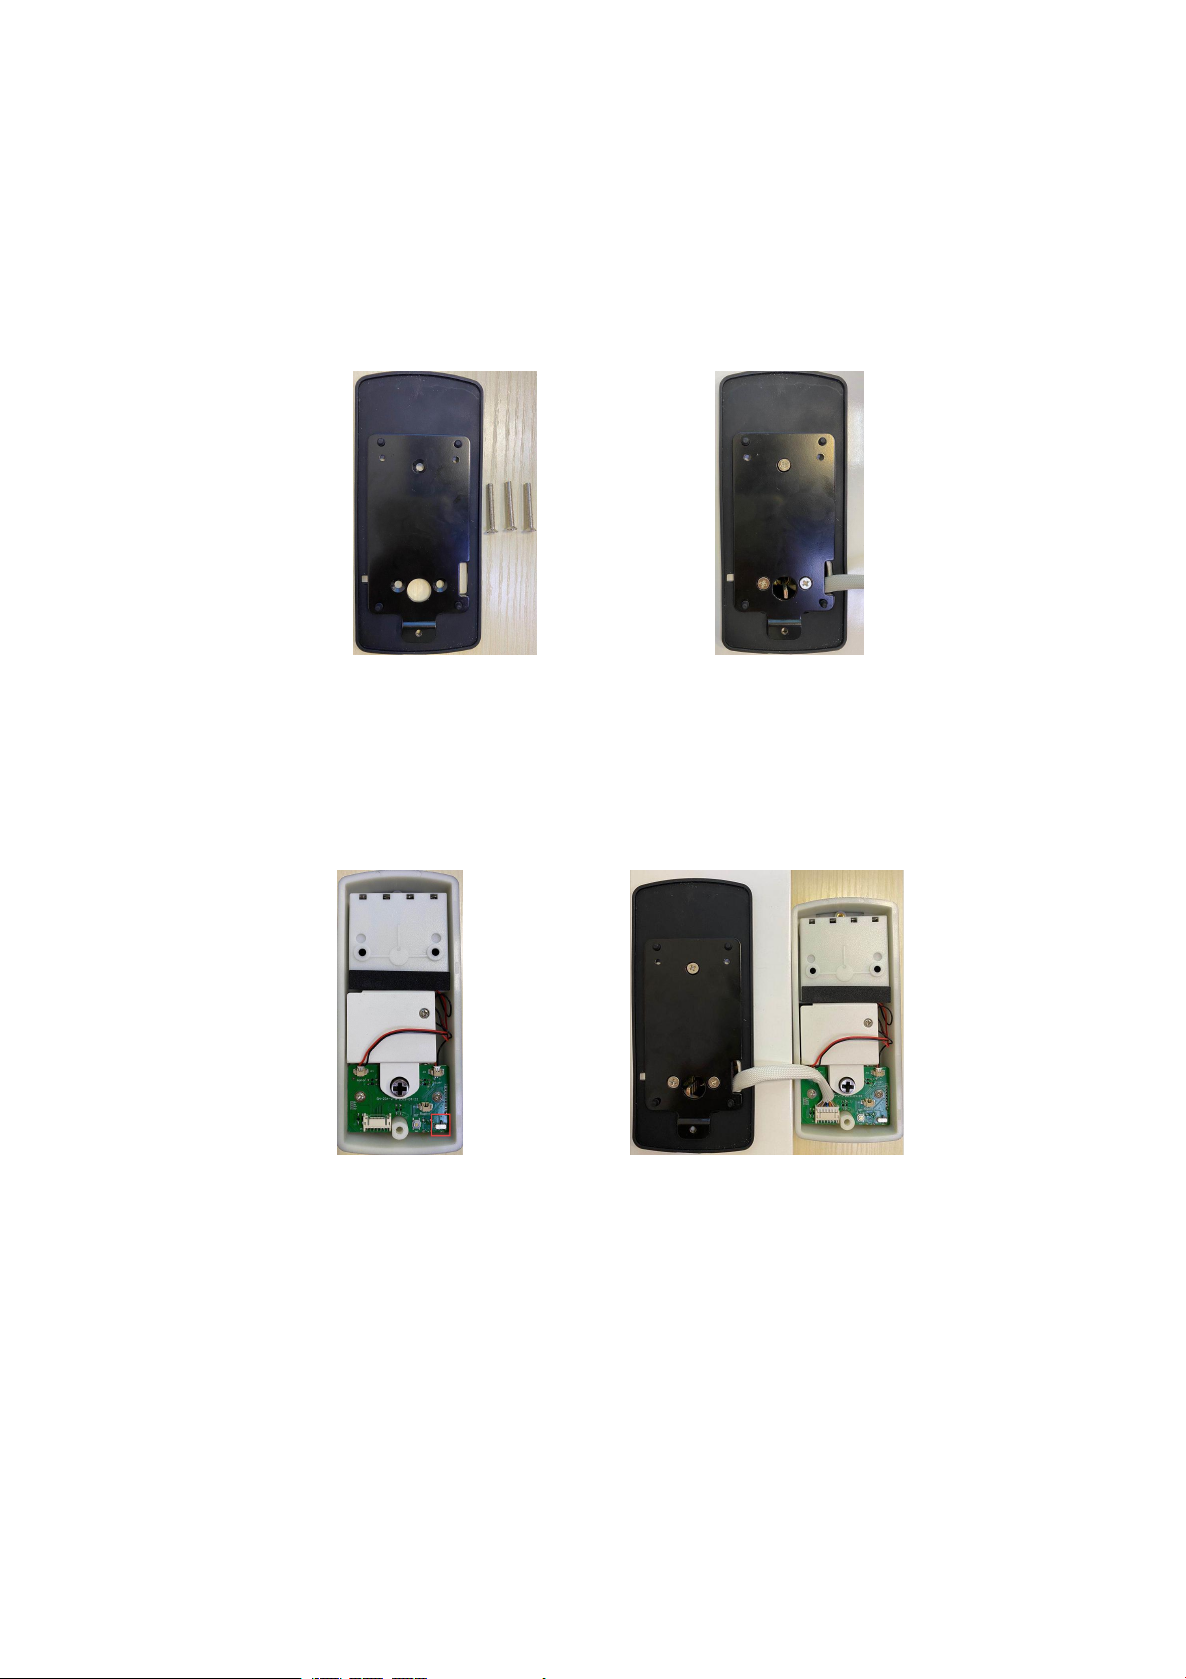
Step 8 Install mounting plate
Hold the side with waterproof silicone against your door, take the IC
wire out, and screw the plate to your door
Ready to install Install completed
Step 9 Install inside back panel
◎Switch the toggle switch to L/R by your door direction
Switch to L for Left-side door / Switch to R for Right-side door
◎Connect the IC wire to inside back panel
◎Adjust turn knob by your door direction and screw inside back panel
to mounting plate(screw hole under the turn knob)
 Loading...