

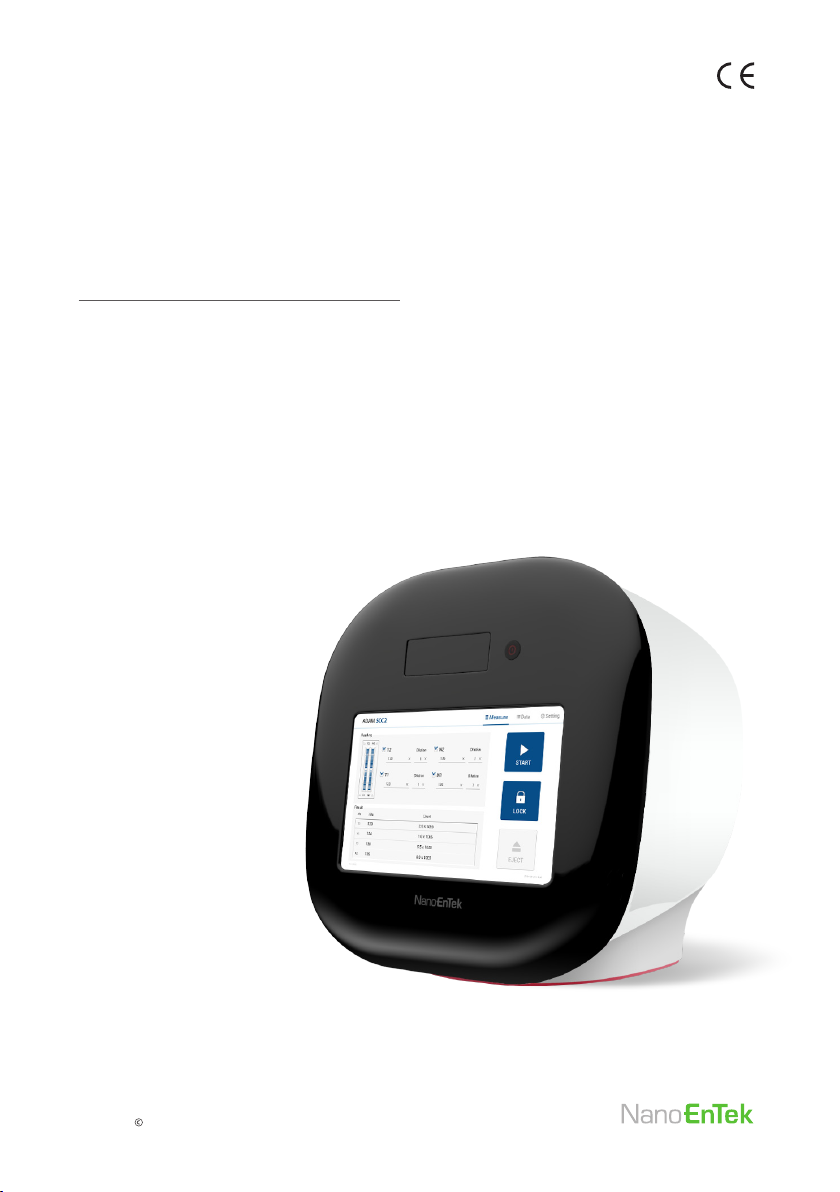
ADAM
SCC
Automated Somatic Cell Counter
Instruction Manual
2
Copyright NanoEnTek, Inc. All rights reserved.


All the materials in this user manual are protected by Korean and international copyright laws. They cannot be
reproduced, translated, published or distributed without the permission of the copyright owner.
ADAM-SCC2 Instruction Manual
Website : www.nanoentek.com
E-mail : sales@nanoentek.com
Manufactured by
NanoEnTek, Inc.
851-14, Seohae-ro, Paltan-myeon, Hwaseong-si, Gyeonggi-do, 18531, Korea
Tel. +82-2-6220-7940
Fax. +82-2-6220-7999
NanoEnTek America, Inc.
240 Bear Hill Road, Suite 101, Waltham, MA 02451, USA
Tel. +1-781-472-2558
Fax. +1-781-790-5649
The information in this manual is described as accurately as possible.
Firmware and software changes and updates may change without prior consent or notication.
Copyright © 2019 by NanoEnTek Inc.
All rights reserved. Published in Korea.
Documentation: NESMU-ASC2-001E
Revision history: V.0.0 AUG 2019
V.1.0 DEC 2019


Table of contents
Introduction
General description
Technology
Somatic Cell Count Kit
Product Contents
ADAM-SCC2
SOMA Chip kit
Upon receiving the instrument
Product Description
Front view of ADAM-SCC2
Rear view of ADAM-SCC2
Getting Started
Environmental requirements
Power on and initial display
Error messages during botting
Count setting
General Operation
Introduction
Sample preparation
Counting cell
Setting
2
3
4
Setting
Wi
Update
22
23
23
Power o
5
5
5
6
7
8
8
9
10
11
12
12
Lock
Power o
Maintenance and cleaning
Trouble shooting
Warranty
Technical specications
Product list
Safety precautions
Safety symbols
Warnings
Technical Support
24
24
25
26
27
28
29
30
31
32
33
Measure
Run sample
Result analysis
Result analysis -Error code
Data
Data list
Edit
Image
Mail
15
16
17
18
19
20
21
Introduction
General
Description
ADAM-SCC2 is an automated somatic cell counter integrated with uorescence optic and image analysis software. ADAM-SCC2 counts the number
of somatic cells to determine the quality of raw milk with unique image
cytometer technology. ADAM-SCC2 can be used as an ideal equipment in
the research eld, dairy farms, milk manufacturing facilities, and veterinary
institutes working with somatic cell analysis. It will be helpful to manage
the milk quality to provide the best grade of milk.
2
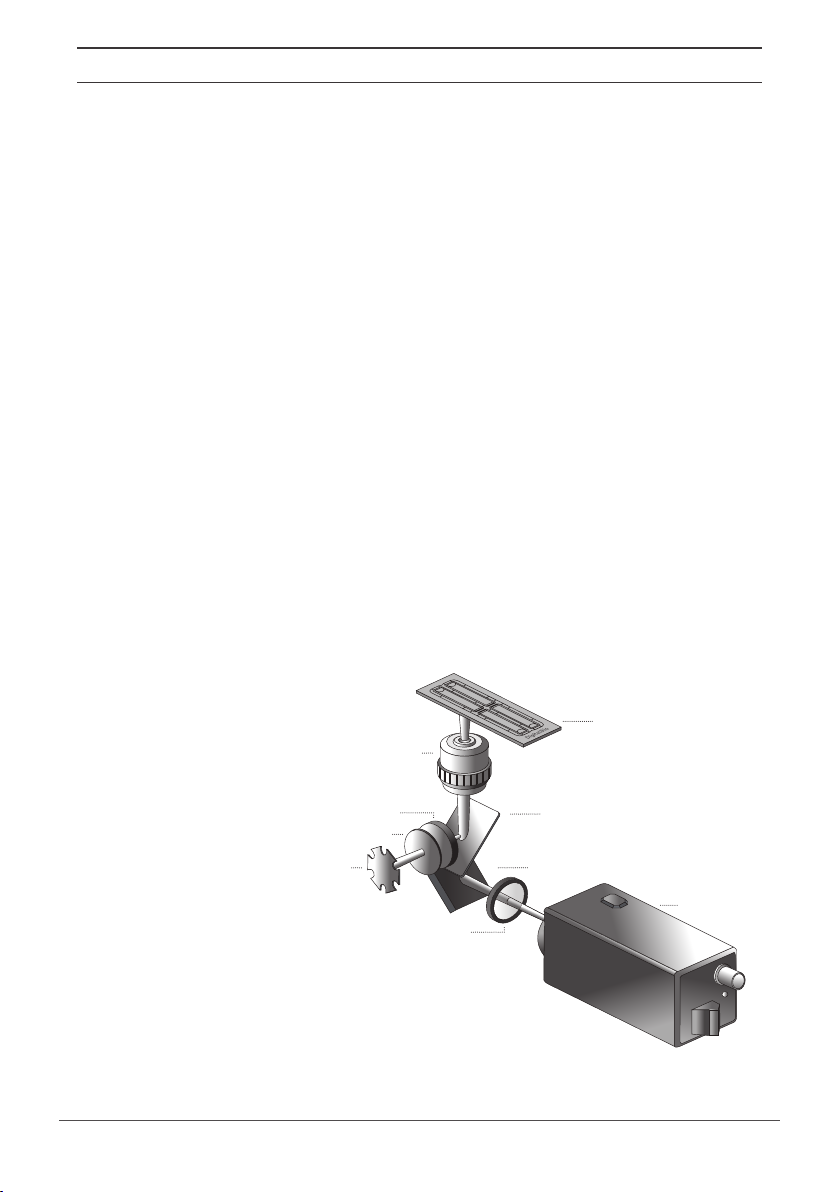
Introduction
Technology
High levels of somatic cells cause disagreeable taste and reduce storage
life in dairy products. These somatic cell counts (SCCs) are accepted as an
international standard for the measurement of milk quality. For this reason,
somatic cell counts are readily available to a dairy farmer in most countries.
Standard reference method for enumeration of somatic cells in raw milk is
the direct microscopic somatic cell count (DMSCC). However, it needs the
training and skill of analysts for accuracy, precision, and reproducibility of
this method. ADAM-SCC2 is fully compatible with the DMSCC. It is composed of the disposable plastic microchips and staining solutions, a uorescence microscopic optics equipped with a CMOS camera, and an image
analysis system. It utilizes the capillary ow of the microuidic chamber
by the surface modication of hydrophilicity. Microuidic technology of
disposable microchips provides low reagent consumption and combining
with the ready-to-use reagent makes daily work easy.
ADAM-SCC2 is not only easy to use but oers the same repeatability and
accuracy as the conventional expensive device.
Excitation lter
Green LED
SOMA chip
Objective Lens
Dichroic Filter
Lenses
Mirror
CMOS Camera
Emission Filter
ADAM-SCC2, Automated Somatic Cell Counter 3
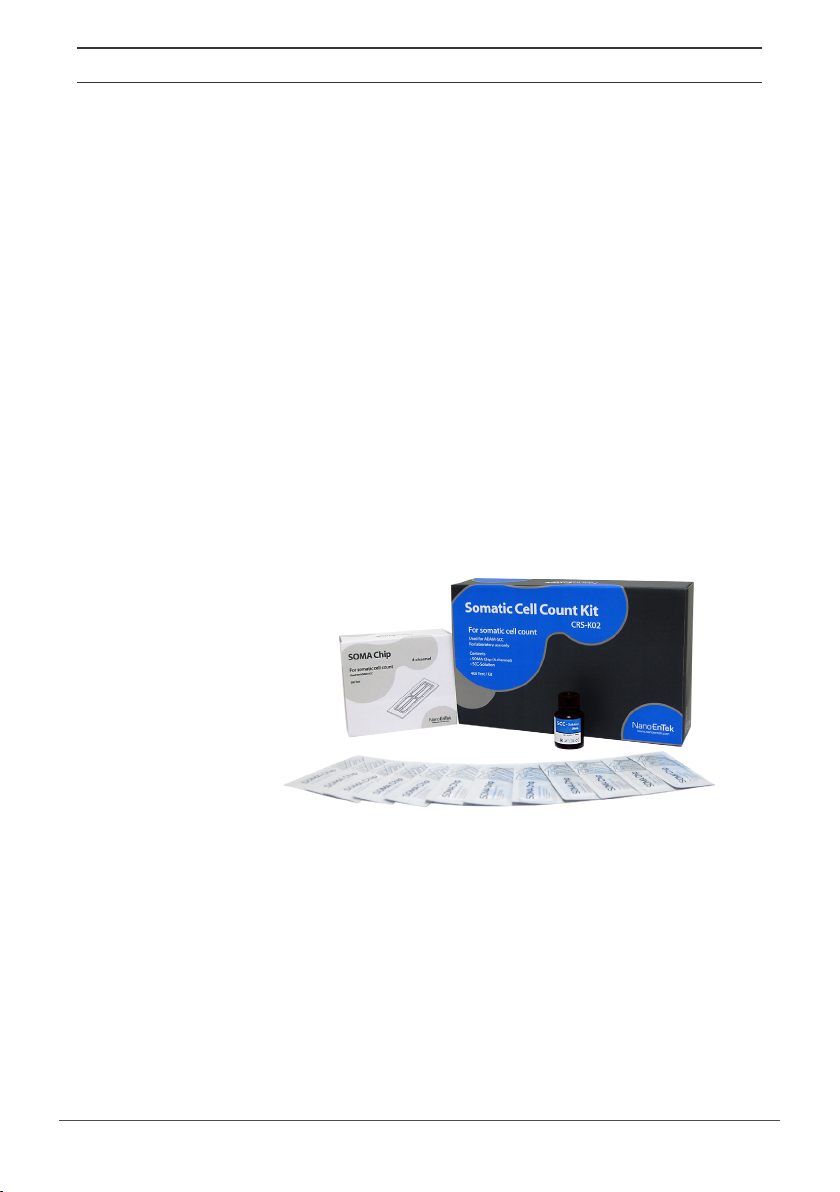
Introduction
Somatic Cell
Count Kit
Somatic Cell Count Kit of ADAM-SCC2 is composed of Propidium Iodide (PI)
for counting somatic cells. It can be used without diluting raw milk.
6
Measuring range of cell density is 0.05 ~ 1.15 x 10
Each SCC-Solution has 25 mL reagent of somatic stain solution. Simply add
100 μL volume of the raw milk sample and 100 μL stain solution in the
1.5 mL tube. Once the experiment is complete the results can be printed
through the optional thermal print. Printed number indicates cell concentration ( x 1000/mL) in each channel.
ㆍSOMA Chip 2X : Load 23 μL/Channel, 2 test/Chip
ㆍSOMA Chip 4X : Load 13 μL/Channel, 4 test/Chip
Store kit box upright and at room temperature. Expiration date of stain solution is written on the bottom of the kit box (yy-mm-dd). Be sure to check
the expiration date before using. Follow the exact steps detailed in the
Instructions for Use section.
cells/mL.
4
Product Contents
Introduction
ADAM-SCC2
SOMA Chip kit
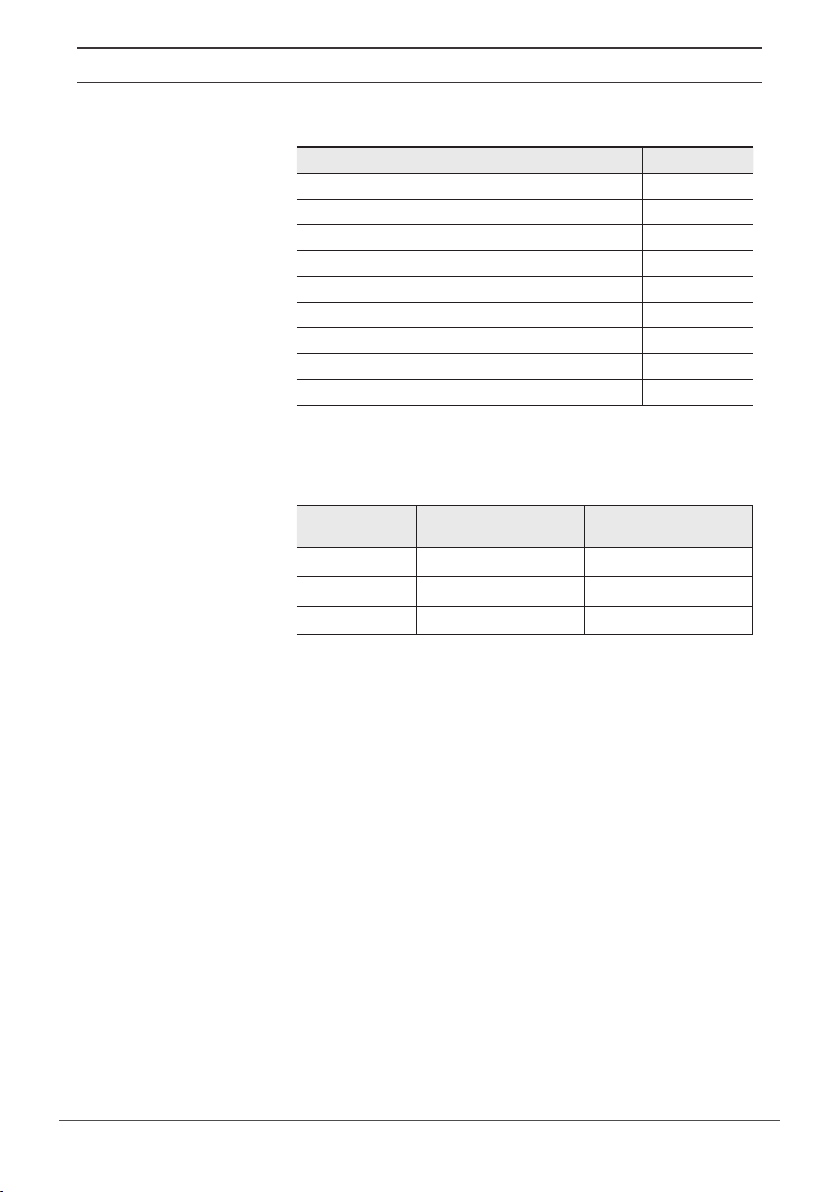
The contents of the ADAM-SCC2 are listed below:
Item Quantity
Main device 1
Instruction manual 1
USB hub 1
Wi dongle 1
Power cord 1
Adapter 1
SOMA Chip Kit 1
Calibration Bead 1
Barcode scanner 1
The contents of the ADAM-SCC2’s Somatic Cell Count Kit are listed below:
Item SOMA Chip 2x Kit
Disposable Chip
SCC-Solution 25 mL x 1ea 25 mL x 2ea
Available test Q’ty
(Cat. No: CRS-K01)
50pcs (2 channel) 100pcs (4 channel)
100 test/kit 400 test/kit
SOMA Chip 4x Kit
(Cat. No: CRS-K02)
Upon receiving
the instrument
• Examine the instrument carefully for any damage incurred during transit.
• Ensure that all parts of the instrument including accessories listed above
are included with the product.
• Any damage claims must be led with the carrier.
• The warranty does not cover in-transit damage.
• Upon receipt, store SOMA Chip at room temperature.
• SCC-Solution should be stored at 2~8℃.
ADAM-SCC2, Automated Somatic Cell Counter 5
Introduction
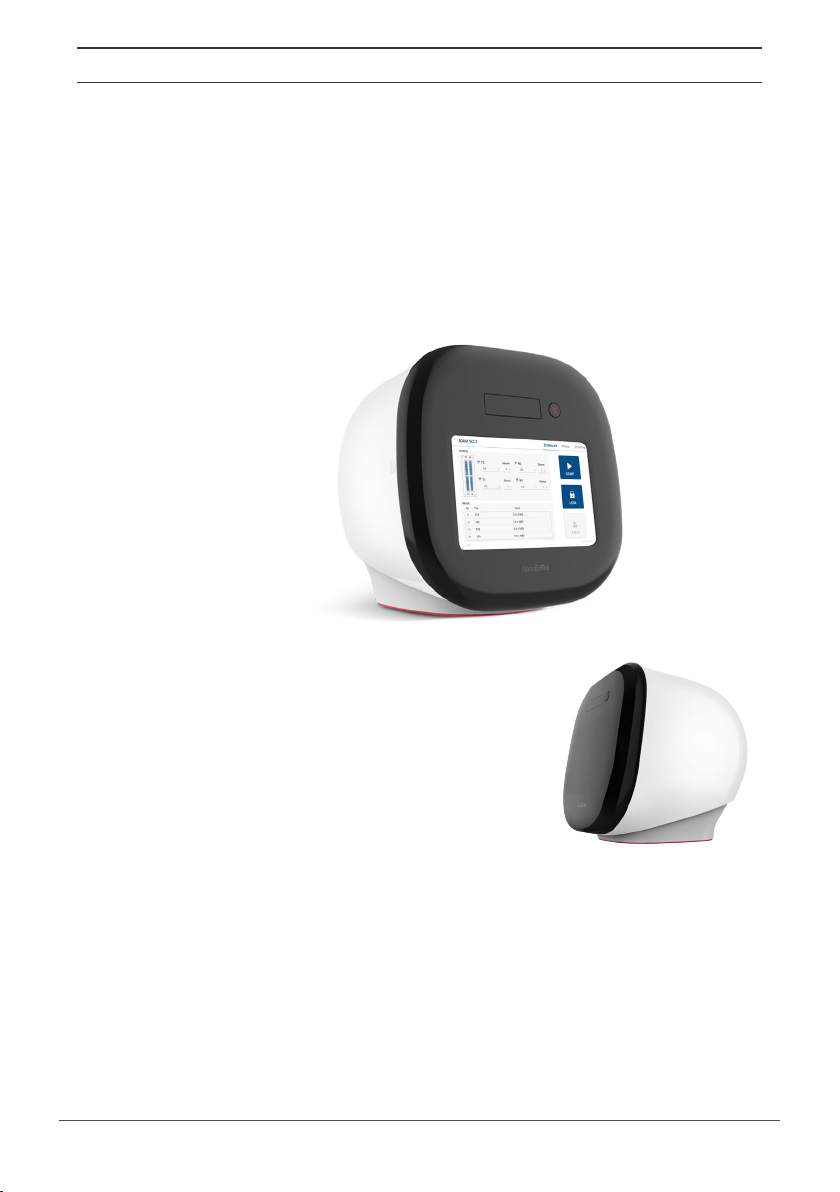
Product Description
Front view of
ADAM-SCC2
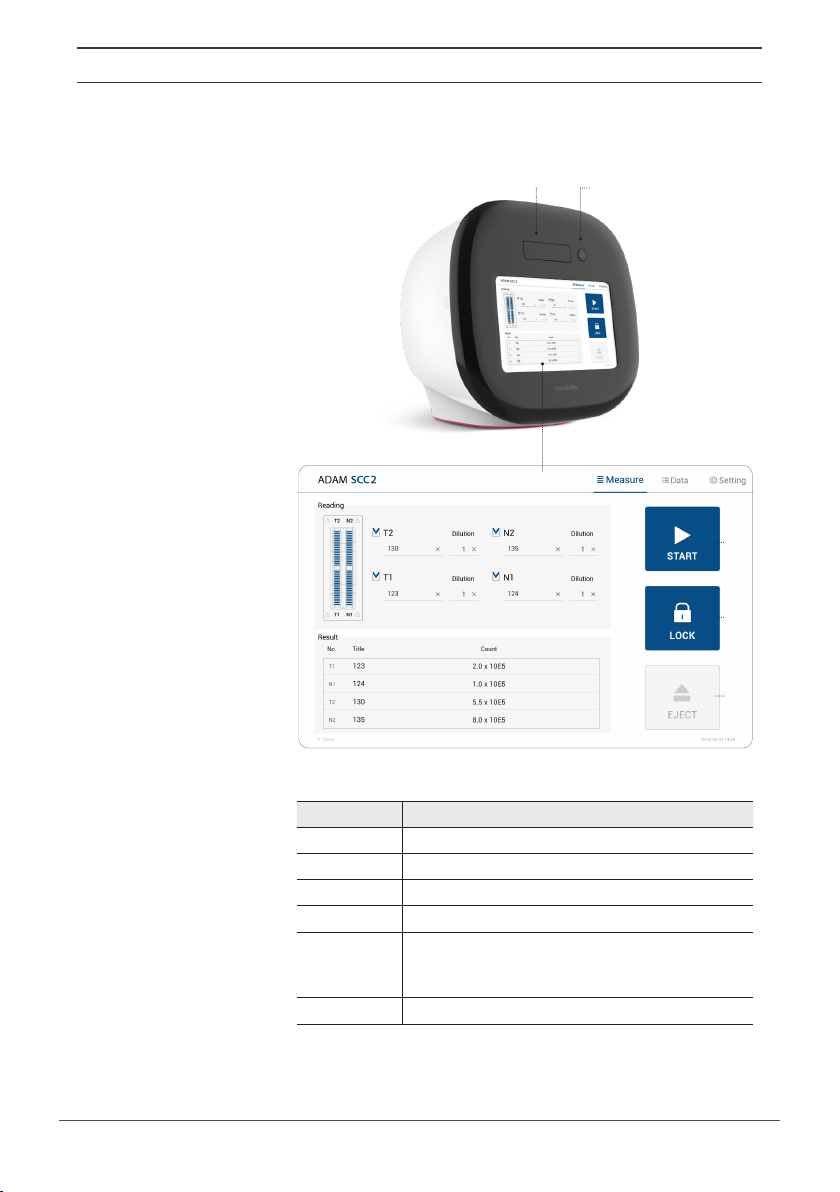
The front view showing various parts of the ADAM-SCC2 is shown below:
Door
①
③
LCD
Power
②
④
⑤
⑥
Control buttons Description
① Door Slide holder is inserted and ejected.
② Power
③ LCD
④ START
⑤ LOCK
⑥ EJECT Ejects the slide holder from ADAM-SCC2. Functions as unload.
6
Power on / o.
Display processes and results.
Performs all procedures of automatic counting.
Protects the alignment of stage from external shock when
ADAM-SCC2 is being moved.
Lock ADAM-SCC2 before turning it o or moving it.
Introduction
Product Description
Rear view of
ADAM-SCC2
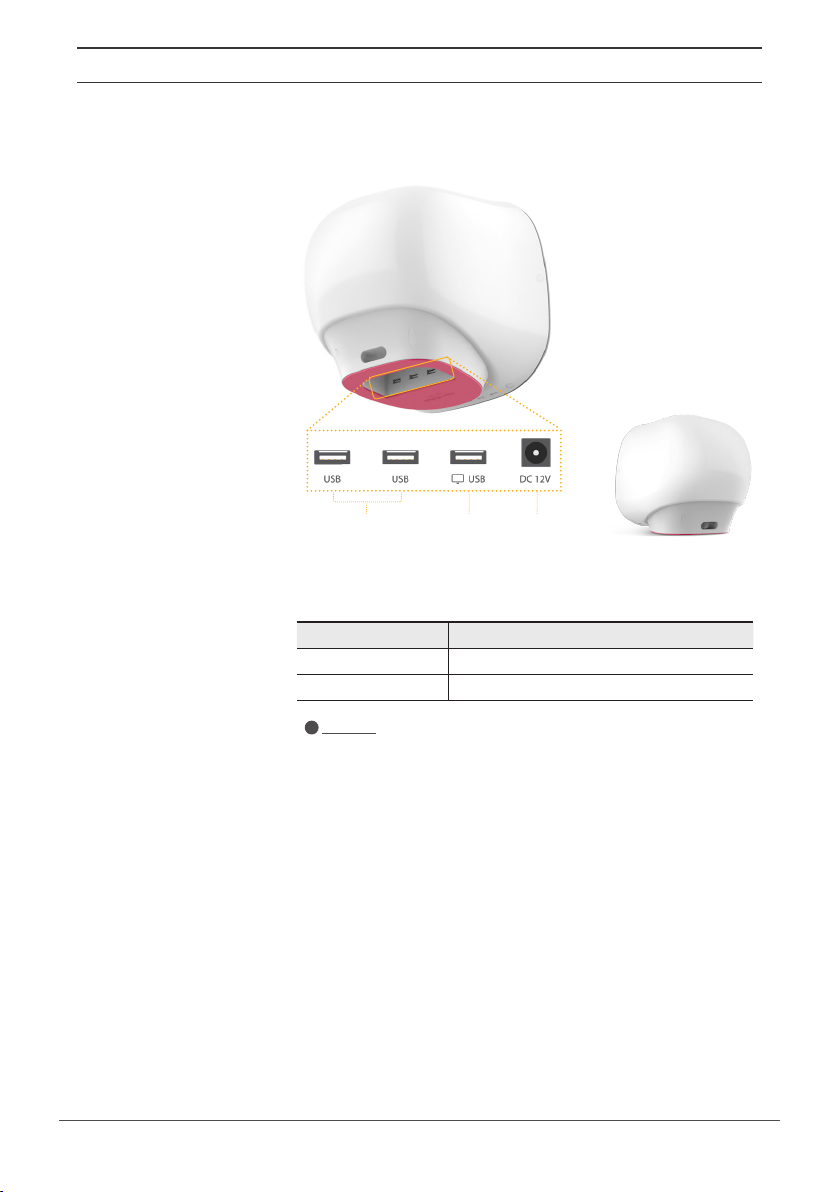
The rear view showing various parts of the ADAM-SCC2.
USB Port
①
Port Description
① USB Port
③ Power Plug
PC Port③Power plug
②
Port for software update and save the data.
Connects ADAM-SCC2 power cord to wall outlet.
CAUTION
!
Do not use the PC port. This port does not recognize USB.
②
ADAM-SCC2, Automated Somatic Cell Counter 7
Introduction
Getting Started
Environmental
requirements
CAUTION
!
At low temperature (≤10 °C), allow the device to warm up for 10 minutes at
ambient temperature before use.
To ensure correct operation and stable performance,
install the ADAM-SCC2 in a location which meets the following conditions:
1. Use at room temperature between 20 and 35 °C.
• Not recommended for cold room use (≤ 4 °C).
2. Do not expose the device to direct sunlight.
3. Do not subject the device to direct or continuous vibration.
4. Do not subject the device to intense magnetic or electromagnetic elds.
5. Do not install the device in high-humidity environment.
6. Location of device should be free from corrosive gases or other corrosive
substances.
7. Ensure minimal contact with dust or other airborne particles.
8. Allow a 10 cm (4 inches) minimum space around the device for proper
airow.
9. Do not place any objects on the device.
Power on and
Initial Display
8
1. Check the connection of ADAM-SCC2 and power cord.
2. Press the power button for 2~3 seconds.
If you get an error message,
please contact your local distributor or sales@nanoentek.com.
If booting is successful and no errors are detected,
the home screens will be displayed as below.
CAUTION
!
•Do not tilt the device too much in the forward when connecting the power cord.
•Do not move the device after connecting power cord.
- When you connect the power cord to ADAM-SCC2 even without power on the device,
it will go through self diagnostic tests.

Introduction
Getting Started
Error Messages
during booting
[System State]
It appears when booting is not working properly.
Turn o main power and restart device.
If this message still appears after restarting,
contact your local distributor or sales@nanoentek.com.
Error code Cause
0x00000C00 Failure of X-axis sensor
0x00007000 Failure of Y-axis sensor
0x00008000 Failure of Z-axis sensor
0x06000000 Failure of Locking module sensor
ADAM-SCC2, Automated Somatic Cell Counter 9

IntroductionGetting Started
5
0
Count setting
Set the conditions in the ‘Setting’ tap before counting.
[SOMA Chip]
Set the SOMA Chip according to you are using.
Somachip
Somachip
T1 N1
4Ch 2Ch
2Ch4Ch
[Cell size]
Set the minimum and maximum size of cell.
Cell size
Min
Max
8
T2 N2
[Dilution factor]
When diluting sample, set the Dilution factor.
CAUTION
!
Factor values for the SCC-Solution is already applied.
Dilution factor
10
1.0

IntroductionGeneral Operation
Introduction
Instructions are provided in this section for preparing the sample with SCCSolution for use with disposable SOMA Chip for automated somatic cell
count using the ADAM-SCC2.
Please check the procedure of sample preparation and testing below.
For more detailed information, please refer to the next page.
1. Mix the raw milk sample with SCC-Solution.
Milk sample
100 μL
SCC-Solution
100 μL
2. Load the mixed sample. Then, wait 1 minute for the sample settling.
- 2 channel: 23μL
- 4 channel: 13μL
3. Insert SOMA Chip. Get the result.
- Result -
ADAM-SCC2, Automated Somatic Cell Counter 11

IntroductionGeneral Operation
Sample
preparation
Counting Cell
1. Prepare some raw milk sample, SCC-Solution, tube, pipette, and tips.
Raw milk Tube
SCC-Solution
2. Thoroughly mix the raw milk sample.
1. Add 100 μL of raw milk sample and 100 μL of SCC-Solution in the tube.
(1:1 ratio)
Milk sample
100 μL
SCC-Solution
100 μL
2. Mix the raw milk sample and SCCSolution by turning the tube upside
down 3-5 times.
3. Load the cell sample onto the chip.
Then, wait 1 minute for the sample
settling.
- 2 channel: 23μL
- 4 channel: 13μL
NOTE
!
Ensure that no bubbles enter each channel.
12
13μL
SOMA Chip 4X

IntroductionGeneral Operation
Counting cell
WARNING
!
[Sample loading error]
Be cautious of loading the correct volume of the sample into SOMA Chip.
The instrument will not detect low or high sample volumes.
Correct volume
T1 N1
T2 N2
Low volume
CAUTION
!
T1 N1
T2 N2
Avoid bubbles which may negatively aect the result.
T1 N1
T2 N2
ADAM-SCC2, Automated Somatic Cell Counter 13

IntroductionGeneral Operation
Counting cell
WARNING
!
[SOMA Chip insert error]
Completely insert SOMA Chip face up, in the direction of the arrow on the
slide. The instrument will not detect if slides are inserted incorrectly.
See pictures below for proper insertion.
( O )
Correctly inserted
( X )
Upside down inserted
CAUTION
!
• Please insert or remove the SOMA Chip when the slide holder is fully ejected.
• When the test is nished, please remove the SOMA Chip from the slide holder.
( X )
Not fully inserted
( X )
Wrong end inserted
14

IntroductionMeasure
Run Sample
Enter a title for each channel of the slide.
Click the title section, then scan the cow ID with a barcode scanner to automatically enter as the title.
Start counting process by pressing ‘START’.
It may take about 2 minutes longer for auto focus at the initial test.
9010 7436
While the test is in progress, you can check the cell images of each channel.
ADAM-SCC2, Automated Somatic Cell Counter 15

IntroductionMeasure
Result Analysis
The result will be displayed after being automatically calculated by ADAMSCC2 software.
CLOSE
No Title Count
T1 120 1.04 x 10E6
N1 125 1.15 x 10E5
T2 130 4.68 x 10E5
N2 143 2.42 x 10E5
16

IntroductionMeasure
Result Analysis
- Error code
E
Error code Cause
E Frames with errors are over 50% of total counting frame.
Frame with error is a frame that contains cells whose
Error frame [#]
diameter is larger than 100μm.
When this error shown in result window, please check
the image.
ADAM-SCC2, Automated Somatic Cell Counter 17

IntroductionData
Data list
①
Control buttons Description
① All Select all data in Data List.
② SEARCH Display the data of the selected date.
③ EDIT
④ IMAGE Check the cell images of each channel.
⑤ SAVE Save the selected data to USB(PDF, Excel, Image).
⑥ DELETE Delete the selected data.
⑦ MAIL
View and edit the data.
Multiple data can be edited with the same settings.
Send the Excel, PDF, and Image les of selected data to
e-mail.
②
③
④
⑤
⑥
⑦
18

IntroductionData
EDIT
①
②
⑤
Control buttons Description
① Sample Edit the sample name.
② Cell size graph View the cell size graph.
③ Cell size setting Set the min/max size of the cell.
④ Dilution Factor
⑤ Frame graph
Set the dilution factor of sample.
Factor values for the SCC-Solution is already applied.
View the counted cell number each frame.
CANCEL
③
④
APPLY
ADAM-SCC2, Automated Somatic Cell Counter 19

Introduction
Data
IMAGE
④
Control buttons Description
① Original Check the original image.
② Counted Check the counted cell image.
③ Frame Select a frame number of the channel.
④ Zoom-in/out
Zoom in and out to check the cell image.
①
②
③
20

Data
Introduction
Data
MAIL
Control buttons Description
① History
② Mail Address
③ Send
Select an e-mail address from the list to send the Excel, PDF,
and Image les of selected data. The e-mail address that
received the les remains in the list.
If you want to receive les by new e-mail, please enter the
e-mail address.
Send the les to a selected e-mail address. Files can be sent
to only one e-mail at a time.
①
②
③
ADAM-SCC2, Automated Somatic Cell Counter 21

IntroductionSetting
Setting
①
②
③
⑥
⑤
④
Control buttons Description
① Count setting
② Dilution factor Set the dilution concentration of the sample.
③ Wi Set the wi to use the e-mail function.
④ Mail Do not change the setting in mail.
⑤ Update Software update through the USB.
⑥ Date&Time Set the current date and time.
⑦ Capacity
Set the conditions in the setting tap before counting.
Refer to page 10 for more information.
Check remaining capacity.
⑦
22

IntroductionSetting
Wi
1. Click the Refresh button.
2. Select the wi.
3. Insert the password of selected wi.
4. Click the Connect button.
CAUTION
!
If connection error occurs, please contact a laboratory facility manager.
Update
1. Prepare the USB with update le.
2. Insert the USB.
3. Click the UPDATE button.
CAUTION
!
• The ‘AdamUpdate’ folder must exist in the root path of the USB folder.
• ADAM-SCC2 can be updated only when the rmware or software le exists in
the ‘AdamUpdate’ folder. The ‘ADAM SCC2.exe’ le should be in the ‘AdamUpdate’ folder.
• Do not rename the ‘AdamUpdate’ folder. The folder name should be ‘AdamUpdate’.
ADAM-SCC2, Automated Somatic Cell Counter 23

Power o
IntroductionSetting
Lock
Power o
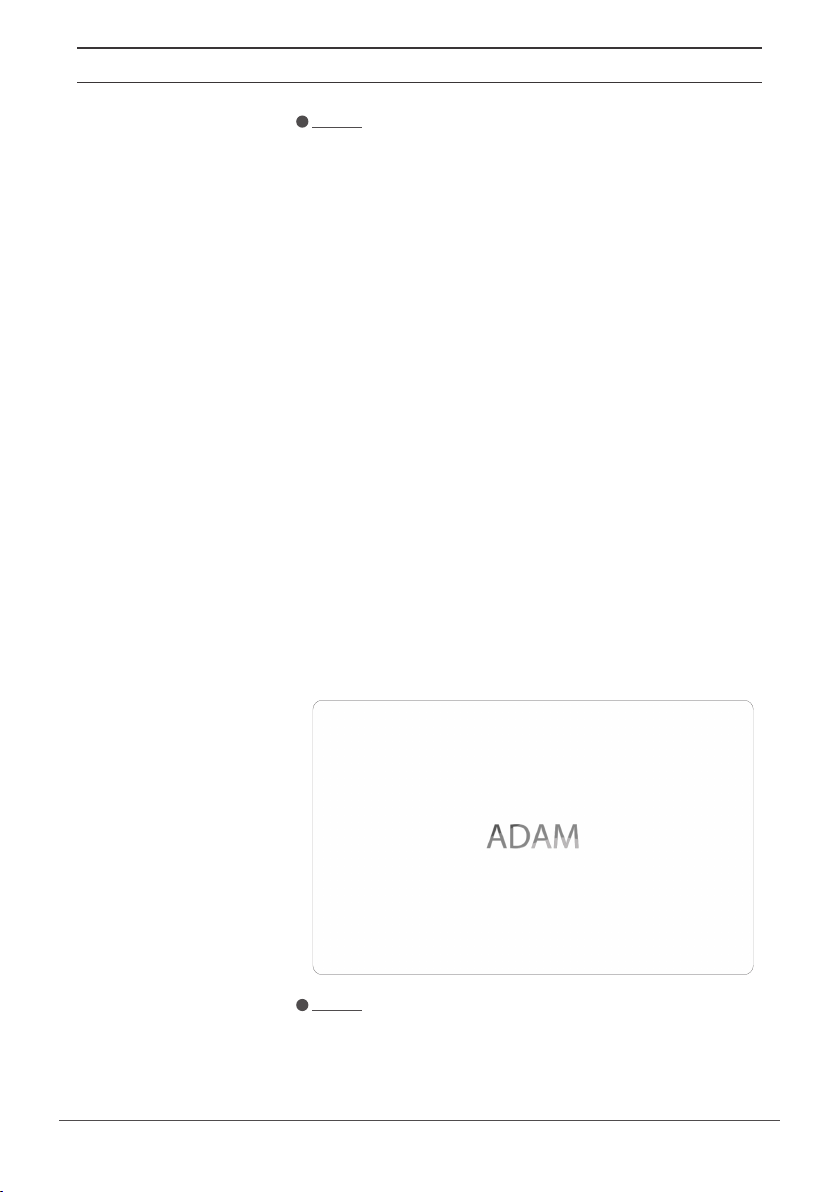
Press LOCK before turning o the device.
If there is no operation for 3 minutes, the lock function will be activated
automatically.
When the device is locked, the screen will be changed as shown below.
If you press the power button 2~3 seconds, then ‘Slide to shut down your
PC’ message will appear. Slide down the screen to turn o the power.
24

Introduction
Maintenance and cleaning
Maintenance
and cleaning
1. ADAM-SCC2 does not need regular maintenance.
2. ADAM-SCC2 has no replacement of consumable materials.
3. Please clean the exposed surface of ADAM-SCC2 frequently or before
testing, using a soft cloth and isopropyl alcohol or deionized water.
CAUTION
!
Dispose of wipes in an appropriately labeled solvent contaminated waste
container.
ADAM-SCC2, Automated Somatic Cell Counter 25

IntroductionTrouble shooting
Trouble
shooting
Problem Description Solution
ADAM-SCC2 does
not power up
Inaccurate result
When error
message is shown
(For information on
each error message,
see page 17)
• No power from outlet.
• Bad power cord.
• Cell number may be out of
range.
• SCC-Solution has expired.
• Too high clumped cells.
• When there are too many
frames with errors
(Error message: E)
• Check power source.
• Replace.
• Adjust the number of cells
between 0.05 ~ 1.15 x 10
cells/mL (refer to page 4).
• Check the expired date.
• Try again after vortexing
the cells.
• Check the suspension of
cells if all cells are fully
dissociated into single cells.
• If contaminants except
cells are found, prepare
sample again.
• Error frame • Prepare sample again
except contamination.
6
26

Introduction
Warranty
Warranty
If any defects occur in the ADAM-SCC2 during one(1) year warranty period,
NanoEnTek will repair or replace the defective parts at its discretion without
charge. The following defects, however, are specically excluded:
1. Defects caused by improper operation.
2. Repair or modication done by anyone other than NanoEnTek or
an authorized agent.
3. Damage caused by substituting alternative parts.
4. Use of ttings or spare parts supplied by anyone other than NanoEnTek.
5. Damage caused by accident or misuse.
6. Damage caused by disaster.
7. Corrosion caused by improper solvent or sample.
For your protection, items being returned must be insured against possible damage or loss. NanoEnTek cannot be responsible for damage incurred
during shipment of a repair instrument. It is recommend that you save the
original packing material in which the instrument was shipped. This warranty should be limited to the replacement of defective products.
For any inquiry or request for repair service,
Contact sales@nanoentek.com or your local distributor.
ADAM-SCC2, Automated Somatic Cell Counter 27

Introduction
Technical Specications
Technical
Specications
ADAM-SCC2
Measuring range
Analysis time
Voltage
Current
Objective lens
LED
Camera
Filter
Weight
Size (W×L×H)
Degree of protection
0.05 ~ 1.15 x 10⁶ cells/mL
< 13 ~ 25 sec/test
DC12V
5A
4 X
4W Green LED
CMOS camera
Excitation lter, Dichroic lter,
Emission lter
7 Kg
227 × 276 × 270 mm
IPX0
: For initial test,
max 2 min/test
Operating environment condition
Temperature
Humidity
Altitude
0 °C ≤ Temperature ≤ 40 °C
10 % ≤ Humidity ≤ 90 %
Altitude ≤ 2,000 m
Transportation & storage environment condition
Temperature
Humidity
Somatic Cell Count Kit
-30 °C ≤ Temperature ≤ 60 °C
10 % ≤ Humidity ≤ 90 %
SOMA Chip
Loading sample vol.
SOMA Chip 2x
T1 N1
SOMA Chip 4x
per test
T2 N2
Measuring sample vol.
per test
*SOMA Chip 2x Kit: please consult your distributor or manufacture for availability.
23 µL/test (SOMA Chip 2X)
13 µL/test (SOMA Chip 4X)
8.6 µL/test (SOMA Chip 2X)
3.4 µL/test (SOMA Chip 4X)
Solutions
SCC-Solution
25 mL
Storage temperature
SOMA Chip
SCC-Solution
0 – 30 °C
2 – 8 °C
Expiration date
SOMA Chip
SCC-Solution
28
2 years
1 year

IntroductionProduct List
Product List
Cat. No. Product Contents Quantity
CRS-K01 SOMA Chip 2X Kit
CRS-K02 SOMA Chip 4X Kit
ADB-500 ADAM Calibration Bead
*SOMA Chip 2x Kit: please consult your distributor or manufacture for availability.
50 pcs SOMA Chip 2X 1
25 mL SCC-Solution 1
100 pcs SOMA Chip 4X 1
25 ml SCC-Solution 2
5 mL Calibration Bead 1
ADAM-SCC2, Automated Somatic Cell Counter 29

IntroductionSafety Precautions
Safety
Precautions
Review and follow the safety instructions below :
• Always ensure that the power supply input voltage matches the voltage
available at your location.
• To avoid the danger of electric shock, install the instrument per the
environmental specications located in “Technical Specications”. If water
or other material enters the instrument, the adaptor, or power inlet,
disconnect the power cord and contact a service person.
• Do not touch the main plug or power cord with wet hands.
• This machine is air-cooled so its surfaces become hot during operation.
During installation and use, leave more than 10 cm (4 inches) free around
the device.
• Do not install the instrument on a slant or a place prone to vibrations or
the risk of instrument malfunction or damage to the instrument will in
crease.
• Never insert any objects (especially metallic) into the air vents of the instru-
ment as this could result in electrical shock, personal injury, and equip ment damage.
• Always set the main switch on the power supply unit to OFF before con-
necting the power cord to the wall outlet.
• To avoid a potential shock hazard, always connect the grounding termi-
nal of the instrument and that of the wall outlet properly. The power cord
should be connected to a grounded, 3-conductor power outlet.
• Position the device so that there is sucient length for the cables and
their respective connections.
• Set the main switch to “ O ” (OFF), unplug the power cord, and lock the
stage before moving.
• If the instrument is broken or dropped, disconnect the power cord and
contact an authorized service person. Do not disassemble the instrument.
• Only use authorized accessories.
• Use this equipment only as specied in this manual and as specied in
any documentation associated with its components. Use of the equip ment in an unspecied manner may result in damage to the device or
injury to the user.
30

IntroductionSafety Symbols
Safety Symbols
The following symbols are found on the instrument and this document.
Always use the equipment in the safest possible manner.
Symbol
Meaning
Caution & Warning
ON (Power)
This instrument and consumables conforms to the
Declaration of Conformity.
Caution: BIOHAZARD
Protective measures must be used in dealing with
biologically hazardous materials such as carcinogenic
reagents.
USB Connection
LED
LED
Disposal of your old appliance
1.
When this crossed-out wheeled bin symbol is attached to
a product it means the product is covered by the European
Directive 2012/19/EU.
2.
All electrical and electronic products should be disposed of
separately from the municipal waste stream via designated
collection facilities appointed by the government or the local
authorities.
3.
The correct disposal of your old appliance will help prevent
potential negative consequences for the environment and
human health.
For more detailed information about disposal of your old
4.
appliance, please contact your city office, waste disposal
service or visit our web-site, www.nanoentek.com.
This product conforms to UL 61010-1, CAN/CSA C22.2
No.61010-1 “Safety Requirements for Electrical Equipment
for Measurement, Control, and Laboratory Use, Part l: General Requirements.” Instruments bearing the TUV symbol
are certied by TUV SUD America Inc to be in conformance
with the applicable safety standard for the US and Canada.
ADAM-SCC2, Automated Somatic Cell Counter 31

IntroductionWarnings
Warnings
After using device, please turn off main power.
1.
If not, it may cause malfunction or may reduce product life.
When turn off the device, be sure lock the device with Lock button.
2.
If not, it may cause mechanical problem or error message when
device is booting.
Item Warning
Battery inside device
Cover
Manual
Sample handling
Waste
• Risk of explosion if battery is replaced incorrectly.
• This battery is not replaceable by user. Refer to an
authorized service person.
• Do not remove cover or dissemble case. There are no
adjustable components inside the instrument.
• If a malfunction is found, refer to an authorized service
person.
• Do not attempt to service the equipment.
• This manual is only available in English.
• Failure to heed warnings may result in injury to service
provider or operator.
• Wear personal protective equipment during sampling
and testing.
• Sample may contain infectious or bio-hazardous agents.
• Use of capped tubes and lint free wipes. Lint free wipes
to be used one time and discarded.
• After using SOMA Chip, appropriately dispose as
bio-hazardous waste.
• Do not reuse SOMA Chip.
32

IntroductionTechnical Support
Technical
Support
Visit the our Website at www.nanoentek.com for :
• Technical resources, including manuals, FAQs, etc.
• Technical support contact information.
• Additional product information and special oers.
For more information or technical assistance, please call or email.
NanoEnTek, Inc.
851-14, Seohae-ro, Paltan-myeon, Hwaseong-si, Gyeonggi-do, 18531, Korea
Tel. +82-2-6220-7940
Fax. +82-2-6220-7999
NanoEnTek America, Inc.
240 Bear Hill Road, Suite 101, Waltham, MA 02451, USA
Tel. +1-781-472-2558
Fax. +1-781-790-5649
Email
sales@nanoentek.com
Website
www.nanoentek.com
ADAM-SCC2, Automated Somatic Cell Counter 33


ADAM
NESMU-ASC2-001E (V.1.0)
SCC
2
NanoEnTek, Inc.
851-14, Seohae-ro, Paltan-myeon, Hwaseong-si,
Gyeonggi-do, 18531, Korea
Tel :+82-2-6220-7940
Fax:+82-2-6220-7999
NanoEnTek America, Inc.
240 Bear Hill Road, Suite 101, Waltham, MA 02451, USA
Tel: +1-781-472-2558
Fax: +1-781-790-5649
Email
sales@nanoentek.com
Website
www.nanoentek.com
 Loading...