

NAMCO Bandai Games 90500070 User Manual

TEKKEN TAG
OPERATORS MANUAL
IT IS THE RESPONSIBILITY OF THE OPERATOR TO MAINTAIN CUSTOMER SAFETY
AT ALL TIMES
, AND IT IS IMPERATIVE THAT THE DETAILS SET OUT IN THIS MANUAL
ARE FOLLOWED PRECISELY
Part No. 90500070
Issue 1

Contents
1. SPECIFICATIONS ...................................................................................................... 3
2. MOVING THE MACHINE ............................................................................................ 4
3. INSTALLATION ........................................................................................................... 4
4. ADJUSTMENTS ......................................................................................................... 5
4-1 Entering the Test Mode ....................................................................................... 5
4-1-1 Selecting and Adjusting Items ....................................................................... 6
4-1-2 Finishing the Test Mode................................................................................. 6
4-2 Display Test ......................................................................................................... 7
4-2-1 Convergence Test .......................................................................................... 8
4-2-2 Colour Bar Test .............................................................................................. 9
4-3 Switch Test ........................................................................................................ 10
4-4 Sound Test ........................................................................................................ 11
4-5 Game Options ................................................................................................... 12
4-6 Coin Options...................................................................................................... 14
4-7 A.D.S. (Book Keeping) ...................................................................................... 16
4-8 DATA CLEAR .................................................................................................... 16
5. PCB CONNECTIONS ............................................................................................... 17
6. PARTS ...................................................................................................................... 18
Page 2

1. SPECIFICATIONS
POWER SUPPLY:- 230volts AC
AMBIENT OPERATING
TEMPERATURE:
MONITOR:- Hantarex 28 Polo Monitor
COIN ACCEPTOR:- Mars CashFlow - 1 Channel
DIMENSIONS:- 790(w) x 1200(d) x 2080(h)
WEIGHT:- 175kg
ACCESSORIES:- Keys: (Cash Door) ..................... 2
+5°C TO +25°C
(Coin Door) ...................... 2
(Back Door) ...................... 2ea
IEC Mains Lead............................... 1
Operators Manual ........................... 1
Monitor Manual ............................... 1
CashFlow Documents ..................... 1
M6 Security Wrench ........................ 1
M4 Security Wrench ........................ 1
Page 3
2. MOVING THE MACHINE
This machine is fitted with castors to make it easier to move. Take care when
moving the machine on an inclined surface.
The overall height of the machine is 2080mm. Take care of any overhead
obstructions. (e.g. Light Fittings, Electric Cables etc.)
3. INSTALLATION
This machine is designed for INDOOR USE ONLY.
Do not install in the following places.
1. Outdoors
2. Direct Sunlight, places with excessive humidity or dust, places where there is
water leakage, near air-conditioning or heating equipment, places with
excessive heat or cold temperature.
3. Places where it would be in the way of emergency exits or fire extinguishing
equipment.
4. Unstable places or places with excessive vibration.
5. Places that are not level.
6. This machine must not be cleaned with a water jet, or installed in an area where
a water jet could be used.
WARNING NEVER turn the power to the machine ON until installation
has been completed.
WARNING In order to prevent possible electric shocks, be sure that the
machine is connected to the mains with a securely connected
earthed plug.
WARNING So that customers are not injured , ensure that there is at
least 500mm separation between other machines or walls.
CAUTION In order to avoid damage to the machine due to mis-operation,
ensure that the voltage of the mains supply is 230volts AC.
NOTE If the location site of this machine has a polished floor it is
recommended that rubber pads are fitted under the level adjusters
to prevent the machine sliding on the floor.
In order to gain access to the Power Supply and CPU assemblies,
make sure that the rear of the machine is separated from a wall
or other machine by at least 500mm.
Page 4
4. ADJUSTMENTS
The following adjustments and tests can be made to this game.
metIecnerefeR
rotinoMehtgnitsujdAdnaoediVehtgnitseT)7p(tseTyalpsiD2-4
T)01p(tseThctiwS3-4
sehctiwSnottuBdnaskcitsyoJehtgnitse
dnuoSehtgnitseT)11p(tseTdnuoS4-4
cnySoediVehtgnitteStenibaCsihTnodesUtoN
nitteS)21p(snoitpOemaG5-4
snoitOemaGehtg
yalPfoecirPehtgnitteS)41p(snoitpOnioC6-4
ataDgnipeeKkooB)61p(SDA7-4
tgnitteseR)61p(raelCataD8-4
gnipeeKkooBeh
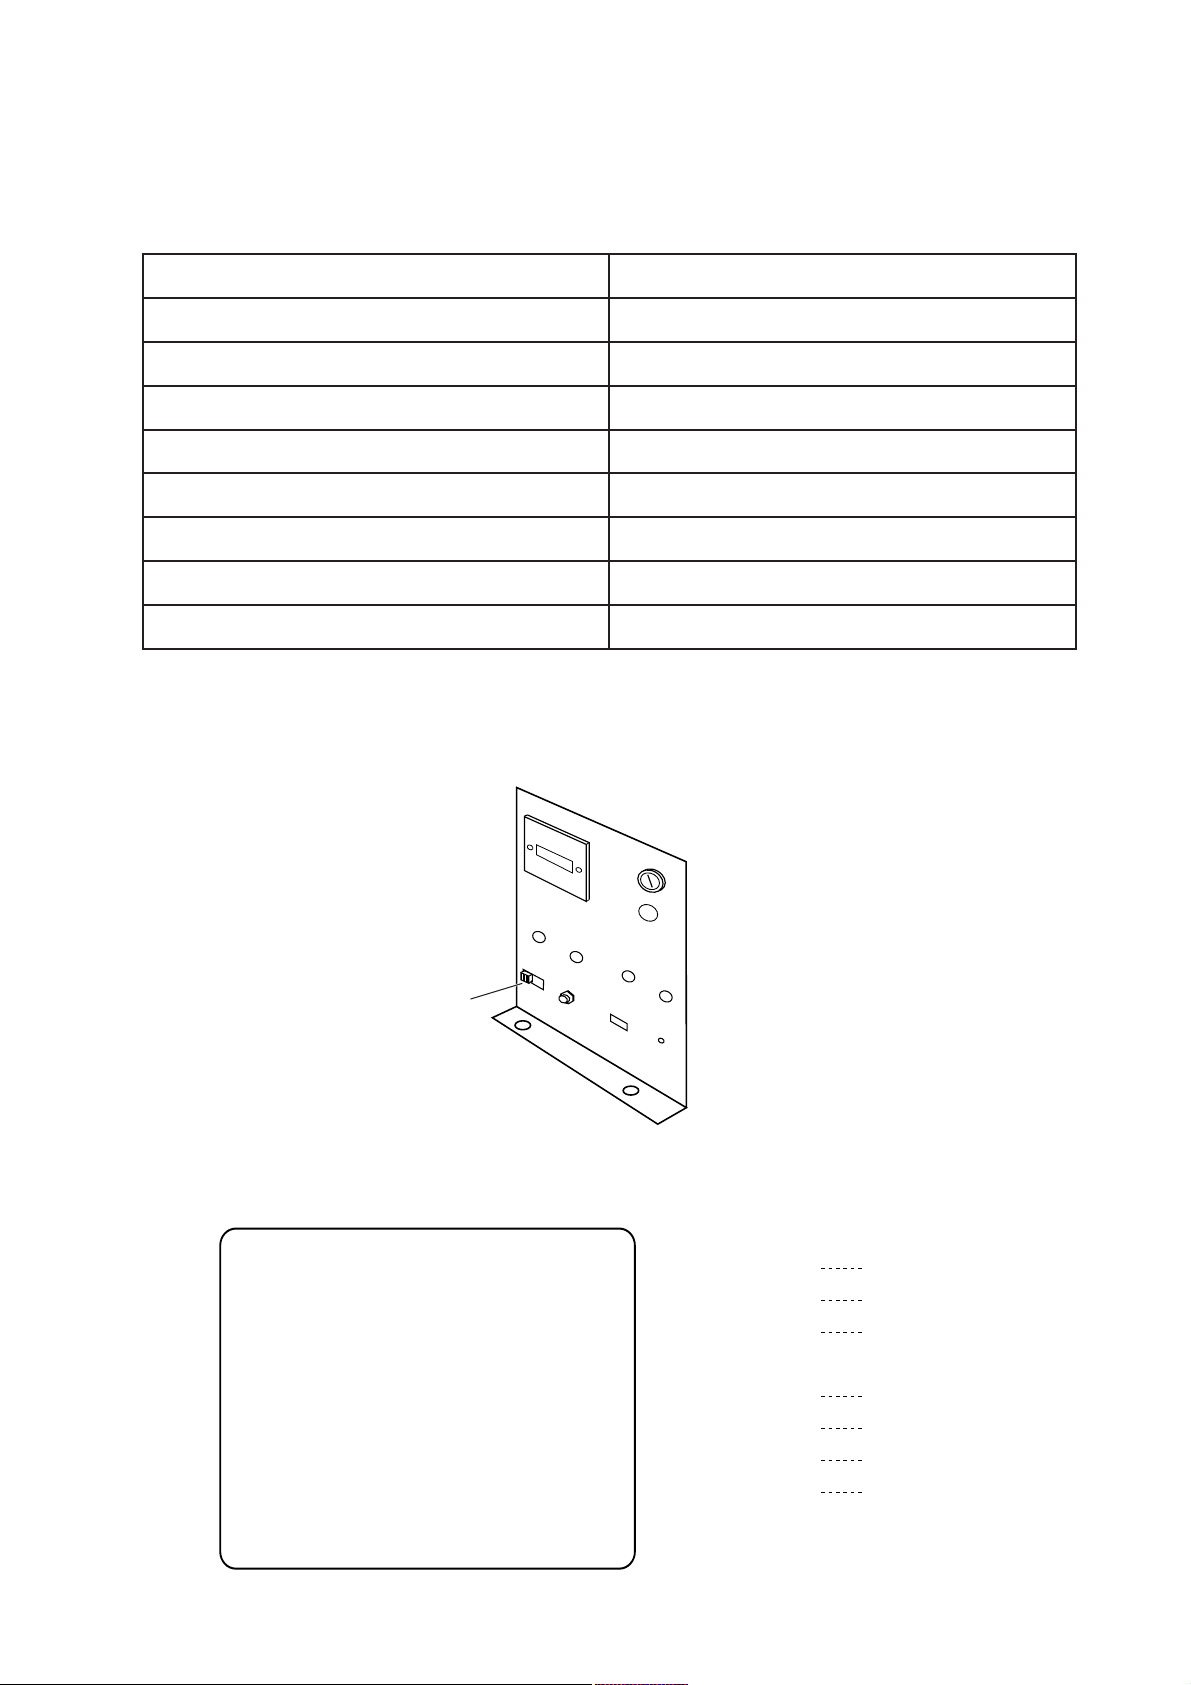
4-1 Entering the Test Mode
Test Switch
1. To enter test mode, slide the TEST switch, located on the service bracket inside
the coin door, to the ON position. The following screen will be displayed.
DISPLA Y TEST
SWITCH TEST
SOUND TEST
JVS CABINET OPTIONS
GAME OPTIONS
COIN OPTIONS
A.D.S.
DATA CLEAR
EXIT & SAVE
Display test
Switch test
Sound test
JVS cabinet options
Game options
Coin options
Check play data
Data clear
Finishing the test mode
(4-2 page 7)
(4-3 page 10)
(4-4 page 11)
(4-5 page 12)
(4-6 page 14)
(4-7 page 16)
(4-8 page 16)
Page 5

4-1-1 Selecting and Adjusting Items
1. Push the Player 1 Joystick up or down to scroll through the test items.
The test will change to red on the display.
Player 1 Joystick
Star t S witch
Switch 1
Switch 2
Switch 4
Switch 3
Switch 5
2. Press the Player 1 Button Switch 1 to enter the selected test.
Details of the adjustments are explained in the following pages.
4-1-2 Finishing the Test Mode
1. Push the Player 1 Joystick up or down to select EXIT & SAVE in the test menu.
EXIT & SAVE on the display will change to red.
2. Press the Player 1 Button Switch 1. The test mode finishes and the game returns
to normal play mode.
Note: The test mode must be finished as described above. If the Test Mode is
ended any other way, the changes made during the test mode will not be
stored or be effective. The test mode cannot be ended by turning the test
switch off only.
If the Test switch is left in the ON position after testing is completed, the
switch will have to be turned OFF and back ON to re-enter the Test Mode.
Page 6
 Loading...