

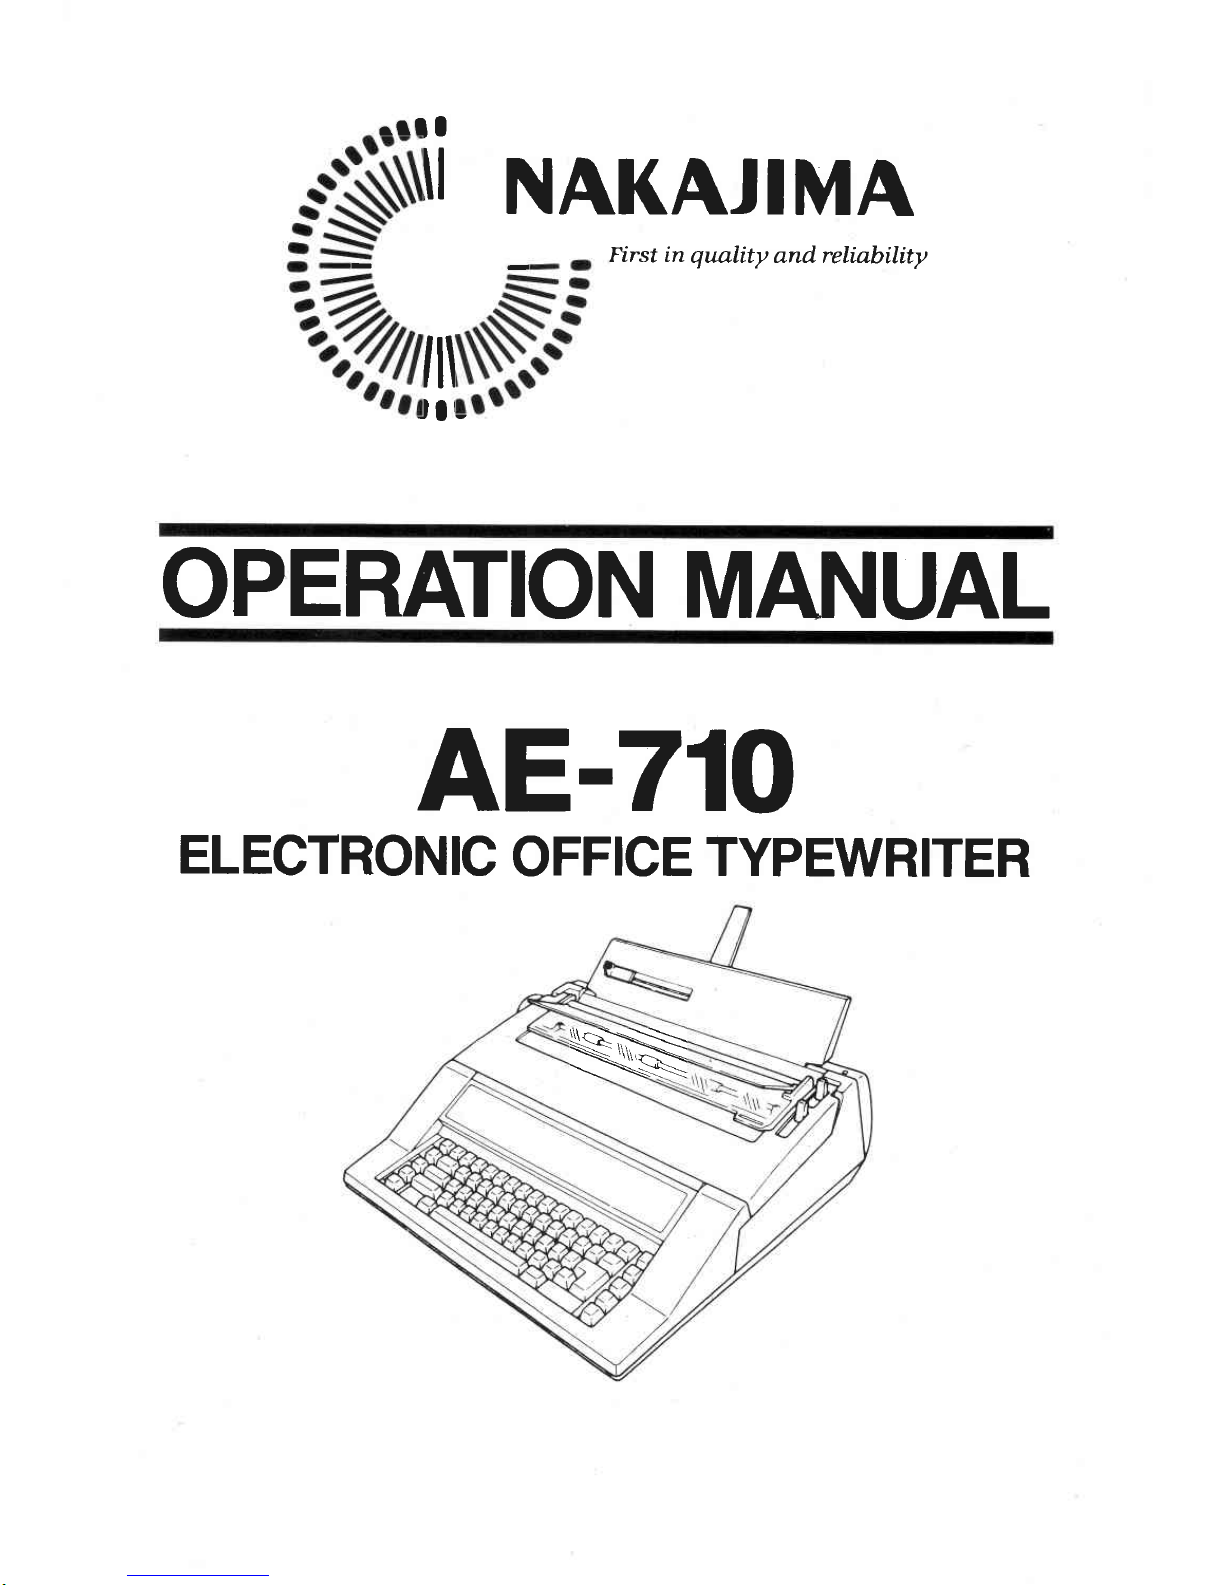
Nakajima AE-710 Operation Manual
It
il
lll
Jlr-
-
rll
I
I
NAKAJIMA
First in quality
and relinbility
OPERATION MANUAL
AE-710
ELECTRONIC
OFFICE
TYPEWRITER
N
FOR
USA ONLY
NOTE: This equipment
has been
tested and found
to comply with
the limits for
a Class B
digital device,
pursuant
to Part l5
of the FCC
Rules. These limits
are designed
to
provide
reasonable protection
against
harmful
interference
in a residential
installation.
This equipment
generates,
uses
and can radiate
radio
frequency
energy and, if
not installed
and used in
accordance with
the instructions,
may
cause harmful
interference
to radio
communications.
However,
there is no guarantee
that
interference
will
not
occur in
a
particular
installation.
If this
equipment
does cause harmful
interference
to radio
or television
reception, which
can
be determined
by turning
the equipment off
and on, the
user is encouraged
to try
to
correct the interference
by one or more
of the followlng
measures:
-
Reorient
or relocate the receiving
antenna.
-
Increase
the separation
between
the equipment and receiver.
-
Connect the equipment
into
an outlet on a
circuit different
from that
to
which
the receiver
is
connected.
-
Consult
the dealer or
an experienced
radio/TV
technician for
help.
FCC
WARNING:
-
Changes
or modifications
not
expressly
approved
by the
party
responsible
for
compliarrce
could void
the
user's
authority to
operate
the
equipment.
-
Use a shielded
interface
cable.
Your new electronic typewt'iter increaies
your
typing efficiency through use
of the most advanced
technology. Some
of the many outstanding features of
your
typewriter are:
.
| 5.0
inch
paper
capacity
.
Easy-to-change 100-characterdrop-in
printwheel
.
l0 line correction memory
(700
characters
max.)
.
Five format
memory
.
Pitch selector:
lO, 12, 15 and PS
(proportional
spacing)
.
Line space selector:
l,l-l/2
and2
.
Full
electronic
tabulation for up to 30
positions
.
Paragraph indention
o
Decimal tabulation
.
Automatic centering
.
Automatic carrier
retum
.
Automaticunderlinins
.
Bold typing
'
Caps
lock
o
Micro up/micro down/micro back space
.
Framing
(line
drawing)
o
Optional
spell
check
(dictionaries
for
English, French,
and Spanish
are available;
This
manual
describes
your
typewriter s functions, operating controls and
procedures,
and replacement
of
its
accessories.
Thorough study of instructions
will facilitate and maximize the ettlcient use of
your
new
electronic typewriter.
TABLE
OF CONTENTS
INTRODUCTION
Rules For
Safe Opcration
Part
Names And Functions
I
a
Key Functions
GETTING STARTED
Unpacking
6
SettingUp...
6
TurningOnTypewriter....
l
Inserting/Ejecting
Paper
tj
Typing
Controls
.
g
Margins
. l0
Tabs.
..... ll
Corrections
l2
TYPING FUNCTIONS
Paragraph
Indention
16
Decimal Tabulation
16
Automatic
Centering
18
Automatic
Carrier Return
19
Required Hyphen
And Required
Space
19
Automatic
Underlining
20
Keyboard II
(Special
Characters)
20
Bold Typing
.
.21
Capslock
........21
MicroUp/NlicroDown/-l\4icroBackSpace
.........22
Framing(LineDrawing)....
........22
Format
(Margin
And
Tab) Memory
.
24
HOW TO
CHANGE ACCESSORIES
Ribbon Cassette
.25
CorrectionTape
...2j
Printwheel
......28
SUPPLIES
., , '. '29
MAINTENANCE
RemovingPlaten
......30
Cleaning
......31
Service
.......3t
INTRODUCTION
Rules
For
Safe
Operation
Make sure
you
are using
the
proper
power
as stated
on the name
plate at the back of the
typewriter
Your typewriter
is a
highly sophisticated
mechanism.
Never attempt to repair
it
yourself
lf repair
becomes
necessary,
take it to the nearest
authorized
service center.
Never
insert metal objects
such as a screwdriver,
paper
clip,
nail file, etc.,
inside
the
typewriter. This
could cause
damage
to the typewriter and/or electrical
shock.
Do not leave
your
typewriter unattended
when
it is turned on.
Always turn off
the typewriter
when you
have finished
typing.
Be sure to turn
off the typewriter
when removing
platen.
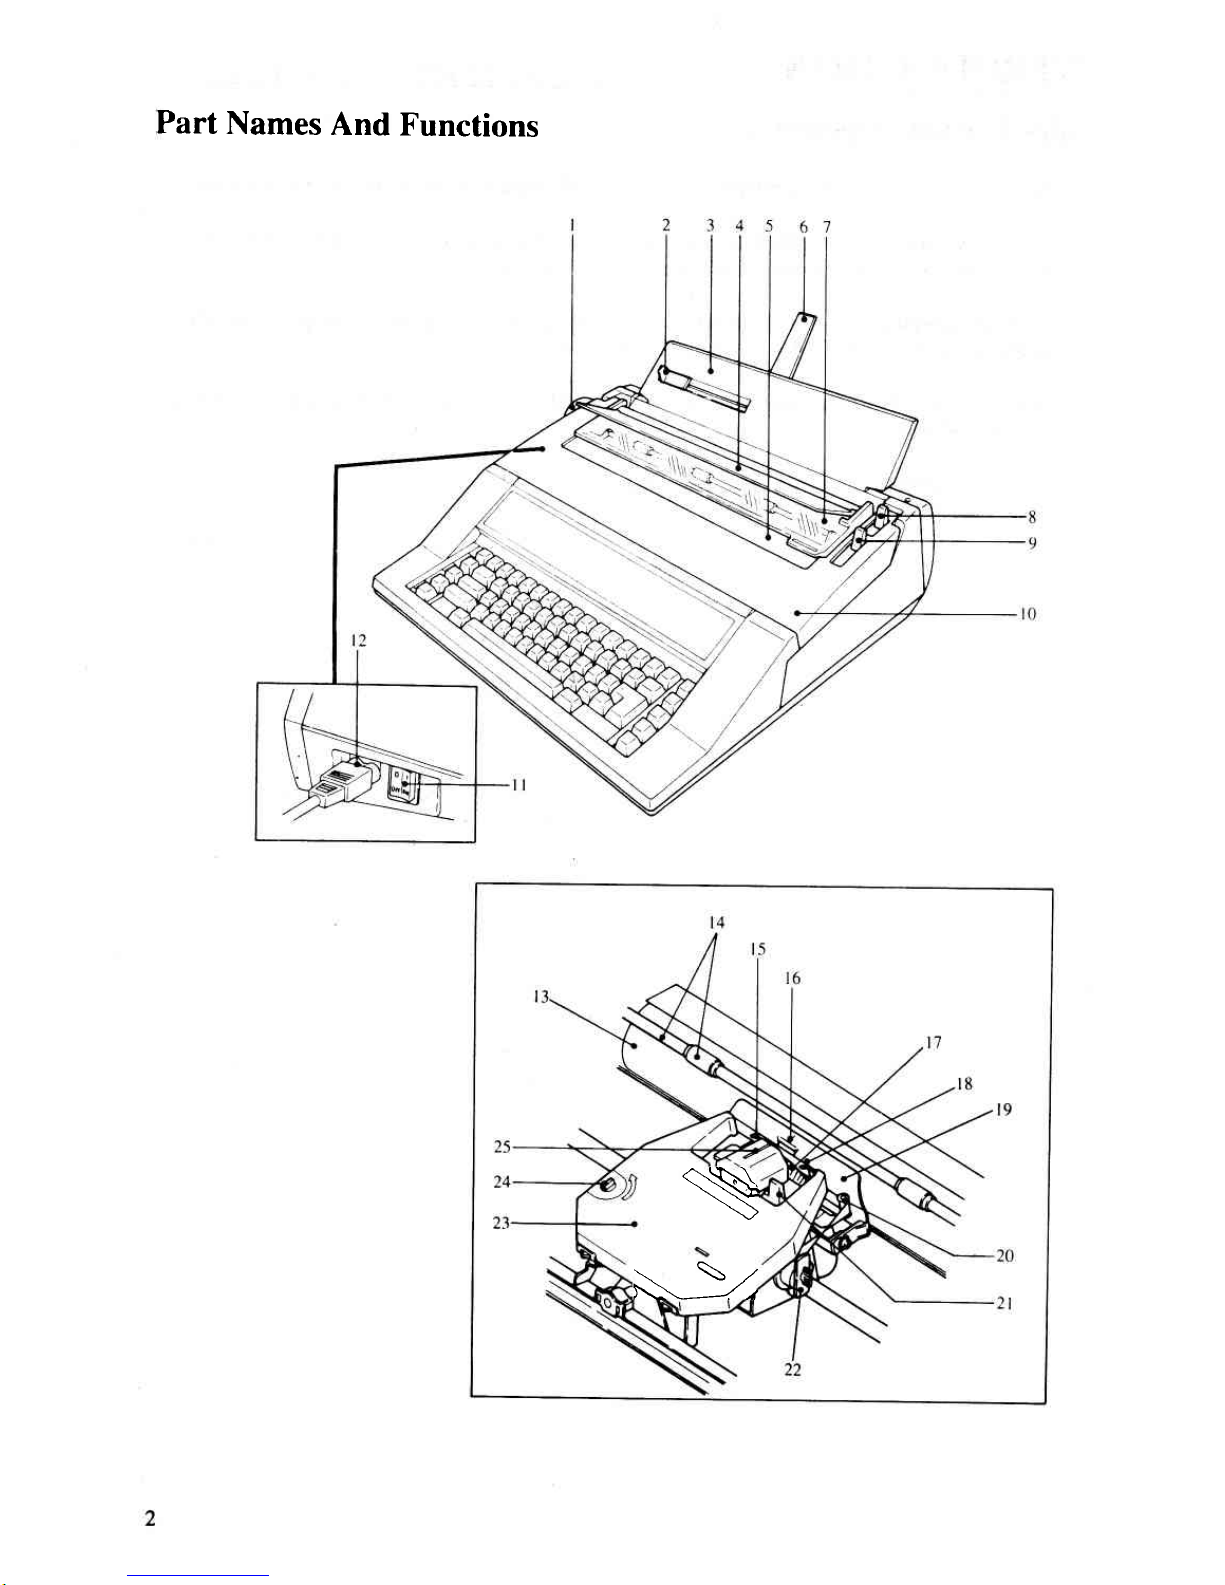
Part
Names
And
Functions
N
\
\,,
) \^\
\\----zl//'
1. PLATEN KNOB
12. POWER
CORD
Used
to
manually ro{ate
the
platen.
13. PLATEN
(ROLLER)
Rolls
paper
in and out.
2. PAPER
GUIDE
Provides consistent
placement
f4. PAPER BAIL & BAIL ROLLERS
of
paper.
Holds paper against the platen.
3. PAPER SUPPORT PANEL
15. RIBBON
GUIDE
Supports the
paper
Guides
ribbon.
4.
GLARE SHIELD
16. PRINT
POINT
INDICATOR
Blocks out direct
light
from
the typing
line.
Indicates
prrnting position.
5.
MARGIN
SCALE
17. PRINTWHEEL
Provides
numerical indication of
printing
posrtron.
18. LINE
LOCATOR
(red
line)
Denotes
the bottom of the tynine Iine
6. PAGE END
INDICATOR
Supptrrts the
paper.
Scale indicates remaining
19. CARD HOLDER
paper
length in inches
(for
I l-inch-long paper
Holds
paper
against the
platen.
only).
20. GUIDE ROLLER
7. NOISE
COVER
Guides correction tape.
Buffers the sound of typing.
21. PRINTWHEEL
SET/RELEASE LEVER
8. PAPER
RELEASE LEVER
Used for replacing
printuheel
Releases
paper
for alignment.
22.
CORRECTION
TAPE
9.
PAPERBAILLEVER
Lifts
the
paper
bail Pull to insert
paper
23. RIBBON
CASSETTE
automatically.
24. RIBBON TAKEUP KNOB
10. TOP
COVER
Used to take up
any slack
in
nbbon.
Open to replace ribbon. correction
tape or
printwheel.
25. PRINT HEAD
Strikes against
printu
heel.
II. POWER
SWITCH
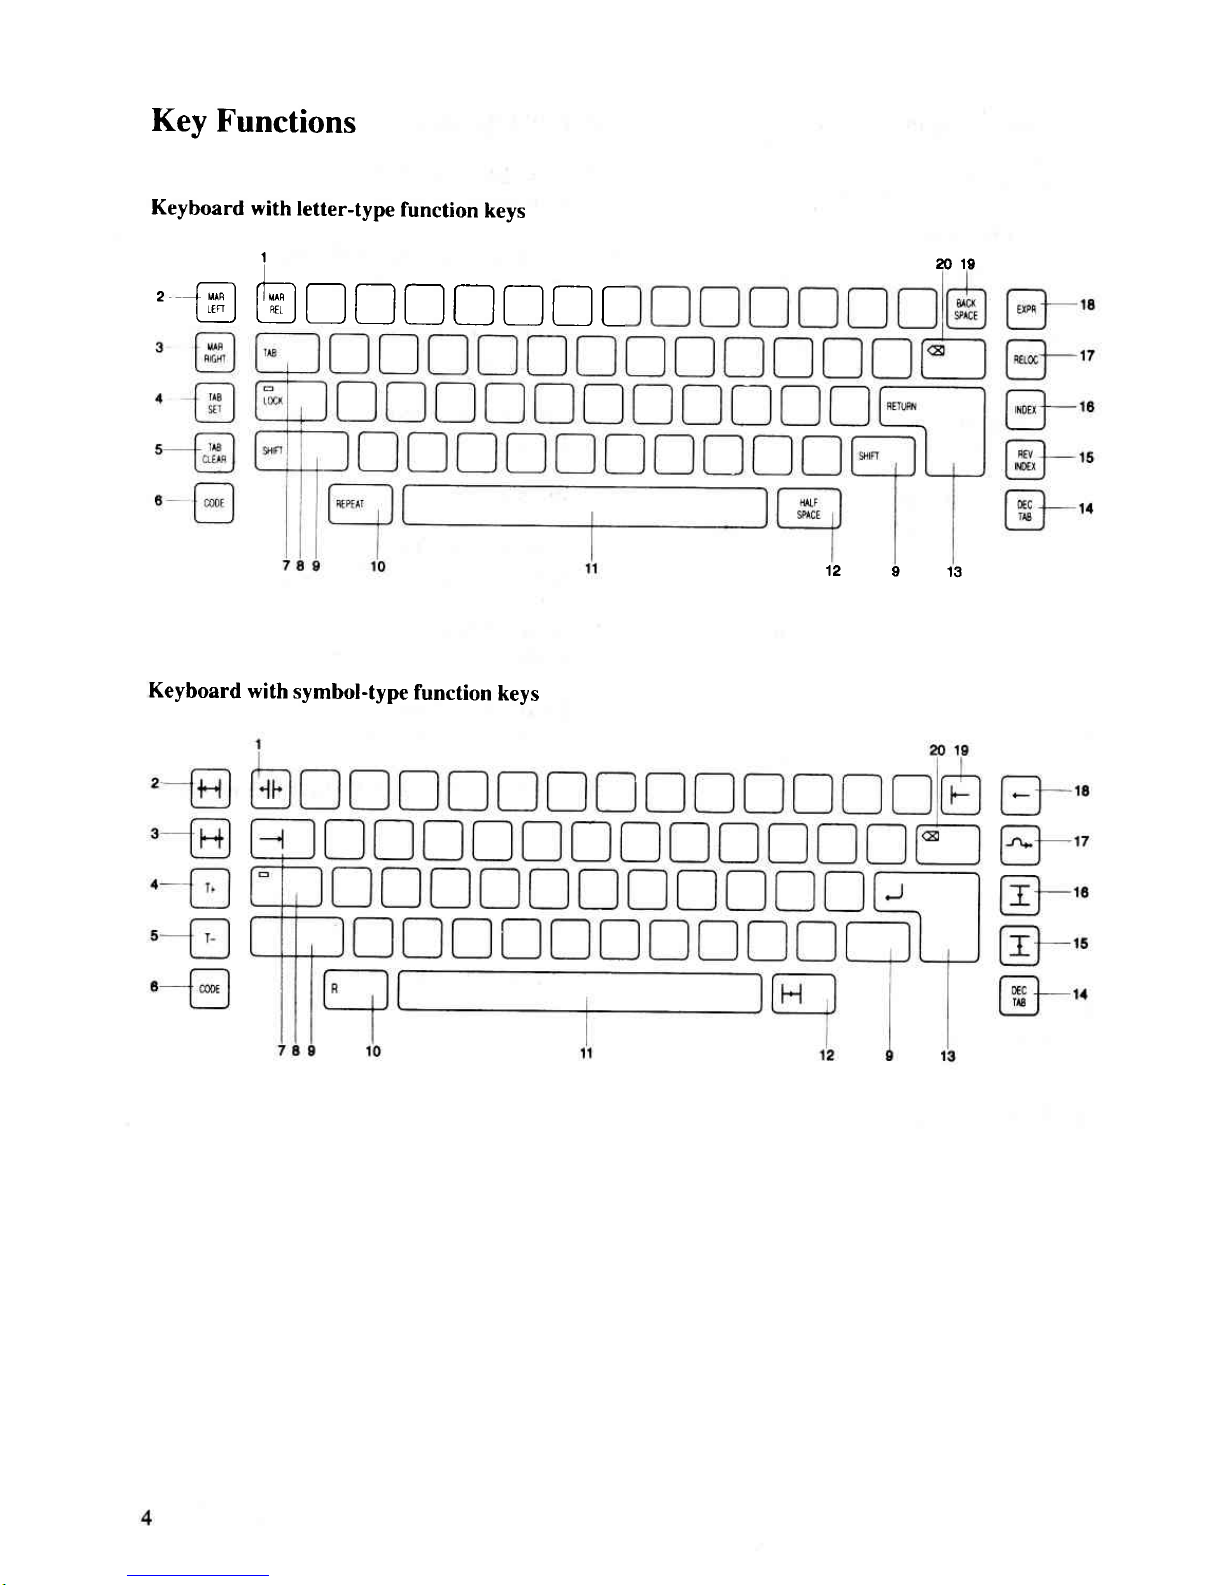
Key
Functions
Keyboard
with
letter-type
function
keys
t
ao
.,9
'
[-,ry] fT--A [_l
n i--l f-] f-_l n I
[
'n
I
L]J
L_J
LJ
LJ
t
ll.
lL--,l
r-
12913
Keyboard
with
symbol-type
function
keys
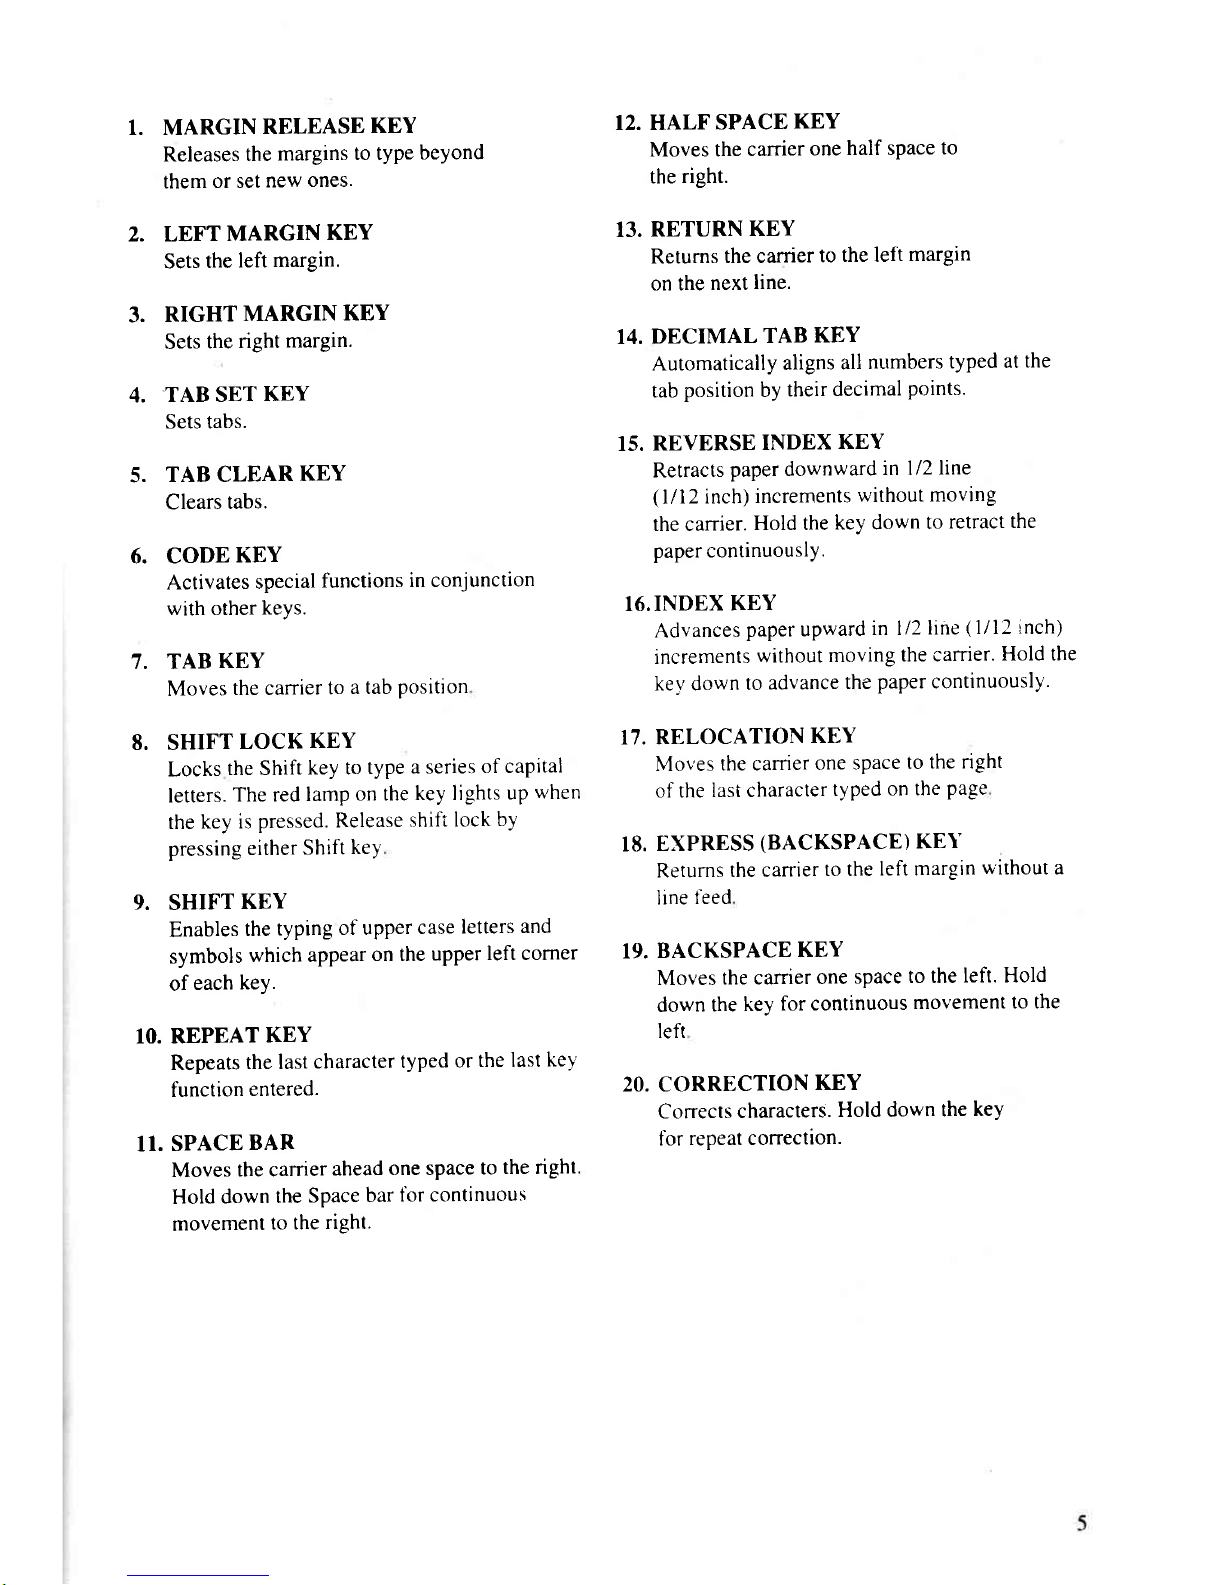
I. MARGIN
RELEASE
KEY
Releases
the
margins
to type
beyond
them
or set
new
ones.
2. LEFT
MARGIN
KEY
Sets
the
left
margin.
3.
RIGHT
MARGIN
KEY
Sets
the
right
margin.
4.
TABSETKEY
Sets tabs.
5.
TABCLEARKEY
Clears
tabs.
6. CODEKEY
Activates
special
functions
in conjunction
with other
keys.
7. TABKEY
Moves
the canier
to
a tab
Position
8. SHIFT
LOCK
KEY
Locks
the Shift
key to
type
a series
of capital
letters.
The red
lamp
on the
key lights
up
when
the
key is
pressed. Release
shift
lock
by
pressing
either
Shift
key
9. SHIFT
KEY
Enables
the
typing
of upper
case
letters
and
symbols
which appear
on the
upper
left corner
of
each
key.
IO. REPEAT
KEY
Repeats
the last
character
typed
or
the last
ke1
function
entered.
II.
SPACE
BAR
Moves
the carrier
ahead
one space
to
the right.
Hold
down
the
Space
bar
for continuous
movement
to the
right.
12. HALF
SPACE
KEY
Moves the
carrier
one
half space
to
the
right.
13.
RETURN
KEY
Returns
the carrier
to
the left
margin
on the
next
line.
14. DECIMAL
TAB
KEY
Automatically
aligns
all
nr.rmbers
typed
at
the
tab
position
by
their
decimal
points.
r5.
REVERSE
INDEX
KEY
Retracts
paper downward
in 1/2
line
(
l/12
inch)
increments
without moving
the carrier.
Hold the
key down
to
retract
the
paper continuously.
16.INDEX
KEY
Advances
paper
upward
in l/2
line
(
1/12 inch)
increments
without
moving
the carrier.
Hold the
key down
to
advance
the
paper
continuously.
17. RELOCATION
KEY
Mo,''es
the carrier
one
space
to
the right
of the
last character
typed
on the
page
I8.
EXPRESS
(BACKSPACE)
KET'
Returns
the canier
to the
left margin
without
a
line
feed
19.
BACKSPACE
KEY
Moves
the carrier
one
space
to the
left. Hold
down
the
key
for continuous
movement
to the
left
20. CORRECTION
KEY
Corrects
characters.
Hold down
the
key
tbr
repeat conection.
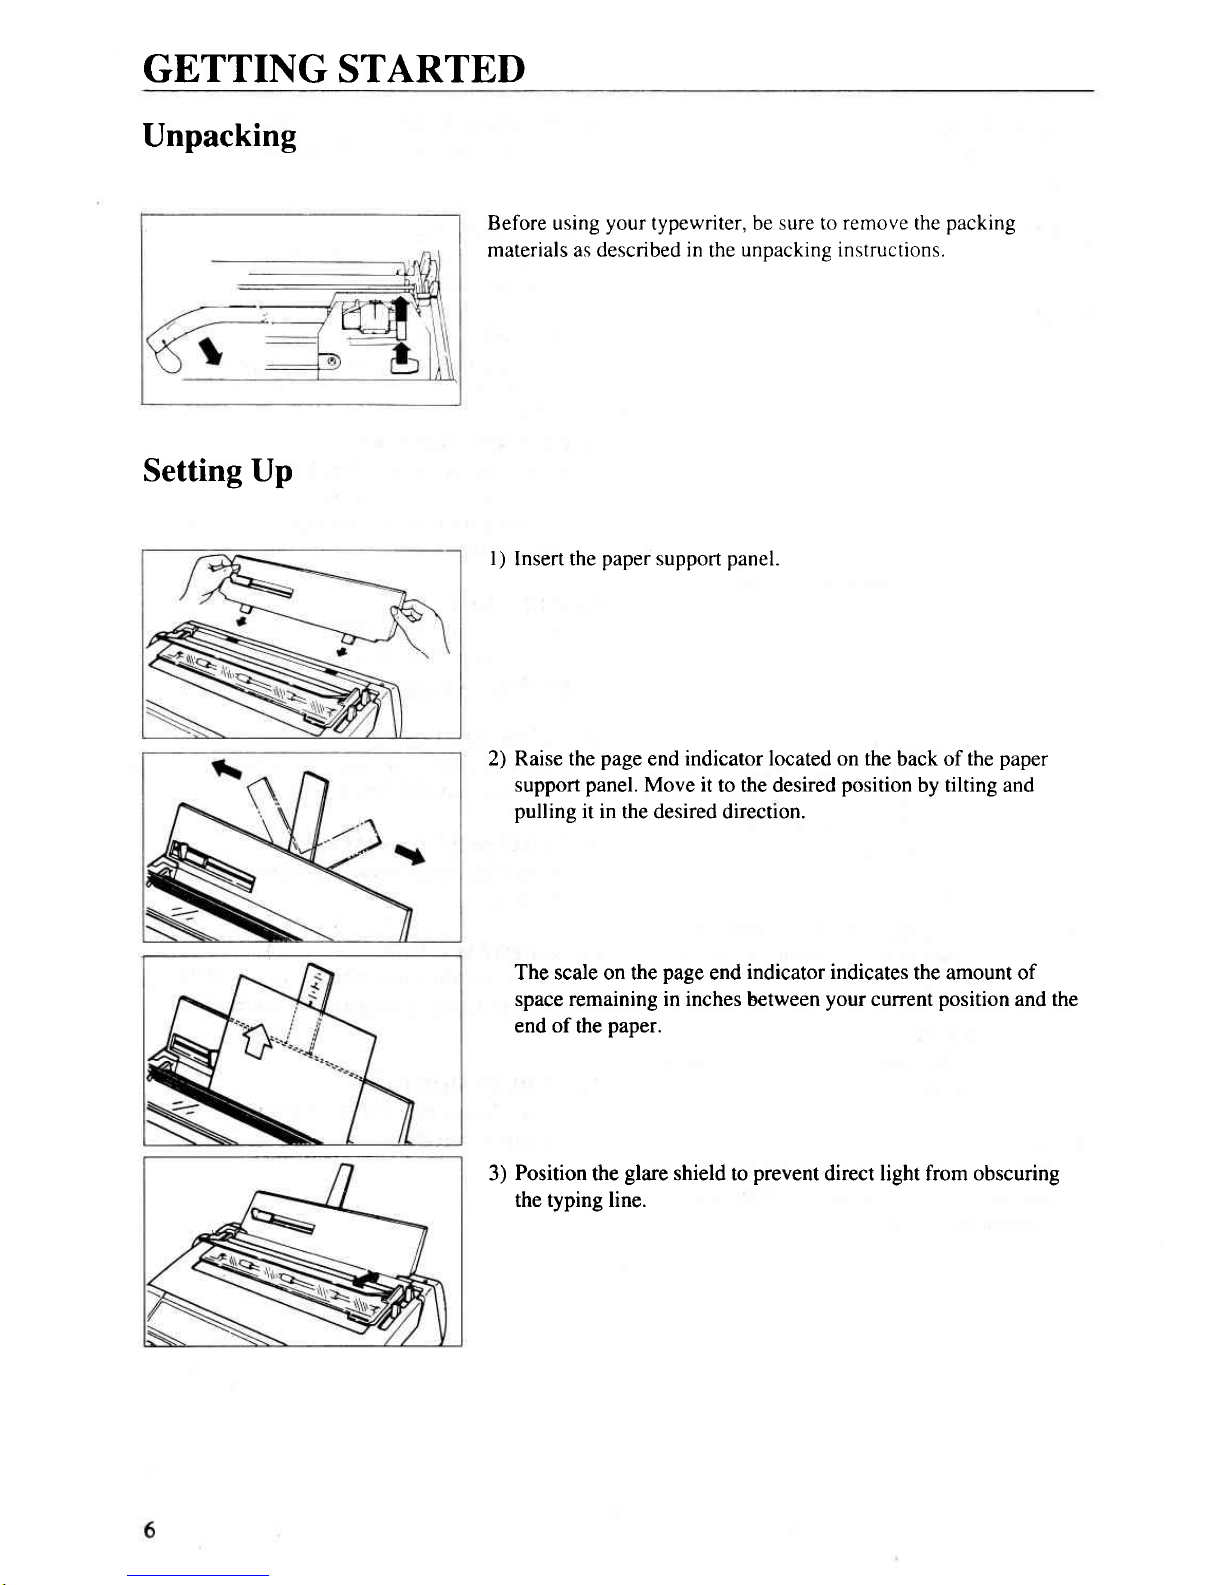
GETTING
STARTEI)
Unpacking
Setting Up
Before using
your
typewriter, be
sure to remove the
packing
materials as described
in
the
unpacking instructions.
l)
Insert the
paper
support
panel.
2) Raise the
page
end indicator located on the
back of
the
paper
support
panel.
Move it
to the desired
position
by tilting and
pulling
it in
the desired directron.
The scale on the
page
end
indicator indicates
the amount of
space remaining in inches between
your
current
position
and the
end of
the
paper.
3)
Position
the
glare
shield to
prevent
direct light from obscuring
the typing line.
"
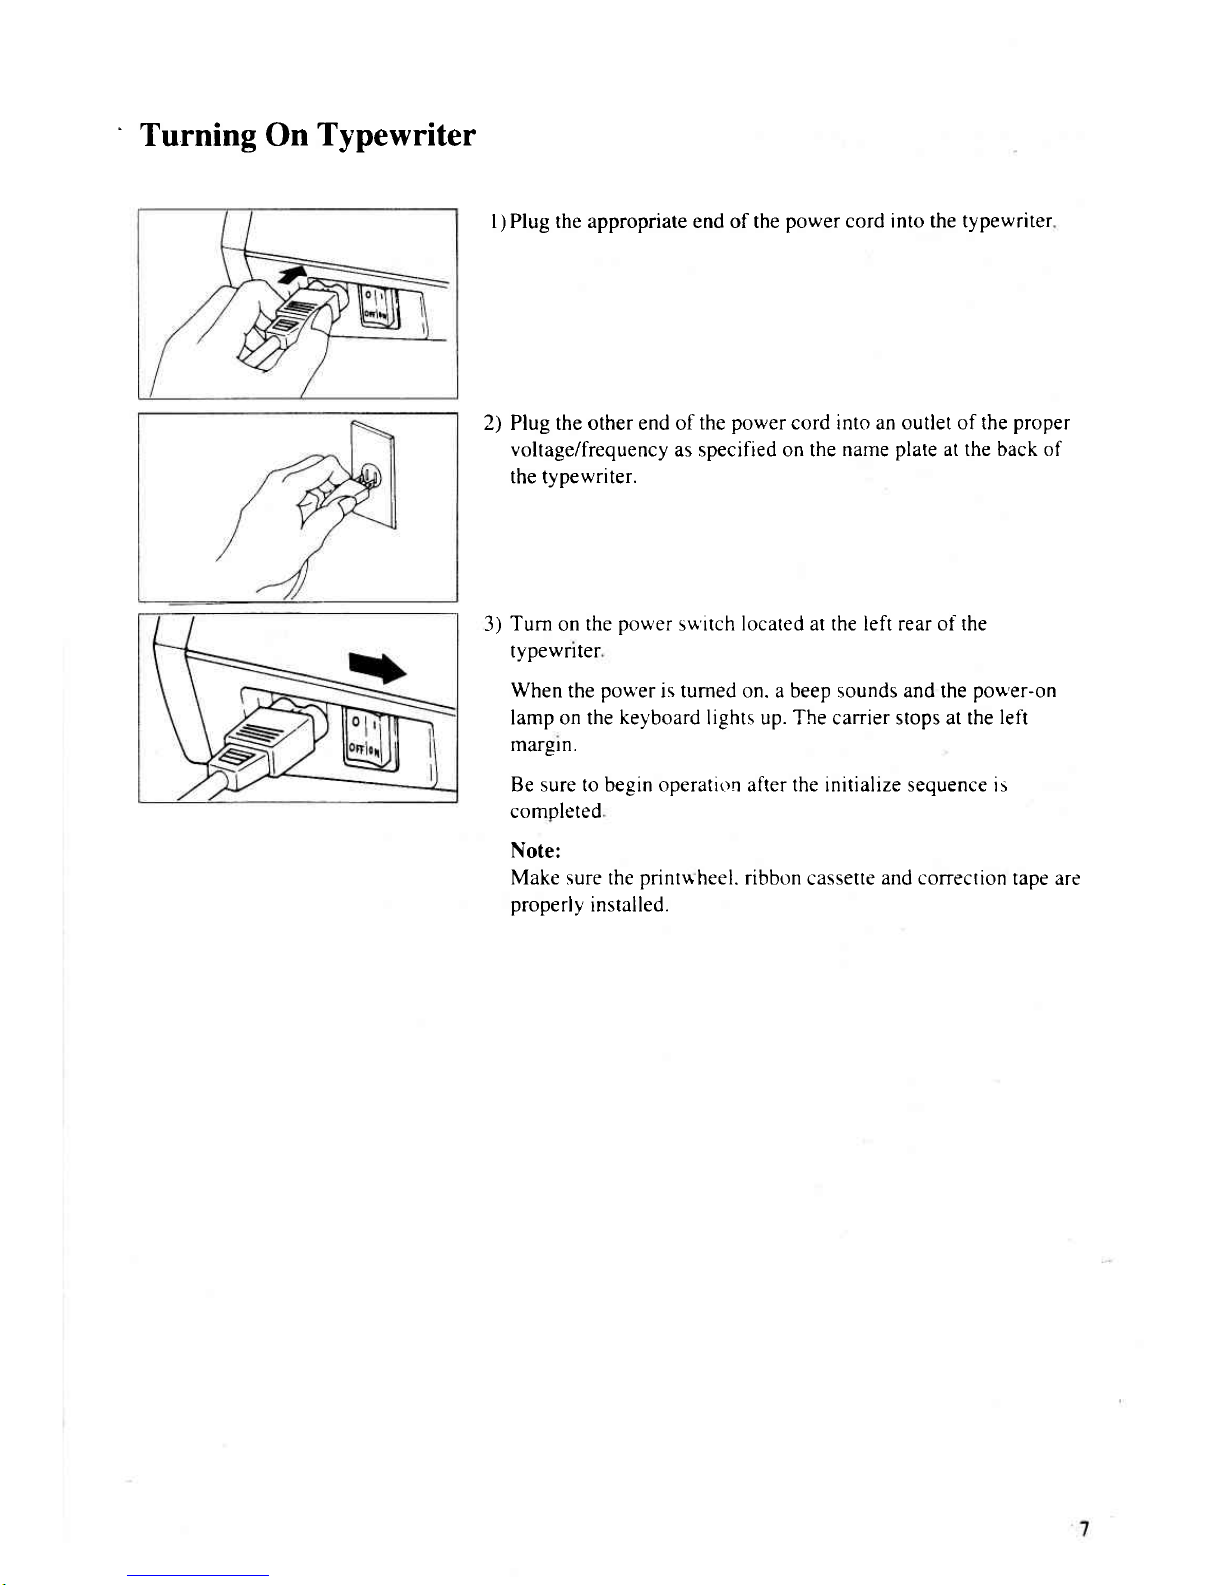
Turning On
Typewriter
I ) Plug the appropriate end of the
power cord into the typewriter
2) Plug the other end of
the
power
cord into an outlet of the
proper
voltage/frequency
as specified on the
name
plate
at the back of
the tvpewriter.
3)
Turn
on
the
power
s\.r'itch located at the left rear of the
typewnter
When
the
pou'er
is tumed on. a beep sounds and the
pou'er-on
lamp on the
keyboard
lights up. The carrier stops at the
left
margln.
Be sure to begin operatir)n after the initialize sequence is
comoleted
Note:
Make sure the
printuheel.
ribbon
cassette
and correction
tape are
properly
installed.
 Loading...