

Page 1
SERVICE FOR YOUR NADY AUDIO PRODUCT
(U.S.) Should your NADY AUDIO product require service, please contact the Nady Service
Department via telephone at (510) 652-2411, or e-mail at service@nady.com.
(International) For service, please contact the NADY AUDIO distributor in your country
through the dealer from whom you purchased this product.
DO NOT ATTEMPT TO SERVICE THIS UNIT
YOURSELF AS IT CAN BE DANGEROUS AND
WILL ALSO VOID THE WARRANTY.
OWNER’S MANUAL
NADY SYSTEMS, INC. • 6701 SHELLMOUND STREET, EMERYVILLE, CA 94608
ADI1manual 10/2/03, 9:53 AM1
Tel: 510.652.2411 • Fax: 510.652.5075 • www.nady.com
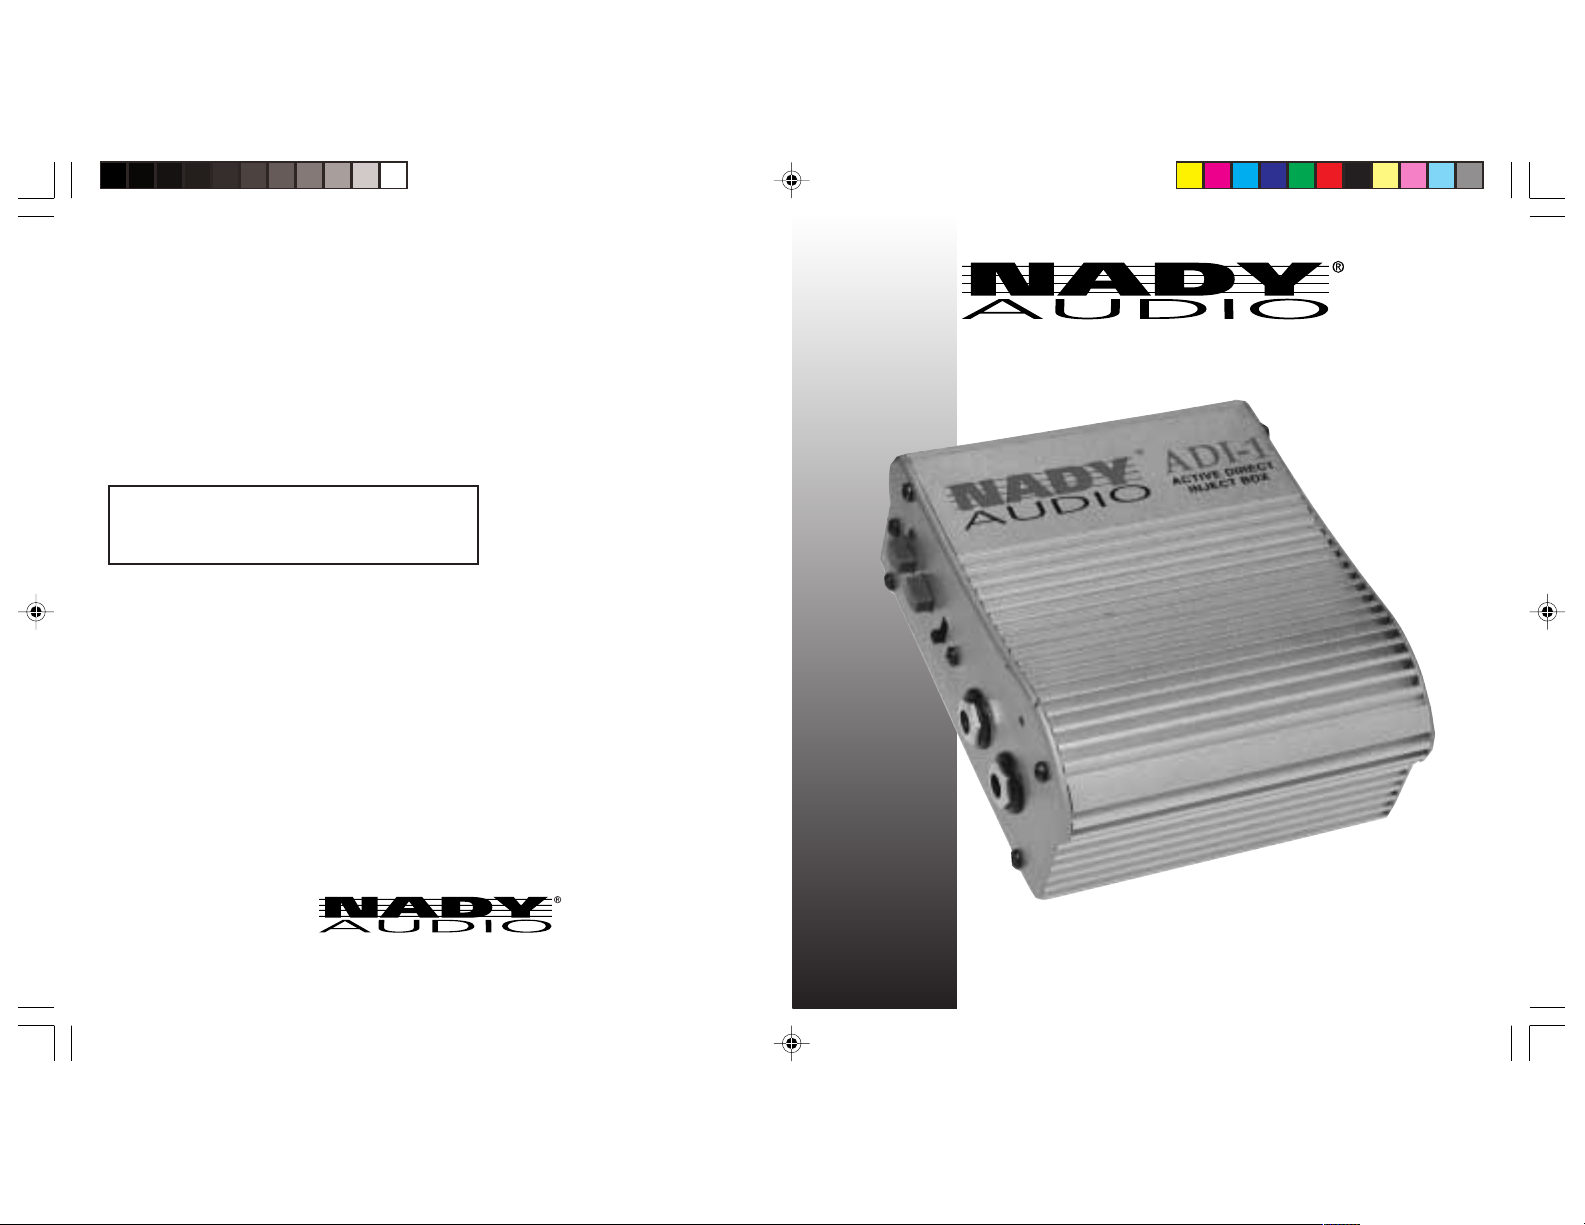
ADI-1
Active Direct Inject Box
Page 2
Introduction
Congratulations for purchasing the ADI-1 Active Direct Inject Box. This unique unit is the
ultimate, multi-functional active DI box. The ADI-1 is indispensable for solving many audio
mismatch and hum problems in numerous stage and studio applications.
• Eliminates impedance mismatch problems and converts any sound source at
almost any level (from guitar to speaker inputs) into a clean, powerful hum-free,
noise-free and interference-free balanced signal perfect for even extremely long
cable runs
• Full-featured controls and connections include On/Off, Ground Lift, and Guitar/
Speaker Source Select input attenuation switches; unbalanced 1/4" TS Input and
Parallel Link Output jacks; and servo-balanced XLR Output jack.
• Parallel link output allows ultimate hookup flexibility by enabling applications such
as connection to the input of the backline or monitor amplifier.
• No compromise circuit design and stringent component selection provide
absolutely flat, full frequency response across the entire audio spectrum, and
negligible distortion for the most natural, powerful audio available.
• Portable aircraft aluminum extruded case for ultimate roadworthiness, long life and
reliability
• Powered either by console’s +48V phantom power or internal 9V battery
Contents
Introduction ......................................................................................................................... 2
Controls and Connections .................................................................................................. 3
Operations .......................................................................................................................... 4
Connected to Instrument ............................................................................................. 5
Connected to Amplifier ................................................................................................ 5
Specifications ..................................................................................................................... 5
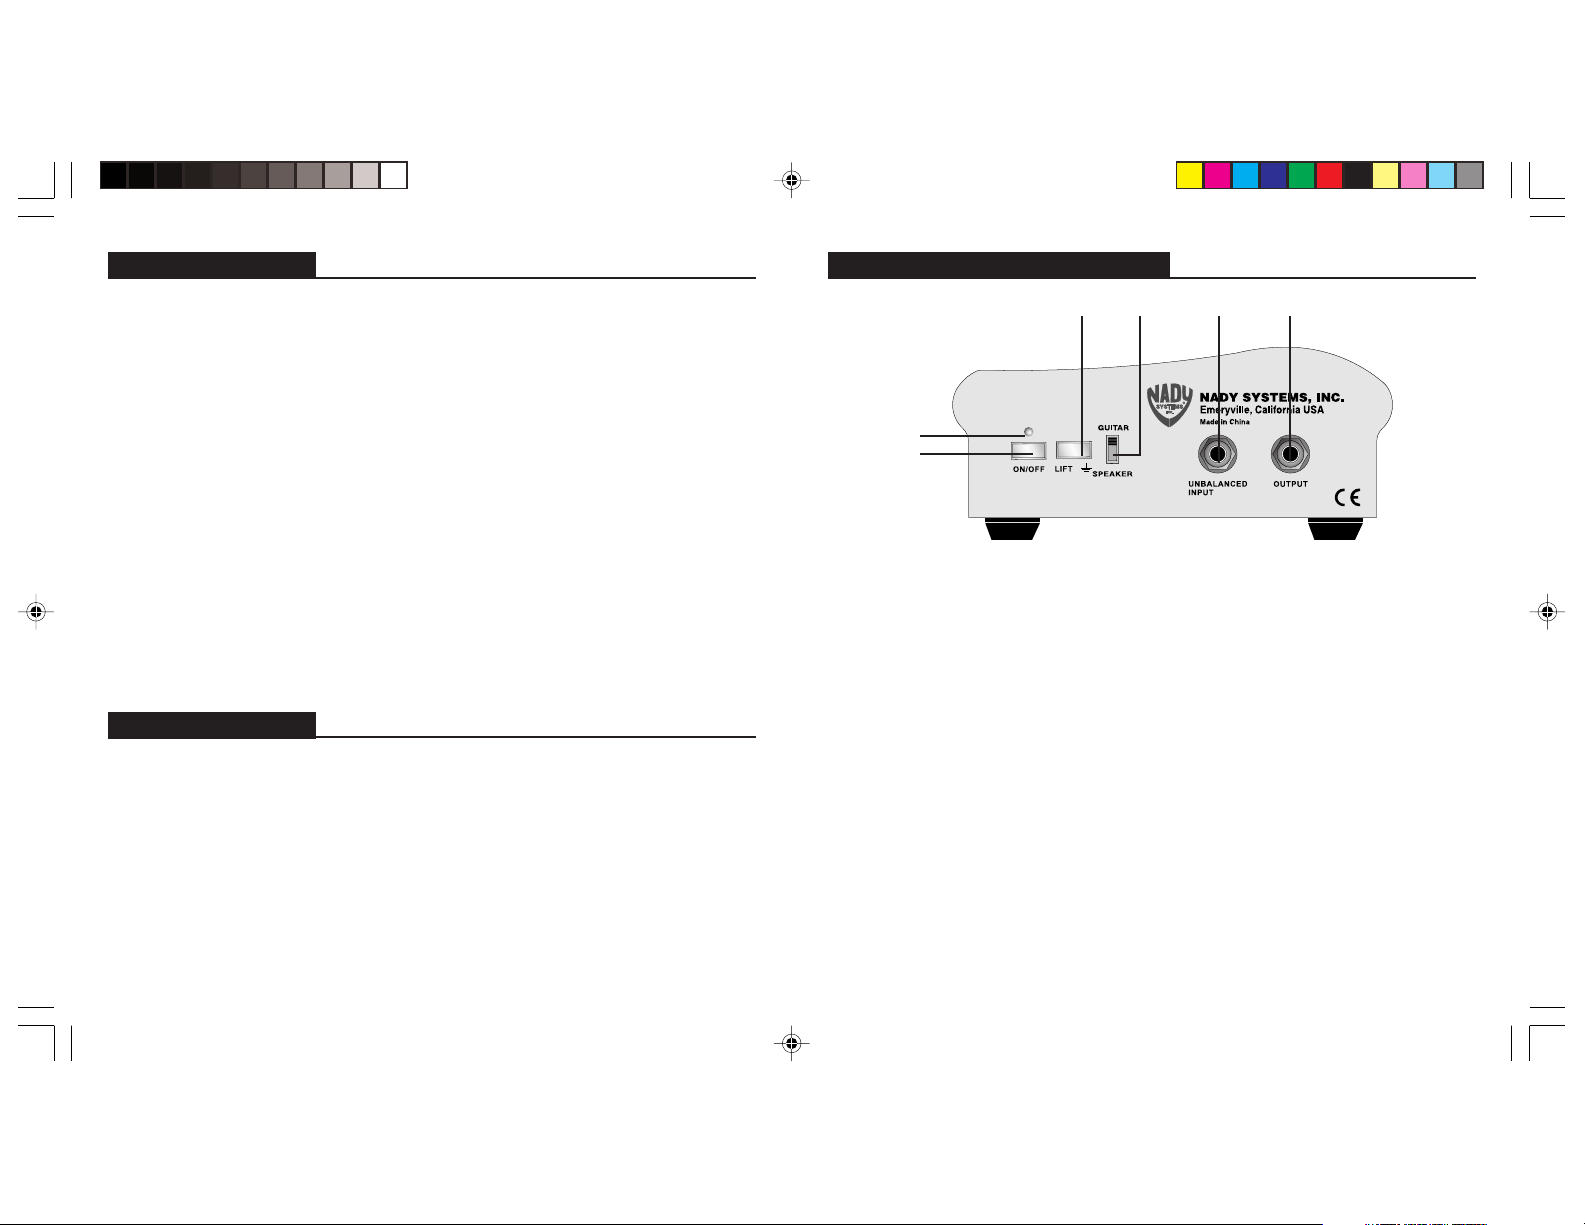
Controls and Connections
(2) (3) (4) (5)
(1A)
(1)
(1) ON/OFF BUTTON
When pressed, this enables the 9V battery power for the unit. If the device connected to
the ADI-1 XLR output has 25V-48V phantom power enabled, the ADI-1 can be used
without draining the 9V battery. Disabling the ON/OFF button will save battery power
when using phantom power.
(1A) POWER ON INDICATOR
This LED lights whenever the unit is on, either from external phantom power, or from
internal battery power when the unit is switched ON.
CAUTION: Always turn on the ADI-1 before turning up the volume on devices connected
to the ADI-1 outputs to avoid damaging your equipment or speakers.
(2) GROUND LIFT BUTTON
When pressed, this disconnects the ground connection between the 1/4" input and XLR
output to eliminate hum caused by ground loops.
ADI1manual 10/2/03, 9:53 AM2
2
3
Page 3

(6) (7)
(3) SPEAKER/GUITAR SWITCH
Switch enables a 35dB pad when set to SPEAKER, allowing the input to receive high
level signals from speaker or amplifier outputs.
(4) 1/4" INPUT
Unbalanced 1/4" input jack for inputting a line level, instrument level, or speaker level
signal.
(5) 1/4" OUTPUT
Unbalanced 1/4" output jack which is in parallel with the input jack. This allows the ADI-1
to be used as a Y-splitter by sending the input signal to another device via the 1/4" output
as well as sending it from the balanced XLR output.
(6) XLR OUTPUT
Balanced XLR output jack [Pin 1 = Ground, Pin 2 = Hot(+), Pin 3 = Cold(-)]
(7) BATTERY COMPARTMENT
Remove screw and panel to install 9V battery.
4
Operation
Connected to Instrument
The ADI-1 can be used to connect the unbalanced output of an instrument or line level
device (eg. guitar, bass, synthesizer, effects module, another mixer) to the balanced
input of a mixer or amplifier. Set the GUITAR/SPEAKER (3) switch to GUITAR for this
application. If you desire to send the original unbalanced signal on to a mixer or
amplifier, use the 1/4" UNBALANCED OUTPUT (5). The 1/4" OUTPUT (5) is paralleled with the input, therefore, when using the 1/4" OUTPUT (5), the input device and
output device volume controls may need to be adjusted to acquire the desired level.
Connected to Amplifier
The ADI-1 can be used to connect an amplifier’s speaker output, or a speaker’s “daisy
chain” output, to the balanced input of a mixer. Set the GUITAR/SPEAKER (3) switch
to SPEAKER for this application. If your speaker has only one connector, the ADI-1
can be inserted between the amplifier and speaker using the 1/4" INPUT (4) and 1/4"
OUTPUT (5) jacks.
Specifications
Frequency Response............................................................................... 20-20 kHz, -3 dB
Noise Level (22Hz-22kHz)..................................................................................... -101dBu
THD + N (10 Hz-22 kHz)................................................................ 0.02% @ 1 VRMS, 1 kHz
Input Impedance (Guitar) ................................................................................ > 1 M ohms
Input Impedance (Speaker) ........................................................................... > 10 K ohms
Output Impedance .................................................................................Approx. 500 ohms
Max. Input Level 9V. Batt (1% THD) ..................................................................... +8.5dBu
Max. Input Level 48V Phantom (1% THD) ........................................................ +11.5 dBu
Inputs .................................................................................... Unbalanced 1/4" Phone Jack
Outputs ................................ Balanced XLR Connector and Unbalanced 1/4” Phone Jack
Power Requirement ...................................... 9 Volt Battery or Phantom Power 24-48 VDC
Weight ......................................................................................................... 0.8 lbs. (.36 kg)
Dimension................................................................. 4.8” x 4.05” x 2” (124 x 103 x 51mm)
5
ADI1manual 10/2/03, 9:53 AM3
 Loading...