


NAB EFTPOS MOBILE
Terminal Guide

2 NAB EFTPOS Mobile Terminal Guide
YOUR NAB EFTPOS MOBILE TERMINAL

NAB EFTP OS Mobile Terminal Guide 3
TABLE OF CONTENTS
Getting to know your NAB EFTPOS terminal 6
Contactless – Tap & Go 8
Understanding your NAB EFTPOS Mobile terminal Integrated with your POS 9
Understanding your NAB EFTPOS Mobile terminal 10
NAB EFTPOS Mobile Multi-Merchant Terminals 11
NAB EFTPOS Mobile Sale – Tap 12
NAB EFTPOS Mobile Sale – Insert/Swipe Using PIN 14
NAB EFTPOS Mobile Sale – Insert/Swipe Using Signature 16
NAB EFTPOS Mobile Sale with Cash-Out 19
NAB EFTPOS Mobile Sale with Tip 22
NAB EFTPOS Mobile Cash-Out Only 25
NAB EFTPOS Mobile Refunds 28
NAB EFTPOS Mobile Review Details of the Last Transaction 31
NAB EFTPOS Mobile Re-print Receipt for the Last Transaction 33
NAB EFTPOS Mobile Re-print Receipt for Past Transactions with Invoice Number 34
NAB EFTPOS Mobile Print Transaction Listing 36
NAB EFTPOS Mobile Print Settlement Totals – Pre-Settlement 38
NAB EFTPOS Mobile Print Settlement Totals – Last Settlement 40
NAB EFTPOS Mobile Manual Settlement 41
NAB EFTPOS Mobile Pre-Authorisation 43
NAB EFTPOS Mobile Pre-Authorisation Completion 46
Pre Authorisation Completion (Auth do not exist on Terminal) 47
NAB EFTPOS Mobile Pre-Authorisation Adjust 50
NAB EFTPOS Mobile Pre-Authorisation Cancel 54
NAB EFTPOS Mobile Pre-Authorisation Completion Cancel 59
NAB EFTPOS Mobile Account Verify 60
NAB EFTPOS Mobile MOTO 62
NAB EFTPOS Mobile Manual Key Entry 66
NAB EFTPOS Mobile Void Last 69
Configuration on the NAB EFTPOS terminal 71
NAB EFTPOS Mobile Automatic Settlement Time Set-up 73
NAB EFTPOS Mobile Transaction Listing Printout 74
NAB EFTPOS Mobile Transaction Listing Printout – Turn Prompt On 75
NAB EFTPOS Mobile Transaction Listing Printout – Turn Prompt Off 76
NAB EFTPOS Mobile Start Shift 77
NAB EFTPOS Mobile End Shift 78
NAB EFTPOS Mobile Print Current Shift Totals 81
NAB EFTPOS Transaction Failed 82
NAB EFTPOS Mobile Surcharge 84
NAB EFTPOS Mobile Surcharge – Turn On/Off 85
NAB EFTPOS Mobile Surcharge – Card Acceptance Set-up 86
NAB EFTPOS Mobile Change Merchant Password 89
Communication Options 91
Requirements for Different Communication Options On NAB Eftpos Mobile Terminals 92
Switch to a Different Communication Option 93
Pair the Terminal And Base For Bluetooth 94
Set Up the Terminal For Dial Up Communication 101
Set Up the Terminal For Broadband Internet Via Ethernet Communication 102
Set Up The Terminal For Broadband Internet Via Wi Fi Communication 103
Additional PINPad Functions 106
Stationery Order (Ordering Receipt Rolls) 107
Changing the Receipt Roll 108
Common Error Messages 109
Enable Auto-Comms Fallback 110
Electronic Fallback Procedure 114
Manual Backup Procedure 115
Termination of EFTPOS Merchant Service 116

4 NAB EFTPOS Mobile Terminal Guide
This guide is for NAB merchants who have signed the Merchant Agreement General
Terms and Conditions. Please make yourself familiar with the contents of this guide
and do not hesitate to contact NAB should you have any further queries.
NAB is here to help you with your NAB EFTPOS Mobile terminal 24 hours a day, 7 days a week.
Technical Support for NAB EFTPOS Mobile terminals
Before contacting the NAB Merchant Service Centre in regard to any error message, please write down all the error
information as well as your merchant and terminal numbers so your query can be quickly resolved.
Call Merchant Service Centre 1300 369 852
Select Option 1 (not connected to computer)
Then
Select Option 1 (Ingenico Move 5000 terminal)
Email Merchant.Service.Centre@nab.com.au
Technical Support for NAB EFTPOS Mobile terminals integrated with your POS
Before contacting the NAB Integrated Help Desk please have your terminal and merchant numbers ready. If your query is
error related, write down the error information displayed on the terminal or your Point of Sale (POS) so your query can be
quickly resolved.
Call NAB Integrated Help Desk 1300 369 852
Select Option 2 (terminal connected to computer)
Then
Select Option 1 (technical issues)
Email Merchant.Service.Centre@nab.com.au
This help desk service is part of our Merchant Service Centre and is provided by KeyCorp Services on behalf of NAB to assist
you with your support needs for the NAB EFTPOS Mobile terminal and PC-EFTPOS software.
For Authorisations
Credit Cards 13 25 15 please have your store number ready before calling
Debit Cards – Cheque or Savings 1300 360 852 please have your merchant number ready before calling
American Express 1300 363 614
Diners Club 1800 331 112

NAB EFTP OS Mobile Terminal Guide 5
For POS Software – NAB EFTPOS Mobile terminals integrated with your POS
Contact your POS Vendor
Sales Enquiries
1300 EFTPOS (1300 338 767)
8am – 6pm Monday to Friday
Fraud Related Enquiries
1300 668 046
8am – 5pm Monday to Friday
Lost or Stolen Cards
Call the above authorisation line appropriate for the card type used (credit or debit).
Ask for extension 500
Service Response Time
It is NAB’s intent to replace a faulty terminal:
• within 4 business hours in metropolitan areas.
• within 24 business hours for country areas
• within 72 business hours for remote areas.
Merchant Details
Please insert your details here for quick reference.
EB Merchant No.
Terminal No.
Store No.

6 NAB EFTPOS Mobile Terminal Guide
GETTING TO KNOW YOUR
NAB EFTPOS MOBILE TERMINAL
Contactless
landing zone
Terminal display/
touchscreen
Telephone-style
keypad
Swipe reader
Menu key
Cancel key
Clear key
Enter/Power
on key
Chip card
reader
Feed
key

NAB EFTP OS Mobile Terminal Guide 7
Using the Touchscreen
The NAB EFTPOS Mobile terminal has a colour touchscreen. Navigating using the touchscreen is easy and intuitive for your
customers. Simply follow the prompts and tap the option on the screen to make a selection.
Using the Keypad
The Menu button is used to access the terminal menu options
The CONTINUE button on the keypad is used to accept
a selected option highlighted or to accept data entry.
This button is also used to power on the terminal
The CLEAR button on the keypad is used for clearing entered
data or moving back to the previous screen
The CANCEL button on the keypad is used to cancel the current function
and return to the Home screen
The Function button on the keypad is used to perform certain advanced functions
on the terminal
[F2]
[F3]
Press [F2 ] on the touchscreen to scroll down the menu options
Press [F3
] on the touchscreen to scroll up the menu options
Basic Functions
Power on
Press the green CONTINUE key
Power off
Remove the terminal from its base and any power source. Press and hold the Func and yellow CLEAR keys together
Cancel an action
Press the red CANCEL button
Change terminal passwords
Contact the Merchant Service Centre
Idle State
If there is no activity on the terminal for 60 seconds, the terminal will return to the Home screen
GETTING TO KNOW YOUR
NAB EFTPOS MOBILE TERMINAL (CONTINUED)

8 NAB EFTPOS Mobile Terminal Guide
The NAB EFTPOS Mobile terminal comes ready with the capability to accept Contactless credit card payments, commonly
referred to as ‘tap and go’. Your customer’s chip card must have the following symbol in order to use the Contactless feature.
What are the advantages of Contactless capability?
Quick and easy to use – simply tap the chip card on the landing zone, where the following icon displays at the top of
the terminal.
If the sale is less than $100, there is no need for your customer to enter a PIN or sign the merchant receipt.
If the sale is over $100, your customer will be required to enter a PIN or sign the merchant receipt.
Printing the customer receipt is optional regardless of the transaction amount.
Are there any restrictions in using Contactless?
If the sale amount is greater than $250, your customer will be asked by the terminal to insert or swipe their card.
Only a Sale transaction can be made using Contactless.
CONTACTLESS
TAP & GO

NAB EFTP OS Mobile Terminal Guide 9
NAB EFTPOS Mobile terminals integrate with your Point of Sale (POS) solution to process credit, debit and charge card
transactions. When the card payment option is selected, the POS integration software provided by PC-EFTPOS, interacts with
the NAB EFTPOS Mobile terminal to process the transaction. The outcome of the transaction is then automatically updated in
your POS solution, making it easy for you to reconcile the payments and shorten payment processing time.
Using NAB EFTPOS Mobile terminals with a POS
NAB EFTPOS Mobile terminals are designed to work with your PC-EFTPOS-certified POS system. The POS system sends the
total amount to the NAB EFTPOS Mobile terminal to finalise the payment.
The solution can be configured to work with different types of communications depending on your environment.
These include:
• 3G
• Broadband Internet via Ethernet
• Broadband Internet via WiFi
• Dial Up
Your NAB EFTPOS Mobile terminal and base are paired via Bluetooth. This enables the terminal to continue to operate
normally when it is separated from the base.
You can also choose to have all transaction receipts printed directly from your POS system or have the terminal print out the
transaction receipt.
Processing transactions with a NAB EFTPOS Mobile terminal integrated with your POS
Your NAB EFTPOS Mobile terminal is integrated with your Point of Sale (POS) system.
For all transaction types, the merchant initiates the transaction on the POS system and follows the system prompts displayed
on the POS screen. The customer follows the prompts displayed on the terminal to process the payment.
Considerations
Transactions completed using an Australian-issued card need to be approved by a PIN. Some transactions, such as Refunds,
may prompt for a signature.
Transactions completed using an internationally-issued card may need to be approved by a signature.
If the signature does not match that on the card, you need to decline the transaction. The terminal will produce a
declined receipt.
As for all transactions types, if a transaction is declined, your customer may need to provide another form of payment to
complete the transaction.
For any transaction errors or issues, please refer to your POS manual, or call the NAB Integrated Helpdesk.
UNDERSTANDING YOUR
NAB EFTPOS MOBILE TERMINAL INTEGRATED WITH YOUR POS

10 NAB EFTPOS Mobile Termi nal Guide
Your NAB EFTPOS Mobile terminal can be configured to work with different types of communications depending on your
environment. These include:
• 3G
• Broadband Internet via Ethernet
• Broadband Internet via WiFi
• Dial Up
The NAB EFTPOS Mobile terminal and base are paired via Bluetooth. This enables the terminal to continue to operate
normally when it is separated from the base.
Navigating the Menu
To access the Menu, press the Menu button.
There are 4 main menu items
Tap to select a menu option.
Processing transactions using your NAB EFTPOS Mobile terminal
All cards can be used on the terminal using:
• Tap (using the contactless feature)
• Insert (using the chip), or
• Swipe (using the magnetic stripe)
UNDERSTANDING YOUR
NAB EFTPOS MOBILE TERMINAL

NAB EFTP OS Mobile Terminal Guide 11
NAB EFTPOS
MOBILE MULTI-MERCHANT TERMINALS
The NAB EFTPOS Mobile terminal can support multiple merchants. This allows multiple merchants to process transactions on
one terminal with separate settlements for each individual merchant.
If your terminal supports multiple merchants, then there must be a Primary merchant identified. The Primary merchant is the
merchant to whom the terminal is provided under the Merchant Agreement and who is responsible for the terminal rental.
The additional merchants who use the terminal are the Secondary merchants. A Secondary merchant has been granted the
use of the terminal by the Primary merchant.
Note: This function is not available on your NAB EFTPOS Mobile terminal when your terminal is integrated with your POS.
Processing transactions on a terminal that supports multiple merchants
When you process transactions on a terminal that supports multiple merchants, the SELECT MERCHANT screen displays,
prompting you to select the relevant merchant.
If the merchant you require is not displayed on the screen, scroll down / up using touch screen on PINPad to move between
previous and next screen.
Tap the name of the required merchant on the screen and continue with the transaction as described in this guide.
Some functions (such as Log on or Manual Settlement) that display the SELECT MERCHANT screen, provide an option
on this screen to select All Merchants.
Tap ALL MERCHANTS when you want to perform the function for all merchants on the terminal at once.

12 NAB EFTPOS Mobil e Terminal Guide
Note: This function is available on NAB EFTPOS Mobile terminals integrated with your POS, however some steps may
not apply or may be initiated via the POS.
Step 1
Enter the sale amount directly on the screen
and press CONTINUE
Step 3
Processing message is displayed
Step 2
Ask customer to TAP their card
Ensure your customer holds their card over the contactless
logo until all four bars ‘light up’ and the terminal sounds a
beep. This will only take a few seconds.
Step 4
An acknowledgement displays once the sale has been
approved and the merchant receipt option to print
is displayed.
NAB EFTPOS MOBILE SALE
– TAP

NAB EFTP OS Mobile Terminal Guide 13
Step 5
Press Yes to print the customer receipt copy if required
Step 6
Printing message is displayed
NAB EFTPOS MOBILE SALE
– TAP (CONTINUED)

14 NAB EF TPOS Mobile Terminal Guid e
NAB EFTPOS MOBILE SALE
– INSERT/SWIPE USING PIN
Note: This function is available on NAB EFTPOS Mobile terminals integrated with your POS, however some steps may
not apply or may be initiated via the POS.
Step 1
Enter the sale amount directly on the screen and
press CONTINUE
Step 3
Ask customer to select their account
Step 2
Ask customer to TAP their card
Step 4
Ask customer to enter their PIN

NAB EFTP OS Mobile Terminal Guide 15
Step 5
Processing message is displayed
Step 7
Press Yes to print the customer receipt if required
Step 6
An acknowledgement displays once the sale has been
approved and the merchant receipt will print.
Remove card from the terminal if inserted
Step 8
Printing message is displayed
NAB EFTPOS MOBILE SALE
– INSERT/SWIPE USING PIN (CONTINUED)

16 NAB EFT POS Mobile Terminal Guide
The signature option is only available for cards issued overseas.
Note: This function is available on NAB EFTPOS Mobile terminals integrated with your POS, however some steps may
not apply or may be initiated via the POS.
Step 1
Enter the sale amount directly on the
screen and press CONTINUE
Step 3
Ask customer to select an account
Step 2
Ask customer to TAP their card
Step 4
Ask customer to enter their PIN
NAB EFTPOS MOBILE SALE
– INSERT/SWIPE USING SIGNATURE

NAB EFTP OS Mobile Terminal Guide 17
Step 5
Processing message is displayed
Step 7
Ask customer to sign the receipt.
You will need to verify your customer’s signature
with the signature on the card. If this is correct, press Yes
Step 6
An acknowledgement displays once the sale has
been approved and the merchant receipt with
signature request will print.
Remove card from the terminal if inserted
NAB EFTPOS MOBILE SALE
– INSERT/SWIPE USING SIGNATURE (CONTINUED)

18 NAB EFT POS Mobil e Terminal Guide
NAB EFTPOS MOBILE SALE
– INSERT/SWIPE USING SIGNATURE (CONTINUED)
Step 8
Press Yes to print the customer receipt if required.
Step 9
Printing message is displayed.

NAB EFTP OS Mobile Terminal Guide 19
NAB EFTPOS MOBILE SALE
WITH CASH-OUT
The cash-out function is only available on debit (cheque and savings) accounts for EFTPOS transactions.
It is an optional feature that you may enable or disable by contacting the Merchant Service Centre.
If you have enabled the cash-out feature, an additional screen will display after you enter the sale amount.
A sale with cash-out transaction is shown as one total item in the settlement report and on the monthly merchant statement.
Note: This function is available on NAB EFTPOS Mobile terminals integrated with your POS, however some steps may
not apply or may be initiated via the POS.
Step 1
Enter the sale amount directly on the screen
and press CONTINUE
Step 3
Ask customer to INSERT or SWIPE their card
Step 2
Enter the cash out amount and
press CONTINUE
Step 4
Ask customer to select an account

20 NAB EFT POS Mobile Terminal Guide
NAB EFTPOS MOBILE SALE
WITH CASH-OUT (CONTINUED)
Step 5
Press ENTER to confirm
Step 6
Processing message is displayed

NAB EFTP OS Mobile Terminal Guide 21
Step 7
An “Approved” acknowledgement displays once the sale has
been successfully processed and the merchant receipt will
print automatically.
Ask customer to remove their card if inserted.
Step 9
Printing message is displayed
Step 8
Press Yes to print the customer receipt if required
NAB EFTPOS MOBILE SALE
WITH CASH-OUT (CONTINUED)

22 NAB EFTPOS Mobile Terminal Guide
NAB EFTPOS MOBILE SALE
WITH TIP
The Tip Amount screen will only display if the tipping feature has been enabled. You may enable or disable the tipping
feature by contacting the Merchant Service Centre.
A sale with tip transaction is shown as one total item in the settlement report and on the monthly merchant statement.
Note: This function is not available on your NAB EFTPOS Mobile terminal when your terminal is integrated with your POS.
Step 1
Enter the sale amount directly on the screen
and press CONTINUE
Step 3
Review the total amount and press ENTER
Step 2
Enter the tip amount and press CONTINUE
Step 4
Ask customer to TAP their card

NAB EFTP OS Mobile Terminal Guide 23
Step 5
Ask customer to select an account
Step 7
An acknowledgement displays once the sale has been
approved and the merchant receipt will print
Remove card from the terminal, if inserted
Step 6
Processing message is displayed
Step 8
Press Yes to print the customer receipt if required.
NAB EFTPOS MOBILE SALE
WITH TIP (CONTINUED)

24 NAB EF TPOS Mobile Terminal Guid e
NAB EFTPOS MOBILE SALE
WITH TIP (CONTINUED)
Step 9
Printing message is displayed

NAB EFTP OS Mobile Terminal Guide 25
The cash-out feature is available on debit (cheque and savings) accounts only for EFTPOS transactions. It is an optional
feature that you may enable or disable by contacting the Merchant Service Centre.
Note: This function is available on NAB EFTPOS Mobile terminals integrated with your POS, however some steps may
not apply or may be initiated via the POS.
Step 1
Press 1 in the Menu to select Transaction
Step 3
Enter the cash amount
Step 2
Press 3 to select Cash Out
Step 4
Ask customer to INSERT or SWIPE their card
NAB EFTPOS MOBILE
CASH-OUT ONLY

26 NAB EFTPOS Mobile Termi nal Guide
Step 5
Ask customer to select an account
Step 7
Processing message is displayed
Step 6
Ask customer to enter the cash amount to confirm
Step 8
An “Approved” acknowledgement displays once the
cash-out has been successfully processed and the
merchant receipt will print automatically
Ask customer to remove their card if inserted.
NAB EFTPOS MOBILE
CASH-OUT ONLY (CONTINUED)

NAB EFTP OS Mobile Terminal Guide 27
NAB EFTPOS MOBILE
CASH-OUT ONLY (CONTINUED)
Step 9
Press Yes to print the customer receipt if required.
Step 10
Printing message is displayed

28 NAB EFT POS Mobil e Terminal Guide
NAB EFTPOS MOBILE
REFUNDS
A ‘Refund’ transaction is used to reverse a ‘Sale’ transaction that has already been settled by the Bank. Both the original ‘Sale’
and the ‘Refund’ transactions will appear on the Customer’s account statement.
The Refund feature is optional. You may enable or disable the Refund feature by contacting the Merchant Service Centre.
Transaction and terminal refund limits apply.
Note: This function is available on NAB EFTPOS Mobile terminals integrated with your POS, however some steps may not
apply or may be initiated via the POS.
Step 1
Press 1 in the Menu to select Transaction
Step 3
Enter the refund amount
Step 2
Press 4 to select Refund
Step 4
Enter your refund password

NAB EFTP OS Mobile Terminal Guide 29
Step 5
Ask customer to TAP their card
Step 7
Ask customer to enter their PIN
Step 6
Ask customer to select an account
Step 8
Processing message is displayed
NAB EFTPOS MOBILE
REFUNDS (CONTINUED)

30 NAB EFTPOS Mobile Terminal Guide
NAB EFTPOS MOBILE
REFUNDS (CONTINUED)
Step 9
An acknowledgement displays once the refund has been
approved and the merchant receipt with signature request
will print
Remove card from the terminal if inserted.
Step 11
Printing message is displayed
Step 10
Press Yes to print the customer receipt if required
The customer will receive the refund within 2 to 4 business
days for Visa, MasterCard and EFTPOS transactions and up
to 5 business days for UnionPay cards.
Note:
For your protection against fraud, please ensure your
passwords are changed regularly
Always compare the signature on the card with the
signature on the receipt
You should always swipe or insert the card through the
terminal rather than key entering the card information to
reduce your exposure to fraudulent transactions.

NAB EFTP OS Mobile Terminal Guide 31
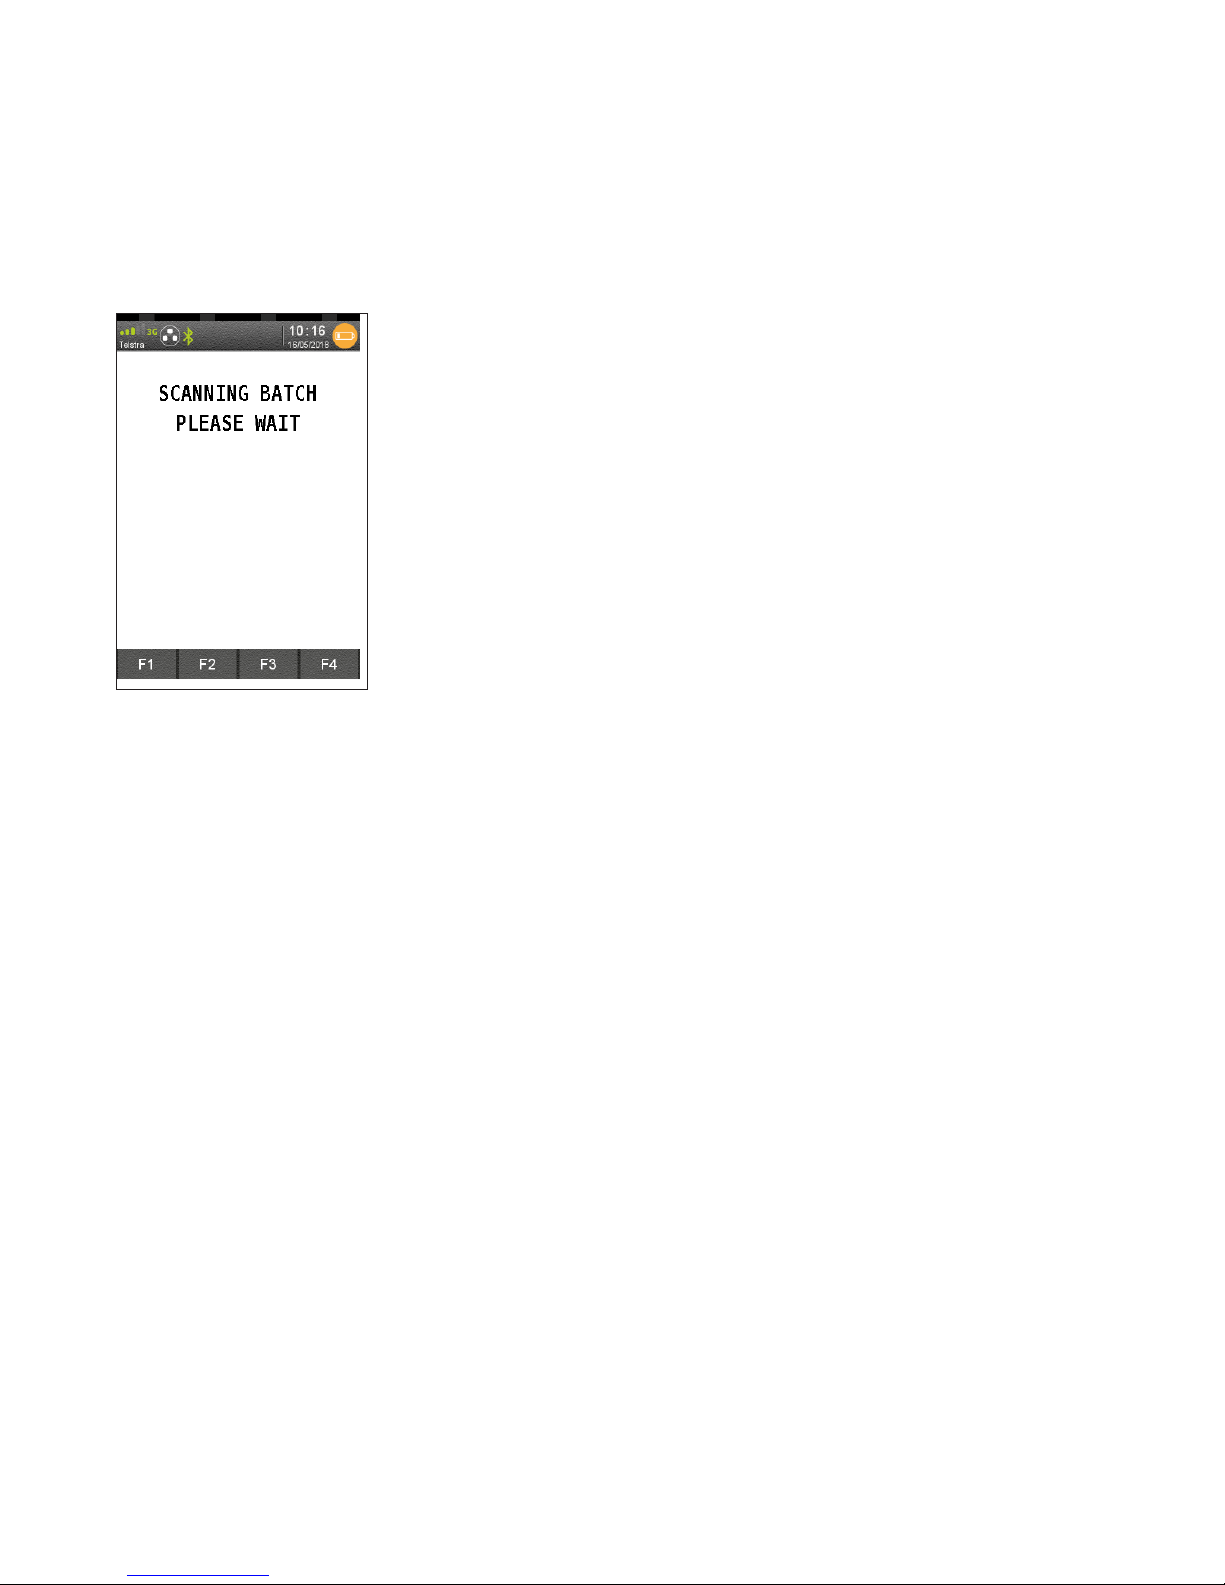
This function allows you to review the details of the last transaction processed on the terminal screen before you proceed
to print a duplicate receipt.
Note: This function is not available on your NAB EFTPOS Mobile terminal when your terminal is integrated with your POS.
Step 1
Press 3 in the Menu to select Batch
Step 3
Scanning batch details message is displayed
Step 2
Press 3 to select Review Batch
Step 4
The details of the last transaction is displayed
NAB EFTPOS MOBILE
REVIEW DETAILS OF THE LAST TRANSACTION

32 NAB EFT POS Mobile Terminal Guide
NAB EFTPOS MOBILE
REVIEW DETAILS OF THE LAST TRANSACTION (CONTINUED)
Step 5
View batch more information
Step 6
View batch more information (cont.)

NAB EFTP OS Mobile Terminal Guide 33
NAB EFTPOS MOBILE
RE-PRINT RECEIPT FOR THE LAST TRANSACTION
This function allows you to print a duplicate receipt for the last transaction processed.
Note: This function is not available on your NAB EFTPOS Mobile terminal when your terminal is integrated with your POS.
Step 1
Press 2 in the Menu to select Print
Step 3
Press 1 to select Last
A duplicate Customer receipt for the last transaction will print
Step 2
Press 1 to select Transactions

34 NAB EF TPOS Mobile Terminal Guide
This function allows you to print a duplicate receipt for a particular transaction (invoice number) within the same
settlement period.
Note: This function is not available on your NAB EFTPOS Mobile terminal when your terminal is integrated with your POS.
Step 1
Press 2 in the Menu to select Print
Step 3
Press 2 to select Invoice
Step 2
Press 1 to select Transactions
Step 4
Enter the invoice number
NAB EFTPOS MOBILE
RE-PRINT RECEIPT FOR PAST TRANSACTIONS WITH INVOICE NUMBER

NAB EFTP OS Mobile Terminal Guide 35
NAB EFTPOS MOBILE
RE-PRINT RECEIPT FOR PAST TRANSACTIONS WITH INVOICE NUMBER
(CONTINUED)
Step 5
Scanning batch details message display
Step 6
Printing message is displayed

36 NAB EFT POS Mobil e Terminal Guide
NAB EFTPOS MOBILE
PRINT TRANSACTION LISTING
This function provides a print out of all transactions processed since the last settlement.
Note: This function is not available on your NAB EFTPOS Mobile terminal when your terminal is integrated with your POS.
Step 1
Press 2 in the Menu to select Print
Step 3
Press 1 to select Audit
The transaction list will begin printing
Step 2
Press 2 to select Reports
Step 4
Enter password
NAB EFTP OS Mobile Terminal Guide 37
NAB EFTPOS MOBILE
PRINT TRANSACTION LISTING (CONTINUED)
Step 5
Scanning batch details message is displayed

38 NAB EFT POS Mobil e Terminal Guide
This function prints a listing of all transactions performed after the last settlement time until the current time.
A pre-settlement does not settle the terminal
Note: This function is not available on your NAB EFTPOS Mobile terminal when your terminal is integrated with your POS.
Step 1
Press 3 in the MENU to select Batch
Step 3
Scanning batch details message is displayed
Step 2
Press 4 to select Batch Totals
Step 4
Press Yes to print a transaction list of
all individual transactions
NAB EFTPOS MOBILE
PRINT SETTLEMENT TOTALS – PRE-SETTLEMENT

NAB EFTP OS Mobile Terminal Guide 39
NAB EFTPOS MOBILE
PRINT SETTLEMENT TOTALS – PRE-SETTLEMENT (CONTINUED)
Step 5
Printing message is displayed

40 NAB EF TPOS Mobile Terminal Guide
NAB EFTPOS MOBILE
PRINT SETTLEMENT TOTALS – LAST SETTLEMENT
This function will reprint the total value of the transactions by card type at Last Settlement.
Note: This function is not available on your NAB EFTPOS Mobile terminal when your terminal is integrated with your POS.
Step 1
Press 3 in the Menu to select Batch
Step 3
QA NAB processing message displays
Step 2
Press 2 to select Last Settlement
The last settlement receipt prints automatically.
Step 4
Printing message is displayed

NAB EFTP OS Mobile Terminal Guide 41
This function allows you to manually close the batch and settle for the day.
Note: Your terminal will settle automatically at 9:30pm AEST daily, unless a manual settlement is performed. You can also
set your terminal to automatically settle at a time that suits you. To do this, refer to NAB EFTPOS Mobile Automatic Settlement
Time Set-up on page 74.
Note: This function is not available on your NAB EFTPOS Mobile terminal when your terminal is integrated with your POS.
Step 1
Press 3 in the Menu to select Batch
Step 2
Press 1 to select Settle
The settlement process commences and when successfully
processed, the settlement receipt will print.
NAB EFTPOS MOBILE
MANUAL SETTLEMENT

42 NAB EF TPOS Mobile Terminal Guide
NAB EFTPOS MOBILE
MANUAL SETTLEMENT (CONTINUED)
Step 3
QA NAB processing message is displayed.
Step 5
Printing message is displayed
Step 4
Press Yes to print a transaction list of all
individual transactions

NAB EFTP OS Mobile Terminal Guide 43
NAB EFTPOS MOBILE
PRE-AUTHORISATION
The Pre-Authorisation feature is optional. You may enable or disable this feature by contacting the Merchant Service Centre.
Pre-Authorisation is used to reserve a value amount on a cardholder’s account. The value amount is generally held for up to
7 days depending on the cardholder’s financial institution.
The funds held are not debited from the cardholder’s account until final payment, a Pre-Authorisation Completion, is
processed. It is important to retain the Pre-Authorisation merchant receipt as the pre-authorisation completion cannot
be completed without the Approval Code from the receipt.
Pre-Authorisations are available for credit cards only.
Note: This function is available on NAB EFTPOS Mobile terminals integrated with your POS, however some steps may not
apply or may be initiated via the POS.
Step 1
Press 1 in the Menu to select ‘Transaction’
Step 3
Press 1 to select ‘Pre-Auth’
Step 2
Press 5 to select ‘Pre-Auth’
Step 4
Enter the pre-authorisation amount

44 NAB EF TPOS Mob ile Terminal Guide
Step 5
Ask customer to TAP their card
Step 7
An Approved acknowledgement displays once the
pre-authorisation has been processed successfully and the
merchant receipt will print automatically.
Step 6
Processing message is displayed
Step 8
Press Yes to print the customer receipt if required.
NAB EFTPOS MOBILE
PRE-AUTHORISATION (CONTINUED)

NAB EFTP OS Mobile Terminal Guide 45
NAB EFTPOS MOBILE
PRE-AUTHORISATION (CONTINUED)
Step 9
Printing message is displayed

46 NAB EFTPOS Mobil e Terminal Guide
The Pre-Authorisation Completion process looks up the original pre-authorisation record, confirms the transaction value
and puts the pre-authorisation payment through as a transaction.
A Pre-Authorisation Completion transaction generally must be performed between 2 to 14 days from when the
Pre-Authorisation was processed. This period is dependent on the type of business you operate.
The value amount is generally held for up to 7 days on pre-authorisation, depending on the cardholder’s financial institution.
Note: This function is available on NAB EFTPOS Mobile terminals integrated with your POS, however some steps may not
apply or may be initiated via the POS.
Ste
p 1
Press the Menu key, then press 1 to
select ‘Transaction’
Step 3 Press 2 to select
‘Completion’
Step 2
Press 5 to select ‘Pre-Auth’
Step 4
Enter the pre-authorisation completion amount
NAB EFTPOS MOBILE
PRE-AUTHORISATION COMPLETION

NAB EFTP OS Mobile Terminal Guide 47
Step 5
Enter the 6 digit APPROVAL CODE
from the merchant receipt
Step 6
Press ENTER to confirm the pre -authorisation
transaction r
etrieved by the terminal.
If the pre-authorisation transaction is not found on
the t
erminal, the customer’s credit card will be
required. Proceed to Step 6a. Otherwise, proceed to
Step 7.
Step 6a
Ask customer to INSERT or SWIPE their
card
Step 6b
Enter the STAN from the pre-authorisation merchant receipt
and press ENTER
NAB EFTPOS MOBILE
PRE-AUTHORISATION COMPLETION (CONTINUED)

48 NAB EF TPOS Mob ile Terminal Guid e
NAB EFTPOS MOBILE
PRE-AUTHORISATION COMPLETION (CONTINUED)
Step 6c
Enter the RRN from the pre-authorisation m
erchant
receipt and press ENTER
Step 6d
Enter the completion amount and press ENTER
Step 6e
Enter the pre-authorisation date (DD/MM) and
press ENTER
Step 6f
Enter the Issuer TRV from the pre-authorisation merchant
receipt and press ENTER

NAB EFTP OS Mobile Terminal Guide 49
Step 6g
Enter the Issuer STAN from the pre-authorisation
merchant receipt and press ENTER
Step 6h
Enter the Issuer RRN from the pre-authorisation
merchant receipt and press ENTER
Step 7
Press ENTER to confirm the completion transaction. The
merchant receipt will print automatically.
Step 8
Press Yes to print the customer receipt if
required
NAB EFTPOS MOBILE
PRE AUTHORISATION COMPLETION (CONTINUED)

5
0 NAB EFTPOS Mobile Terminal Guide
The pre-authorisation adjustment feature is optional and is available if you are a merchant operating in the following
business types:
• Eating places and restaurants
• Drinking places, bars, taverns, nightclubs etc
• Local and suburban commuter passenger transportation, including ferries
• Passenger railways and bus lines
• Recreational service miscellaneous (aircraft rental) and recreational service miscellaneous (bicycle rental)
• Motorcycle rental, boat rental equipment rental and motor home rental
• Trailer park or campground
• Amusement parks, circuses, carnivals, and fortune tellers
• Cruise lines
• Lodging merchants
• Vehicle rental
• Card absent taxicabs and limousines
The pre-authorisation adjustment process looks up the original pre-authorisation record and allows the authorisation value
to be changed (up or down).
The funds held are not debited from the cardholder’s account until final payment, a pre-authorisation completion,
is processed. It is important to retain the pre-authorisation adjustment merchant receipt as the pre-authorisation completion
cannot be completed without the Approval Code from the receipt.
pre-authorisation adjustment is available for credit cards only.
Note: This feature is available on NAB EFTPOS Mobile terminals integrated with your POS, however some steps may not apply
or may be initiated via the POS.
Step 1
Press the Menu key,
then 1 to select ‘Transaction’
Step 2
Press 5 to select ‘Pre-Auth’
NAB EFTPOS MOBILE
PRE-AUTHORISATION ADJUST

N
AB EFTPOS Mobile Terminal Guide 51
Step 3
Press 3 to select ‘Pre-Auth Adjust’
Step 5
Enter the 6 digit APPROVAL CODE
from the original
pre-authorisation merchant receipt and press ENTER
Step 4
Enter the new pre-authorisation amount and press enter
If the pre-authorisation transaction is not found on the terminal
proceed to Step 6
a, otherwise proceed to Step 7
Step 6a
Ask customer to Tap, INSERT or SWIPE their card
NAB EFTPOS MOBILE
PRE-AUTHORISATION ADJUST (CONTINUED)

5
2 NAB EFTPOS Mobile Terminal Guide
Step 6b
Enter the STAN from the pre-authorisation merchant receipt
and press ENTER
Step 6c
Enter the RRN from the p
re-authorisation merchant
receipt and press ENTER
Step 6d
E
nter the new pre-authorisation amount and press ENTER
Step 6e
Enter the pre-authorisation date (DD/MM) and press
ENTER
NAB EFTPOS MOBILE
PRE-AUTHORISATION ADJUST (CONTINUED)

NAB EFTPOS Mobile Terminal Guide 53
NAB EFTPOS MOBILE
PRE-AUTHORISATION ADJUST (CONTINUED)
Step 6f
Enter the pre-authorisation settle date (DD/MM) and press ENTER
Step 6g
Enter the Issuer TRV from the pre-authorisation merchant
receipt and press ENTER
Step 6h
Enter the Issuer STAN from the pre-authorisation merchant
receipt and press ENTER
S
tep 6i
Enter the Issuer RRN from the pre-authorisation merchant
receipt a
nd p
res
s ENTER. The merchant receipt will print
automatically. Proceed to Step 8.
Step 7
Ask customer to Tap, INSERT or SWIPE their card.
The merchant receipt will print automatically.
Step 8
Press Yes to print the customer receipt if required.

5
4 NAB EFTPOS Mobile Terminal Guide
The Pre-Authorisation Cancel process looks up the original pre-authorisation record and allows the authorisation to
be cancelled.
These transactions will be passed on to the cardholder’s financial institution to remove hold on any funds associated with
the original pre-authorisation
Step 1
Press 1 in the Menu to select ‘Transaction’
Step 3
Press 4 to select ‘Pre-Auth Cancel’
Step 2
Press 5 to select ‘Pre-Auth’
Step 4
Press 1 to cancel one pre-authorisatinon
NAB EFTPOS MOBILE
PRE-AUTHORISATION CANCEL

N
AB EFTPOS Mobile Terminal Guide 55
NAB EFTPOS MOBILE
PRE-AUTHORISATION CANCEL (CONTINUED)
Step 5
Press OK to confirm the type of
pre-authorisation cancellation
Step 7
Confirm transaction to be canceled
Step 6
Enter the 6 digit APPROVAL CODE to be cancelled from
the merchant receipt
Step 8
An acknowledgement displays once the transaction has
been cancelled successfully and the merchant receipt will
print automatically.

5
6 NAB EFTPOS Mobile Terminal Guide
NAB EFTPOS MOBILE
PRE-AUTHORISATION CANCEL (CONTINUED)
Step 9
Press Yes to print the customer receipt if required.
Step 10
Printing message is displayed

NAB EFTPOS Mobile Te
rminal Guide 57
NAB EFTPOS MOBILE
PRE-AUTHORISATION COMPLETION CANCEL
The Pre-Authorisation Completion Cancel process looks up the original pre-authorisation completion record and allows the
transaction to be cancelled.
Step 1
Press 1 in the Menu to select ‘Transaction’
Step 3
Press 4 to select ‘Pre-Auth Cancel’
Step 2
Press 5 to select ‘Pre-Auth’
Step 4
Enter the 6 digit APPROVAL CODE to be
cancelled from the merchant receipt

5
8 NAB EFTPOS Mobile Terminal Guide
Step 5
Scanning batch details message displays
Step 7
An acknowledgement displays once the transaction has
been cancelled successfully and the merchant receipt will
print automatically
Step 6
Confirm transaction to be canceled
Step 8
Ask customer to sign the receipt. You will need to
verify your customer’s signature with the signature
on the card. If this is correct, press Yes
NAB EFTPOS MOBILE
PRE-AUTHORISATION COMPLETION CANCEL (CONTINUED)

N
AB EFTPOS Mobile Terminal Guide 59
NAB EFTPOS MOBILE
PRE-AUTHORISATION COMPLETION CANCEL (CONTINUED)
Step 9
Press Yes to print the customer receipt if required.
Step 10
Printing message is displayed

6
0 NAB EFTPOS Mobile Terminal Guide
NAB EFTPOS MOBILE
ACCOUNT VERIFY
The Account Verify feature validates a card without having to process a pre-authorisation transaction or Sale transaction.
This transaction will not debit or place a hold on any cardholder funds.
Step 1
Press 1 in the Menu to select ‘Transaction’
Step 3
Ask customer to TAP their card
Step 2
Press 6 to select ‘Acct Verify’
Step 4
Processing message is displayed

NAB EFTPOS Mobile Te
rminal Guide 61
NAB EFTPOS MOBILE
ACCOUNT VERIFY (CONTINUED)
Step 5
An Approved acknowledgement displays once the
transaction has been processed successfully and the
merchant receipt will print automatically.
Step 7
Printing message is displayed
Step 6
Press Yes to print the customer receipt if required.

6
2 NAB EFTPOS Mobile Terminal Guide
This function is for use when processing card payments for orders received by mail or telephone or initiated over the
internet (ECOM).
MOTO transactions do not incur a surcharge and the transaction will display as MOTO on the receipt and settlement
transaction listing. MOTO transactions can be processed on credit or charge cards only.
Note: This function is available on NAB EFTPOS Mobile terminals integrated with your POS, however some steps may
not apply or may be initiated via the POS.
Step 1
Press 1 in the Menu to select Transaction
Step 3
Enter the MOTO sale amount
Step 2
Press 7 to select MOTO
Step 4
Commence entering the customer’s card number
NAB EFTPOS MOBILE
MOTO

N
AB EFTPOS Mobile Terminal Guide 63
NAB EFTPOS MOBILE
MOTO (CONTINUED)
Step 5
Complete entering the customer’s card number,
and press CONTINUE
Step 7
Press the corresponding number
to select type of order
Step 6
Enter the card expiry date receipt
in MMYY format
Step 8
Press the corresponding number to select
frequency of transaction

6
4 NAB EFTPOS Mobile Terminal Guide
Step 9
Confirm the MOTO transaction
Step 11
An acknowledgement displays once the sale has been
approved and the merchant receipt will print.
Step 10
Processing message is displayed
Step 12
Press Yes to print the customer
receipt if required.
NAB EFTPOS MOBILE
MOTO (CONTINUED)

NAB EFTPOS Mobile Te
rminal Guide 65
NAB EFTPOS MOBILE
MOTO (CONTINUED)
Step 13
Printing message displays.

6
6 NAB EFTPOS Mobile Terminal Guide
NAB EFTPOS MOBILE
MANUAL KEY ENTRY
The manual key entry function is only available if approved by NAB. To submit a request for this function, contact the
Merchant Service Centre.
It is recommended that merchants do not manually enter card details without first attempting to swipe or insert the card in
the card readers. Using this function will require customer signature verification, and any surcharge that has been set on the
terminal will apply to the sale.
Note: This function is available on NAB EFTPOS Mobile terminals integrated with your POS, however some steps may
not apply or may be initiated via the POS.
Step 1
Enter the sale amount directly on the screen and
press CONTINUE
Step 3
Complete entering the customer’s card number,
and press ENTER
Step 2
Ask customer to TAP their card
Step 4
Enter the card expiry date in MMYY format

N
AB EFTPOS Mobile Terminal Guide 67
Step 5
Enter the CCV number from the card and
press ENTER
Step 7
Processing message is displayed
Step 6
Press ENTER to confirm the transaction
Step 8
An acknowledgement displays once the sale has
been approved and the merchant receipt with signature
request will print
NAB EFTPOS MOBILE
MANUAL KEY ENTRY (CONTINUED)

6
8 NAB EFTPOS Mobile Terminal Guide
NAB EFTPOS MOBILE
MANUAL KEY ENTRY (CONTINUED)
Step 9
Ask customer to sign the receipt.
You will need to verify your customer’s signature with
the signature on the card. If this is correct, press Yes
Step 11
Printing message displays
Step 10
Press Yes to print the customer receipt if required.

N
AB EFTPOS Mobile Terminal Guide 69
This function allows the last transaction performed to be cancelled. This is an optional feature and you may enable or disable
this feature by contacting the Merchant Service Centre.
A void last transaction will not appear on the Merchant Statement, Settlement report or on the cardholder’s statement.
Note: This function is only available for credit transactions. If you need to cancel a debit (cheque or savings) transaction,
a refund must be processed.
Note: This function is not available on your NAB EFTPOS Mobile terminal when your terminal is integrated with your POS.
Step 1
Press 3 in the Menu to select Batch
Step 3
Review the transaction details and press ENTER to confirm
The merchant copy of the voided receipt
will print automatically.
Step 2
Press 5 to select Void Last
Step 4
Processing message displays
NAB EFTPOS MOBILE
VOID LAST

7
0 NAB EFTPOS Mobile Terminal Guide
NAB EFTPOS MOBILE
VOID LAST (CONTINUED)
Step 5
Press YES to print the customer receipt if required.
Step 7
VOID transaction accepted
Step 6
Printing message displays

N
AB EFTPOS Mobile Terminal Guide 71
There are several functions and settings that you can set directly on the terminal.
These settings enable you to:
• Change how certain functions work (such as changing the time that automatic settlement begins for the terminal,
or prompting for a transaction listing printout at settlement)
• Change values used on the terminal (such as changing your merchant password)
• Change the communication method your terminal uses
• Turn some functionality on or off (such as charging a surcharge for certain credit card transactions).
CONFIGURATION ON THE
NAB EFTPOS MOBILE TERMINAL

72 NAB EFTPOS Mo
bile Terminal Guide
This function allows you to set-up the terminal to automatically settle every day at a preferred time that you specify.
The terminal must be switched on for automatic settlement to occur. For overnight settlements, it is recommended the
terminal remains on its charging base.
Note: This function is not available on your NAB EFTPOS Mobile terminal when your terminal is integrated with your POS.
Step 1
Press the Func key
Step 3
Press ENTER to change the time
Step 2
Enter 13 using the PINpad and press ENTER
Step 4
Enter the new time in the 24 hour HH:MM format,
and press ENTER
NAB EFTPOS MOBILE
AUTOMATIC SETTLEMENT TIME SET-UP

N
AB EFTPOS Mobile Terminal Guide 73
Step 5
The new settlement time displays
Step 6
Press CANCEL to exit
NAB EFTPOS MOBILE
AUTOMATIC SETTLEMENT TIME SET-UP (CONTINUED)

7
4 NAB EFTPOS Mobile Terminal Guide
NAB EFTPOS MOBILE
TRANSACTION LISTING PRINTOUT
By default, the Transaction Listing does not print automatically at the time of settlement. This applies to both automatic and
manual settlement.
This function enables you to display a prompt at the time of settlement to print the Transaction Listing.
Note: When the Transaction Listing printout prompt is turned on, if you are not there at the time of settlement to select yes
or no to print, the Transaction Listing will automatically print after 1 – 2 minutes.
Note: This function is not available on your NAB EFTPOS Mobile terminal when your terminal is integrated with your POS.

N
AB EFTPOS Mobile Terminal Guide 75
Note: This function is not available on your NAB EFTPOS Mobile terminal when your terminal is integrated with your POS.
Step 1
Press the Func key
Step 3
Press ENTER to turn off the prompt to print
the Transaction Listing
Step 2
Enter 14 using the PINpad and press ENTER
Step 4
The prompt is turned on. Press CANCEL to exit
NAB EFTPOS MOBILE
TRANSACTION LISTING PRINTOUT – TURN PROMPT ON

7
6 NAB EFTPOS Mobile Terminal Guide
NAB EFTPOS MOBILE
TRANSACTION LISTING PRINTOUT – TURN PROMPT OFF
Note: This function is not available on your NAB EFTPOS Mobile terminal when your terminal is integrated with your POS.
Step 1
Press the Func key
Step 3
Press ENTER to turn off the prompt to print the
Transaction Listing
Step 2
Enter 14 using the PINpad and press ENTER
Step 4
The prompt is turned off. Press CANCEL to exit

N
AB EFTPOS Mobile Terminal Guide 77
NAB EFTPOS MOBILE
START SHIFT
This function will start a shift reprint the total value of the transactions by card type at Last Settlement.
Note: This function is not available on your NAB EFTPOS Mobile terminal when your terminal is integrated with your POS.
Step 1
Press the Func key
Step 3
Press 1 to select Start/ End Shift
Step 2
Enter 63 using the PINpad and press ENTER
Step 4
The screen shows Shift mode has been activated

7
8 NAB EFTPOS Mobile Terminal Guide
NAB EFTPOS MOBILE
END SHIFT
This function will end a shift, print shift totals and deactivate shift mode.
Note: This function is not available on your NAB EFTPOS Mobile terminal when your terminal is integrated with your POS.
Step 1
Press the Func key
Step 3
Press 1 to select Start / End Shift
Step 2
Enter 63 using the PINpad and press ENTER
Step 4
Scanning batch details message displays

N
AB EFTPOS Mobile Terminal Guide 79
NAB EFTPOS MOBILE
END SHIFT (CONTINUED)
Step 5
Report printing
Step 7
Clear shift totals
Step 6
Reprint shift total
Step 8
Shift cleared

8
0 NAB EFTPOS Mobile Terminal Guide
NAB EFTPOS MOBILE
END SHIFT (CONTINUED)
Step 9
Shift mode deactivated

N
AB EFTPOS Mobile Terminal Guide 81
NAB EFTPOS MOBILE
PRINT CURRENT SHIFT TOTALS
This function will print current shift totals without ending the shift.
Note: This function is not available on your NAB EFTPOS Mobile terminal when your terminal is integrated with your POS.
Step 1
Enter 63 using the PINpad
Step 3
Scanning batch details message displays
Step 2
Press 2 to Print current shift totals
Step 4
Print current shift totals

8
2 NAB EFTPOS Mobile Terminal Guide
NAB EFTPOS MOBILE
SALE – TRANSACTION FAILED
Transactions can be declined for several reasons. Refer to the message on the screen for the possible scenarios.
Step 1
Enter the sale amount directly on the screen
and press CONTINUE
Step 3
Ask customer to select their account
Step 2
Ask customer to TAP their card
Step 4
Ask customer to enter their PIN

N
AB EFTPOS Mobile Terminal Guide 83
NAB EFTPOS MOBILE
SALE – TRANSACTION FAILED (CONTINUED)
Transactions can be declined for several reasons. Refer to the message on the screen for the possible scenarios.
Step 5
Processing message displays
Step 7
Press YES to print the customer receipt if required.
Step 6
Transaction failed – DECLINED
Step 8
Printing message displays

8
4 NAB EFTPOS Mobile Terminal Guide
Merchants have the ability to charge customers an additional fee for paying by debit or credit cards – surcharging.
The surcharge can be either a fixed fee or a percentage fee based on the value of the transaction.
A surcharge fixed fee amount that is greater than $3 or a percentage amount greater than 15% is prohibited by the terminal.
If you do decide to charge customers a fee for paying by a debit or credit card you will need to make sure you do not act in a
misleading or deceptive way.
You should ensure customers are aware of:
• The extra charge, and
• The surcharge rate before the transaction is entered into.
This can be done in many ways, including in-store notices or prominent messages on bills. Customers can choose whether
to pay the card fee or to use another form of payment, for example cash. The customer will have the option on the terminal
screen to not accept the surcharge and cancel the transaction.
Note: This function is not available on your NAB EFTPOS Mobile terminal when your terminal is integrated with your POS.
NAB EFTPOS MOBILE
SURCHARGE

N
AB EFTPOS Mobile Terminal Guide 85
NAB EFTPOS MOBILE
SURCHARGE – TURN ON/OFF
Note: : This function is not available on your NAB EFTPOS Mobile terminal when your terminal is integrated with your POS.
Step 1
Press 4 in the Menu to select Terminal
Step 3
Press F1 to select Enable
Step 2
Press 5 to select Surcharging
Step 4
Surcharging is enabled. Press CANCEL

8
6 NAB EFTPOS Mobile Terminal Guide
Note: This function is not available on your NAB EFTPOS Mobile terminal when your terminal is integrated with your POS.
Step 1
Press 4 in the Menu to select Terminal
Step 3
Press ENTER
Step 2
Press 5 to select Surcharging
Step 4
Use the F2 and F3 buttons to scroll to the
card issuer, and press ENTER
NAB EFTPOS MOBILE
SURCHARGE – CARD ACCEPTANCE SET-UP

NAB EFTPOS Mobile Ter
minal Guide 87
NAB EFTPOS MOBILE
SURCHARGE – CARD ACCEPTANCE SET-UP (CONTINUED)
Step 5
Press 1 to enter a Fixed Fee or 2 to enter
a Percentage of the Total
Step 7
Press ENTER to confirm the value entered
Step 6
Enter the fixed fee amount or percentage of
the total rate, and press ENTER
Step 8
The value entered will display in the Select Issuer screen.
Repeat steps 5 to 8 for each card or account type, to apply
a surcharge value.
Press CANCEL to exit menu

8
8 NAB EFTPOS Mobile Terminal Guide
Step 9
Press OK to print surcharge summary receipt or
CANCEL to exit
Surcharge Summary Receipt
Note: The surcharge charge amount details
will be included on every EFTPOS receipt
NAB EFTPOS MOBILE
SURCHARGE – CARD ACCEPTANCE SET-UP (CONTINUED)

NAB EFTPOS Mobile Te
rminal Guide 89
This function allows you to change the Merchant password. This password change feature will change your refund
password only.
Note: This function is not available on your NAB EFTPOS Mobile terminal when your terminal is integrated with your POS.
Step 1
Press the Func key
Step 3
Press ENTER to change the password
Step 2
Enter 90 using the PINpad and press ENTER
Step 4
Enter the current password and press ENTER
NAB EFTPOS MOBILE
CHANGE MERCHANT PASSWORD

9
0 NAB EFTPOS Mobile Terminal Guide
Step 5
Enter the new password and press ENTER
Step 7
A confirmation message displays
Step 6
Enter the new password again and press ENTER
NAB EFTPOS MOBILE
CHANGE MERCHANT PASSWORD (CONTINUED)

NAB EFTPOS Mobile Te
rminal Guide 91
In addition to Mobile 3G connectivity, the following communication options are available on NAB EFTPOS Mobile terminals:
• Broadband internet via Ethernet
• Broadband internet via Wi-Fi
• Dial Up
Merchants must have:
• Release 3.14 software (or higher) downloaded on their terminals for the different communication options to be available.
• Broadband and/or dial up capability set up in store according to the communication requirements for the terminal
(refer to Requirements for different communication options on NAB EFTPOS Mobile terminals on page 94).
The terminal must have:
• Been set up for the communication options that may be used by the terminal
• Been paired with the base to allow Bluetooth to work with broadband internet and dial up communication options
Contact the Merchant Service Centre or Integrated Help Desk to assist with setting up the terminal for a new communication
method or pairing the terminal and base for Bluetooth.
Once the initial set up has been completed, the merchant can switch between the communication options on the terminal
at any time as required.
COMMUNICATION OPTIONS

9
2 NAB EFTPOS Mobile Terminal Guide
REQUIREMENTS FOR DIFFERENT COMMUNICATION OPTIONS ON NAB
EFTPOS MOBILE TERMINALS
Requirements for Different Communication Options on NAB EFTPOS Mobile Terminals
All communication options come configured on new terminals and when a new terminal is installed, it will be set up to
operate on either 3G Mobile (GPRS) or the merchant’s preferred communications option that already exists in store.
It is possible to switch to a different communications option after the terminal has been installed, provided that the
facility has been set up in store according to the terminal requirements. When these facilities are available in the store, the
merchant may initially need assistance from the Merchant Service Centre or Integrated Help Desk to ensure that any specific
configuration settings required for that store are set up for the terminals.
What you need to know about each communication option
Option Communicates with
NAB using…
What you need to use this
option
Limitations with
this option
Who can use
this option
3G Mobile A Telstra 3G SIM card, much
like a mobile phone
A Telstra 3G SIM card – your
terminal already has this
3G black spots Everyone. Available in store
and on the road with 3G
coverage on the Telstra
Mobile Network
Broadband Internet
via Ethernet
The internet, using an
Ethernet cable
A router^ with an internet
connection and an Ethernet
cable.
If using a store network,
you need to plug the
terminal base in via an
Ethernet cable
#See note below re
Firewall/security filtering
and network configuration
requirements
Everyone with
internet access
This is the fastest option for
transacting
Broadband Internet via
Wi-Fi
The internet, using
a Wi-Fi hotspot
Wi-Fi hotspot and
Password
#See note below re
Firewall/security filtering
and network configuration
requirements
Connecting to a public
Wi-Fi network may impact
transaction processing
Everyone with internet
access plus a Wi-Fi hotspot
Dial Up A dedicated phone line^ A dedicated Analogue
or PSTN phone line^
Do not use dial up via NBN
Slower communication
and functionality download
times
Anyone in a 3G network
weak spot^ or without
access to the internet or
Wi-Fi
^ The merchant should contact their Internet provider to help them set up Broadband Internet or dial up facilities in store.
NAB does not provide routers or assistance with setting up Internet access in store.
# For Broadband Internet Ethernet and Wi-Fi connection, you need to configure your network:
• to enable DHCP
• WPA2 secured network – Wi-Fi only
• i If your outbound internet connection is filtered via a firewall or any other security appliance, update your security
appliance or firewall to allow traffic to the following URL and Port Numbers:
oURL: prodnabposna300.nab.com.au
oPort: 7000-7034
oProtocol: UDP

N
AB EFTPOS Mobile Terminal Guide 93
Step 1
Press 4 in the Menu to select Terminal
Step 3
Use the F2 and F3 buttons to scroll to the communication
option and press ENTER
Note: There will be a slight delay while the terminal
connects to the new communication network.
Step 2
Press 4 to select Host Comms
SWITCH TO A DIFFERENT COMMUNICATION OPTION

9
4 NAB EFTPOS Mobile Terminal Guide
The terminal and base must be paired for Bluetooth before dial up or internet communication options can be set up on
the terminal.
To Check if the Base and Terminal are Already Paired
Step 1
Check for the Bluetooth symbol in the status header bar at
the top of the terminal screen
• If the Bluetooth symbol is displayed but shows grey, go
to step 2.
• If the Bluetooth symbol is not displayed at all, it
indicates that you may need to update the version of
the software on your terminal. Contact the Merchant
Service Centre or Integrated Help Desk for help
with this.
Step 2
Remove the terminal from the base, then check if the
Bluetooth symbol shows green.
• If the Bluetooth symbol shows green, it indicates that
the terminal is currently communicating with a base
via Bluetooth. This means the terminal is paired with
the base.
• If the Bluetooth symbol remains grey, go to step 3.
Step 3
Check that the power to the base is turned on and that the
power cable is connected correctly.
Step 4
Return the terminal to the base and check the power symbol
on the terminal screen to check that it is charging.
Step 5
Remove the terminal from the base again and check if the
Bluetooth symbol shows green.
• If the Bluetooth symbol still remains grey, it may
indicate that the terminal is not paired with the base
for Bluetooth. Contact the Merchant Service Centre or
Integrated Help Desk for help with pairing the terminal
and the base.
PAIR THE TERMINAL AND BASE FOR BLUETOOTH

N
AB EFTPOS Mobile Terminal Guide 95
To Pair the Terminal and the Base for Bluetooth
When you contact the Merchant Service Centre for help to pair the terminal and base for Bluetooth, they will help you to
work through the following steps.
Step 1
Check for the Bluetooth symbol in the status header bar
at the top of the terminal screen
Step 3
Press 3 to select Others
Step 2
Press 4 to select Terminal
PAIR THE TERMINAL AND BASE FOR BLUETOOTH (CONTINUED)

9
6 NAB EFTPOS Mobile Terminal Guide
PAIR THE TERMINAL AND BASE FOR BLUETOOTH (CONTINUED)
Step 4
Press 3 to select Manager Menu.
Note:
• If user presses Menu button on keypad, option 3 displays
as Manager Menu and option 4 as Delete All pre-Auth.
• If user presses Menu button on touch screen, option 3
displays as Delete All pre-Auth.
Step 5
Enter the password and press ENTER
Note: The default password is 1234, unless you have
changed it with the Merchant Help Desk.

N
AB EFTPOS Mobile Terminal Guide 97
Step 6
Tap Control panel
Step 8
Tap Communication means
Step 7
Tap Terminal settings
Step 9
Tap Bluetooth
PAIR THE TERMINAL AND BASE FOR BLUETOOTH (CONTINUED)

9
8 NAB EFTPOS Mobile Terminal Guide
Step 10
Tap Base
Step 12
Tap New Base
Step 11
Tap Association
• If the base and terminal are paired successfully, the
Association Complete confirmation message displays.
Go to the next step.
• If the base and terminal are not paired successfully,
the Association Incomplete message displays. If this
occurs, repeat all of the above steps to pair the base and
terminal for Bluetooth.
PAIR THE TERMINAL AND BASE FOR BLUETOOTH (CONTINUED)

NAB EFTPOS Mobile Te
rminal Guide 99
PAIR THE TERMINAL AND BASE FOR BLUETOOTH (CONTINUED)
Step 13
A message displays on the terminal to warn that the terminal
will reboot
This message is displayed only on terminals with release
0.3 X and 0.5 X. Not applicable to terminals running
0.7 X release
The terminal reboots automatically.

1
00 NAB EFTPOS Mobile Terminal Guide
Step 14
The Idle screen redisplays with the Bluetooth
symbol in the status header bar of the terminal.
PAIR THE TERMINAL AND BASE FOR BLUETOOTH (CONTINUED)
 Loading...