

mywigo MWG359, Turia MWG419, MWG569 Titan Mini User Manual

Mobile Phone
User Manual
MWG359 Mini

2
Contents
Safety............................................................................................................ 4
Environment .............................................................................................. 6
1 Getting Started...................................................................................... 7
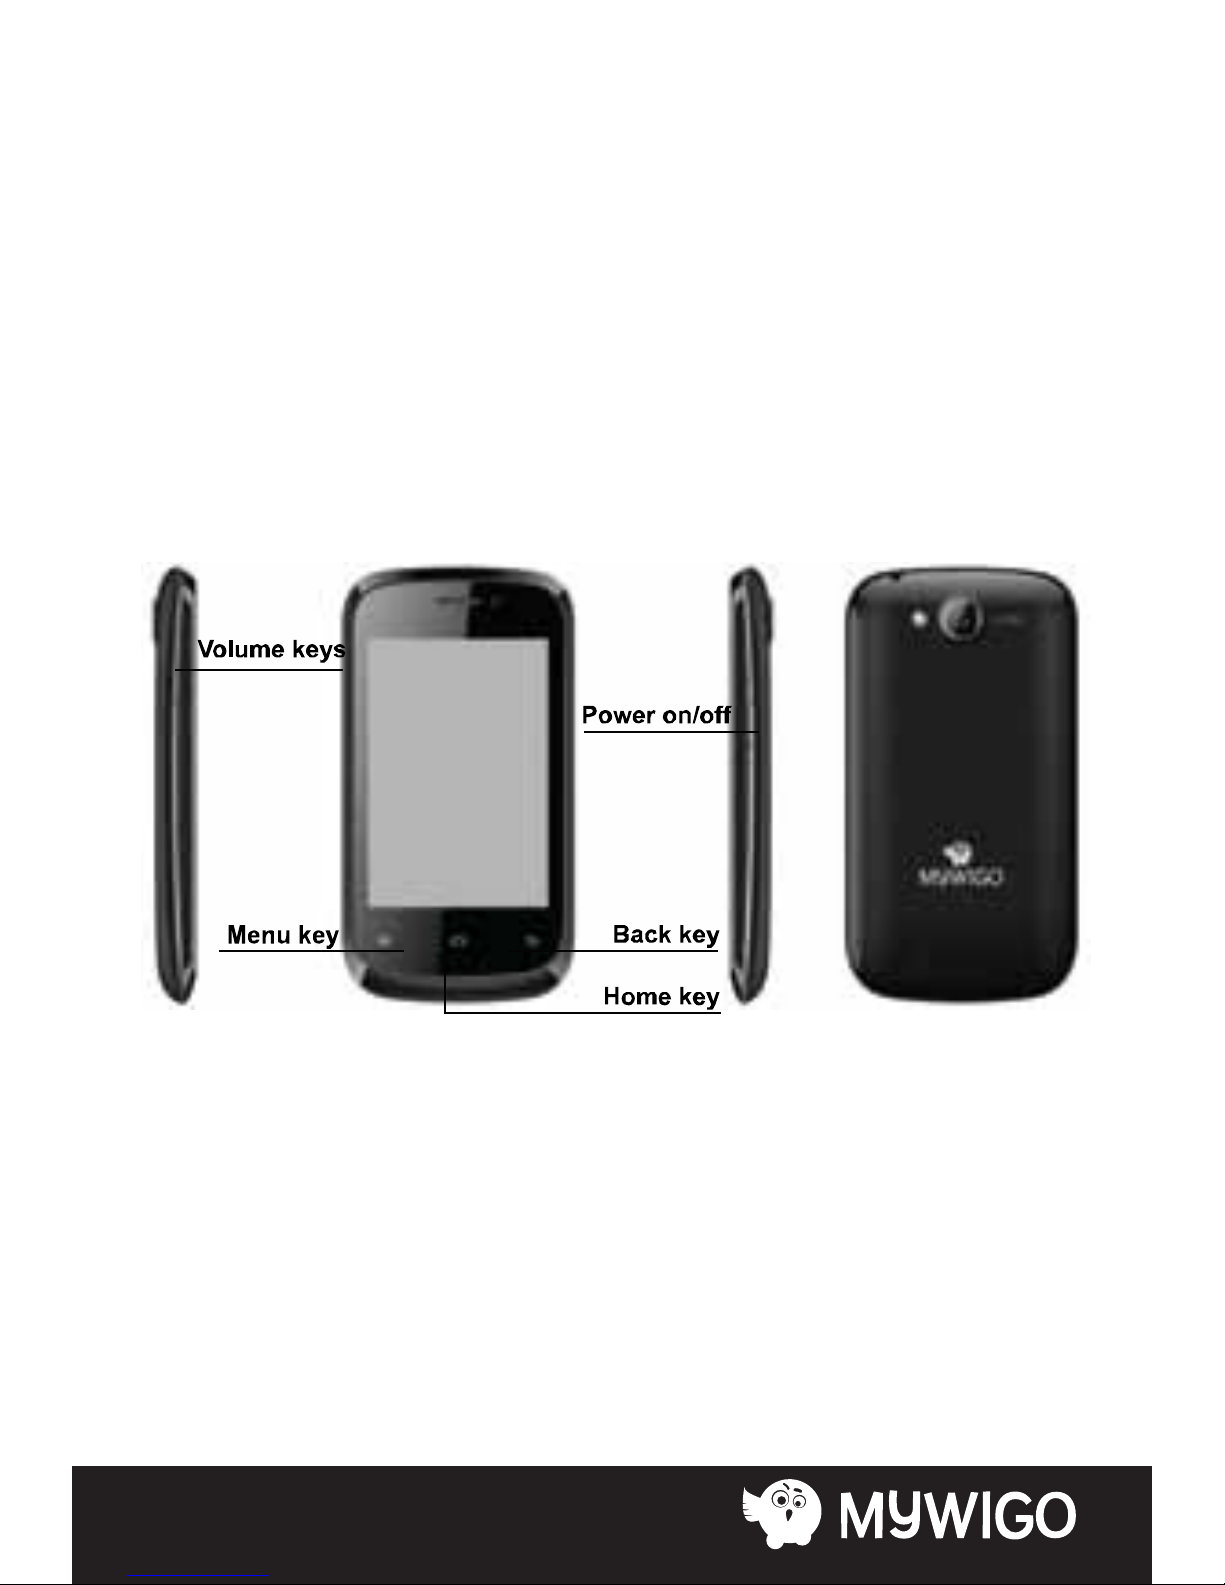
1.1 Getting to know your touch phone............................................ 7
1.2 Installing the SIM card, battery, and storage card................. 7
1.3 Charging the Battery......................................................................11
1.4 Starting up the device ...................................................................12
1.5 Status Icons........................................................................................17
2 Using phone features........................................................................20
2.1 Turning the phone function on and o ..................................20
2.2 Making a call .....................................................................................20
2.3 Answering and Ending a call....................................................... 22
2.4 In-call options................................................................................... 22
2.5 Using call history .............................................................................23
2.6 Call settings ....................................................................................... 23
3 Setting on your device...................................................................... 23
4 ActiveSync.............................................................................................29
5 Contacts ................................................................................................. 33
6 Exchanging Messages.......................................................................37
7 Internet...................................................................................................44
7.1 Ways of Connecting to the Internet..........................................44
7.2 Browser...............................................................................................45
8 Experiencing Multimedia................................................................. 48
8.1 Camera & Picture.............................................................................48
8.2 Music....................................................................................................52

3
8.3 FM Radio............................................................................. 56
8.4 Sound record .................................................................... 56
9 Other applications.............................................................. 56
9.1 Calendar.............................................................................. 56
9.2 Alarm Clock ....................................................................... 59
9.3 Calculator........................................................................... 61
Technical Specications....................................................... 62

4
Safety
Never attempt to disassemble your phone. You alone are
responsible for how you use your phone and any consequences
of its use.
As a general rule, always switch o your phone wherever the
use of a phone is prohibited. Use of your phone is subject to
safety measures designed to protect users and their environment.
Do not use your phone in damp areas (bathroom, swimming
pool…). Protect it from liquids and other moisture.
Do not expose your phone to extreme temperatures lower than
- 10°C and higher than + 55°C.
The physicochemical processes created by chargers impose
temperature limits when charging the battery. Your phone
automatically protects the batteries in extreme temperatures.
Do not leave your phone within the reach of small children
(certain removable parts may be accidentally ingested).
Electrical safety: Only use the chargers listed in the
manufacturer’s catalogue. Using any other charger may be
dangerous; it would also invalidate your warranty. Line voltage
must be exactly the one indicated on the charger’s serial plate.
Aircraft safety: When traveling by plane, you will need to switch
your phone o when so instructed by the cabin crew or the
warning signs.
Using a mobile phone may be dangerous to the operation of
the aircraft and may disrupt the phone network.

5
Its use is illegal and you could be prosecuted or banned from
using cellular networks in the future if you do not abide by these
regulations.
Explosive materials: Please comply with warning
signs at petrol station asking you to switch your phone o. You
will need to comply with radio equipment usage restrictions in
places such as chemical plants, fuel depots and at any location
where blasting operations are under way.
Electronic equipment: To avoid the risk of demagne-
tization, do not let electronic devices close to your phone for a
long time.
Electronic medical equipment: Your phone is a
radio transmitter which may interfere with electronic medical
equipment or implants, such as hearing aids, pacemakers,
insulin pumps, etc. It is recommended that a minimum
separation of 15 cm be maintained between the phone and an
implant. Your doctor or the manufacturers of such equipment
will be able to give you any advice you may need in this area.
Hospitals: Always make sure that your phone is switched
o in hospitals when so instructed by warning signs or by
medical sta.
Road safety: Do not use your phone when driving. In
order to give your full attention to driving, stop and park safely
before making a call. You must comply with any current
legislation.

6
Distance of operation: This phone model has been
tested and meets radiofrequency exposure guidelines when
used as follows:
• Against the ear: Place or receive a phone call and hold the
phone as you would a wire line telephone.
• Body worn: When transmitting, place the phone in a carry
accessory that contains no metal and positions the phone a
minimum of 2.5 cm form your body. Use of other accessories
may not ensure compliance with radiofrequency exposure
guidelines. If you do not use a body worn accessory and are not
holding the phone at the ear, position the phone a minimum of
2.5 cm from your body,
• Data operation: When using a data feature, position the phone
a minimum of 2.5 cm from your body for the whole duration of
the data transmission.
Environment
Packaging: To facilitate the recycling of packaging materials,
please obey the sorting rules instituted locally for this type of
waste.
Batteries: Spent batteries must be deposited at the
designated collection points.
The product: The crossed-out waste bin mark axed to the
product means that it belongs to the family of electrical and
electronic equipment.
7
1.2 Installing the SIM card, battery, and storage card
You need to remove the back cover before you can install the
SIM card and battery. Also, make sure to always turn o the
power before installing or replacing the SIM card and battery.
To promote the recycling and recovery of waste electrical and
electronic equipment (WEEE) and at the same time safeguard
the environment, European regulations require you to obey the
sorting rules instituted locally for this type of waste.
1 Getting Started
1.1 Getting to know your touch phone
8
To remove the back cover
1. Make sure your device is turned o.
2. Firmly hold the device with both hands and the front panel
facing down.
3. Push the back cover up with your thumbs until it disengages
from the device and then slide it up to remove.
To remove the battery
1. Make sure your device is turned o.
2. Remove the back cover.
3. The bottom of the phone has a notch. Lift the battery by the
notch to remove it.
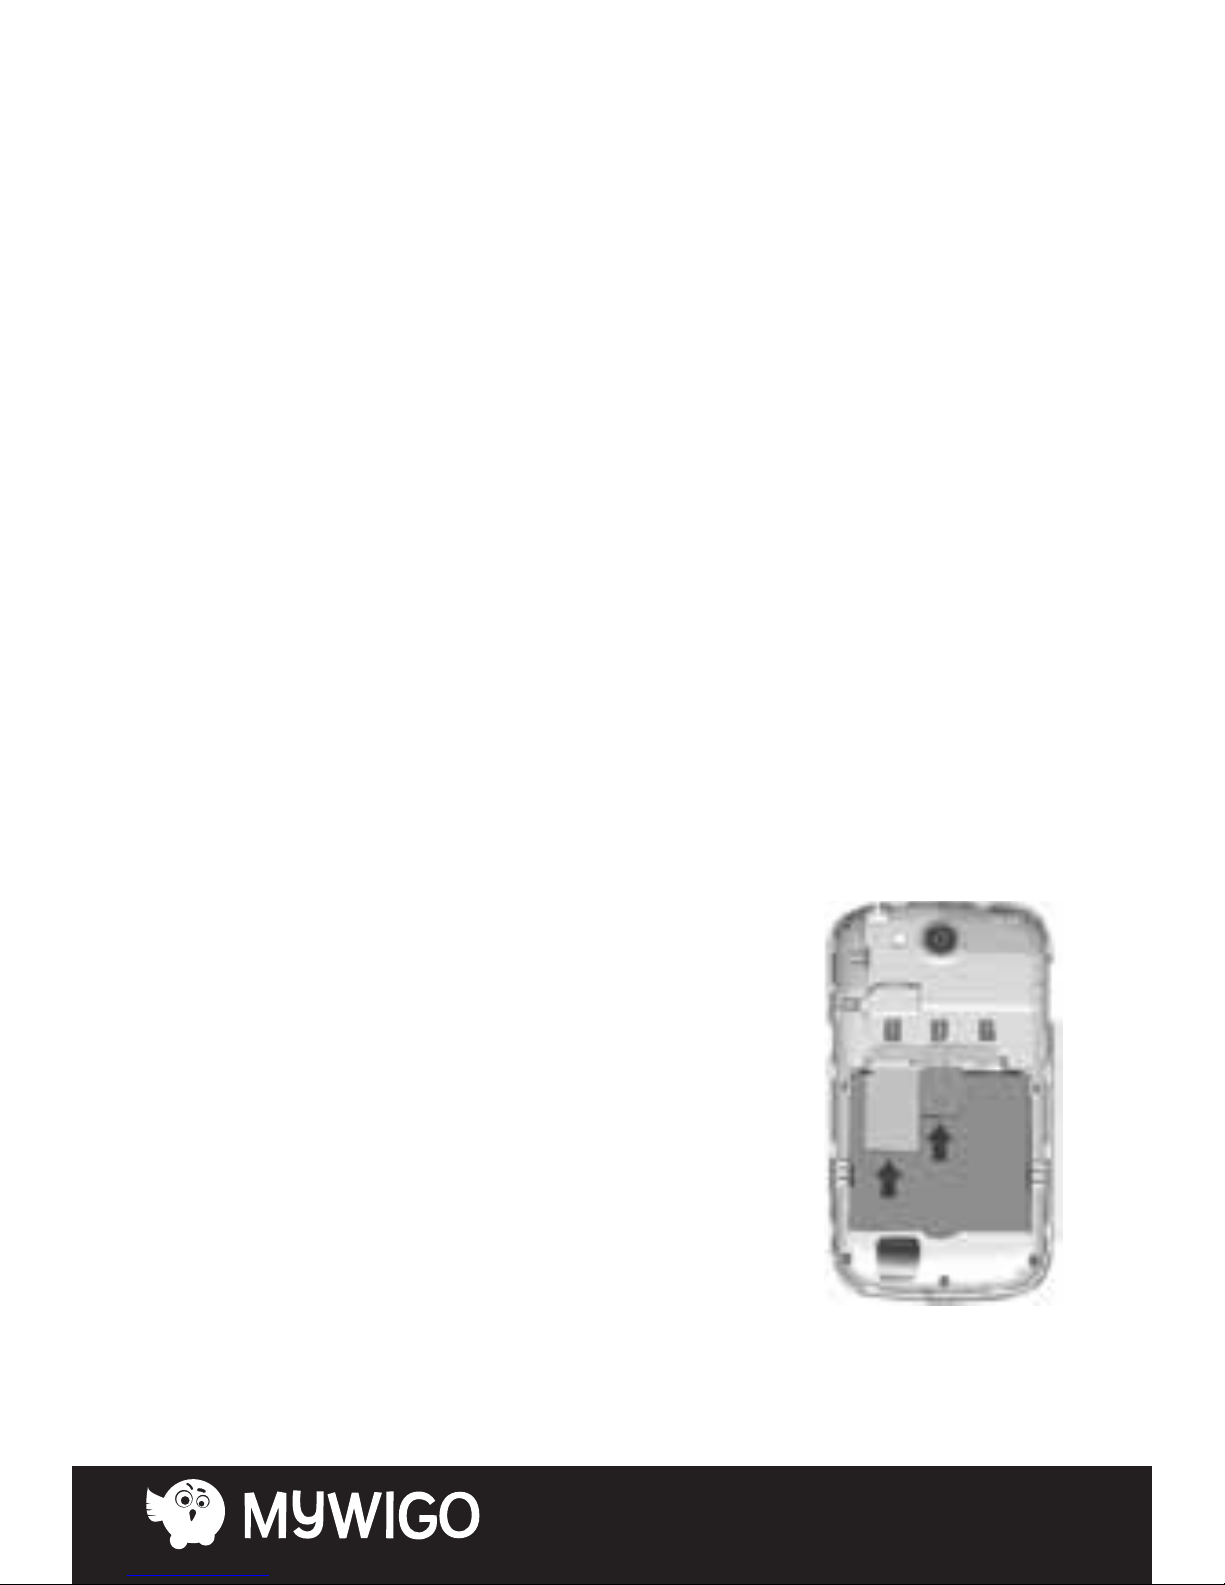
To install the SIM card
The SIM card contains your phone number, service details, and
phonebook/ message memory. Your device is supported both
2G and 3G (WCDMA) SIM cards.
1. Remove the battery if it is installed.
2. Locate the SIM card slot, and then insert
the SIM card with its gold contacts facing
down and its cut-o corner facing out
the card slot.
3. Slide the SIM card completely into
the slot.
9
Note:
• The phone can be supported the double SIM cards. The card
slot 1/2 will be both supported 3G SIM card (WCDMA), but one
SIM card can use 3G networks only.
If you need to use 3G operation, please insert 3G card in the card
slot 1(Default SIM1 card, dened in the menu
Settings/More…/Mobile networks/3G service), the SIM2 card
will be supported 2G network only (If insert 3G card in the card
slot 2, you can also use 2G operation only).
• Some legacy SIM cards may not function with your device. You
should consult with your service provider for a replacement SIM
card. There may be fees for this service.
To install a memory card
To have additional storage for your images,
videos, music, and les, you can purchase a
memory card and install it into your device.
1. Make sure that your device is turned o,
and then remove the back cover.
2. Locate the memory card slot on the
upper part of the exposed right panel.
3. Insert the memory card into the slot with
its gold contacts facing down until it clicks
into place.

10
Note:
To remove the memory card, press it to eject it from the slot.
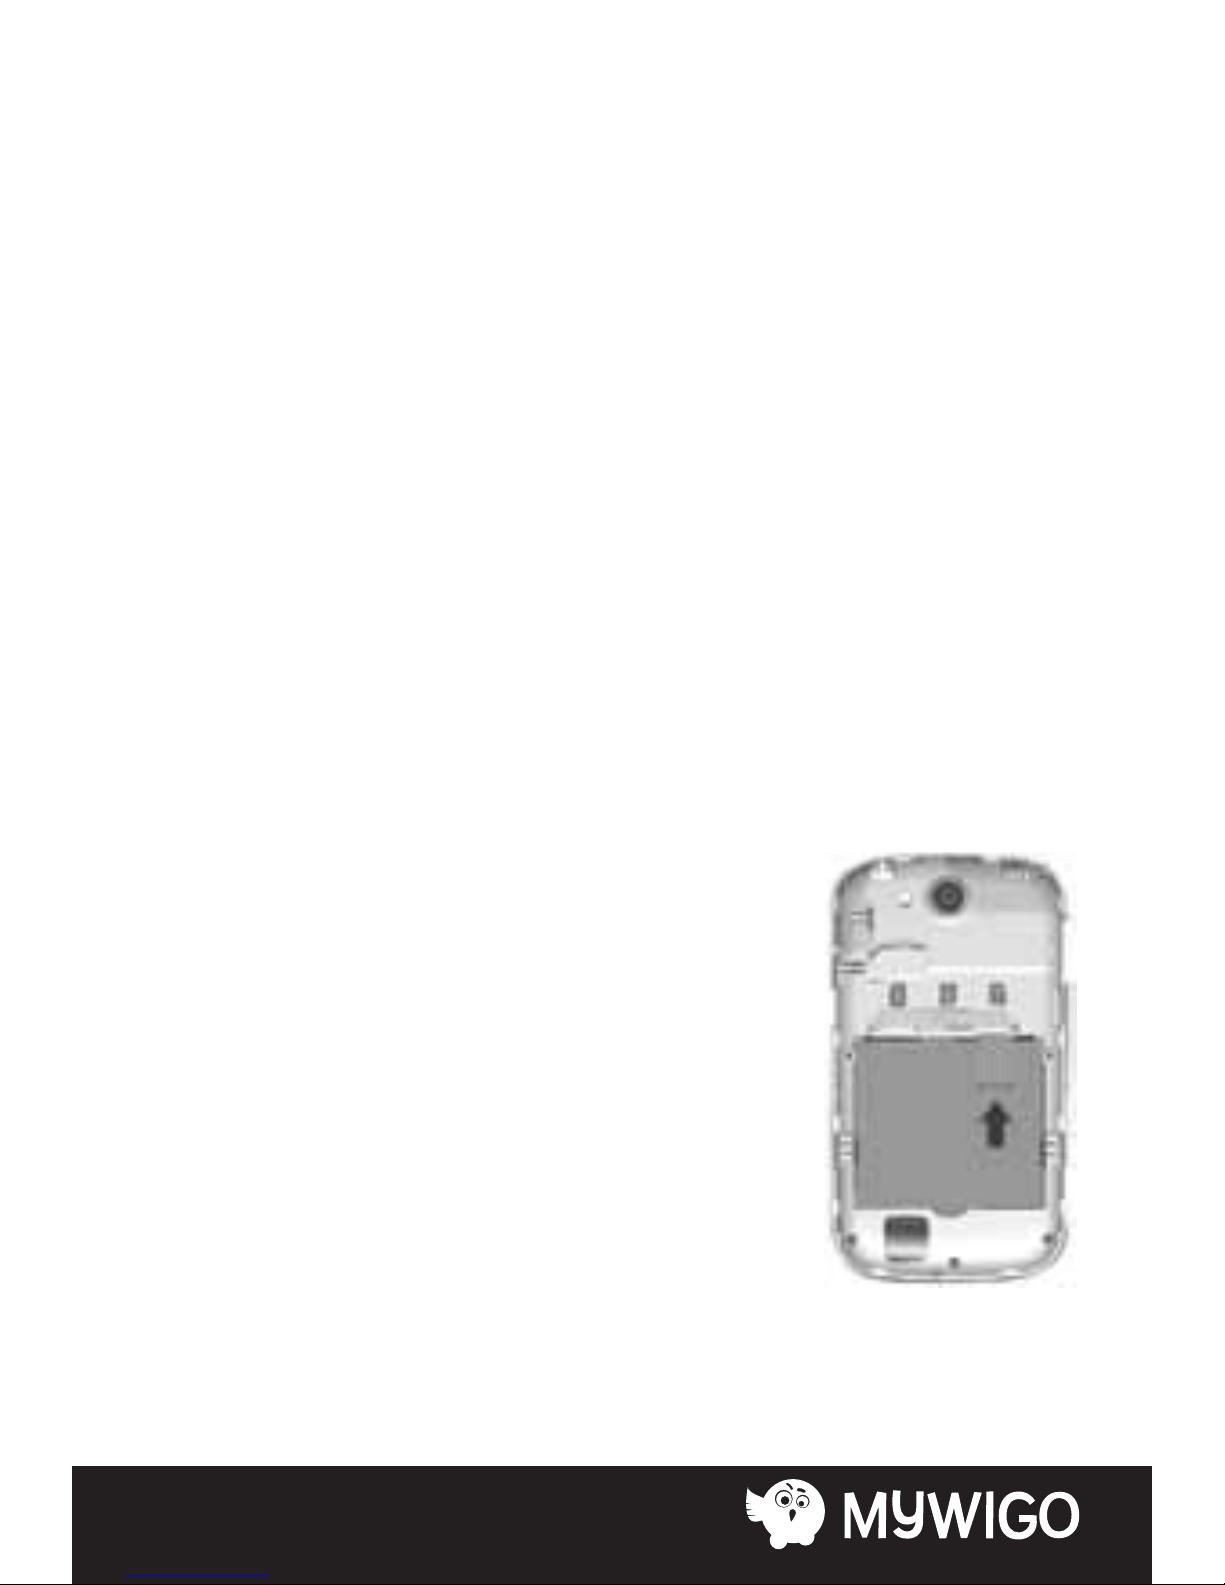
To install the battery
Your device comes with a rechargeable Lithium-ion battery and
is designed to use only manufacturer-specied original
batteries and accessories. Battery performance depends on
many factors, including network conguration, signal strength,
and usage patterns.
Warning: To reduce risk of re or burns:
• Do not attempt to open, disassemble, or service the battery
pack.
• Do not crush, puncture, short external contacts, or dispose of
in re or water.
• Do not expose to temperatures above 60°C (140°F).
• Replace only with the battery pack designated for this product.
• Recycle or dispose of used battery as stipulated by local
regulations.
1. Align the battery’s exposed copper contacts with the battery
connectors at the bottom part of the battery compartment.
2. Insert the contacts side of the battery rst and then gently
push the battery into place.
3. Replace the back cover.

11
1.3 Charging the Battery
New batteries are shipped partially charged. Before you start
using your device, it is recommended that you install and
charge the battery. Some batteries perform best after several
full charge/discharge cycles.
Note: Only the AC adapter and USB sync cable provided with
your device must be used to charge the device.
Connect the USB connector of the AC adapter to the sync
connector on your device, and then plug in the AC adapter to an
electrical outlet to start charging the battery.
As the battery is being charged while the device is on, a
charging icon appears in the title bar of the Home screen. After
the battery has been fully charged, a full battery icon appears in
the title bar of the Home screen.
Warning: • Do not remove the battery from the device while
you are charging it using the AC or car adapter.
12
• As a safety precaution, the battery stops charging before it
overheats.
1.4 Starting up the device
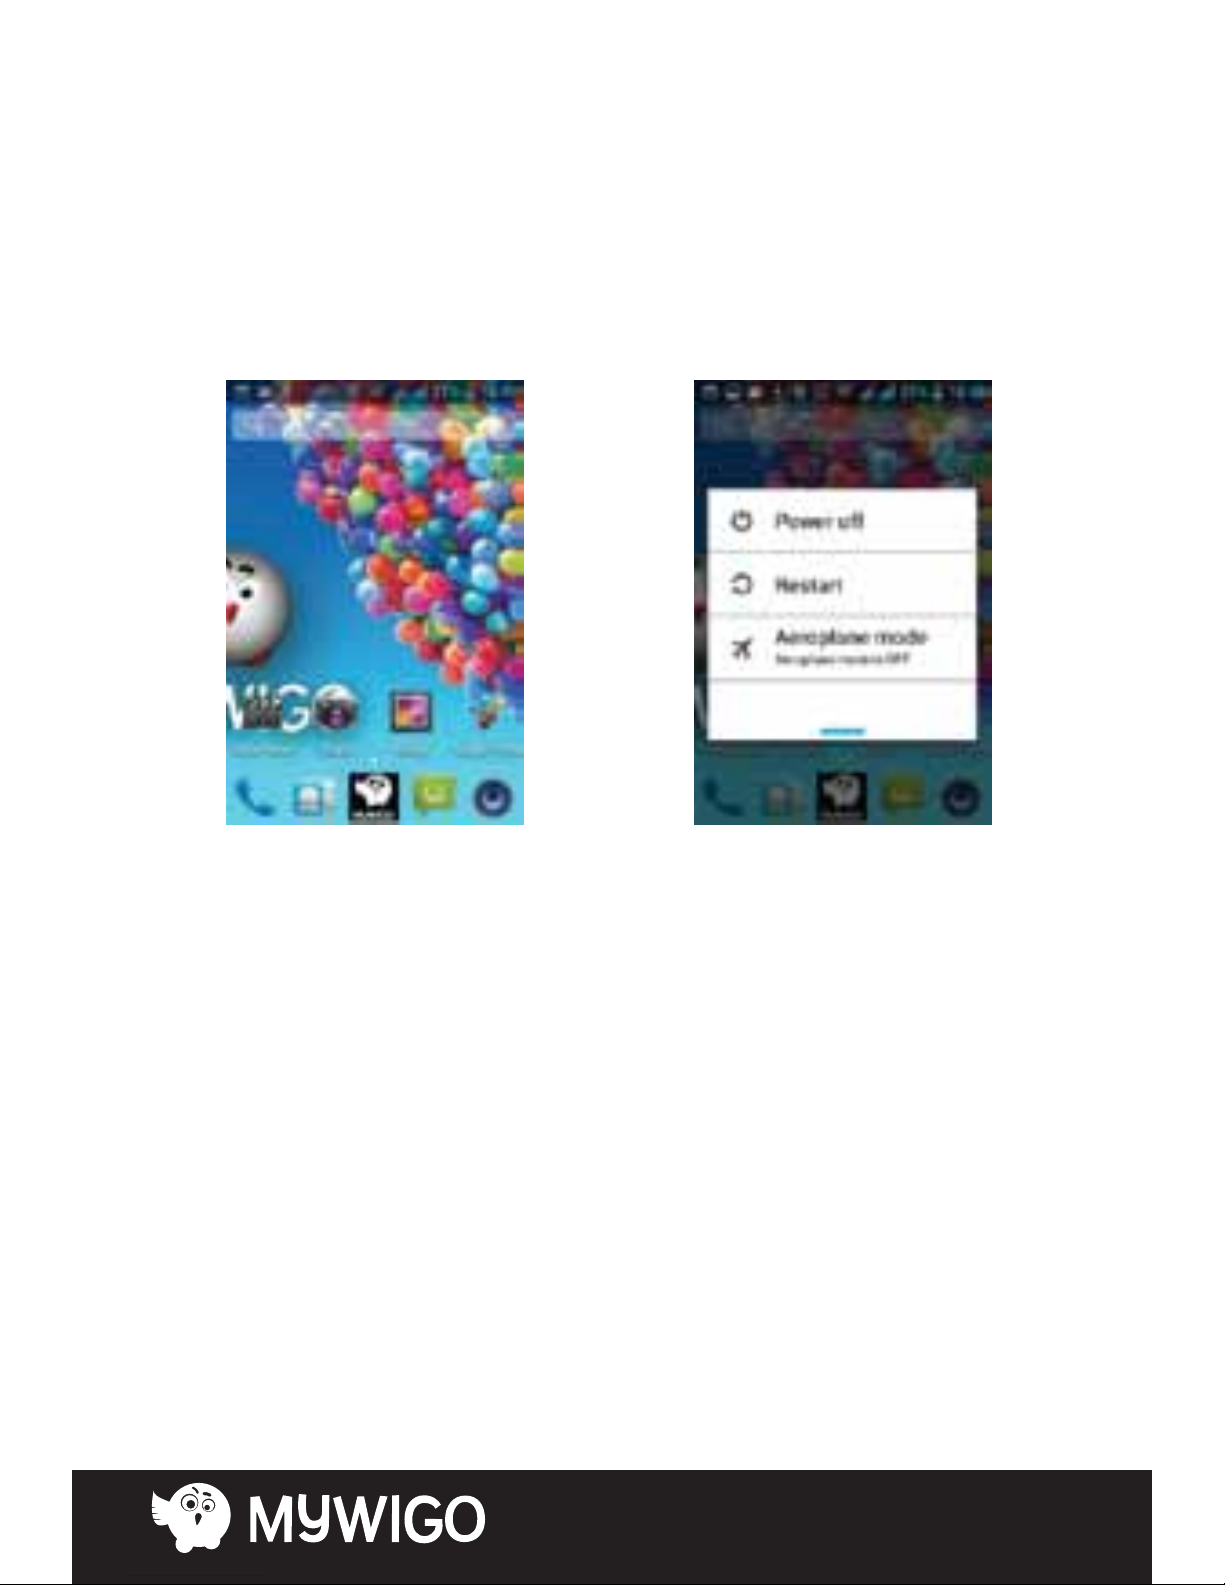
Power on/o
To power o your phone, press & hold POWER. On release, the
Phone options menu opens. Select ‘Power o’ and conrm.
To power on again, press & hold POWER.
13
Silent mode
To silence your phone quickly, press & hold the – volume button
to zero volume. Or on the Home screen, touch
and select Settings > Audio proles. Select ‘Silent’ check box.
Screen sleep
After a period of inactivity, your screen will go to sleep (display
will turn black). In sleep, your phone uses less battery power.
You can control this behavior:
Set screen timeout period
1. On the Home screen, touch and select Settings.
2. Select Display option.
3. Select Sleep. Select a time from the menu.
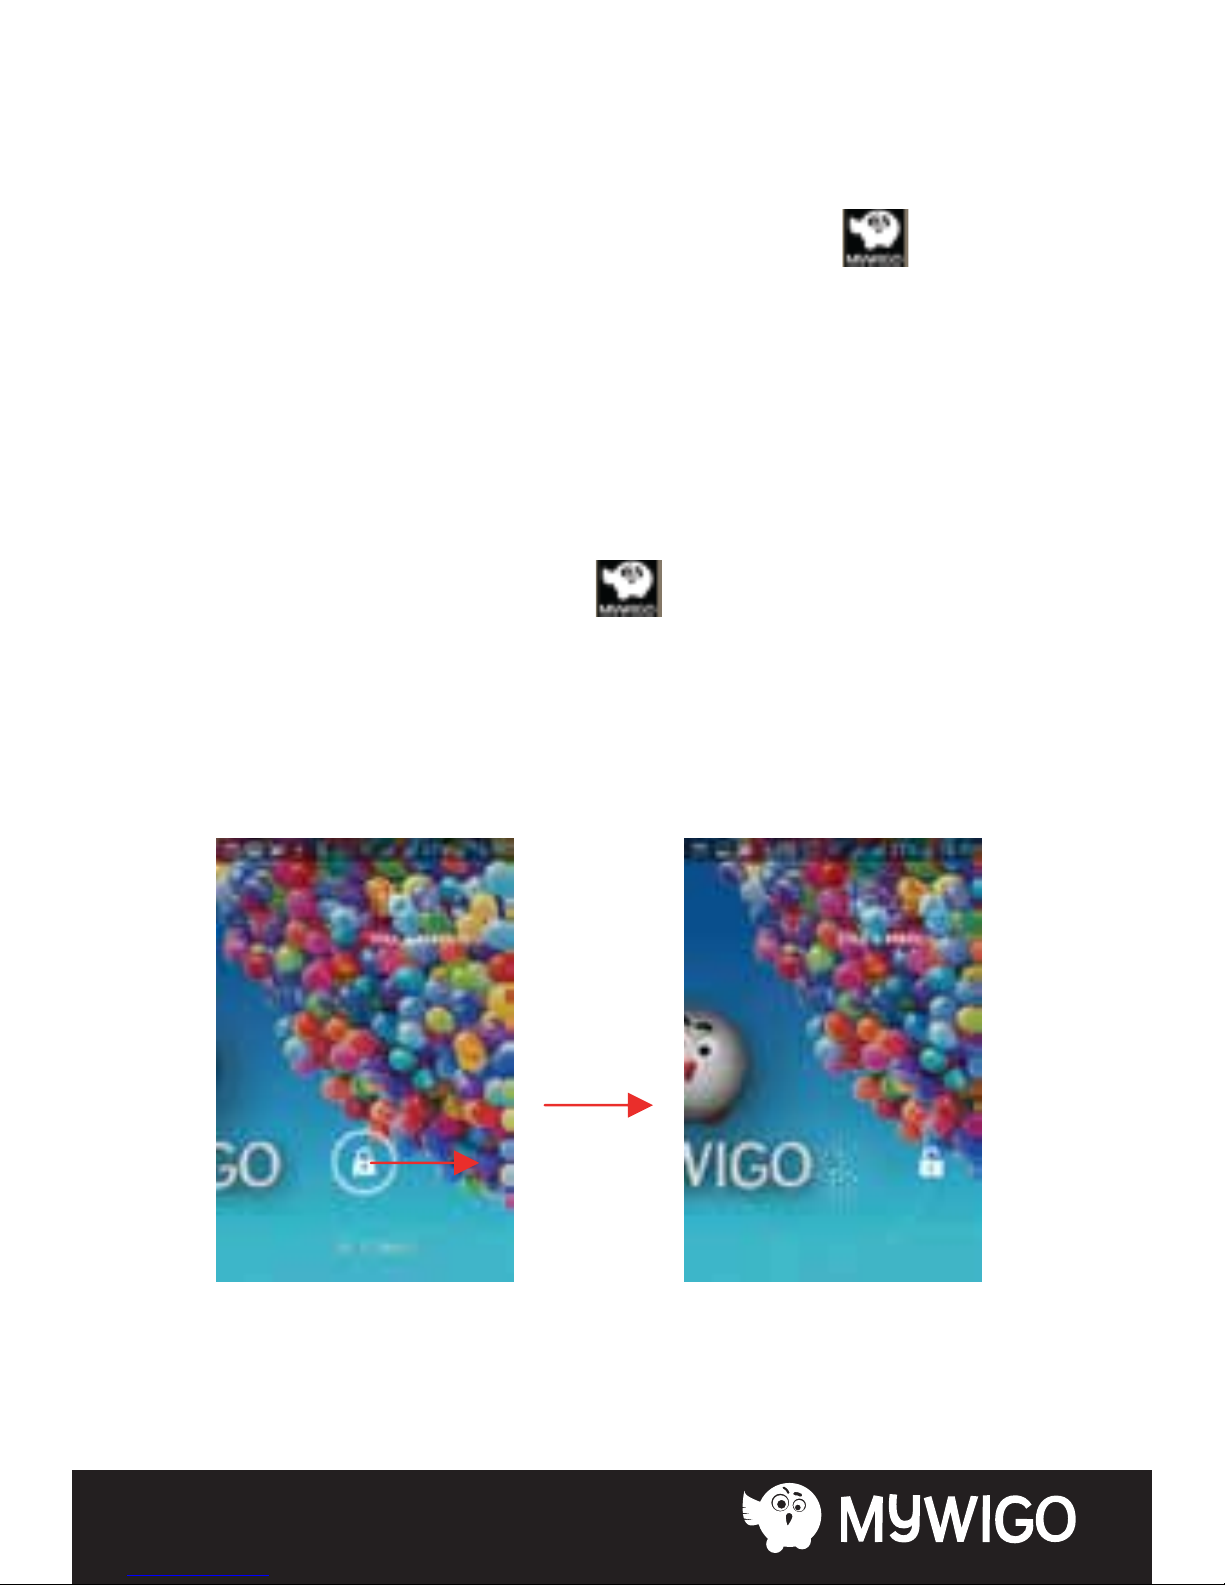
Lock screen & put phone to sleep

14
Except when on a phone call, from any screen, press POWER
(immediately). While not on a call, to lock your control buttons
and screen from accidental touch activation, press POWER.
You can increase the security of your phone by setting Screen
unlock pattern. Once set, in order to unlock your screen, you’ll
have to draw the correct unlock pattern. You can set your screen
unlock pattern as follows:
1. On the Home screen, touch and select Settings.
2. Select Security and then scroll down to Screen lock pattern
section.
3. Set or change your unlock pattern by selecting Screen lock
pattern, as applicable.
4. Follow the prompts to dene your pattern.
Note: You must slide your nger along the screen to create the
pattern, not select individual dots. Connect at least four dots.
If you want your pattern to be hidden as you draw it, clear ‘Make
pattern visible’ check box.
15
Home screen
The Home screen is your starting point for using all the
applications on your phone. You can customize your Home
screen to display applications, shortcuts, and widgets as you
like.
1. Touch the application tab with your ngertip to reveal
the application icons.
2. The Home screen actually extends beyond the screen width.
On Home screen, slide your ngertip left and right along the
screen to reveal the full width of the Home screen. This
additional space gives you more room to customize Home with
applications, shortcuts, and widgets.
16
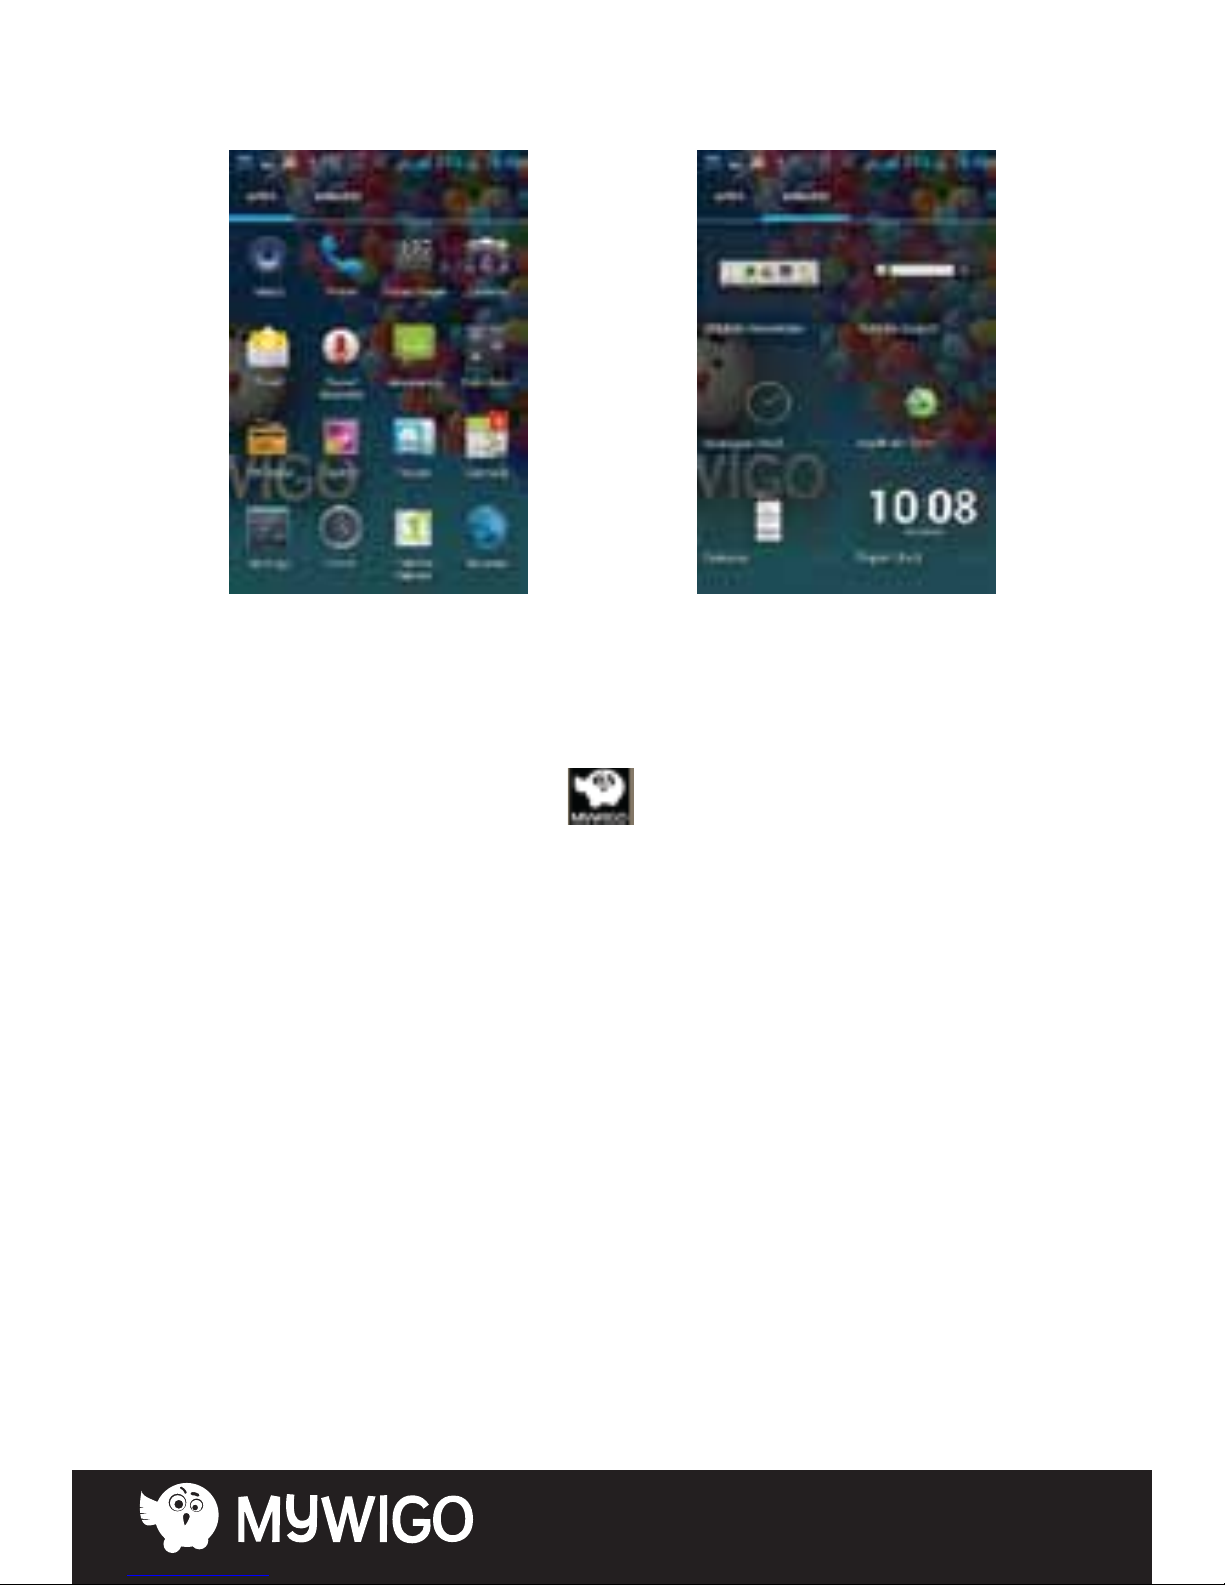
3. Create Home screen shortcuts and widgets:
• Touch the application tab with your ngertip to reveal
the application icons, slide your ngertip right to show the
shortcuts and widgets.
• Select an Application shortcut, a Shortcut to some of your
saved information (such as a play list), a Widget (a clock or
picture frame) for your Home screen.
• The application, shortcut, folder, or widget appears on Home
screen.
Tip: To create an application shortcut quickly, touch the
application tab to reveal all the application icons, then touch &
hold an application icon. Its shortcut is added to the Home
screen; close the application tab to see it.
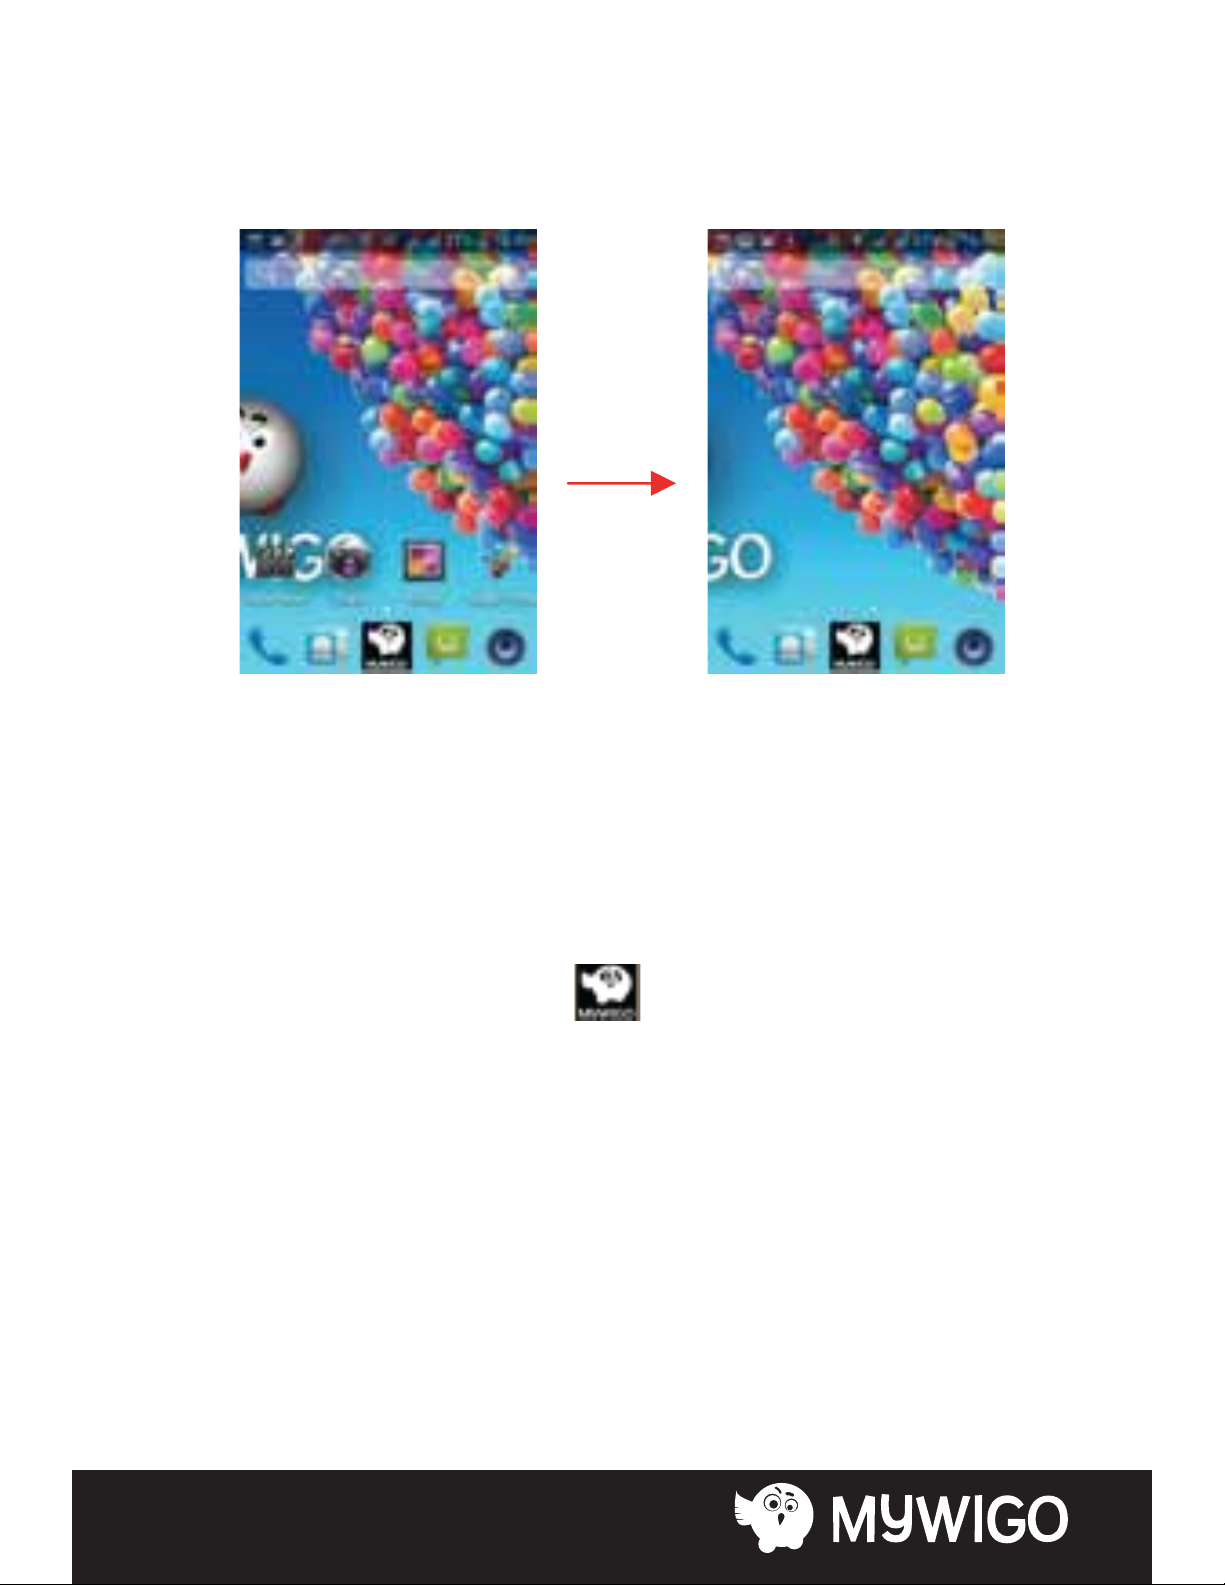
4. To remove a shortcut or widget from your Home screen, touch
& hold the item to enter “move mode”. The application tab turns

17
into a Trash button. Drag the item to the Trash button and
release. You’ll know when your item is in the Trash because the
item and the tab will turn red.
5. Move objects on the Home screen
• To move an icon or other item on the Home screen, you must
rst touch & hold it to enter move mode. The object will magnify
when it’s ready to be moved.
• Without lifting your nger (or you’ll drop out of move mode),
drag the object to the new position. To move an item to a
section of the Home screen not in view, move it to the edge of
the screen and hold it there for a moment. The screen view will
shift; position the object and release.
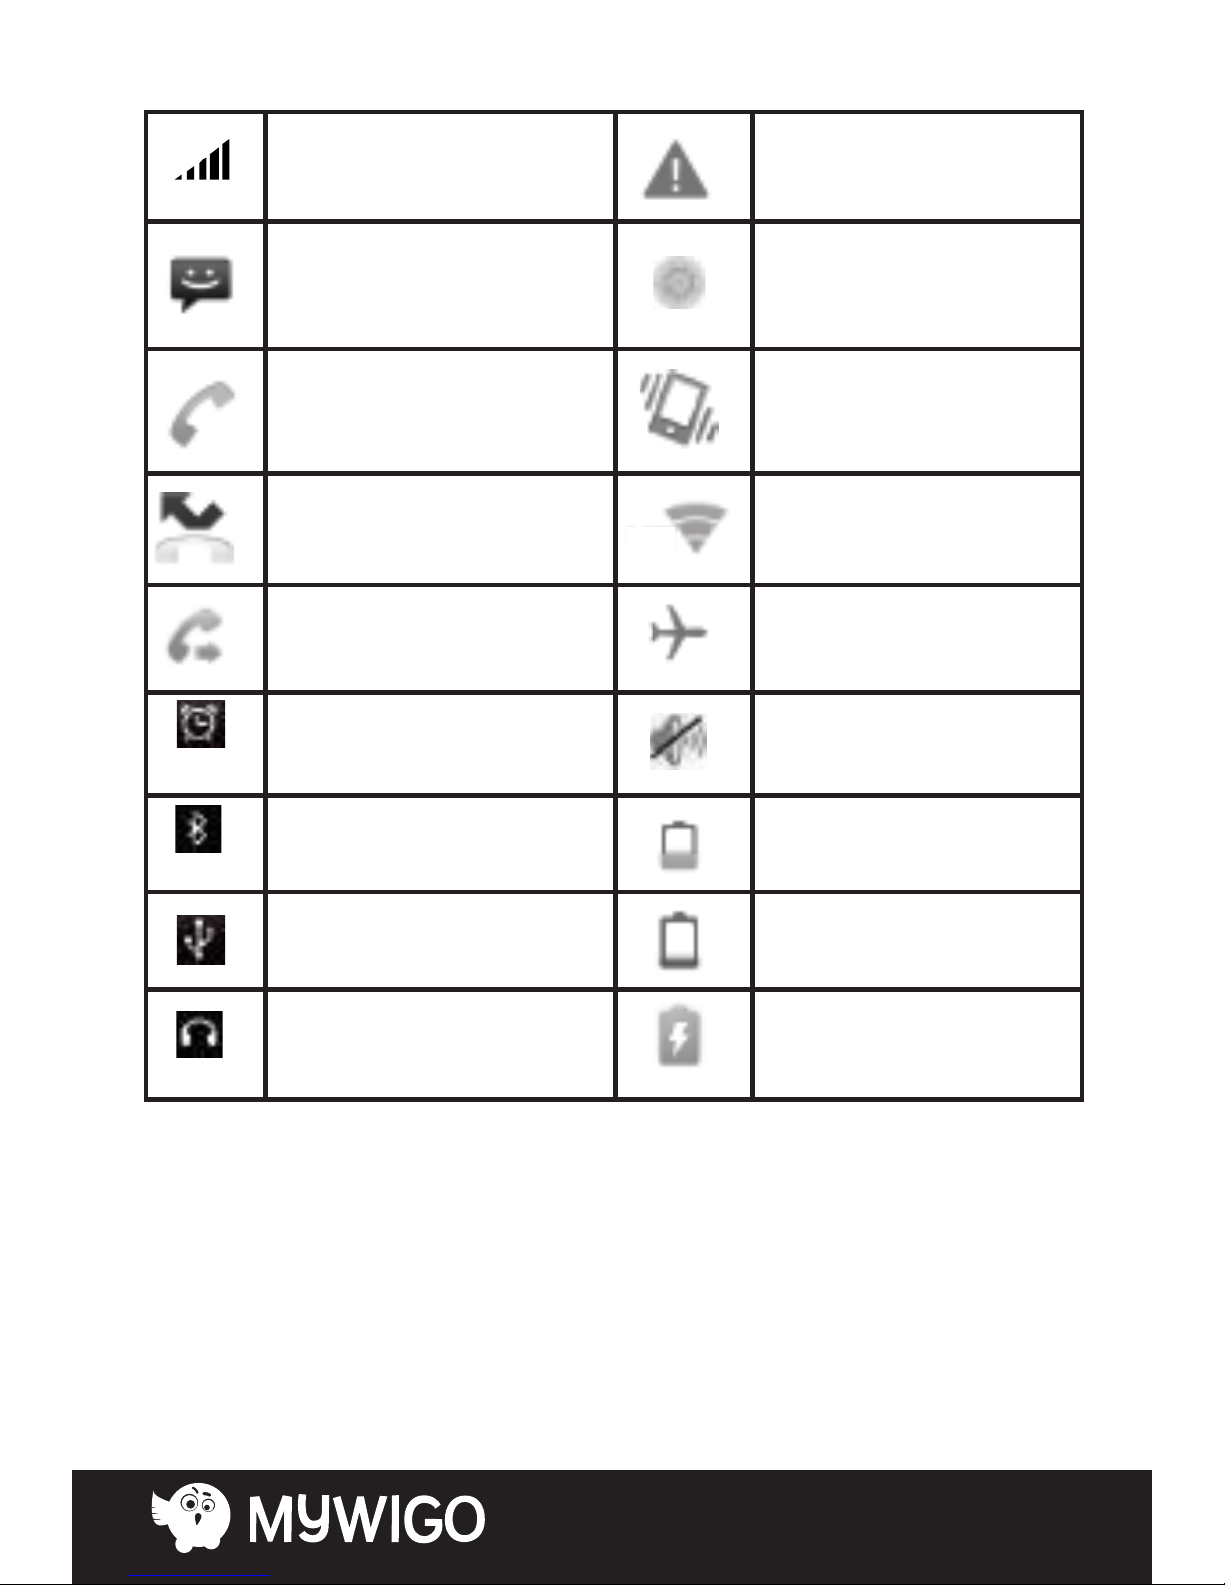
1.5 Status Icons
Connection status icons
Along the top of your phone screen is the status bar. On the left
side, icons will appear, notifying you of a new message,
upcoming calendar event, or something else you should notice.
On the right side of the status bar, you’ll see connection status
icons.
18
Network signal Sign-in/sync error
Song is playing
Ringer is o
(Silent mode)
SMS/MMS
WLAN service
connected
Call in progress.
Wireless services are
o (Airplane mode)
Missed call
Phone on mute
Call forward
Battery is low
Alarm is set
Battery is very low!
Bluetooth is on
Battery is charging
Connected the PC
Connected the
earphone
19
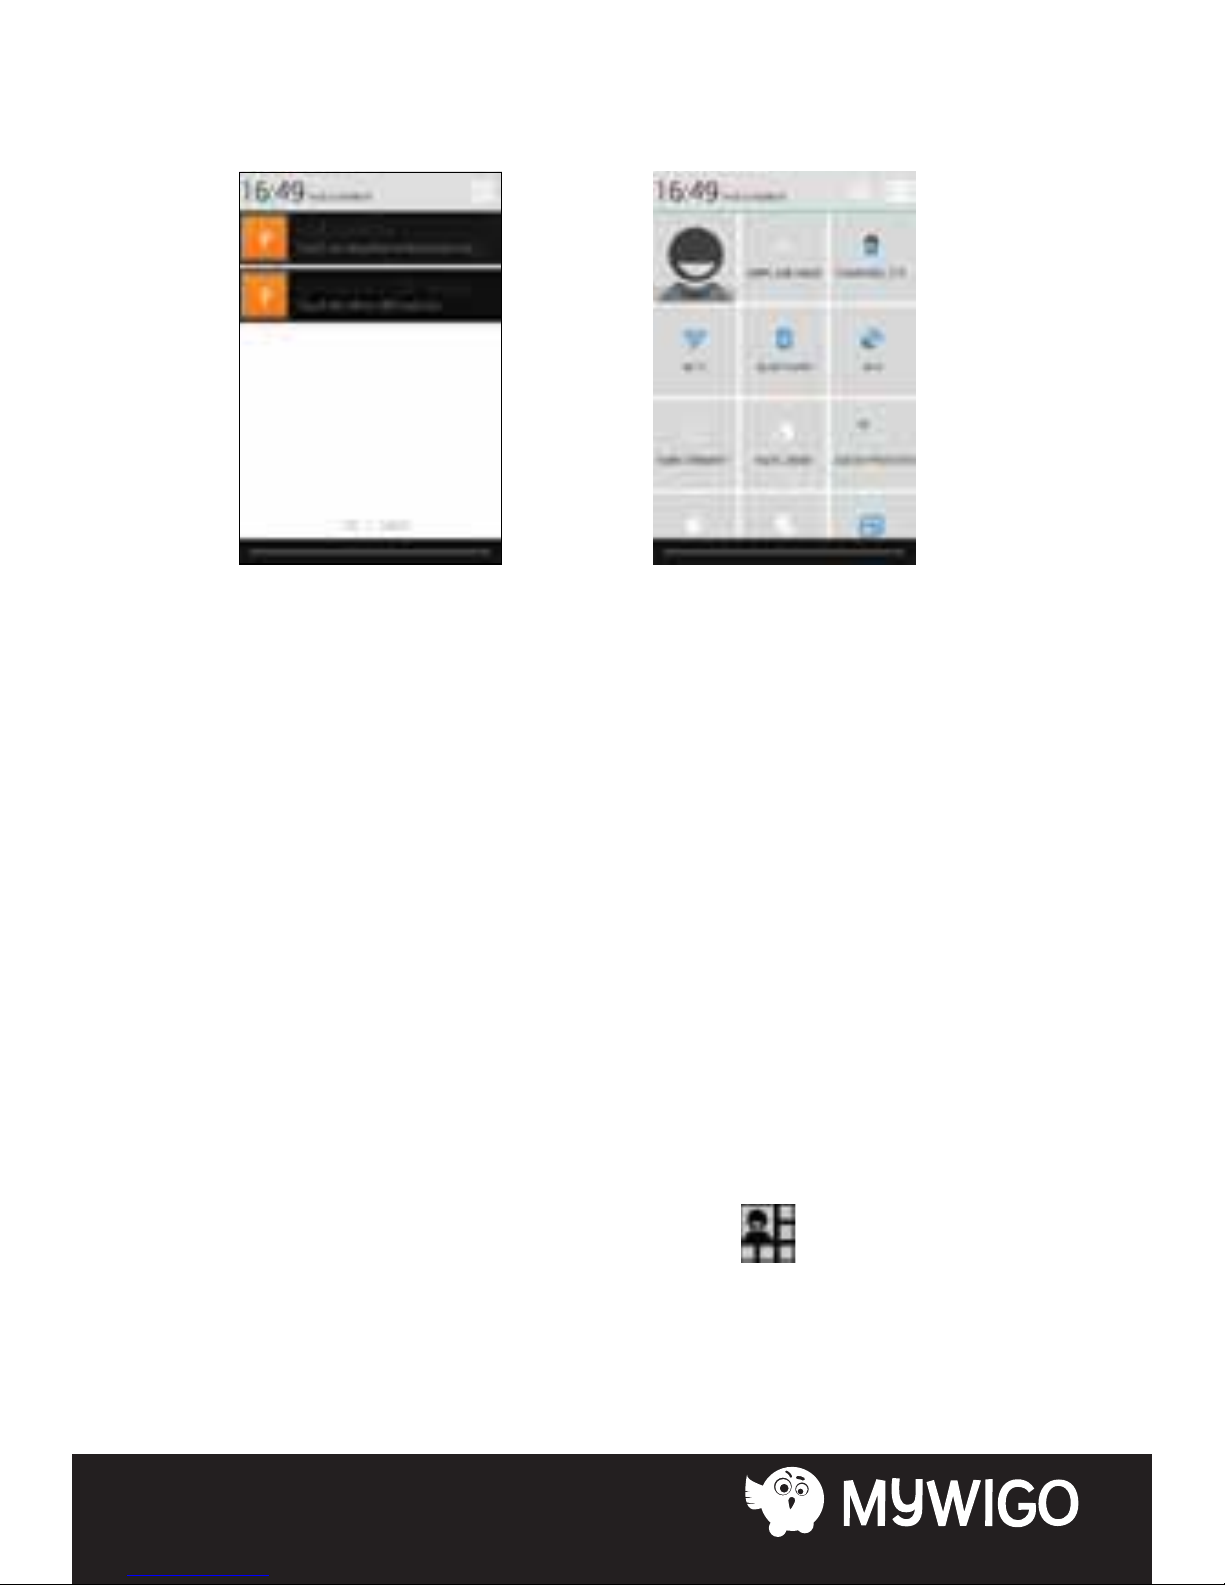
Read your notications
When you see a notication in the status bar, touch the bar and
slide your nger down the screen to open the list of notications
displayed in the sliding window.
Ongoing notications report activities such as call forwarding
ON, current call status, song playing.
Notications report the arrival of new messages, calendar
events, and alarms. You can clear notications list by selecting
‘Clear’ notications at the top of the notications window.
To open the message, reminder, or other notication, you can
touch the items. To close the notications window, slide your
nger up the screen.
Notes: On the home screen, touch the bar and slide your nger
down the screen to open the list of notications displayed in the
sliding window, you can touch the icon on the top of the
screen to enter the shortcuts screen, such as Airplane mode,
Wi-Fi, Bluetooth, Data connection, Airplane mode, Brightness,
you can open or close the selected function directly.
 Loading...