

Page 1

TECHNICAL SUPPORT
T-REX™ TOTAL ROTARY EXTRACTOR
General Troubleshooting
Problem: Possible Causes: Solutions:
Motor fan is spinning but cleaning
head is not.
Pinion gear has broken.
IMPORTANT: Do not plug the motor into power directly. Serious damage to the motor
will result. The machine should only be powered through the lighted pigtail coming o
the handle.
Replace the pinion gear.
(Part # H129. See next page.)
TS-TREX-09/02/15 • PAGE # 1
Page 2
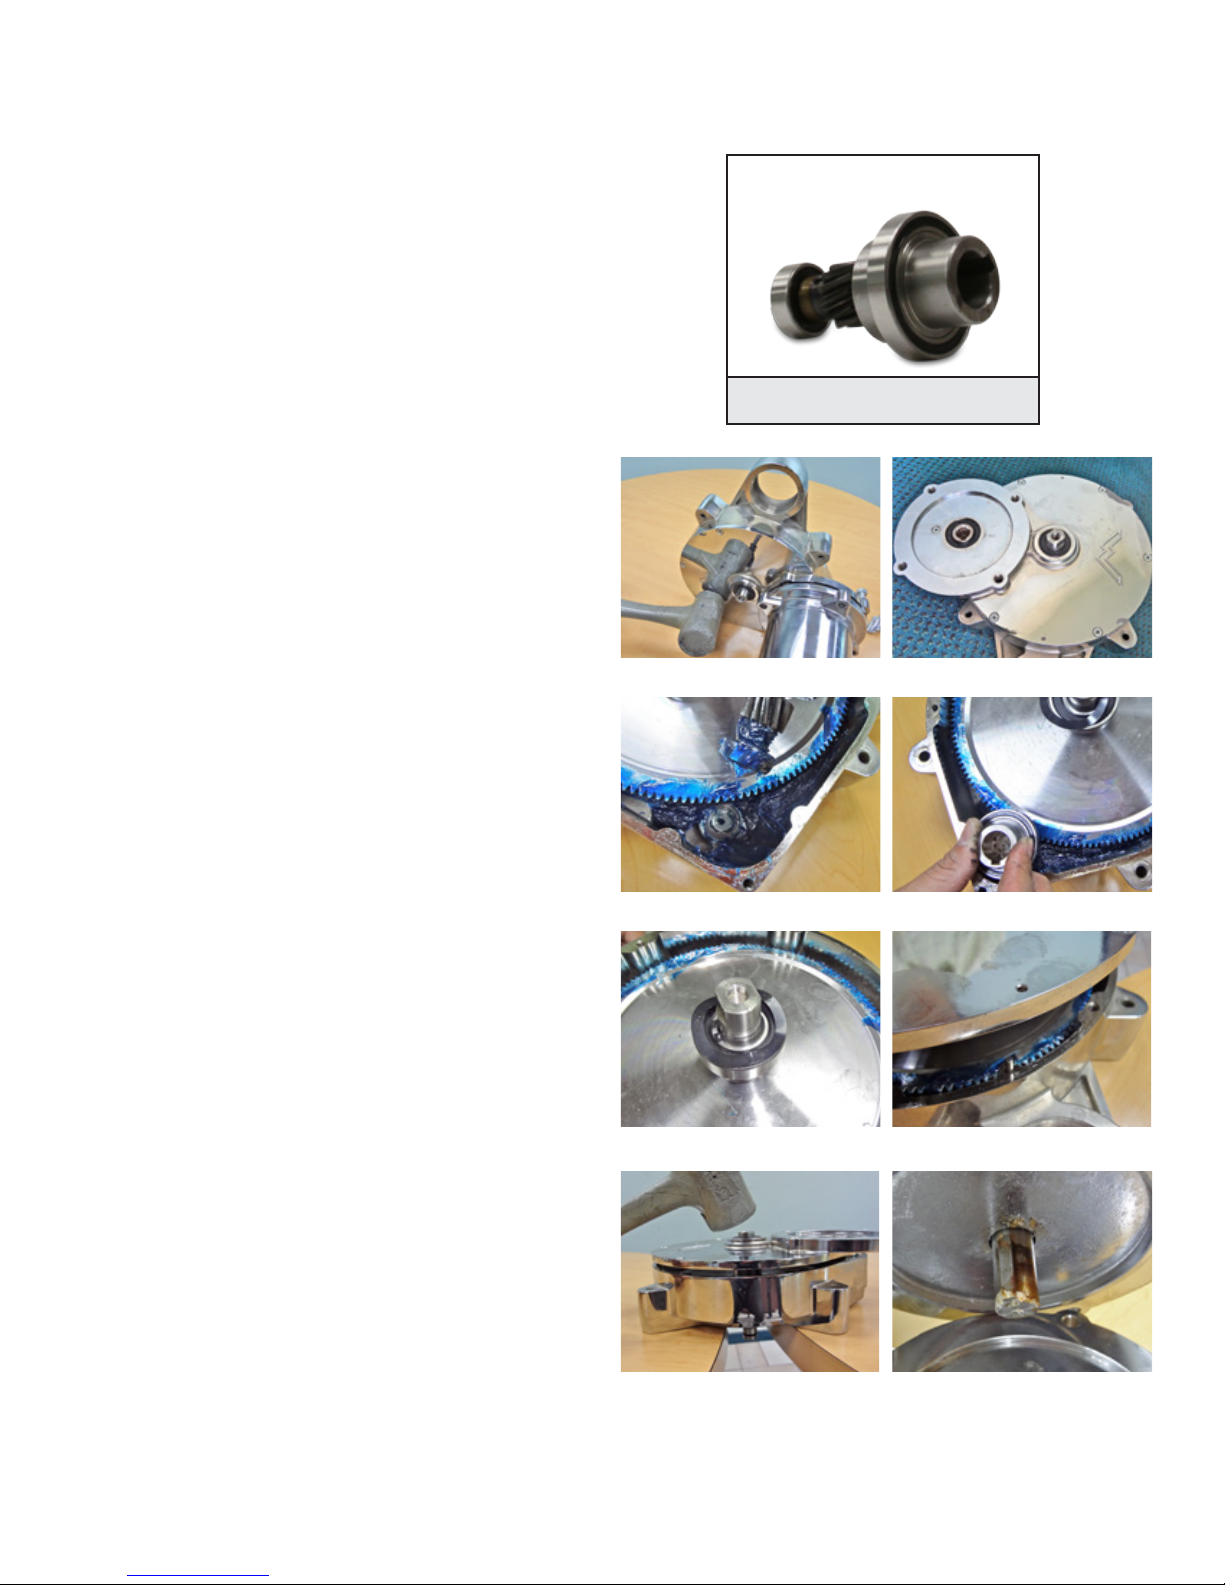
How to Replace Pinion Gear for T-REX™ with 1/2 HP Motor
Does not apply to T-REX™ Jr.
Step 1: Remove the four bolts holding the
transmission and motor together.
Step 2: Pull the motor o the transmission. You
can use a rubber mallet to loosen the seal if
necessary (Figure A).
Step 3: Use a Phillips head screwdriver to
unscrew the 6 screws on the transmission cap
(Figure B). Remove the transmission cap.
Step 4: Remove the broken pinion gear.
Step 5: Install the new pinion gear (Part # H129)
by inserting the gear side into the space beside
the large transmission gear. Use the existing
grease inside the transmission to lube the
pinion gear (Figure C). Twist the pinion gear to
make sure the gears are aligned. You should
see the large gear spin a little (Figure D).
Step 6: Make sure the wave washer is centered
on the bearing for the large gear (Figure E). Line
up the pins on the transmission casing with the
holes on the transmission cap and tap the cap
into place (Figure F). The transmission should
be on a surface that allows the threaded shaft
on the bottom to hang free so that it doesn’t
push back up against the cap as you’re trying
to tap the cap back on (Figure G).
A
C
E
H129
Pinion Gear
B
D
F
Step 7: Replace the screws with a Phillips
screwdriver. The longer screw goes in the hole
in the motor cavity.
Step 8: Twist the pinion gear by hand to make
sure it is aligned properly. You will see the
bearing for the main gear spin slightly.
Step 9: Match the locking key on the motor
shaft to the key slot on the transmission and
slide the motor back in place (Figure H). Line
up the bolt holes and make sure the power
cord is coming out the back.
G
H
TS-TREX-09/02/15 • PAGE # 2
Page 3
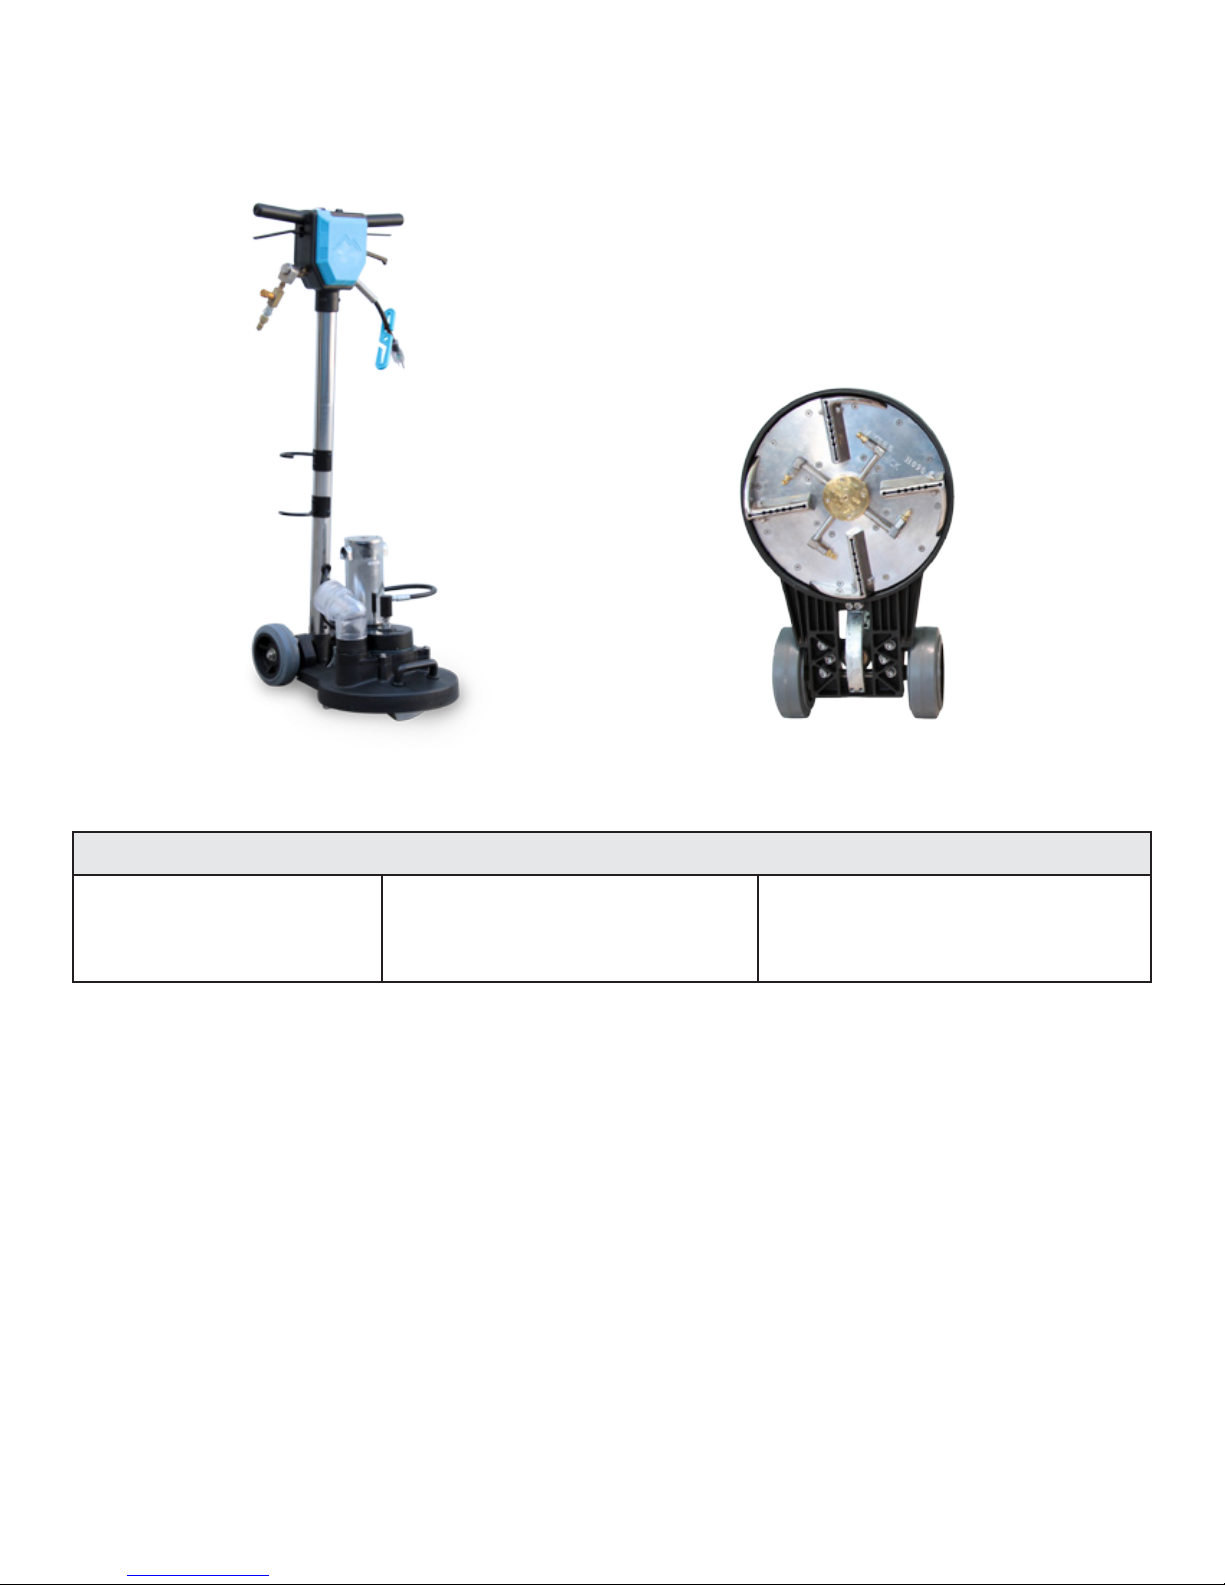
T-REX™ JR. TOTAL ROTARY EXTRACTOR
General Troubleshooting
Problem: Possible Causes: Solutions:
Gear box is making loud grinding
noise while running. (When gears
are properly working, the motor
will run quietly.
Oset gear is damaged.
Replace the gear.
(Part # H237. See next page.)
TS-TREX-09/02/15 • PAGE # 3
Page 4
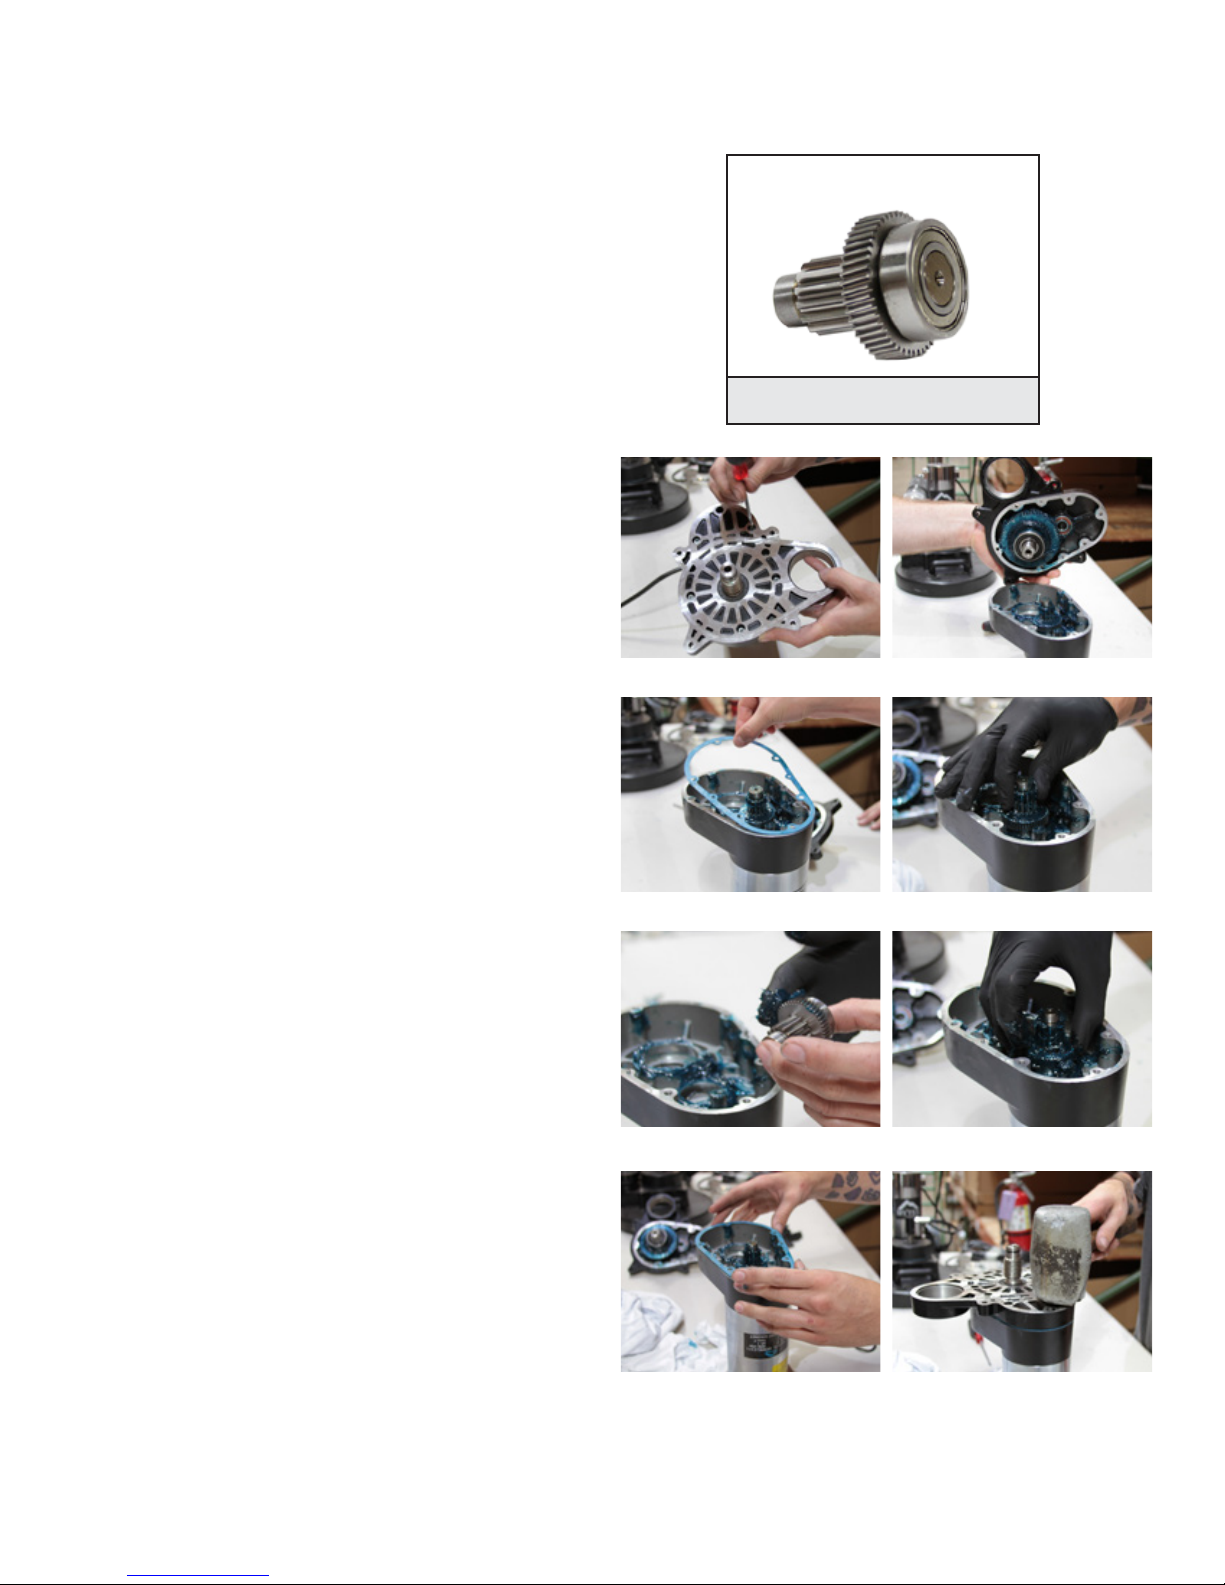
How to Replace the Gears on T-REX™ Jr. Gearbox
Does not apply to T-REX™.
Step 1: Remove the screws holding the
bottom transmission plate and gearbox
together (Figure A).
Step 2: Remove the plate o the transmission.
If it binds up on the shaft, gently rock the plate
as you pull it o (Figure B).
Step 3: Remove rubber gasket from gearbox -
set aside for reassembly (Figure C).
Step 4: Remove the oset gear (smaller gear) -
it should lift straight out (Figure D).
Step 5: Before installing the new oset gear,
fully coat the new oset gear with blue lube
from the motorbox (Figure E).
Step 6: Install the new gear by pressing back
into place by hand. To ensure that gears are
straight and engage with one another, twist the
gear by hand to make sure teeth are aligned
properly. (Figure F).
A
C
H237
Oset Gear w/ bearing
B
D
Step 7: Replace rubber gasket. Make sure
holes are aligned (Figure G).
Step 8: Re-install plate. You can tap down with
a mallet if needed. Replace the screws with a
Phillips head screwdriver (Figure H).
E
G
F
H
TS-TREX-09/02/15 • PAGE # 4
Page 5

Switching the T-REX™to New Style Power Cord Between Motor
and Handle
If you are switching your T-REX™ to the new style motor with the black transmission, you will need
to replace the power cord running through the handle since the new motor has a dierent style plug.
Does not apply to the T-REX™ Jr.
Step 1: Remove back cover by unscrewing the 4 screws.
I
Step 2: Remove front cover by unscrewing the 3 screws.
Step 3: Clip o the black and white wires that are
connected to the blue and red wires on the front board
(Figure I).
Step 4: Clip the green ground wire on the back of the
handle (Figure J).
Step 5: Pull the the old power cord out through the hole
at the bottom of the handle.
Step 6: Snake the new power cord up the handle to the
swtich box.
J
Step 7: Wire the new power cord to the same terminals
as the old power cord (black to blue, white to red, green
to green).
If O-Ring on the Bottom of the Transmission Shaft Goes Bad
Mytee carries a replacement O-Ring (Part # G107).
It is available at
www.mytee.com.
G107
O-Ring
Lubricating Felt Seal
Make sure to keep your felt seal (Part # G014) lubricated. To do this, saturate the felt seal thoroughly
with included Super Lube® (Part # PH648).
TS-TREX-09/02/15 • PAGE # 5
Page 6

Adjusting the Board to Factory Settings on T-REX™and
T-REX™ Jr.
Follow these troubleshooting instructions to ensure your T-REX™ is running optimally.
Step 1: Remove back cover by unscrewing the 4 screws.
Step 2: Remove front cover by unscrewing the 3 screws.
Step 3: The board should look like the one in Figure K. The notches on the knobs should be set to
the following positions:
• Knob 1: 3 o’clock
• Knob 2: 2 o’clock
• Knob 3: 8 o’clock
• Knob 4: 9 o’clock
• Knob 5: 9 o’clock
If your board does not match this, use a Philips screwdriver to adjust the knobs to these settings.
Step 4: Put the front and back covers back on.
K
TS-TREX-09/02/15 • PAGE # 6
Page 7

T-REX Wire Schematic
AC Power
Rev. 10-29-2014
T-REX with Dart Controls
Upgrading Speed Control Board on T-REX
™
If your old style speed control board is broken and irrepairable, it must be replaced with the new
style control board. Follow these diagrams to rewire your speed control from old style to new style.
Does not apply to T-REX™ Jr.
Old Style Control Board
L1
L2
LED specs
E-
B+
G
Dart 125D
Motor speed
control
safety switch
Must Have Permanent
Connection
top view
2
1
+
L
E-
Slide Potentiometer
Note: X indicates non use
3
B+
+
6.8k resistor
G
DC
Motor
-+
Speedpot LO
Speedpot High
Speedpot Wiper
- Armature
+ Field
AC Input N
AC Input L
+ Armature
New Style Control Board
L1
G
L2
+
+
Note: X indicates non use
Momentary Switch
Must Have Permanent
Connection
Top View
2
1
L
E-
Slide Potentiometer
3
B+
to Board
L2
L1
A+
A-
P2 P1
DC Power
to Motor
P3
G
DC
Motor
-
+
TS-TREX-09/02/15 • PAGE # 7
Page 8

Jet Information
T-REX
Jet part number
Jet size 1/8K-1.0 1/8K-1.0 11002
Flow 0.2 GPM 0.2 GPM 0.2 GPM
Installing Optional 7th Jet on T-REX
™
B183 B183 B114A
T-REX™ Jr. Flexstar
™
Optional 7th jet can be added on to the T-REX™ only.
To install, simply unscrew the hex screw in the center of the brass spray manifold and screw in the
jet.
B114A
Jet part number
Jet size 11002
Flow 0.2 GPM
7th Jet
Info
B114A
Motor Carbon Brushes
The DC motors on the T-REX™, and T-REX™ Jr. models have carbon brushes. These carbon brushes
will wear with time and usage. It is important that the brushes be replaced at the rst signs of wear.
If the brushes wear out and let the commutator and armature come in contact, it can cause costly
damage to the speed control board used in the machine.
Signs of Brush Wear
• On-and-o cycling. If motor begins to cycle, as if turning on-and-o rapidly, the brushes are likely
worn.
• Shaking, banging, or slapping sound from motor.
• Sparks and/or smoke from motor.
• Marked decrease in power of motor.
In any of these cases, replace the brushes immediately.
Replacement Carbon Brushes
• T-REX™: Part # C311-BMK
• T-REX™ Jr.: Part # C311B-BMK
TS-TREX-09/02/15 • PAGE # 8
 Loading...