

Page 1
12/02
Page 2

Dear Customer:
Congratulations on the purchase of your new janitorial and carpet cleaning
equipment. As you are already aware, the scene of the janitorial world is
becoming more high tech, and we at Mytee Products, Inc. strive to keep you
on the cutting edge with superior quality and technology.
Keep in mind that your KS-500 is a machine and neglect and/or abuse will
cause unnecessary damage and void warranty. With simple maintenance however, your machine will give you quality performance for many years to come.
The labels on your unit are scratch resistant. They are made with a clear film.
To achieve a high gloss finish, simply peel off the thin, clear layer.
If warranty questions arise, please consult your user's guide or get in touch
with your distributor. If you have questions about maintenance, replacing parts
or ordering parts, please call an authorized Mytee Products, Inc. service center. To see an updated list, visit our website at www.Mytee.com.
Before you begin cleaning, please read you user's guide thoroughly.
Sincerely,
Customer Care Dept.
Page 3

General Safety . . . . . . . . . . . . . . . . . . . . . . . . . . . . . . . . . . . .3
Warranty . . . . . . . . . . . . . . . . . . . . . . . . . . . . . . . . . . . . . . . .4
RMA . . . . . . . . . . . . . . . . . . . . . . . . . . . . . . . . . . . . . . . . . . .5
Description/ Advantages . . . . . . . . . . . . . . . . . . . . . . . . . . . .6
Set-Up . . . . . . . . . . . . . . . . . . . . . . . . . . . . . . . . . . . . . . . . . .7
Operation . . . . . . . . . . . . . . . . . . . . . . . . . . . . . . . . . . . . . . . .8
Troubleshooting . . . . . . . . . . . . . . . . . . . . . . . . . . . . . . . . . . .9
Parts List . . . . . . . . . . . . . . . . . . . . . . . . . . . . . . . . . . . . . . .11
Notes . . . . . . . . . . . . . . . . . . . . . . . . . . . . . . . . . . . . . . . . . .15
Table of Contents
Page 4

General Safety/ Warnings
These precautions have been written for your safety and the safety of others
in mind. These precautions MUST BE FOLLOWED at all times to avoid
serious injury, harm, and/or death, and damage to the unit.
Warning: To reduce the risk of fire, electrical shock, or injury:
1. READ ALL INSTRUCTIONS BEFORE USING EXTRACTORS.
2. Use only as described in this manual. Use only manufacturer's
recommended attachments.
3. Always unplug power cord from electrical outlet before attempting any
adjustments or repairs.
4. Do not unplug by pulling on cord. To unplug, grasp the plug, not the
cord.
5. Do not pull or carry by cord. Do not close a door on cord or pull cord
around sharp edges or corners.
6. Do not run appliance over cord. Keep cord away from heated surfaces.
7. Do not use with damaged cord or plug. If cord is damaged, repair
immediately.
8. Do not use outdoors or on wet surfaces and/or standing water.
9. Always unplug or disconnect the machine from the power supply before
servicing. Unplug or disconnect the appliance from power supply when
not in use.
10. Do not allow to be used as a toy. Close attention is necessary when used
by or near children.
11. Do not use in areas where flammable or combustible material may be
present.
12. Do not leave the unit exposed to harsh weather elements. Temperatures
below freezing may damage components and void warranty.
13. Use only the appropriate handles to move and lift unit. Do not use any
other parts of this machine for this purpose.
14. Keep hair, loose clothing, fingers, and all parts of body away from all
openings and moving parts.
15. Use extra care when cleaning on stairs
16. To reduce the risk of fire or electric shock, do not use this machine with
a solid-state speed control device.
3
Page 5

MYTEE LIMITED WARRANTY POLICY
Mytee Products, Inc. endeavors to provide high quality products and product support to its customers and therefore backs up all of its new products purchased from Mytee Products Inc.
(“Mytee”) or any authorized Mytee distributor/service center with this limited warranty. This limited warranty begins on the date of the customer’s purchase and is valid and available to the original purchaser only. Mytee’s products are for commercial use only and are not intended for personal, family or household uses.
HOWEVER, OTHER THAN SET FORTH HEREIN, MYTEE GIVES NO WARRANTY,
EXPRESS OR IMPLIED, AS TO DESCRIPTION, QUALITY, MERCHANTABILITY, FITNESS
FOR ANY PARTICULAR PURPOSE, PRODUCTIVENESS, INFRINGEMENT, OR OTHER
MATTER, OF ANY GOODS WHICH MYTEE SHALL SUPPLY. THERE ARE NO WARRANTIES WHICH EXTEND BEYOND THE DESCRIPTION ON THE FACE HEREOF.
MYTEE SHALL IN NO WAY BE RESPONSIBLE FOR THE PROPER USE AND APPLICATION OF THE GOODS. MYTEE NEITHER ASSUMES NOR AUTHORIZES ANY OTHER
PERSON TO ASSUME FOR MYTEE ANY OTHER LIABILITY IN CONNECTION WITH THE
SALE OF MYTEE’S GOODS. THIS LIMITED WARRANTY POLICY MAY BE CHANGED OR
WITHDRAWN BY MYTEE AT ANY TIME WITHOUT NOTICE.
WEAR PARTS 90-DAY LIMITED WARRANTY: Mytee will replace all wear parts for 90 days
from the date of original purchase. “Wear parts” are items which wear out as a result of usage or
the passage of time and are consumed despite attempts to maintain them, such as gaskets, wheels,
brass, cords, wires, electrical terminals, hoses, switches, thermostats, plastisol parts, filters, bearings, brushes, solenoids, o-rings, bulbs, heating elements, castors, or other parts deemed wear items
in Mytee’s sole discretion. This warranty covers the cost of replacement only and does not cover
shipping or labor costs.
PUMP, VACUUM MOTOR AND HEATER 1-YEAR LIMITED WARRANTY: Mytee warrants that pumps, vacuum motors, and heaters will be free from manufacturing defects, defects in
workmanship, and defects in material for one (1) year from the date of original purchase. This warranty does not apply and is void if the pump, vacuum motor, or heater has worn brush motors, water
damage, chemical build-up, chemical damage, or evidence of abuse, neglect or tampering. This
warranty covers the cost of replacement or repair only and does not cover shipping or labor costs.
HOUSING 3-YEAR LIMITED WARRANTY: For three (3) years from the date of purchase,
Mytee warrants a percentage of the cost of replacement of rotationally-molded housings pro-rated
as follows: Mytee will pay 100% of replacement cost in the first year from the date of purchase,
75% of replacement cost in the second year from the date of purchase and 25% in the third year
from the date of purchase. Replacement cost does not include the cost of shipping or labor.
LIMITATION OF DAMAGES: THE REMEDY OF REPLACEMENT OR REPAIR OF ANY
DEFECTIVE GOODS SHALL BE THE EXCLUSIVE REMEDY UNDER ANY WARRANTY
MADE BY MYTEE, WHETHER EXPRESS OR IMPLIED. IN NO EVENT SHALL MYTEE BE
LIABLE FOR ANY INCIDENTAL OR CONSEQUENTIAL DAMAGES, PROPERTY DAMAGES, OR PERSONAL INJURIES.
All limited warranties are void for, and Mytee does not warrant in any way, any product that evidences misapplication, improper installation, abuse, lack of maintenance, negligence in use or care,
abnormal use, alteration of design, use of incompatible or corrosive chemicals, use in a rental service, and/or servicing, installation of parts, or repairs by anyone other than Mytee or a Mytee
4
Page 6

authorized distributor or service center. Mytee may make changes in products it manufactures
and markets at any time; these changes are made without obligation to change, retrofit, or
upgrade any product previously sold or manufactured.
Mytee has no obligation to honor the limited warranties set forth herein unless the original purchaser, promptly upon discovering the warranty claim and prior to continuing to use the product, contacts Mytee or a Mytee authorized distributor or service center to describe the claim and
to receive and follow instructions for documenting and resolving the claim. In addition, the
purchaser must provide the product to which the claim applies to Mytee or a Mytee authorized
distributor or service center for a thorough inspection.
If any provision or portion of this limited warranty policy is found to be unenforceable, then
the remaining provisions and portions shall remain valid and enforceable. If any provision or
portion of this limited warranty policy is found to be limited by law, then that provision or portion shall be construed to make it effective within the bounds of law. For example, if there are
legal limitations on the duration of warranties, the warranties made herein shall be construed to
have the minimum duration required by law, or, if there are legal limitations of exclusion of
remedies, the exclusions made herein shall be construed to apply to the fullest extent possible
without violating the law.
The validity, construction and performance of this warranty policy shall be governed by the
laws of the State of California, without respect to conflicts of laws principles. The exclusive
jurisdiction of any legal action arising from or related to this warranty policy shall be in the
State of California and no legal action shall be commenced elsewhere.
RETURNED MATERIAL AUTHORIZATION PROCEDURE
It is the responsibility of any Authorized Service Center (ASC) or Distributor with written
authorization to ensure the Customers equipment is repaired as soon as possible. Only Mytee
Products, Inc. or it’s authorized dealers with written authorization, service centers, and agents
may make warranty repairs on these products. All others do so at their own risk and expense.
The Distributor must follow Mytee Products, Inc. standard RMA procedure:
1. When a repair falls within the Warranty time period for a piece of equipment, the
Distributor will fill out a RMA/Warranty claim form. This form will act as a repair order to
replace any defective parts.
2. All defective parts must be returned to Mytee Products, Inc. with the RMA/claim form for
evaluation at the customer
’s expense. This shipping is non-refundable. All warranty claims
are subject to an evaluation by Mytee Products, Inc. to determine if warranty will be
approved. Any credit for repair and/or parts will only be issued upon evaluation and approval
from Mytee Products, Inc.
3. When Warranty is approved, the Distributor’s account will be credited for the replacement
part(s). Mytee Products, Inc. will ship the warranted replacement part(s) to the Distributor
prepaid. If Warranty is denied the Distributor’s account will not be credited for any parts sent
for this claim.
5
Page 7

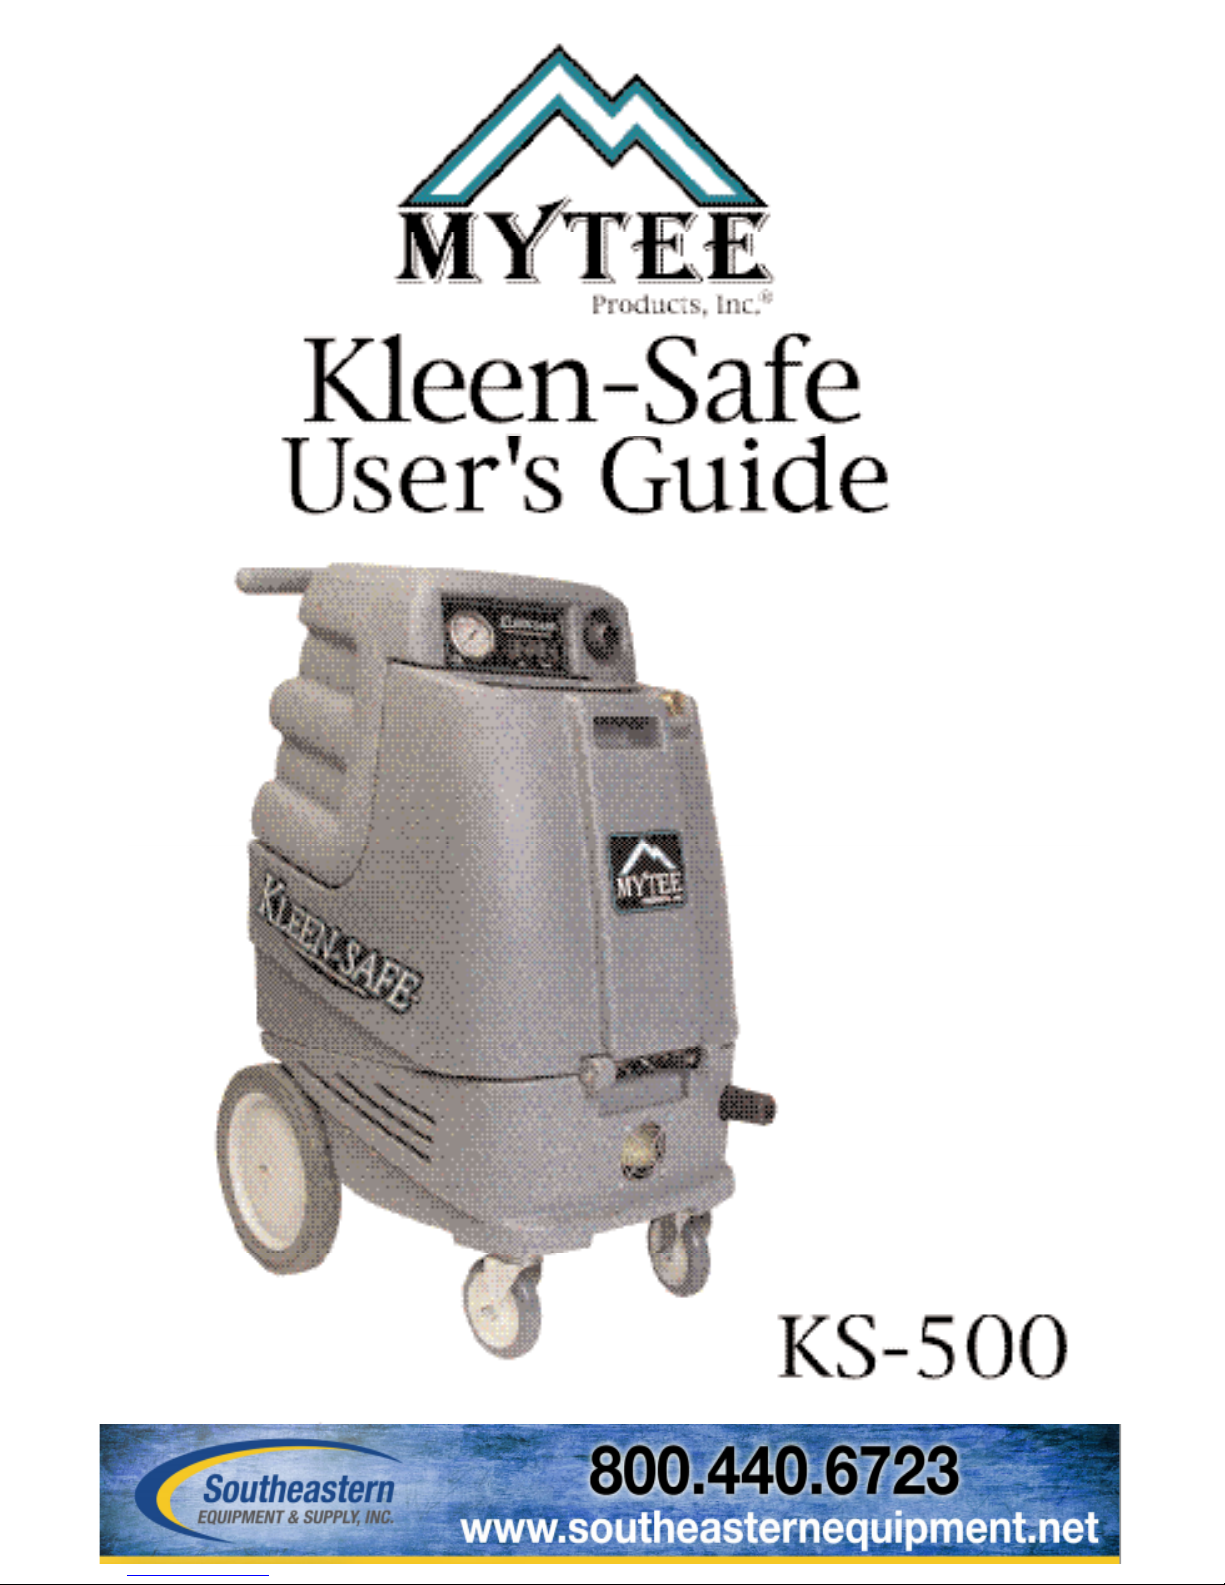
Description and Advantages
The KS-500 KLEEN-SAFE Cleaning System is a 12-gallon unit that is
equipped with a 450psi pump and a single High Performance, 3 stage vacuum
motor. This machine has a single 50-foot power cord. The amperage draw is
13-amps. To run this unit effectively will require a 20-amp outlet.
The KS-500 KLEEN-SAFE delivers these additional MYTEE advantages:
PERFORMANCE
The KLEEN-SAFE lives up to its name. It’s “Hands-Off” hygienic design
cleans more efficiently and effectively than any manual method!
VERSATILITY
Use the KLEEN-SAFE in restrooms to clean toilets, sinks, tubs, windows,
shower stalls, as well as non-porous surfaces in pool areas, locker rooms,
kitchens, and stairwells.
EASY TO USE
Simply load the KLEEN-SAFE with the provided multi-surface cleaner and
rinsing agent. Then, use the solution hose and high-pressure gun to get the job
started. This system features chemical metering with a wash-and-rinse,
low/high, adjustable pressure gun. Use the scrub brush or floor squeegee
wand, along with the drying appliance attachment and hand squeegee, for
great professional results.
PORTABILITY
With it’s heavy-duty 12” wheels and 5” casters, the KLEEN-SAFE maneuvers in tight spaces and hard-to-reach spots.
PRIMING
Mytee Products, Inc. is the first in the industry to introduce the 60 second
electronic, hassle-free prime. With just a push of a button, your KLEENSAFE will prime in 60 seconds, without a priming hose!
6
Page 8

Set-up
1. You will find a black plastic 45-degree elbow inside the machine. Place
this elbow on the drain valve on the rear of the unit. The elbow will direct
the flow of recovered water downward.
2. Plug in yellow electrical cord into a 20-amp circuit outlet.
3. Fill solution tank with water, and add 1/2 cup of rinse additive.
4. It is very important that you prime the pump
. To do this, plug in solution
hose to the quick disconnect and cleaning tool. Turn the pump switch (4) on
and depress prime button for a continuous 60 seconds.
N
OTE: THE GAUGE WILL NOT REGISTER PRESSURE WHILE THE PRIME SWITCH IS
DEPRESSED
5. Next, install the containers of cleaning solution into blue baskets under the
handle on the rear of the machine. Install the metered supply tubes into the
cleaning chemical.
6. For first time use, and units that have air bubbles in chemical tubes (“a dry
system”), you must prime the chemical injection system. To do this, open the
solution tank cover, remove clear tube, take off colored metering tip, and
replace the tube. Turn chemical selection knob to desired chemical. With the
pump still on, adjust trigger gun to low-pressure chemical position (nozzle
pulled out), and pull trigger to verify chemical delivery. Select the proper
metering tip for desired ratio. Once again, remove tube in solution tank,
install desired tip, and replace tube.
7. With the machine plugged in, solution tank full, and pump primed, you are
now ready to begin cleaning.
7
Page 9

1. To begin cleaning, make sure trigger gun is in the low-pressure chemical
position (nozzle pulled out.) Spray desired areas thoroughly by rotating
nozzle to desired fan pattern (left= stream, right= fan.)
2. When desired application of chemical is obtained, set trigger gun to the
high-pressure solution position (nozzle pushed in), and rinse off chemical.
3. The pressure gauge (3) registers the pressure output of the spray gun.
Pressure can be regulated with the control knob located on the front, lower
right of machine. To increase pressure, turn knob clockwise, and to
decrease pressure, turn it counter-clockwise.
4. When complete, turn pump switch (1) OFF.
5. To remove water from floor, attach green vacuum hose to the recovery
tank inlet, and attach floor squeegee wand. Turn vacuum switch (2) ON.
With a level back and forth motion, suction up excessive water. For larger
puddles, use the gulper tool instead of squeegee.
6. To dry off surfaces, attach yellow vacuum hose to exhaust fitting at the
lower rear of machine. Turn vacuum switch (2) ON. For smaller and harder to reach areas, use the wand and dryer nozzle.
Operation
KS500
8
Page 10

TROUBLESHOOTING
SYMPTOM: Unit will not turn on.
PROBLEM: Not plugged in.
SOLUTION: Plug machine in proper outlet.
PROBLEM: Circuit breaker has popped.
SOLUTION: Reset circuit breaker. Make sure no other items are running on the
same circuit as machine. Outlet must be a 20-amp circuit.
PROBLEM: Wire from power cord has become disconnected from terminal
block.
SOLUTION: Reattach wire to terminal block.
SYMPTOM: Pump is not running properly.
PROBLEM: Quick disconnects are not completely locked together.
SOLUTION: Snap quick disconnects firmly together.
PROBLEM: Switch on switch plate is bad.
SOLUTION: Replace switch.
PROBLEM: Jets on wand are clogged.
SOLUTION: Clean jet with soft wire brush or remove jet and flush clean.
PROBLEM: Filters are clogged.
SOLUTION: Remove filters and rinse with clean water.
PROBLEM: The solution tank is empty.
SOLUTION: Fill the solution tank up with a premixed detergent.
PROBLEM: Pump wire has become disconnected.
SOLUTION: Reconnect wire.
PROBLEM: Pump motor brushes are worn out.
SOLUTION: Replace pump.
PROBLEM: Pressure drops and pump pulsates and/or makes noise.
SOLUTION: With pump running, and solution hose and cleaning tool attached,
depress priming button for 60 seconds.
PROBLEM: Pump is pulsating.
SOLUTION: Tighten all hoses. Check for leaks.
9
Page 11

PROBLEM: Pressure switch on pump head is bad.
SOLUTION: Replace with new pressure switch.
SYMPTOM: Vacuum motor not working properly.
PROBLEM: Switch on switch plate is bad.
SOLUTION: Replace switch.
PROBLEM: Hose not connected tightly to wand or machine.
SOLUTION: Connect hose tightly.
PROBLEM: Wand is clogged with hair, carpet fibers and or debris.
SOLUTION: Clean wand.
PROBLEM: Drain valve is not shut completely.
SOLUTION: Close drain valve completely.
PROBLEM: Vacuum tank lid is not on tightly.
SOLUTION: Secure the vacuum tank lid on tightly.
PROBLEM: Vacuum tank lid or the vacuum tank is cracked.
SOLUTION: Replace the vacuum tank lid or the vacuum tank.
PROBLEM: Vacuum hose is cracked or split.
SOLUTION: Replace vacuum hose.
PROBLEM: Ball float is shut off.
SOLUTION: Empty the vacuum tank of all wastewater.
PROBLEM: Vacuum motor armature is worn out.
SOLUTION: Replace vacuum motor.
PROBLEM: Water is coming out of the vacuum motor.
SOLUTION: Use a low foaming detergent.
PROBLEM: Ball float is not installed correctly.
SOLUTION: Make sure the ball float is firmly installed on the elbow.
10
Page 12

DESCRIPTION PART NUMBER
3 stage
vacuum motor
C302
450 psi pump C313
1/4” male
quick disconnect
B101
1/4” female
quick disconnect
B102
1/2” filter strainer B119A
In-line filter B175
Dema injector B223
11
Page 13

DESCRIPTION PART NUMBER
6” vacuum
tank lid
G056
Float assembly cage H235
Float assembly
elbow
P755
Plunger and seals RK0022
Valves and O-rings RK0023
Cam bearing RK0024
2 position switch E515
12
Page 14

DESCRIPTION PART NUMBER
Prime/pressure
relief cilinoid valve
B239
High pressure hose A943
Scrub brush H695
Scrub brush handle H696
12” hand squeegee H699
Gulper tool H700
18” floor squeegee
with wheels
H815
13
Page 15

DESCRIPTION PART NUMBER
35’ green
vacuum hose
H843
35’ yellow
vacuum hose
H844
2 piece, aluminum,
button-lock wand
P505
Hose hanger H375
Chemical container
bracket
H688
High pressure
spray gun
A1007
Dryer nozzle A919
14
Page 16

IMPORTANT INFORMATION
Model # ________________________ Serial # ______________________
Distributor name and phone# ______________________________________
Date of purchase ___________________
NOTES
15
 Loading...