

Mystery Electronics EasyMix EM12 User Manual
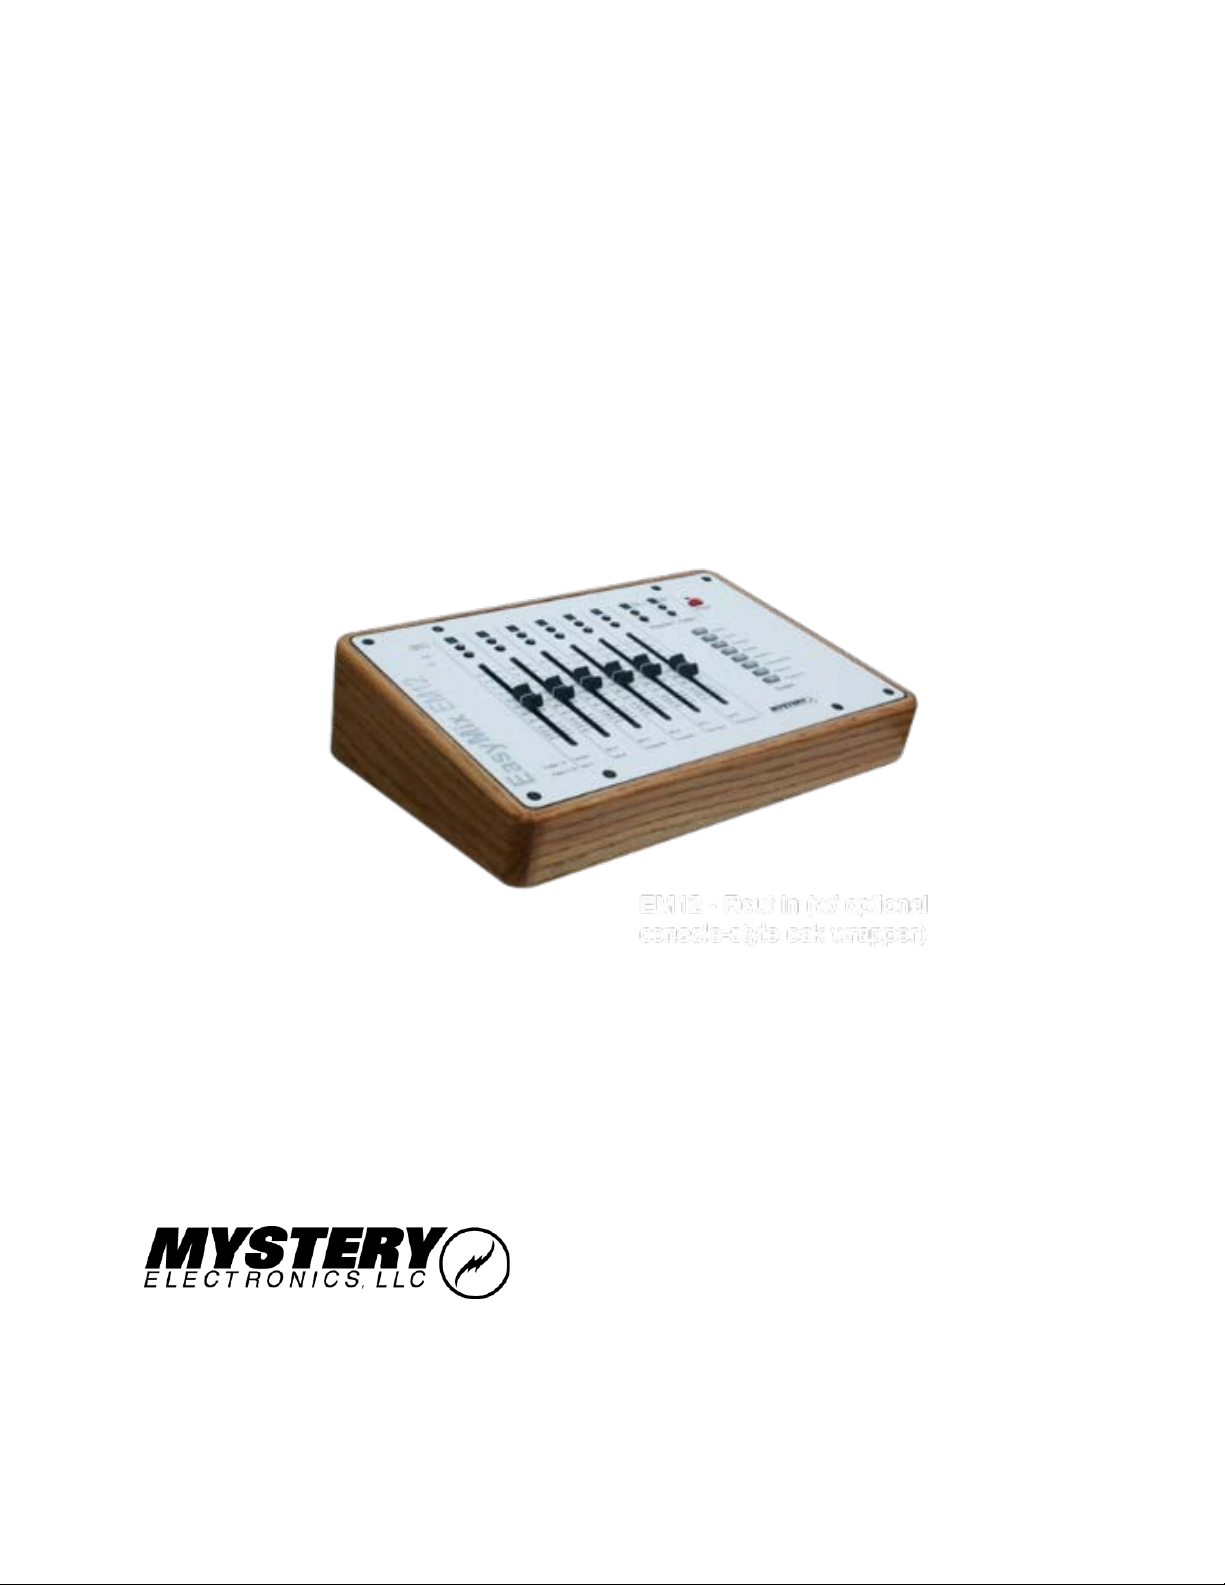
EasyMix DSP Remote Control
Model EM12 User Guide
The Tactile DSP Remote Control Solution
6438 Morton Road
Greenbrier, TN 37073
800 798 2256 sales
615 643 8460 support
615 643 8464 fax

Contents:
How to connect to the EM12 3
Home 3
Site Setup 4
Site Setup – BSS Soundweb London 4
Site Setup – Rane HAL 6
Site Setup – Symetrix SymNet and Jupiter 7
Site Setup – Biamp Tesira 8
Site Setup – Q-Sys 10
Network 11
EM 12 Setup 11
Fader Cal 14
Update 14
Page | 2

How to connect to the EM12.
The EM12 is set to use DHCP by default. The easiest method of locating the EM12 is to connect
it to a LAN that has a DHCP server. You can manually assign a static IP after accessing the EM12
setup pages.
If your LAN has a DHCP server enabled:
1) Connect the EM12 to your LAN.
2) Use one of the following options to locate the IP address of the EM12.
a) View the IP address in your DHCP server’s address table.
b) Download and run our Windows discovery tool.
c) Install and run a network diagnostic app such as Fing.
If your LAN doesn’t have a DHCP server enabled:
1) Connect the EM12 to your LAN
2) The default static IP address is 192.168.0.205
Home (status) page
• Status Shows connection status
• Connection Info Shows DSP brand specific connection info
• EasyMix IP EasyMix IP Address
• DSP IP DSP IP Address
• Selected Type Displays currently selected DSP brand or model
• DSP response time Displays the amount of time it takes for the DSP to respond to
requests from the EM12.
• DSP Loop Elapsed time since last communication with the DSP.
• Button Pressed Currently pressed button on the EasyMix.
• Firmware Version Currently loaded firmware version.
Test Faders – allows you to run a test of the fader motors
Test Indicators – allows you to run a test of the LEDs.
Page | 3
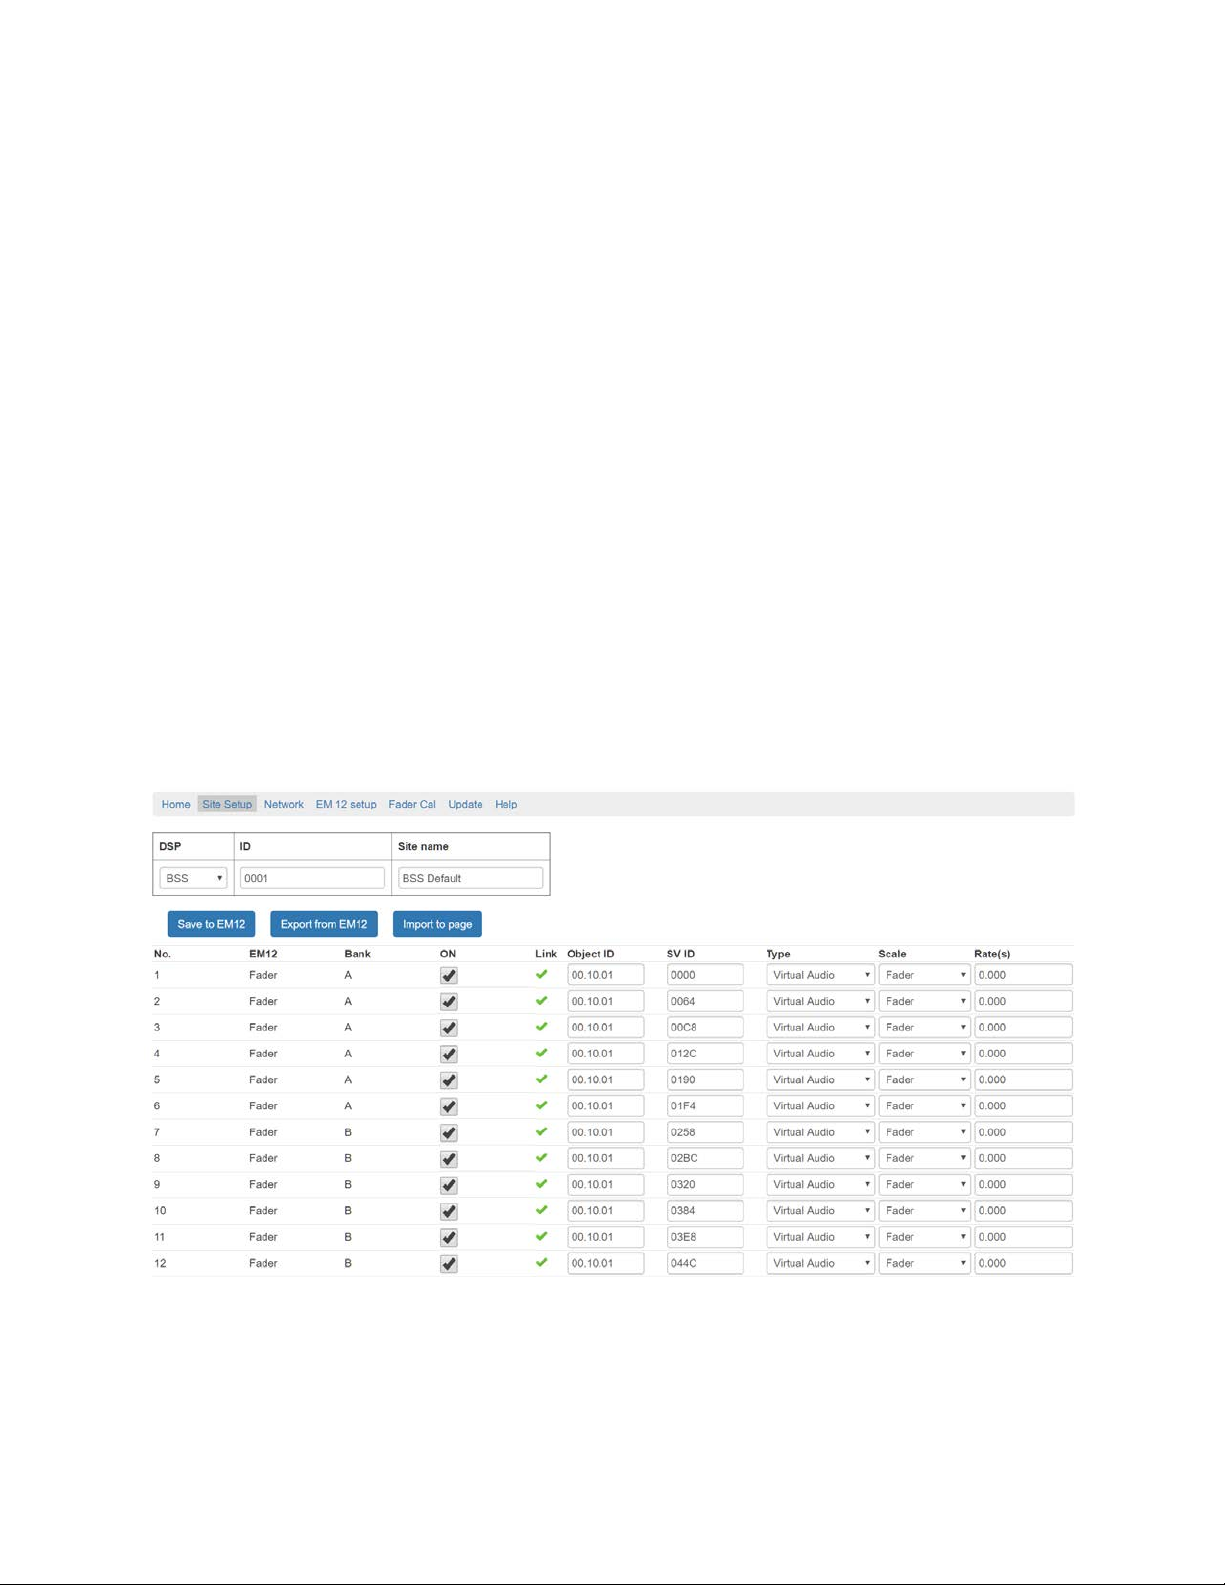
Site Setup Page
The Site Setup page allows you to link the EM12 controls to the controls in your DSP
configuration file. The following controls are available for linking.
• Faders 1-24 (Banks A, B, C, and D)
• Low Shelf 1-24 (Banks A, B, C, and D)
• Hi Shelf 1-24 (Banks A, B, C, and D)
• Mid EQ 1-24 (Banks A, B, C, and D)
• Auto button 1-24 (upper button above each fader) (Banks A, B, C, and D)
• Mute button 1-24 (lower button above each fader) (Banks A, B, C, and D)
• Meter 1-24 (lower led above each fader) (Banks A, B, C, and D)
• HG 1-24 (upper led above each fader) (Banks A, B, C, and D)
• System Buttons 1-12
• Status 1-4
Choose a DSP from the dropdown list to load the default configuration for that DSP.
Site Setup Page – BSS Soundweb London
Choose BSS to load the default settings for a BSS DSP. The default settings set the DSP ID to 1
and the DSP and Communication type (found on the Network page). Note: Refer to the Audio
Architect help file for instructions on how to obtain the correct Object ID’s and SV ID’s from
your DSP file.
Page | 4

Save to EM12 - Saves the current configuration to the EM12. Specify a Site name to name the
configuration.
Export from EM12 - Saves the current configuration stored in the EM12 to a file for later
import.
Import to page - Load a configuration file to the user interface for editing.
Note: to save a configuration file for later import, configure your device and click Save to EM12.
This stores the file to the EM12. Then click Export from EM12 to create a file that can be
imported.
Toggle individual controls on or off independently.
Link show the status of a particular control.
• = unknown. Save to EM12 to update the setup.
• = no communication with particular control on the setup file. Check your settings.
• = Communication established.
Enter the Object ID in hexadecimal for the processing block that you wish control. Note: Make
sure your Audio Architect file is set to display Object ID's in hex. Go to File > Application Options
> General Settings and enable both Display Addresses in Hex and Display Object addresses in
Octals.
Enter the SV ID in hexadecimal for the individual control on the processing block. Do not enter
0x at the beginning of the ID.
Set the control Type.
Options are:
• Virtual Audio - For all audio objects
• Virtual Logic - For all logic objects.
Set the Scale to match the scaling of the control.
Options are:
• Button - Used for mutes and toggles.
• Fader - Level controls
• EQ Fader
• Meter
• Indicator
Set the control Rate as desired (seconds). Set meters to longer intervals to reduce load on the
network.
Page | 5
 Loading...