

MySpy WiFi Messenger Alarm Quick Start Manual
MySpy™ WiFi Messenger Alarm
Quick Start
Before You Begin
Mount and wire your alarm according to installation instructions.
NOTE:
• Cellular WiFi hotspots are not recommended for use with
this WiFi alarm, as intermittent or unreliable notifi cation
service can result.
• WPA2 Security must be enabled on the wireless router
for WiFi connections.
This quick start manual covers setup using a WPS connection
to your wireless network. For setup using other network
connection options, please see the full setup manual at
www.sjerhombus.com
MySpy™ WiFi
Messenger
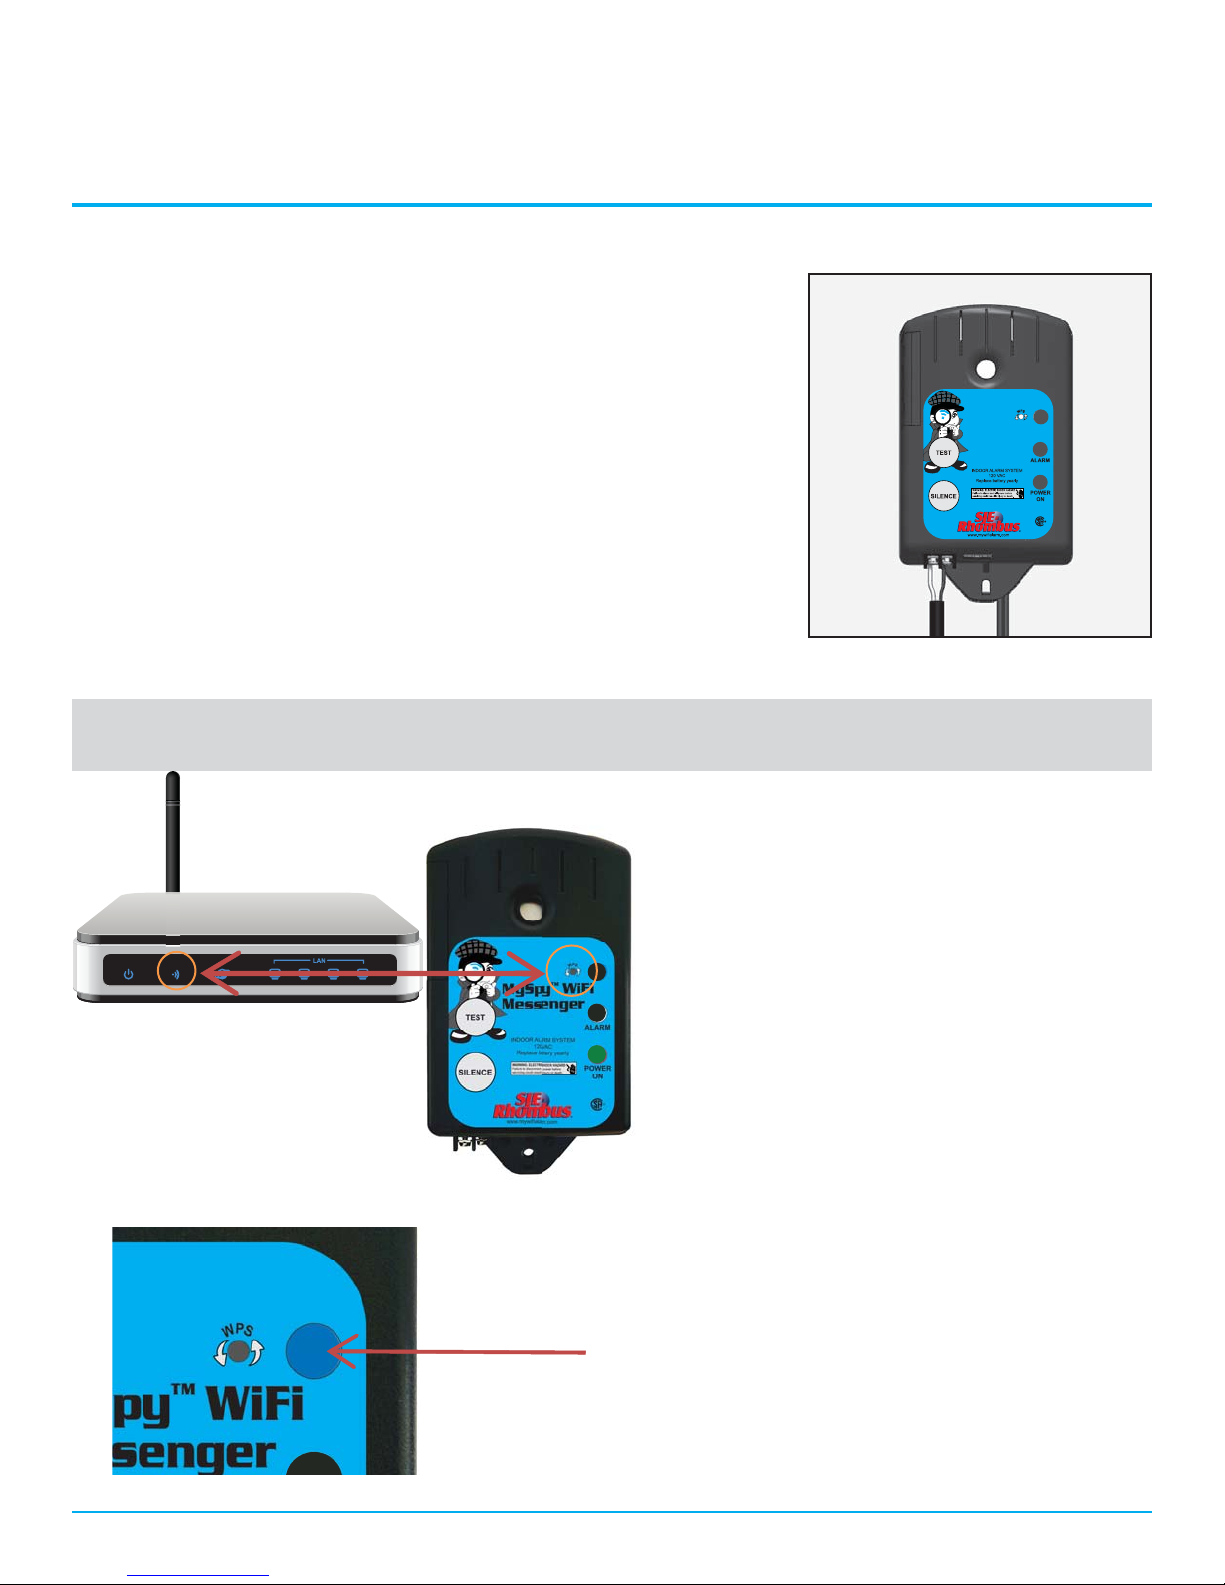
STEP 1: WiFi Network Setup (WPS)
1. Press the WPS button on your wireless
router (often on the back side of router).
2. Press the WPS button on the MySpy™ WiFi
POWER WPS INTERNET
Messenger Alarm (the blue network status
light will fl ash continuously).
The blue network status light will illuminate
steadily when the MySpy™ WiFi Messenger
Alarm is successfully connected to the wireless
network.
E1
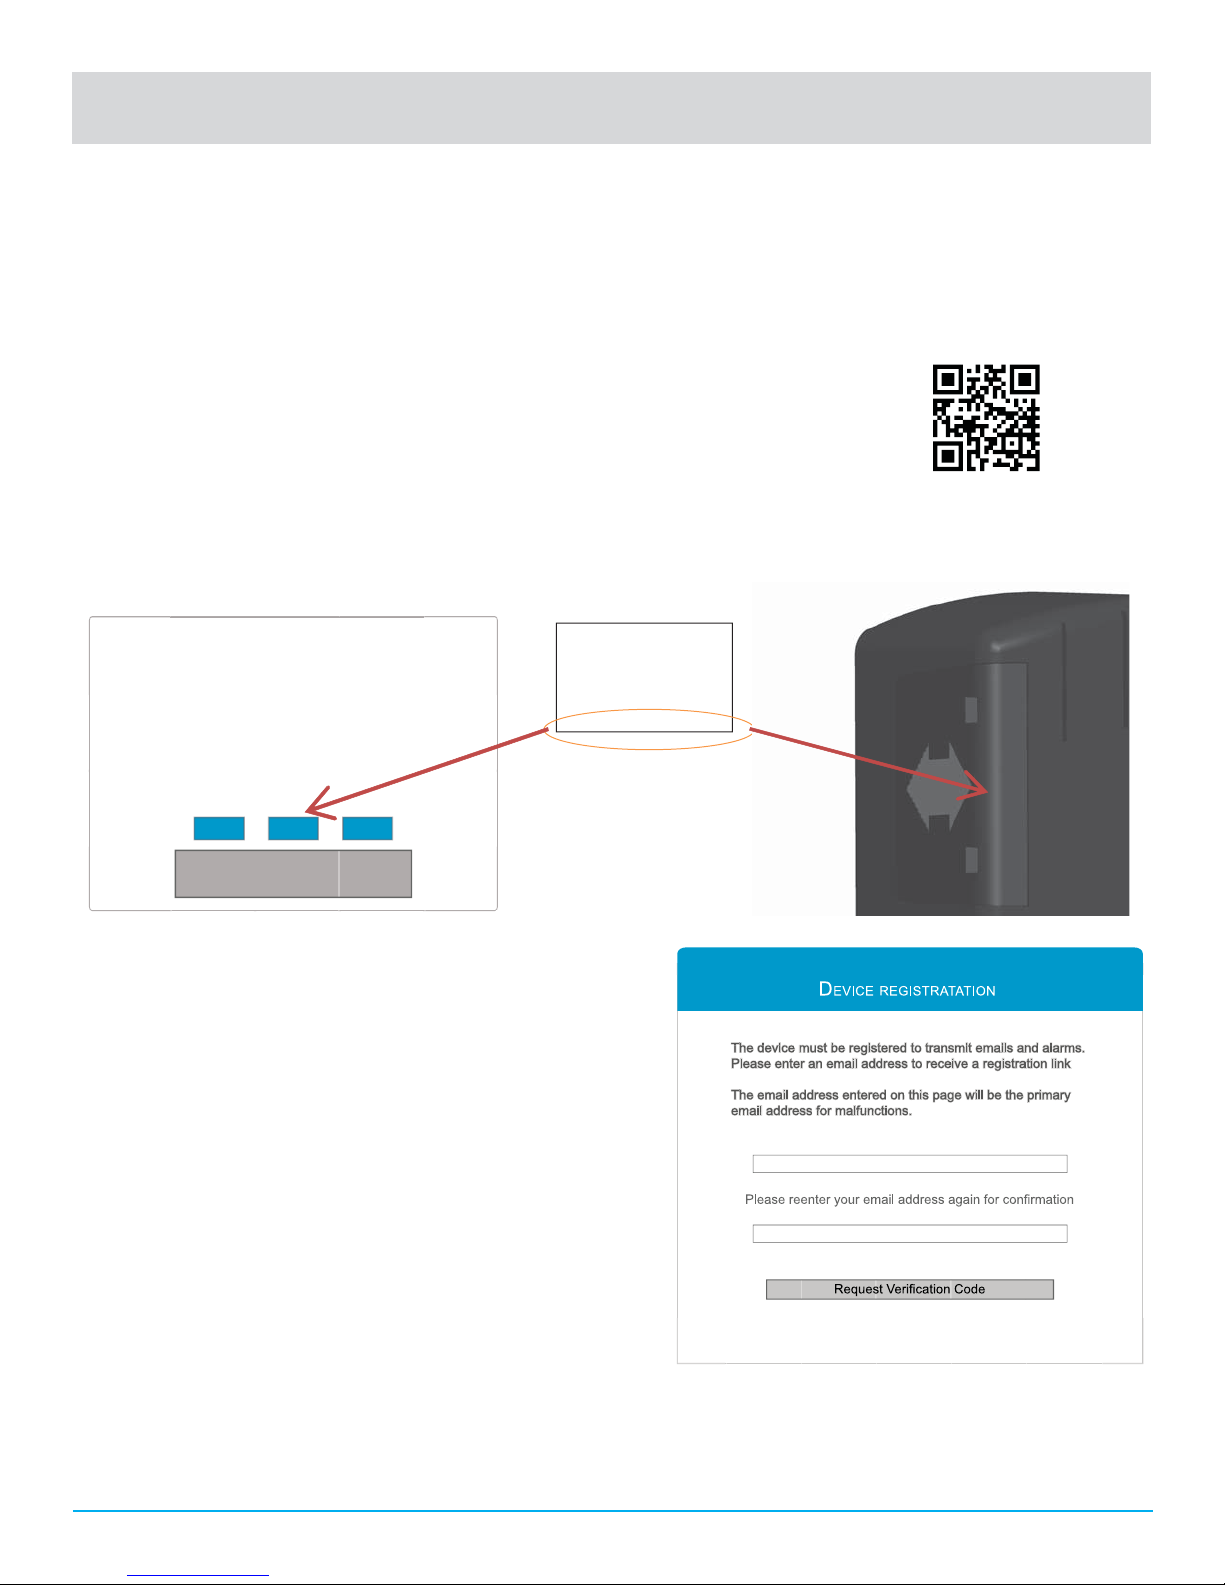
STEP 2: Verifi cation
1. After the alarm is successfully connected to the wireless network, allow 2 minutes before
proceeding.
2. Using your internet connected device (i.e. Laptop, Desktop, etc.), open a new web browser
window or tab.
Note: you must be connected to the same router as your MySpy™ WiFi Messenger Alarm.
3. Type the following into the address fi eld at the top of your web browser:
www.mywifi alarm.com or scan QR code.
4. Follow the registration link.
5. After reading and accepting the terms of the MySpy™ WiFi Messenger Alarm, enter your alarm’s
Unit ID# located on the back of the battery compartment cover. (DO NOT ENTER THE COLONS).
Click Confi gure.
NOTE: Before continuing, make sure device shows
a CONSTANT BLUE LIGHT (not flashing light)
Please enter the Unit ID# on the label of your alarm system
This is found on the back of the Batery Compartment lid
This will be similar to A1B5 C3D2 E7C2
WARNING!
USE ALKALINE BATTERY
ONLY, NON-ALKALINE
BATTERY MAY REDUCE
PRODUCT PERFORMANCE
UNIT ID#
A1B5:C3D2:E7C2
Configure
6. If the MySpy™ WiFi Messenger Alarm has not been
verifi ed, the DEVICE REGISTRATION screen will
open and you will be required to enter an email
address to receive a verifi cation link. Enter your
email address and press the Request Verifi cation
Code button.
Note: All future alarm notifi cations will be sent to
this verifi cation email address in addition
to the email addresses entered on the MySpy™
WiFi Messenger Alarm’s setup page.
7. An email will be sent to the verifi cation email
address entered with a link to the Notifi cation Setup
page. Click this link to access the Notifi cation Setup
page. This email must be received and opened by
the same device used for the steps above.
8. If the MySpy™ WiFi Messenger Alarm has already gone through the verifi cation process, the web
browser will immediately be redirected to the Notifi cation Setup page.
E2
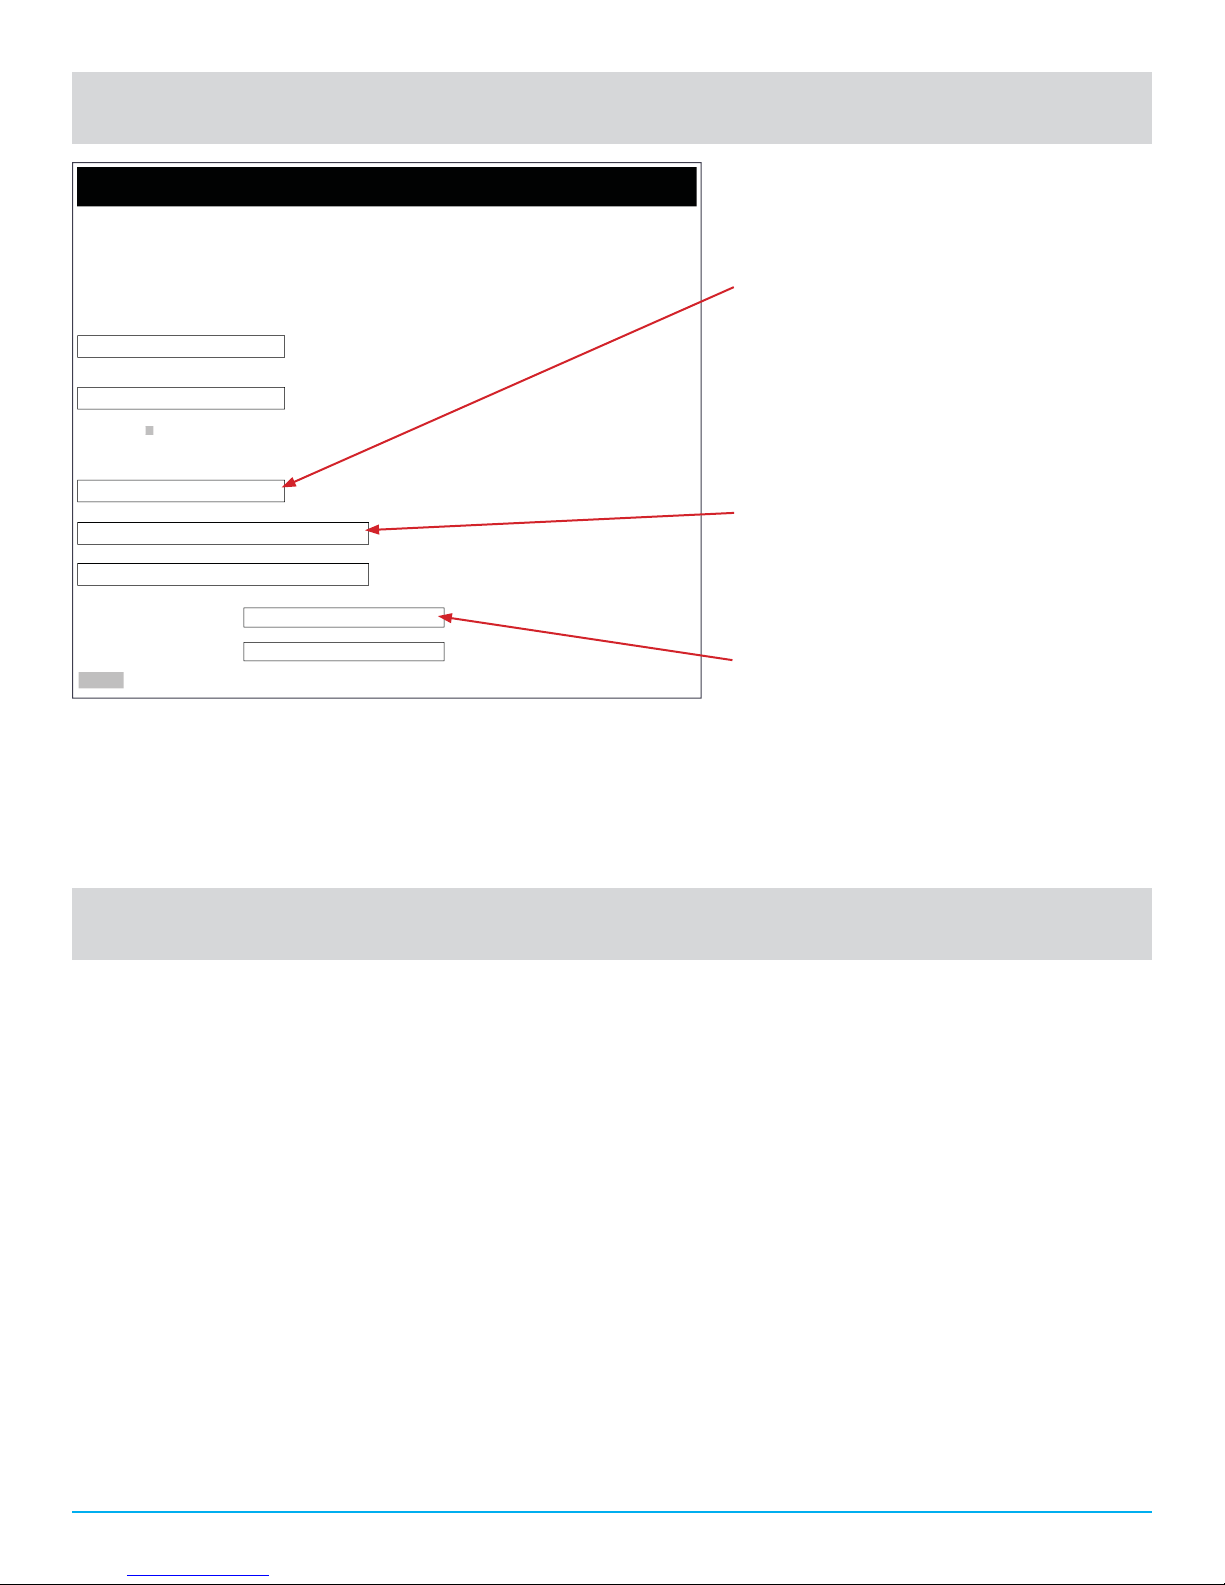
STEP 3: Alarm Notifi cation Setup
S
t
Notification Setup
At least one email address or one phone number must be provided to receive notification messages.
IP Address: 10.4.150.148
MAC Address: A1:B5:C3:D2:E7:C2
Battery Status: None (Hit F5 to refresh)
Network Name (SSID)
Alarm setup page, fi ll in the
appropriate data:
a. Device Name: Enter a unique
device name for each MySpy™
WiFi Messenger Alarm being
1. On the MySpy™ WiFi Messenger
WPA2 Security Key
installed.
EXAMPLE: “Cabin Sump Alarm”
No Security
Device Name
Email Address 1
Email Address 2
Maximum 30 characters including
spaces.
b. Email Addresses: Fill in the email
addresses which will be receiving
notifi cations from the MySpy™
Example: 123-456-7890
Text Message Phone Number 1
Text Message Phone Number 2
Example: 123-456-7890
WiFi Messenger Alarm.
c. Enter the phone number of
Submit
ubmi
the device (or devices) that will
receive the text message.
Note: A minimum of one email address or text message phone number must be entered to receive
alarm notifi cations.
2. Click Submit to save your notifi cation data.
STEP 4: Setup Testing
1. Press and release the “TEST” button on the MySpy™ WiFi Messenger Alarm. The alarm horn will
sound and the alarm light will activate while the “TEST” button is being held.
2. Verify that an alarm notifi cation is received via email or text.
Note: It may take several minutes for the message to appear in your email inbox or message folder,
depending upon email server traffi c or other circumstances. If you have not received a notifi cation
within 5 minutes, verify the email address and/or cellular phone information is entered correctly and
that any email fi lters are set to allow messages from mywifi alarm@mywifi alarm.com.
While using a WiFi connection, a signal strength rating will also be sent with the alarm and power
restored notifi cations.
5.0 - 10.0 Great!
3.0 - 4.9 Good. No signal loss is expected.
2.0 - 2.9 Marginal. You may experience occasional signal loss.
0.0 - 1.9 Weak. Move alarm closer to wireless router.
E3

Troubleshooting Guide
Network status light fl ashes:
• One Flash Every Five Seconds: No WiFi can be found. Verify wireless router is powered
and functioning. Verify alarm is within range of wireless router.
• Two Flashes Every Five Seconds: An IP address cannot be obtained. Cycle the power to
your wireless router. Enable DHCP in your router set up (see router manufacturer’s
user’s manual).
• Three Flashes Every Five Seconds: Email is unable to be sent. Verify the internet
connection is functioning. Verify the email address is valid.
Alarm webpage is not found.
• Alarm is not connected to a wireless network. Connect to the wireless network according to
the setup instructions.
• Your internet connected device (laptop, desktop, tablet, smartphone, etc.) is not connected
to the same wireless network as the alarm. Connect your device to the same wireless
network as the alarm.
• The correct Unit ID# was not entered into the browser: www.mywifi alarm.com. Follow the
registration link. Re-enter the correct Unit ID# for your alarm.
Notifi cation emails or text messages are not received.
• Email address or cellular information was not set up correctly. Verify email addresses are
valid and/or cell numbers are entered correctly.
• Internet access is not functioning. Repair the internet connection.
• Notifi cation email has been blocked. Unblock or allow emails from
mywifi alarm@mywifi alarm.com in your email account.
• The MySpy™ WiFi Messenger Alarm terms and conditions have not been accepted and/or
a verifi cation email has not been sent. Follow steps in the “Verifi cation” section.
Congratulations!
Your MySpy™ WiFi Messenger Alarm
is now confi gured and ready to be used.
(Remember to test your alarm on a regular basis to ensure proper operation)
E4
 Loading...