

Page 1
Installation, Operating, Maintenance
and After Sales Manual.
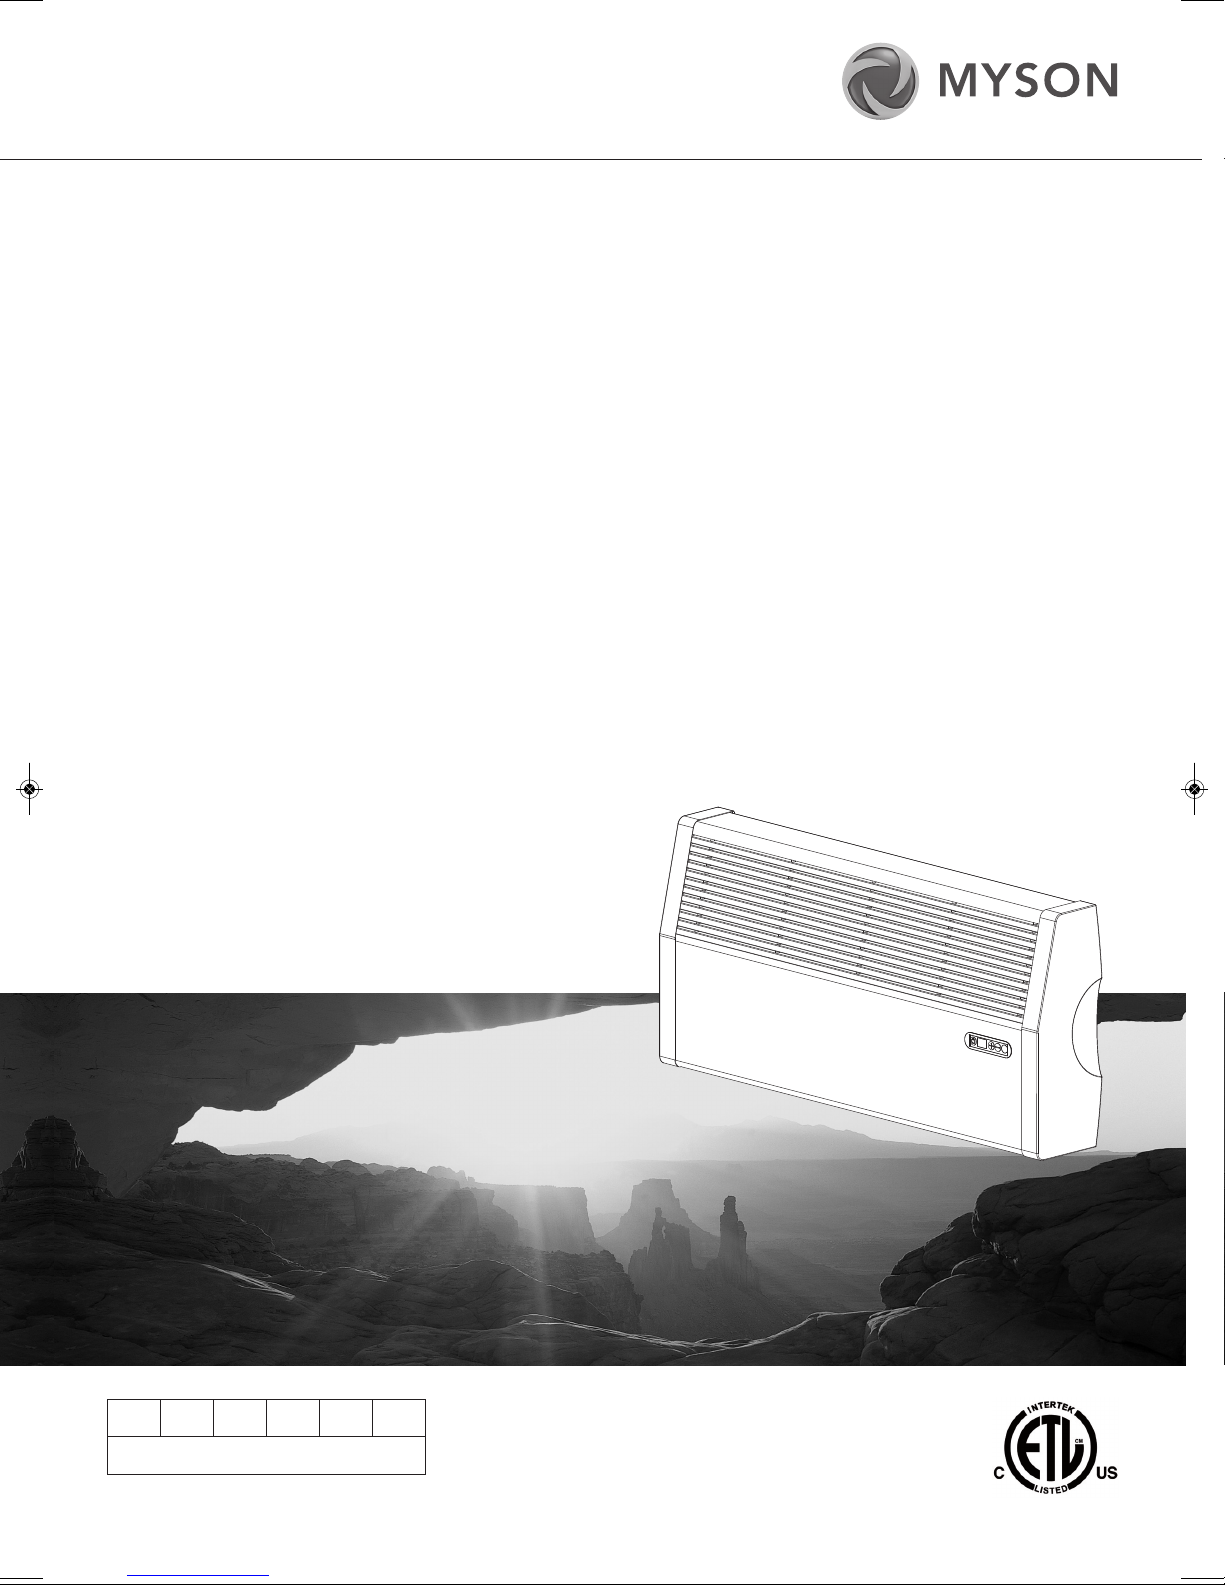
LO-LINE RC & LO-LINE RC Heater/Cooler
Models: 6-4, 9-6, 14-10, 19-15
heatingthroughinnovation.
Product Serial Number:
Installation Date:
Please leave this manual with the end user.
Part Number: 1371053
01.01.2012 ISSUE 2
Issue 2
Tested to UL & CSA Standards
Page 2

Contents
1.0 General Information 03
2.0 Heating System Design 03
3.0 Unit Selection/Sizing 03
4.0 Location 03
5.0 Preparation 04
6.0 Fixing 04
7.0 Water Connections 05
8.0 Electrical Connection 06
9.0 Commissioning Procedure 07
10.0 Technical Data 08
11.0 Operating Instructions 09
12.0 Troubleshooting 10
13.0 Maintenance 11
Page 3

1.0 General Information
LO-LINE RC & LO-LINE RC Heater/Cooler
03
l This MYSON LO-LINE fan convector is designed for wall
mounted installation with a minimum installation height of
6 inches to the underside of the unit.
l The LO-LINE should only be used on closed circulation, two
pipe, pump assisted central heating systems (LO-LINE), on
heating and cooling systems (LO-LINE Heater/Cooler), or as a
stand alone zone.
l The LO-LINE Heater and Heater/Cooler can be used on low
water temperature systems.
l The minimum side clearance is 4 inches.
l In rooms with ceiling heights above 10ft a ceiling fan or other
means of heating stratification should be considered.
l Before proceeding with the installation, the heating system
design must be considered and the unit correctly sized
to meet the heat loss requirements of the room at normal
fan speed.
2.0 Heating System Design
This fan convector can be fitted on a series loop with mono-flo
or venturi Tees, on a two pipe system, or on a stand alone zone.
For optimum fan convector heating performance the system
must be capable of providing sufficient hot water through the
heat exchanger. This means that:
1. Care must be taken in sizing both the pump and the piping.
2. The minimum pipe size from boiler to fan convector must be
1
/2inch copper tube.
3. Where the unit is fitted on to a system with other emitters a
separate circuit for the fan convector should be considered
to provide adequate water flow.
l This unit is supplied with an infra red remote control system
and has 3 operating modes:
Automatic – the desired room temperature is programmed in
to the unit and the fan speed is automatically adjusted until
the desired room temperature is achieved.
Fan only – allows user selection of any of the 3 available
fan speeds irrespective of room temperature or water
temperature in the coil.
Fan only with water temperature control – allows the user to
select any of the available fan speeds, which will operate only
if the water temperature in the coil is above 90°F. This enables
control of the unit via an externally mounted room thermostat
if desired.
4. The system water must be above 90°F for heating mode.
5. Optimum performance of this unit will require effective
balancing of the whole system.
6. This unit must not be used to replace a radiator in an
existing system unless an adequate flow of water through
the unit can be guaranteed.
7. The loop must be pumped. LO-LINE fan convectors are not
suitable for gravity circulation systems.
1.02.03.04.0
3.0 Unit Selection/Sizing
Heat output performance is given in the Technical Data section
of this manual. Outputs are shown for the three fan speeds,
however, it is important to size the unit to match the calculated
heat loss requirements of the room with the unit operating on
the normal fan speed. The higher fan speeds are used in
automatic mode when the room temperature is significantly
lower than the preset temperature.
4.0 Location
l This LO-LINE unit may be fitted to any convenient wall at a
height from floor level that suits the application, providing an
unimpeded flow of warm air into the area to be heated.
l The minimum distance from the underside of the unit to floor
level is 6 inches.
When establishing the temperature difference, i.e. entering
water to room temperature, allowance should be made for
temperature drop in the system. It is the water temperature at
the unit that dictates the output.
l Prior to installation the wall should be checked to make sure
it is straight and flat, to avoid twisting the unit.
l For cooling applications, the need for disposal of condensate
may influence the position of the unit.
Page 4
04
Cover Fixing Screws
B
C
2 inches
A
2 7/
16
2 1/
4
min each
side
9
3
/
4
15
3
/
16
2
3
/
16
4 1/
4
6 inches
LO-LINE RC & LO-LINE RC Heater/Cooler
5.0 Preparation
Before proceeding with the installation, unpack the carton
contents and check against the checklist below:
1. LO-LINE or LO-LINE Heater/Cooler unit.
1
2.
/2inch isolating valves (1 pair).
3. Instruction manual.
4. Fixing kit (rubber mounts and cable gland).
5. Remote control handset.
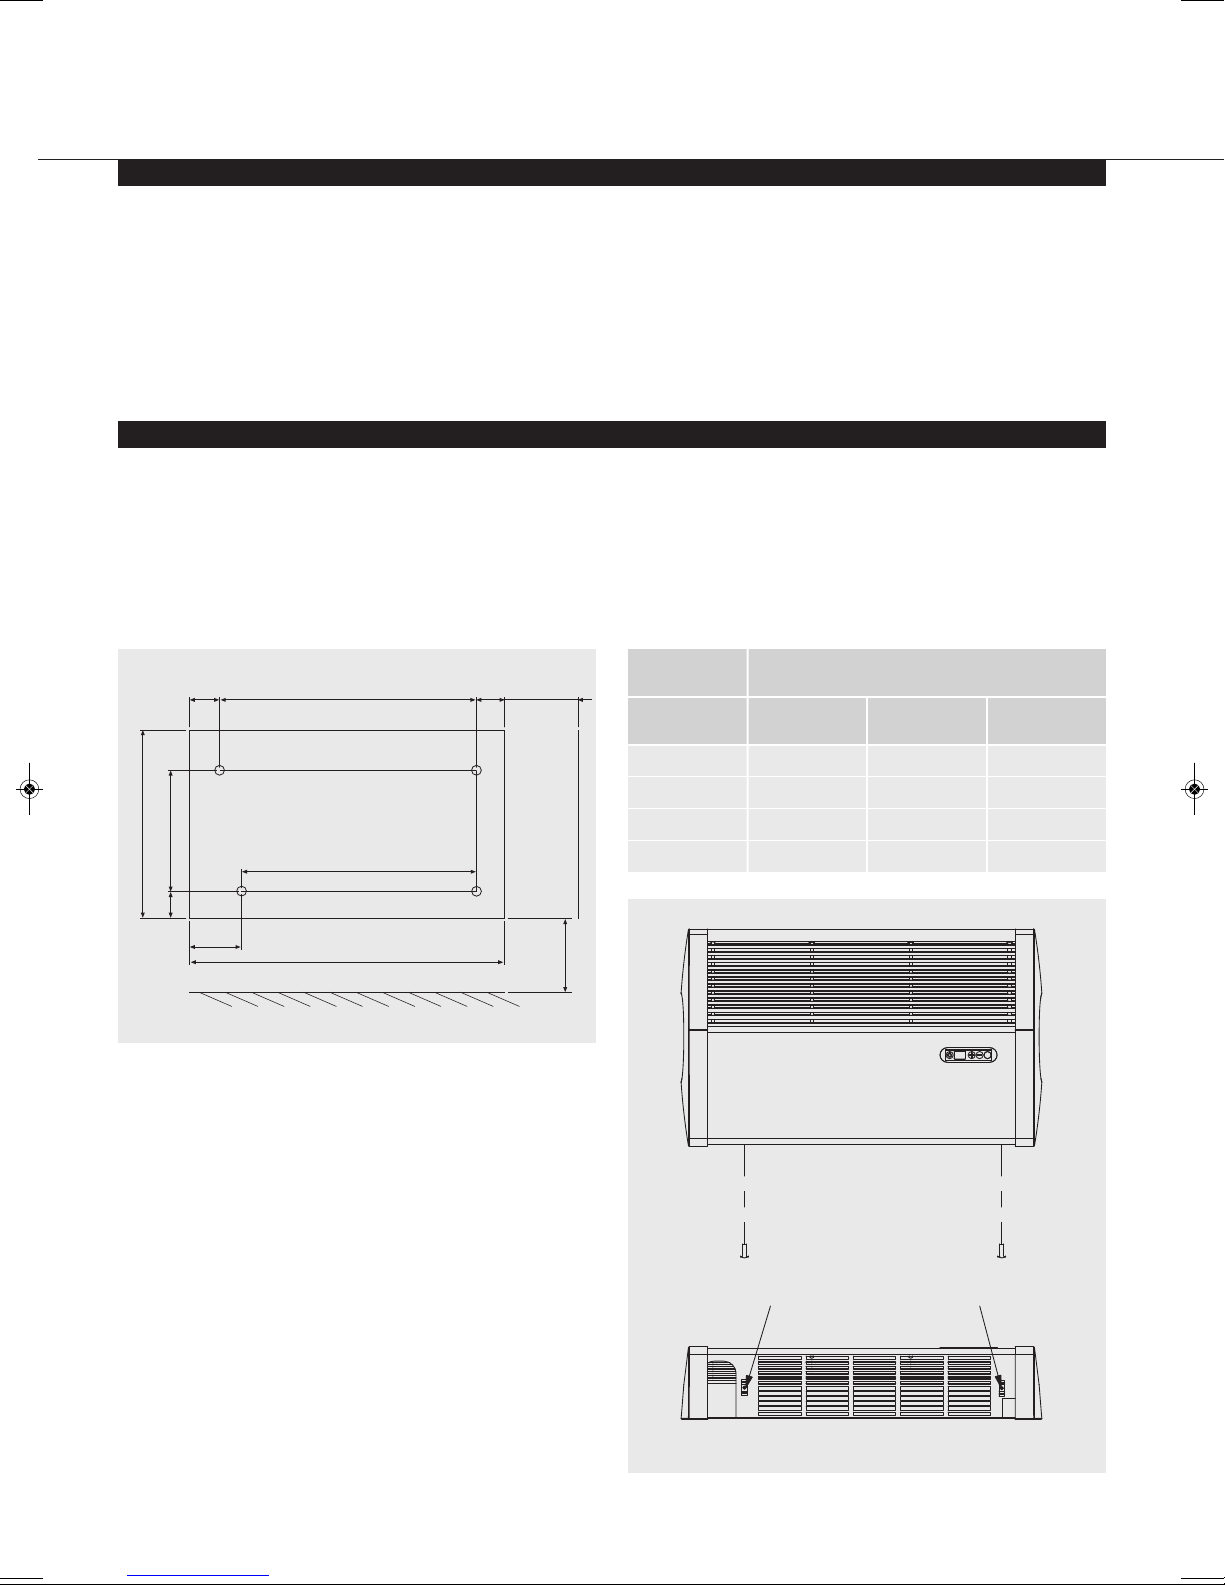
6.0 Fixing
l Using the fixing dimensions (see fig. 1), mark the fixing hole
positions on the wall.
l Plastic or metal anchors suitable for No.8 wood screws should
be used for mounting the convector to the wall.
l Remove the backing from the self-adhesive washers and place
on screws with adhesive side towards the point.
Fig. 1
l Tighten the screws into the wall leaving about
projecting.
l Press adhesive washers to the wall.
Dimensions (inches)
Unit A B C
19-15 4413/
14-10 335/
9-6 253/
6-4 205/
16
8
8
8
401/
297/
2011/
1515/
16
8
16
16
383/
2613/
1815/
141/
3
/8inch
8
16
16
8
Remove the outer casing as follows:
l Remove the 2 screws from the underside of the unit (see fig. 2).
l Lift off the outer case.
l Fit chassis on to mounting screws and tighten.
Fig. 2 Case fixing screw positions
Page 5

7.0 Water Connections
5
1
/
8
7
1
/
2
2
11
/
16
2
3
/
8
3
29
/
32
2
27
/
32
3
29
/
32
2
3
/
8
LO-LINE RC & LO-LINE RC Heater/Cooler
05
l Connect unit to system flow and return pipes using the two
1
/2inch isolating valves (see fig. 3).
Note: To ensure effective venting of the heat exchanger the
supply pipe should be connected to the bottom connection of
the heat exchanger.
Note: For LO-LINE installations pipe-work must not be routed
directly underneath the unit as this will adversely affect the
operation of the integral room thermostat. If this cannot be
avoided, the pipe-work must be boxed to prevent heat rise.
l Ensure system is flushed in accordance with recognised best
practice and a suitable inhibitor is added to the system as
necessary.
l Open valves fully, check pipe connections for leaks and vent
the heat exchanger - see Commissioning Procedure.
LO-LINE Heater/Cooler installations with chilled water will
require provision for condensate disposal in accordance with any
local regulations.
A drain tray is fitted for condensate collection within the unit.
This should be connected to a 15mm drain pipe.
Note: External pipe-work carrying chilled water must be
insulated. Use a suitable sealant as necessary to ensure that
condensate does not spill or leak. Once connection to the
system supply and return pipes is made, any exposed internal
1
/2inch pipework and isolating valves must be insulated.
5.0
6.07.0
Fig. 3
Page 6

06
O O
LN
Motor
Power Board
Control Board
Air Sensor
Water Sensor
O O
Brown
Blue
White
Yellow
G
LO-LINE RC & LO-LINE RC Heater/Cooler
8.0 Electrical Connection
WARNING: This appliance must be grounded. The electrical installation must comply with state or local codes.
l This unit is supplied with a factory fitted 3 core cord, 6ft in
length with moulded plug.
Fig. 4 Wiring diagram
Page 7

9.0 Commissioning Procedure
Dipswitches
LO-LINE RC & LO-LINE RC Heater/Cooler
07
l Fill and vent the system.
l Open both valves fully and vent air from the heat exchanger
by unscrewing the air bleed valve situated above the valves in
the angled top of the chassis.
l Check for leaks at pipe connections.
l Refit the outer case and secure using the 2 fixing screws.
l Check the operation of the unit by following the operating
instructions.
l When installation and commissioning are complete, hand over
instruction manual to end-user.
Heat Pump and Low Water Temperature Systems
In heating mode, the control system brings the fan on when the
water in the coil reaches 90°F. For low water temperature
systems, e.g. heat pump systems, it is possible to switch off the
boost speed option in automatic mode so that the unit runs in
medium or normal fan speeds depending on demand. This
means low outlet air temperatures from the unit are avoided
when the room temperature is low in relation to the set
temperature.
This facility can be switched on or off by following the instruction
below:
l Isolate electrical supply.
l Remove outer cover.
l Change switch 1 position according to requirements
(see fig. 4).
l Refit outer cover.
l Switch on electrical supply.
Fan Pulse
Fan pulse mode causes room air to be drawn over the air
temperature sensor periodically to maintain room temperatures
more effectively. In certain circumstances, for example when
units are over-sized in relation to the heat loss of the room, it
may be necessary to turn off this function. Use dipswitch 3
according to requirements.
Displayed Temperature Calibration
Depending on the location of the unit there may be a difference
between the temperature at the unit and the temperature in the
middle of the room being heated.
The displayed temperature calibration function enables
calibration in heating mode of the displayed temperature to the
actual room temperature using the following procedure:
l Run the fan convector until room conditions stabilise.
l Press the ʻOn/Offʼ key and ʻ+ʼ key for 5 seconds (the display
will flash, alternating between ʻroʼ and the calibration
temperature.
l Calibrate the displayed room temperature by using the
ʻ+ʼ and ʻ-ʼ keys with the fan running.
l Press the ʻOn/Offʼ key to finish.
Fig. 5
Switch Switch Down Switch Up
1 Auto Fan Speed Selection 2 Speed 3 Speed
2 Heating / Cooling Heating Heating & Cooling
3 Fan Pulse Off On
4 Temperature Display °F °C
8.09.0
Page 8

08
LO-LINE RC & LO-LINE RC Heater/Cooler
10.0 Technical Data
Heating Performance Data
Model Fan Setting
Flowrate
(GPM)
Entering Water Temperature (°F), entering air temperature 65°F
110 120 130 140 150 160 170 180 190 200
Boost
19-15
14 -10
9-6
6-4
Note: Performance figures for heating and cooling based on a flow rate of 3 GPM. For a flow rate of 1 GPM multiply by 0.87.
Medium
Normal
Boost
Medium
Normal
Boost
Medium
Normal
Boost
Medium
Normal
3
3
3
3
7997 9691 11372 13042 14702 16354 17999 19637 21269 22895
7224 8753 10270 11777 13275 14766 16250 17728 19200 20667
6374 7722 9060 10389 11710 13024 14333 15636 16933 18227
6137 7435 8723 10002 11274 12539 13798 15052 16301 17546
5247 6356 7457 8550 9636 10717 11793 12864 13931 14994
4316 5227 6132 7030 7922 8810 9694 10574 11450 12324
4081 4942 5797 6645 7489 8328 9163 9994 10822 11647
3274 3964 4649 5329 6005 6678 7347 8013 8676 9337
2525 3058 3586 4111 4633 5151 5668 6182 6694 7204
2668 3231 3790 4344 4895 5443 5988 6531 7072 7611
1954 2366 2775 3181 3584 3985 4385 4782 5178 5572
1724 2087 2447 2804 3159 3512 3863 4213 4561 4908
Heat Output (Btu/h)
Test Pressure: 290psi
Max working pressure: 145psi
Water connections:
Electrical Supply: 110V 60Hz
1
/2" compression
Cooling Performance Data (figures @ 50% RH)
Approximate Hydraulic Resistance through Fan Convectors
GPM
3
1
Cooling Performance (Btu/h)
Model Fan Setting
Flowrate
(GPM)
25° 35° 45°
Air-Mean Water Temperature Difference (°F)
Tot. Sens. Tot. Sens. Tot. Sens.
Boost
19-15
14 -10
9-6
6-4
Cooling performance tested in accordance with BS 4856 Part 2. Flow rate 340 ltr/h. Relative humidity 50%.
Medium
Normal
Boost
Medium
Normal
Boost
Medium
Normal
Boost
Medium
Normal
3
3
3
3
5128 4366 8203 5929 11650 6425
4896 4024 7832 5412 11124 6077
4482 3693 7169 4816 10181 5407
4108 3519 6570 4823 9330 5315
3451 2937 5522 3986 7843 4317
2934 2523 4691 3469 6660 3851
2376 1943 3799 2757 5394 3564
2007 1696 3208 2288 4555 2439
1669 1414 2669 1916 3790 2059
1659 1328 2653 1884 3769 2435
1308 1121 2093 1535 2973 1691
1074 927 1718 1277 2440 1427
6-4
6.7
0.6
9-6
6.4
0.8
ft wg
14 - 10
9.4
1.0
19 - 15
13.1
1.4
Noise Levels
Model
19-15 27.2 31.8 38.6
14-10 23.1 28.5 40.1
9-6 21.6 29.6 38
6-4 23.7 31.7 40.7
Noise levels tested in accordance with EN 23741.
Sound Pressures at 2.5m (dBA)
Normal Medium Boost
Weight, Water Content and Motor Power
Model
19-15 80 1.6 34.6
14-10 62 1.2 28
9-6 35 0.7 20
6-4 35 0.6 17
Test Pressure: 20bar (2 MPa)
Water connections: 15mm
Motor
Power (W)
Maximum working pressure: 10bar (1MPa)
Electrical supply: 230V - 50Hz
Water
Content (pints)
Unpacked
Weight (lbs)
Page 9

11.0 Operating Instructions
LO-LINE RC & LO-LINE RC Heater/Cooler
09
Description
This LO-LINE unit is fitted with a control system that provides
either automatic or manual control of the unit. In automatic
mode the desired temperature set point is selected and the unit
will adjust the fan speed according to the difference between
the actual room temperature and the set point. When the room
temperature reaches the set point the fan will switch off and
thereafter will continue to cycle on and off to maintain the room
temperature. The temperature set point range is 59 - 95°F.
In manual mode the automatic temperature control is over
ridden and any of the three fan speeds can be operated
inrespective of the water temperature in the unit. This means
that air circulation can be provided in summer for example, or
that heating performance can be controlled manually.
In manual mode, with water temperature control, any of the 3
fan speeds can be selected and the fan will operate when the
water temperature in the coil is greater than 90°F. This means
that heating performance can be controlled manually, and the
unit could be controlled via an external room thermostat.
The unit can be controlled using the infra red remote control
handset supplied with the unit (see fig. 6) and also using the
control panel on the unit (see fig. 7). If necessary, however, the
control panel can be locked electronically to prevent tampering
once the controls have been set (see over).
Fig. 6 Fig. 7
The remote control hand set takes 2 AAA batteries (not supplied).
Controls Display
Power button Switches unit on & off
‘+/-’ button Adjust temperature set point from
59 - 95°F
Scrolls into F1, F2, F3, A1, A2 or A3
manual mode.
Heating
Heating will only be provided when the central heating boiler is
on, the pump is running and the system water temperature is
greater than 90°F. Ensure the boiler is on, and set timer, boiler
controls and room thermostats as necessary.
10.0
11.0
Page 10

10
LO-LINE RC & LO-LINE RC Heater/Cooler
11.0 Operating Instructions (continued...)
Operation Display
Power off No Display
Switch on supply to unit for 30 seconds
(unit off)
Supply on / unit off
Switch on unit Set point flashes for
approx 5 secs, then
Ambient temperature
displayed
Use ‘+/-’ to adjust Set point flashes for
set point approx 5 secs, then
Ambient temperature
The ambient temperature is always displayed unless the water
temperature falls below 110°F*, or if the set point is being
adjusted.
Water temp <110°F Shows both power
& unit on
*110°F in normal heating system, 90°F for heat pumps and above 68°F in cooling.
Manual
Manual mode can be used for air circulation without heat or for
manual control of the heating function.
Use ‘+’ to scroll beyond 95°F
Or use ‘-’ to scroll below 59°F
Selected fan speed displayed
Continuous
fan only
Fan & water
temperture
(water inlet >90°F)
Scrolling back out of manual using the ‘+’ or ‘–’ button will revert
the unit back to last temperature set point.
Cooling Mode
l Close the heating system and isolate any other heat emitters.
l Open the cooling water system.
l Ensure cooling is on, and set cooling unit timer and controls
as necessary.
Cooling operation works in exactly the same way as heating.
Follow the procedure above to set the unit controls.
Locking Unit Controls
The control panel on the main unit can be locked electronically
to prevent interference once the controls have been set. After
setting the unit to the desired temperature setting and with the
unit in running mode, press the On/Off button on the main unit
for about 6 seconds until the two middle horizontal bars appear
on the display. The horizontal bars will disappear after about 6
seconds and the unit is in key lock mode.
If any of the unit controls are pressed the horizontal bars will
reappear to show the key lock mode is activated, however,
during this mode the handset controls remain functional.
To unlock the system press the On/Off button for about 6
seconds until the horizontal bars disappear.
12.0 Troubleshooting
Once installed this fan convector becomes part of a complete
heating system that will generally include a boiler, pump, other
emitters such as radiators and fan convectors, and a number of
heating controls, dependent on system complexity. An apparent
problem with this unit may be the result of system controls being
incorrectly set and can be solved easily without calling out your
installer or MYSON. Before calling your installer or MYSON,
please carry out the checks listed opposite.
Page 11

12.0 Troubleshooting (continued...)
LO-LINE RC & LO-LINE RC Heater/Cooler
11
Problem Remedy
Possible Causes
Unit switched off
Temperature set point reached
Unit not switched on at breaker panel
Heating Mode -
No Fan
Breaker tripped at panel
Unit isolating valves shut
Water temperature reaching fan
convector below 110°F
(Heater model only)
Boiler ON and set to high with central
Note: Operation of fan convector can be checked by
Heating Mode
(Heater model only)
poor heating
performance and/or
Low water temperature to unit Turn up boiler thermostat
Poor water flow Vent air from heating system
unit cycles on
water sensor
If the fan convector is still faulty after checking the above, call your installer or MYSON.
Turn on
Increase temperature set point
Switch on breaker
Check all wiring and reset breaker
Open valves
Check boiler -
Programmer ON
heating pump running
switching to manual fan setting
Common Installation Faults
For optimum performance, this unit must be correctly sized to
match the heat loss requirements of the space it is required to
Problem
Poor heating performance
(Heater model only)
Heating Mode
(Heater model only)
poor heating
performance and/or
unit cycles on
water sensor
System incorrectly balanced with unit starved of hot water flow
Unit incorrectly sized for heat loss of room
13.0 Maintenance
Before undertaking any maintenance activity isolate the
electrical supply.
Maintenance should be restricted to occasional removal of dust
and lint around the unit. The outer surface may be wiped over
heat, and the heating system must be correctly designed to
provide adequate flow of hot water to the unit (refer to section
2). If the recommendations in section 2 are not followed,
problems may arise as detailed below.
Possible Causes
Boiler thermostat set too low
Lack of flow to fan convector -
Pump set on low setting
Isolating valves not fully open
Pipe sizing to unit too small
11.0
with warm water and mild detergent taking care to avoid water
entering the grille areas.
12.013.0
Page 12

MYSON INC 49 Hercules Drive, Suite 4904, Colchester VT0446
T: 802 654 7500, F: 802 654 7022, info@mysoninc.com, www.mysoninc.com
heatingthroughinnovation.
01.01.2012 ISSUE 2
 Loading...