

Page 1
ULTRAPEN
MADE IN USAMADE IN USA
™
PT4
Free Chlorine Equivalent
E TM
(FC
& Temperature Pen
S
)
ACCURATE
S
S
RELIABLE
SIMPLE
Professional Water Analysis
Accuracy of up to ±0.3 ppm FC
•
Proprietary Sensor Design
•
Calibration with pH and ORP
•
Standard Solutions
Automatic Temperature Compensation
•
Temperature Readout
•
Waterproof
•
Powered by one N Type Battery
•
(Included)
PACKAGE CONTENTS:
PT4 Pocket Tester Pen - Battery Installed•
Scoop•
Soaker Cap•
Pocket Clip•
Holster•
Lanyard•
ORP Cleaning Paper•
Operating Instructions•
Visi t o u r w eb s it e :
myronl.com/pt4.htm
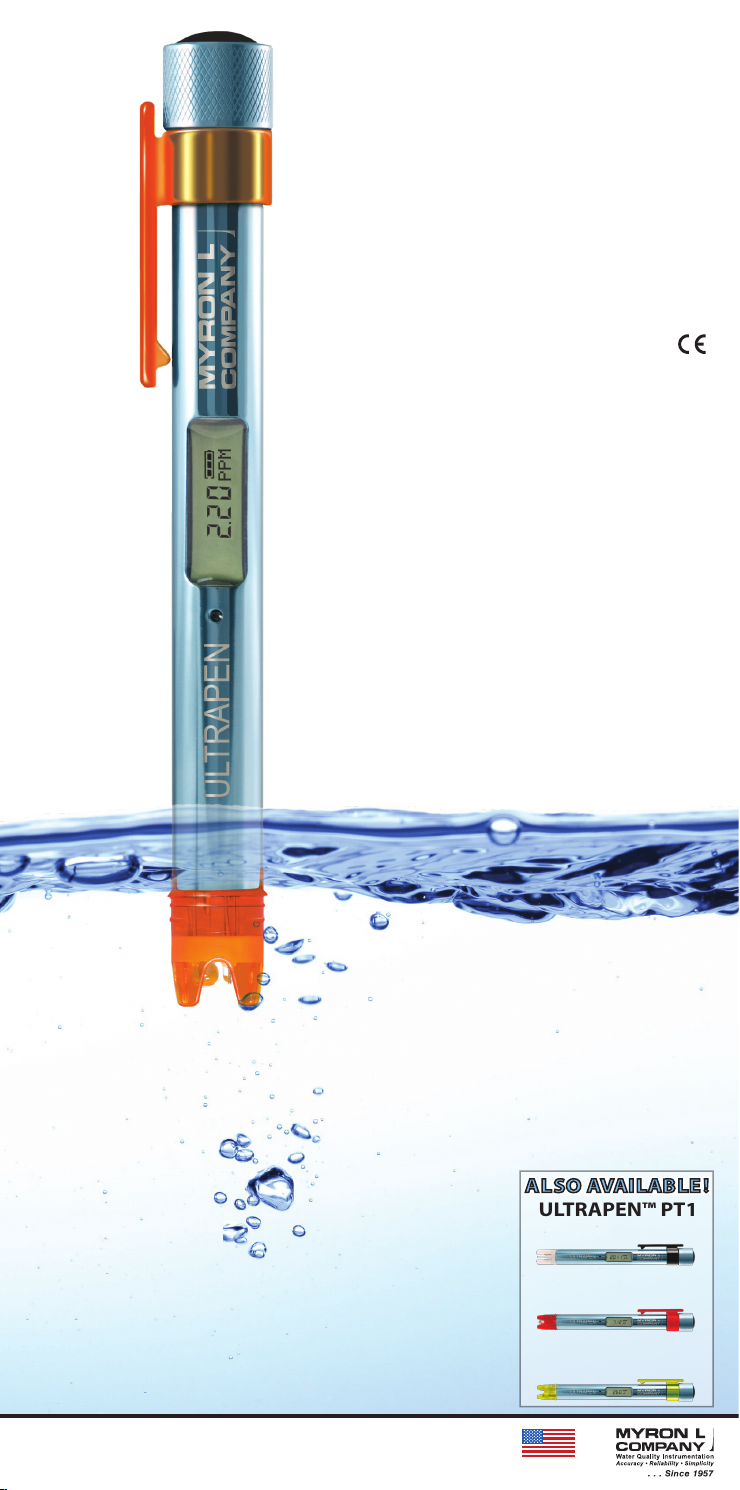
ULTRAPEN™ PT1
Conduc tivity, TDS, Salinity
& Temperature
E
myronl.com
ULTRAPEN™ PT2
pH & Temperature
ULTRAPEN™ PT3
ORP & Temperature
Page 2

INTRODUCTION
Thank you for purchasing the Myron L ULTRAPEN™ PT4 FCE
Pen. This instrument is designed to be extremely accurate, fast,
and simple to use in diverse water quality applications. Advanced
features include automatic temperature compensation in
calibration mode; highly stable microprocessor-based circuitry;
user-intuitive design; and waterproof housing. A true one-handed
instrument, the PT4 is easy to calibrate and easy to use. To take
a measurement, you simply push a button then dip the PT4 in
solution. Results display in seconds.
1. Push Button — turns PT4 on; selects mode and unit preferences.
FEATURES
2. Battery Cap — provides access to battery for replacement.
3. Pocket Clip — holds PT4 to shirt pocket for secure storage.
4. Battery Indicator — indicates life remaining in battery.
5. Display — displays measurements, menu options, battery indicator, and rmware revision
(during power-up).
6. LED Indicator Light — indicates when to dip PT4 in solution, when measurement is in
progress, and when to remove PT4 from solution.
7. FCE Sensor — measures Free Chlorine Equivalent of a solution.
8. Soaker Cap — contains Sensor Storage Solution to maintain sensor hydration. To remove,
twist the soaker cap while pulling off using caution not to spill the Storage Solution. To replace,
ll the soaker cap half full with Storage Solution. Twist the soaker cap while pushing back on,
using caution, as excess Storage Solution may squirt out.
CAUTION: Do NOT push the soaker cap beyond the Cap Stop as sensor damage WILL
occur.
NOTE: The formation of KCl crystals around the soaker cap is normal. These crystals do not
affect the sensor life, performance, or accuracy provided they are rinsed off with water prior
to a test.
9. Scoop — used to hold sample solution when dipping is not possible. To install, push the
scoop onto the sensor while shifting side-to-side. To remove, pull the
scoop off while shifting side-to-side. Verify the FCE sensor remained
fully inserted into the PT4. If not, reinstall per
FCE Sensor Replacement section on page 5.
To use, hold the scoop directly under a vertical
stream during measurement, avoiding bubbles.
10. Holster — run your belt through the strap in the back of the holster for hands-free
portability.
11. Lanyard — attach through hole in top of pocket clip.
12. ORP Electrode Cleaning Paper — for deep cleaning the platinum electrode.
1
Page 3

OPERATING INSTRUCTIONS
NOTE: Selecting “ESC” from any menu immediately powers the PT4 off without saving
changes.
I. Temperature Unit Selection
The PT4 allows you to select the type of units used for displaying temperature:
˚C (Degrees Celsius) or ˚F (Degrees Fahrenheit).
To set the preference:
1. Push and release the push button to turn the PT4 on.
2. Push and hold the button. The display will alternate between “CAL”, “FAC CAL”, “ºCºF
TEMP”, “ModE SEL”, “PAr SEL”, “SOL ck”, and “ESC”.
3. Release the button while “ºCºF TEMP” is displayed. The display will alternate between
“PUSHnHLD” and “ºCºF TEMP”.
4. Push and hold the button. The display will alternate between “˚C”, “˚F” and “ESC”.
Release the button when desired unit preference displays.
5. “SAVEd ºC” or “SAVEd ºF” will display; then the unit will power off.
II. FCE Mode Selection
The PT4 allows you to select the FCE measurement mode you prefer:
Hold Mode (default) — will display real-time readings until stable or 2 minutes, which ever
comes rst, then display nal readings.
LIVE Mode — real-time readings are displayed continuously for up to 5 minutes, a push and
release of the button will turn your PT4 off immediately.
To set the FCE measurement mode preference:
1. Push and release the push button to turn the PT4 on.
2. Push and hold the button. The display will alternate between “CAL”, “FAC CAL”, “ºCºF
TEMP”, “ModE SEL”, “PAr SEL”, “SOL ck”, and “ESC”.
3. Release the button when “ModE SEL” is displayed. The display will alternate between
“PUSHnHLD” and “ModE SEL”.
4. Push and hold the push button. The display will alternate between “Hold”, “LIVE” and
“ESC”.
5. Release the button when desired mode displays.
6. “SAVEd” will display, then the PT4 will power off.
III. FCE Measurement
The following table explains what the LED Indicator Light signals indicate and gives the
duration of each signal:
LED Signal Action Duration
Rapid Flashing Dip pen in solution and swirl. 6 sec
Slow Flashing Measurement in process; continue to swirl.
In Hold mode real-time readings are displayed
until the LED is on solid.
In LIvE mode real-time readings are displayed
20 -120 sec in Hold mode
5 min in LIvE mode
until the PT4 turns o..
Solid Light
(Hold mode only)
Measurement is complete. Values are displayed
until the PT4 turns o.
6 sec
CAUTION: To measure solution at the extremes of the specied temperature or FC
range, allow the PT4 to equilibrate by submerging the sensor in the sample solution for 1
minute prior to taking a measurement.
NOTE: If you cannot dip the PT4 in the sample solution, pour the sample into a clean
container. If you don’t have a container or need to test a vertical stream of solution, use
the scoop to hold sample solution.
1. Rinse the pen 3 times in a sample of the solution.
2. Push and release the push button.
3. While the LED ashes rapidly, dip the PT4 in FRESH sample solution so that the
sensor is completely submerged. If you do not submerge the sensor in solution
before the ashing slows, allow the PT4 to power off and retake the reading.
4. While the LED ashes slowly, swirl the PT4 around to remove any air bubbles,
keeping the sensor submerged.
a. In Hold mode when the LED turns on solid, remove the PT4 from solution. The
b. In LIVE mode allow the PT4 to remain in solution while the LED ashes slowly.
display will alternate between the nal FCE and temperature readings. Note the
readings for your records.
The display will alternate between live FCE and temperature readings. Note the
readings for your records. LIVE measurement will time out after 5 minutes OR
push and release the push button to turn the PT4 off at any time during LIVE
measurement.
IV. Calibration
The Myron L Company recommends calibrating twice a month, depending on usage.
E
2
Page 4

However, you should check the calibration whenever measurements are not as expected.
For greatest accuracy, you should perform a 3-point wet pH calibration, and wet ORP
calibration with the ORP Standard Solution closest in value to the solution you will be
testing.
NOTE: If the measurement is NOT within calibration limits for any reason, “Error” will
display. Check to make sure you are using a proper Myron L Company pH Buffer or ORP
Standard Solution. If the solution is correct, clean the sensor as described in Sensor
Cleaning section on page 4. Restart calibration.
NOTE: Small bubbles trapped in the sensor may give a false calibration. After calibration
is completed, measure the pH Buffer or ORP Standard Solutions again in solution check
mode “SOL ck” (see pages 3 and 4) to verify correct calibration.
NOTE: If at any point during calibration, you do not submerge the sensor in solution
before the ashing slows, allow the PT4 to power off and start over.
NOTE: You should always calibrate with pH 7 rst.
A. Calibration Preparation
For maximum accuracy, ll 2 clean containers with each pH Buffer and/or ORP Standard
Solution. Arrange them in such a way that you can clearly remember which is the rinse
solution and which is the calibration standard/buffer. If you don’t have enough standard/
buffer, you can use 1 container of each standard/buffer for calibration and 1 container of
clean water for all rinsing. Always rinse the FCE sensor between standard/buffer solutions.
Ensure the FCE sensor is clean and free of debris.
B. pH Calibration using Myron L Company pH 7, 4, and 10 Buffer
Solutions.
NOTE: You should always calibrate with pH 7 rst.
1. Thoroughly rinse the PT4 by submerging the sensor in pH 7 Buffer rinse solution and
swirling it around.
2. Push and release the push button to turn the PT4 on.
3. Push and hold the push button. The display will alternate between “CAL”, “FAC CAL”,
“ºCºF TEMP”, “ModE SEL”, “PAr SEL”, “SOL ck”, and “ESC”.
4. Release the button when “CAL” displays.
5. The display will alternate between “PUSHnHLD” and “CAL.
6. Push and hold the button, The display will alternate between “PH” and “ORP”.
7. Release the button when “PH” is displayed.
8. The display will indicate “CAL” and the LED will ash rapidly.
9. While the LED ashes rapidly, dip the PT4 in pH 7 Buffer Calibration Solution so that
the sensor is completely submerged.
10. While the LED ashes slowly, the pH calibration point will display along with “CAL”.
Swirl the PT4 around to remove bubbles, keeping the sensor submerged.
11. If the pH 7 calibration is successful, the display will indicate “SAVEd”, then
“PUSHCONT” will be displayed (“PUSHCONT” will NOT be displayed if only calibrated
with pH 4 or 10).
12. Push and release to continue or let the unit time out to exit after a 1-point or 2-point
calibration.
13. Repeat steps 9 through 12 with pH 4 and 10 Buffer Solutions. After the 3rd calibration
point is successfully saved, the display will indicate “SAVEd” and power off.
14. Verify calibration by retesting the calibration solution in solution check mode “SOL
ck”, see section V below.
C. ORP Calibration using Myron L Company 80mV Quinhydrone, 260mV
Quinhydrone, or 470mV MLC Light’s ORP Standard Solution.
NOTE: The PT4 has automatic temperature compensation in ORP calibration mode
(from 15ºC to 30ºC).
1. Follow pH calibration steps 1 through 6, using ORP Solutions.
2. Release the button when “ORP” is displayed.
3. The display will indicate “CAL” and the LED will ash rapidly.
4. While the LED ashes rapidly, dip the PT4 in ORP Standard Solution so that the
sensor is completely submerged.
5. While the LED ashes slowly, the ORP calibration point will display along with “CAL”.
Swirl the PT4 around to remove any air bubbles, keeping the sensor submerged.
6. If the ORP calibration is successful, the display will indicate “CAL SAVEd”, then
time out.
7. Verify calibration by retesting the calibration solution in solution check mode.
V. SOLUTION CHECK
Solution check is provided to verify the proper calibration value was recorded when
using Myron L Company pH Buffers and ORP Standard Solutions. To verify proper
calibration, simply put the PT4 into solution check mode, select the mode to verify (pH
or ORP), then dip the sensor into the pH Buffer or ORP Calibration Solution so that the
sensor is completely submerged and swirl around to release any air bubbles, then verify
displayed value matches the value on the bottle.
Solution Check continued on page 4 ...
3
Page 5

Battery Housing
Battery
+
_
Align groove in battery housing with guide
bump in pen case.
Pen Case
... Solution Check continued from page 3
To perform Solution Check:
1. Push and release the push button to turn the PT4 on.
2. Push and hold the push button. The display will alternate between “CAL”, “FAC
CAL”, “ºCºF TEMP”, “ModE SEL”, “PAr SEL”, “SOL ck”, and “ESC”.
3. Release the button when “SOL ck” displays.
4. The display will alternate between “PUSHnHLD” and “SOL ck”.
5. Push and hold the button, The display will alternate between “PH” and “ORP”.
6. Release the button when desired mode (pH or ORP) is displayed.
7. While the LED ashes rapidly, dip the PT4 in FRESH buffer/calibration solution so
that the sensor is completely submerged and swirl the PT4 around to remove any
air bubbles.
8. Verify value displayed is correct.
NOTE: To verify ORP calibration while in solution check mode, you must manually
correct for temperature variations from 25ºC. See instructions that come with the ORP
Standard Solutions for temperature chart.
VI. Factory Calibration
When pH Buffers are not available, the PT4 can be returned to factory default calibration
using the FAC CAL function. This will erase any stored wet calibration.
NOTE: Default factory calibration resets the electronics only and does NOT take the
condition of the sensor into consideration.
To return your PT4 to factory calibration:
1. Push and release the push button.
2. Push and hold the button. The display will alternate between “CAL”, “FAC CAL”,
“ºCºF TEMP”, “ModE SEL”, “PAr SEL”, “SOL ck”, and “ESC”.
3. Release the button when “FAC CAL” displays. The display will alternate between
“PUSHnHLD” and “FAC CAL”.
4. Push and hold the push button. “SAVEd FAC” displays indicating the pen has been
reset to its factory calibration.
I. Routine Maintenance
1. ALWAYS rinse the FC
2. ALWAYS replace the soaker cap half lled with Sensor Storage Solution to prevent the
sensor from drying out after each use.
3. Do not drop, throw, or otherwise strike the PT4. This voids the warranty.
4. Do not store the PT4 in a location where the ambient temperatures exceed its specied
Operating/Storage Temperature limits.
E
sensor with clean water after each use.
II. Battery Replacement
MAINTENANCE
The PT4 display has a battery
indicator that depicts the life
remaining in the battery. When the
indicator icon is at 3 bars, the battery
is full. When the indicator icon falls to
1 bar, replace the battery with an N
type battery.
In a clean/dry environment, 1.
unscrew the pen cap in a counter-clockwise motion.
Slide the cap and battery housing out of the 2. PT4.
Remove the depleted battery out of its housing.3.
Insert a new battery into the battery housing oriented with the negative end 4.
touching the spring.
Align the groove along the battery housing with the guide bump inside the 5. PT4
case and slide the battery housing back in.
Screw the 6. PT4 cap back on in a clockwise direction. Do not over tighten.
III. Sensor Cleaning (additional sensor cleaning methods at www.myronl.com)
Cleaning the sensor: The Myron L Company recommends cleaning your sensor every
two weeks, however this depends on application and frequency of use. Indications of a
dirty sensor are slower and/or erroneous readings.
There are three critical components in your PT4 sensor; a very sensitive glass pH
sensor bulb, a platinum ORP electrode, and a temperature sensor encapsulated in a
small glass noid. Use extreme caution when cleaning your PT4 sensor.
To clean your sensor, select one of the following methods:
Basic Cleaning: Using a solution made of dish soap mixed with water and a cotton •
swab, gently clean the inside of the sensor body and platinum electrode, rinse
thoroughly with clean water, then recondition the sensor.
Cleaning the pH Sensor Bulb: If the sensor becomes dirty, clean the sensor surface •
with an isopropyl soaked cotton swab. Then rinse thoroughly with clean water.
Deep cleaning the platinum ORP electrode: Using the ORP electrode cleaning •
paper and water, gently clean the platinum electrode, rinse thoroughly then
recondition the sensor.
To recondition the sensor: Rinse the sensor thoroughly with clean water, then allow
it to soak in Storage Solution for a minimum of 1 hour (for best results allow the sensor
to soak in Storage Solution overnight).
4 5
Page 6

IV. FCE Sensor Replacement
CAUTION: Only Remove/Replace the FCE sensor in a CLEAN and DRY
environment!
To remove the FCE sensor: Remove the soaker cap; make sure the PT4 (including
the FCE sensor) is clean and dry.
Loosen the battery tray (to allow pressure equalization).
Then rmly grasp the FCE sensor body and slowly pull the FCE sensor out.
To install a new FCE sensor: Line up the alignment tabs on the FCE sensor with
the alignment slots on the PT4 unit. Gently push the FCE sensor into position, then
close the battery cap.
SPECIFICATIONS
FC
Range: 0 – 10.0 ppm 0 - 71°C / 32 - 160°F
Accuracy: <5.00ppm ±0.3 ppm
Resolution: 0.01 ppm 0.1ºC / 0.1ºF
Time to Reading Stabilization: 10 - 45 seconds
Power Consumption: Active Mode 37mA, Sleep Mode 2μA
Temperature Compensation: Automatic In Calibration Mode From 15ºC to 30ºC
Physical Dimensions: 17.15cm L x 1.59cm D / 6.75in. L x 0.625in. D
Weight: 50.4g / 1.78oz. (without soaker cap and lanyard)
Case Material: Anodized Aircraft Aluminum with Protective Coating
Battery Type: N type, Alkaline, 1.5V
Calibration Standard Solutions: pH4, pH7, pH10, ORP80, ORP260, ORP470
Operating/Storage Temperature: 0 - 55ºC / 32 - 131ºF
Enclosure Ratings: IP67 and NEMA6
EN61236-1: 2006 – Annex A: 2008: Electrostatic discharge to the PT4 may
cause it to spontaneously turn on. If this occurs, the PT4 will turn off.
E
≥5.00ppm ±0.5 ppm
Temperature
± 0.1ºC / ± 0.1ºF
QUICK REFERENCE INSTRUCTIONS
1. Push and release the push button to turn the PT4 on.
2. While the LED ashes rapidly, dip the PT4 in sample solution so that the sensor
is completely submerged.
3. While LED ashes slowly, swirl PT4 around to remove bubbles, keeping
the sensor submerged. Avoid contact with sides/bottom of container, if
applicable.
If in LIVE mode, while the LED is ashing slowly, the display will alternate between
the live FCE and temperature readings. Note readings for your records.
If in Hold mode, when the LED is ashing slowly, the display will alternate between
the live FCE and temperature readings, when the LED turns on solid, remove
the PT4 from the solution. The display will alternate between the captured FCE
and temperature readings. Note readings for your records.
ACCESSORIES
STANDARD SOLUTIONS FOR CALIBRATION:
The ULTRAPEN™ PT4 requires pH 4, pH 7, and pH 10 pH Buffer Solutions and
80mV Quinhydrone, 260mV Quinhydrone, or 470mV MLC Light’s ORP Standard
Solutions for wet calibration, and Sensor Storage Solution for proper storage.
Order Model Numbers: PH4Q, PH7Q, PH10Q, ORP802OZ, ORP2602OZ,
ORP4701OZ, ORPCALKIT, SSQ.
RPT4 Replacement FCE Sensor (with instructions)
OECP-25/-100 ORP Electrode Cleaning Paper, QTY 25 or QTY 100
For additional calibration kits available, contact the Myron L Company.
MYRON L WARRANTY
The PT4, excluding the FCE sensor, has a one (1) year limited warranty.
The FCE sensor has a six (6) month limited warranty.
MYRON L COMPANY
2450 Impala Drive
Carlsbad, Ca 92010-7226
Phone: +1-760-438-2021
Customer Service E-Mail: info@myronl.com
Technical Support E-Mail: techquestions@myronl.com
MADE IN USA ©2012 MYRON L COMPANY
Website: www.myronl.com
PT4OM 08-13B
 Loading...