

Page 1
ULTRAPEN
MADE IN USAMADE IN USA
™
PT1
Conductivity/TDS/Salinity
& Temperature Pen
S
ACCURATE
S
S
Professional Water Analysis
Accuracy of ±1% of READING
•
±.2% at Calibration Point
•
Reliable Repeatable Results
•
KCl, NaCl and 442
•
Modes
Automatic Temperature Compensation
•
Autoranging
•
Waterproof
•
Powered by 1 N Type battery
•
(included)
PACKAGE CONTENTS:
PT1 Pocket Tester Pen - battery installed•
Scoop•
Pocket Clip•
Holster•
Lanyard•
Operating Instructions•
RELIABLE
SIMPLE
™ Natural Water
Visi t o u r w eb s it e :
myronl.com/pt1.htm
myronl.com
ULTRAPEN™ PT2
pH & Temperature
ULTRAPEN™ PT3
ORP & Temperature
ULTRAPEN™ PT4
Free Chlorine Equivalent
(FCE)
& Temperature
Page 2
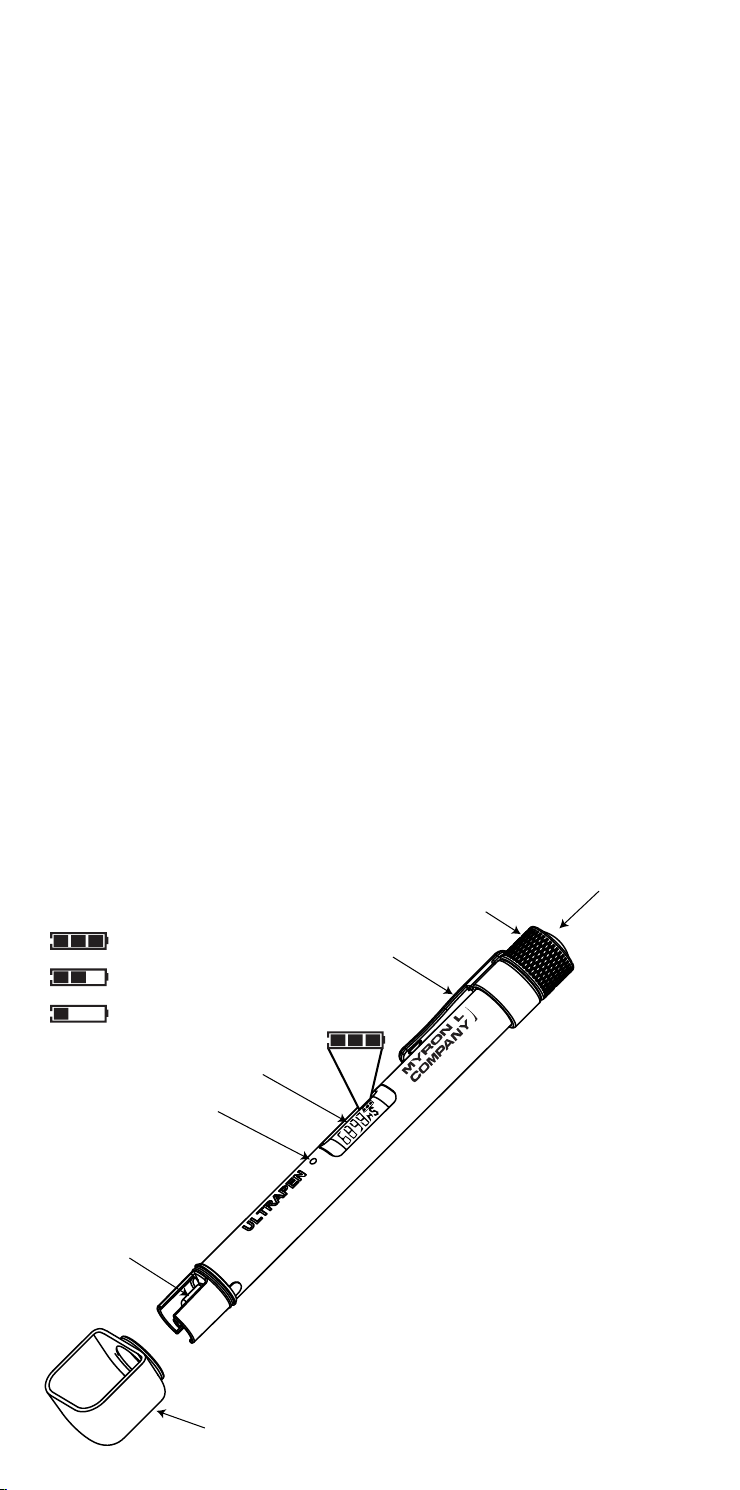
INTRODUCTION
9. Scoop
5. Display
6. LED
Indicator Light
1. Push Button
7. Electrodes
8. Cell
2. Pen Cap
3. Clip
}
4. Battery Indicator
Battery Indicator
Icon Charge States
Full
Low
Depleted
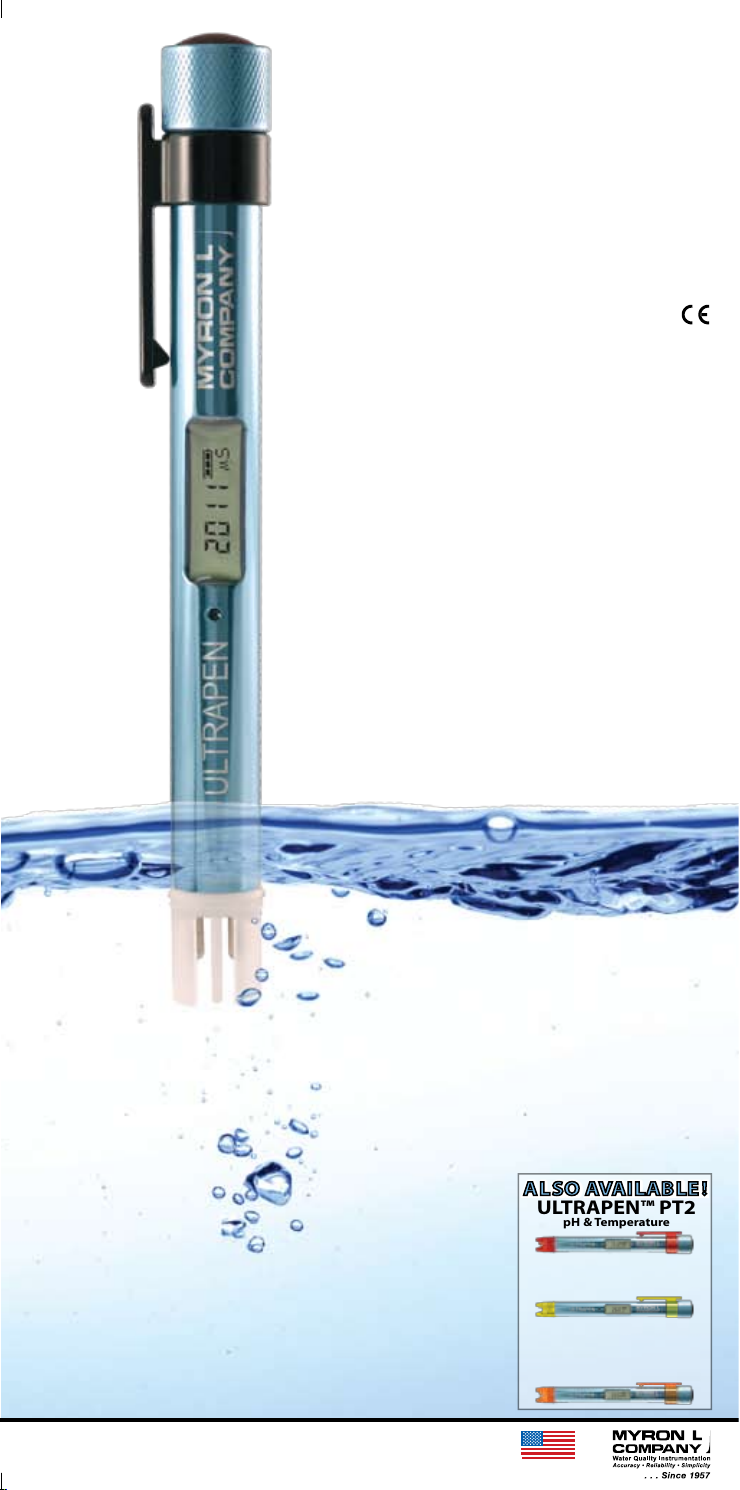
Thank you for purchasing the Myron L ULTRAPEN™ PT1 Conductivity/
TDS/Salinity Pen. This instrument is designed to be extremely accurate,
fast and simple to use in diverse water quality applications. Advanced
features include the ability to select from 3 different solution types that
model the characteristics of the most commonly encountered types
of water; proprietary temperature compensation and TDS conversion
algorithms; highly stable microprocessor-based circuitry; user-intuitive
design; and waterproof housing. A true, one-handed instrument, the PT1
is easy to calibrate and easy to use. To take a measurement, you simply
press a button then dip the pen in solution. Results display in seconds.
FEATURES
1. Push Button — turns instrument on; selects mode and unit
preferences.
2. Pen Cap — provides access to battery for replacement.
3. Clip — holds pen to shirt pocket for secure storage.
4. Battery Indicator — indicates charge left in battery.
5. Display — displays measurements, mode options and battery
indicator.
6. LED Indicator Light — indicates when to dip instrument in solution,
when measurement is in progress, and when to remove instrument from
solution.
7. Electrodes — measure electric current of solution.
8. Cell — contains ux eld in dened area for accurate current
measurement.
9. Scoop — contains sample solution for measurement when sampling
from a vertical stream. To use, slide the open end of the scoop over the
bottom of the pen until the neck of the scoop is ush with the top of the cell.
Hold pen with scoop end under stream. Rinse and ll with sample solution
3 times. Fill with solution again, then take measurement. We recommend
you recalibrate the pen using the scoop to retain accuracy of ±1%.
1
Page 3

SPECIFICATIONS
Measurement Range: 1 - 9999 µS or ppm (0.0010 - 9.999 ppt salinity)
Accuracy (After Wet Calibration): ± 1% of reading
Repeatability: < 1000 µS or ppm ± 1 Count
Resolution: Conductivity and TDS:
Time to Reading Stabilization: 10 - 20 seconds
Active Mode Power Consumption: 30 - 100 mA
Sleep Mode Power Consumption: 2 µA
Temperature Measurement Range: 0 - 71° C or 32 - 160° F
Temperature Accuracy Displayed: ± 0.1 ºC or ± 0.1 ºF
Temperature Compensation Method: Automatic to 25ºC
Physical Dimensions: 17.15 cm L x 1.59 cm D or 6.75 in. L x .625 in. D
Weight: 55 g or 1.94 oz.
Case Material: Anodized Aluminum with Protective Coating
Battery Type: N type, Alkaline
Battery Voltage: 1.5 V
Calibration Solution Point: 1800 µS KCl; 3000 ppm 442™ (2027 ppm NaCl)
Operating/Storage Temperature: 0 - 55ºC or 32 - 131ºF
Water Resistance: IP67 and NEMA 6
EN61236-1: 2006 - Annex A: 2008
≥ 1000 µS or ppm ± 0.3% of reading
0.1 for 1.0 - 99.9 µS or ppm
1 for 100 - 9999 µS or ppm
Salinity: 0.0001 for 0.0010 - 0.0999 ppt
0.001 for 0.100 - 9.999 ppt
Temperature: 0.1 ºC or ºF
Electrostatic discharge to case of instrument may
cause PT1 to spontaneously power on. In this case,
the PT1 will power off after several seconds.
FULL OPERATING INSTRUCTIONS
I. Solution Selection
The PT1 allows you to select from several preprogrammed
measurement modes. The following table lists measurement modes
with their corresponding parameters; temperature compensation and
TDS conversion solution models; and units of measure.
Mode Parameter Solution Model Units
Cond
KCl Conductivity potassium chloride microsiemens (µS)
tdS
442 Total Dissolved
Solids (TDS)
tdS
NaCl TDS sodium chloride ppm
442 Salinity 442™ Myron L Natural
SALt
SALt
NaCl Salinity sodium chloride ppt
ESC This is the escape function. Selecting escape exits solution
selection without saving changes and turns the PT1 off.
To select a measurement mode:
1. Press and release the push button. The LCD will briey display the
rmware version then the current measurement mode. If the measurement
parameter and solution type displayed are correct, proceed to
II. Temperature Unit Selection. If not, proceed to step 2.
2. Immediately push and hold the push button. The display will scroll
through “CAL”, “SOL
the button when “SOL SEL” displays.
3. While the display scrolls through “PUSHnHLD” and “SOL SEL”, push
and hold the push button. The display will scroll through “Cond KCl”,
“tdS 442”, “tdS NaCl”, “SALt 442”, “SALt NaCl” and “ESC”. Release
when the desired measurement mode displays.
4. “SAVEd” displays indicating the measurement mode is saved in
memory. Allow the pen to time out to turn power off.
442™ Myron L Natural
Water Standard
parts per million
(ppm)
parts per thousand
Water Standard
SEL”, “FAC CAL”, “ºCºF TEMP”, and “ESC”. Release
(ppt)
Page 4

II. Temperature Unit Selection
The PT1 allows you to select the type of units used for temperature
measurements. The following table lists preference options with their
corresponding units.
Mode UnitPreference
C Degrees Celsius
F Degrees Fahrenheit
ESC This is the escape function. Selecting escape exits temperature
unit selection without saving changes and turns the PT1 off.
To set the preference:
1. Press and release the push button. The LCD will briey display the
rmware version then the current measurement mode.
2. Immediately push and hold the push button. The display will scroll
through “CAL”, “SOL
the button when “ºCºF TEMP” displays.
3. While the display scrolls through “PUSHnHLD” and “ºCºF TEMP”, push
and hold the push button. The display will scroll through “C”, “F” and
“ESC”. Release when the desired unit option displays.
4. “SAVEd” displays indicating the unit preference is saved in memory.
Allow the pen to time out to turn power off.
SEL”, “FAC CAL”, “ºCºF TEMP”, and “ESC”. Release
III. Normal Operation
Before you take a reading, make sure the pen is clean, calibrated (see
IV. Calibration) and in the appropriate measurement mode. The sample
solution must also be within the specied measurement range. Keep
all foreign material away from the sample to avoid contamination.
NOTE: If you cannot dip the pen in the sample solution, pour the
sample into a clean container. If you don’t have a sample container
and need to test a vertical stream of solution, use the scoop.
The following table explains what the LED Indicator Light signals mean
and gives the duration of each signal.
LED Indicator Light Signal Meaning Duration
Rapid Flashing Dip pen in solution 6 sec
Slow Flashing Measurement in process 10-20 sec
Solid Light Note measurement value 6 sec
CAUTION: To measure solution at the extremes of the specied
temperature range, allow the pen to equilibrate by submerging the cell in
the sample solution for 1 minute prior to taking a measurement.
1. Rinse the pen 3 times by submerging the cell in fresh sample solution
and swirling it around.
2. Remove pen from solution, then press and release the push button.
Firmware version will be displayed, then current measurement mode.
3. Grasp the pen by its case with your ngers positioned between the
display and the pen cap to avoid sample contamination.
4. While the LED ashes rapidly, dip the pen in fresh sample solution so
that the cell is completely submerged. If you do not submerge the cell
in solution before the ashing slows, allow the pen to power off and
retake the reading.
5. While the LED ashes slowly, swirl the pen around to remove
bubbles, keeping the cell submerged. Keep the pen at least 1 inch
(2½ cm) away from sides/bottom of container, if applicable.
6. When the LED turns on solid, remove the pen from solution. The display
will alternate between the measurement and temperature readings.
Note the readings for your records.
Page 5

IV. Calibration
The PT1 is designed to be very reliable and requires only infrequent
calibration. The Myron L Company recommends calibrating each
measurement mode you use once monthly. However, you should
check the calibration whenever measurements are not as expected.
The PT1 is programmed for 2 calibration options: Wet Calibration
or Factory Calibration. Wet calibration is most accurate. But if a
high quality standard KCl-1800 µS or 442-3000 ppm solution is not
available, the PT1 can be returned to factory settings.
A. Wet Calibration
Use calibration solution specied for measurement mode: Use KCL-
1800 for Cond KCl; Use 442-3000 for tdS 442, SALt 442, tdS NaCl,
and SALt NaCl. See Specications table for 442 solution ppm NaCl
equivalent value. Calibrating tdS simultaneously calibrates SALt for
the same value and vice versa.
1. Pour Myron L Company calibration solution into a clean container.
2. Rinse the pen 3 times by submerging the cell in fresh calibration
solution and swirling it around.
3. Remove pen from solution, then ll the container one more time.
4. Press and release the push button. The LCD will briey display the
rmware version then the current measurement mode. Ensure the
PT1 is in the correct solution mode.
5. Immediately push and hold the push button. The display will scroll
through “CAL”, “SOL SEL”, “FAC CAL”, “ºCºF TEMP”, and “ESC”. Release
the button when “CAL” displays.
6. Grasp the pen by its case with your ngers positioned between the
display and the pen cap to avoid sample contamination.
7. While the LED ashes rapidly, dip the pen in calibration solution so that the
cell is completely submerged. If you do not submerge the cell in solution
before the ashing slows, allow the pen to power off and start over.
8. While the LED ashes slowly, swirl the pen around to remove
bubbles, keeping the cell submerged. Keep pen at least 1 inch
(2½ cm) away from sides/bottom of container.
9. When the LED light stays on solid, remove the pen from the solution.
“CAL SAVED” will display indicating a successful calibration.
NOTE: If an incorrect solution is used or the measurement is NOT
within calibration limits for any other reason, “Error” displays alternately
with “CLEAn CEL/CHEC SOL”. Check to make sure you are using the
correct calibration solution. If the solution is correct, clean the cell by
submerging the cell in a 1:1 solution of Lime-A-Way® and water for 5
minutes. Rinse the cell and start over.
10. Small bubbles trapped in the cell can give a false calibration. Measure
the calibration solution again to verify correct calibration. If the reading
is not within ±1% of the calibration solution value, repeat calibration.
B. Factory Calibration
If you do not have the proper calibration solution or wish to restore the
pen to its original factory settings for any other reason, use the FAC
CAL function to calibrate the PT1.
1. Press and release the push button. The LCD will briey display the
rmware version then the current measurement mode.
2. Immediately push and hold the push button. The display will scroll
through “CAL”, “SOL SEL”, “FAC CAL”, “ºCºF TEMP”, and “ESC”. Release
the button when “FAC CAL” displays.
3. While the display scrolls through “PUSHnHLD” and “FAC CAL”, push
and hold the push button until the display scrolls through “SAVEd” and
“FAC CAL”, indicating the pen has been reset to its factory calibration.
4. Allow the pen to time out to turn power off.
4 5
Page 6

QUICK REFERENCE INSTRUCTIONS
Battery Housing
Battery
+
_
Align groove in battery housing with guide
bump in pen case.
Pen Case
1. Press and release push button to turn pen on.
2. WhiletheLEDashesrapidly,dipthepeninsamplesolutionso
that the cell is completely submerged.
3. WhileLEDashesslowly,swirl pen around to removebubbles,
keeping cell submerged. Avoid contact with sides/bottom of
container,ifapplicable.
4. When LED turns on solid, remove pen from solution. Display will
alternate between measurement and temperature readings.
5. Notereadingsforyourrecords.
MAINTENANCE
I. Battery Replacement
The PT1 display has a battery charge indicator that depicts the life left in
the battery. When the indicator icon is at 3 bars, the battery is full. When
the indicator icon falls to 1 bar, replace the battery with an N type.
1. In a CLEAN DRY environment unscrew the pen cap in a counterclockwise motion.
2. Slide the cap and battery housing out of the pen.
3. Remove the depleted battery out of its housing.
4. Insert a new battery into the battery housing oriented with the negative
end touching the spring.
5. Align the groove along the battery housing with the guide bump inside
the pen case and slide the battery housing back in.
6. Screw the pen cap back on in a clockwise direction. Do not overtighten.
II. Routine Maintenance
1. Always rinse the cell and electrodes with clean water after each use.
2. If the electrodes scale or become dirty, clean the cell by submerging the
probe end in a 1:1 solution of Lime-A-Way® and water for 5 minutes.
Then rinse thoroughly with clean water.
3. Do not drop, throw or otherwise strike the pen. This voids the warranty.
4. Do not store the pen in a location where the ambient temperatures
exceed its specied Operating/Storage Temperature limits.
ACCESSORIES
STANDARD SOLUTIONS FOR CALIBRATION:
The ULTRAPEN™ PT1 uses the following solutions for wet calibration.
Order MODEL#s: KCL-1800, 442-3000 (2027 ppm NaCl)
Excepting the battery, the Myron L PT1 Conductivity/TDS/Salinity Pen is warrantied to be free
MYRON L WARRANTY
from manufacture defect for 1 year.
MYRON L COMPANY
Customer Service E-Mail: info@myronl.com
Technical Support E-Mail: techquestions@myronl.com
Website: www.myronl.com
2450 Impala Drive
Carlsbad, Ca 92010-7226
Phone: +1-760-438-2021
MADE IN U.S.A.
PT1TFM 08-13
 Loading...