

Myron & Davis NV7SLG1 Installation Instructions Manual
http://www.myronanddavis.com
Installation Instructions
Subaru Legecy
NV7SLG1
INSTALLATION INSTRUCTIONS AND USE
The Myron & Davis In-Dash Navigation System Includes
a built in DVD player that should not be viewed by the
driver while driving to avoid violation of State and Local
Laws. This product should be installed by a professional
to ensure proper installation and operation.
Myron & Davis is not responsible for any potential accidents,
property damage or bodily harm that might result from improper
installation or operation.

- Read the entire installation instructions prior to performing any work.
- Before installation, check to see that all parts are not damaged or defective.
1 - Ensure all appropriate materials are available
These are some of the common installation items you will need:
- Digital Multi – Meter
- Philips screwdriver set
-Trim Removing tools
- ¼” drive sockets
-Torx or Allen-drive wrenches
-A functional DVD or CD
Myron and Davis Entertainment Systems
Multi-Media Navigation System Installation Guide
NV7SLG1 Rev A

Installation Guide
2- Caution
-Battery
Check the battery to ensure it’s fully charged
NOTE: Some new vehicles batteries are not fully charged and may cause improper
operation
3 - Warning
- Remove the key from the ignition
- Disconnect the negative battery terminal
- Care must be used working with vehicles with airbags to prevent:
- injury
- damage to or malfunction of the airbag system
- work on malfunctioning systems or components must be performed by certied
technicians
4 - Removing the Dash Trim
Use caution when removing dash trim components as not to damage or mar the
surfaces or damage the fasteners
- Inspect all fasteners for damage and replace as necessary.
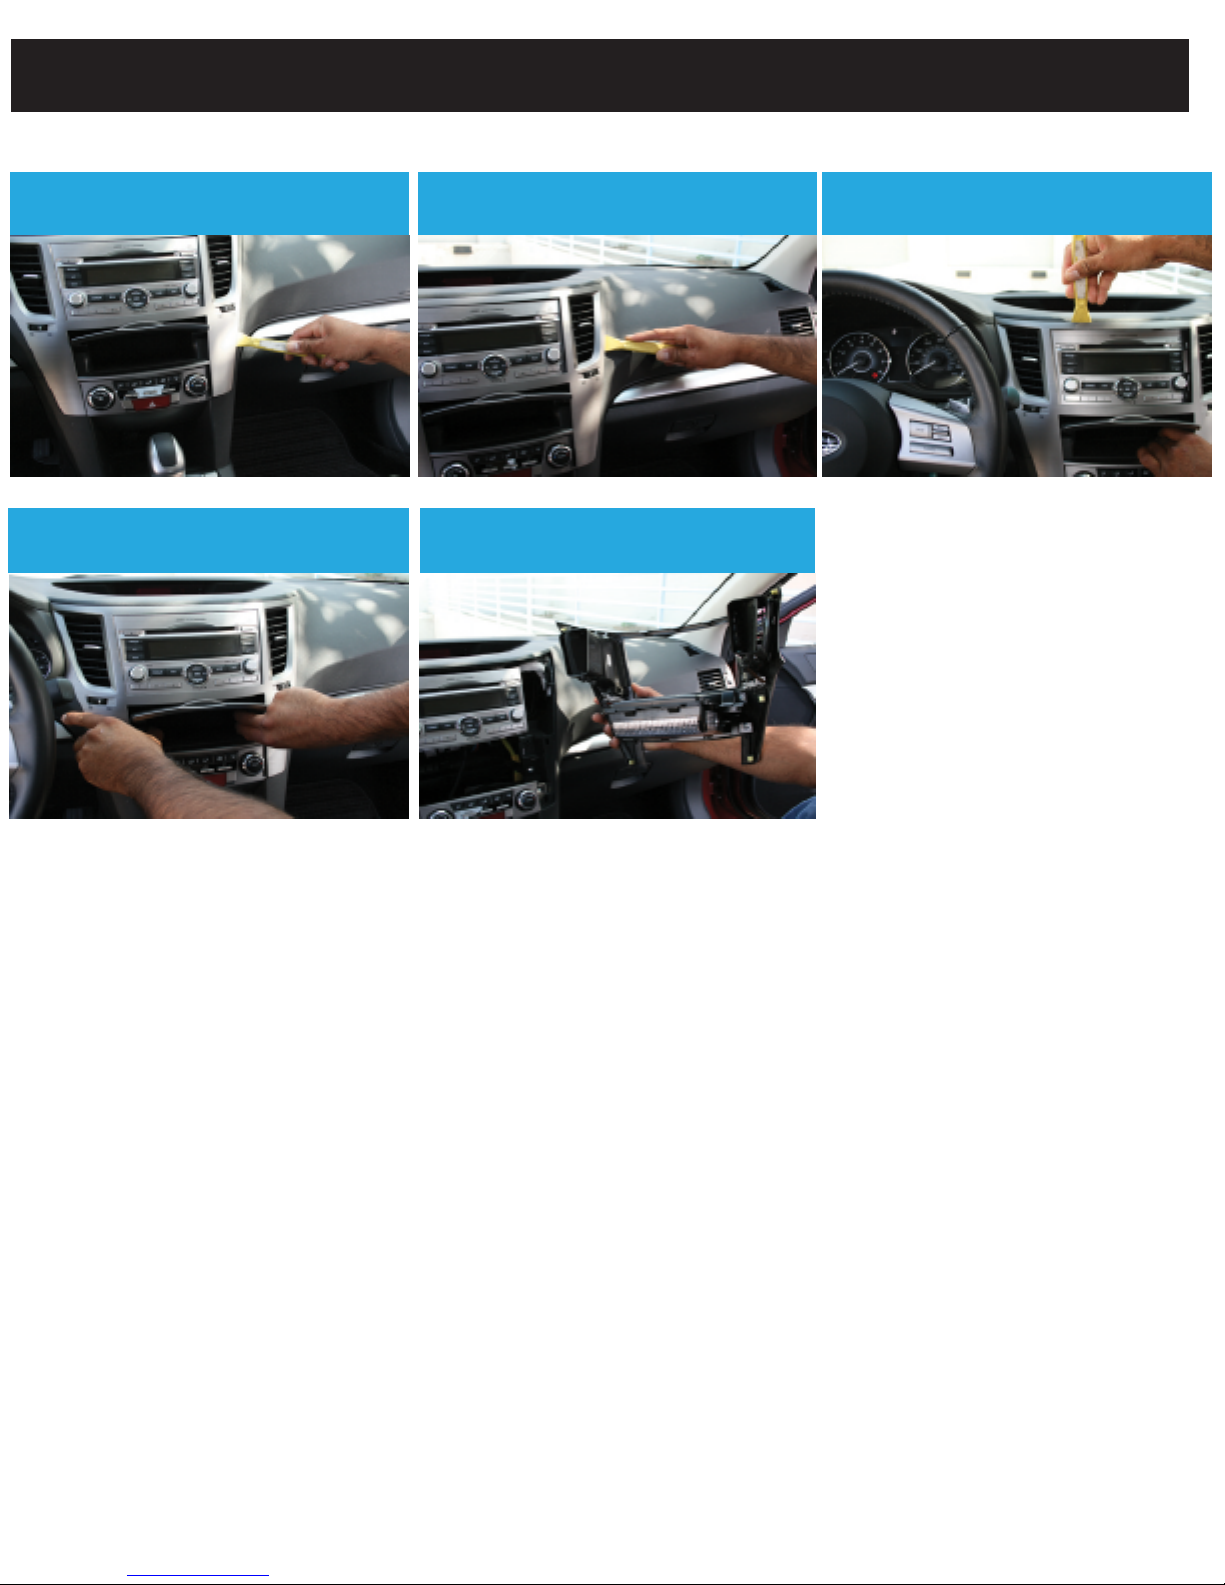
4 – Removal of the Dash Trim Cont’d.
Step 4 - Remove AC control
Step 1. Use a panel removal tool to
start removing the radio trim
knobs
Step 4. Pull evenly from the pocket
below the radio.
Step 4 - Remove AC control
knobs
Step 2. Be sure to use the tool all the way
around the perimeter of the radio trim.
Step 5. Remove the radio trim.
Step 3. Make sure all the clips are
released
 Loading...