

Myron & Davis AD218 User Manual

Important Precautions
The design and manufacture of this player takes personal safety into consideration. Improper operation
may result in electric shock, fire, and other hazards. Please adhere to the following instructions.
Safety Precautions
There is dangerous voltage within this product. To prevent electric shock, do not open the cabinet. Please contact
a professional technician to service this product. Replacement components will be supplied according to
manufacturers recommendations.
To prevent electricity leakage or damage, do not spill liquids into the product. Do not drop anything into the
ventilation hole of the cabinet or any other opening.
For power, the player must be in line with the mark on the rear of the p anel. When the plug of the unit is
commented to the main outlet, the unit will still be connected to AC even if the power is turned off.
To prevent damage caused by lightning, shut off power when unit is not use.
Clean cabinet with dry, soft cloth only after power is turned off.
Operating Precautions
Place product on leveled surfaces where there are little dust and good ventilation.
Avoid exposing unit to moisture, heat, vibration, and direct sunlight. Moisture may cause condensation to build
within the lens and will affect the play functions. If condensation occurs, turn unit on, unload disc, then turn for 1-2
hours.
This will vaporize the condensation with the heat generated.
Do not power on and off frequently. Wait seconds prior to reopening
Do not play broken, damaged, or twisted discs. Do not place anything other than discs into tray. If discs are
improperly loaded, do not force.

Table of content
1. DVD features and specifications ….….……………………………………………………………….…………………………………………............ 1
2. Name of parts …………………………………………………………………...……………………….……………………………..………….………. 2
2.1. Frontal panel ……………………………………………………………………………………….……………………………………..………….. 2
2.2. Rear panel ………………………………………………………………………………………….…………………………………………..…….. 2
3.2. Assembling batteries of remote control ……………………………………………………………………………………………………………. 4
4. Basic operations …………………………………………………………………………………………...…………………………………...…………. 7
4.4. Stop playing ……………………………………………………………………………………………………………………………………...…… 7
5.4. Slow play ……………………………………………………………………………………...…………………………………………………...…. 9
5.6. Skip to previous chapter/track …………………………………………………………………………………………………………………….. 10
5.12. Display playing time and state …………………………...…………………………………………………………………………..………….. 12
Example 2: Set brightness and contrast ……………………………………………………………………….……………………………………… 14
Example 3: Parental ……………………..………………………………………………………………………………….…………………………... 15
7. Functions of buttons in remote control ………………………………………………………………………………………………..….…….………. 16
8. Technical terms …………………………………………………………………………….………………………………………..………….………… 20
9. Troubleshooting ………………………………………………………………………………………………………………….…….………….……… 21
10. How to deal with disk …………………………………………………….……………………………………………….………….………………… 22
11. Warranty………………………..…………………………………………………………………….……………………….……………….…………. 23
Example 1: Set TV screen ratio mode …………………………………………..………...………………………………………………………….. 13
6. System setting …………………………………..……………………………...…………………………………………………….…………….…….. 13
5.13. MP3 operations ………………………………………………………...………………………...……………………………………………..... 12
5.11. Program play ………………………………………………………………………………………..…………...………………………………... 11
5.10. Select subtitle language ……………………………………………………………..…………………………………………………………… 11
5.9. Repeat play ……………………………………………………………………..………………………………...………………………………… 10
5.8. Display track list ………………………………………………………………..…………………………………………………………………… 10
5.7. Select track …………………………………………………………………………………...………………………………………………..…… 10
5.5. Skip to next chapter/track …………………………………………………………………………………………………………...…………….. 10
5.2. Play fast forward ………………………………………………………………………...…………………………………………………………… 9
5.3. Play fast backward …………………………………………………………………………………………………………………...…………….... 9
5. Frequent operations ………………………………………………………………………...…...………………………………………………………... 9
5.1. Select content to be played with menu …………………………………………………………………………………………………………….. 9
4.5. The use of remote sensor …………………………………………………………………………………………………………………………… 8
4.6. Last memory function …………………………………………………...……………………...…………………….……………………………… 8
4.3. Mute ………………………………………………………………………………...…………...……………………………………………………. 7
4.2. Pause …………………………………………………………………………...…………………………………………………………………….. 7
4.1. Play …………………………………………………………………………………...…………………………………………………...………….. 7
3.3. Connections ……………………………………………………………………………………………………………………………...…………... 5
3.1. Unpacking and check ……………………………………………………………………………………………………..………………………… 4
3. Preparation before operation ………………………………………………………………………………..…………………………………………… 4
2.3. Remote control ………………………………………………………………………..….………………………………………………………….. 3

DVD features and specifications
Features & Benefits
z DVD, VCD, SVCD, CD-R, CD-RW, MP3 compatible
z Last scene memory
z Slot type disc feeder
z On screen display menu
z Full function wireless remote control
z Volume control
z Zoom feature
Specifications
Other video format: CDDA, HDCD, CDG, WMA, JPEG, MPEG1, MPEG2, MPEG4
Audio format: Analog stereo audio L/R channel output
Power voltage: DC 10V~16V
Power consumption: 15W
Frequency response: DVD: 20Hz-20KHz
Weight: 1.2Kg
Product dimension: 170x160x30 (mm)
Operation temperature: -20к~70к
Storage temperature: -40к~85к
Notes: Any change to the design and specifications will not be advised.
-1-
z Slow play back
z 5 speed fast forward/backwards
z Step play/program play
z Frame by frame/Slow motion
z Multiple language menu/subtitle
z NTSC/PAL compatible
z Mechanical/electronic/memory anti shock
Output interface: RCA output x 1
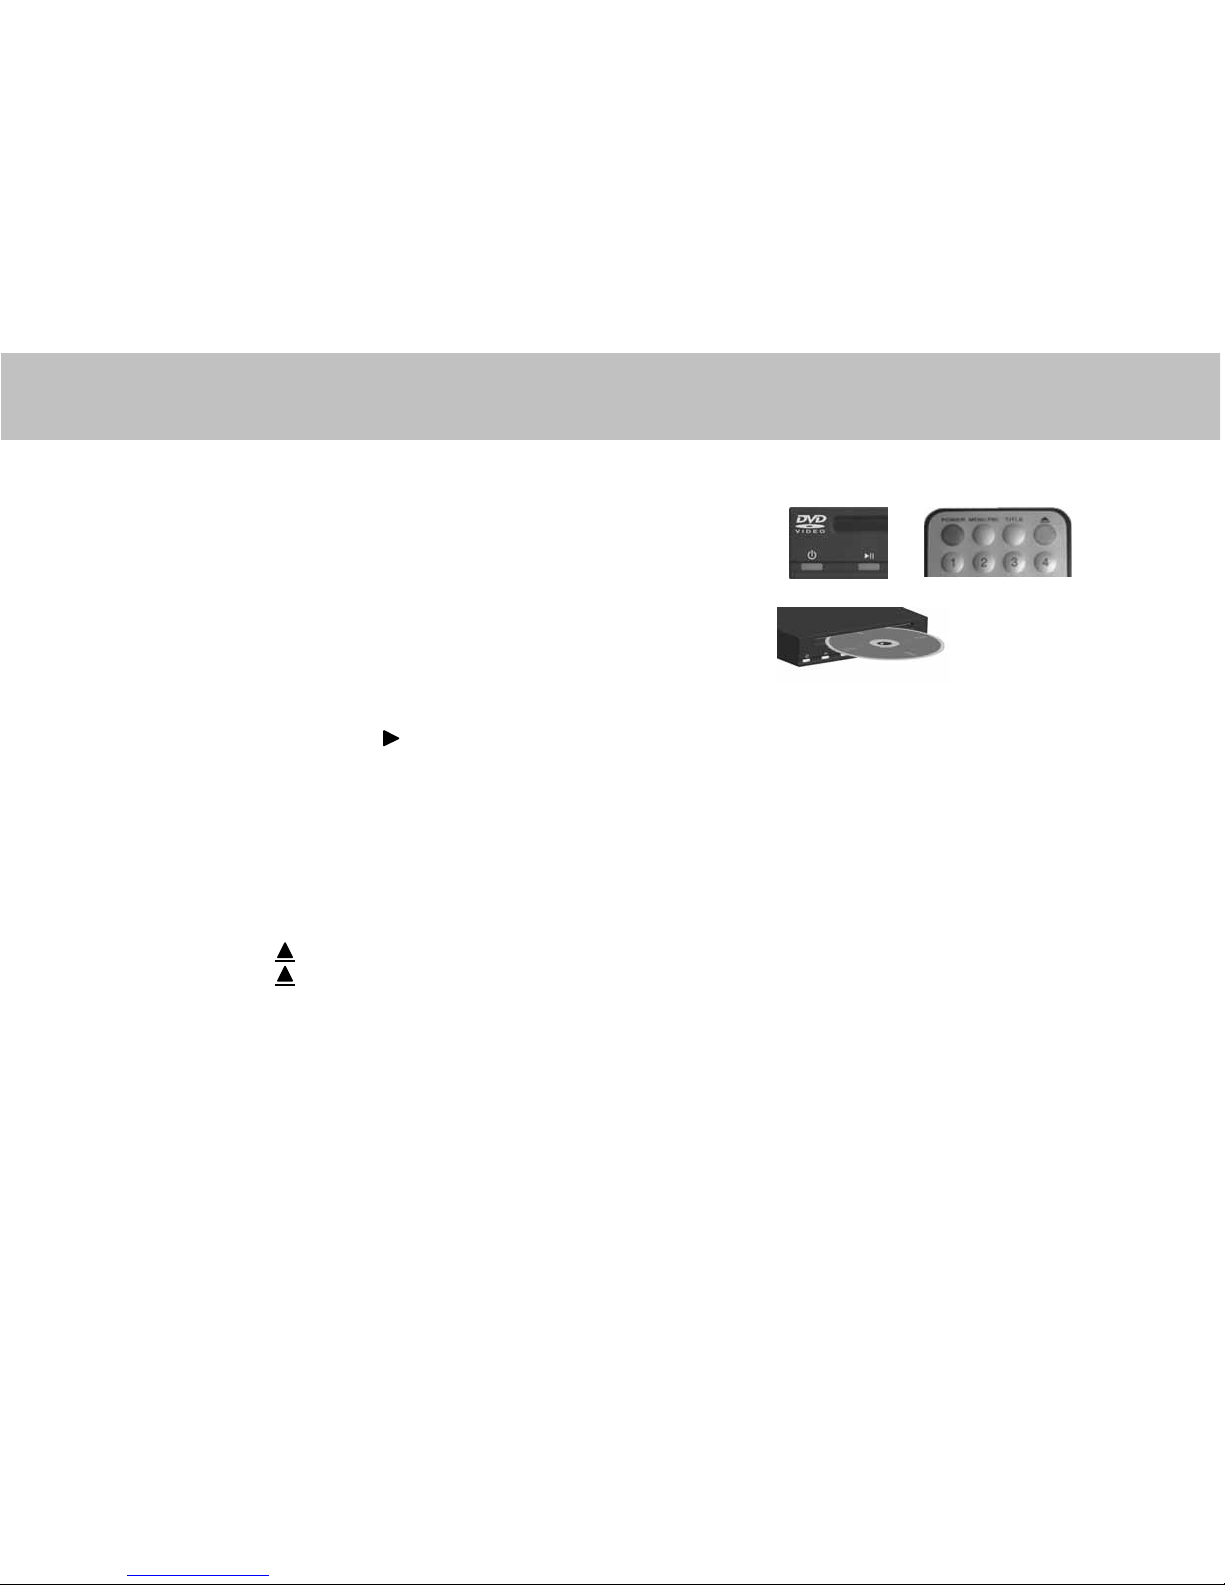
Names of parts
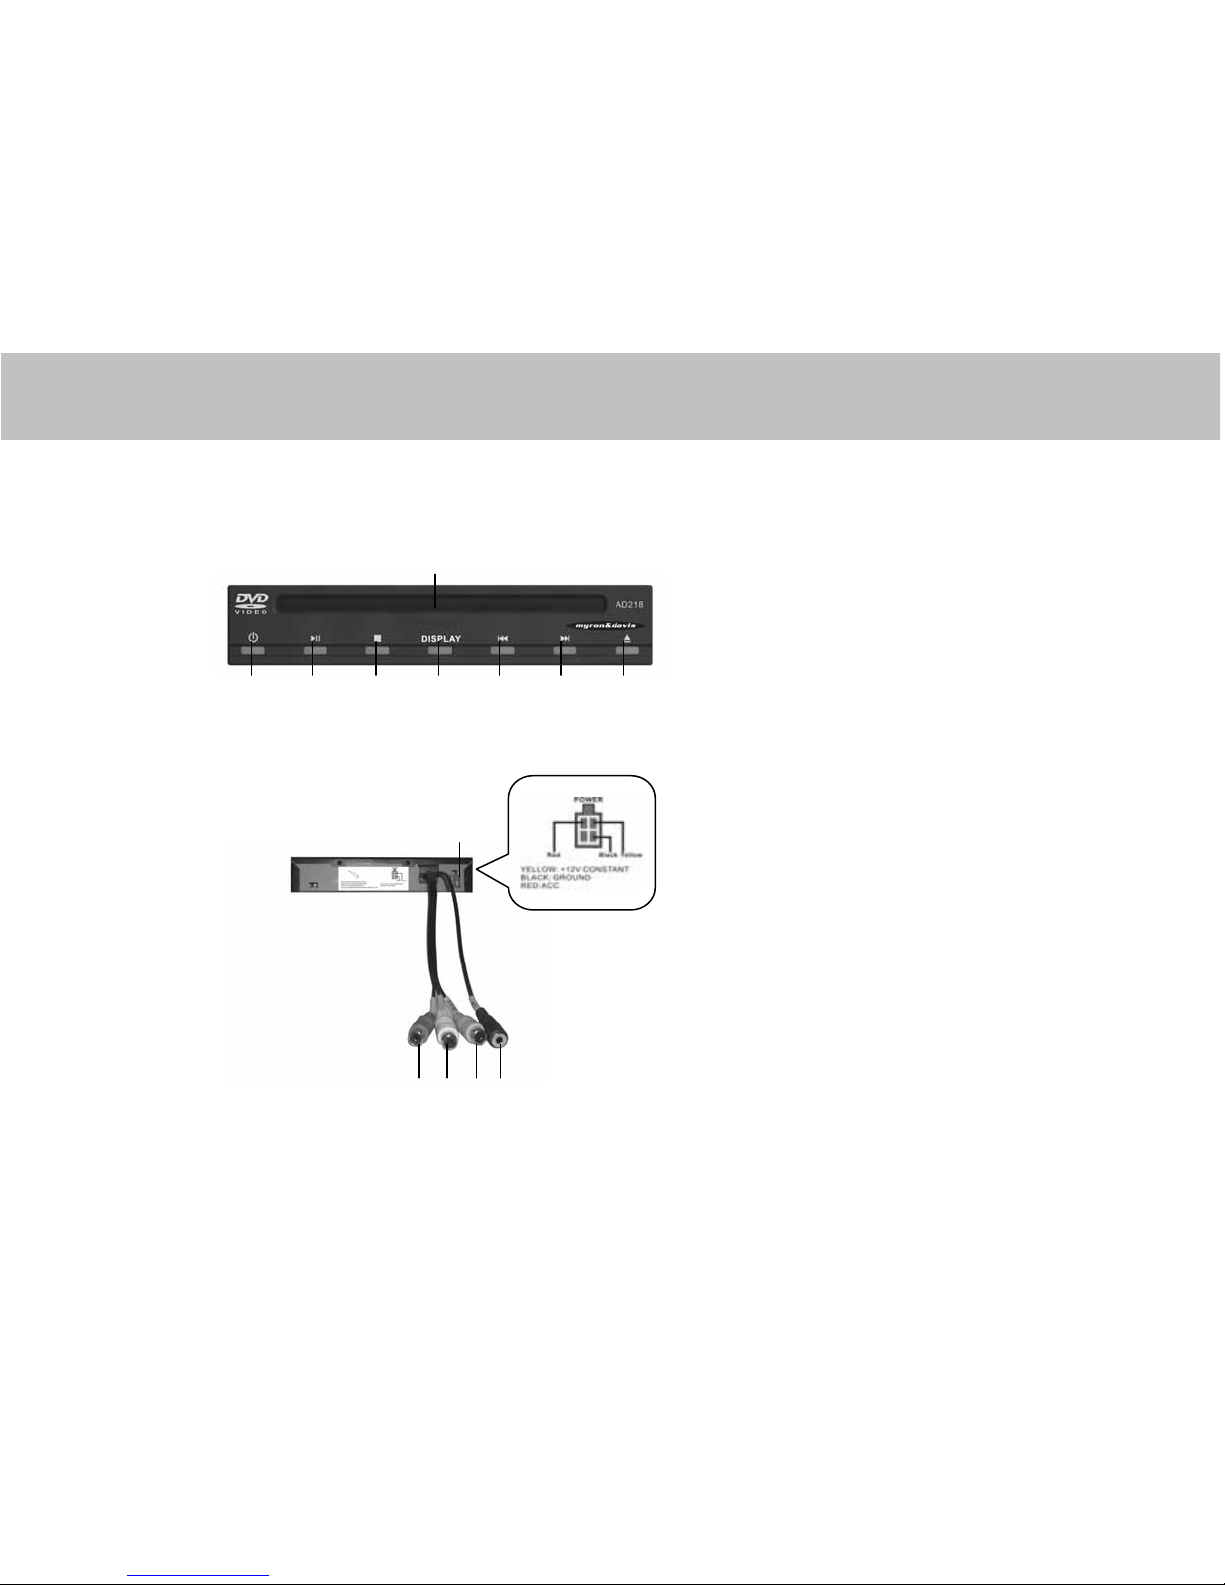
2. Names of parts
2.1. Front panel
2. POWER
3. PLAY/PAUSE
4. STOP
5. DISPLAY
6. PREVIOUS
2.2. Rear panel
1
1. POWER
5. REMOTE SENSOR
2 3 4 5
-2-
2 3 4 5 6 7 8 7. NEXT
1 1. DISK SLOT
8. EJECT
4. VIDEO OUT (YELLOW)
3. AUDIO-L OUT (WHITE)
2. AUDIO-R OUT (RED)
Names of parts
-3-
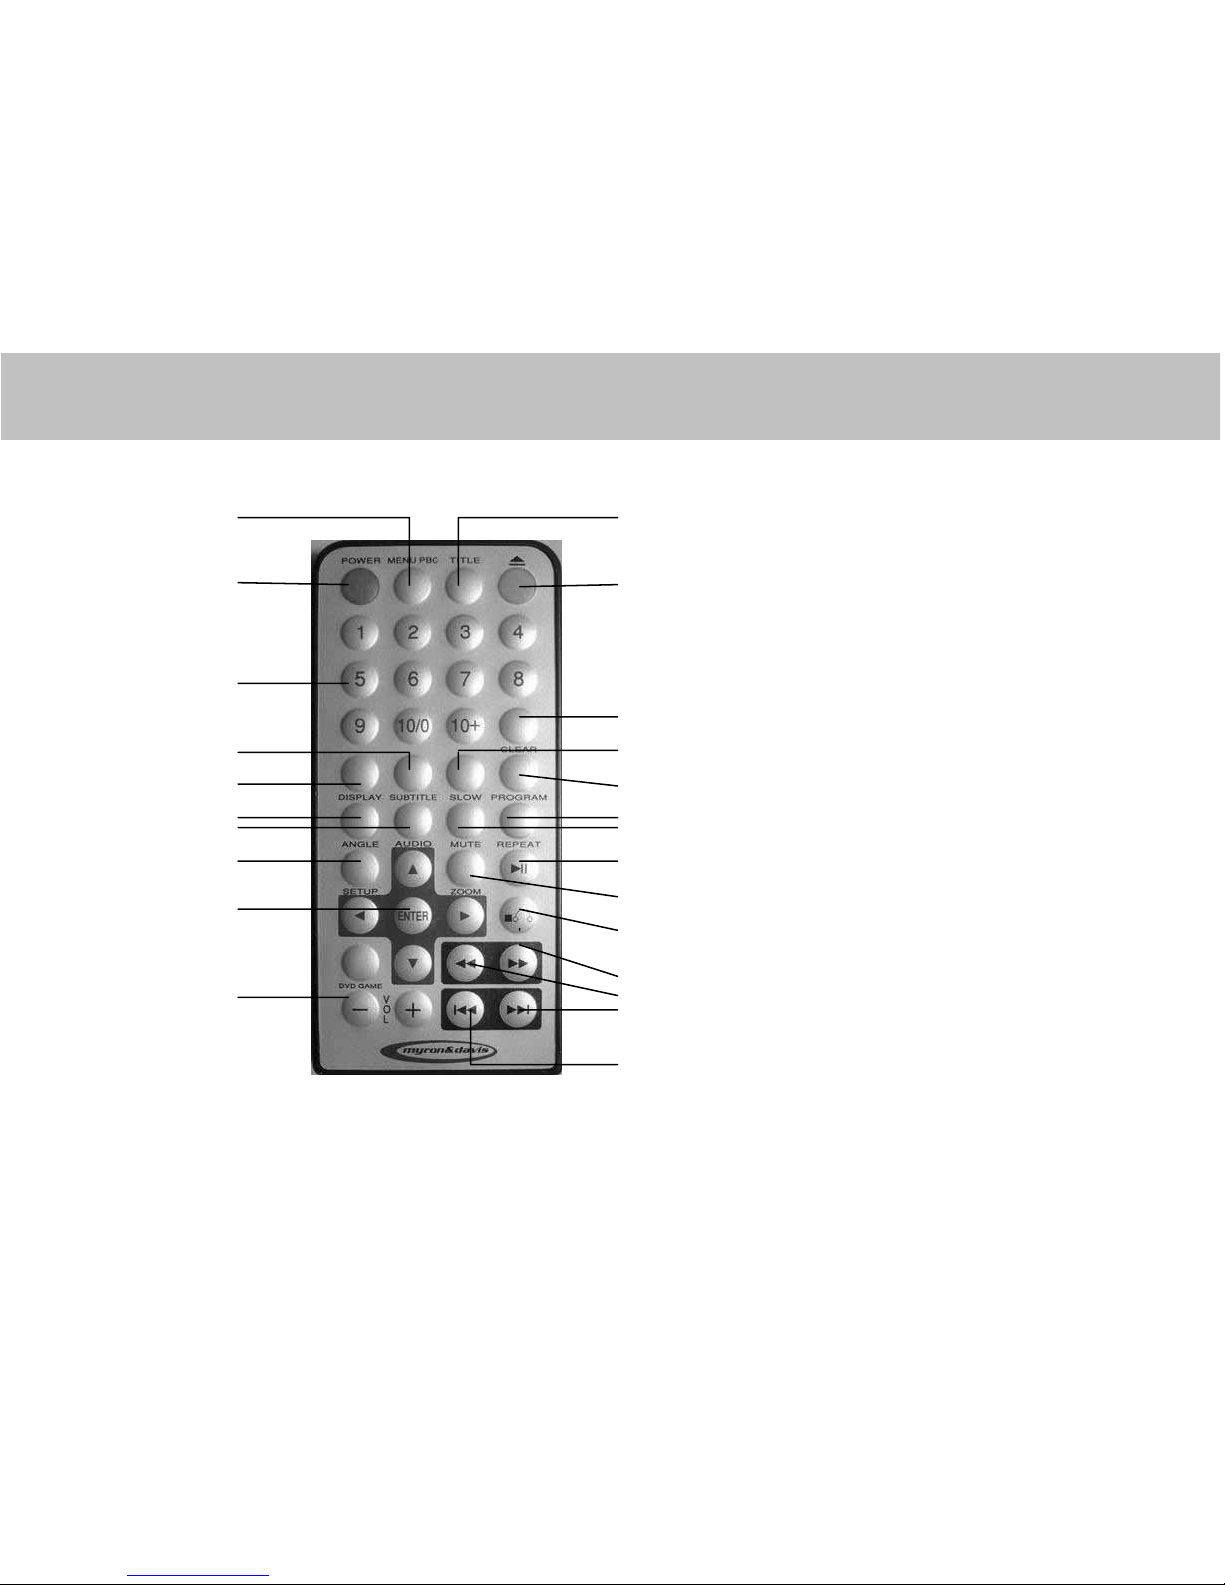
2.3. Remote control
1 11 1. MENU PBC 13. CLEAR
2. POWER 14. SLOW
2 12 3. NUMBER 15. PROGRAM
4. SUBTITLE 16. REPEAT
5. DISPLAY 17. MUTE
6. ANGLE 18. PLAY/PAUSE
7. AUDIO 19. ZOOM
3 8. SETUP 20. STOP
13 9. ENTER/SELECT 21. FORWARD
10. VOLUME 22. BACKWARD
4 14 11. TITLE 23. NEXT
5 15 12. EJECT 24. PREVIOUS
6 16
7 17
8 18
9 19
20
21
10 22
23
24

Preparation before operation
3. Preparation before operation
3.1. Unpacking and check
Check for the following accessories:
REMOTE CONTROL (1)
BRACKETS (2)
SCREWS (4)
BATTERIES (2)
OWNER’S MANUAL (1)
REMOTE SENSOR (1)
3.2. Assembling batteries of remote control
Open battery compartment, insert two AAA batteries, make
sure to match “+” and “-“ of the batteries to the marks in the
battery compartment. While operating remote control, please
point it to the front of the DVD player.
-4-
Names of parts
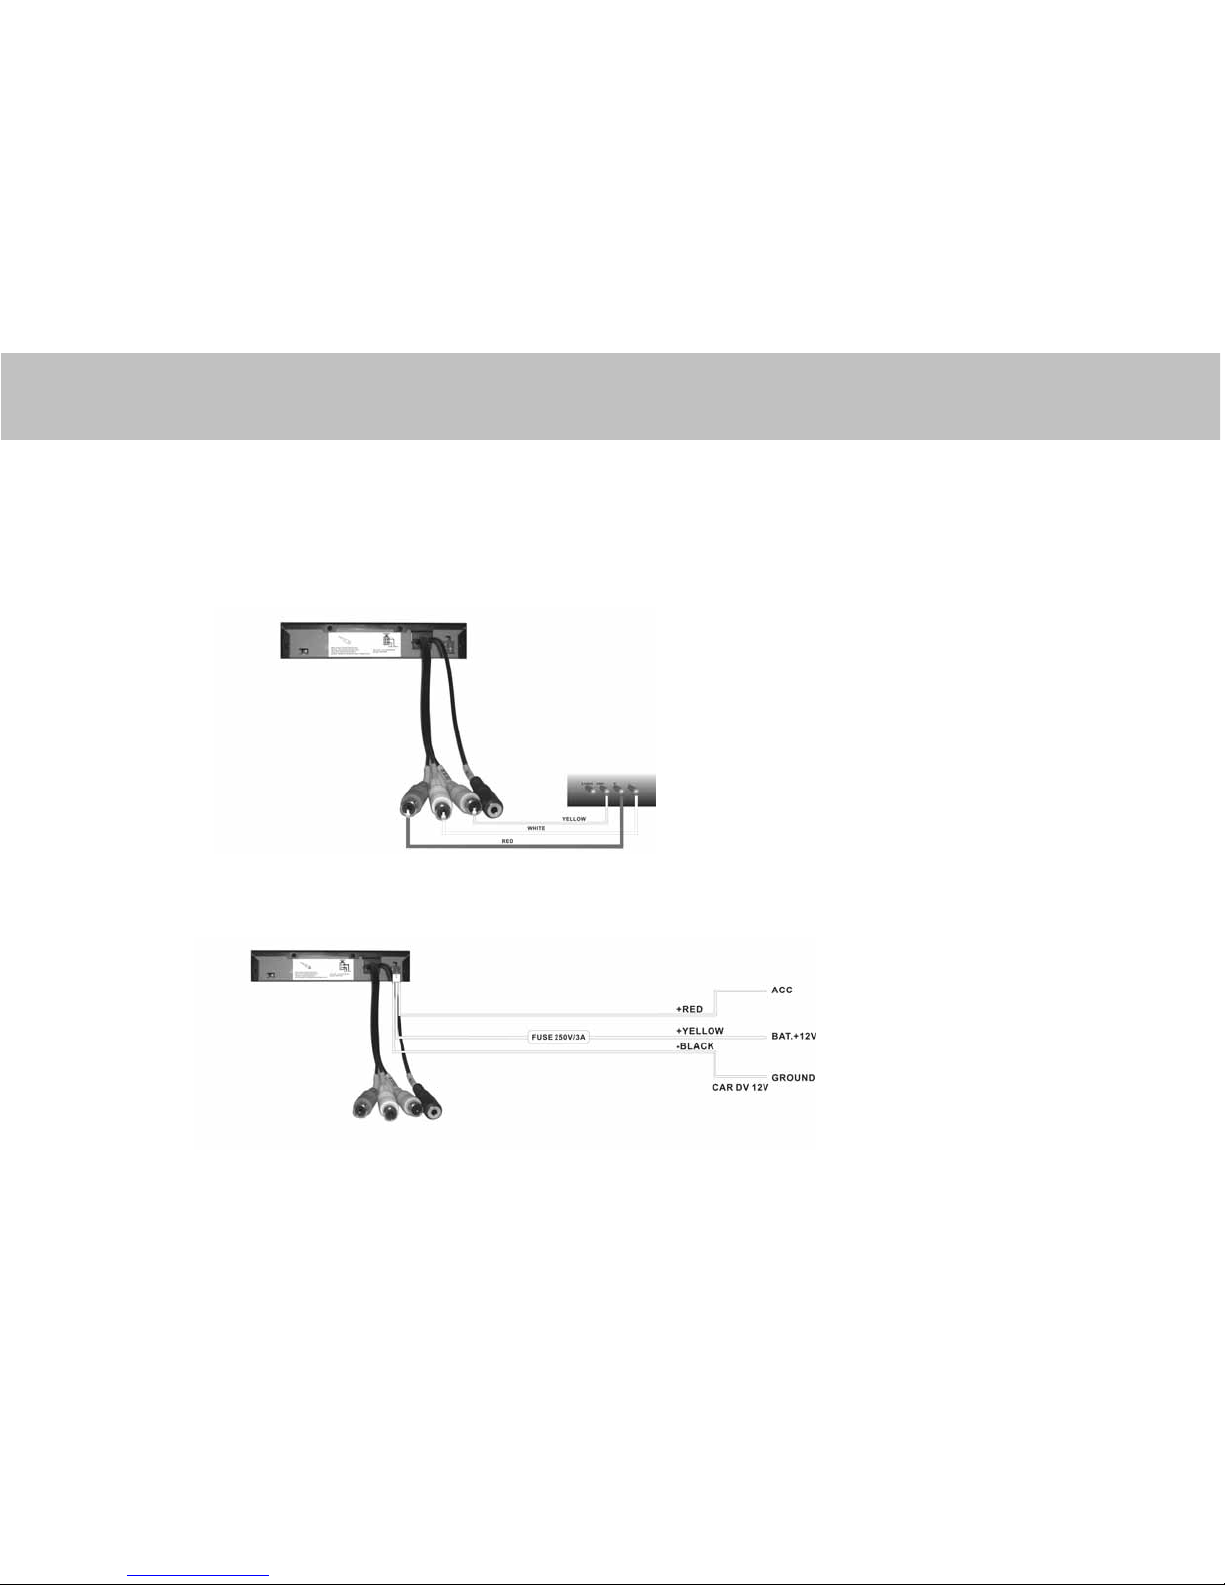
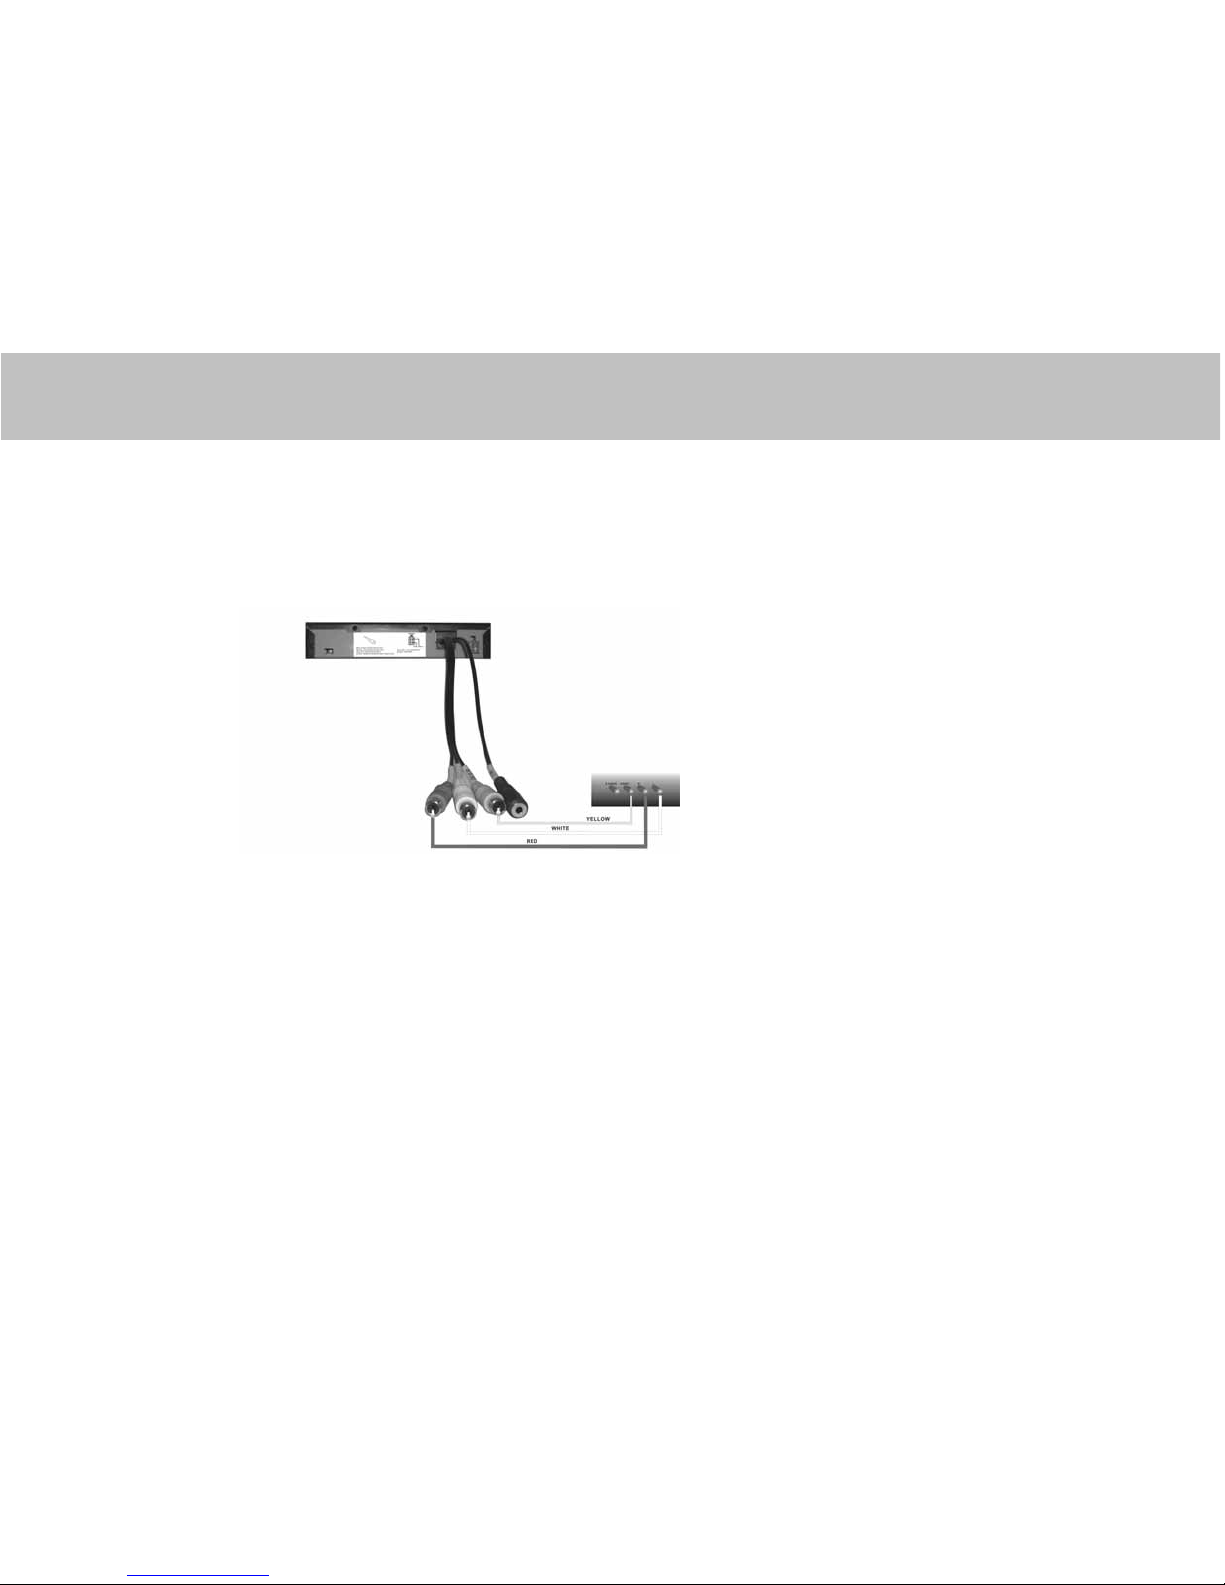
3.3. Connections
The video signal is output through composite video output terminal, while audio signal is output
by either RCA terminal or coaxial terminal (digital).
DVD to MONITOR
TV
DVD to FILTER
Wiring diagram for automotive application
-5-
Preparation before operation
DVD to AMP
If you are powering more than two screens, you may need to add an amplifier to boost the output
signal. Connect the video and audio outputs to the amplifier using RCA cables.
AMP
-6-
Basic operations
4. Basic operation
4.1. Play
1. Push [POWER] in the player.
2. Insert media discs in DVD slot. Disc will
start to play automatically.
4.2. PAUSE
While playing, push [ II ] to pause the feature.
Press again to resume playback.
4.3. Mute (available to analog audio output signal only)
Push [MUTE] to silence the sound of the player, press it again to return to normal state.
4.4. Stop playing/Eject
1. Push [
] to eject disc from DVD player .
2. Push [
] again to reload disc into DVD player.
3. Press POWER button to turn off the power.
-7-

Basic operation
4.5. The Use of Remote Sensor
Depending on the placement of your DVD player, you can control the
DVD function either by pointing directly at the DVD player, external
remote sensor mounted on the dash of your vehicle or at the Myron&
Davis monitor..
4.6. Last Memory Function
After the engine is turned off, power button is po wered off, or the function is set to line in by accident,
when the players turned back on again, it will start from where it last ended.
(Basic operation)
1. While playing, if you find that the picture is not
shown at full screen, partially hidden, or black
and white images occur, you will need to restart
the system. Please select the correct TV system
(PAL or NTSC).
2. When the symbol shows to the TV screen,
it signified an invalid operation and is not
accepted by the player.
-8-
 Loading...