

Page 1
Page 2

Page 3

TABLE OF CONTENTS
Introduction . . . . . . . . . . . . . . . . . . . . . . . . . . . . . . . . . . . . . . . . . . . . . . . .1
Your Myotone® Facial Toning System Device . . . . . . . . . . . . . . . . . . . . .2
Myotone® Conductive Gel . . . . . . . . . . . . . . . . . . . . . . . . . . . . . . . . . . . . 3
Additional Myotone® System Items . . . . . . . . . . . . . . . . . . . . . . .. . . . . . .4
Before Using Your Myotone® . . . . . . . . . . . . . . . . . . . . . . . . . .. . . . . . .5
Usage Instructions-- Personal Preparation. . . . . . . . . . . . . . . . . . . . . . . . . 6
Basic Techniques Face . . . . . . . . . . . . . . . . . . . .. . . . . . . . . . . . . . . . . . . .7
Basic Techniques Forehead . . . . . . . . . . . . . . . . . . . . . . . . . . . . . …… . 8
Advanced Techniques Eye and Temple…. . . . . . . . . . . . . . . . . . . . . …. . 9
Advanced Techniques Forehead . . . . . . . . . . . . . . . . . . . . . . . . . . . . . . . 10
Advanced Techniques Cheek Movement 1 . . . . . . . . . . . . . . . . . . . . . . . .11
Advanced Techniques Cheek Movement 2 . . . . . . . . . . . . . . . . . . . . . . . .12
Advanced Techniques Jaw and Chin Movements. . . . . . . . . . . . . . . . . . . 13
Advanced Techniques Neck Movement 1 . . . . . . . . . . . . . . . . . . . . . . . .. 14
Advanced Techniques Neck Movement 2 . . . . . . . . . . . . . . . . . . . . . . . . .15
Cleaning & Maintenance & Troubleshooting. . . . . . . . . . . . . . . . . . . . . . 16
Indications for Use & Warnings . . . . . . . . . . . . . . . . . . . . . . . . . . . . . . . . . 17
Precautions . . . . . . . . . . . . . . . . . . . . . . . . . . . . . . . . . . . . . . . . . . . . . .. . 18
Adverse Reactions . . . . . . . . . . . . . . . . . . . . . . . . . . . . . . . . . . . . . . . . . . . 19
Technical Specifications . . . . . . . . . . . . . . . . . . . . . . . . . . . . . . . . . . . . . . .20
Page 4

USER MANUAL
Myotone® is a non-invasive cosmetic toning device that rejuvenates and
renews your facial appearance safely and effectively at home. This device
delivers low level microcurrent impulses to strategic locations on the face
and allows the user to adjust settings from 0 to 480 microamps for a
personalized comfort level. Our patented procedure for facial toning is on
the cutting edge of microcurrent technology. Regular use of your Myotone®
device will result in a more vibrant and youthful looking face.
In order for this device to work properly, it is important to first apply the
Myotone® Conductive Gel to the skin areas that are being treated. Gently
apply the Myotone® to strategic areas of your face as outlined in this
manual. The Myotone® has 3 toning settings to adjust to your comfort
level. Using your Myotone® for just 5-10 minutes a day will provide you
with a vibrant more youthful looking face!
The Myotone® System includes the following:
1. Myotone® Device
2. Myotone® Conductive Gel (4 fl. oz.)
3. Myotone® Charger (Pow
er Adapter)
4. Myotone® Internal
Battery Pack (Only replaceable by manufacturer)
5.
Myotone® Instructional DVD
6. Myotone® User Manual
Indications for Use and Intended Use
The
Myotone® Facial Toning Device is intended for facial stimulation and is
indicated for over-the-counter cosmetic use.
Page | 1
Page 5
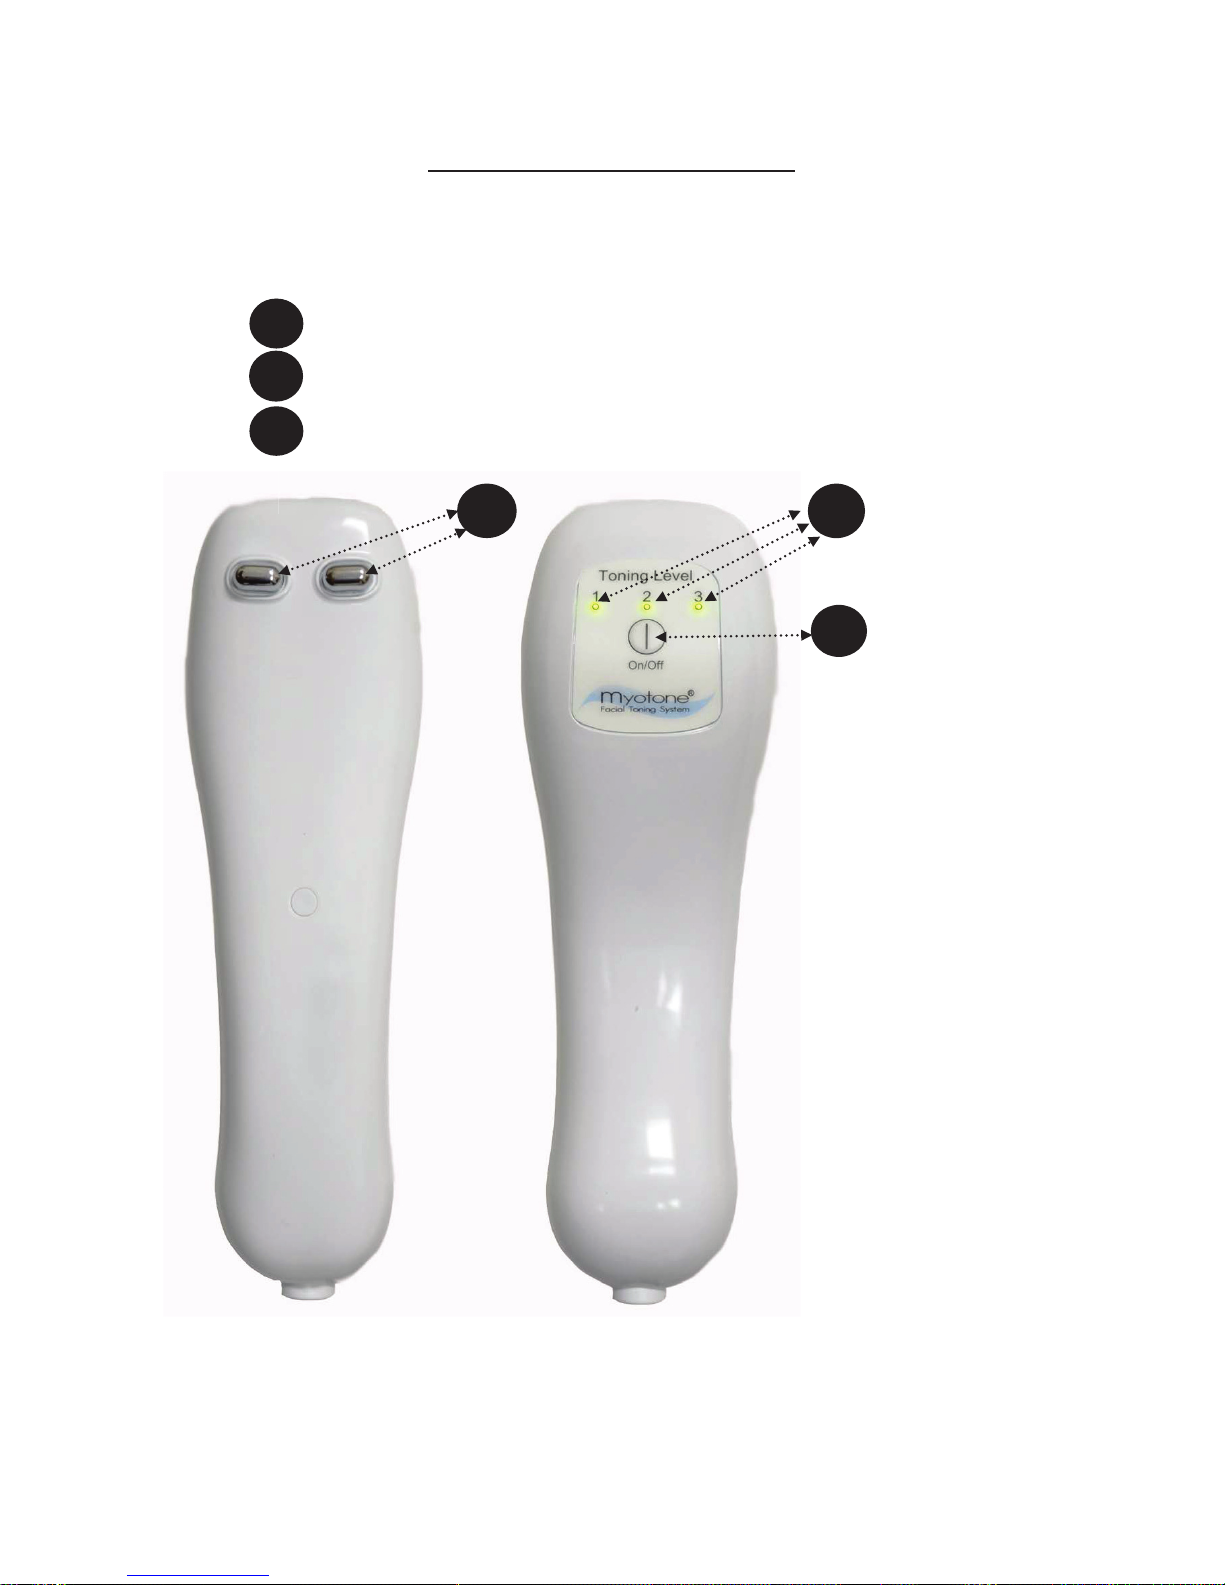
The Myotone® System
Myotone® General Specifications:
Measures approx. 7.5” L x 2.2” W x 2” H Device Net Weight is approx. 5.6 oz.
System Kit Gross Weight is approx. 1lb.8.6oz Made by Myo Technologies, Inc. in the USA
Dual Electrode Tips
On/Off Button and Toning Level Toggle Button
Toning Level and Charging Indicator Lights
A
B
C
B
C
A
1. Myotone® Device
Page | 2
Page 6

2. Myotone Conductive Gel
x 4 fl. oz. (Conductivity Gel)
x Product Description: Clear gel for conductivity.
This product is water soluble.
x Ingredients: Purified Water, EDTA Disodium, Propylene Glycol,
Diazolidinyl Urea, Iodopropynyl, Carbomer, Glycerin and
Triethanolamine.
Additional Myotone® Conductive Gel can be ordered from our online ordering
store at www.myotone.com or by calling us toll free at 1-877-969-2811.
Page | 3
Myotone Elite System
Page 7
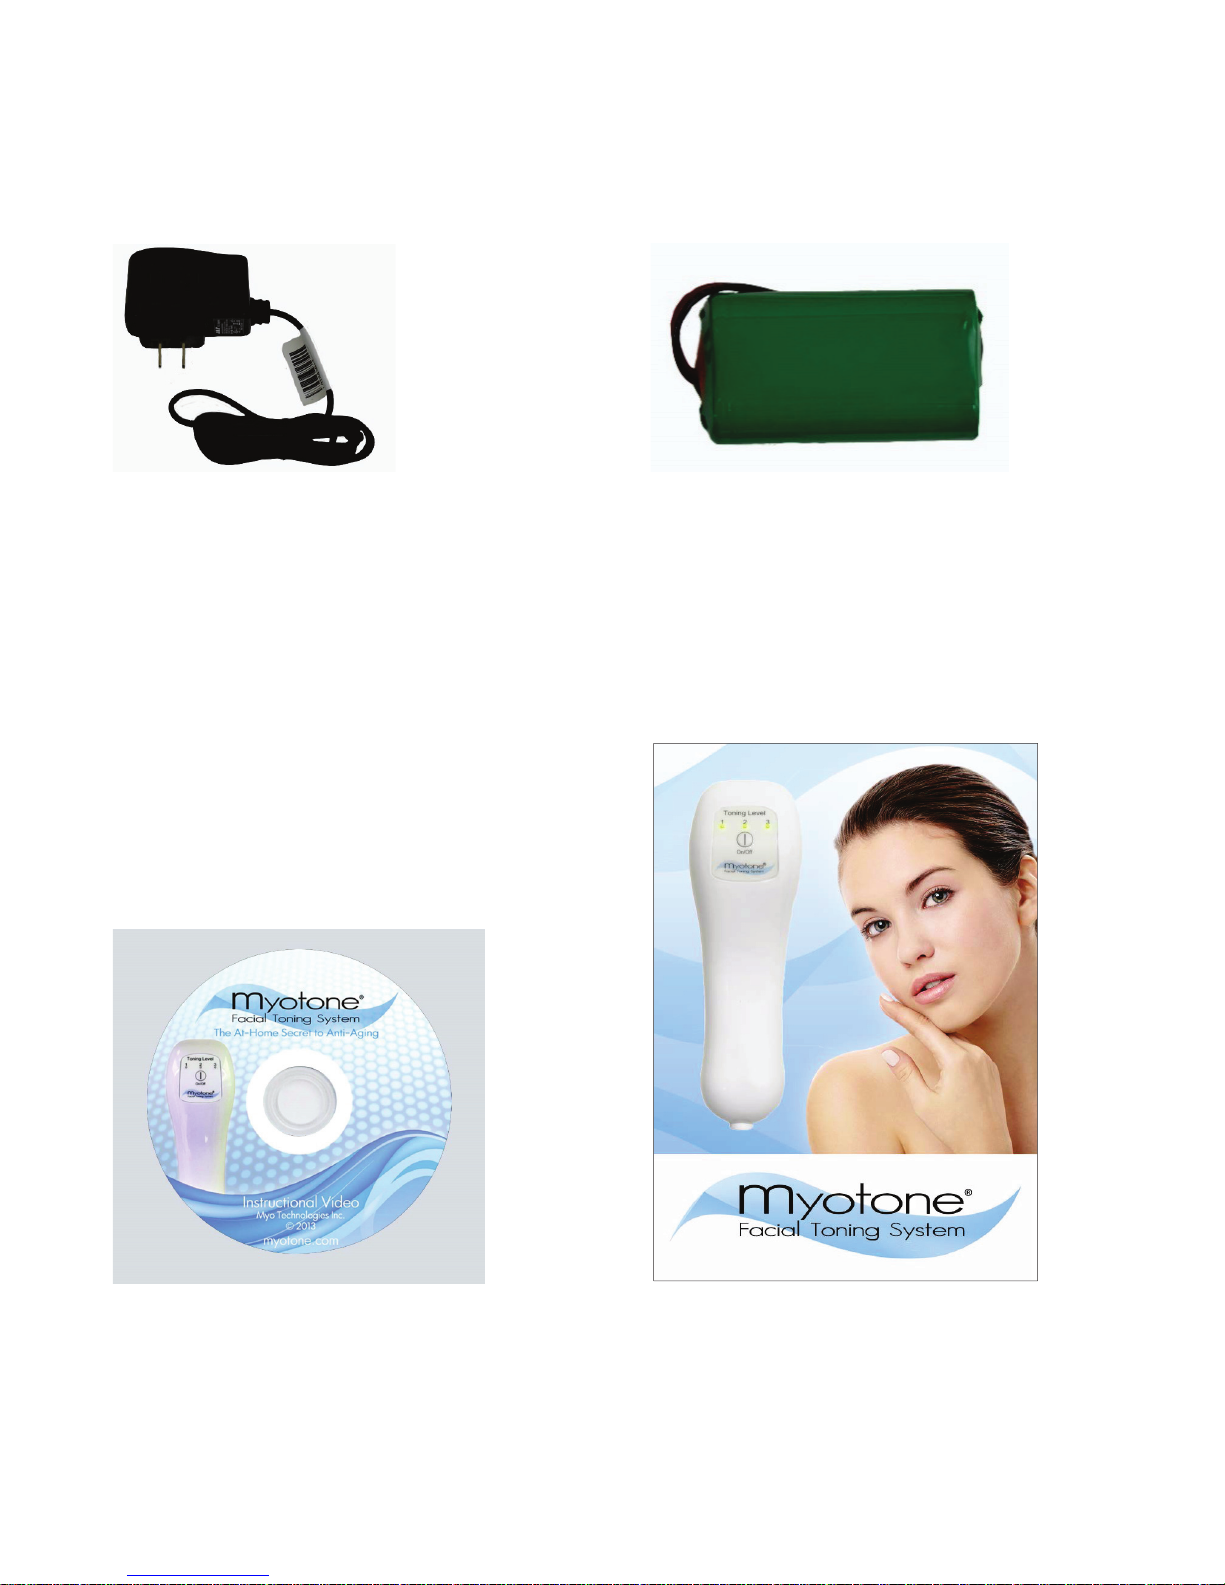
Additional Items Included:
3. Myotone Charger (Power Adapter) 4. Myotone Internal Battery Pack
Input : 100-240v Output 5v 2 (3.7) V Rechargeable Lithium Ion batteries
Note: For use only with the Myotone Unit Note: Battery Pack is not replaceable by user.
and is not approved for any other device. Please call the manufacturer for replacement.
5. Myotone Instructional DVD 6. Myotone User Manual
Directions for use of your Myotone Directions for use and precautions
Page | 4
Page 8

Before Using Your Myotone®
x Remove the Myotone® device and power adapter from the package.
x Plug your device into a working electrical outlet using your power
adapter. The Myotone® must be charged for 6 hours prior to your first
treatment. Following the initial charge, once every week to 2 weeks is
sufficient. Note: The green LED “Toning Level” light will flash if the
battery is getting low.
x When the provided charger is plugged into your Myotone®, the green LED
indicator lights on your Myotone® will flash and cycle through all three toning
levels one at a time, 1-2-3, indicating the device is charging. When the device
is fully charged, all three of the green LED lights will remain solid, at that point
your Myotone® is ready to use. Disconnect your device from the power
adapter and turn it on by pressing the On/Off button.
x Do not use your Myotone® while connected to the power adapter. The
Myotone® will not function while plugged into a power source.
x You may adjust the toning level to your comfort by repeatedly pressing
the On/Off button. Each time you press the On/Off button your
Myotone® will advance through Toning Levels 1, 2, 3 and then turn off.
With the Myotone off press the On/Off button once for level 1, twice for
level 2, three times for level 3, and four times to turn your Myotone®
back off. Note: To turn your Myotone off from toning level 1, press the
On/Off button three times. From Toning Level 2, press On/Off button
twice. From Toning Level 3, press On/Off button once.
x Always cover the area being treated with Myotone® Conductive Gel.
x When your device is turned on, an electrical current is emitted through
the electrode tips. For proper conductivity, make sure that both electrode
tips are always touching the skin at the same time.
x Begin your Myotone® treatment as described on page 8 of this manual.
Watch the Myotone® Instructional DVD for additional help.
x Remember to turn your Myotone® off after every treatment.
Note: Your Myotone® device will not contract your muscles nor cause them to
twitch. You may feel a slight tingling sensation, although some users will not feel
a sensation at all. The current can be sub-sensory because it mimics the brain’s
natural current and thus is very, very small. If you do not feel the current it is OK.
As long as the green LED light is on (matching the toning level you have
selected) your Myotone is functioning properly. However, if the sensation does
becomes unpleasant, lower the toning to level 1. When used correctly, the
current can be very soothing.
Page | 5
Page 9

Myotone® Usage Instructions
Personal Preparation
To gain optimal results, start by cleansing your face with a non-oil based
cleanser. It is recommended that men cleanly shave any unnecessary hair
from their face before use. Exfoliating the areas to be treated 1 to 2 times
per week should allow for even better results.
Position yourself in front of a mirror in a well-lit room. Once you become
familiar with the proper placements of your Myotone® device, you may
choose to perform your treatments without the use of a mirror.
Apply the Myotone® Conductive Gel to only one side of your face at a time.
Apply a small amount of conductive gel to the dual probes of the Myotone®
device. Use just enough gel to completely cover the probes. If the gel
begins to dry during your treatment, reactivate the gel by applying a small
amount of water to the area being treated. For best results, the Myotone®
Conductive Gel is recommended. Aloe Vera or other water based gels with
enzymes may cause wearing to electrode tips.
For best results, use your Myotone® system 5-7 times per week for the
initial 5 weeks. Use the system 3 times per week for the next 2 weeks, and
then 2 times per week for the following two weeks. After that you only need
to use your Myotone® system once per week for maintenance or if you feel
you need a “Myo-boost”.
Do not use your Myotone® in any way other than directed in this
instruction manual.
Page | 6
Page 10

Basic Techniques Figure 1
Directions- Face
1. Appl
y the Myotone®
Conductive Gel.
2. Position both probes just
above y
our jaw line on the
points marked, and .
Hold for 4 seconds.
(Fig. 1)
3. Reposition the probes on
the points marked
and .
Hold for 4 seconds.
(Fig. 1)
4. Position both probes
under y
our cheek bone on
the points marked and .
Hold for 4 seconds.
(Fig. 1)
5. Reposition the probes by
y
our hairline on the points
marked and . Hold for 4
seconds.
(Fig. 1)
6. Position both probes
under y
our cheek bone, to
the side of your mouth on
the points marked and .
Hold for 4 seconds.
(Fig. 2)
7. Reposition the probes on
the points marked
and ,
in the center of the cheek
area. Hold for 4 seconds.
(Fig. 2)
8. Lastly, reposition the
probes on points marked
with
and near the back
of your cheek. Hold for 4
seconds.
(Fig 2)
Repeat each step 2 times.
Figure 2
Page | 7
Page 11

Basic Techniques
Directions- Forehead
1. Appl
y the Myot
one®
Conductive
Gel.
2. Position the probes
above y
our temple on the
points marked and .
Hold for 4 seconds.
(Fig 1)
3. Reposition the probes
above the center of y
our
eyebrow, on the points
marked and . Hold for
4 seconds.
(Fig 1)
4. Be sure to keep the
probes
just above your
eyebrow. Do not let the
probes touch the eyes or
eyelids.
Repeat each step a total
of 2 times. When
completed, repeat the
steps on the opposite
side of your face.
NOTE: The Myotone®
Instructional video mentions
lowering toning level to 1 during
this movement. This is not a
necessary change unless
discomfort occurs.
Figure 1
Page | 8
Page 12

Advanced Techniques
Directions- Eye and Temple
1. Position the Myotone®
probes at the points marked
and . Hold for 4 seconds.
(Fig 1)
2. Then move the Myotone® in
a swooping “J” motion slowly
in the direction of the arrows
for a count of 4 seconds. Hold
at the end of the move near
your temple for 2 seconds.
(Fig 1)
3. Reposition the probes on
your temple on the points
marked and . Hold for 4
seconds then move the
Myotone® slowly in the
direction of the arrows up to
your hairline.
(Fig 2)
4. Reposition the probes on
the points marked and .
Hold for 4 seconds then move
the Myotone® slowly in the
direction of the arrows up to
your hairline.
(Fig 2)
Repeat each step 2 times
on both sides of face.
*Note: We do recommend
only using settings 1 or 2
around the eye area.
Figure 1
Figure 2
Figure 2
Page | 9
Page 13

Advanced Techniques
Directions- Forehead
1. Position the probes at the
points marked
and . Hold for
4 seconds then move the
Myotone® slowly in the direction
of the arrows towards your scalp
for a count of 4.
(Fig 1)
2. Reposition the probes at the
points marked and .
Hold
for 4 seconds then move the
Myotone® slowly in the direction
of the arrows towards your scalp
for a count of 4.
(Fig 1)
3. Reposition the probes at the
points marked and . Hold for
4 seconds then move the
My
otone® slowly in the direction
of the arrows towards your scalp
for a count of 4.
(Fig 1)
4. Reposition the probes at the
points marked and . Hold for
4 seconds then move the
M
yotone® slowly in the direction
of the arrows towards your scalp
for a count of 4.
(Fig 1)
Repeat 2 times on both sides of
your forehead.
Figure 1
Page | 10
Page 14

Advanced Techniques
Directions- Cheek Movement 1
1. Position the probes at the
points marked and . Hold for
4 seconds then move the
My
otone® slowly in the direction
of the arrows towards your ear
for a count of 4.
(Fig 1)
2. Reposition the probes at the
points marked and
. Hold for
4 seconds then move the
Myotone® slowly in the direction
of the arrows towards your ear
for a count of 4.
(Fig 1)
3. Reposition the probes at the
points marked and
. Hold for
4 seconds then move the
Myotone® slowly in the direction
of the arrows towards your ear
for a count of 4.
(Fig 1)
4. Finally, reposition the probes
at the points marked and
.
Hold for 4 seconds then move
the Myotone® slowly in the
direction of the arrows towards
your ear for a count of 4.
(Fig 1)
5. Repeat 2 times on both sides
of y
our face. Do not allow the
probes to touch your lips.
Figure 1
Figure 1
Page | 11
Page 15

Advanced Techniques
Directions- Cheek Movement 2
1. Position the probes at the
points marked and , along
the jaw
line. Hold for 4 seconds,
then move the Myotone® slowly
in the direction of the arrows
towards your eye bone for a
count of 4.
(Fig 1)
2. Reposition the probes at the
points marked and
, along
the jaw line. Hold for 4 seconds,
then move the Myotone® slowly
in the direction of the arrows
towards your eye bone for a
count of 4.
(Fig 1)
3. Reposition the probes at the
points marked
and , along
the jaw line. Hold for 4 seconds,
then move the Myotone® slowly
in the direction of the arrows
towards your eye bone for a
count of 4.
(Fig 1)
4. Finally, reposition the probes
at the points marked and ,
along the jaw
line. Hold for 4
seconds, then move the
Myotone® slowly in the
direction of the arrows towards
your eye bone for a count of 4.
(Fig 1)
Repeat each step 2 times on both
sides of your face.
Figure 1
Page | 12
Page 16

Advanced Techniques
Directions- Chin Movement 1
1. Position the probes at the
points marked and .
Straddle y
our jawbone in the
center of your chin with each
electrode. Hold for 4 seconds
then move the Myotone®
slowly in the direction of the
arrows towards your ear for a
count of 4 seconds.
(Fig 1)
Directions- Chin Movement 2
2. Reposition the probes at the
points marked and . Probes
shoul
d only be placed directly
centered under your chin in the
tissue there, do not place the
probes over trachea or midline
of the neck. Hold for 4 seconds
then move the Myotone® slowly
up in the direction of the arrows.
(Fig 2)
3. Reposition the probes at the
points marked and . Hold for
4 seconds
then move the
Myotone® slowly up in the
direction of the arrows.
(Fig 2)
4. Repeat each step 2 times on
both sides of the face.
Figure 1
Figure 2
Page | 13
Page 17

Advanced Techniques
Directions- Neck Movement 1
1. Position the probes at the
points marked and , just
above the collarbone. Move
the My
otone® in the direction
of the arrows for a slow count
of 4, stopping just under the
jaw line.
(Fig1)
2. Reposition the probes at the
points marked and . Move
the My
otone® in the direction
of the arrows for a slow count
of 4, stopping just under the
jaw line.
(Fig1)
3. Reposition the probes at the
points marked and . Move
the M
yotone® in the direction
of the arrows for a slow count
of 4, stopping just under the
jaw line.
(Fig1)
4. Reposition the probes at the
points marked and
. Move
the Myotone® in the direction
of the arrows for a slow count
of 4, stopping just under the
ear and jaw line.
(Fig1)
5. Repeat each step 2 times on
both sides of the neck.
F
igure 1
Page | 14
Page 18

Advanced Techniques
Directions- Neck Movement 2
1. Position the probes at the
points marked and
(just
above the collarbone) then
move the Myotone® in the
direction of the arrows for a
slow count of 4, stopping just
before the back of the neck.
(Fig1)
2. Reposition the probes at
the points marked and ,
then move the My
otone® in
the direction of the arrows for
a slow count of 4, stopping
just before the back of the
neck.
(Fig1)
3. Reposition the probes at
the points marked and ,
then move the My
otone® in
the direction of the arrows for
a slow count of 4, stopping
just before the back of the
neck.
(Fig1)
4. Reposition the probes at
the points marked and ,
then move the My
otone® in
the direction of the arrows for
a slow count of 4, stopping
just under the ear before the
back of the neck .
(Fig1)
5. Repeat each step 2 times on
both sides of the neck.
Note: Keep the probes away
from the midline of the neck. Do
not rest them near or on the
trachea. Be sure to position
them in the muscle just outside
of the area.
Figure 1
Page | 15
Page 19

Areas To Avoid
WARNING:
Do not use your Myotone® on:
x Mid-line of neck
(avoid area near or on
the trachea for risk of
potential problems with
thyroid gland)
x Mouth Area (on top of
the lips or touching the
lips-if they happen to
brush or briefly touch
that is fine. Constant
use on lips is not
recommended)
x Eye Area (eyelid over
the eye ball or eye ball
itself)
Troubleshooting
If you are experiencing any problems
with the performance or functionality
of your Myotone® device, please
make sure that the device is being
charged from a working electrical
outlet, and that the toning level is set
properly. You may not feel the
current but as long as the green LED
light is lit on the toning level you have
selected, your Myotone® should be
functioning correctly. If problem
persists please call our toll free
number: 1-877-969-2811.
Cleaning & Maintenance
After each treatment, wipe all
application areas with a soft damp
cloth. Do not use any other cleaning
agents except water. To facilitate
better conductivity, take special care
when cleaning around the base of
the metal probes to prevent product
build-up. To insure the probes are
cleaned properly, you should use a
slightly damp Q-tip around the
probes. Do not submerge your
device in water or any other liquid.
Page | 16
Page 20

Indications for Use
Over-the-counter cosmetic use
Contraindication for Use
Do not use this device if you have a cardiac pacemaker, implanted defibrillator, or other
implanted metallic or electronic device. Such use could cause electric shock, burns,
electrical interference, or death.
Warnings
x If you are in the care of a physician, consult with your physician before using this
device;
x Do not apply stimulation around your mouth, eyes or vertical center of face and
neck;
x Do not apply stimulation across your chest because the introduction of electrical
current into the chest may cause rhythm disturbances to your heart, which could
be lethal;
x Do not apply stimulation near the thorax which may increase the risk of cardiac
fibrillation;
x Do not apply stimulation over painful areas. If you have painful areas, you should
consult with your physician before using this device;
x Do not apply stimulation in the presence of electronic monitoring equipment (e.g.,
cardiac monitors, ECG alarms), which may not operate properly when the
electrical stimulation device is in use;
x Do not use this device in close proximity to short-wave or microwave equipment;
x Do not apply stimulation when in the bath or shower;
x Do not apply stimulation while sleeping;
x Do not apply stimulation while driving, operating machinery, or during any activity
in which electrical stimulation can put you at risk of injury;
x Do not use the device on children, if it has not been evaluated for pediatric use.
x Consult with your physician before using this device, because the device may
cause lethal rhythm disturbances to the heart in susceptible individuals; and
x Apply stimulation only to normal, intact, clean, healthy skin.
Myotone® should not be used by:
x Children
x Pregnant Women
x People subject to seizures
x People with cancer/tumors
x People with cardiac pacemakers
x People with implanted defibrillators/stimulators
x People with electronic implanted devices
Page | 17
Page 21

Do not use Myotone® if you have or are experiencing:
Heart Conditions
Hemophilia
Facial Paralysis
Psoriasis
Advanced Diabetes
Multiple Sclerosis
Epilepsy
Skin Disorders
Do not use Myotone® if you currently have or use:
AHA Peels
Retin-A
Microdermabrasion
Renova
Do not use Myotone® directly on:
Open wounds or rashes
Recently damaged tissue
Cancerous lesions
Enlarged moles
Injured or inflamed skin
Painful areas
Precautions
Your Myotone® device is designed for cosmetic use only and for individuals in good
health. If this is not the case for you, please consult your physician before use. Be sure
to view your User Manual and Instructional DVD before using your Myotone®. A slight
tingling sensation may occur while using the Myotone® device. Lowering the toning may
reduce or eliminate this sensation. There also may be a perception of flashing lights
during your Myotone® treatment resulting from the stimulation of your optic nerve. If this
condition persists, please consult your physician.
x You may experience skin irritation or hypersensitivity due to the electrical
stimulation or electrical conductive medium. This can usually be reduced by
using an alternate conductive medium.
x The safety of electrical stimulation during pregnancy has not been established.
x If you have suspected or diagnosed heart disease, you should follow precautions
recommended by your physician.
x If you have suspected or diagnosed epilepsy, you should follow precautions
recommended by your physician.
x Use caution if you have a tendency to bleed internally, such as following an injury
or fracture.
x Use caution if stimulation is applied over areas of skin that lack normal sensation.
x Men should shave before use as hair can interfere with the conductivity of the
electrodes. Areas beneath a beard or mustache cannot be treated.
x This device has been tested for EMC Interference and may produce EMC
Interference. Do not apply stimulation in the presence of electronic monitoring
equipment (e.g., cardiac monitors, ECG alarms).
x The Myotone® device should be kept out of the reach of children.
Page | 18
Page 22

Adverse Reactions
There have not been any reported adverse reactions with the Myotone® device
specifically. However, skin irritation and burns beneath the electrodes have been
reported with the use of other electronic stimulators.
You may experience headache and other painful sensations during or following the
application of electrical stimulation near or around your eyes and face. You should stop
using this device and consult your physician if you experience any adverse reactions.
This device is solely intended for cosmetic use on the face. Any harmful consequence
resulting from misuse or application to other body areas, connection improper voltage
sources, dirty conductive solution or electrodes, or any other improper applications is
neither the responsibility of Myo Technologies, Inc. nor its affiliates.
This device has been tested and found to comply with the limits for medical devices to
the IEC 60601-1-2. These limits are designed to provide reasonable protection against
harmful interference in a typical medical installation. This equipment generates, uses,
and can radiate radio frequency energy and, if not installed and used in accordance with
the instructions, may cause harmful interference to other devices in the vicinity.
However, there is no guarantee that interference will not occur in a particular
installation. If this device does cause harmful interference to other devices, which can
be determined by turning the device off and on, the user is encouraged to try to correct
the interference by one or more of the following measures:
x Reorient or relocate the receiving device.
x Increase the separation between the equipment.
x Connect the equipment into an outlet on a circuit different from that to which the
other device(s) are connected.
x Consult the manufacturer or field service technician for help.
Explanation of Warning Symbols:
Type BF applied part
Attention, consult accompanying
documents
Page | 19
Page 23

Technical Specifications
Type of protection
against electrical
shock
Class II (while charging) or Internally Powered (while stimulating)
Degree of
protection against
electrical shock
BF
Degree of
protection against
ingress of water
(IEC 529)
IPx0
Suitability for use
in presence with
flammable
anesthetic mixture
Not suitable
Mode of operation Continuous
Electrical Ratings
(or Maximum
Recurring Peak
Voltage Rating)
3 current output settings of 160, 320 and 480 microamps
respectively, chosen for low, medium and high settings with three
maximum current voltages; 10, 15 and 20 volts, respectively.
Frequency 10 Hz
Power Supply Only for use with supplied power supply DA12-050US-M
Storage &
Transport
Environmental
Information
Temperature Range Humidity Range Pressure Range
-15°C to 40°C (5° F to
104° F)
10 to 93 %RH 500 to 1060 hPa (15 to
31 inHg)
Operating
Environmental
Information
Temperature Range Humidity Range Pressure Range
10°C to 40°C (50° F to
104° F)
30 to 75 %RH
700 to 1060 hPa (21 to
31 inHg)
Waste Disposal
(Battery)
disposed of in compliance with all applicable local, state, and
federal laws and regulations
Page | 20
Page 24

Myo Technologies, Inc.
1213 Culbreth Drive, Ste. 124
Wilmington, NC 28405
www.myotone.com
©Myo Technologies Inc. 2014
 Loading...