

MyKey 2300 Installation Instructions Manual
Mykey 2300 Installation Instructions
(NOTE : Please read the instructions before commencing installation)
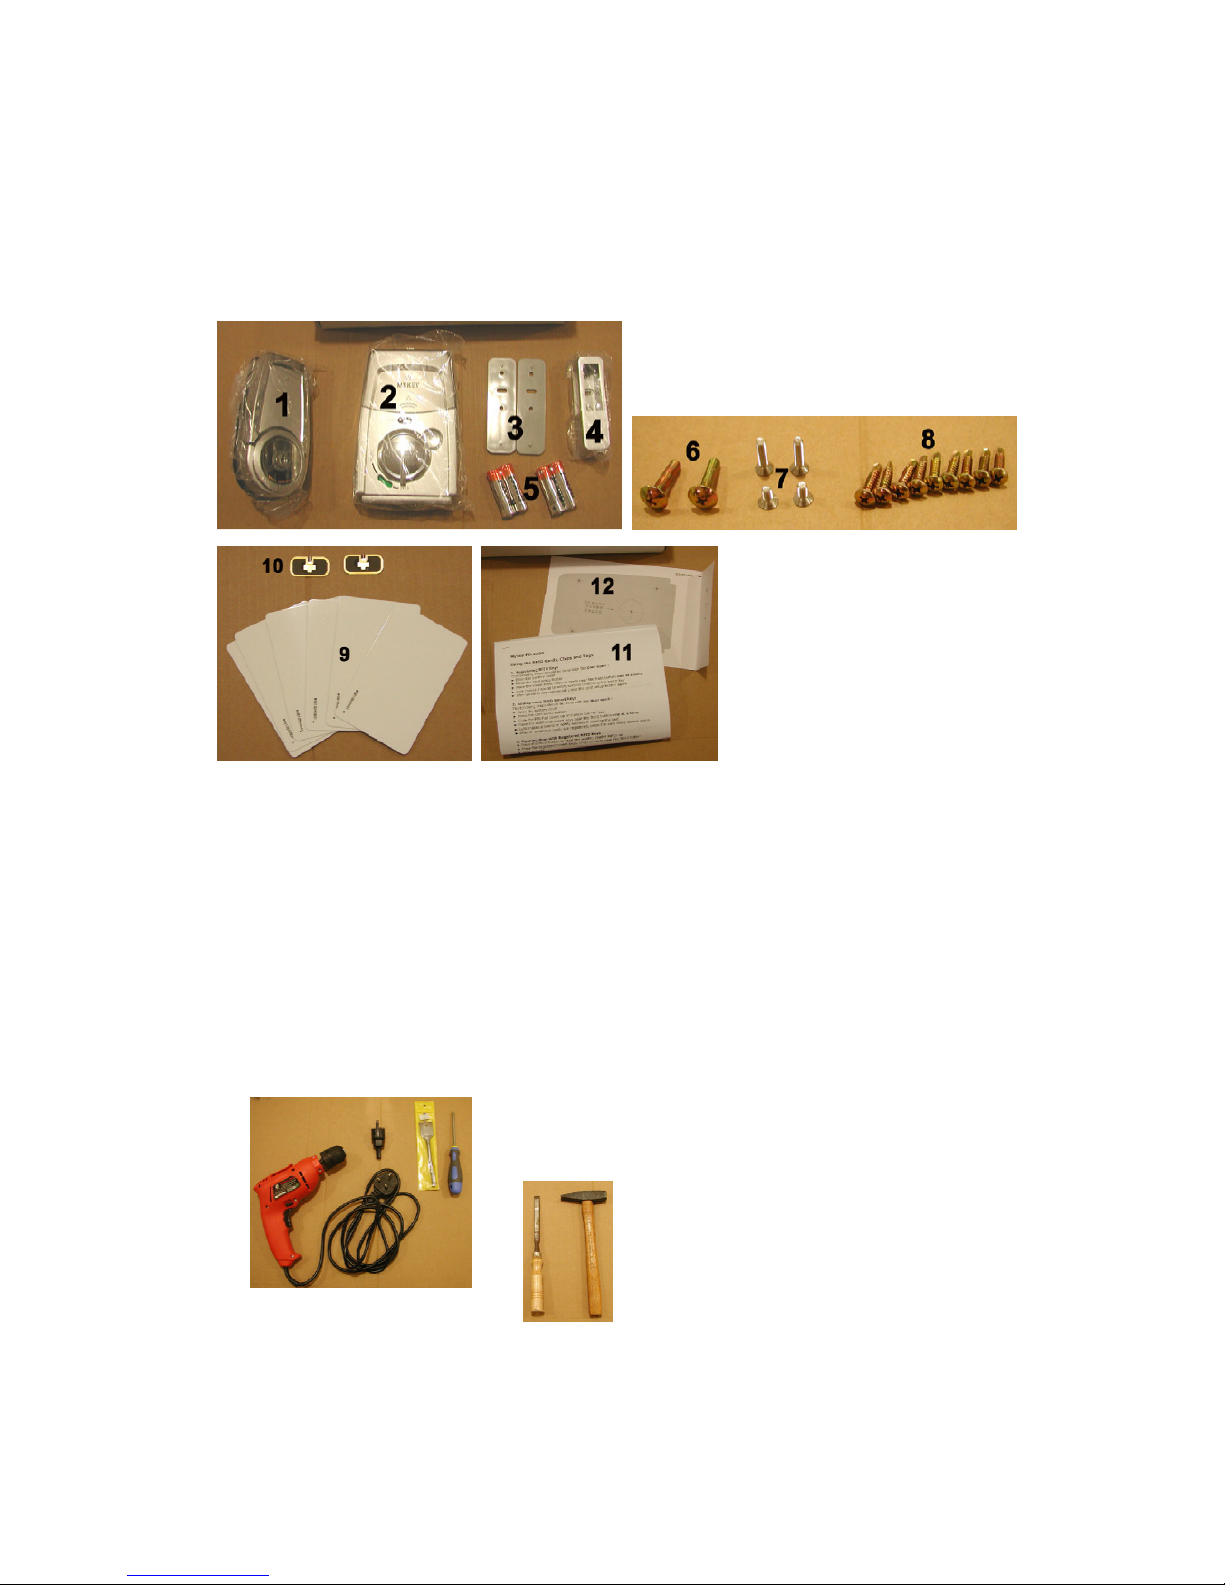
When you receive your box, please check that you have all the following components.
1. Outer Front Body
2. Inner Back Body
3. 2 Plastic Pads (1 Thin & 1 Thick)
4. Latch Housing
5. 4 AA Batteries
6. 2 pc Front Body Mounting Screws
7. 4 Back Body Screws (2 Long & 2 Short)
8. 9 pcs Mounting Screws
9. 6 RFID Cards
10. 2 RFID Chips
11. English Instructions, and
12. Installation Template
Additional Tools required (not supplied) :
1. Electric Drill
2. 30mm or 32mm Coring Drill Bit
3. Cross-Head Screwdriver
Hammer and Chisel may be required if any door
trimming has to be removed.
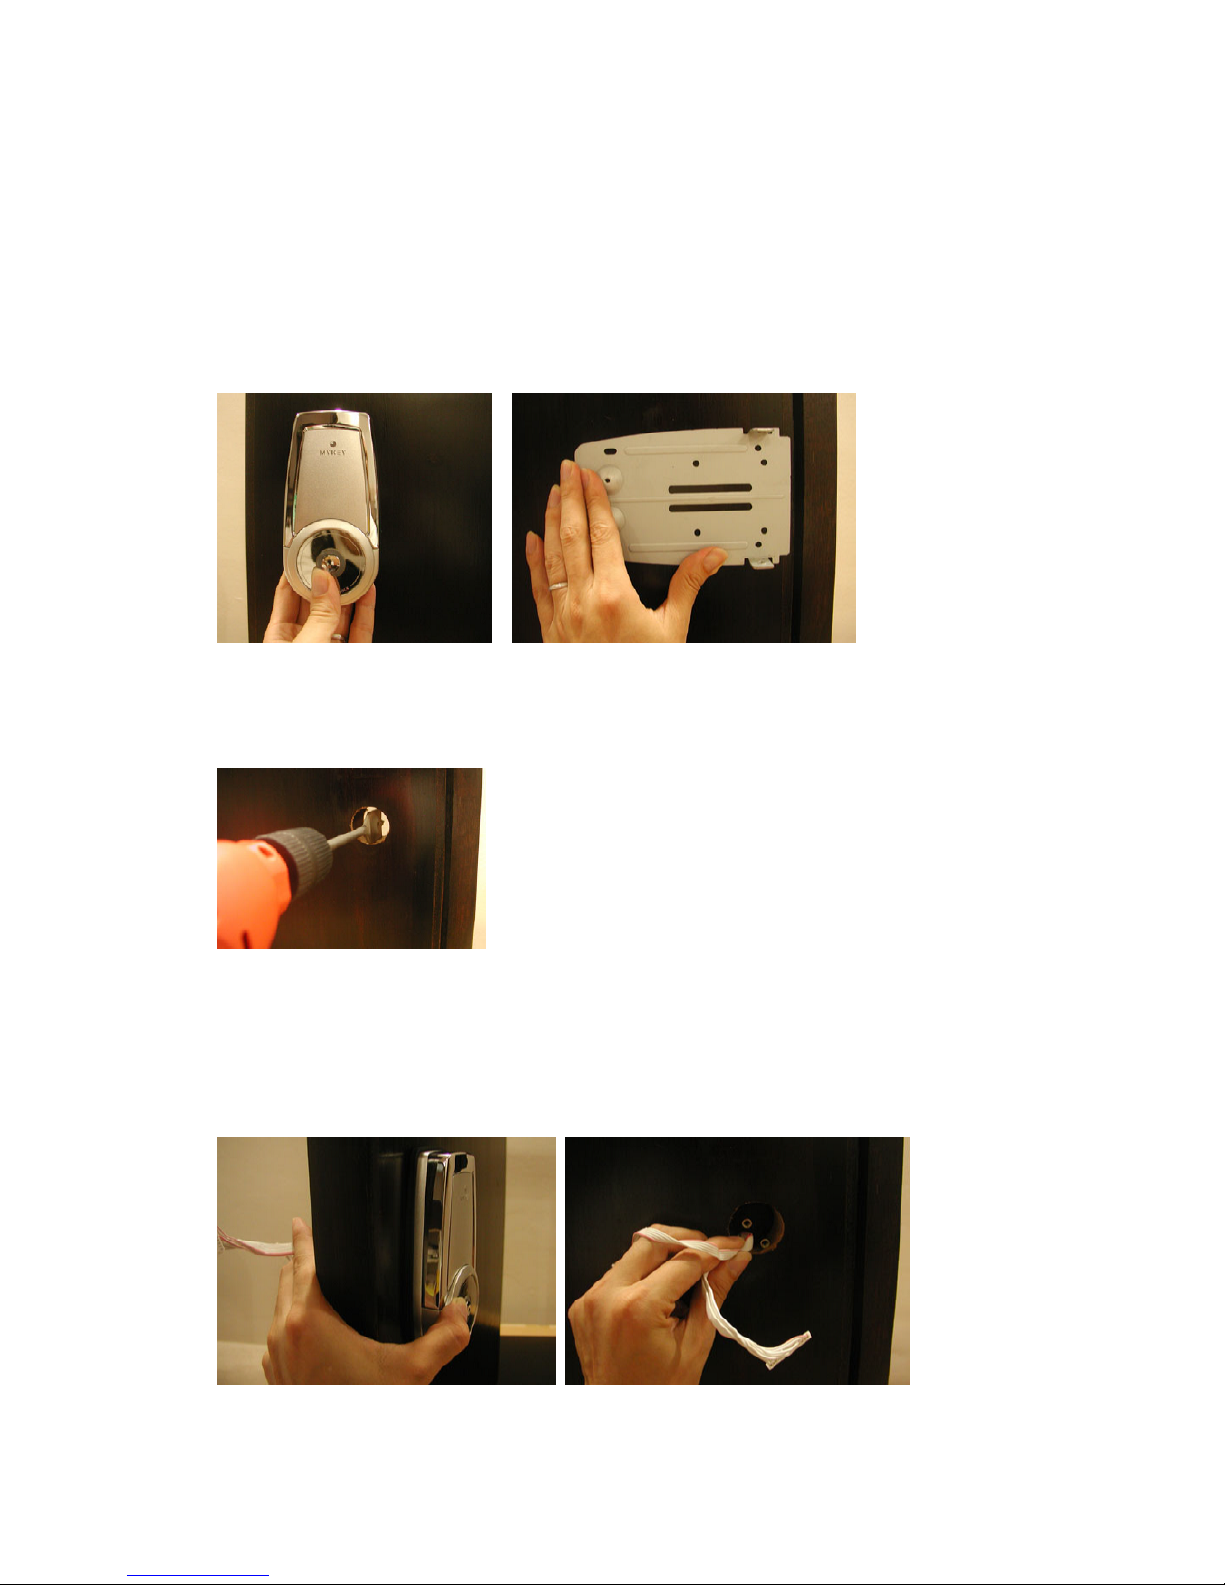
Installation for doors where door frame is even with the door
Front Body Location
On the outside, place the Front Body mounts touching the door to locate the position of the lock hole.
Mark the position with a pencil. Measure the distance from the edge of the door. It should be
between 35mm to 90mm. Ensure the door is able to close properly if the Front Body is mounted in
that position.
On the inside, measure the same distance from the edge of the door and mark out the point. Using
the Inner Body Base Plate, ensure that the mounting location of the inner body is not obstructed.
Ensure the lock hole will end up within the 2 slots of the Base Plate.
Drill the 30mm or 32mm hole.
Mounting the Front Body to the Base Plate
Place the Front Body mounts through the drilled hole and thread the wires through the Base Plate,
being careful not the cut the wires whilst doing so. It would be advisable to get help in holding the
Front Body in place at this time. With the Front Body Mounting Screws, secure the Front Body to the
Base Plate, leaving a gap of about 1mm from the edge of the door for the Base Plate. Ensure the
Front Body is vertically aligned and the Base Plate horizontally aligned.
 Loading...