


iGrabber Nano User Manual
1.INTRODUCTION
Introduction
The iGrabber Nano is captur e equipment with a specific desi gn for capturing MPEG files, whi ch
transmit screened images to a Hard Drive (HDD) by connecting an AV and S-Video cable with
high resolution (720*576). You can edit from a DV/Digital 8 video recorder, VCR, DVD or camera
to burn VCD, SVCD, DVD, MPEG4, AVI formats directly.
1.1 Feature:
• 640 x 480, 29.97 frames per second NTSC video capture
• 640 x 480, 25 frames per secon d PAL/SECAM video capture
• High contrast, high quality video - better than DV at the same size
• Excellent audio/video synchro nization
• Uncompressed YUV format: 66.5 GB per h our for video and audio
• Compressed JPEG format: 3 GB per hour for video and audio
• 640 x 480 single frame capture
• Audio support up to 48 KHz 16-bit stereo for de vices that have audio input
• Auto-Detect Input And Format, to automatically adapt to the cu rrent video source
• Rasy to use, AppleScript enabled capture software with fast full screen playback
• Software to export movies to any QuickTime suppor ted format, including DV and H.264
• Share your video with our free S /W at Dyyno.com simultaneously.
1.2 Specification
• USB 2.0 PnP Interface, USB video/audio transfer
• Automatic NTSC/PAL detection
• Push to start push to stop button
• Capture the Video directly as MPE G 4 / 2 / 1 Format
• Capture Video Source from VHS, V8, Hi8, e tc.
• Support Still Image Capture in JPEG or BMP form at
• Video resolution:
• NTSC: 720 x 480 @ 30 FPS
• PAL: 720 x 576 @ 25 FPS
• External video input: Composite and S-Video
• Burn video files on to DVD/VCD/SVCD
• Additional multimedia software – DVD Studio
• MPEG Encoder
• MPEG Editor
• Burn DVD
1.3 System requirements
• Intel Pentium4 1.4G CPU, recomm ended Pentium4 2.0G or higher
• RMA is 128M, recommend 256M or higher
• A high speed USB 2.0 interface
• A VGA card that supports DirectX9.0
• CD-ROM (for installation)
• 300MB HD space needed to install driv er and application. 600MB to 3GB per hour i s the space
1

• required for recording depend ing on the format.
• Mac OS X 10.4 PPC Mac OS X 10.3.9 Mac OS X 10.4
• IntelMac OS X 10.0Mac OS X 10.1Mac OS X 10.5 Mac OS X 10.6
• PPCMac OS X 10.2Mac OS X 10.5 IntelMac OS X 1 0.3
• Mac OS Classic
1.4 Contents
• iGrabber Nano
• A/V multi-cable
• Installation Manual
• DVD Studio User Manual(option)
• Installation CD(include DVD Studio)
1.5 iGrabber Connection Di agram
2. Driver and Application Installation
Step 1: When you complete the connecti ons, the OS will display a prompt -- “New Hardwa re
Device” was found. (Only on XP, there is no this message on vista and XP) Please choose
“Cancel”, & insert the CD
2
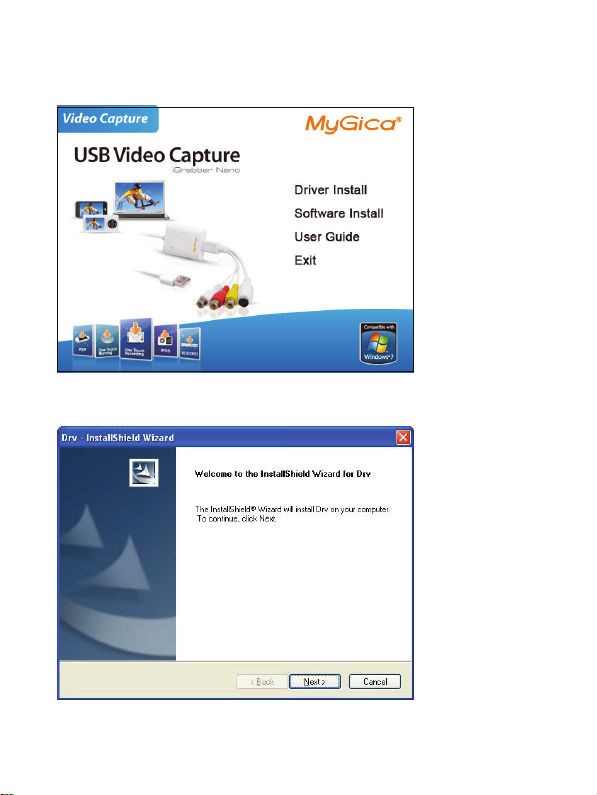
Step 2: When the CD is inserted, the OS will guide you through the setup a utomatically. Click
“Driver Install” or run Drive\Setup.ex e.
Step 3: Click “next” to continue installatio n
3
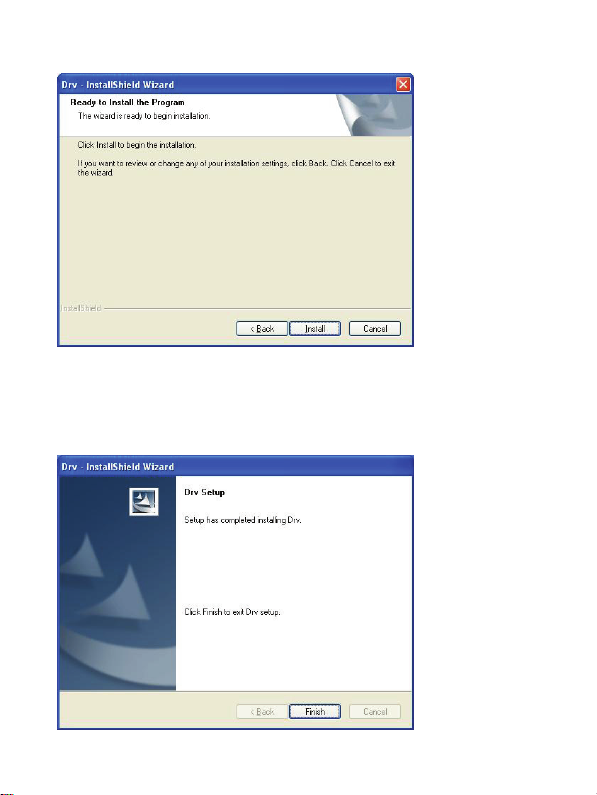
Step 4: Click “Install” to continue installation driver
Step5: Click “Finish” to completely install the Driver Software
4

Step 6: Click “Software Install” or run “Soft\Setup.exe and ShowBiz\Setup.exe” to install the
application. At the “Choos e Setup Language” prompt, sel ect the language of your c hoice by
using the down arrow selection box.
Step 7: Click “next” to continue installatio n
Step 8:Click “I accept…” to continue “S howBiz DVD” installation.
Step 9:Choose install the components, and click “Next”.
Step 10:Prepare to install ShowBiz DVD click “next”
Step 11: Click “Finish” to completely install the ShowBiz DVD edit Software
Step12: Please make sure that DirectX 9.0 is installed before installing the application. If not, the
system will prompt you to install it autom atically
5

Step 13: Install EZGrabber. Click “Install”
Step 14: At the next auto prompt “Windows Media Format 9 Series”, click “Yes”(Only for
Windows XP. Vista and Windows 7 has installed Windows Media Format 9 as default)
Step 15: After reading the license agreem ent, click “Yes” to co ntinue “Windows Media Format
9” installation.
6

Step 16: In the following screen prom pt, click “Finish”.
Step 17: The program will also install the f ollowing Icons on your desktop
Step 18: When the installation is completed, please verif y everything by viewing your Devi ce
Manager. If you are using windows XT, open the Device Manager. Click “Start,” and then click
“Control Panel”. Click “Performance and Maintenanc e”, and then click “System”. On the
Hardware Tab click “Device Manager”, you shoul d see new device installed. If they are not
there, please re-plug device and reinstall driver.
7

iGrabber Device on windows xp.
iGrabber Device and USB Device, two devices on Windows 7
8

3. EZ Grabber Application
Main user Interface
NO
Description
1
Status
2
Setting Setup menu
3
Snapshot
4
Start to record
5
Stop record
6
Skip end
7 Sk ip home 15
8
Pause
NO
Description
9
Play recorded files
10
Status window
11 Stop playing files
12
Skip forward
13
Skip back
14
Open the recorded file
Minimiz e
Full screen : Window and video
desktop switch
About:Show version and copyrig ht.
Exit EZ Grabber
16
Dyyno dUb.
9

5. How to use ShowBiz software
5.1 Capture module.
It will detect video format automatically, or click “Device setting” to change it.
Choose video input
10

Choose video format and locati on of recorded files.
5.2, Edit and Produce modules, plea se click”?” button to get online help.
11

4. Stream LIVE with Dyyno Universa l Broadcaster (dUb)
3 simple steps to LIVE broadcasting us ing your CapIt video capture devic e:
1) Make sure you have dUb installed – it will show up on Start menu, All Programs as “Dyyno
Broadcaster”; it will also be an icon on your desktop. If not then install dUb after installing
CapIt.
http://www.mygica.com/down-eng/software/igrabberdyyno.zip
2) Click on the Dyyno dUb ‘d’ button on the EZ Gra bber panel. Then create your FREE
Dyyno LIVE streaming channel at http://www.dyyno.com/signup
3) The log into D yyno dUb using your username/password
4) Now as as soon as you click on Dyyno dUb ‘d’ button on the EZ Grabber panel you will be
broadcasting your EZ Grabber video feed LIVE
5) Alternati vely you can double click on d Ub, login, then drag & drop the dUb ‘d’ on the video
feed from CapIt
You are now streaming LIVE on the Internet. Your friends, family, and colleagues can view your
LIVE stream at http://www.dyyno.com/your-channel-name
visit http://www.dyyno.com/dub/
Note:
If you get an error message ”The a pplication failed to initiali ze properly(0xc0150002). Click on
OK to terminate application” when you open the software on ”Windows XP.
Please make sure that you have ins talled the Service Pack 3 updat e for Windows XP. If that do
esn’t solve the problem, please try installing the Microsoft Visual C ++ Redistributable Package f
rom
http://www.microsoft.com/downloa ds/en/details.aspx?familyid=20 0b2fd9-ae1a-4a14-984d-389c
36f85647&displaylang=en.
12
. For more information on dUb please
031001502
 Loading...