

MyGica ATV1900AC Quick Start Manual

Quick Start Guide
www.mygica.tv
1900
ATV
ac
2
Quick Setup Guide
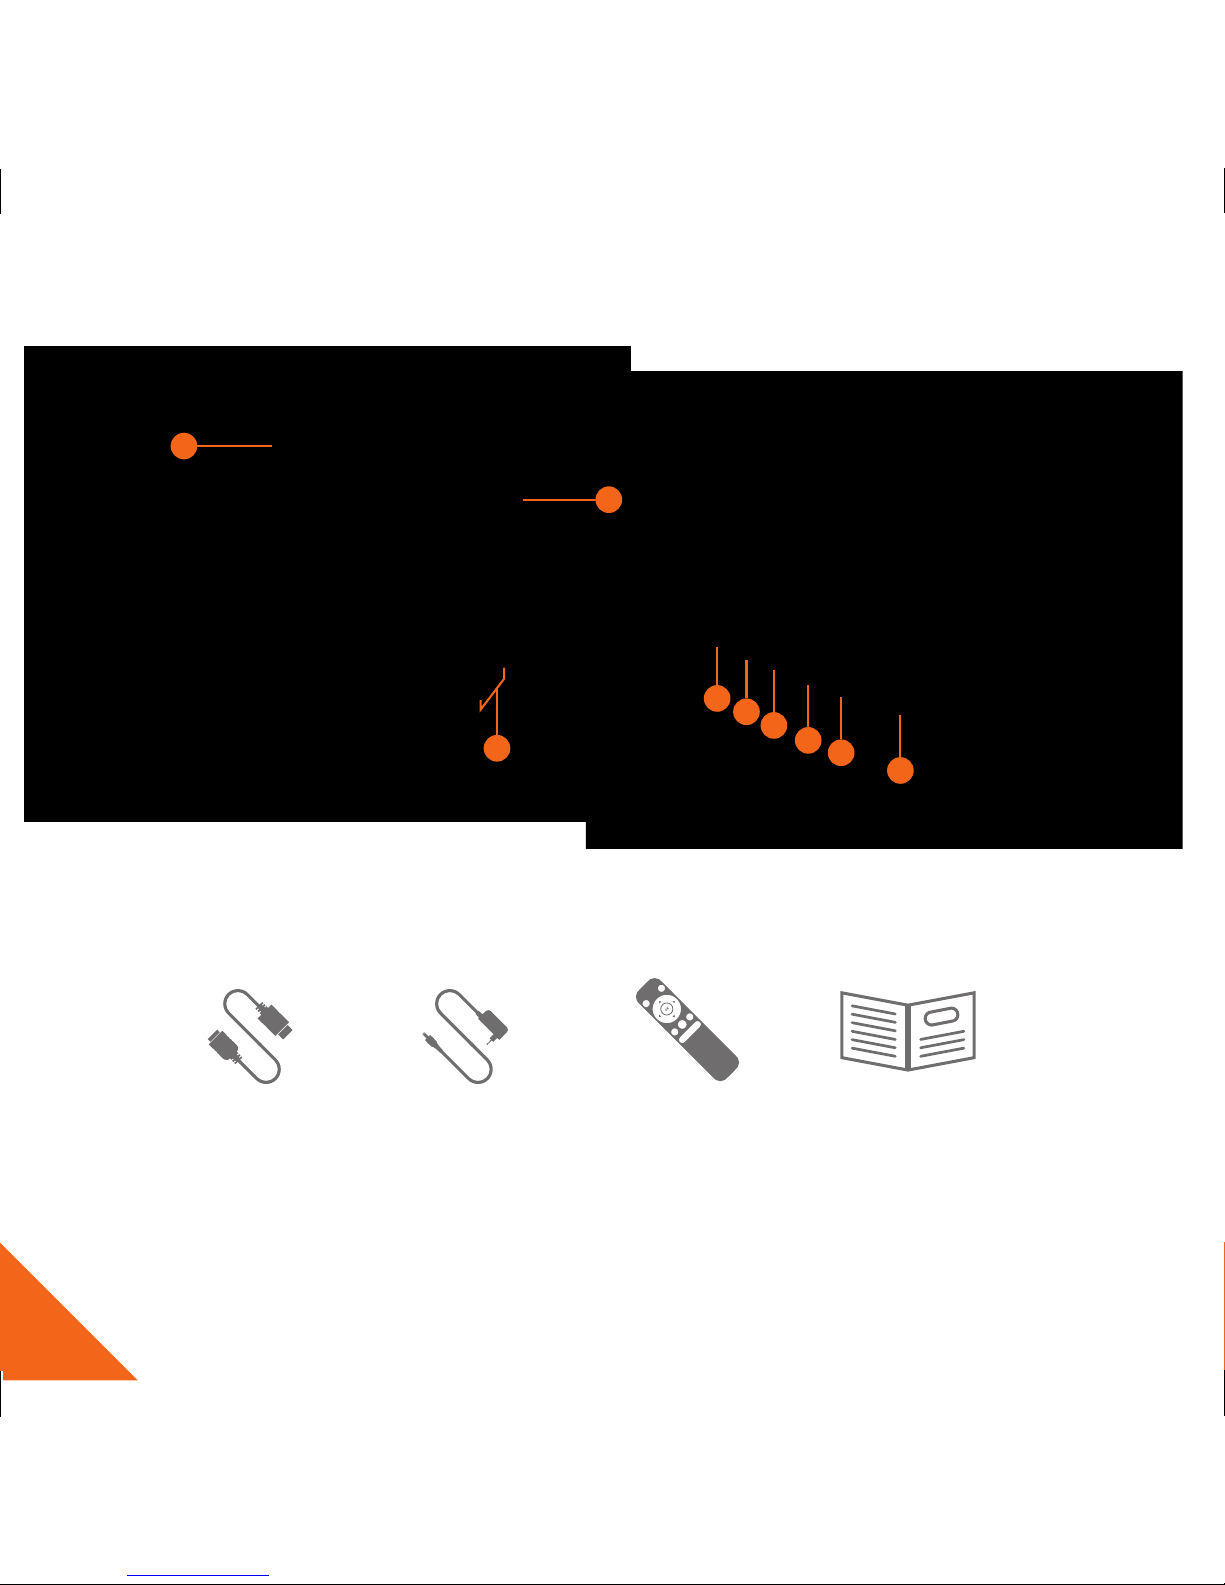
After opening the box, please check carefully with the packing list. If any item is missing or damaged,
please contact your dealer as soon as possible.
1
2
3
4
5
6
7
8
8
1. USB 2.0 Port
2. Micro SD Port
3. Reset
4. HDMI Port
5. LAN Port
6. SPIDF Port
7. DC Input
8. Wi-Fi Antenna
Power AdapterHDMI Cable Remote Control
Quick Start Guide
3
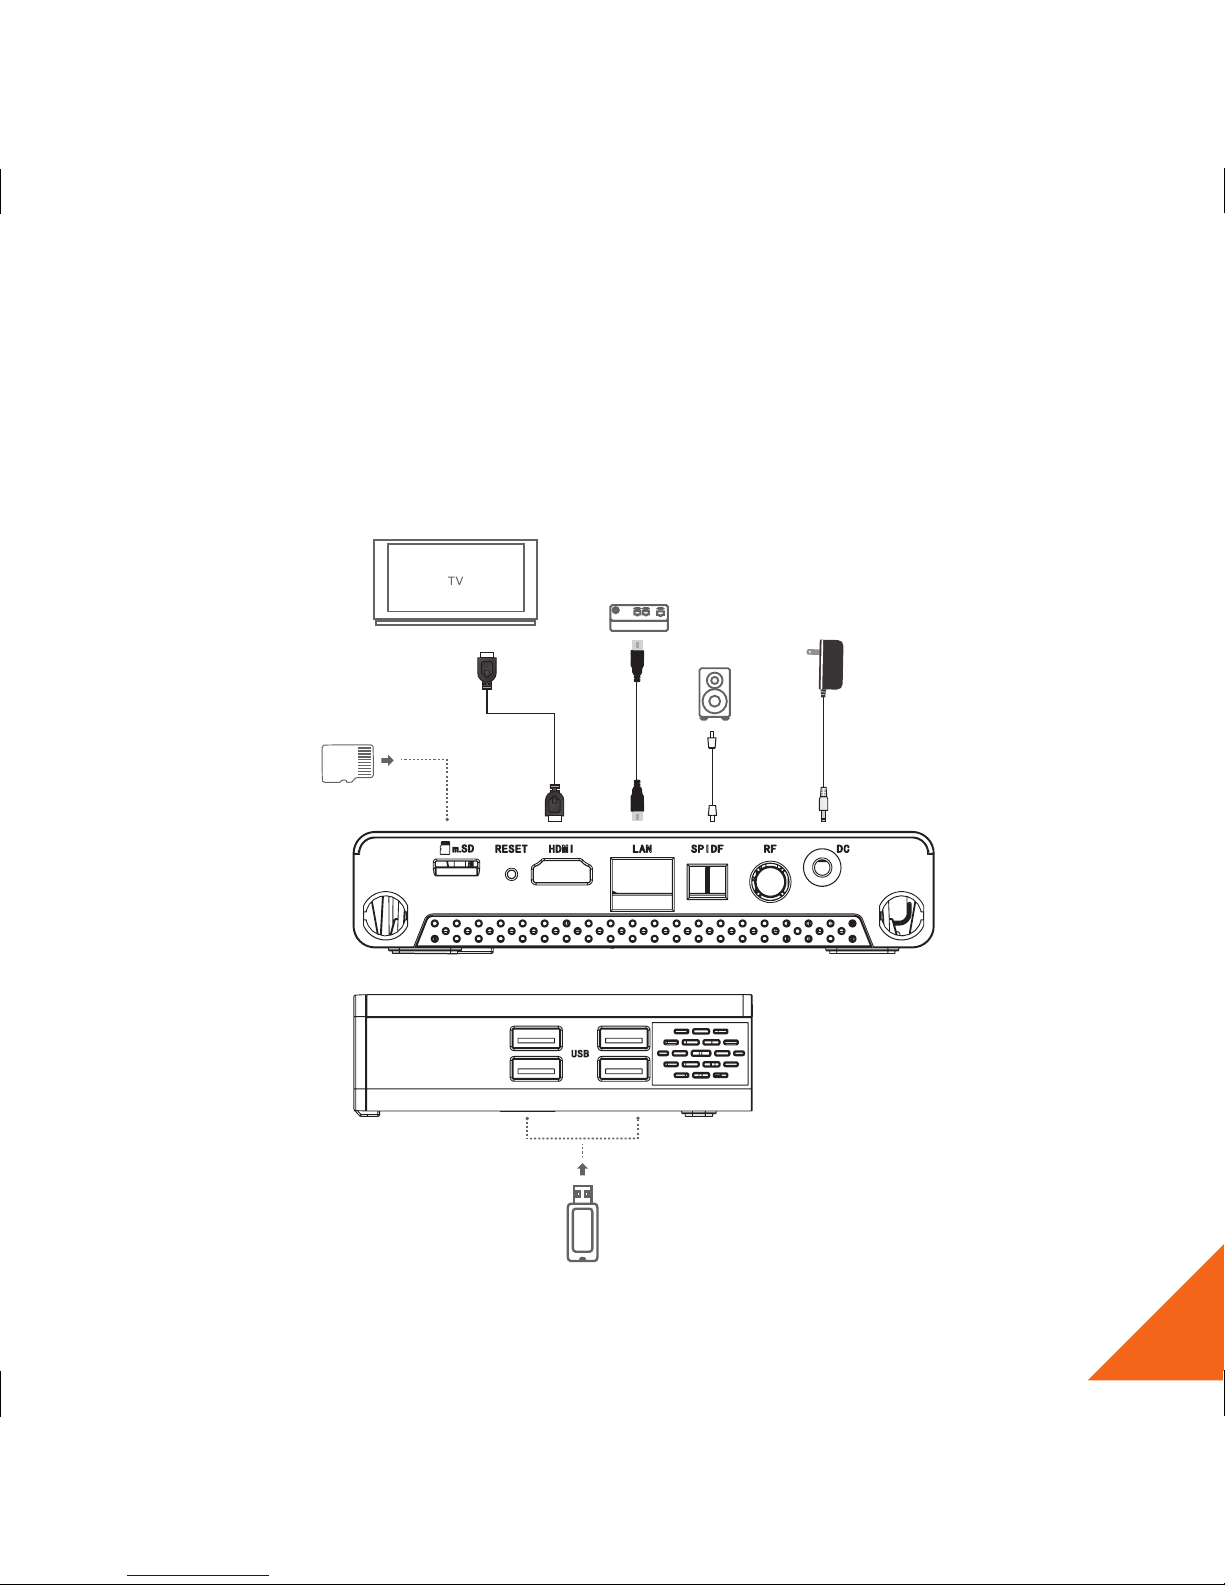
Connect Power and HDMI
Place ATV1900AC on a at platform near the TV, and make sure nothing blocks the remote
cont rol signal.
Micro SD Card
USB
Modem
DC
HDMI
HDMI Output
Speaker
4
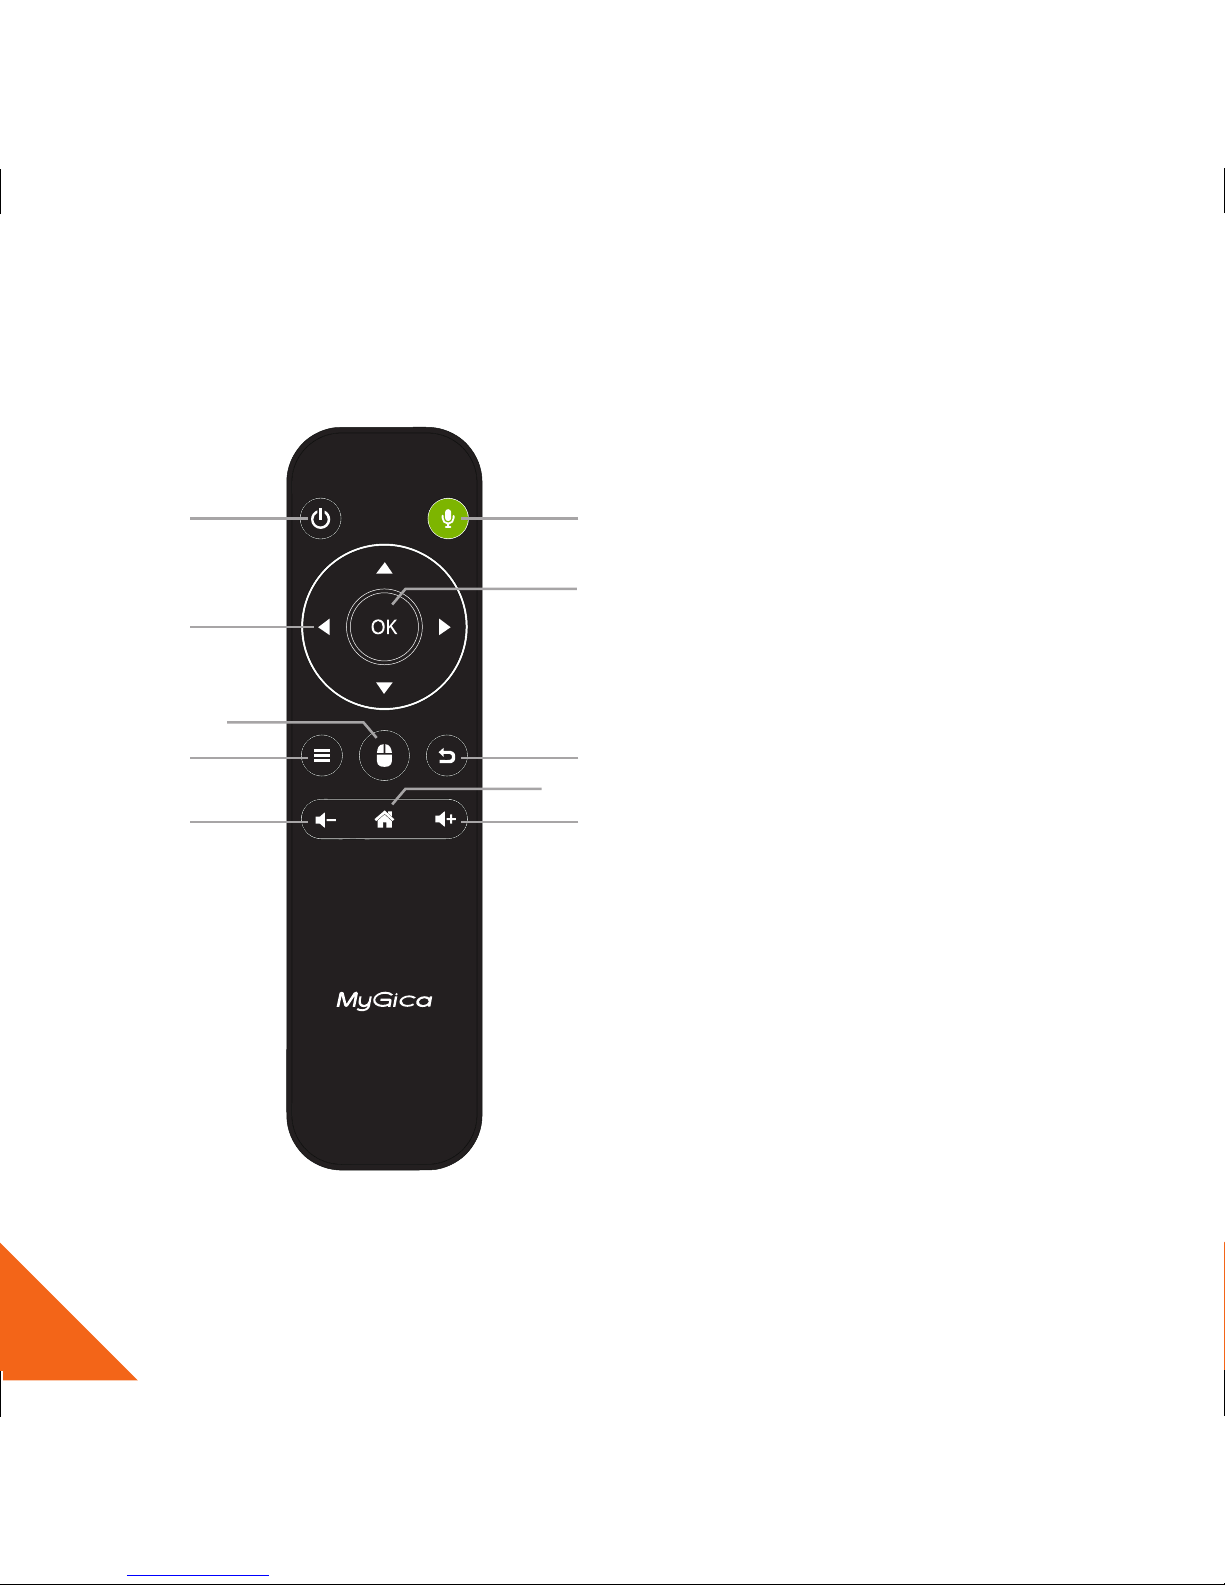
KR-54 Remote
1. Power
2. Navigational buttons
3. Mouse Mode
4. Menu
5. Vol -
6. Mic button (Hold to talk)
7. OK
8. Return
9. Home
10. Vol +
1
2
3
4
5
6
9
8
10
7

5
First Time Usage
Part 1: Power Up
1.1.
When you first power up
the device, it will enter the
Setup Wizard
1.2. Select your language (Note:
English is default).

6
1.3. Adjust your screen position to
fit properly onto your television or
monitor.
1.4. Setup your Wi-Fi or Ethernet
connection.

7
1.5. You can select either one to start
using ATV1900, All the applications and
function are the same, just layout
differently.
1.6.
Select which launcher screen you
would like to use.
**Tip: Using the MyGica launcher is
recommended.
1.7. The right screen shot is the Google
Home Screen.
There is a search button on the top of
the screen, below that is some video
from YouTube and under the video are
all the applications installed.
 Loading...