

MYE M15TV-NAQ2 Owner's Manual
Mar 24, 2009 (Version 4) www.myeclubtv.com Page 1/24
MYE PERSONAL DIGITAL TV SYSTEM
MYE Entertainment
M15TV-NAQ2
Owners Manual

CONTENTS
GENERAL SAFETY and CARE 3 - 4
In the Box…………………………………….. 5
Mounting the Screen………………………... 5
MENU: SETUP and OPERATION
Main MENU – Access 6
1 CHANNEL MENU 6 - 9
1 - 1 Tuning Band…………………... 6 1 - 2 Cable Mode……………. 7
1 - 3 DTV Signal…………………….. 7 1 - 4 Auto CH Search………. 8
1 - 5 Manual CH…………………….. 8 1 - 6 Channel Label Options.. 9
1 - 7 Menu Language………………. 9
2 Video Menu 10 - 12
2 - 1 Contrast……………………….. 10 2 - 2 Brightness…………….. 10
2 - 3 Sharpness…………………….. 11 2 - 4 Color…………………… 11
2 - 5 Tint…………………………….. 11 2 - 7 Aspect Ratio………….. 12
2 - 8 Settings………………………… 12
3 Audio Menu 13 - 15
3 - 1 Audio Language……………… 13 3 - 2 Base…………………… 14
3 - 3 Treble …………………………. 14 3 - 4 Balance……………….. 14
3 - 5 Digital Audio Output………….. 15 3 - 6 Setting…………………. 15
4 Setting Menu 16 - 18
4 - 1 Set Time……………………….. 16 4 - 2 Sleep Mode Timer……. 16
4 - 3 Advanced Video Mode………. 17 4 - 4 Set Password………… 17
4 - 5 Parental Control ……………... 17 4 - 6 Close Caption Options.. 18
4 - 7 Closed Caption…………….…. 18
5 - 1 Auto OFF / Vibration Detect ... 19 5 - 2 Channel Default Time…. 20
5 - 3 Channel Default………………. 20 5 - 4 Auto Default……………. 21
5 - 5 Auto Power ON………………. 21
5 Custom Features 19 - 21
6 IR Remote Control………... 22
7 Warranty…………………….. 23 - 24
page(s)
6
page
Mar 24, 2009 (Version 4) www.myeclubtv.com Page 2/24

Thank you for your purchase of the MYE Entertainment MYE PERSONAL DIGITAL TV SYSTEM.
This product has been designed specifically for use in the health & fitness industry, ensuring maximum
performance and longevity in the harsh fitness club environment. Properly cared for, this product will
provide years of high-quality entertainment.
Required
Tools
GENERAL SAFETY and CARE
WARNING!
Do not open monitor enclosure. There are no user-serviceable parts inside.
Any changes or modifications made to this product that are not approved by
MYE Entertainment will void the user’s warranty and authorization to operate
Prepare an area in which to place the product components as they
are removed from the box prior to installation. The surface of the
work area should be clean so as not to damage the screen and
associated components.
Do not open package using sharp instruments or tool.
Inspect all shipping carton for signs of damage and to ensure that the
contents of the carton have not broken loose during shipping.
7/16” wrench #2 Phillips NO POWER TOOLS!
the equipment.
Mar 24, 2009 (Version 4) www.myeclubtv.com Page 3/24
y
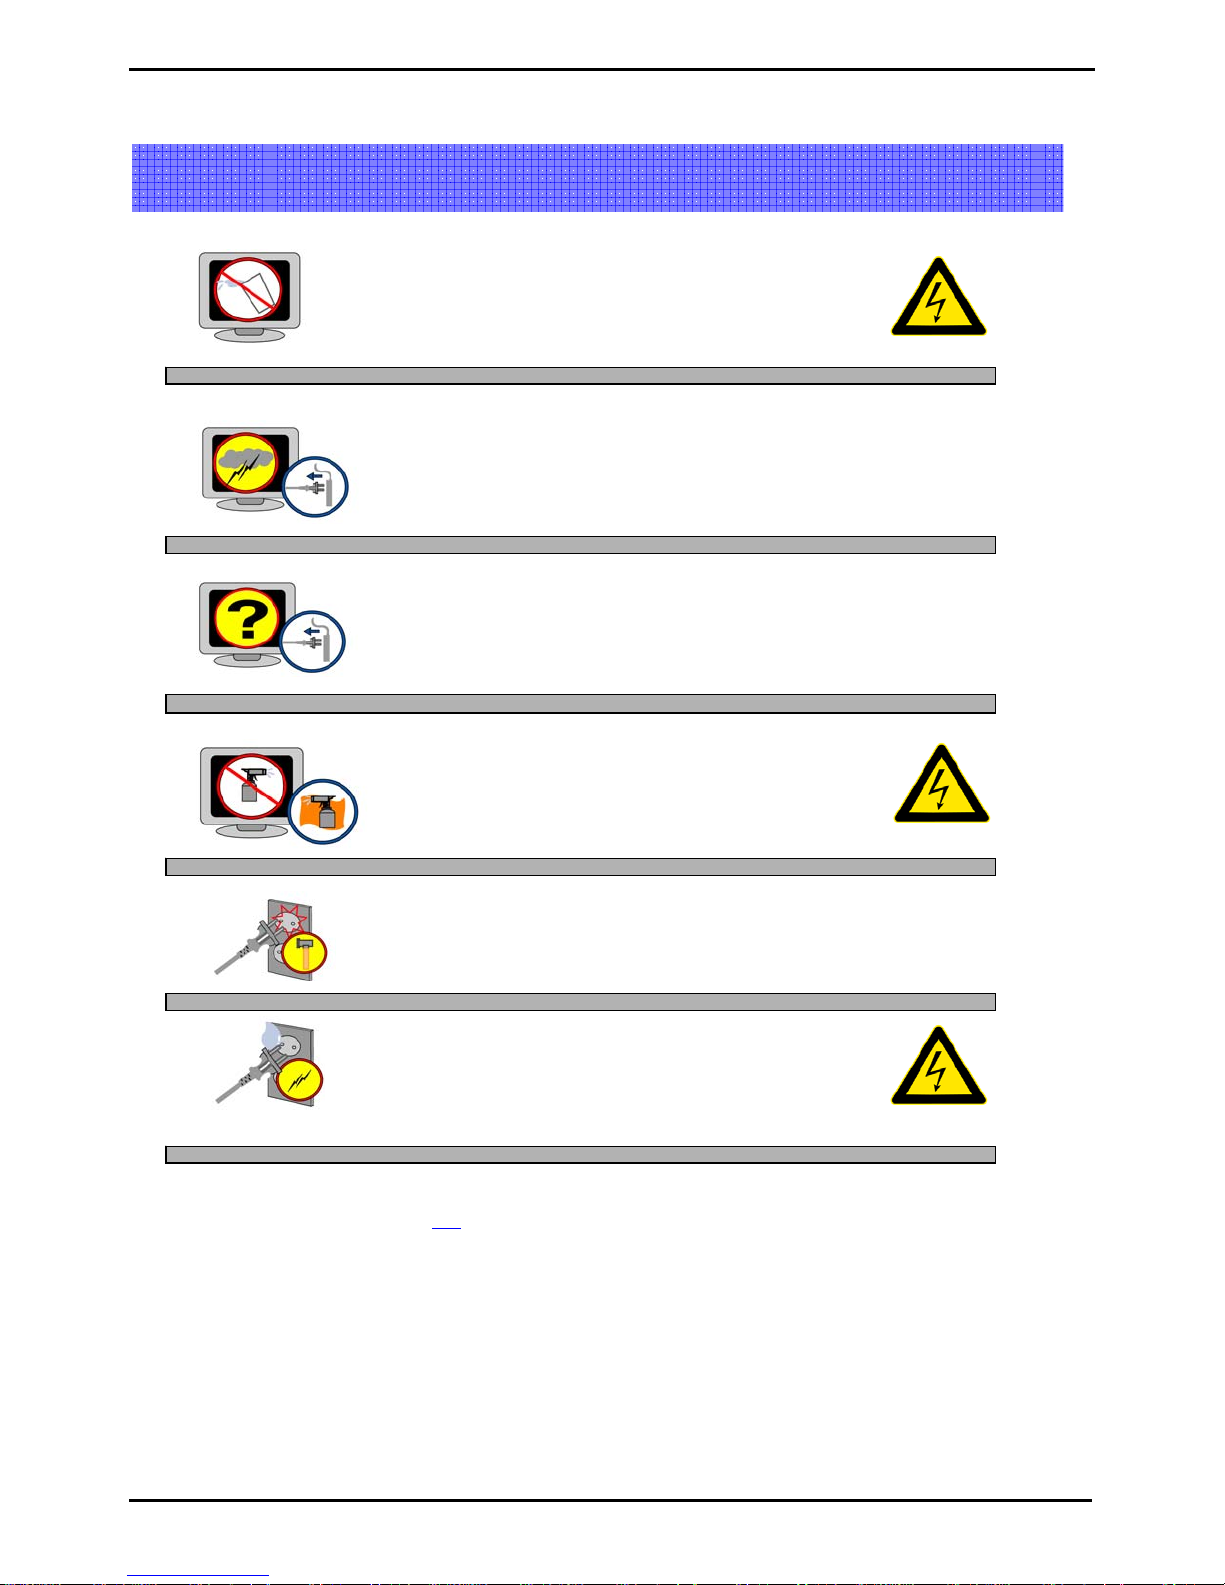
GENERAL SAFETY and CARE
Keep away from liquid or areas of high humidity
Unattended monitor should be unplugged during
lighting or electrical storms.
Unplug by the power cord if there are uncharacteristic
sounds or if smoke occurs.
Do not spray cleaner directly on monitor. This can cause electrical
shock or damage to the enclosure. Use a mild solution
on a soft cloth to wipe the surface of the monitor.
Do not use bent or damaged power cords.
Discontinue use and contact
our technician.
Never touch power cords with wet hands.
Radio Frequency Interference (RFI) Federal Communications Commission, Part 15
This device complies with Part 15 of the FCC
1. This device may not cause harmful interference, and
2. This device must accept any interference received, including interference that may cause undesired operation.
This product generates and utilizes radio frequency energy. If not installed and maintained in accordance with the installation &
maintenance procedures as prescribed by MYE Entertainment, there is a possibility of causing interference with other services.
In order to determine whether or not this pr o duct is generating harmful interference, try per forming the following steps:
• Try turning off the product by unplugging it from the AC power receptacle.
• Try powering the product from another AC power receptacle.
• Relocate or turn the antenna of the receiving device.
• Increase the distance between this product and the receiving device.
If these steps do not resolve the interference, please contact your local installing company or MYE Entertainment at 1-661-964-0217.
Rules (47CFR15). Operation is subject to the following two conditions:
Mar 24, 2009 (Version 4) www.myeclubtv.com Page 4/24
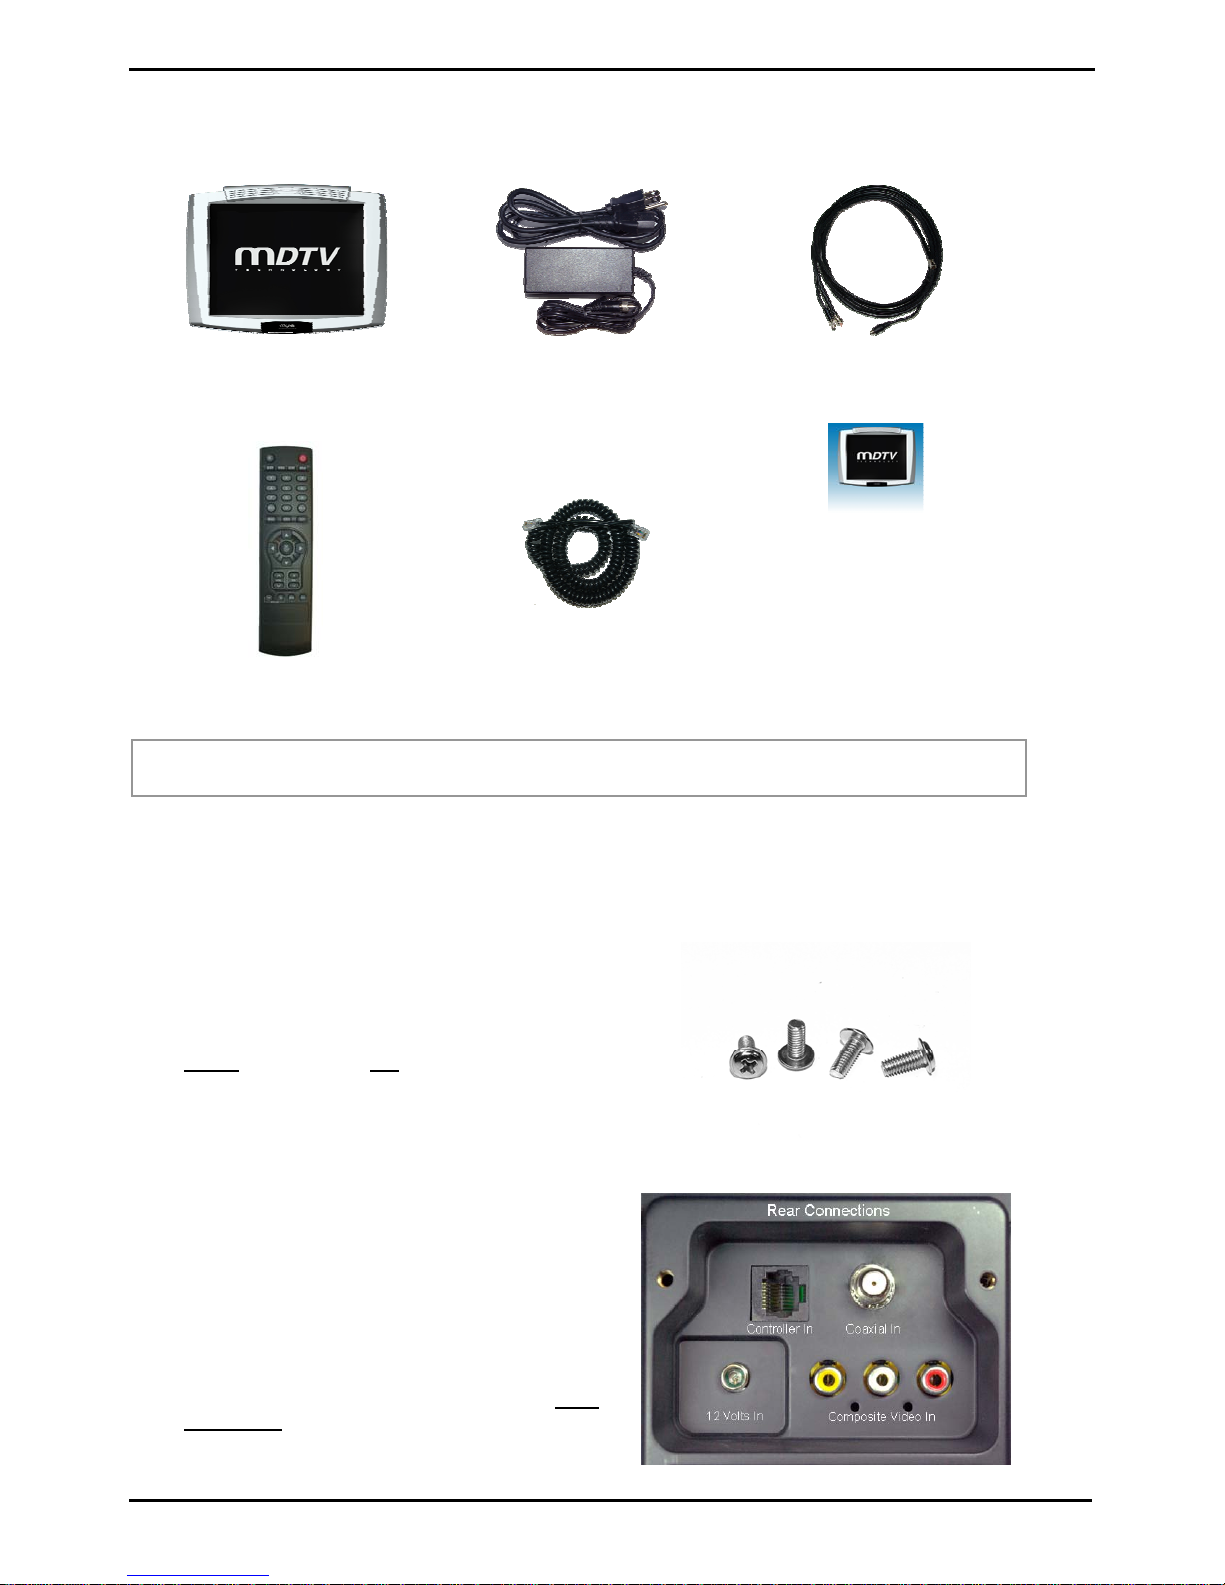
In The Box…
The shipping carton for the screen should contain the following components:
Screen
IR remote control
Power adapter & AC power
cord
Screen controller coiled cord
with 8-pin modular plugs
Combined coaxial/power cable
MYE Entertainment
MYE PERSONAL DIGITAL TV SYSTEM
M15TV-NAQ2
Owners Manual
Owners Manual
IMPORTANT! REPORT ALL DAMA G ES AND SH ORT A G ES IMM EDIATELY!
Mounting the Screen
Once the mount has been assembled and the cabling routed through the equipment or universal stand, the
screen must be attached to the mounting plate.
Unplug the power adapter from the power source.
Use the four screws (included) to fasten the screen
to the mount. Using screws other than those
supplied, may result in damage to the screen. It is
highly
Fasten the F-connector of the coax ial cable on to
Push the 12-volt connector on to 12-volt jack on the
recommended not to use a power tool when
tightening these screws, as this may result in
damage to the screen! Use a #2 Phillips
screwdriver, taking care not to over-tighten!
the fitting on the rear of the screen. It is important
that care be taken with this connector, as
over-tightening will result in serious damage to
the screen. This connector should be started using
only fingers an d t hen tightened t o 20 in c h - p ounds of
torque, slightly more than finger-tight.
rear of the screen. Tighten the locking collar only
finger tight in order to prevent the connector from
vibrating loose during normal use.
Screen mounting Screws
Mar 24, 2009 (Version 4) www.myeclubtv.com Page 5/24

MENU: SETUP and OPERATION
Once the unit has been connected, a setup procedure is required for optimal operation.
MAIN MENU – ACCESS To access all MENU functions you MUST enter MENU mode.
1-CHANNEL MENU
Sub-menu page “Channel”
To ENTER MENU
1) Push “MENU” on the IR remote.
2) Use ST keys on remote to select Sub-Menu.
Sub-menu pages are:
Channel
Video
Audio
Setup
3) Push the X key to enter a Sub-Menu.
To EXIT MENU
1) Push EXIT to set /exit MENU
1-1 Tuning Band
Tuning Band
Cable Mode
DTV Signal
Auto CH Search
Manual CH Setting
Channel Label Options
Menu Language
Menu Language
Enter MENU and Sub-menu page…
1) Use ST keys on remote to select Tuning Band.
2) Push “OK” key to enter / change setting.
3) (AIR – CABLE – HRC – IRC – AUTO CABLE)
Mar 24, 2009 (Version 4) www.myeclubtv.com Page 6/24
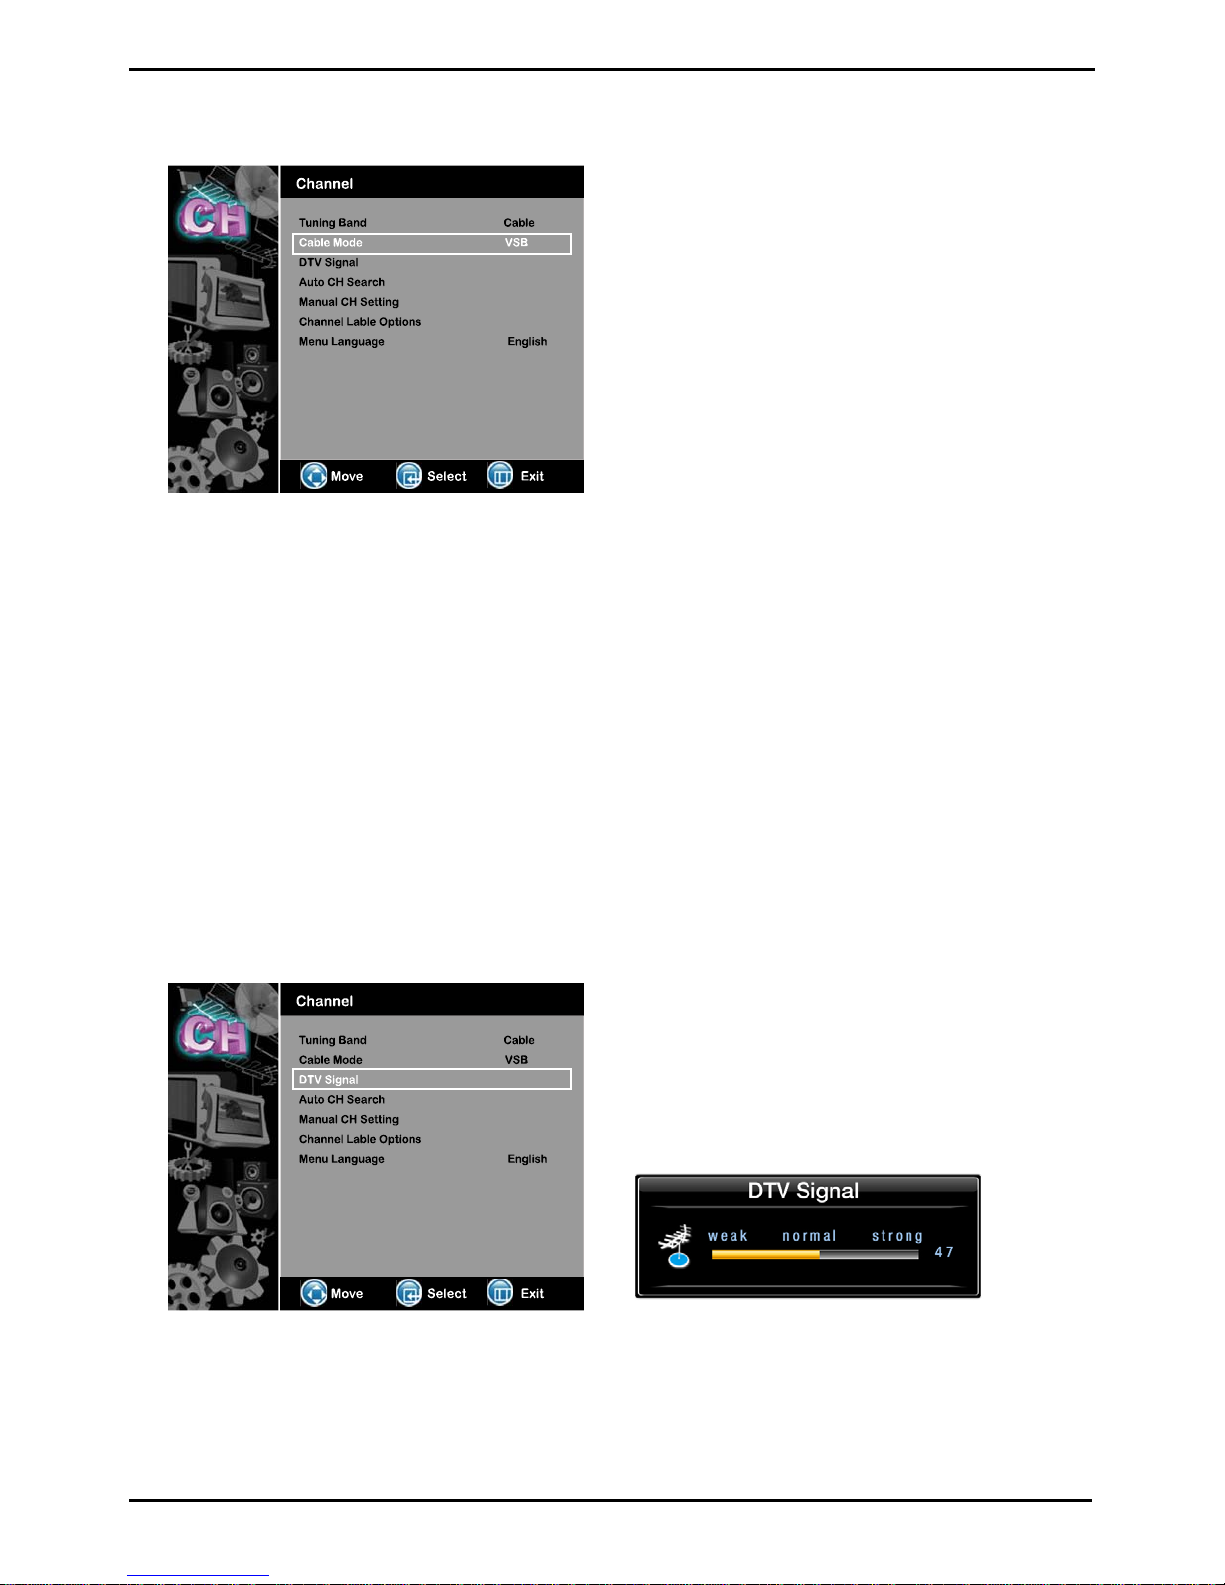
1-2 Cable Mode
Enter MENU and Sub-menu page…
1) Use ST keys on remote to select Cable Mode.
2) Push “OK” key to enter / change setting.
(VSB – QAM – NONE)
Cable Mode set to NONE will scan analog channels only.
Digital cable is supported depending on transmission system. When QAM is set, 64/256 QAM is automatically detected and
set. This works only when Tuning Band is set to cable. Please check with your cable provider whether the transmission
system is 8VSB, 64QAM or 256QAM. Encrypted signals from paid channels cannot be converted into video/audio. When
transmission is 8VSB, set cable mode at VSB. When transmission is 64/256 QAM, set cable mode at QAM.
Input Signal Level Requirements
Common sources of television signal are cable, satellite or over-the-air antenna systems. Many of these choices will
provide signal in analog, digital or both even both formats. In order to provide high-quality images, the signal level supplied
to each screen should be in the range of +5dBmV to +15 dBmV when read on analog chan nels. A signal level outside of
this range will provide less than optimum results. In order to ensure the highest degree of satisfaction, MYE Entertainment
recommends using a MYE Entertainment Certified Installer for installation & ongoing maintenance.
1-3 DTV Signal
Enter MENU and Sub-menu page…
1) Use ST keys on remote to select DTV Signal.
2) Push “OK” key to enter.
Signal Window meter will show signal strength.
(weak/normal/strong)
Mar 24, 2009 (Version 4) www.myeclubtv.com Page 7/24
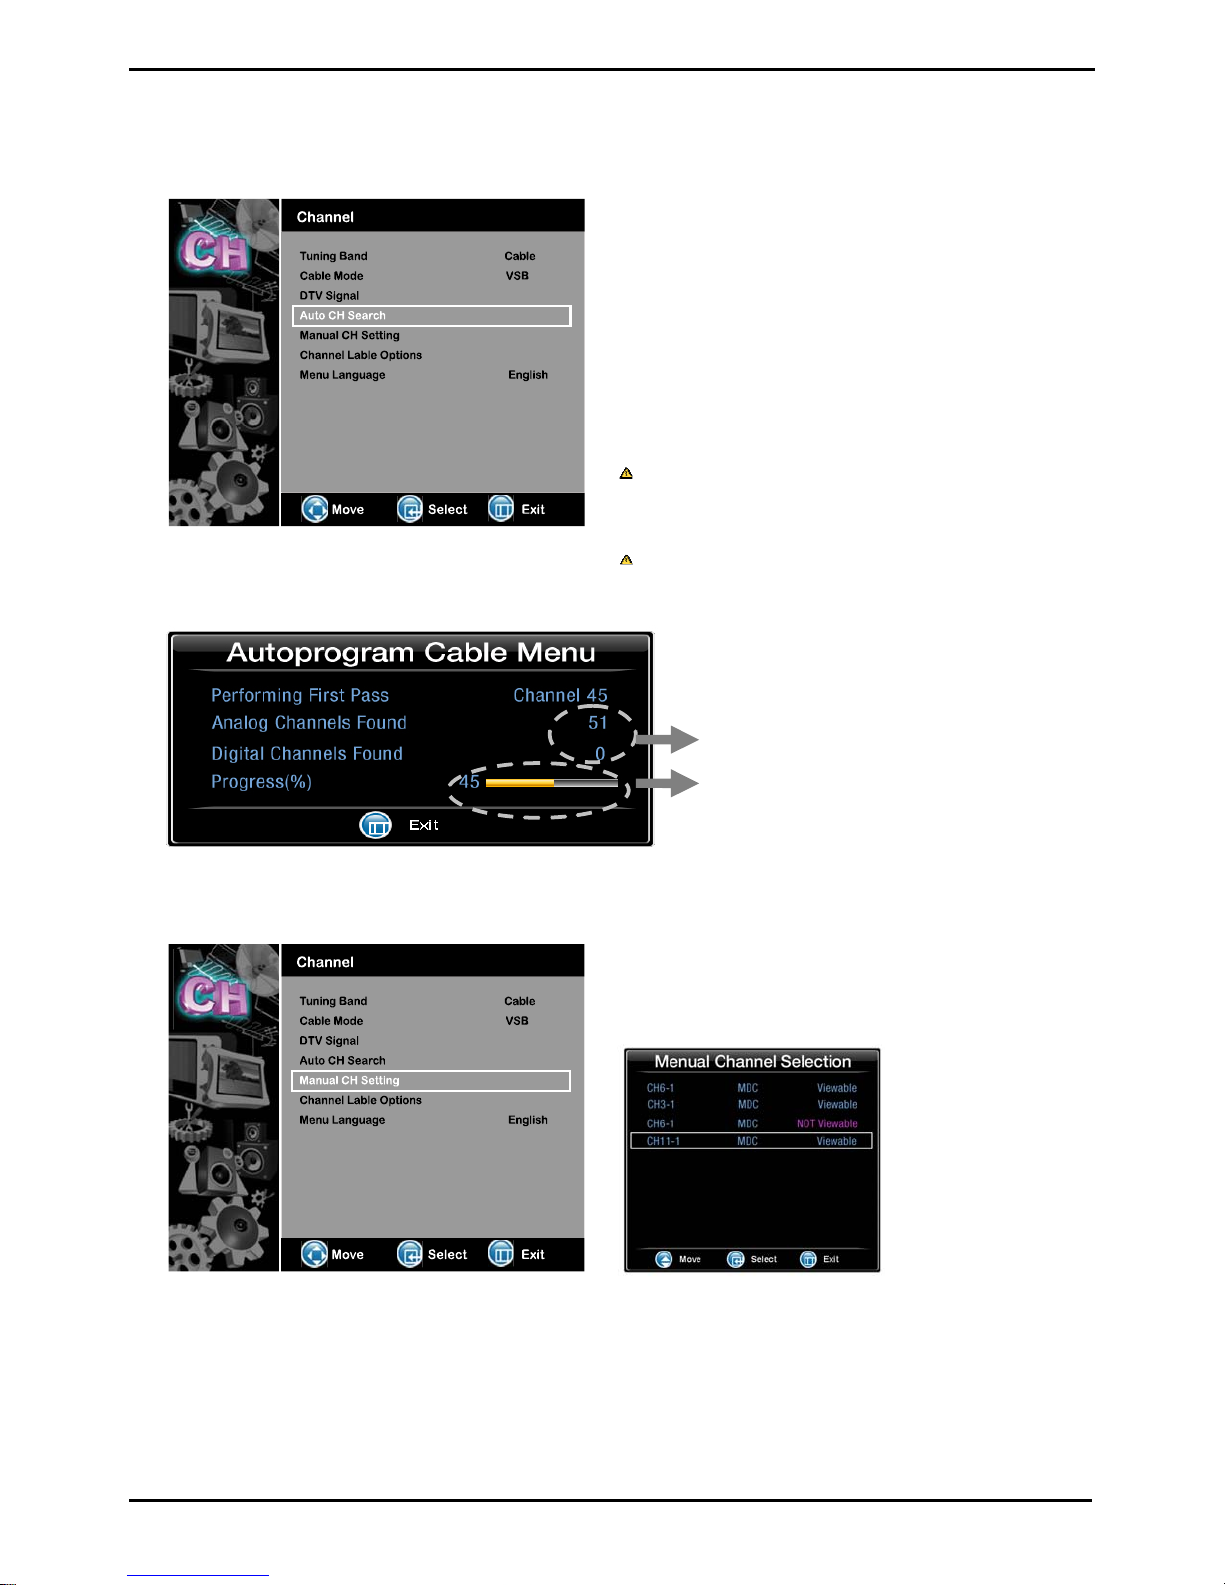
1-4 Auto CH Search
1-5 Manual CH Setting
Enter MENU and Sub-menu page…
1) Use ST keys on remote to select Au to CH Search.
2) Push “OK” key to enter.
Broadcasting frequency is automatically searched and
saved. The search starts from analog TV (NTSC) to
digital TV (VSB /QAM), and it takes 2~4 min.
Channel numbers are allocated for weak signals from
analog broadcasting. IN DTV, weak signals or signals
without broadcasting data are ignored.
Depending on the content provided by the cable or satellite
company, there may be some content received that is
inappropriate for your intended viewing audience. Once
channel scanning is complete, these channels can be deleted
as necessary by using the IR remote control.
If the content provider does not provide an encoded rating for
the content (Eg: MA14), inappropriate content will not be
blocked by the parental control setting of the screen.
Number of channels found.
Autoprogram status.
Enter MENU and Sub-menu page…
1) Use ST keys on remote to select Manual CH.
2) Push “OK” to move to channel list.
3) Use ST keys on remote to select channel
4) Push “OK” to enter / set options:
Channel Default - Auto Default
Channel Def. & Auto Def.
Viewable – Not Viewable – Favorite
(See Section 5 for definitions and use.)
Mar 24, 2009 (Version 4) www.myeclubtv.com Page 8/24
 Loading...