


Provided By
http://www.MyBinding.com
http://www.MyBindingBlog.com
IDEAL 4850-95 EP /
5221-95 EP / 6550-95
EP Guillotine
Instruction Manual
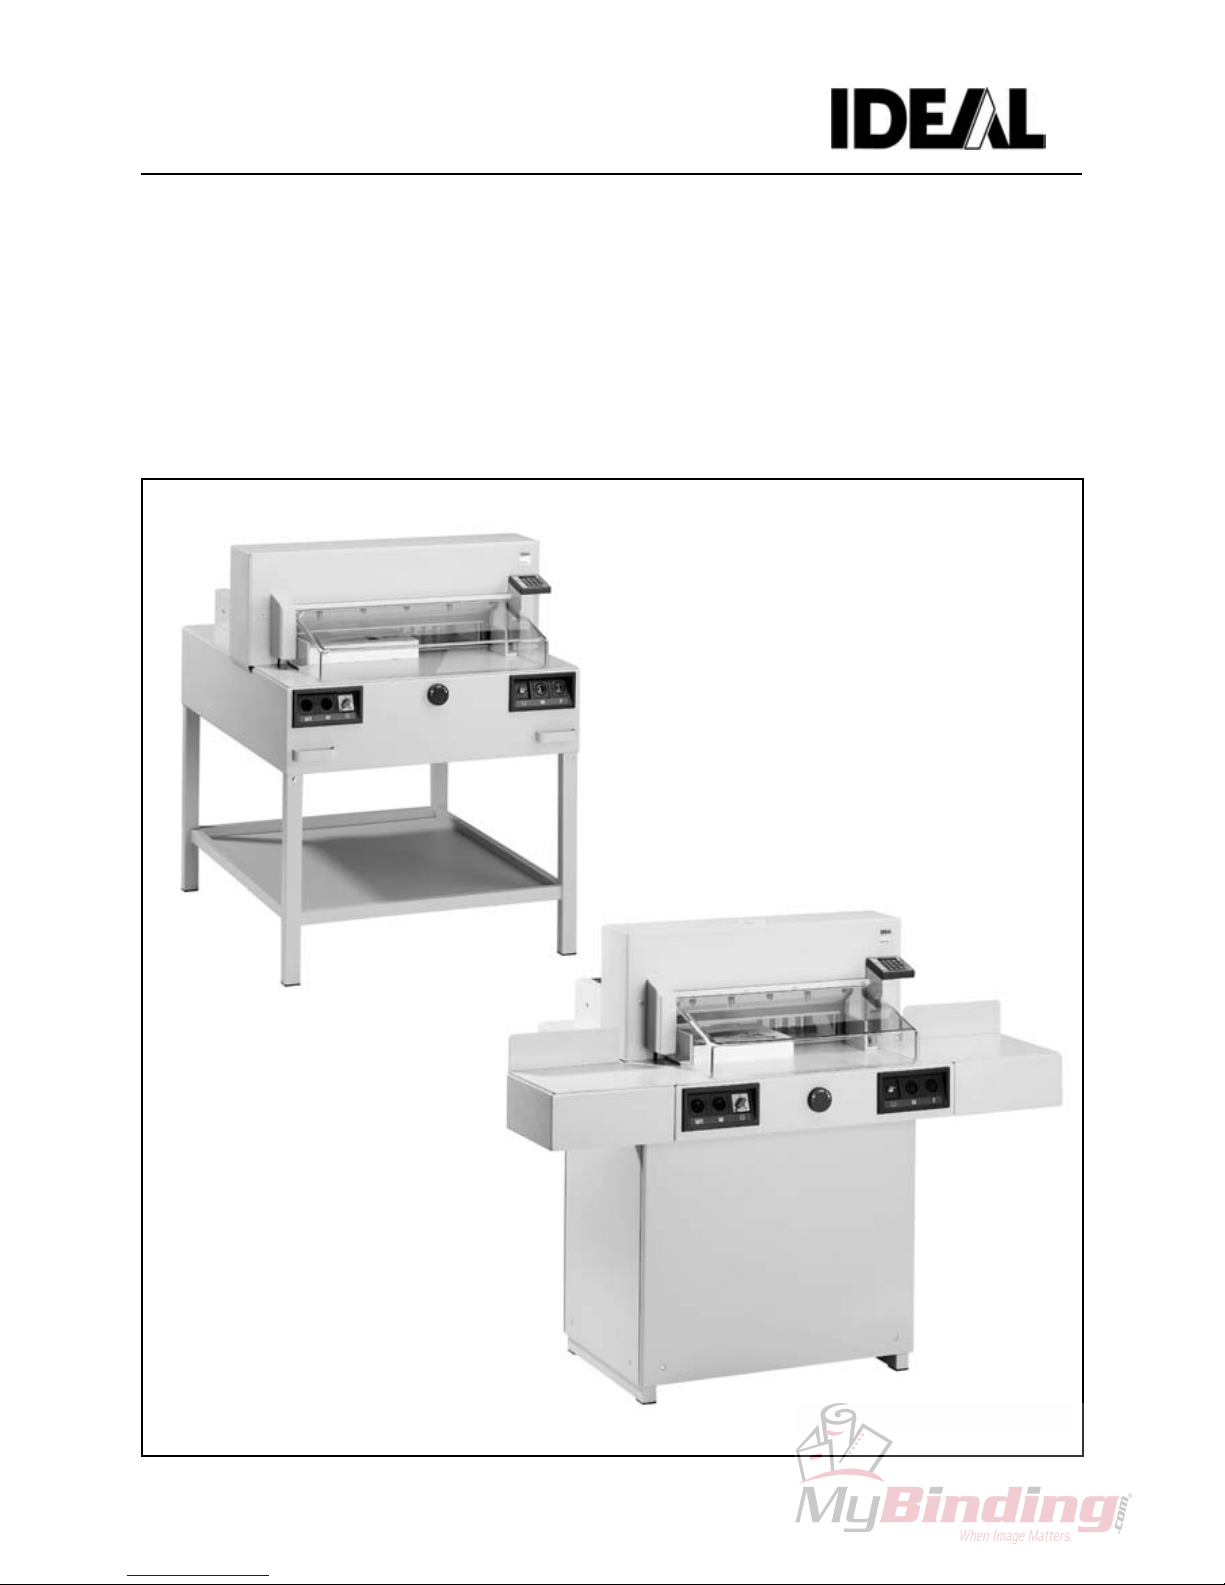
IDEAL 4850-95 EP
IDEAL 5221-95 EP
IDEAL 6550-95 EP
Betriebsanleitung
l
Operating Instructions
Mode d'emploi
Gebruiksaanwijzing
Manuale d'istruzione
Instrucciones para el uso

IDEAL 4850-95 EP; IDEAL 5221-95 EP; IDEAL 6550-95 EP
3 01-01-23 B5221G1A doc
Table of contents
1. General..................................................4
1.1 Application .............................................4
2. Installation..............................................5
2.1 Preparing for installation.........................5
2.2 Power supply..........................................5
3. Operation...............................................6
Checklist................................................6
3.1 Operating elements................................6
3.2 Start machine.........................................7
Cutting to specified dimensions..............7
Cut according to markings......................7
Eject functio n..........................................7
Repeat cutting........................................7
Repeat dimension function completed....7
Cutting activation....................................7
Cutting stop or interruption.....................7
3.3 Programming..........................................8
Entering a program ................................8
Eject functio n :.........................................8
Programming of repeat cut dimension....8
Cancel a program...................................8
Working with programs...........................9
General.................................................. 9
Escape the program mode.....................9
Program keys
¢ and £:........................9
Display in cm or inch..............................9
Adjust the eject-dimension.....................9
4. Maintenance ........................................10
Safety check ........................................10
4.1 Cutting stick replacement.....................10
Setting the cutting depth.......................10
Turning resp. replacing the cutting stick10
Cutting test...........................................10
4.2 Blade replacement ...............................11
Blade demounting................................11
Blade mounting.................................... 11
4.3 Maintenance all 7 days.........................12
4.4 Maintenance all 6 months ....................12
Lubricant and grease gun.....................12
5. Trouble shooting ..................................13
6. Technical data......................................14
7. Accessories..........................................14
EG-declaration of confor m it y
IDEAL 4850-95 EP
IDEAL 5221-95 EP
IDEAL 6550-95 EP
IDEAL 4850-95 EP; IDEAL 5221-95 EP; IDEAL 6550-95 EP
4 01-01-23 B5221G1A doc
1. General
s Danger!
Non-compliance with the instructions may
endanger persons.
l Warning!
Non-compliance with the instructions may
cause damage to the machine.
This instruction manual helps you to learn the
safe and comfortable operat ion with this
machine. Before working with the machine
please read this instruction carefully and
consider the safety regulations.
The operating instructions must be always
available for the operator.
Machine is proved by GS- and CE.
s Danger
Only instructed persons are allowed to
operate the machine.
No operation by children.
All components which may endanger the
operator are covered by a quard. This
machine is only designed for “one-man
operation”. The cutting action which is dange-
rous to the operator is protected thr ough a
guard (1) and a two-handed control system (2)
1.1 Application
The machine is designed for cutting reams of
paper to a specified dimension. Dimension
setting may be performed via keys or manually
at the rotary control. The cutt ing takes place
through the "two-handed control system".
l Warning!
The machine may only be used for cutting
paper or similar materials. Clips etc. will
damage the cutting blade.
s Danger!
The cutting of hard material or material
which might splinter is forbidden.
IDEAL 4850-95 EP; IDEAL 5221-95 EP; IDEAL 6550-95 EP
5 01-01-23 B5221G1A doc
2. Installation
The machine must be installed on a sturdy,dry
and leveled floor.
s Danger!
- The machine must not be located out side.
- Do not use in the vicinity of inflammable
liquids or gases.
- Do not use in humid environments.
- Protect mains cable against heat , oil and
sharp edges.
Use 4 strong people to lift the machine from the
pallet.
IDEAL 5221 - For further tr anspor t ation
For further transportation it is possible to use a
pallet truck. Wooden covers on front and back
must be removed to transport with pallet truck .
For transport through narrow doors:
- Remove the wooden side covers.
- Remove machine from the base (4 screws).
- The machine can be transported on it s side.
- Mount the machine on the base.
- Fix the side covers.
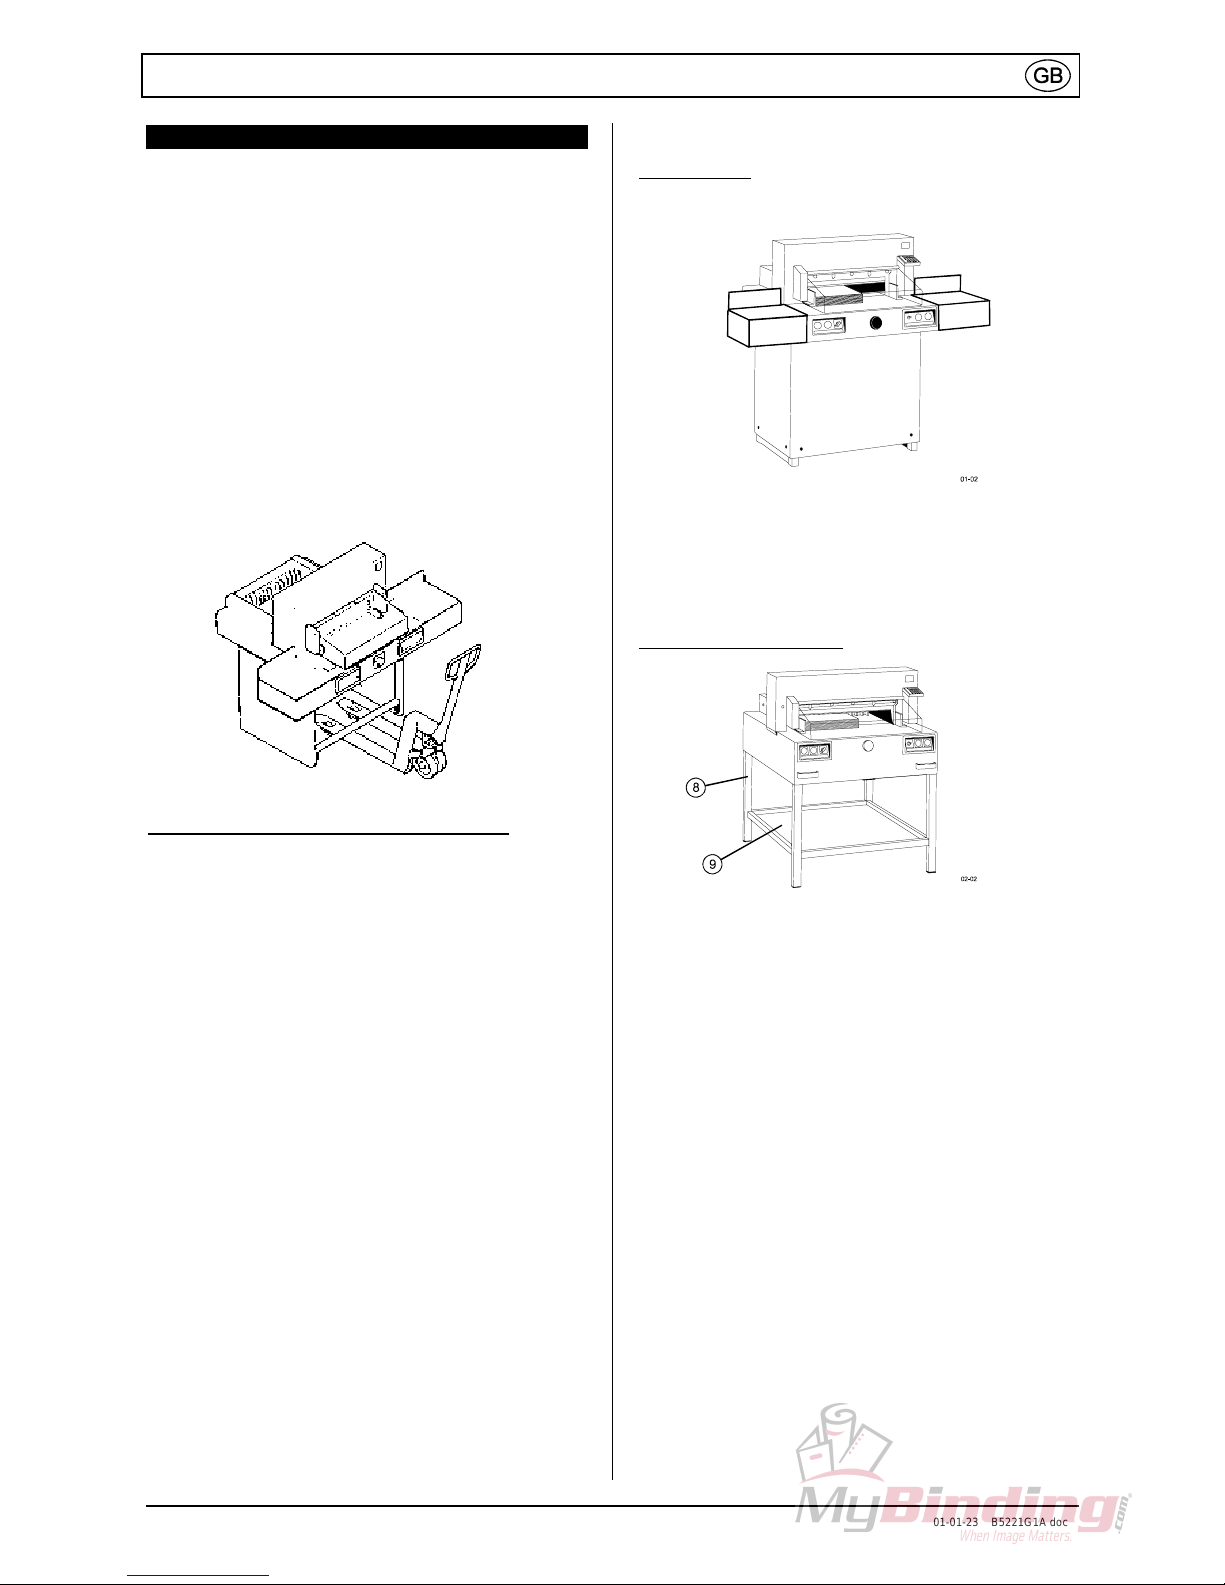
2.1 Preparing for installation
IDEAL 5221
The machine will be delivered ready for
operation.
As an option side tables, left and right ar e
available. These should be mounted so that the
surfaces are flush with the main table.
IDEAL 4850 and 6550
- Place the machine on the enclosed stand (8)
and secure with the 4 screws.
- Place the shelf (9) in the st and.
2.2 Power supply
The name plate is located at the rear of the
machine.
- Data stated on the rating plat e
- Voltage “ V “,
- Frequency “Hz”,
- Power consumption “A”
must correspond to the values of the power
supply unit.
- Earth wire must be available.
- Connect the machine with the mains.
Standard machines are factory-set as follows:
Voltage 220 - 240V (110V - 120V) 1 phase
Frequency 50Hz (60Hz)

IDEAL 4850-95 EP; IDEAL 5221-95 EP; IDEAL 6550-95 EP
6 01-01-23 B5221G1A doc
3. Operation
s Danger!
The machine may only be operated by
persons who have read and understood the
operating instructions and safety
instructions.
s Danger!
Check safety devices are complete and
function prior to starting the machine.
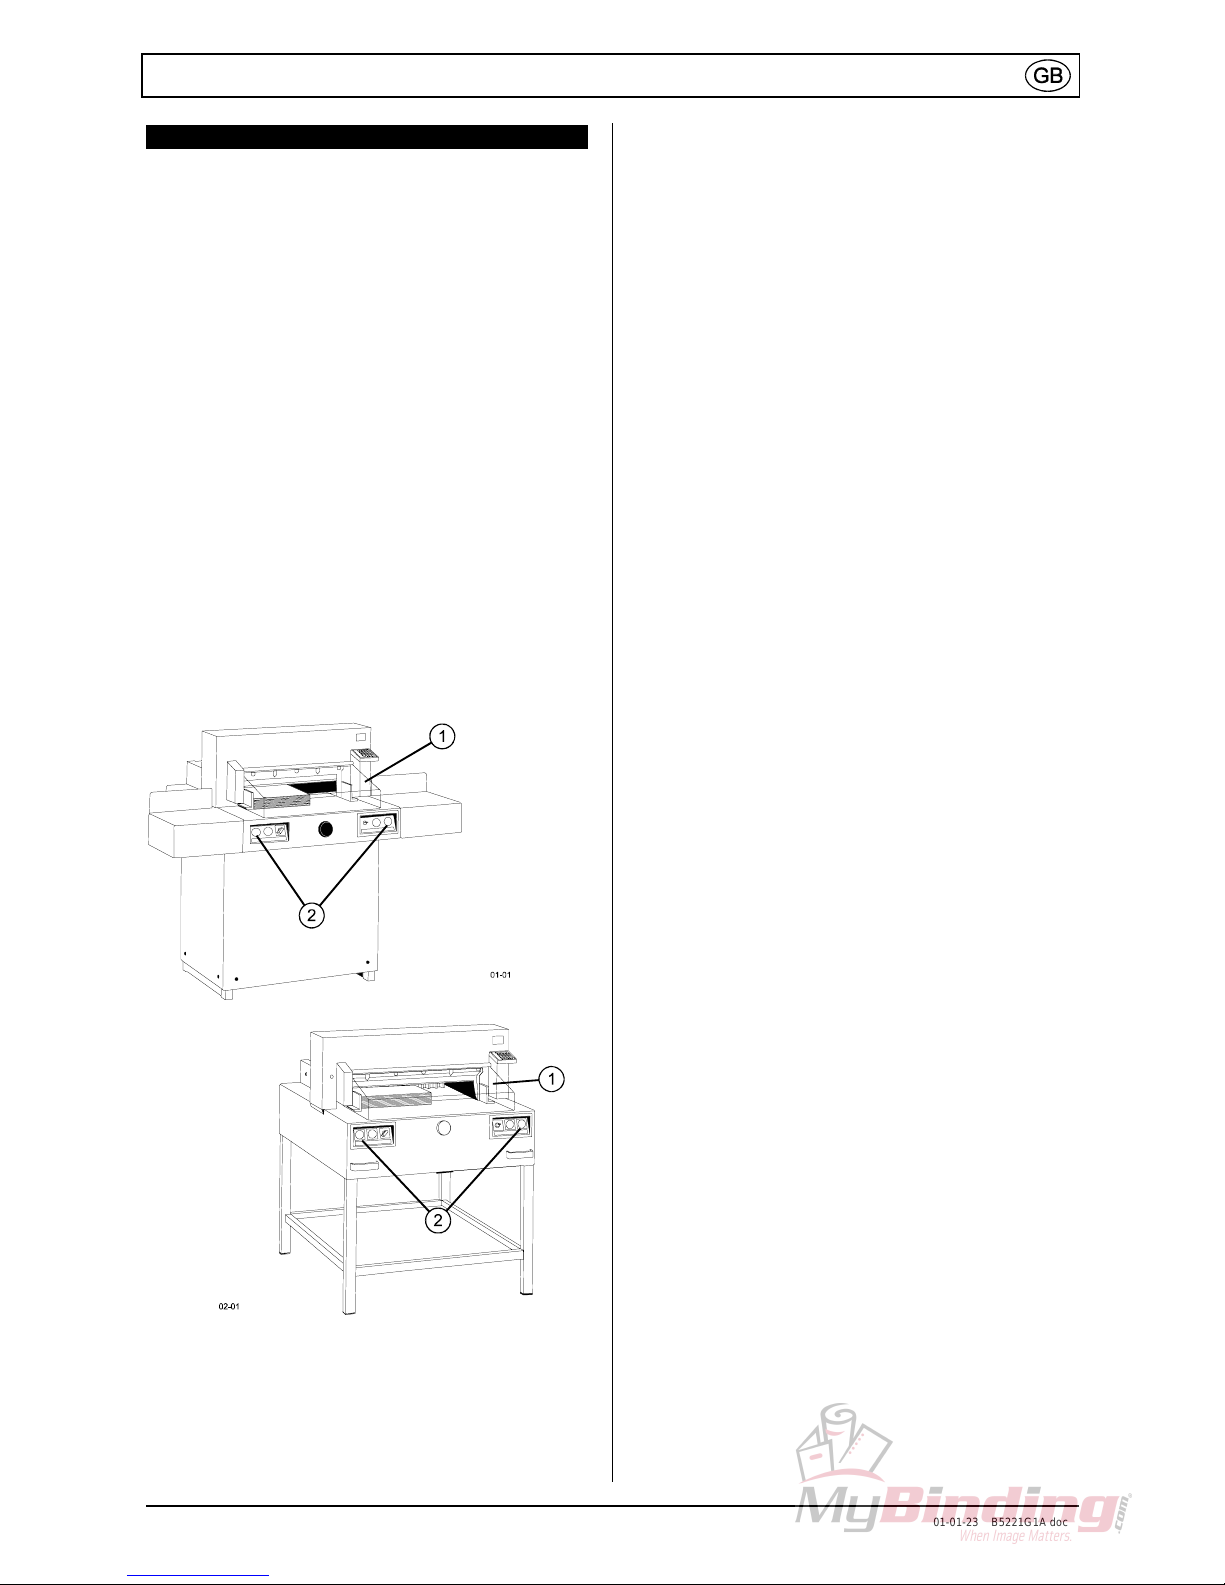
Checklist
- Machine panels:
All panels must be mounted
- Cutting activation:
Open the safety guard (1).
The cutting mechanism starts through a "twohanded control system" (2). The cutting
mechanism should only start if the guar d is
closed and the buttons of the two handed
control system are pressed exactly at the
same time.
- Guard didn't closed itself Þ otherwise replace
the gasspring.
It is recommended to keep a check handbook.
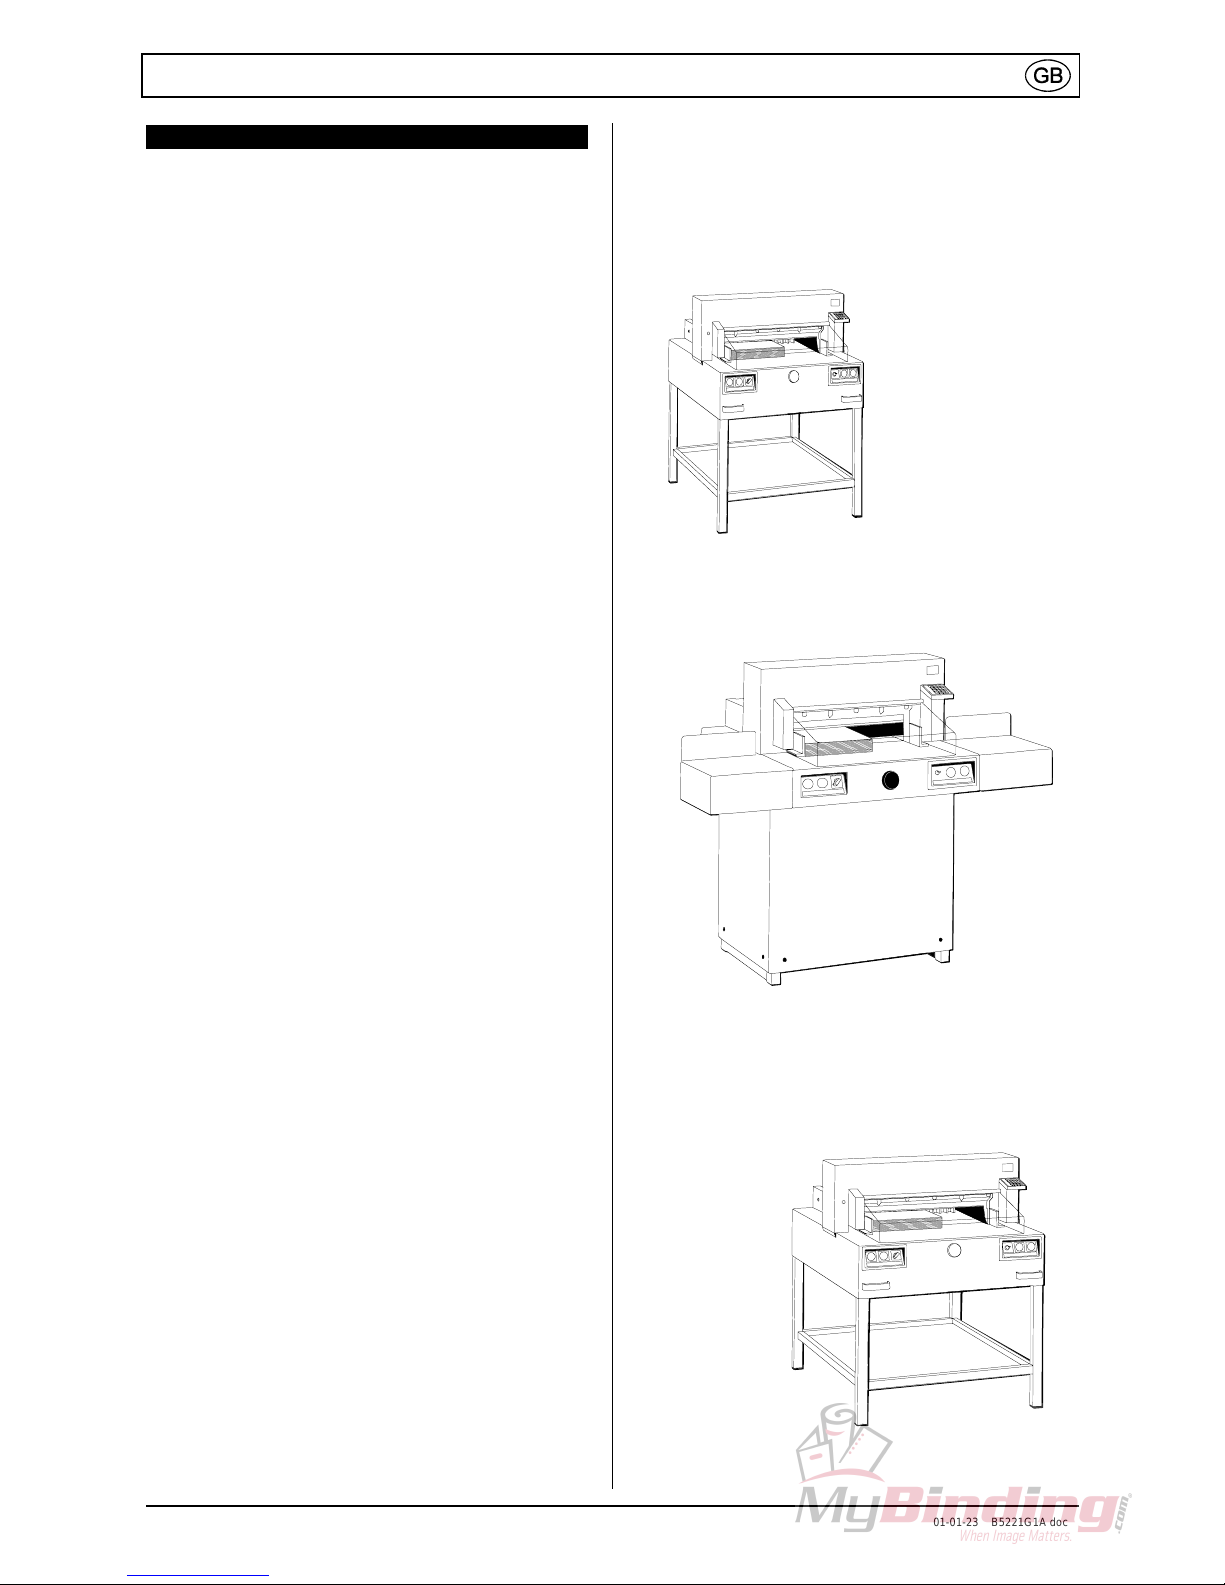
3.1 Operating elements
(1) Guard
(2) Two-hand activation
(3) Backgauge control
(4) Clamp returns
(5) Main switch
(6) Rotary control for backgaug e set ting
(7) Key switch
(8) Pre-clamping
(10) Dimensions display (cm or inch)
(11) - Programmable dimension
- Eject function
(12) Programmable dimension
(13) Stop & Clear; annulation & correction
(14) Start
(15) Memory / Dimension repeat
(16) Numerical keypad
(17) Changeover cm/inch.
(19) Clear program
(20) select program
(21) Enter
(22) Program number
(23) Program step
(24) Display repeat cut
(25) Specified dimension
Pre-clamping:
+
Clamp returns:
Cutting sequence with automatic clamping:
+

IDEAL 4850-95 EP; IDEAL 5221-95 EP; IDEAL 6550-95 EP
7 01-01-23 B5221G1A doc
3.2 Start machine
- Main switch (5) to position “1”.
- Insert the key (7) for the control panel and
turn it to the right.
- Open the safety guard ( 1) .
- Press
key (14).Þ Backgauge (9) m oves
to the rear and searches for the reference
position, (10) measurement appears on the
display.
Dimensions control - cutting to specified
dimensions
- Enter dimension at the numerical keypad (16)
Þ LED "S" (25) appears.
- Press
key Þ dimension is approached,
LED "S" disappears.
Dimensions below 9 cm can only be
approached with the
key held pressed.
- Insert the paper and push it with the k nocking
up device to the backgauge.
- Release the cut.
Programming is described under point 3.3
“programming”.
Cut according to marking s
- Adjust the backgauge with the hand-wheel (6)
to the back.
- Insert the paper and push it with the k nocking
up device to the backauge (9).
- Turn rotary control (6) to the right until the
marking on the paper to be cut is below the
cutting line indicator. The further the rotary
control is turned to the right, the faster the
backgauge moves. Return of the backgauge
is only possible in quick motion by turning the
rotary control to the left.
- Release the cut.
Eject function
If you press the key
¢ instead of , after
insertion of the dimension the backgauge
moves to the front for t aking out the paper.
After that it goes to the adjusted dimension of
the figure field.
Repeat cutting
- Enter
dimension at numerical
keypad (16).
- Drive to dimension by activating the
key.
- Push the paper to the backg auge (9).
- Press
M key Þ LED „M“ (24) is displayed.
- Enter repeat dimension.
- Press
key after cutting activation
Þ Backgauge moves to the front by the set
amount of the repeat dimension entered.
Repeat dimension function completed
- Press
M key Þ LED "M" (24) switch off.
Cutting activation
s Danger!
- Run backgauge to t he front for turning the
paper stack.
- Do not reach into the cutting ar ea when
the blade is in motion.
- Do not interrupt the upward movement of
the blade by performing switching
procedures.
You can only release a cut, if the specified
dimension was approached correctly. Þ The
LED "S" on the display has to be off.
- Close the guard (1).
- Press both buttons of the two-hand activation
(2) simultaneously and keep them depressed
until the paper is completely cut.
Cutting stop or interruption
- Release one or both buttons of t he two-hand
control.

IDEAL 4850-95 EP; IDEAL 5221-95 EP; IDEAL 6550-95 EP
8 01-01-23 B5221G1A doc
3.3 Programming
M
o
o 2
22
2 4
44
4. #
##
# %%%% .
S
This control system enables you to store 9
programs each with 9 programmable steps.
One step represents one measurement or max.
9 chain measurements. After entering the
program numbers you are able to change
between several program steps with the keys
¢ and £.
First figure in display = program num ber ,
Second figure = program step.
Dimensions below 9 cm can only be
approached with the
key held pressed.
"
UL
ULUL
UL" on the Display Þ the entered dimension
is too low.
"
OL
OLOL
OL" on the Display Þ the entered dimension
is too high.
Each program step corresponds to one
dimension. The indicated program st ep can be
overwritten at any time. These programs
remain stored when the machine is off. Should
you change to another dimension unit all
programmed measures are converted into t he
new unit (cm and inch).
Entering a program
- Press
P Þ "PR
PRPR
PR" appears in the Display
-
1 ... 9 Enter program number 1....9.
First figure in Display = program num ber.
-
1 ... 9 Enter dimension 1....9, or move the
backgauge to the desired measur em ent with
the rotary control.
-
= store the dimension Þ next program step
appears.
-
1 ... 9 Enter the next dimension.
-
= store the dimension.
-
P + Escape the program mode.
Eject function
Pressing the keys
= and ¢ simultaneously for
storing the dimension forces the backgauge
first to move to the f r ont pushing out the paper ,
and then move to the entered dimension on the
display.
Programming of r epeat cut dimension
-
P press Þ "PR
PRPR
PR" appears in the Display
-
1 ... 9 Enter program number 1....9.
First figure in display = program num ber
Second figure = program step.
-
¢ ... £ Enter program step 1...9.
-
1 ... 9 Enter repeat cut dimension.
-
M
MM
M Þ N1
N1N1
N1 Display shows one repeat cut.
-
M
MM
M Þ N1
N1N1
N1 Display shows two repeat cuts.
-
M
MM
M Þ N1
N1N1
N1 Display shows three repeat cuts.
-
M
MM
M Þ NNNN .... Display shows ... repeat cuts.
Maximum nine repeat cuts can be entered.
Entering the tenth repeat cut will delete the
repeat cut and the display shows the actual
program step.
-
= store the dimension.
P + Escape the program mode.
Cancel a program
-
P press Þ "PR
PRPR
PR" appears in the display.
-
1 ... 9 enter program number 1....9.
- Key
press two times.
Each program has to be cancelled separately.
Single program steps can only be overwritten.
Deleting the last program st ep.
- Enter
0.
- Press
=.
P + Escape the program mode.

IDEAL 4850-95 EP; IDEAL 5221-95 EP; IDEAL 6550-95 EP
9 01-01-23 B5221G1A doc
Working with programs
M
o
o 2
22
2 4
44
4. #
##
# %%%% .
S
- Press
P Þ PR
PRPR
PR appears on the display.
-
1 ... 9 Enter Program number 1....9.
With the keys
¢ and £ you are able to change
between several program steps.
With
the backgauge moves to the
indicated dimension.
With
the moving of the backgaug e st ops.
The cutting mechanism is described under
point 3.2 “Start the Machine”.
General
LED "S" blinks Þ the basic position will appear.
LED "S" is off Þ the actual dimension appears.
In the program mode the eject ion of paper
¢ is
not possible. The ejection of the paper has t o
be programmed.
After each cut pressing the key
the
backgauge moves to the next dimension.
Escape the program mode
- Press
P Þ PR
PRPR
PR appears on the display.
- Press
Þ Escape the program mode.
Program keys ¢ and £
By means of buttons
£ and ¢ dimension at
your choice can be reached.
-
P + £ resp. ¢ Þ PU
PUPU
PU resp. PO
POPO
PO appears on
the display.
- Insert the desired dimension.
-
= Store dimension.
Display in cm or inch
- Press
mm inch
Þ Display changes between mm
and Inch.
Adjust the eject-dimension
-
P + M P + M Þ EJ
EJEJ
EJ on display.
- Insert the desired dimension.
-
= Store dimension.

IDEAL 4850-95 EP; IDEAL 5221-95 EP; IDEAL 6550-95 EP
10 01-01-23 B5221G1A doc
4. Maintenance
s Danger
- Maintenance work may only be performed by
trained staff.
- Replacement of blade and cutting stick may
only be performed when the main switch is
switched off.
- Disconnect from the mains before starting
any service work or before removing the
cover.
Safety check
Perform a safety check every 5 years according
to § 40 VBG 7i according to test specification
EBA WN 105 18 61. The execution of this
safety check must be confirmed on the test
protocol. A test badge must be fixed to the rear
of the machine.
4.1 Cutting stick replacement
If the last sheet of paper of a stack is not
completely cut, the cutting depth must be
adjusted.
Setting the cutting depth
- Turn the screw (9) a half turn to right.
- Perform cutting t est as described below
If the cutting stick (2) is very worn it must be
turned.
l Warning!
Too deep cutting into the cutting st ick
shortens the life time of t he blade.
Turning or replacing the cut t ing stick
- Turn the screw (9) to the left until it stop.
Then a turn to the right.
- Dismount cutting stick (2).
- Turn the cutting stick (the non-used side must
be close to the blade) and plug it into the
holding bolt.
The cutting stick can be used eight times.
Cutting test
- If the last sheet of paper of a stack is not cut
over its total length, Turn t he scr ew (9) a half
turn to the right.
- Repeat this procedure until the paper is cut
over its total length.

IDEAL 4850-95 EP; IDEAL 5221-95 EP; IDEAL 6550-95 EP
11 01-01-23 B5221G1A doc
4.2 Blade replacement
Despite correctly set cutting depth and new
cutting stick if it is not possible to achieve a
clean cut Þ sharpen or replace the blade.
Blade demounting
s Danger!
The blade is very sharp. Do not dismount or
transport the blade without blade protection.
- Lower the knife by pressing both cut buttons.
Keep one button pressed and turn off the
main switch (5).
- The eccentrics (1) are now exposed and
should be turned to position 0 (special wrench
found in tool set).
- For model 4850 the knif e scr ew (6) m ust be
removed.
- Remove the special wrench and turn on the
main switch (5) until the knife r eturns to the
home position.
- Remove the 2 knife screws (2).
- Put the knife changing tool (4) into place and
fasten it to the knife.
- Screw out the remaining 2 respectively 3
blade screw.
- Loosen the grips of the knife changing tool (4)
lightly.
- Take the knife downwards out of the
machine.
- Change the cutting stick as described above.
Blade mounting
- Place the knife to be exchanged with the knife
changing tool (4) mounted, int o the knife
carrier (3) up to the top and screw it into place
with the grips.
- Lightly tighten 3 of the 5 knife screws (with
washers).
- remove the knife changing tool
- Lightly tighten the remaining knife screws
(with washers) (2).
- For model 4850 the knif e scr ew (6) can only
be inserted after the knife has been lowered.
- Remove all tools and distribute paper along
the entire cutting length.
- Lower the knife by pressing both cut buttons.
Keep one button pressed and turn off the
main switch (5).
- The 3 eccentrics (1) should then be used to
lower the blade until the paper is cut along
the entire length of the knife (The knife must
remain parallel to the cutting stick).
- If needed, the k nife can be lowered using the
knife depth adjustment scr ew (9) ( Knife must
be in upper position).
- For model 4850 tighten the knife screw (6).
- Turn main switch (5) to position I.
- The knife will return to the upper position and
the knife screws should be tightened f irmly.
- As described cut a stack of paper .
l Warning!
Blades may only be sharpened by
specialists.

IDEAL 4850-95 EP; IDEAL 5221-95 EP; IDEAL 6550-95 EP
12 01-01-23 B5221G1A doc
4.3 Maintenance cycle all 7 days
- Move backgauge to the front .
- Lubricate the grease nipple (1) .
4.4 Maintenance cycle all 6 months
- Turn main switch to position 0.
- Remove the upper housing and the wooden
front panel or the fr ont housing.
- Remove paper debris
- Lubricate all grease nipples.
- Check the linkage par t s (2) + (3) from motor
to knife for wear.
- Reassemble the machine.
Lubricant and grease gun
- Roller bearing grease - all t ypes..
- Grease dispenser found in tool set - remove
plug and chain before filling.

IDEAL 4850-95 EP; IDEAL 5221-95 EP; IDEAL 6550-95 EP
13 01-01-23 B5221G1A doc
5. Trouble shooting
s Danger!
Disconnect from the mains before starting
any sevice work or before removing the
cover.
5.1 Trouble shooting
Malfunction:
Display illumination off.
Cause:
Power supply.
Remedy:
- Mains switch on.
- Plug in mains plug.
- Check main fuse.
- Overload switch (9) on.
Malfunction:
Cutting may not be activated.
a) Cause:
Dimension was not approached correctly.
Þ LED "S" does not go off.
Remedy:
press
once again.
b) Cause:
Safety check of the guar d.
Remedy:
Open and close the guard.
c) Cause:
Measurement below 9,00 cm.
Remedy:
Press
until the backgauge has
reached the position.
d) Cause:
Backgauge not in the right position
Þ
CUT
CUTCUT
CUT on Display.
Remedy:
Please inform the technical service.
Malfunction:
Knife stops even though motor still
functions.
Cause:
The safety clutch was activated.
Remedy:
Contact your dealer.
Malfunction:
The last sheet of paper in a stack is not
completely cut.
Remedy:
Set cutting depth or turn resp. replace
cutting stick. (see chapter “ cut ting stick
replacement”).
Malfunction:
Poor cutting.
Remedy:
No clear cut despite the cutting depth is
correctly set and the cutting stick replaced
the cutting blade must be sharpened resp.
replaced.

IDEAL 4850-95 EP; IDEAL 5221-95 EP; IDEAL 6550-95 EP
14 01-01-23 B5221G1A doc
6. Technical data
Sound level DIN 45635-1-27: 71dB(A)
The exact technical specifications can be found
on the technical specifications sticker on t he
machine.
Guard
Interlock the control system:
Space between hood and table < 20mm
7. Accessories
l Important!
Only fit accessories recommended by the
manufacturer.
Knocking up device 9000 521
IDEAL 5221-95 EP
Spare knife 9000 130
6 cutting sticks 9000 024
Side tables left and right 9000 530
IDEAL 4850-95 EP
Spare knife 9000 021
Cutting sticks 9000-022
IDEAL 6550-95 EP
Spare knife 9000 025
Cutting sticks 9000 026


EG-KONFORMITÄTSERKLÄRUNG
EC-declaration of conformity
Déclaration de conformité CE
Declaración CE de conformidad
Dichiarazione CE di conformità
EG-verklaring van overeenstemming
Declaraçao CE de conformidade
EF-overensstemmelseserklæring
- Hiermit erklären wir, daß die Bauart von
- Herewith we declare that
- Par la présente, nous déclarons que
- Por la presente, declaramos que la
- Si dichiara che il modello della
- Hiermede verklaren wij, dat de in de handel gebrachte machine
- Com a presente, declaramos que o modelo da
- Hermed erklæres, at produkttypen
4850-95 EP; 5221-95 EP; 6550-95 EP
- folgenden einschlägigen Bestimmungen entspricht :
- complies with the following provisons applying to it:
- sont conformes aux dispositions pertinentes suivantes:
- satisface las disposiciones pertinentes siguientes:
- è conforme alle seguenti disposizioni pertinenti:
- voldoet aan de eisen van de in het vervolg genoemde bepalingen:
- está em conformidade com as disposições pertinentes, a saber :
- er i overensstemmelse med følgende bestemmelser:
EWG-RL 89/392; EWG-RL 73/23; EWG- RL 89/ 336
- Angewendete harmonisierte Normen insbesondere
- Applied harmonized standards in particular
- Normes harmonisée utilisées, notamment
- Normas armonizadas utilizadas particularmente
- Norme armonizzate applicate in particolare
- Gebruikte geharmoniseer de normen, in het bijzondere
- Normas harmonizadas utilizadas, em particular
- Harmoniserede standarder, der blev anvendt, i særdaleshed
EN60204; prEN1010-1; prEN1010-3; EN55014-1; EN55014-2;
EN6100-3-2; EN6100-3-3;
EN292; EN294 EN27779; EN349; DIN45635-27
Krug & Priester GmbH u. Co KG 19. 3. 2001
72336 Balingen, Germany Datum Wolf gang Priester
- General Manager -
11AVKon

IDEAL Krug & Priester 72336 Balingen, Germany http://www.ideal.de 01/2001 B5221G1A doc
 Loading...