

MXN MXN-P7DQ Owner's Manual
7” DIGITAL SPLITSCREEN TFT LCD
ALL ROUND VISION MONITOR
Model: MXN-P7DQ
Design and specications are subject to change without notice.
OWNER’S MANUAL
PLEASE READ CAREFULLY BEFORE
USING THIS PRODUCT.

·
I
·
N
·
D
·
E
·
X
·
Package Contents
Menu
Operation
System Setting
Function
Picture
AUX Picture
Normal/Mirror
Camera Trigger
Distance Marker
Auto Picture Scan
Camera Name
Speed Switch
Specication
Connection
Installation
Split
Triple
Quad
Distance Marker Adjust
Lock On/Off Function
Scan On/Off Function
03
10
04
05
05
06
06
06
07
07
08
08
09
17
16
14
10
10
11
12
13
13
MXN-P7DQ
Owner’s Manual
3
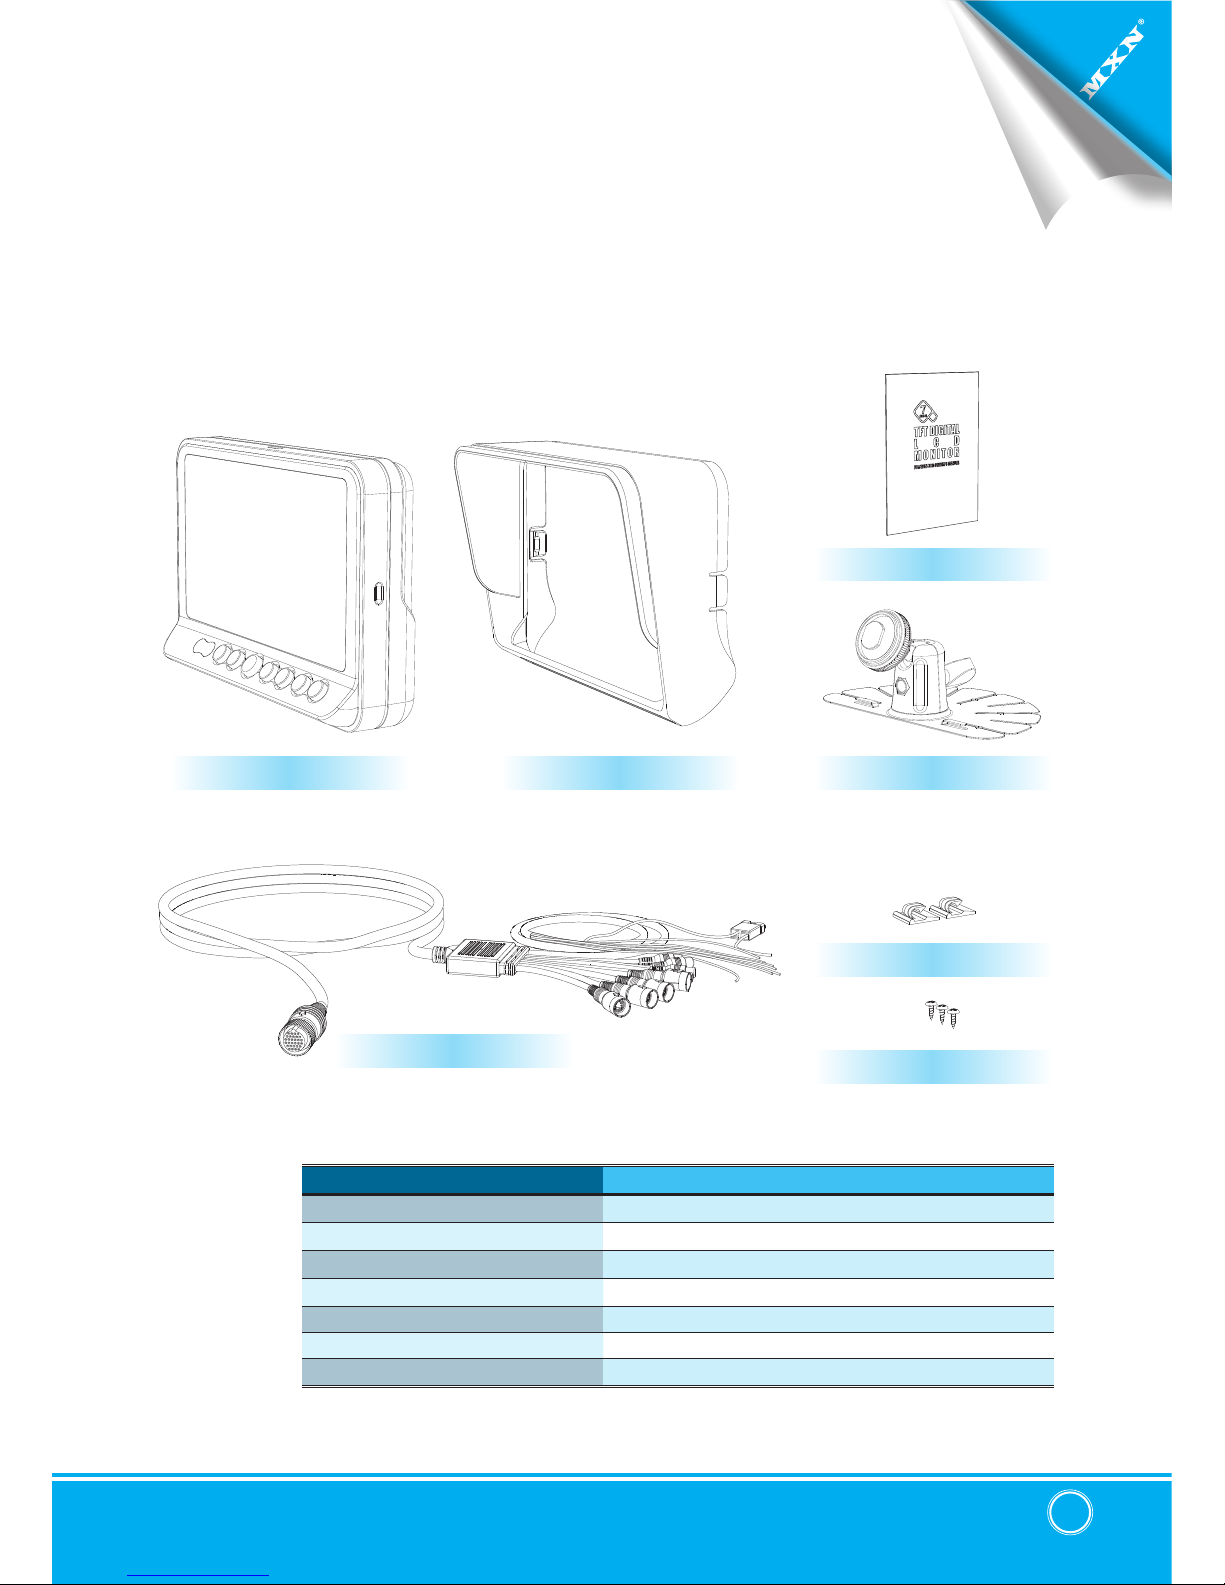
▣ PACKAGE CONTENTS
MONITOR SUNVISOR STAND BRACKET
MANUAL
BRACKET SCREWS
CABLE CLIP
ITEM Q’TY
MONITOR 1
SUNVISOR 1
STAND BRACKET 1
BRACKET SCREW 3
CABLE CLIP 2
CAMERA INPUT CABLE 1
MANUAL 1
CAMERA INPUT CABLE
7" TFT DIGITAL LCD Monitor
4
▣ OPERATION
RIGHT
POWER
SELECT
DOWN
MENU
DAY/NIGHT SENSOR (CDS)
LEFT
UP
Press [RIGHT] button to adjust monitor volume.
Use [RIGHT] button to change OSD setting during
system setting.
Press [POWER] button to turn on/off the monitor.
Press [SELECT] button to select the respective camera channel.
(CAM1-CAM2-CAM3-CAM1..)
Press [DOWN] button to navigate the menu for system setting.
Press [MENU] button for system setting.
Automatic brightness control sensor.
Press [LEFT] button to adjust monitor volume.
Use [LEFT] button to change OSD setting during
system setting.
Press [UP] button to navigate the menu for system setting.
S1
S3
S2
S4
MXN-P7DQ
Owner’s Manual
5
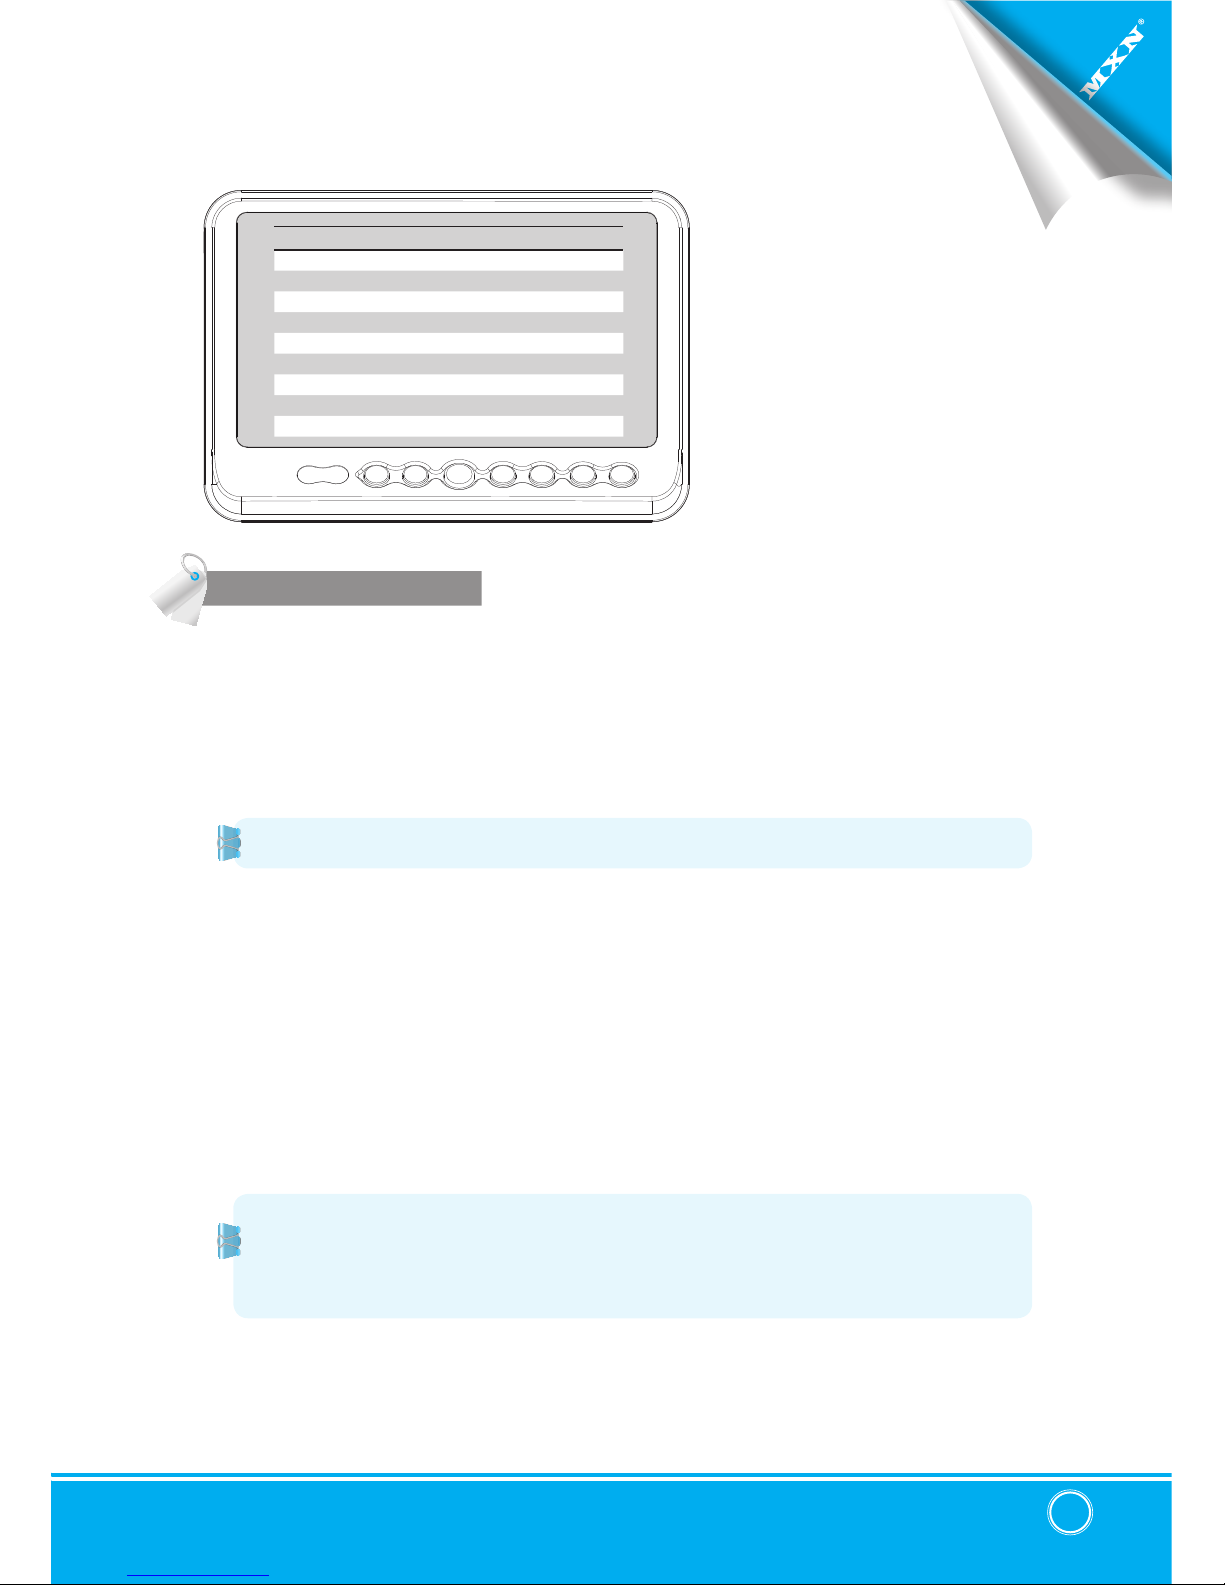
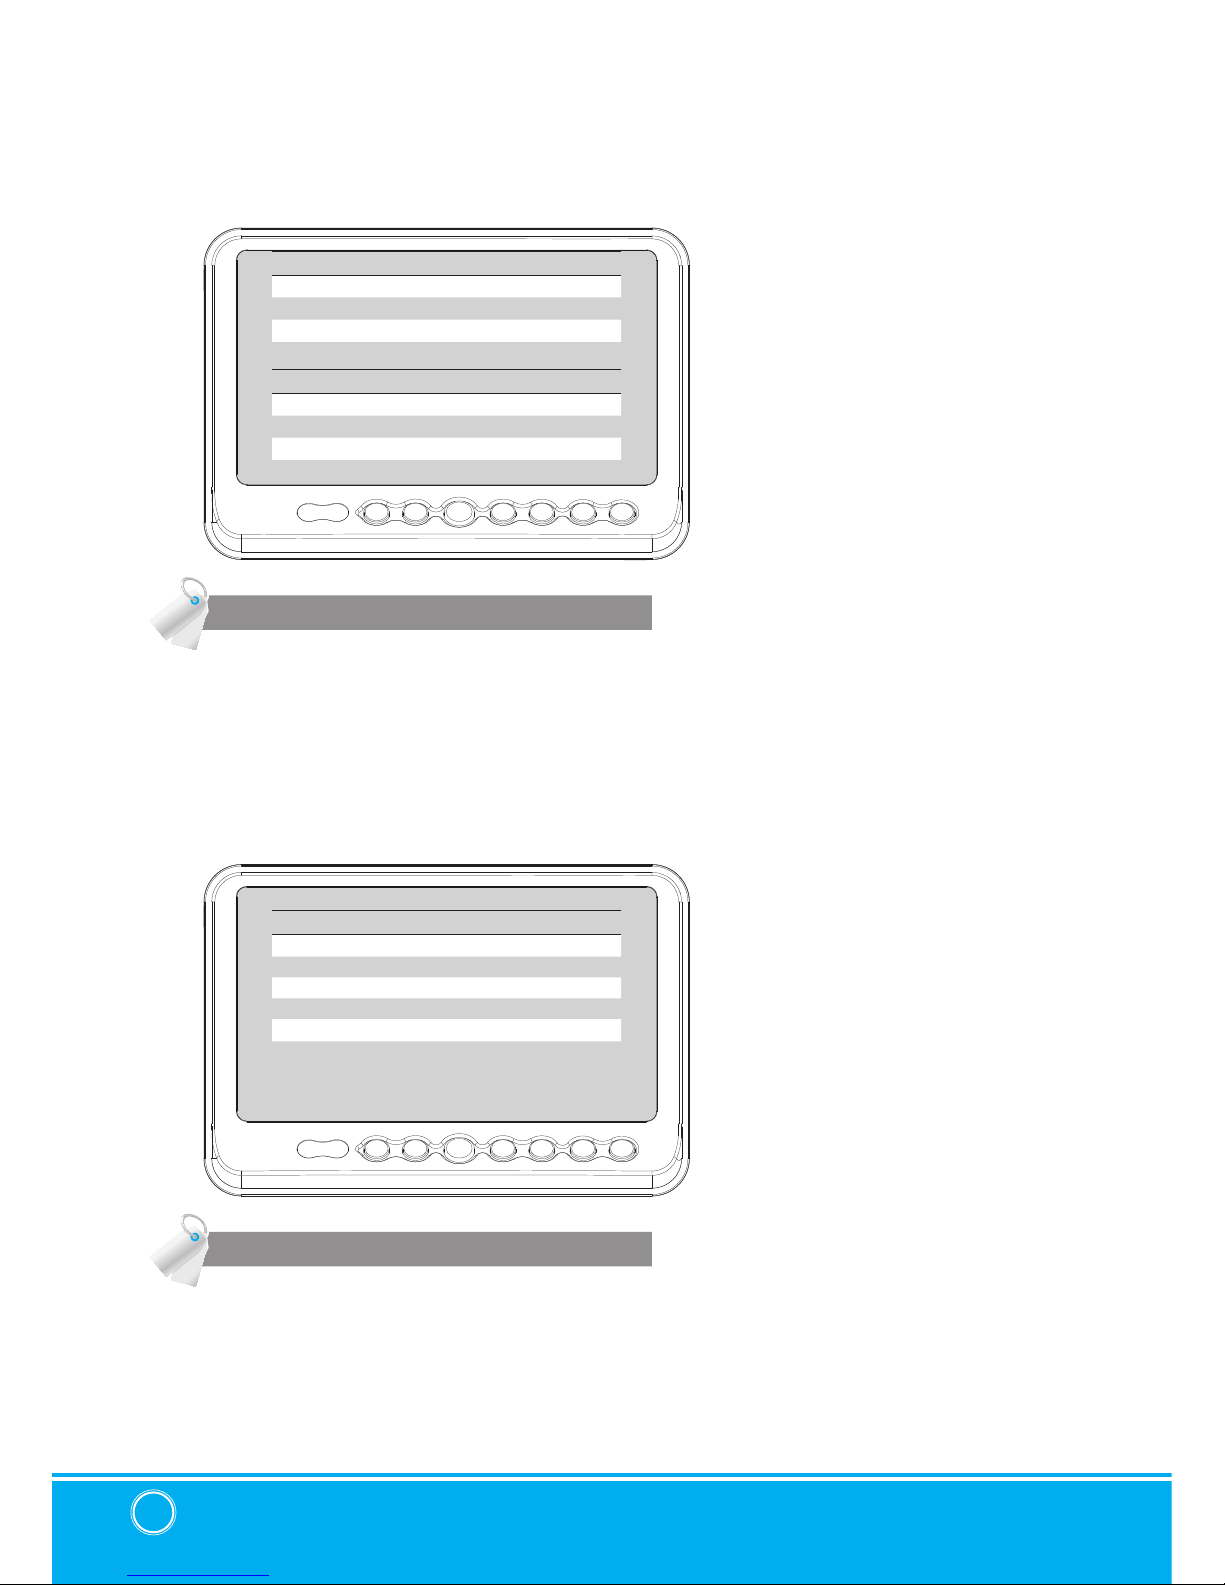
▣ SYSTEM SETTING
FUNCTION
FUNCTION
LANGUAGE ENGLISH
SYSTEM NTSC/PAL
DIMMER AUTO/OFF
NIGHT BRIGHT 50
AUTO POWER AUTO/ON/OFF
MONITOR HEAT ON/OFF
RESET >
SYSTEM INFO VER 1.00
LANGUAGE
Provide 6 Multi-lingual OSD [ENGLISH, SWEDISH, DANISH, NORWEGIAN, DUTCH, FINNISH].
Select the preferred
LANGUAGE
.
SYSTEM
Select
NTSC/PAL
DIMMER (Automatic Brightness Control)
Select
AUTO
or
OFF
to have Automatic or Manual brightness of the monitor.
REMARK: By activating DIMMER AUTO function, the monitor adjusts the brightness according
to the environment.
NIGHT BRIGHT
Select the DIMMER to
『
AUTO』, set the value of backlight on NIGHT mode.
AUTO POWER
Select monitor activation function as below.
[
AUTO
] Monitor keeps the last setting in memory.
[
ON
] Monitor starts up
『Power-ON』
mode automatically.
[
OFF
] Monitor starts up
『Stand-By』
mode automatically.
MONITOR HEATER
Select MONITOR HEATER『ON』to have automatic heating function in order to enable fast
picture start during extreme cold weather condition.
RESET
Press >> button to go the factory default setting.
SYSTEM INFO.
Refers to system information of the monitor.
Remark: During MONITOR HEATER ON mode,
Heating activates automatically when the temperature of inside monitor is below 0 degree
Celcius.
Wh en th e tempe ratur e of in side mon itor is ove r 0 degre e Celci us, hea ting sto ps
automatically.
7" TFT DIGITAL LCD Monitor
6
▣ SYSTEM SETTING
PICTURE
NORMAL/MIRROR
PICTURE
CONTRAST 50
BRIGHTNESS 50
COLOR 50
TINT 50
AUX PICTURE
CONTRAST 50
BRIGHTNESS 50
COLOR 50
TINT 50
NORMAL/MIRROR
CAM1
NORMAL/MIRROR
CAM2 NORMAL/MIRROR
CAM3 NORMAL/MIRROR
CAM4 NORMAL/MIRROR
UP/UPSIDE DOWN
UP/UPSIDE DOWN
Press [LEFT/RIGHT] button to adjust preferred PICTURE of the monitor.
PICTURE MENU adjust PICTURE of CAM1, CAM2, CAM3, CAM4, SPLIT, TRIPLE, QUAD
MODE
AUX PICTURE MENU adjust PICTURE of AUX MODE
User can adjust picture setting value for『CAMERA CHANNELS』and『AUX CHANNEL』
seperately.
NORMAL/MIRROR
Each camera picture (CAM1/CAM2/CAM3/CAM4) can be switchable as
NORMAL/MIRROR
image.
UP/UPSIDE DOWN
Camera pictures can be switchable as UP/
DOWN
image.
 Loading...