

MXN MXN-P7D, P7D Owner's Manual
7” DIGITAL TFT LCD
ALL ROUND VISION MONITOR
Model: MXN-P7D
Design and specications are subject to change without notice.
OWNER’S MANUAL
PLEASE READ CAREFULLY BEFORE
USING THIS PRODUCT.

·
I
·
N
·
D
·
E
·
X
·
Package Contents
Connection
Operation
System Setting
Function
Picture
Camera Set up
Normal/Mirror
Auto Picture Scan
Camera Trigger
Distance Marker Adjust
Scan ON/OFF Function
Lock ON/OFF Function
Installation
MONITOR installation with Stand bracket & Sunvisor
Installation of heavy duty mounting brackets
Specication
03
11
04
05
05
06
06
07
07
08
09
10
10
12
12
13
14
MXN-P7D
Owner’s Manual
3
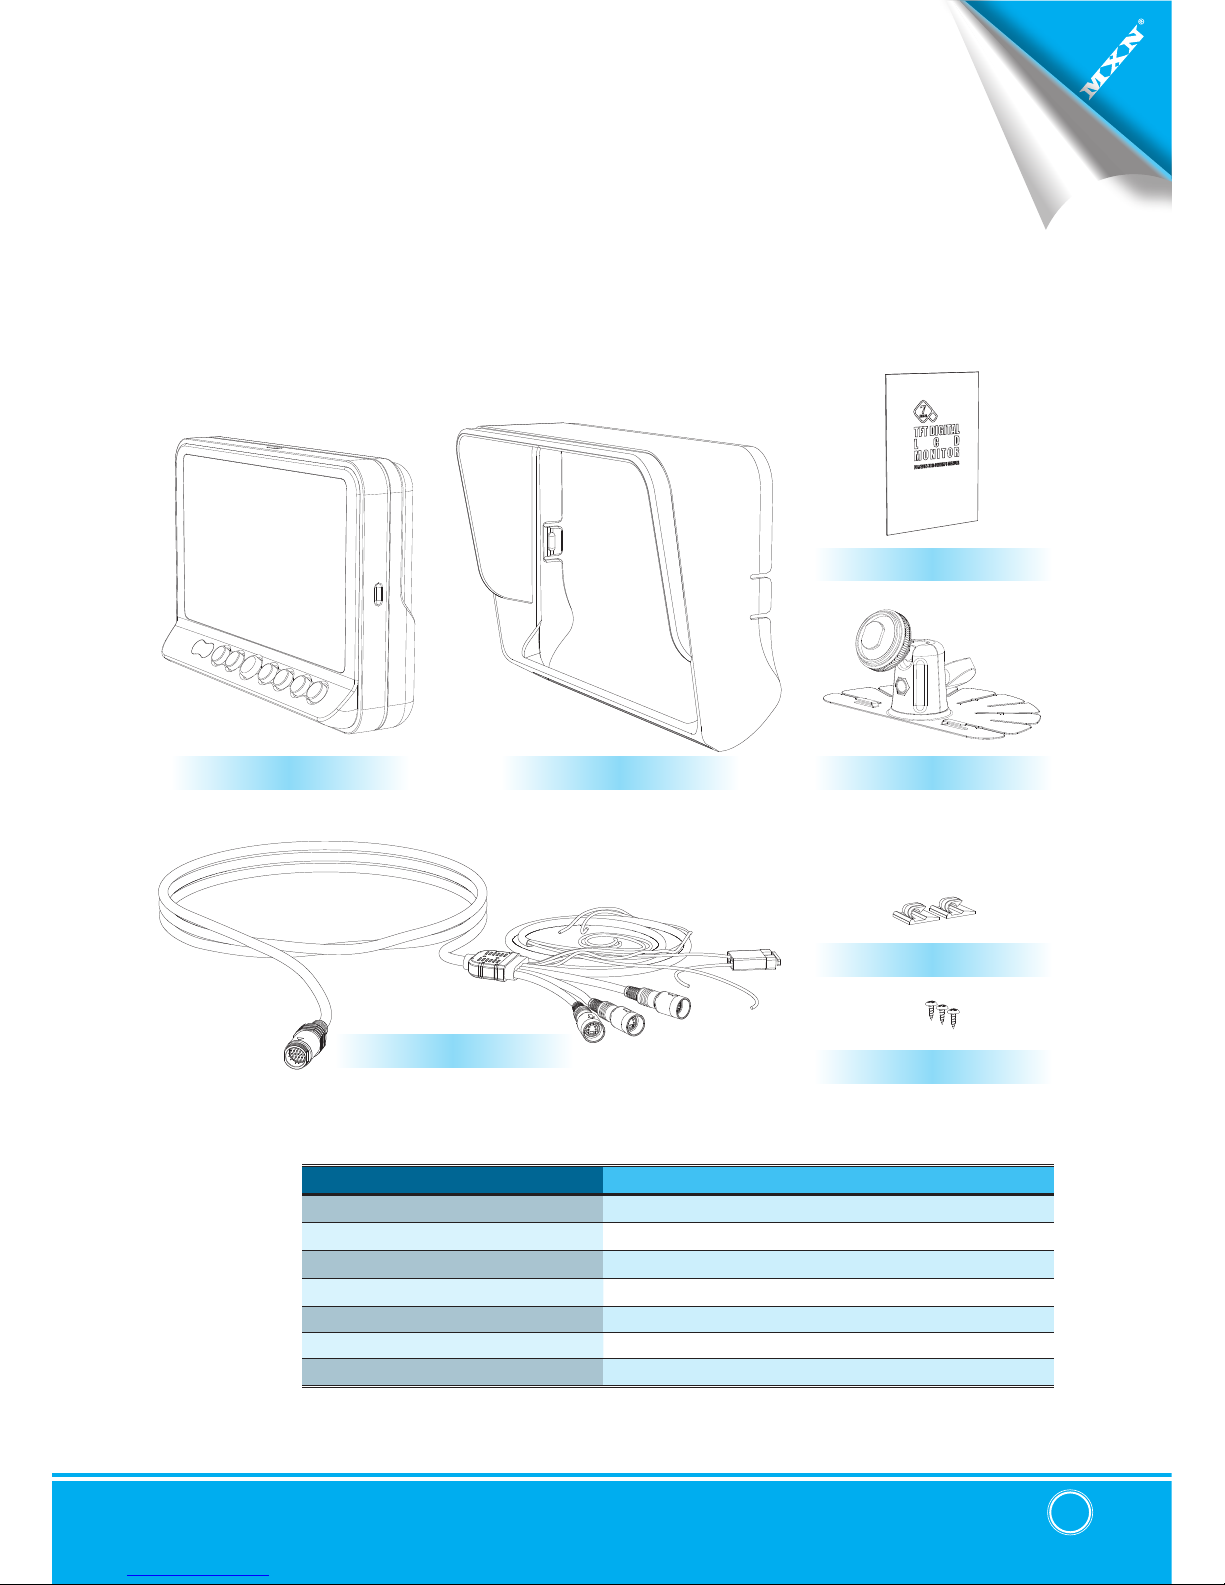
▣ PACKAGE CONTENTS
MONITOR SUNVISOR STAND BRACKET
MANUAL
BRACKET SCREWS
CABLE CLIP
ITEM Q’TY
MONITOR 1
SUNVISOR 1
STAND BRACKET 1
BRACKET SCREW 3
CABLE CLIP 2
CAMERA INPUT CABLE 1
MANUAL 1
CAMERA INPUT CABLE

7" TFT DIGITAL LCD Monitor
4
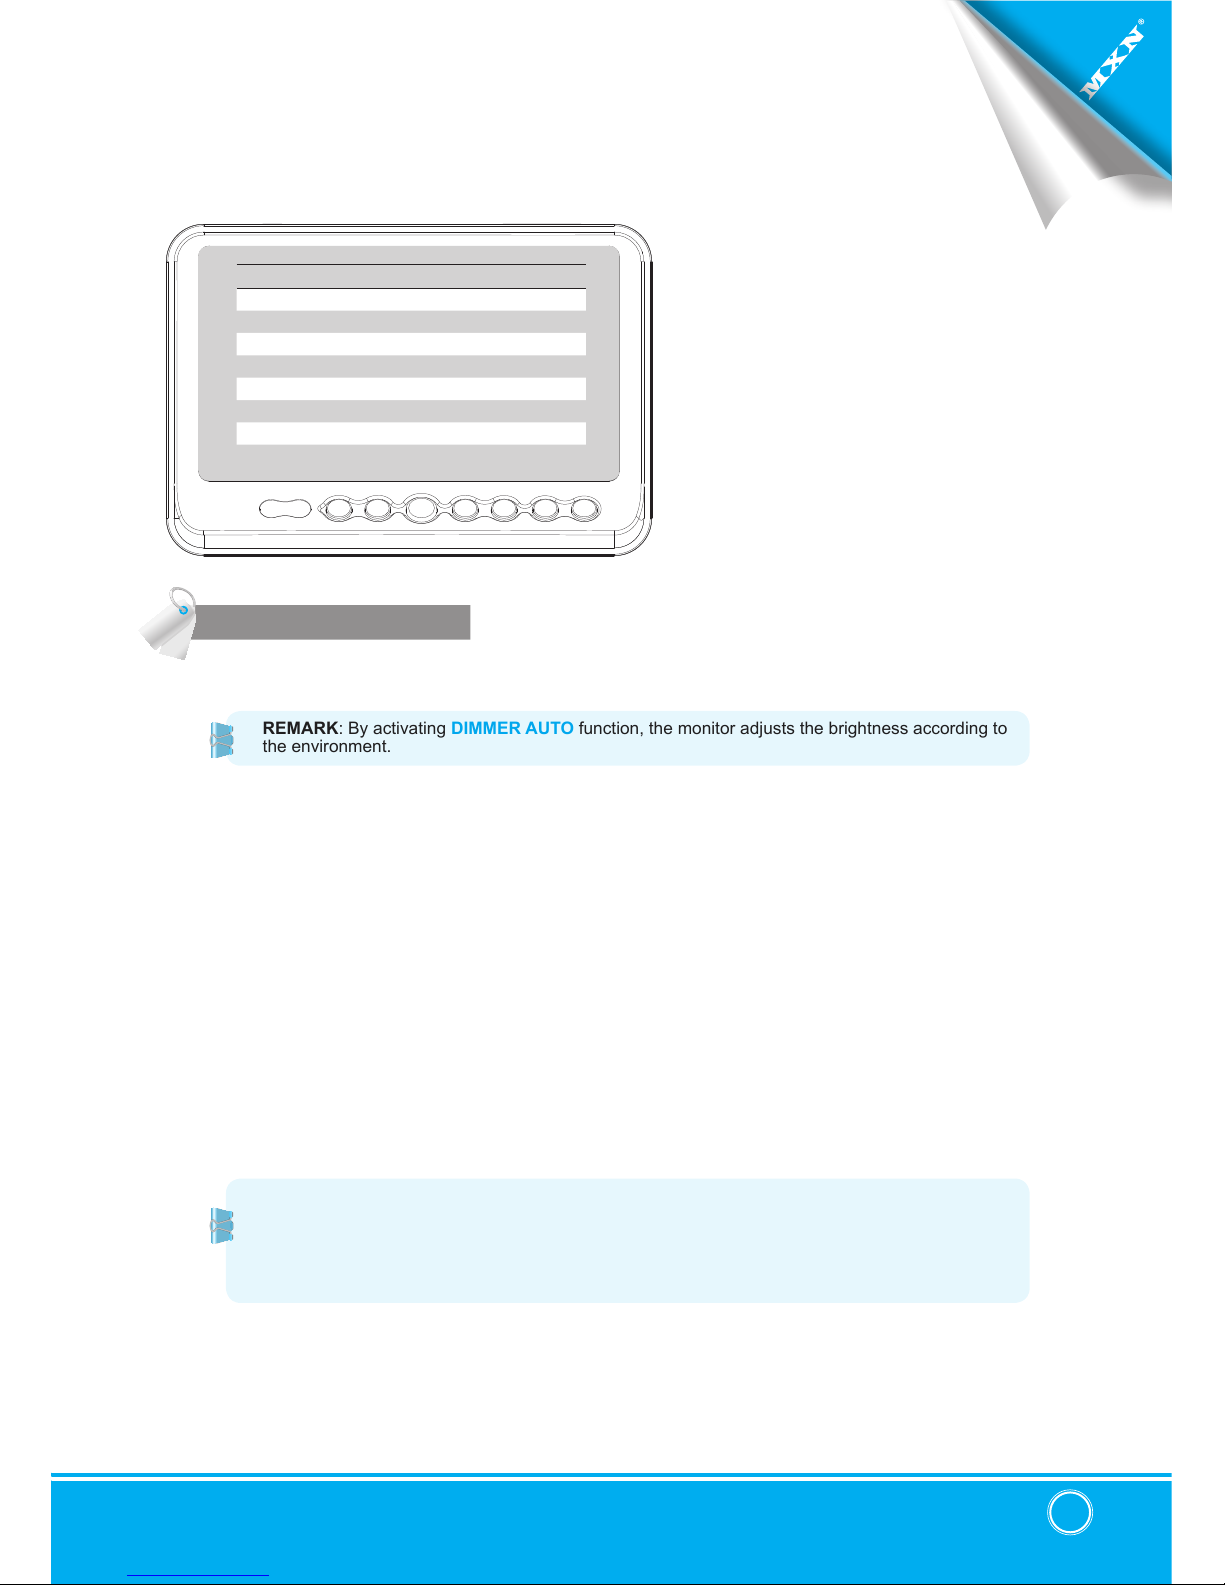
▣ OPERATION
RIGHT
POWER
SELECT
DOWN
MENU
HEATER LAMP
DAY/NIGHT SENSOR (CDS)
LEFT
UP
Press [RIGHT] button to adjust monitor volume.
Use [RIGHT] button to change OSD setting during
system setting.
Press [POWER] button to turn on/off the monitor.
Press [SELECT] button to select the respective camera channel.
(CAM1-CAM2-CAM3-CAM1..)
Press [DOWN] button to navigate the menu for system setting.
Press [MENU] button for system setting.
Orange color will be illuminated in case heater function is activated.
Automatic brightness control sensor.
Press [LEFT] button to adjust monitor volume.
Use [LEFT] button to change OSD setting during
system setting.
Press [UP] button to navigate the menu for system setting.
MXN-P7D
Owner’s Manual
5
▣ SYSTEM SETTING
DIMMER (Automatic Brightness Control)
Select AUTO or OFF to have Automatic or Manual brightness of the monitor.
REMARK: By activating DIMMER AUTO function, the monitor adjusts the brightness according to
the environment.
NIGHT BRIGHT
Select the DIMMER to
『
AUTO』, set the value of backlight on NIGHT mode.
LANGUAGE
Provide 6 Multi-lingual OSD [ENGLISH, SWEDISH, DANISH, NORWEGIAN, DUTCH, FINNISH].
Select the preferred LANGUAGE.
AUTO POWER
Select monitor activation function as below.
[AUTO] Monitor keeps the last setting in memory.
[ON] Monitor starts up
『
Power-ON』mode automatically.
[OFF] Monitor starts up
『
Stand-By』mode automatically.
MONITOR HEATER
Select MONITOR HEATER『ON』to have automatic heating function in order to enable fast
picture start during extreme cold weather condition.
RESET
Press >> button to go the factory default setting.
SYSTEM INFO.
Refers to system information of the monitor.
FUNCTION
FUNCTION
DIMMER AUTO/OFF
NIGHT BRIGHT 50
LANGUAGE ENGLISH/…
AUTO POWER AUTO/ON/OFF
MONITOR HEATER ON/OFF
RESET >
SYSTEM INFO. VER 1.0
Remark: During MONITOR HEATER ON mode,
Heating activates automatically when the temperature of inside monitor is below 0
degree Celcius.
When the temperature of inside monitor is over 0 degree Celcius, heating stops
automatically.
 Loading...