

MXN MXN9500DD Owner's Manual

7” DIGITAL 2-DIN TFT LCD
ALL ROUND VISION MONITOR
Model: MXN9500DD
Design and specications are subject to change without notice.
OWNER’S MANUAL
PLEASE READ CAREFULLY BEFORE
USING THIS PRODUCT.

PACKAGE CONTENTS 03
OPERATION 04
SYSTEM SETTINGS 05
FUNCTION 05
PICTURE MENU 06
NORMAL/MIRROR 06
AUDIO 07
TRIGGER AUDIO 07
CAMERA TRIGGER 08
DISTANCE MARKER 08
MARKER 08
AUTO PICTURE SCAN 09
CAMERA NAME 09
SPEED SWITCH 10
MENU 11
SPLIT 11
TRIPLE 11
QUAD 12
MANUAL SELECTION 12
DISTANCE MARKER ADJUSTMENT 13
MENU LOCK ON/OFF FUNCTION 14
AUTO PICTURE SCAN ON/OFF FUNCTION 14
CONNECTIONS 15
CAMERA INPUT 15
INSTALLATION 16
IN-DASH INSTALLATION 16
REMOVAL OF INSTALLED MONITOR 16
ON-DASH INSTALLATION WITH BRACKET
17
INSTALLATION OF HEAVY DUTY MOUNTING BRACKETS 18
SPECIFICATIONS 19
· I · N · D · E · X ·

MXN9500DD
Owner’s Manual
3
PACKAGE CONTENTS
SUNVISOR MONITOR BRACKET
REMOVER
MANUAL
BRACKET SCREWS
CABLE CLIP
ITEM Q’TY
MONITOR 1
SUNVISOR 1
REMOVER 2
BRACKET 1
BRACKET SCREW 3
CABLE CLIP 2
MULTI-CABLE 1
MANUAL 1
MULTI-CABLE
7” DIGITAL 2-DIN TFT LCD ALL ROUND VISION MONITOR
4
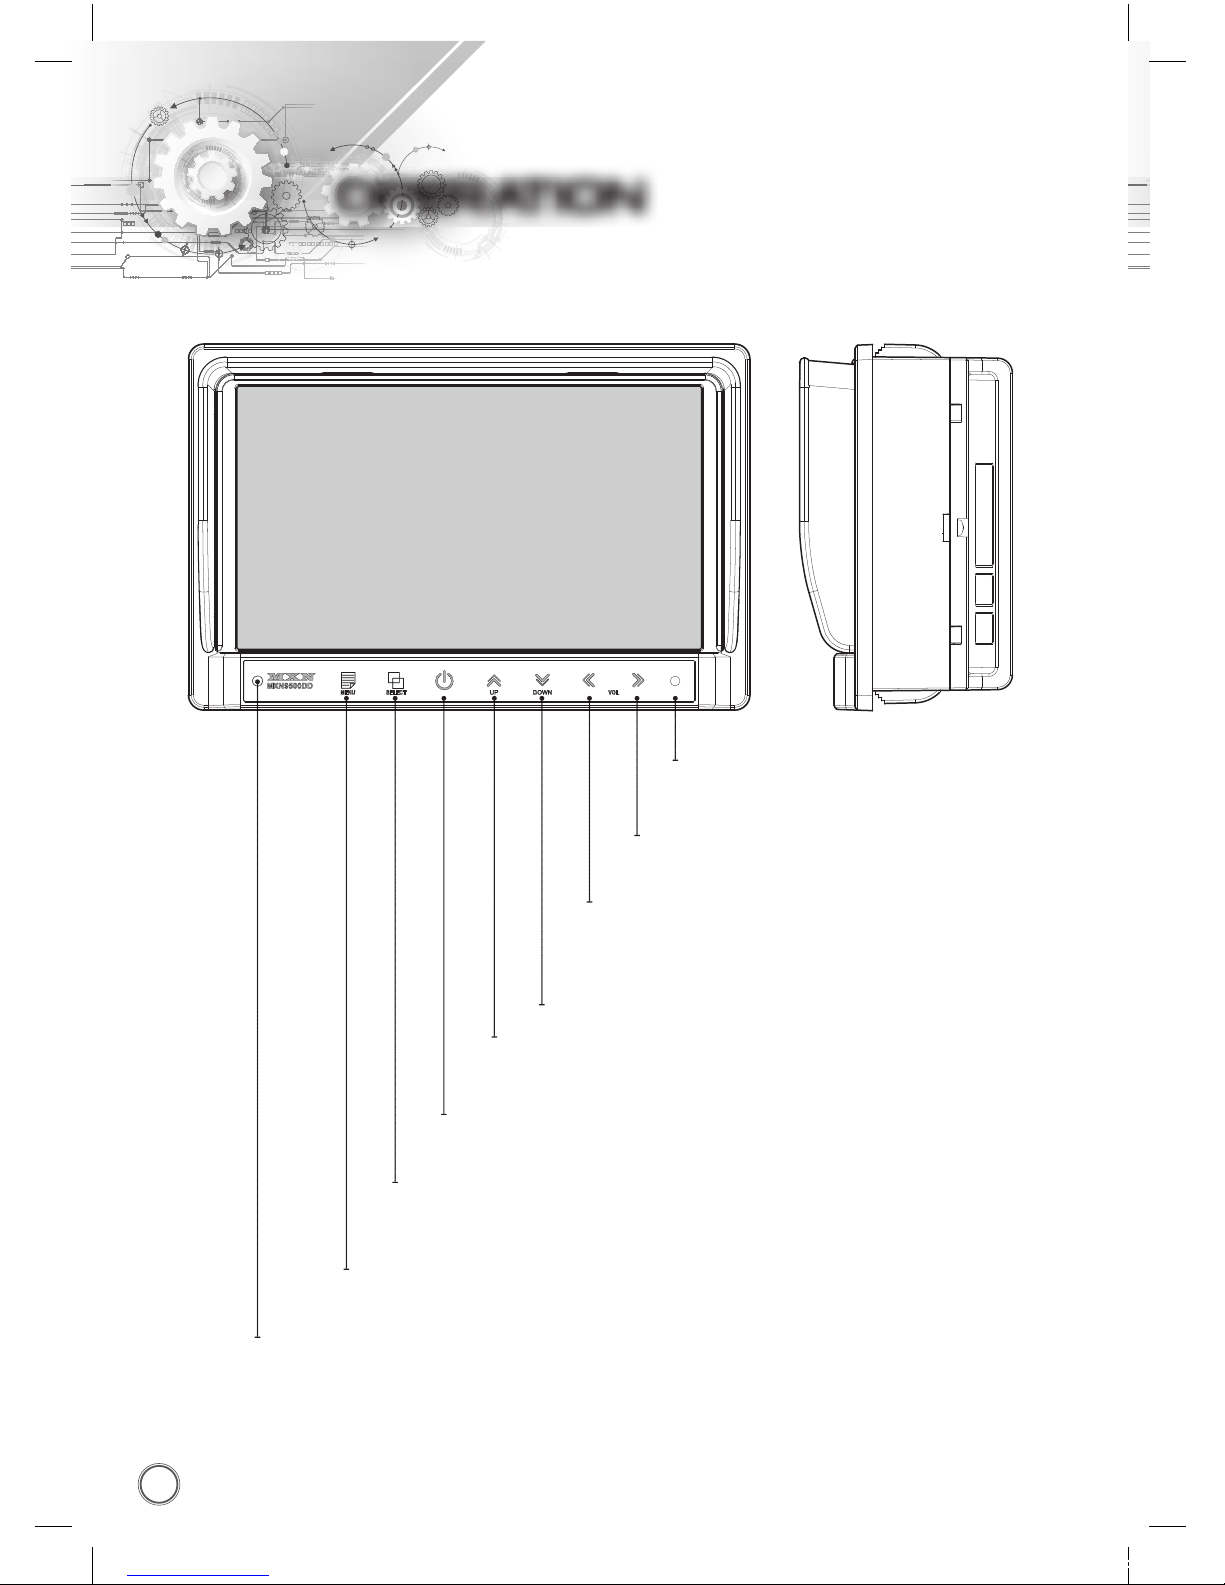
OPERATION
RIGHT
SPEAKER
POWER
SELECT
DOWN
MENU
DAY/NIGHT SENSOR (CDS)
LEFT
UP
Press [RIGHT] button to adjust monitor volume.
Use [RIGHT] button to change OSD setting during
system setting.
Press [POWER] button to turn on/off the monitor.
Press [SELECT] button to select the respective camera channel.
(CAM1-CAM2-CAM3-CAM4-AUX-SPLIT-TRIPLE-QUAD-CAM1..)
Press [DOWN] button to navigate the menu for system setting.
Press [MENU] button for system setting.
Automatic brightness control sensor.
Press [LEFT] button to adjust monitor volume.
Use [LEFT] button to change OSD setting during
system setting.
Press [UP] button to navigate the menu for system setting.
MXN9500DD
Owner’s Manual
5
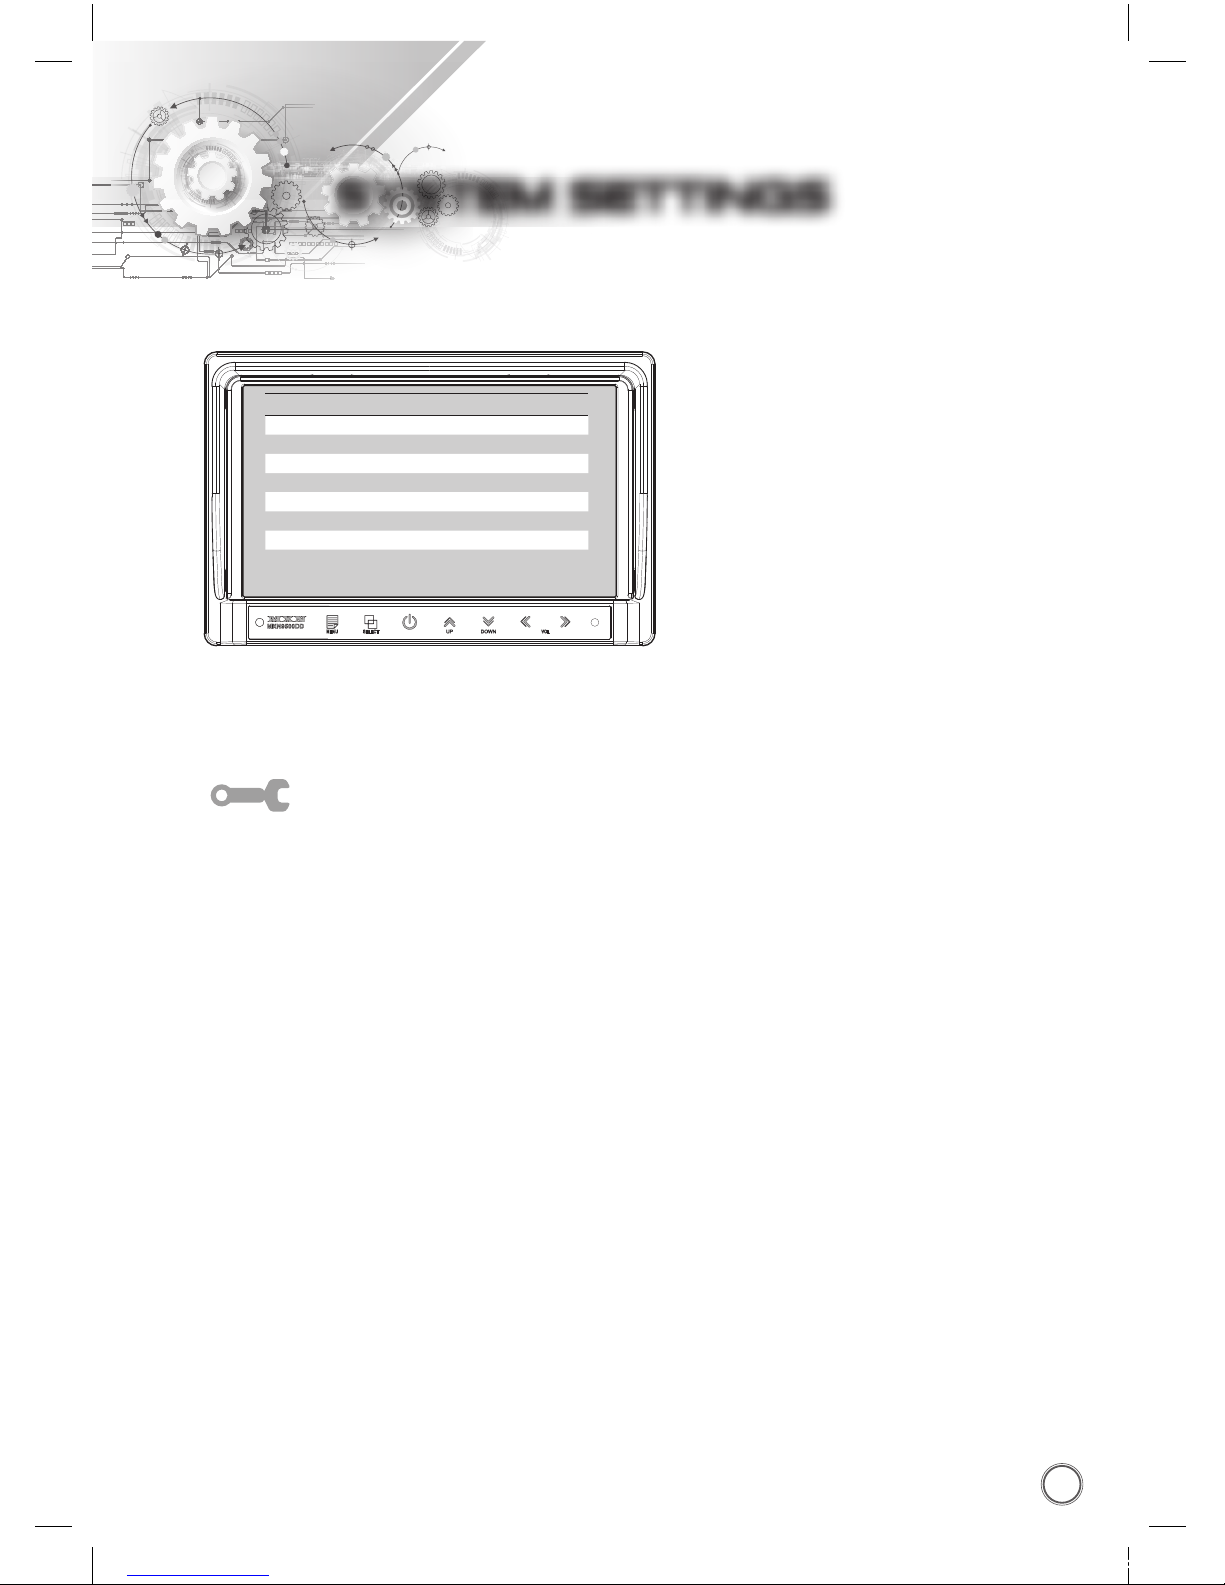
SYSTEM SETTINGS
DIMMER (Automatic Brightness Control)
Select AUTO or OFF to have Automatic or Manual brightness of the monitor.
REMARK: By activating DIMMER AUTO function, the monitor adjusts the brightness and button
illumination according to the environment’s light conditionst.
NIGHT BRIGHT
Select the DIMMER to
『
AUTO
』
, set the value of backlight on NIGHT mode.
LANGUAGE
Total 6 OSD languages can be selected: [ENGLISH, SWEDISH, DANISH, NORWEGIAN, DUTCH,
FINNISH].
Select the preferred LANGUAGE.
AUTO POWER
Select monitor activation function as below.
[AUTO]
Monitor keeps the last setting in memory, after vehicles ignition OFF and ON.
[ON]
Monitor starts up
『
Power-ON
』
mode automatically.
[OFF]
Monitor starts up
『
Stand-By
』
mode automatically.
RESET
Press >> button to go the factory default settings.
SYSTEM INFO.
Refers to system information of the monitor.
FUNCTION
FUNCTION
LANGUAGE ENGLISH
SYSTEM NTSC/PAL
DIMMER AUTO/OFF
NIGHT BRIGHT 50
AUTO POWER AUTO/ON/OFF
RESET >
SYSTEM INFO VER 1.30
7” DIGITAL 2-DIN TFT LCD ALL ROUND VISION MONITOR
6
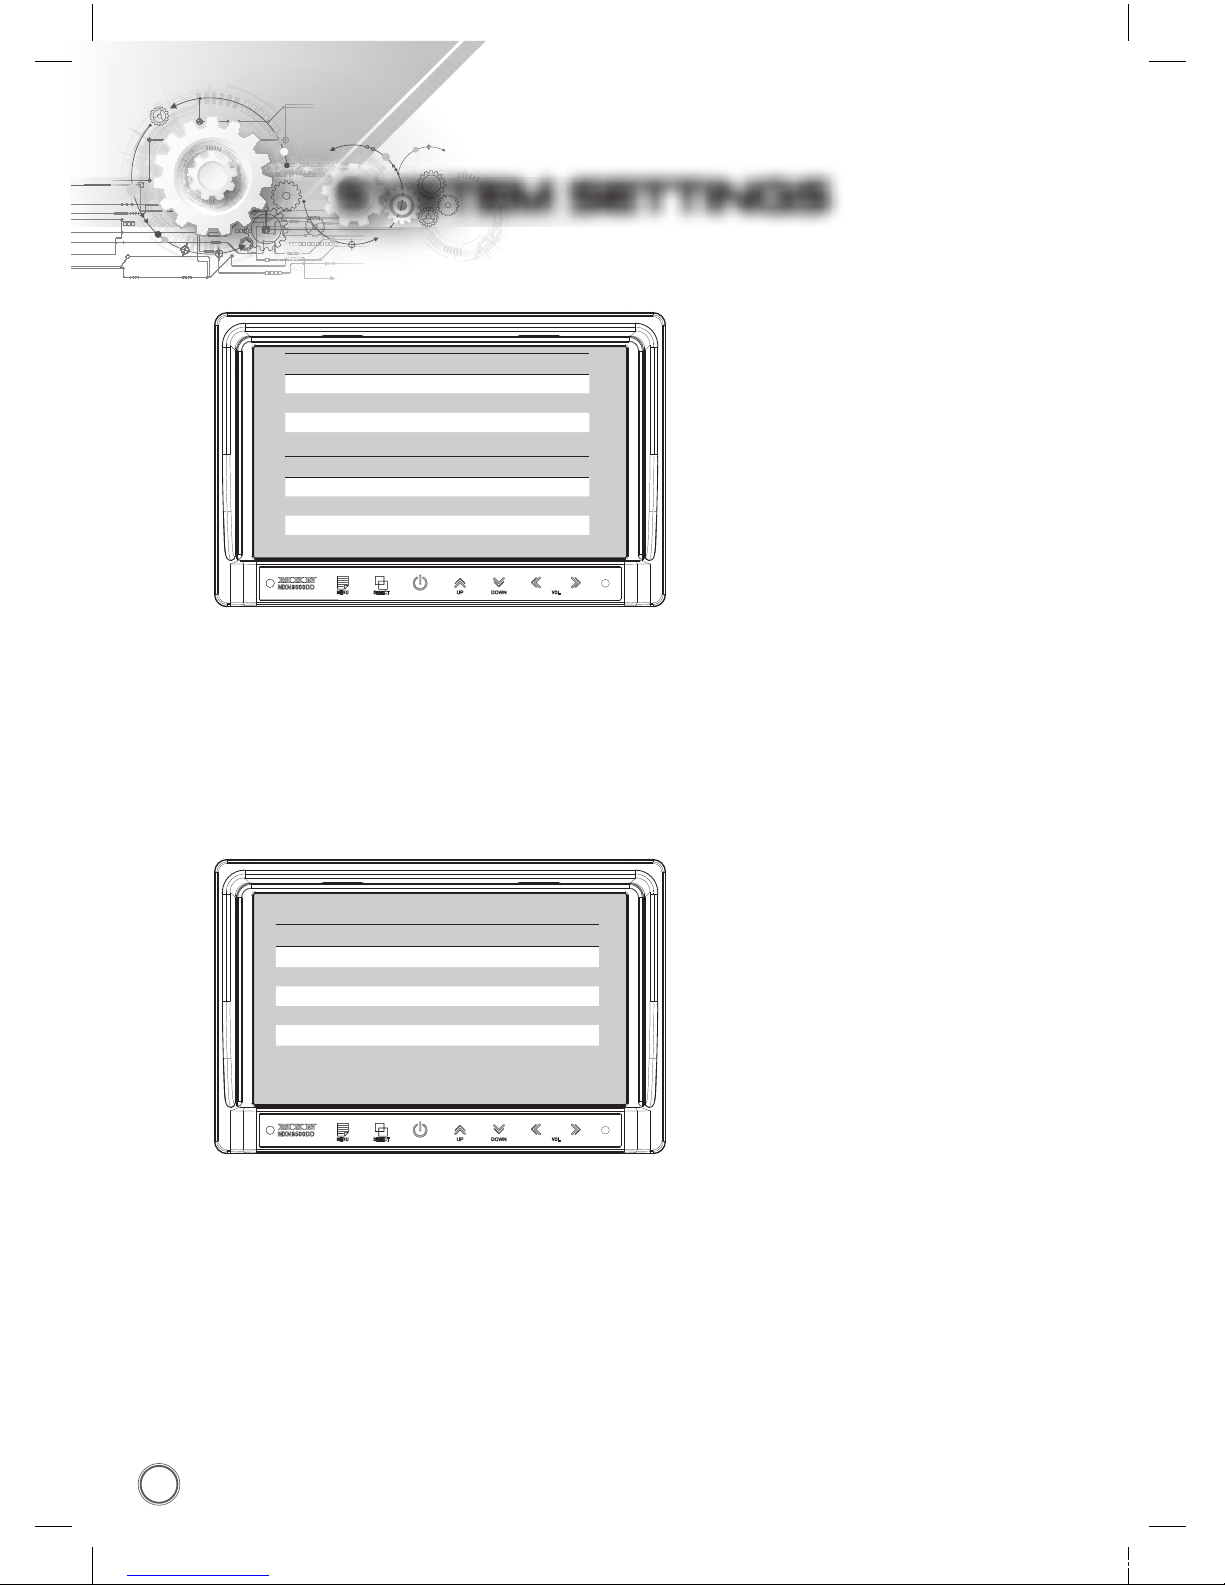
SYSTEM SETTINGS
Press [LEFT/RIGHT] button to adjust the PICTURE of the monitor.
User can adjust picture setting values for CAMERA CHANNELS and AUX CHANNEL individually.
Via PICTURE MENU, the picture of CAM1, CAM2, CAM3, CAM4, SPLIT, TRIPLE, QUAD MODE
can be adjusted.
Via AUX PICTURE MENU, the picture of aux channel can be adjusted.
PICTURE MENU
PICTURE
CONTRAST 50
BRIGHTNESS 50
COLOR 50
TINT 50
AUX PICTURE
CONTRAST 50
BRIGHTNESS 50
COLOR 50
TINT 50
NORMAL/MIRROR
Each camera picture (CAM1/CAM2/CAM3/CAM4) can be switched individually as
NORMAL/MIRROR
image.
UP/UPSIDE DOWN
Camera pictures can be rotated 180 degree as
UP/DOWN
image.
NORMAL/MIRROR
NORMAL/MIRROR
CAM1
NORMAL/MIRROR
CAM2 NORMAL/MIRROR
CAM3 NORMAL/MIRROR
CAM4 NORMAL/MIRROR
UP/UPSIDE DOWN
UP/UPSIDE DOWN
 Loading...