

Page 1
◈
Contents
◈
Features
■Bestpicturequality(incombinationwithDigitalLCDmonitor)
■HighresolutionCCDcamera(470,000pixels)
■1/3”ColorCCDhighresolutionimagesensor
■IP68WaterproofRating
■Diagonal130˚Viewing
■Ultralowlightperformance
■AutomaticElectronicIris
■Built-inMicrophone
■Built-inIRLED’s
■AdjustableMIRROR/NORMALimage
■Temp.-30˚Cto+80˚C
■Vibrationresistant
■Waterproofscrewtypeconnector(IP67),4-pinmini-DIN.
■E-mark.
ScanningSystem
Resolution
S/Nratio
MinimumIllumination
Powersupply
PowerConsumption
OperatingTemperature
FieldofViewangle
Dimension
Weight
1/3”ColorSONYSUPERHADIICCD
PAL470,000pixels
520TVLines
Betterthan50dB(atAGCoff)
0lux(IRLED’son)
DC9V~DC24V
170mA(DC9V)~60mA(DC24V)
-30˚Cto+80˚C
130˚(Diagonal),110˚(Horizontal),81˚(Vertical)
72(W)x77(H)x50(D)mm
205g(totalweightincl.bracket&sunvisor:312g)
Built-inIRLED’s
Built-inMicrophone
Normal/Mirror
■
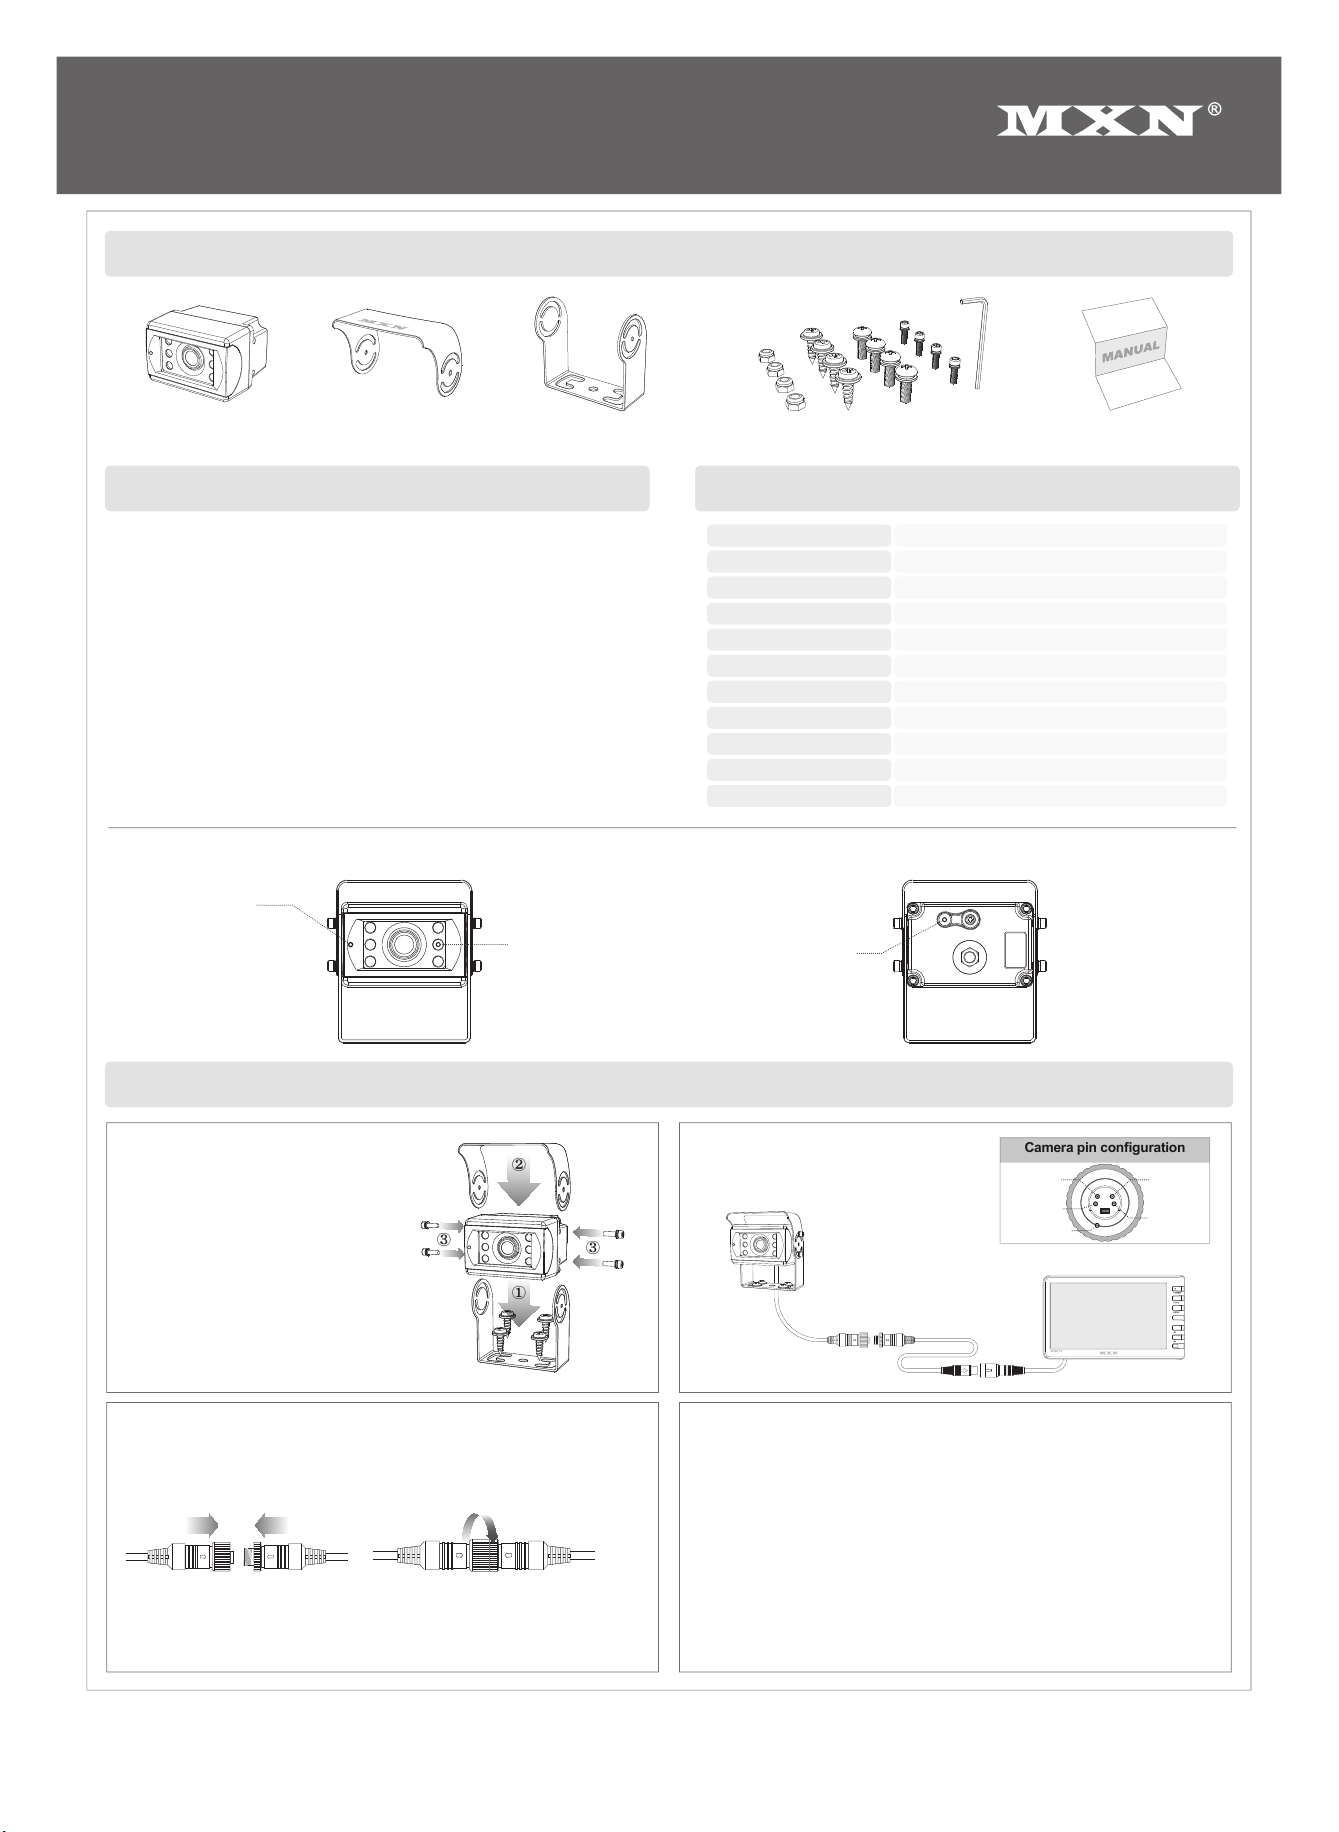
Front View
■
Camera Assembly
Securing cable connection
Wiring to Monitor
Caution !!
■
Rear View
◈
Technical Specications
◈
Installation
OWNER’S MANUAL
MXN35C
AUTO HEATED, INFRA RED COLOR CAMERA
ImageSensor
1. Fix the supplied mounting bracket to
the vehicle.
2. Fix the bracket with camera and
sun-shield according to drawing.
3. Adjust the viewing angle of the camera
and fasten the screws rmly.
1. Match the arrow marks and
press the connectors together.
* Design And Specications Are Subject To Change Without Notice.
Note!
The warranty will not be valid if the problem is related to moist / corrosion in the connector.
2. Screw the camera connector
up clockwise.
3. Tighten cable connection rmly
in order to prevent water ingress.
1. Before making the connection, disconnect the ground terminal from the battery
to avoid short circuits.
2. The plugs should be fully inserted into the connectors or jacks.
A loose connection may cause malfunctioning of the unit.
3. A damaged cable may affect the operation of the camera and may even cause
a malfunction of the camera or monitor: Avoid a damaged cable!
4. Protect the cable by using a guide tube, pipe or run the cable inside the vehicle
as much as possible. Caution! Run the cable in natural shapes in order to
prevent cable breaks.
5. Preferably use an acid free grease in between the waterproof screw type
connectors and tighten them rmly eachother.
Run the cable from the camera to the
monitor.
Camera pin conguration
Camera x 1 Bracket x 1 Instruction manual x 1Camera Screw Kit x 1Sun-shield x 1
1
2
3
3
Audioout Videoout
Ground
N.C.
Power(9~24VDC)
Monitor
Extensioncable
(Notsupplied)
 Loading...