

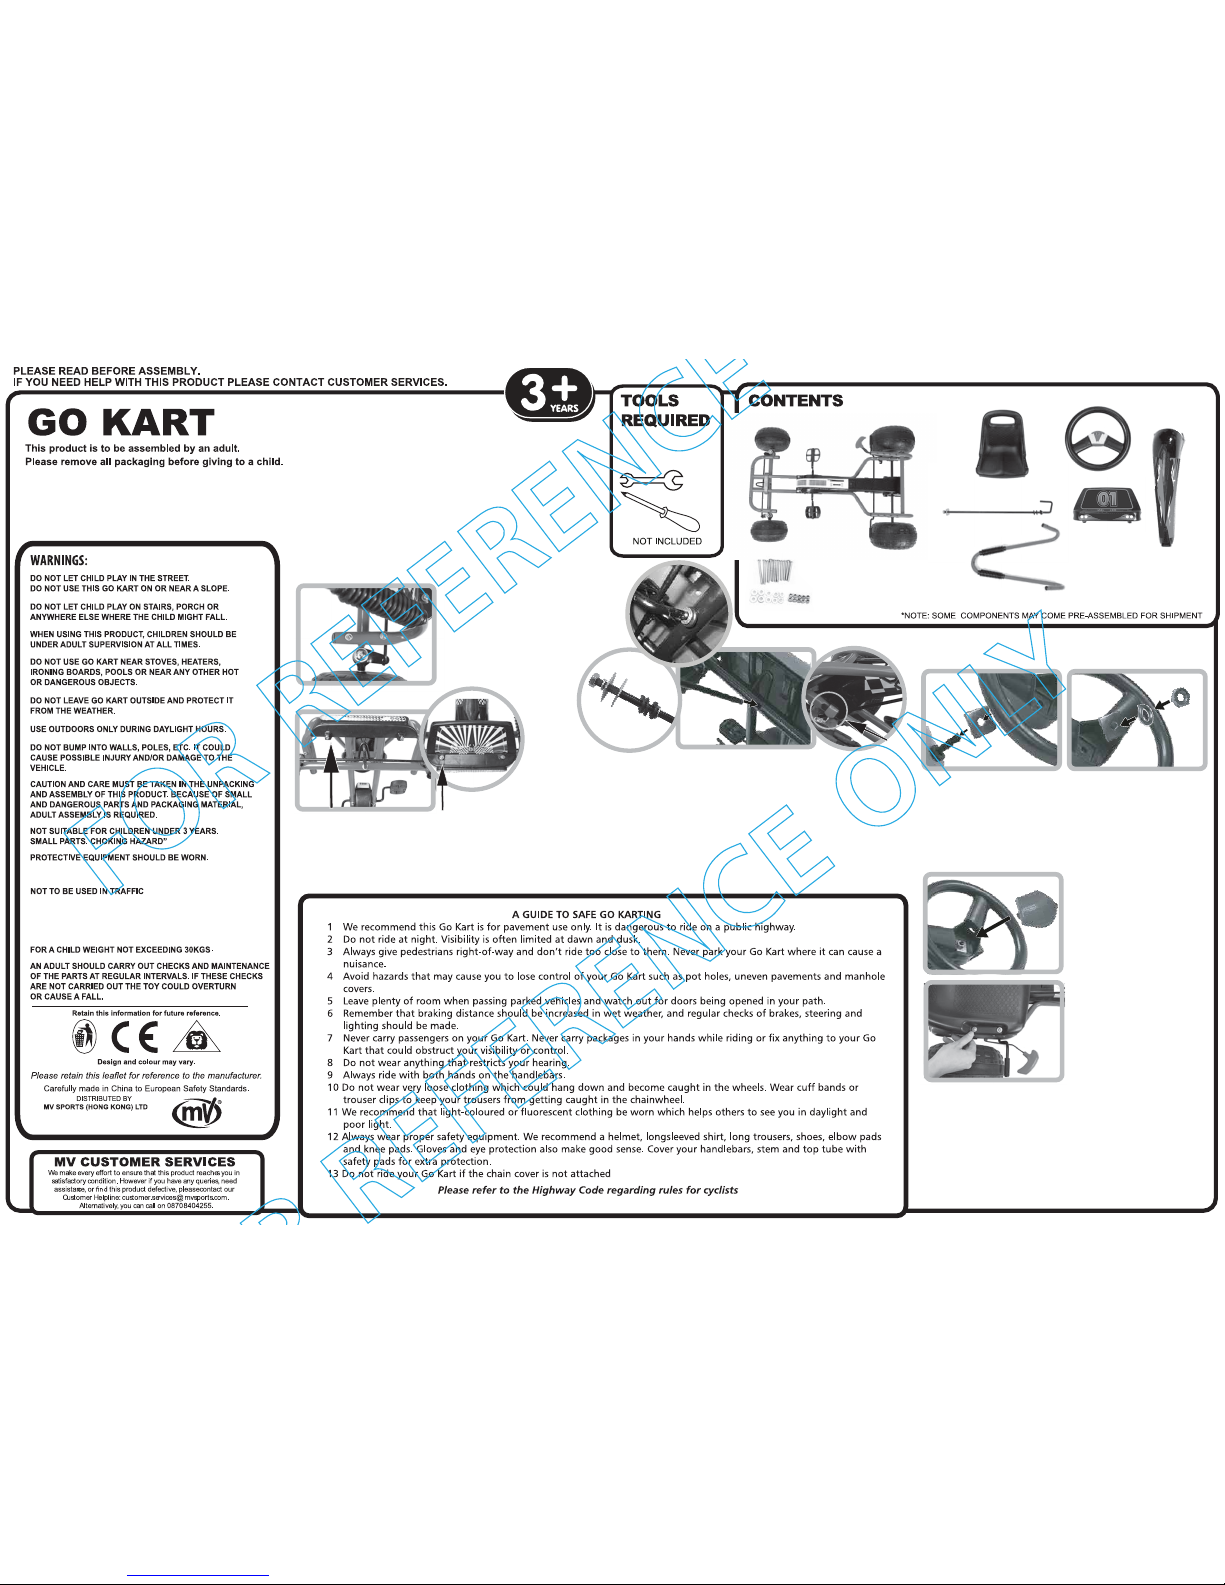
MV Sport GO KART, M14459 Assembly Instructions
MV RECOMMENDS THE USE OF PROTECTIVE PADS AND
HELMET WHEN USING THIS PRODUCT.
FOR AGE 3+ YEARS
RECOMMENDED TYRE PRESSURE: 30 PSI. CHECK TYRE
PRESSURE EVERY TIME BEFORE USE.
PRODUCT No. M14459
SEAT
STEERING WHEEL
FRONT PANEL
BODY
ISSUE 1 - 07/2017
1. Attach the steering support to
the frame of the go-kart, using 4
x M5 45mm bolts, dia5 12mm
washers and M5 nuts.
4. Assemble the steering wheel: On the steering shaft,
insert 2 plastic washers (one below the top of the front
panel, the other above the top of the front panel, then a
square metal washer then steering wheel, then a square
metal washer then a metal spring washer an then fix with
a nut.
ASSEMBLY INSTRUCTIONS
3. Assemble the steering shaft and front panel: Remove
the nut and washers from the Steering shaft (see picture).
Slide the plastic J hook of the front panel into the metal
clip on the frame (see picture). Insert a metal washer and
then a plastic washer to the steering shaft. Insert the
steering shaft with the plastic and metal washer from the
bottom to the car body. The J hook of the steering shaft
should go into the triangle area of the steering linkage.
The steering shaft pass through the car body then
through the steering support tube.
5. Place the steering wheel
cover in the centre of the
steering wheel.
6. Fix the seat to the frame
of the go-kart using 4 x M5
40mm bolts, dia5 14mm
washers and M5 nuts.
FRONT PLATE
STEERING SHAFT
4PCS X M5 40MM BOLTS
4PCS X M5 45MM BOLTS
2PCS X M5 50MM BOLTS
4PC X DIA5 14MM WASHERS
6PCS X DIA5 12MM WASHERS
10PCS X M5 NUTS
STEERING SUPPORT
2. Fix the front plate on the
front of the go-kart with 2 x
M5 50mm bolts, dia5 12mm
washers and M5 nuts.
Screwdriver &
Spanner required.
Austin Tower • Room 1001 - 03 1005 - 1007•
10th Floor • 152 Austin Road • T.S.T. Kowloon•
Hong Kong

PRODUCT No. M14459
1. Take the clutch
handle away.
MAINTENANCE AND STORAGE
Lubricate the chain often to maintain effective movement. Check the bolts, nuts and connection parts
often. Do not store in direct sunlight and not external Tighten or re-fix the safety elements and the main
parts if necessary. If a defect is noted, do not use the product until it has been repaired.
RECOMMENDED TYRE PRESSURE: 30 PSI. CHECK TYRE PRESSURE EVERY TIME BEFORE USE.
How to remove the chain cover
2. Remove the two
screws at the front
of the cover.
3. Remove the
screw at the rear
of the cover.
4. Take apart the
top and bottom
part of the chain
cover to access
the chain.
HOW TO USE THE BRAKE AND CLUTCH
Reduce your riding speed and then
pull the brake handle up and backward to ensure the brakes are
applied.
Pull the clutch handle back to the neutral
position. This will enable the rider to pedal
freeing without moving and can be pushed by
an adult.
Push the clutch handle forward to engage the
chain so that the rider can pedal forward or
backward.
CLUTCH HANDLE
BRAKE
 Loading...