

MVP Recovery MX 2000 User Manual

MX 2000
User Manual
Quick Start:
We at MVP Recovery would like to thank you for choosing the top rated GPS tracking
device for your vehicle and personal assets.
● Charge the device before use minimum of 5 hours up to 24 hours.
● Power on the device button at the top of the unit, press and hold for 3 seconds
● Travel with the device for up to 1 hour so that the unit triangulates with our
satellites.
● Login to the device tracking page at http://www.mvprecovery.net
● Use the 7 digit number given for your username which is the last 7 digits of the
IMEI number on the back of the device and enter your password given.
● You will see an orange dot with your device number which is the last reported
position of the unit and a quick view guide.
● To locate your device you can use the locate now button or it will automatically
communicate every 5 minutes.
● The quick view display offers great features that allow you to set up geo-fence
alerts to your email or cell phone when the device enters or leaves the selected
area.
● SOS features allows you to input multiple cell numbers when activated
● Speeding alerts can be activated and the system will generate an alert when the
designated speed is exceeded.
● Battery life feature and much more!
For more information feel free to contact customer / technical support via
the ‘contact us’ link for any questions on setting up your personal device
and we will reply back to you within 24 hours, 7 days a week. For faster
service you may also email support directly at support@mvprecovery.net.
Introduction
Prime AT PLT is a powerful GPS locator which is designed for vehicle, pets and asset tracking.
With superior receiving sensitivity, fast TTFF and GSM frequencies 850/900/1800/1900. Its
location can be real time or schedule tracked by backend server or specified terminals. Based on the
embedded wireless tracking protocol, Prime AT PLT can communicate with the backend server
through GPRS/GSM network, and transfer reports of emergency, Geo-fencing, device status and
scheduled GPS position etc… Service provider can easily setup their tracking platform based on the
functional wireless tracking protocol.
1
2 Product Overview 2.1
Button /Mini USB Interface Description
Button/interface
Description
Power Button
◆
Power on Prime AT PLT
◆
Power off Prime AT PLT (If power button is enabled)
Function
Button
◆
Geo-Fence mode
Long press the button to enable/disable Geo-Fence ID0
◆
Geo-Fence in current position mode
Long press the button to enable/disable Geo-Fence ID0. If enable
GeoFence ID0, using the current position as the center of Geo-Fence 0.
◆
SOS mode (default)
Long press the button to activate SOS alarm
Mini USB
interface
◆
Connect a 5V DC adapter to power on the Prime AT PLT and charge the
internal battery.
◆
Connect a 3.7V Li-ion or Li-Polymer battery to power on Prime AT PLT
◆
Backend server developer or administrator can use the data cable to
configure Prime AT PLT
Reset Button
◆
Clicking this button will cut off the internal power supply of this device,
which allow user to reset the Prime AT PLT while device malfunction.
You need to press the power button to power on the device again after the
reset button is clicked.
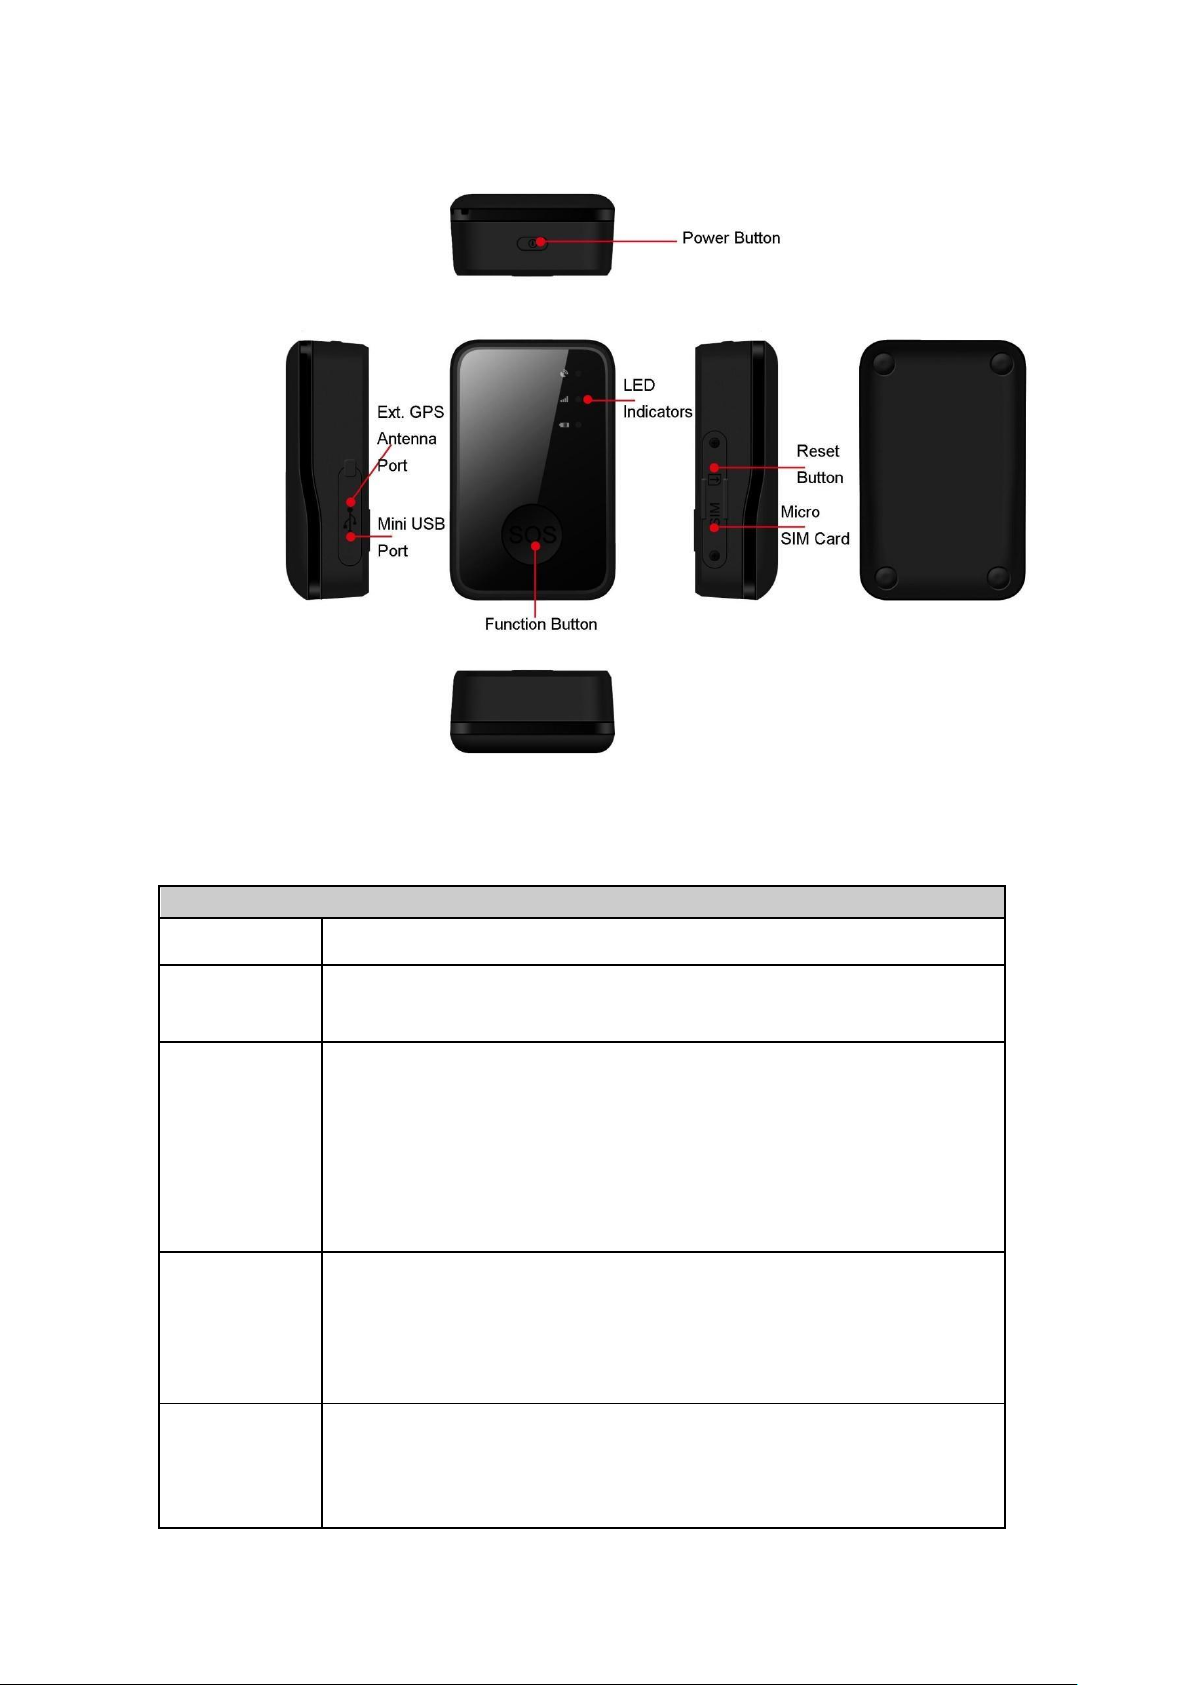
Appearance
Figure 1-1
2.2 Buttons/Mini USB Interface Description
2
 Loading...