

Mvac Central vacuum system Owner's Manual
English
Owner’s Manual
For housEhold usE only
Please read this document carefully before installing
and/or using your vacuum cleaning system.
Model: ______________________ Serial no: ________________________

3
IMPORTANT SAFETY INSTRUCTIONS
When using an electrical appliance, basic precautions should always be followed,
including the following.
Read all instructions before using this appliance
WARNING – To reduce the risk of re, electric shock, or injury:
1. Do not leave appliance when plugged in. Unplug from outlet when not in use and
before servicing.
2. Do not use outdoors or on wet surfaces.
3. Do not allow to be used as a toy. Close attention is necessary when used by or
near children.
4. Use only as described in this manual. Use only manufacturer’s recommended
attachments.
5. Do not use with damaged cord or plug. If appliance is not working as it should,
has been dropped, damaged, left outdoors, or dropped into water, return it to a
service center.
6. Do not pull or carry by cord, use cord as a handle, close a door on cord, or pull
cord around sharp edges or corners. Do not run appliance over cord. Keep cord
away from heated surfaces.
7. Do not unplug by pulling on cord. To unplug, grasp the plug, not the cord.
8. Do not handle plug or appliance with wet hands.
9. Do not put any objects into openings. Do not use with any opening blocked; keep
free of dust, lint, hair, and anything that may reduce air ow.
10. Keep hair, loose clothing, ngers, and all parts of body away from openings and
moving parts.
11. Do not pick up anything that is burning or smoking, such as cigarettes, matches,
or hot ashes.
12. Do not use without dust bag and/or lters in place.
13. Turn off all controls before unplugging.
14. Use extra care when cleaning on stairs.
15. Do not use to pick up ammable or combustible liquids such as gasoline or use
in areas where they may be present.
16. Connect to a properly grounded outlet only. See Grounding Instructions.
SAVE THESE INSTRUCTIONS

5
Table Of COnTenTs
Preface 6
Schematic – M4 6
Schematic – Other Models 7
INSTALLATION
Unit Installation 8
Dos & Don’ts 9
Muffler Installation (optional) 12
Electric Connections 13
Grounding Instructions 14
Low Voltage Connections 15
Converting the vacuum unit 17
OPERATING INSTRUCTIONS
Hose Hook-up & Inlets 18
Attachments Mvac 19
Maintenance Suggestions Module 21
MAINTENANCE
Motor 22
Maintenance – M4 22
Maintenance – Other models – with bag 23
Maintenance – Other models – without bag 24
TROUBLESHOOTING
General Information 25
Decrease in suction strength 26
Vacuum will not start 28
Vacuum will not stop 29
WARRANTY INFORMATION
Limited Lifetime Warranty 30
One Year Satisfaction Guarantee 30
Warranty on Mvac Attachments 31
WEEE Directive 32
6
7
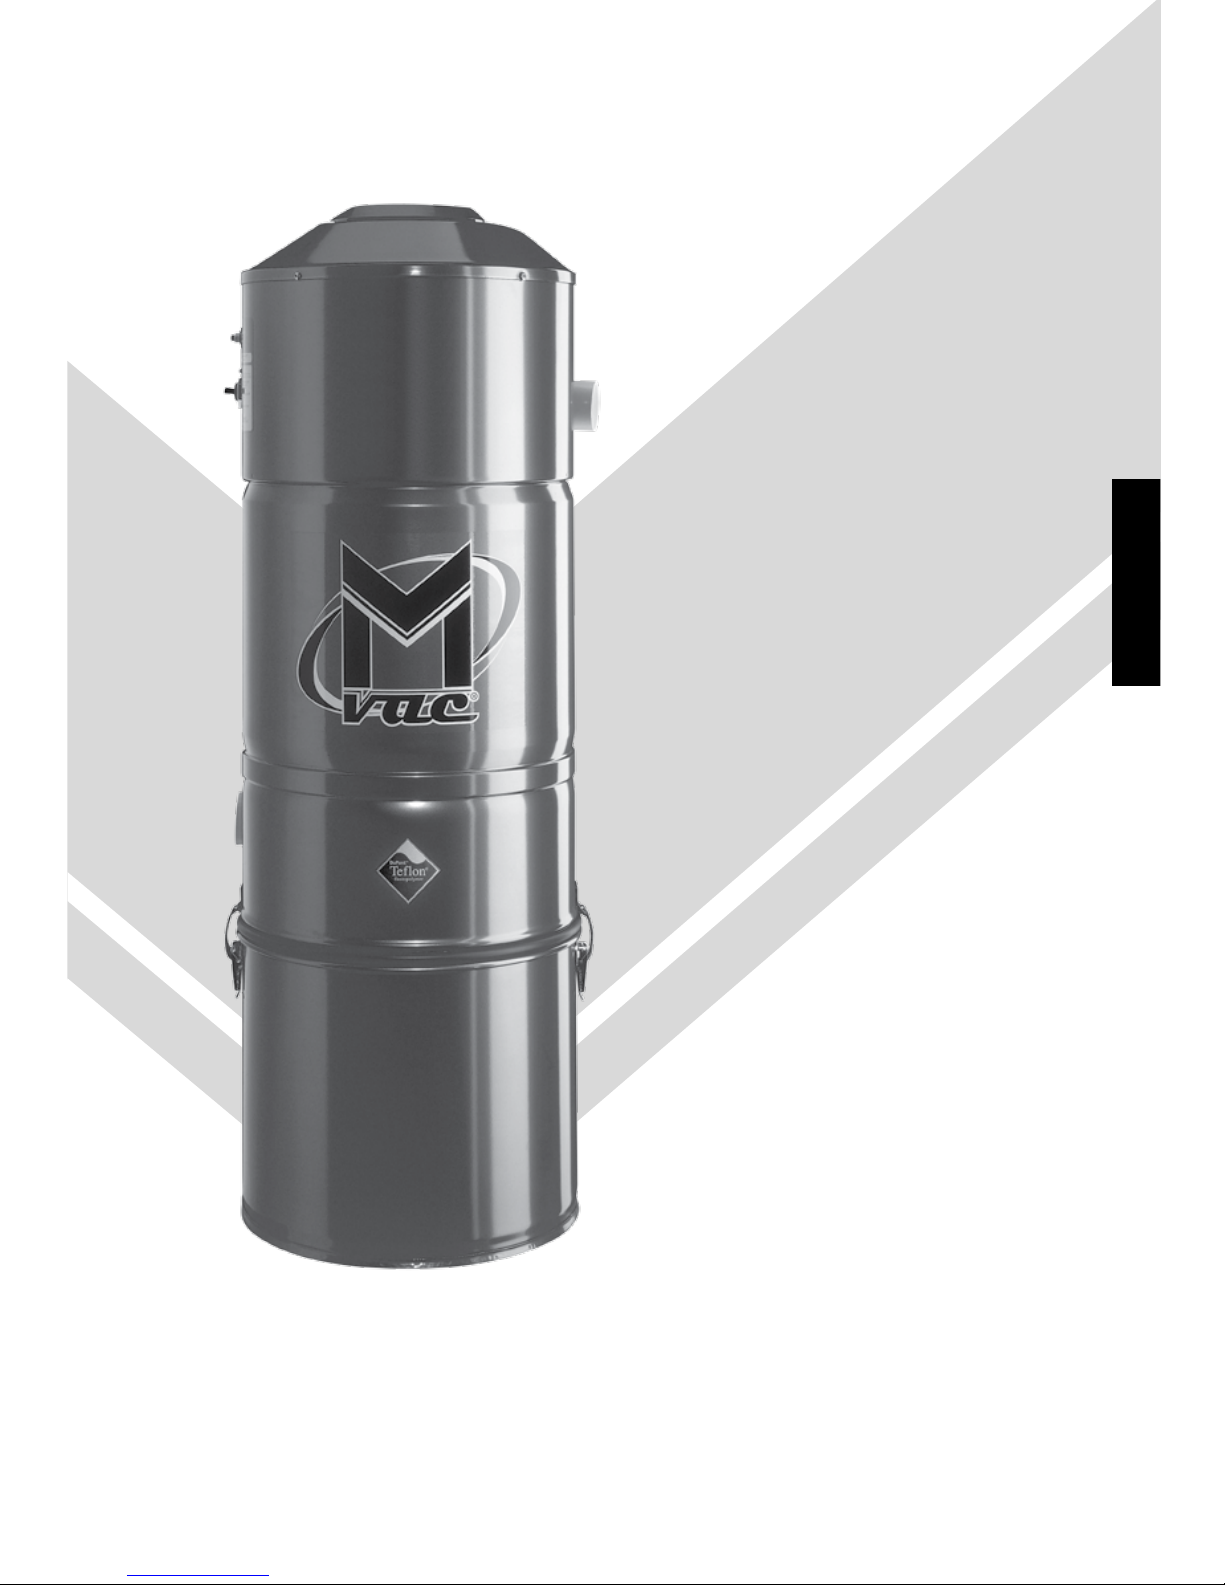
sCheMaTiC – OTher MOdels
1. Circuit Breaker
2. Reset (M9, M10, M11 and M12 models)
3. LED (M9, M10, M11 and M12 models)
4. Low Voltage Connector
5. Serial Number
6. Air Intake
7. Air Exhaust
8. Muffler (optional)
6
5
4
3
2
1
7
PrefaCe
Your new Mvac central vaccum system was designed and manufactured in
Blainville, Quebec, by the largest central vacuum cleaner manufacturer in
Canada. With over forty five years of experience in the field, we provide a highquality, state-of-the-art product, and guarantee your complete satisfaction. Our
extensive network of qualified professionals ensures first quality service near you.
Contact us for the location of the Mvac authorized service center in your area.
sCheMaTiC – M4
1. Circuit Breaker
2. Low Voltage Connector
3. Serial Number
4. Air Intake
5. Air Exhaust
6. Muffler (optional)
min. 30 cm (12")
min. 5 cm (2")
min. 30 cm (12")
Recommended 40 cm (16")
min. 30 cm (12")
2
3
4
1
5
min. 30 cm (12")
With muffler turned down
Muffler turned up 183 cm (72")
Muffler turned down 163 cm (64")
95 cm (38")
Muffler turned up 92 cm (36.5")
Muffler turned down 140 cm (55")
90 cm (36")
min. 30 cm (12")
min. 30 cm (12")
Recommanded 40 cm (16")
min. 30 cm (12")
min. 30 cm (12")
min. 30 cm (12")
With muffler turned down
6
8
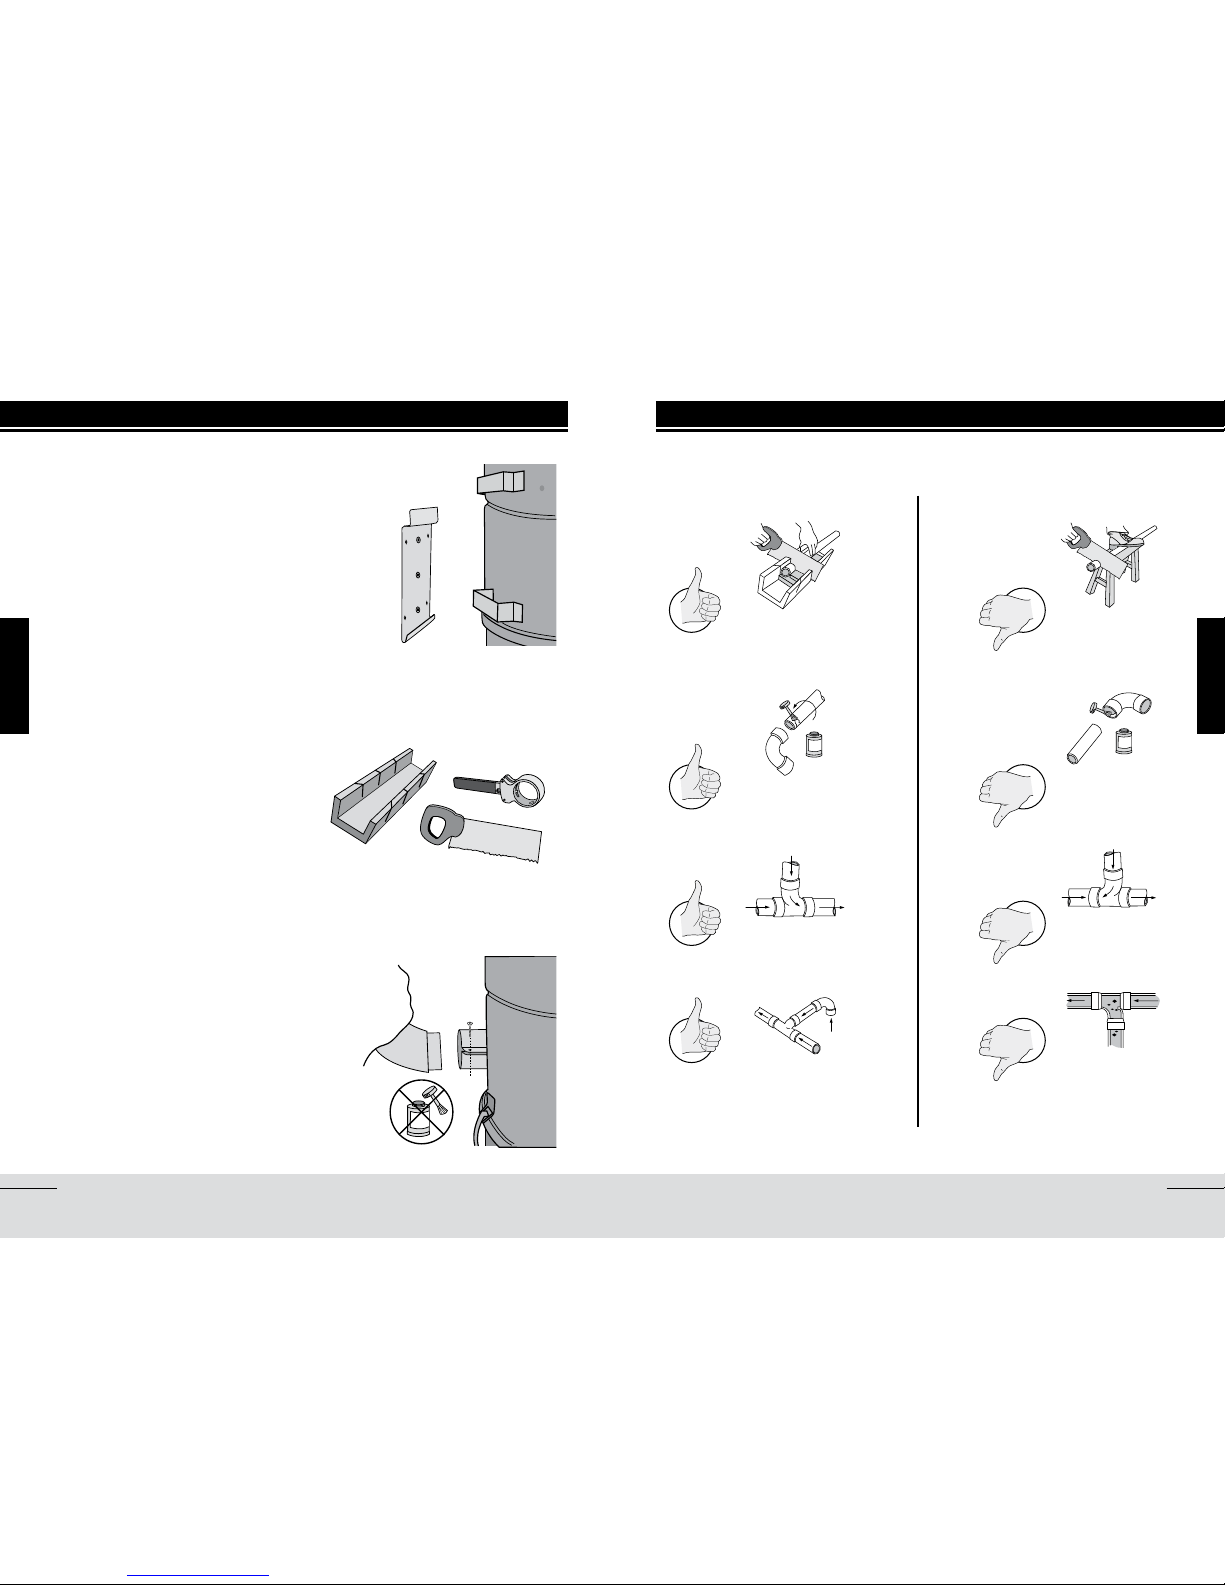
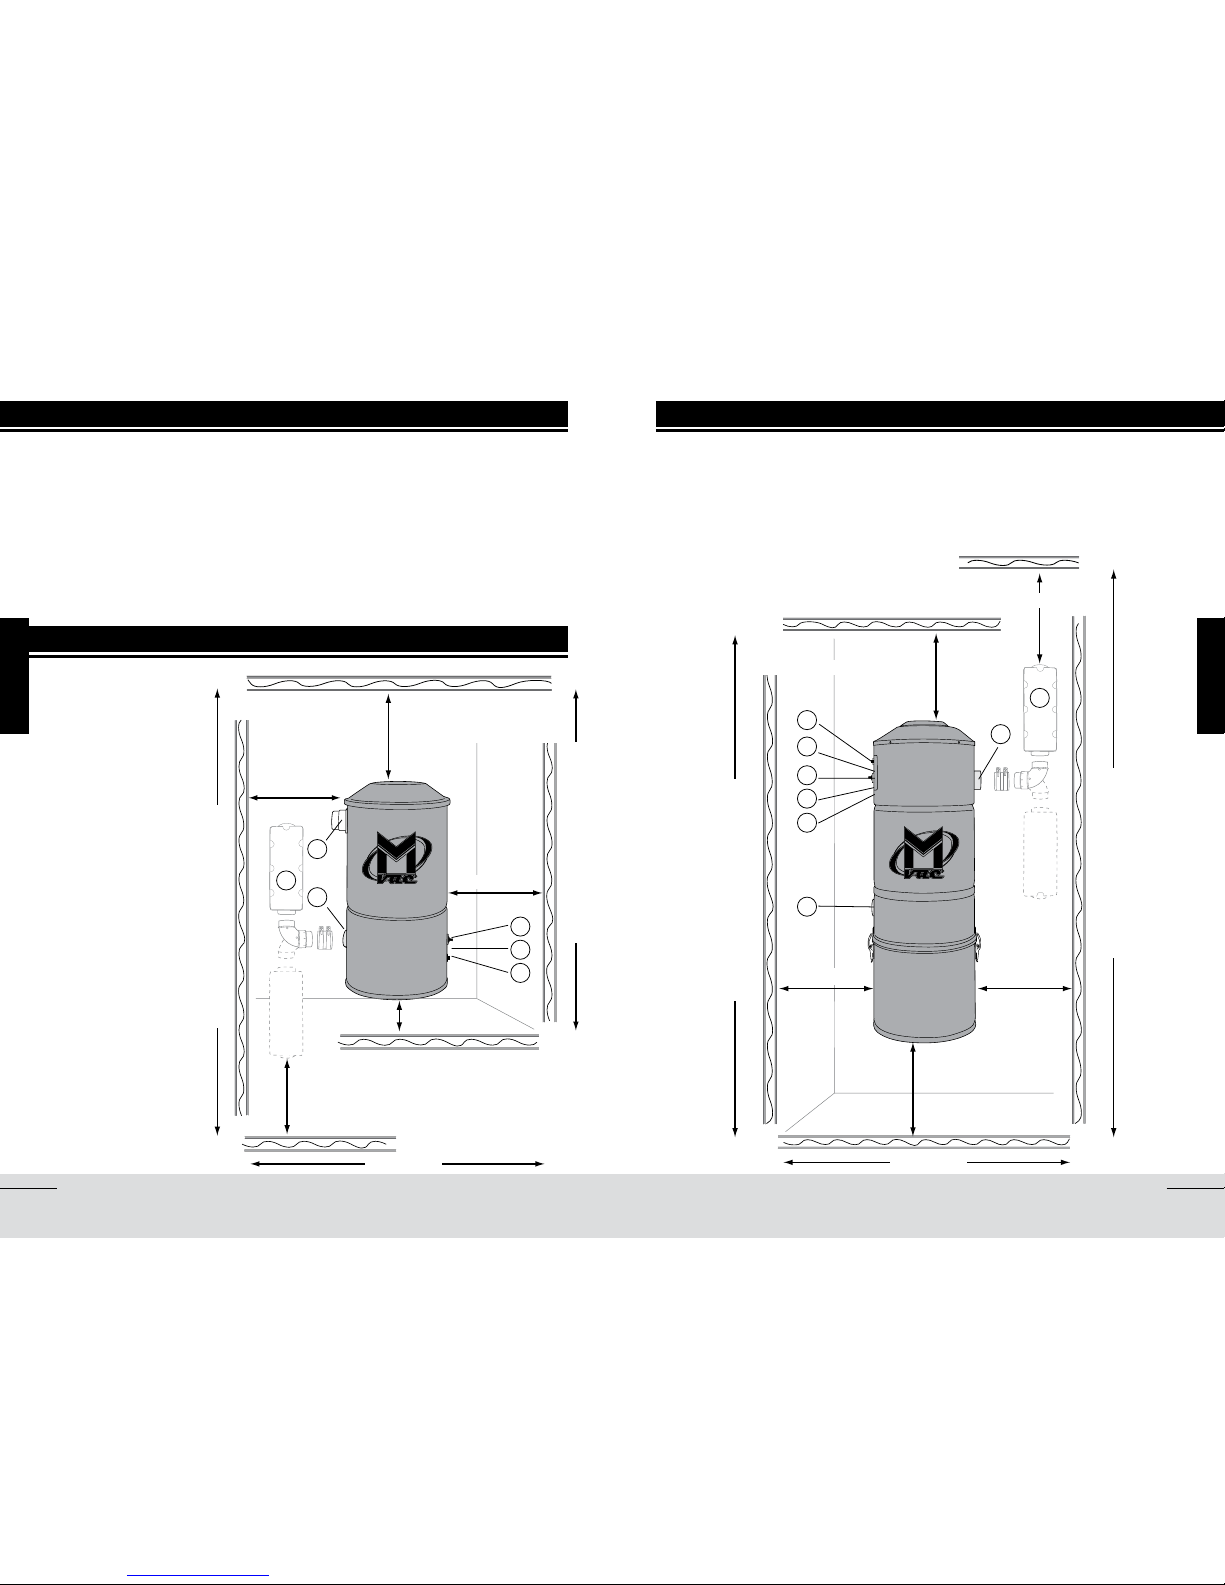
figure 1
figure 2
figure 3
8
Installation
9
Installation
dOs & dOn’TsuniT insTallaTiOn
Using the mounting plate provided with
your vacuum cleaner, secure the unit to
the wall (figure 1), at a height allowing
easy access for maintenance of the
filters, dirt receptacle and/or bags (see
pages 6 and 7).
The connections to the piping system
will require some basic tools: a mitre
box and small saw or a pipe cutter
(figure 2). See pages 9 and 10 for
general instructions pertaining to the
preparation of PVC pipes. To simplify
matters, installation kits, including
necessary fittings, pipes, glue and
wiring, as well as a detailed instructions
booklet, are available from Mvac service
centers.
Contrary to all other connections
in the piping system, do not glue
the last fitting to your unit. Mvac
central vacuums are equipped with an
adjustable air intake valve (figure 3),
which does not require glue. An airtight fit is achieved with the screw-type
adjustment on the fitting itself.
INSTALLING CONDUITS
A
B
A
B
10
Installation
11
Installation
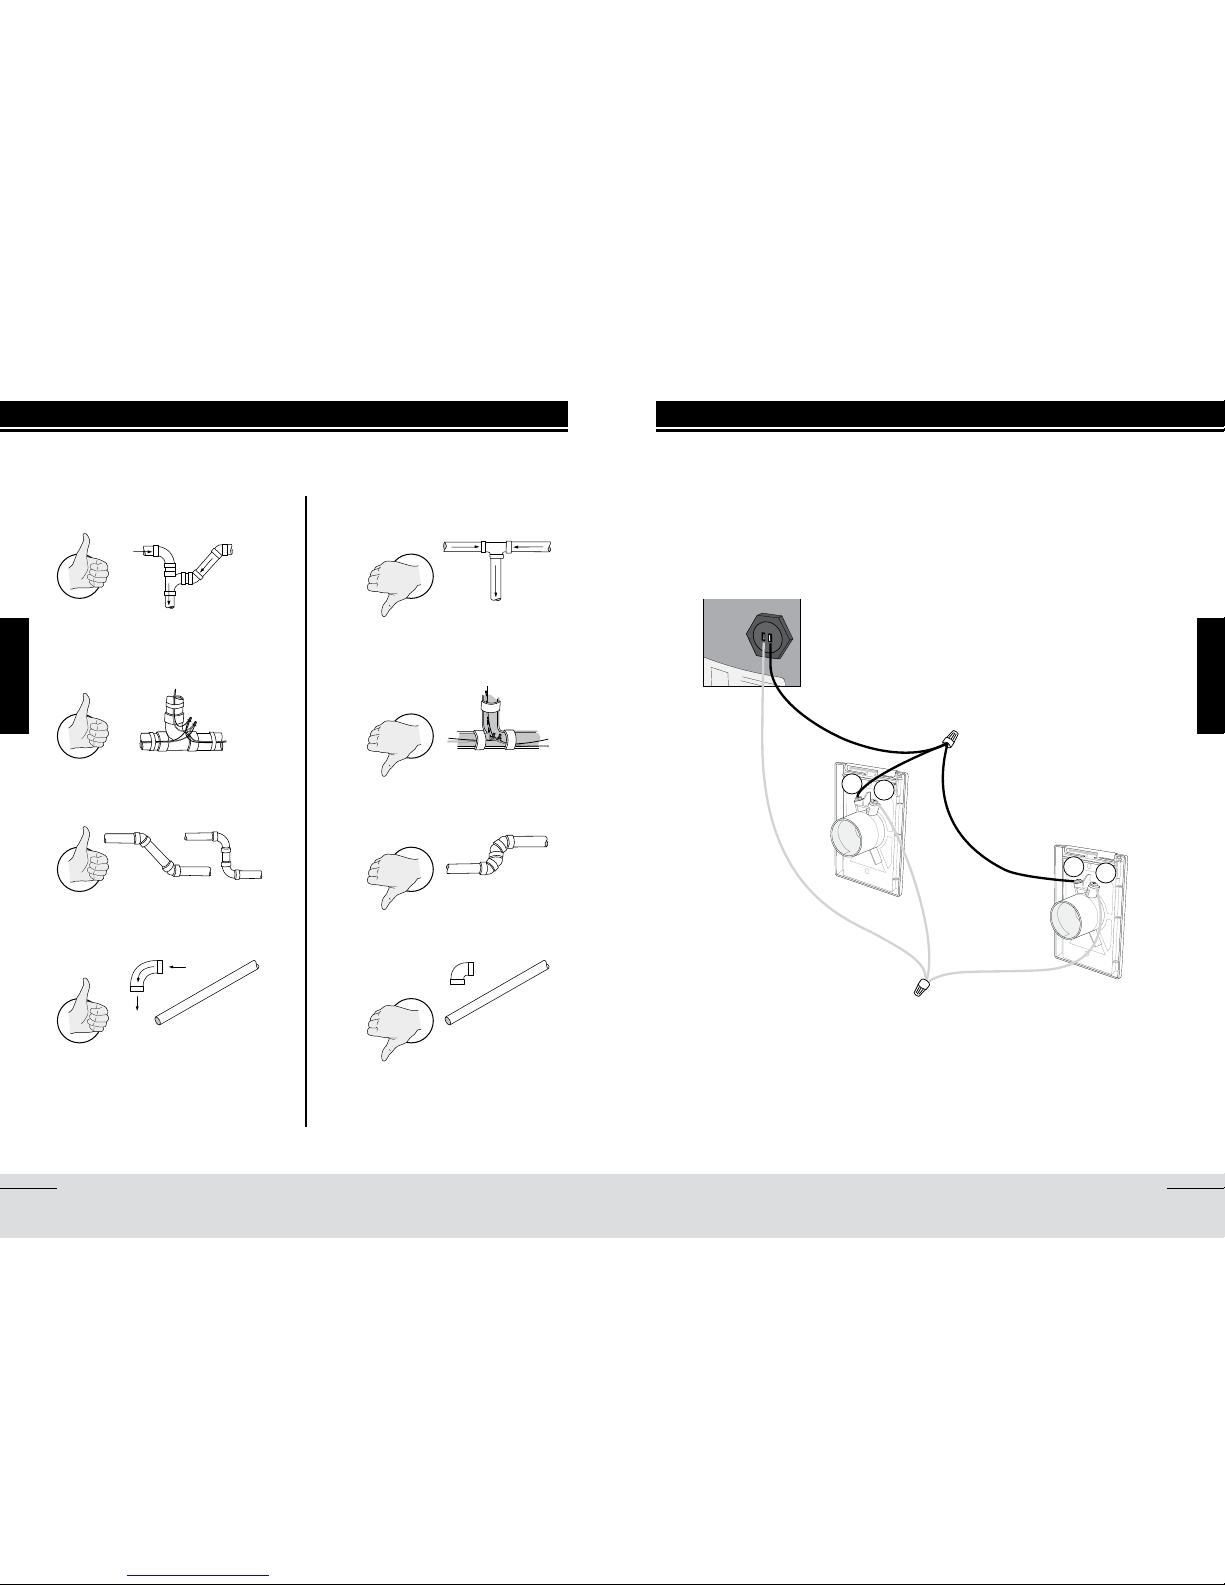
dOs & dOn’Ts
INSTALLING INLETS
When installing your vacuum inlets, we recommend that the principle of electric
polarity be taken into account. Ensure that the wire connected onto contact A
on inlet 1 is the same as that connected to contact A on inlet 2, and so on. Do
not cross, reverse or interchange wires.
dOs & dOn’Ts
inlet 1
inlet 2
 Loading...