

MuxLab GLI-500018 Quick Installation Manual
8495 Dalton Road, Mount Royal, Quebec, Canada. H4T 1V5
Tel: (514) 905-0588 Fax: (514) 905-0589
Toll Free (North America): (877) 689-5228
E-mail: videoease@muxlab.com URL: www.muxlab.com
© MuxLab Inc. 2010 94-000665-A SE-000665-A
Specifications
Environment
S-Video equipment
Devices
DVD players, satellite receivers, laptops, notebooks, monitors, LCD
projectors, CCD cameras, video switchers, S-Video splitters, S-Video
converters and other S-Video equipmen t
Transmission
Transparent to the user
S-Video Audio
Bandwidth
20 Hz to 6 MHz 20 Hz to 20 kHz
Impedance
75 ohms Source 100 Ω Max, Receiver 10 kΩ min.
Max. Input
1.1 Vp-p 1.1 Vp-p
Insertion Loss
Less than 2 dB per pair dB
over the frequency range
Less than 2 dB per pair
Return Loss
Better than 15 dB over the
frequency range
N/A
Common Mode
Rejection Ratio
Greater than 40 dB over the
frequency range
60 dB @ 1 kHz min.
THD
N/A Less then 0.007% @ 1 kHz
Max. Distance:
Cat 5e/6 UTP/STP
1,000 ft (305 m) 3250 ft (1 km)
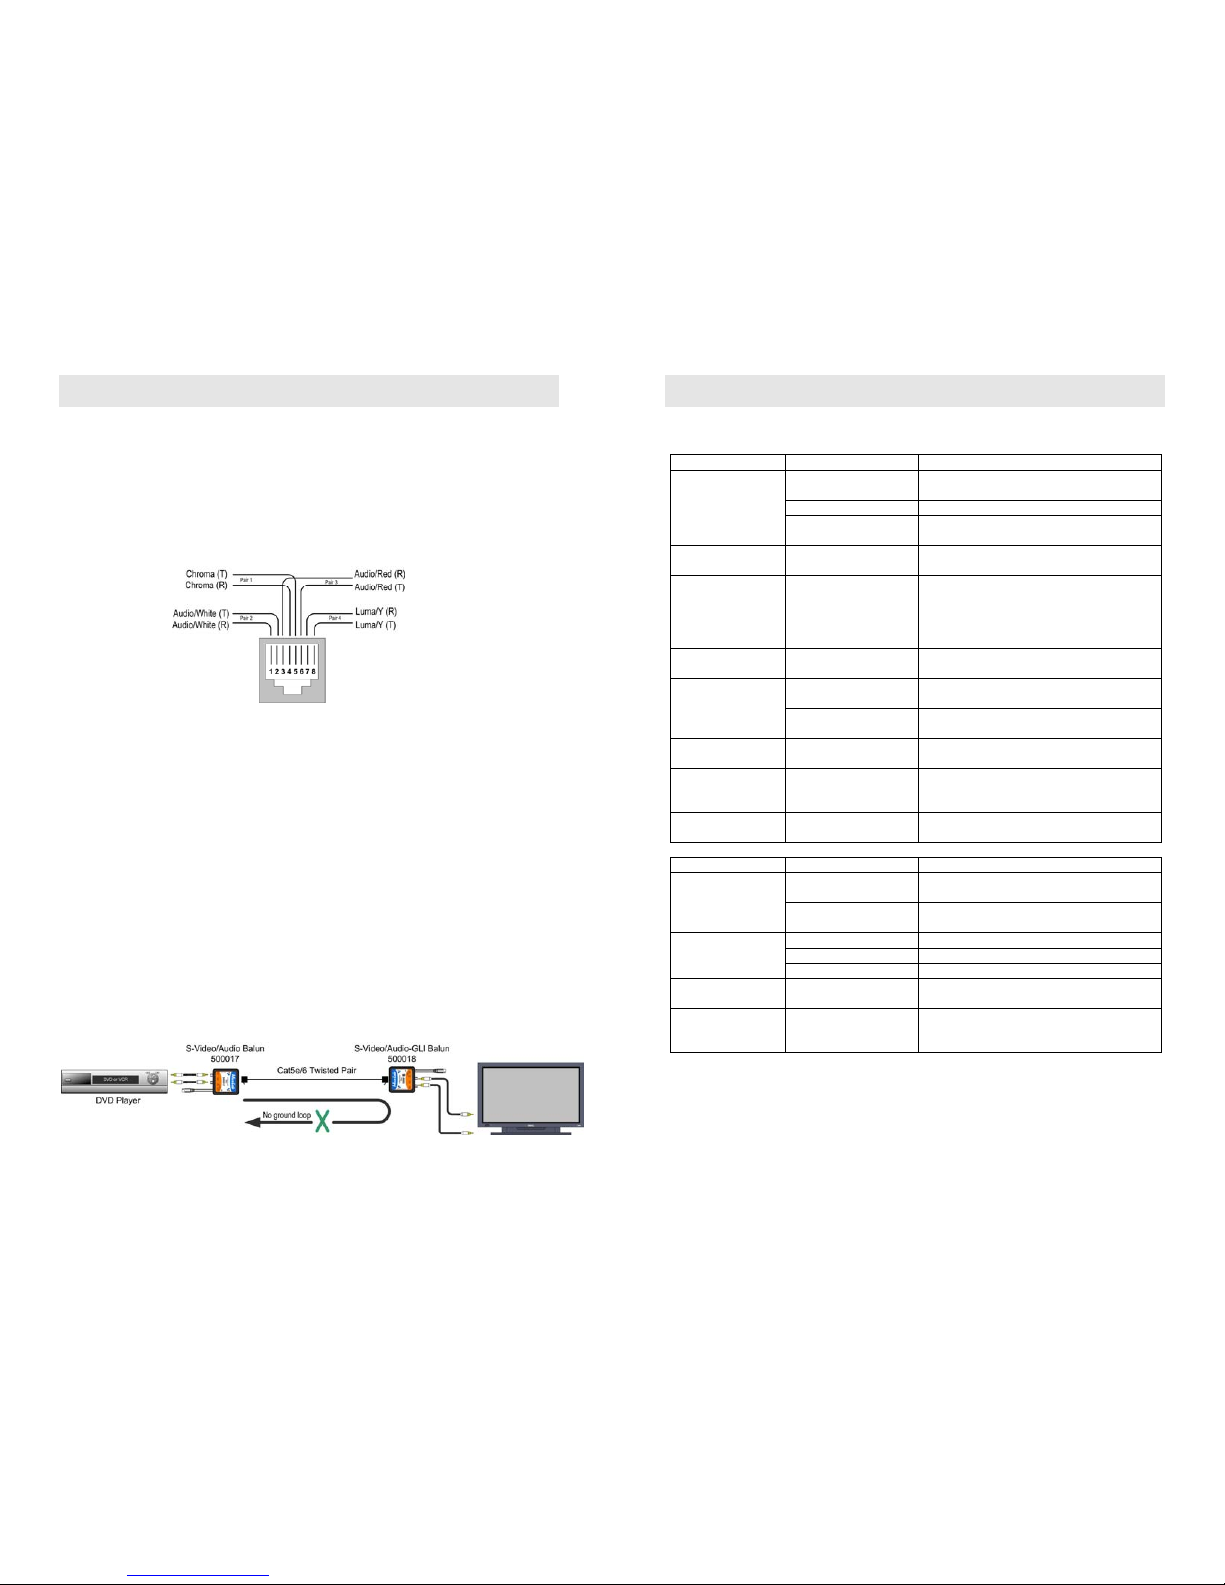
Pin Configuration
(RJ45)
Reverse Polarity
Sensitive
Luma: Pins 7(R) & 8(T)
Chroma: Pins 4(R) & 5(T)
Audio 1: Pins 1(R) & 2(T)
Audio 2: Pins 3(R) & 6(T)
Cable:
Cat 5e/6 UTP/STP
24 AWG or lower solid copper twisted pair wire
Impedance: 100 ohms at 1 MHz
Maximum capacitance: 20 pf/ft
Attenuation: 6.6 dB/1,000 ft at 1 MHz
Ground Loop
Isolation
In the range of +/-50VDC
Connectors
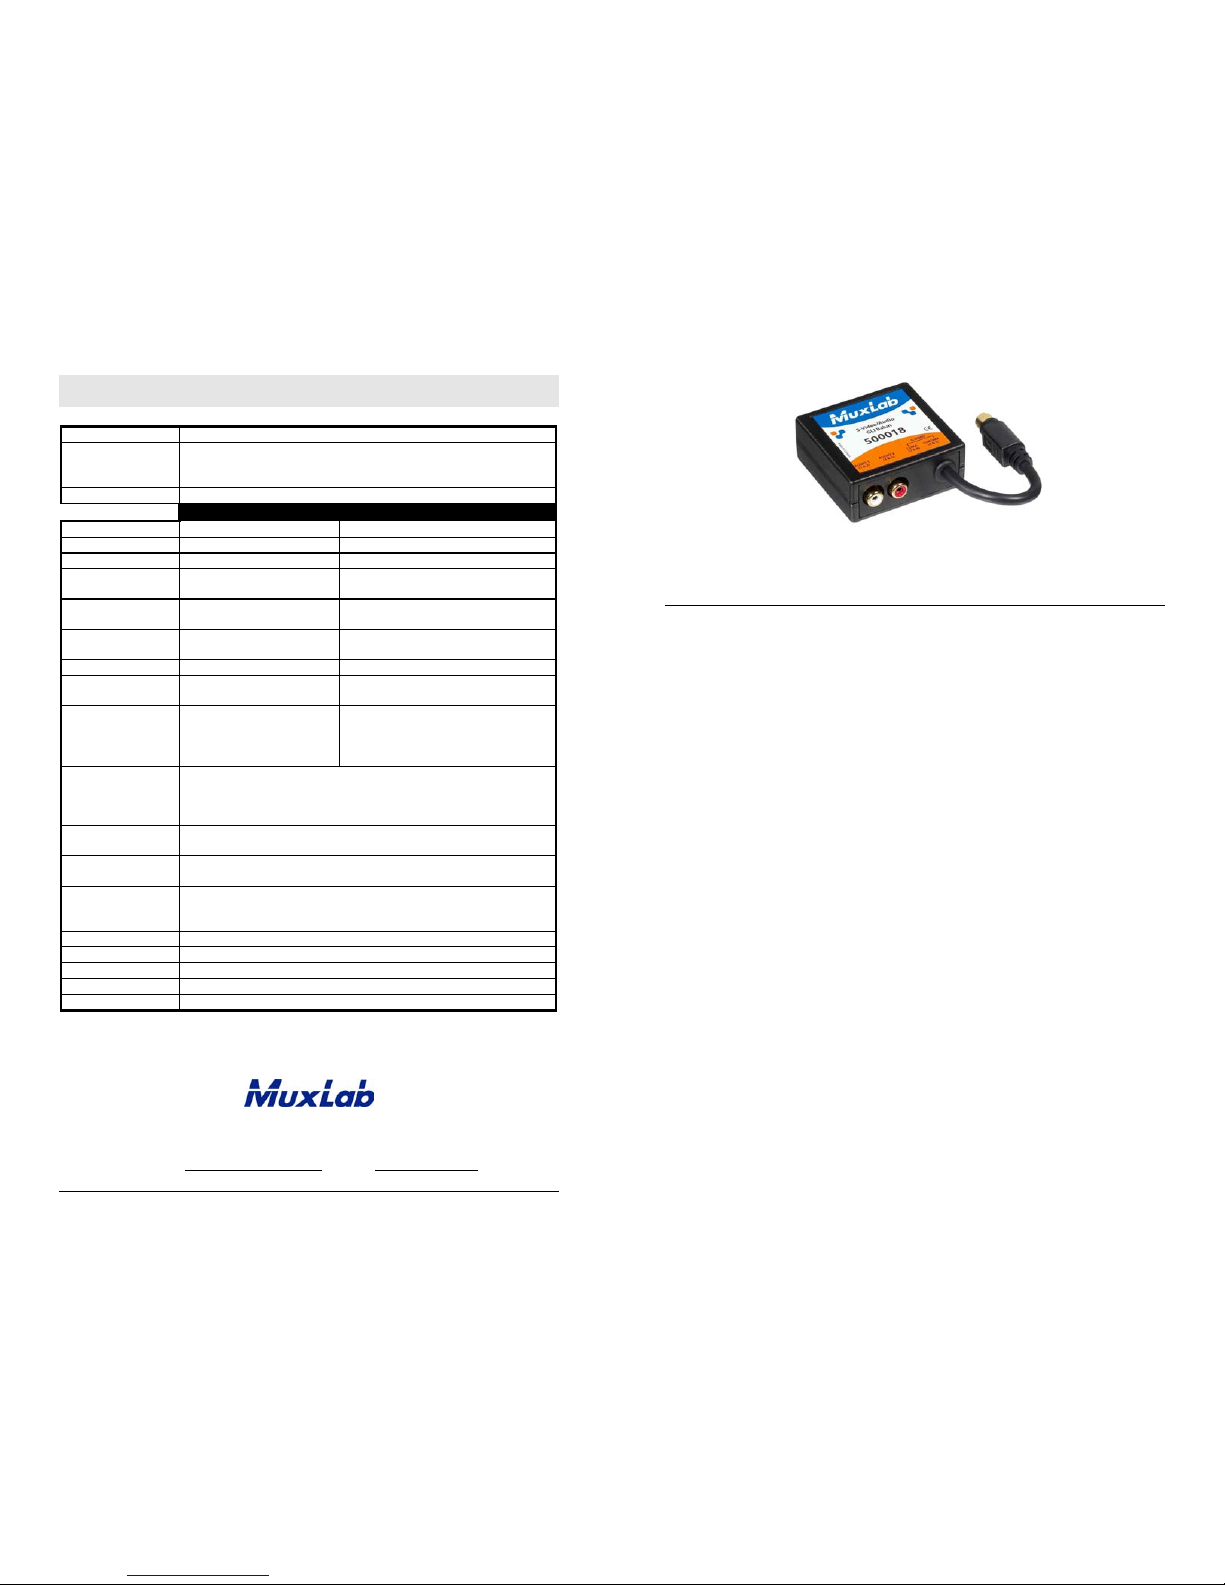
One (1) 4-pin Mini DIN, two (2) RCA audio jacks and one (1) RJ45
The 500018 comes with one (1) 6” dual-RCA stereo audio cable
Temperature
Operating: 0° to 55°C
Storage: -20° to 85°C
Humidity: Up to 95% non-condensing
Enclosure
Fire retardant plastic; black
Dimensions
2.40” x 2.25” x 1.00” plus 6” Max. S-Video lead
Weight
3.6 oz (103 g)
Warranty
Lifetime
Order Information
500018 S-Video/Audio GLI Balun
S-Video/Audio Balun GLI – 500018
Quick Installation Guide
Overview
The S-Video/ Audio GLI Balun allows one (1) S-Video channel and one (1) stereo line level analog
audio channel to be transmitted via unshielded twisted pair (UTP) cable in a point-to-point
connection for more versatile cabling. The S-Video/Audio GLI Balun offers full ground loop
isolation to help to eliminate hum-bars or other distortions related to ground loop. The balun is
used in conjunction with other standard MuxLab S-Video products such as the 500016, 500017,
500038 and 500200 in order to provide ground loop isolation for the system.
Applications
The S-Video/Audio GLI Balun is applied where ground loop issues may be present. Some
applications include home theatre systems, boardroom projector systems, classroom training and
rental & staging.
Caution: Do not attempt to open the housing. There are no user-serviceable parts inside the
S-Video/Audio GLI Balun. Opening the unit may void your warranty.
Note: In order to support the full 20Hz to 20KHz audio bandwidth, the baluns at both ends must
support 20Hz to 20KHz bandwidth. Please verify the balun’s specification table. Furthermore,
only amplified speakers may be connected directly to the S-Video/Audio GLI Balun. Do not
connect 4 ~ 8 ohm speakers directly to the balun.
© MuxLab Inc. 2010
Installation
To install the S-Video/Audio GLI Balun, perform the following steps:
1. Only one (1) S-Video/Audio GLI Balun is required in the link. The other balun may be any
MuxLab standard (non-GLI) S-Video balun.
2. Typically the S-Video/Audio GLI Balun is installed at the monitor side.
3. Identify the pin configuration of the baluns. Two (2) twisted pairs are required for S-Video
and two (2) twisted pairs are required for stereo analog audio. The pin configuration follows
the EIA/TIA 568A or B standard. The S-Video/Audio GLI Balun is reverse polarity sensitive.
Please ensure that wiring is straight through (Ring to Ring, Tip to Tip).
2. Turn off power and disconnect the S-Video source and S-Video monitor.
3. Make certain that modular outlets and cross connects to which you will connect the S-Video
baluns are configured properly and labeled appropriately to identify the circuit.
4. Verify that the desired twisted pairs are not being used for other LAN or telephone equipment.
5. Connect the audio connectors to the audio source via RCA stereo audio jumper cables.
Caution: Respect colors appearing on color-coded RCA jacks and plugs in order to ensure
the stereo effect is maintained.
6. Connect a standard (non-GLI) S-Video balun to the S-Video port of the source equipment (i.e.
DVD or STB).
7. Connect a Cat 5e/6 cable from the RJ45 jack on the S-Video/Audio Balun to the twisted pair
cabling of the building.
8. At the destination point, connect the S-Video/Audio GLI Balun to the S-Video display.
9. Connect the audio connectors to the line-level RCA audio inputs at the receiver via the RCA
stereo audio jumper cable included with the product.
10. Connect the other end of the Cat 5e/6 cable to the RJ45 jack of the S-Video/ Audio GLI
Balun.
11. Power on the S-Video/ Audio equipment at both ends and adjust the monitor image and audio
levels to the desired settings. The figure below shows a typical application.
Troubleshooting
The following tables describe some of the symptoms, probable causes and possible solutions
regarding the S-Video/Audio GLI Balun:
Video Symptom Probable Cause Possible Solutions
No continuity in video
link
Verify cable continuity between pairs of baluns.
Power off Check power supplies of video equipment.No video
Improper connection
and/or swapped pair
Check that baluns are connected to correct
video inputs and outputs
Unusual colors Reversed polarity
Check wiring and ensure straight-through
polarity
Background
pattern
EMI interference
Identify possible radiating frequency sources
(i.e., wireless LANs, switching power supplies).
Try to isolate them from the video connection.
Use shielded twisted pair grounded at both
ends.
Smearing Exceeded distance
Verify cable grade. Use higher-grade cable if
necessary.
Exceeded distance
Verify cable grade. Use higher-grade cable if
necessary. Increase contrast on monitor.
Weak contrast
Unusual link attenuation
Verify cable distance using ohmmeter or cable
tester.
Image not stable
Defective link or
equipment
Verify video equipment interface integrity.
Horizontal bars
moving slowly
Substantial crosstalk
between multiple video
sources
Consecutively turn off other video sources to
determine which video source is the cause of
interference.
Snowy picture Distance is near limit
Verify cable grade; use higher-grade cable if
necessary; reduce color intensity at monitor.
Audio Symptoms Probable Causes Possible Solutions
EMI interference
Check that wiring is not too close to
transformers and lighting ballasts.
Poor audio quality
Split pair
Ensure that the UTP pairs are not split and that
each pair of wires is twisted.
No power Check your audio system for power.
Open circuit Check wiring to ensure continuity.No audio
Defective balun Change S-Video baluns for another pair.
Audio phase
cancellation
Reversed wires Check for straight-through wiring.
Audio weak
Distance specifications
exceeded
Check DC loop resistance and verify if distance
specification is exceeded. Reduce cable length
or eliminate high-loss components.
If you still cannot diagnose the problem, please call MuxLab Customer Technical Support at
877-689-5228 (toll-free in North America) or (+1) 514-905-0588 (International).
 Loading...