

Page 1
VideoEase™ CATV Distribution Hub
(500300, 500301, 500303, 500304)
Installation Guide
P/N: 94-000620-B
Page 2

© MuxLab Inc. CATV Distribution Hub Installation Guide
Pag
Copyright Notice :
Copyright © 2012 MuxLab Inc. All rights reserved.
Printed in Canada. No part of this publication may be reproduced, stored in a retrieval
system, or transmitted in any form or by any means, electronic, mechanical,
photocopying, recording, or otherwise without prior written permission of the author.
Trademarks :
MuxLab and VideoEase are registered trademarks of MuxLab Inc.
e 2
Page 3

© MuxLab Inc. CATV Distribution Hub Installation Guide
Pag
Table of Contents
1. Overview ........................................................................................................................4
1.1. Description........................................................................................................4
1.2. Features.............................................................................................................4
2. Technical Specifications ...............................................................................................5
3. Installation Procedure ..................................................................................................7
3.1. Parts List ...........................................................................................................7
3.2. Product Overview .............................................................................................8
3.3. Pre-Installation Checklist .................................................................................9
3.4. Pre-Installation Tips .........................................................................................9
3.5. Physical Installation........................................................................................10
3.6. Installation Procedure .....................................................................................11
4. Troubleshooting ..........................................................................................................14
5. Product Warranty Policy ...........................................................................................15
e 3
Page 4

© MuxLab Inc. CATV Distribution Hub Installation Guide
Pag
1.
Overview
1.1. Description
The VideoEase CATV Distribution Hub allows a terrestrial broadband RF
video signal to be distributed to multiple RF receivers via Cat5 unshielded
twisted pair cable. The CATV Distribution Hub is available in two (2)
configurations; Eight (8) ports: 500300/500301 and sixteen (16) ports:
500303/500304.
The CATV Distribution Hub works in conjunction with MuxLab’s passive
CATV Balun and other RF video equipment for a more complete cabling
solution. The CATV Distribution Hub has a 900 MHz bandwidth and
supports broadband video and Internet. The product features built-in gain
amplification and port buffering and may be used in conjunction with standard
RF distribution equipment for larger installations
1.2. Features
• 900 MHz bandwidth
• Built-in RF amplifier
• Bi-directional transmission
• Works with other standard RF video equipment
• Compact design
e 4
Page 5

© MuxLab Inc. CATV Distribution Hub Installation Guide
Pag
2.
Technical Specifications
Environment Broadband CATV, VHF, FM, broadband Internet, digital cable.
Devices
Frequency Band Supported
Insertion Gain per pair –
Forward path (S21)
Insertion Gain per pair –
Reverse path (S12)
Return Loss
Common Mode Rejection Ratio
Mounting
Dimensions
Weight
Set-top tuners, RF splitters, RF amplifiers, modulators, combiners, re-processors,
cable modems
CATV: 54-900 MHz, RETURN CHANNEL: 5-42MHz
8P (500300/500301) 16P (500303/500304)
55-450 MHz: >12 dB
450-900 MHz: >10 dB
5-42 MHz: >0 dB 5-42 MHz: >0 dB
> 5 dB from 5 to 42MHz
> 6 dB from 54 to 900 MHz
> 30 dB from 5 to 900 MHz > 30 dB from 5 to 900 MHz
Desktop 1U Rack-mount
9.3” x 3.9” x 1.6” (23.5 x 9.9 x 4 cm) 19” x 3.9” x 1.75” (48.3 x 9.9 x 4.4 cm)
28 oz (817 g) 41 oz (1.2 kg)
55-450 MHz: >12 dB
450-900 MHz: >10 dB
> 5 dB from 5 to 42MHz
> 6 dB from 54 to 900 MHz
Maximum Distance - Cat 5 UTP
Dependant on channel frequency, input power and receiver sensitivity.
e 5
Page 6

© MuxLab Inc. CATV Distribution Hub Installation Guide
Pag
LED Indicators
Cable – UTP
Cable – “F”
Connectors
RJ45 Pin Configuration
Compatible MuxLab Baluns
Power Requirement
Power Supply
Temperature
Power: One (1) green LED.
CAT5/5e or CAT6 24 gauge or lower solid copper twisted pair wire.
Impedance: 75 ohms at 1 MHz (RG6)
RF Input: “F” connector
RF Outputs: Eight (8) or sixteen (16) RJ45S depending on model
RJ45 Pins 7& 8
500006 (550MHz), 500302 (900 MHz)
12VDC @ 400 mA
Desktop 110-240V switching power supply.
Input: 100-240V, ~0.5A Max, 50-60Hz
Output: +12V, 1.25A. Output Power: 15W Max. Detachable AC power cord
Operating: 0° to 40°C. Storage:-10° to 70°C. Humidity: up to 95% non-condensing
Enclosure
Regulatory
Warranty
Order Information
Black painted aluminum
FCC, CE, RoHS
2 years
500300 CATV Distribution Hub, 8 Ports, 110V
500301 CATV Distribution Hub, 8 Ports, 220-240V
500303 CATV Distribution Hub, 16 Ports, 110V
500304 CATV Distribution Hub, 16 Ports, 220-240V
e 6
Page 7

© MuxLab Inc. CATV Distribution Hub Installation Guide
Pag
3.Installation
Procedure
3.1. Parts List
The CATV Distribution Hub comes with the following parts. Please verify
that all pieces are present before proceeding.
• Base Unit
• External Power Supply 12VDC/1.25 A
• Rubber stand-off (500300, 500301 only)
• Installation Guide
e 7
Page 8

© MuxLab Inc. CATV Distribution Hub Installation Guide
Pag
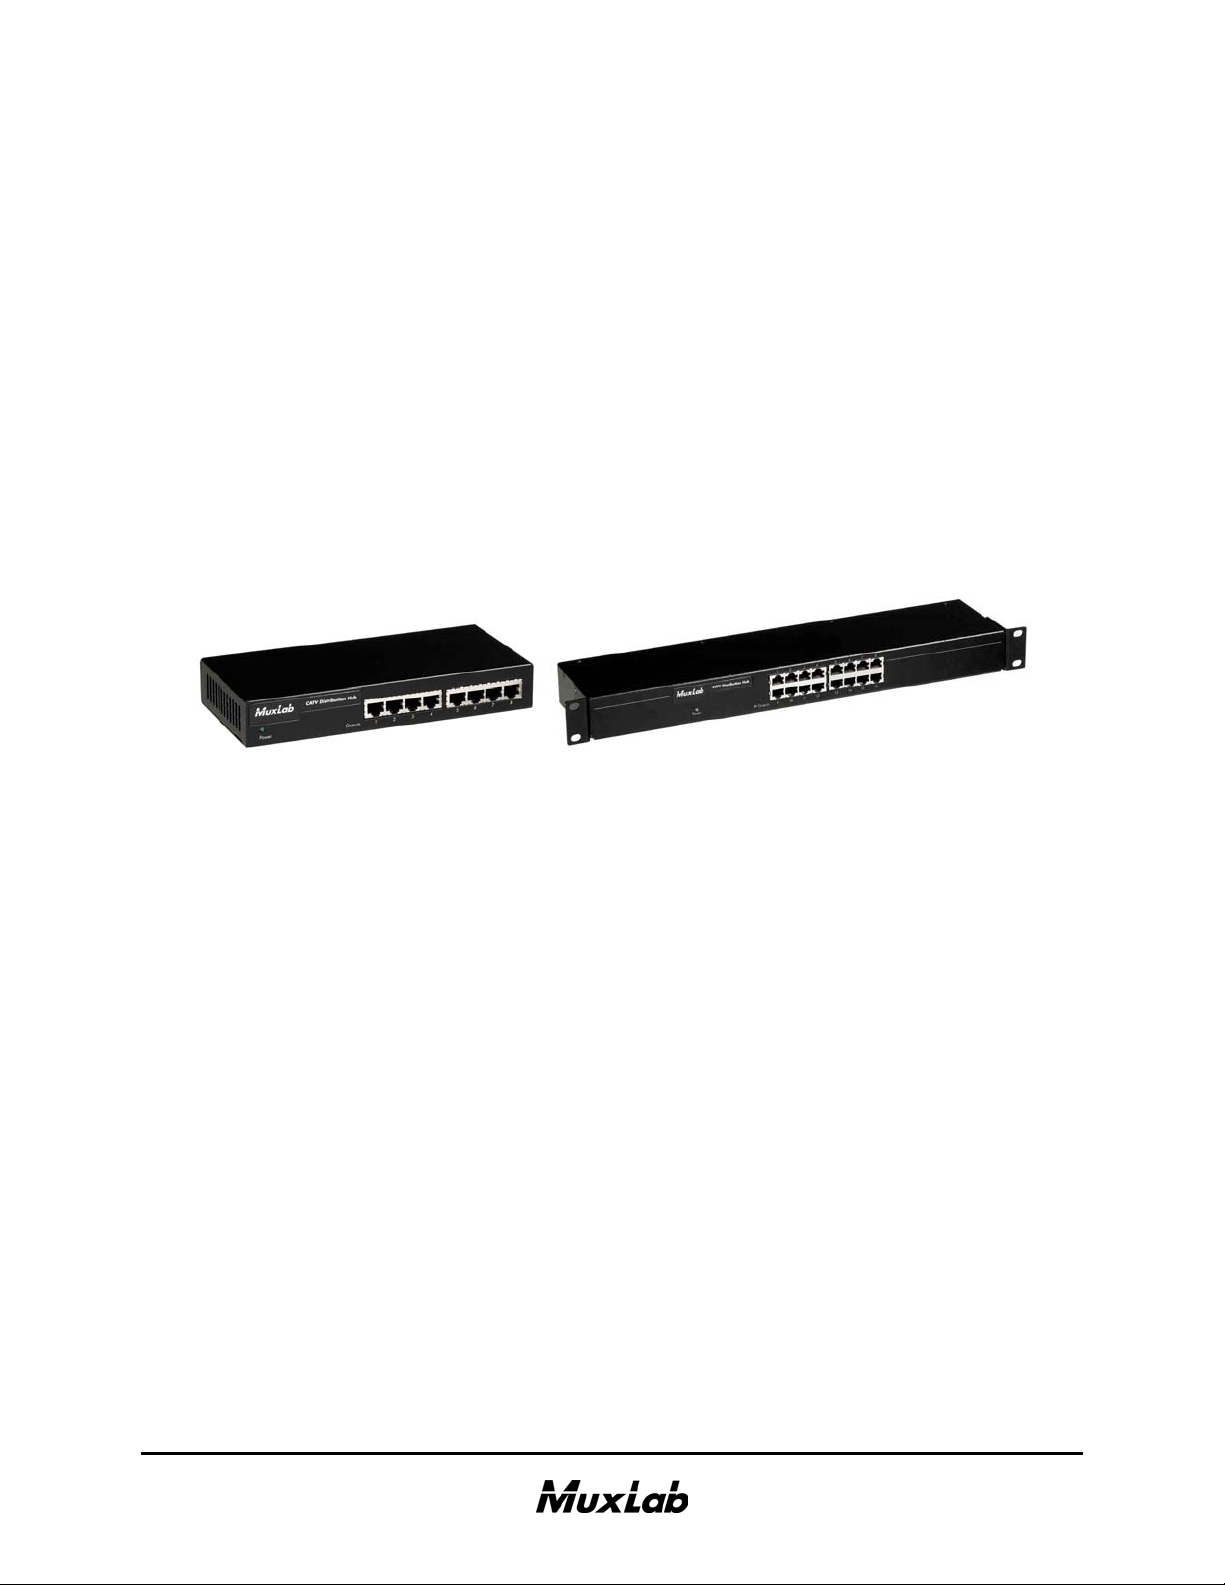
3.2. Product Overview
The external connections and diagnostics of CATV Distribution Hub are
detailed in the following diagrams. Please familiarize yourself with them
before installing the unit.
Figure 1: CATV Distribution Hub 8P (500300, 500301) Front panel
Figure 2: CATV Distribution Hub 8P (500300, 500301) Rear panel
Figure 3: CATV Distribution Hub 16P (500303, 500304) Front panel
Figure 4: CATV Distribution Hub 16P (500303, 500304) Rear panel
e 8
Page 9

© MuxLab Inc. CATV Distribution Hub Installation Guide
Pag
3.3. Pre-Installation Checklist
The CATV Distribution Hub provides a centralized CATV copper twisted pair
cabling solution.
1. The CATV Distribution Hub is always connected to the terrestrial CATV
cable feed within a building. For example it is connected directly to the
output of a CATV head end feeding from equipment such as an RF splitter,
RF amplifier or RF modulator.
2. The CATV Distribution Hub must be used in conjunction with MuxLab’s
passive CATV Baluns (p/n 500006, 500302). The CATV Baluns are
connected at each RF receiver, tuner or cable modem.
3. Don’t cascade Distribution Hub.
3.4. Pre-Installation Tips
1. In a point-to-point scenario for CATV, VHF and FM, cable lengths of up
to 45 meters may be achieved if the nominal input is about 5dBV. If
signal is higher than 10 dBmV, it may be necessary to attenuate the lower
frequency or reduce the signal level in order to avoid over-driving the TV
or modem.
2. When combining an existing signal with a modulated signal, make sure to
have equal signal strength at the point of the combiner so one signal does
not degrade the other.
3. When possible, use the lowest frequencies available for the modulated
channels. Lower frequency channels have lower signal loss on the cable
runs. Don’t drive the cable with more than 10dBmV.
e 9
Page 10

© MuxLab Inc. CATV Distribution Hub Installation Guide
Pag
3.5. Physical Installation
The CATV Distribution Hub has two models; 8-port desktop (500300,
500301) and 16-port rack-mount (500303, 500304).
1. If the 8-port hub is being installed desk, select the final destination for the
product and install the unit on a desk to shelf as shown below.
Figure 5: 8-port desktop installation
2. If the 16-port hub is being installed, select the final destination for the
product and install the unit in a 19” relay rack using standard rack mount
screws.
Figure 6: 16-port rack mount installation
e 10
Page 11

© MuxLab Inc. CATV Distribution Hub Installation Guide
Pag
3.6. Installation Procedure
The CATV Distribution Hub is available in 8-port (500300, 500301) and 16port (500303, 500304) versions. In order to install the product, please follow
the steps below:
1. Perform steps 1 to 2 listed in the previous section.
2. Ensure that the power is turned off on CATV equipment.
3. Connect one (1) coax cable from CATV head end to the RF input on the
CATV Distribution Hub.
Figure 2: CATV Distribution Hub
4. Connect the external 12VDC power supply to the hub and plug the power
supply into an AC power outlet. If power is present, then the green power
LED will be ON.
e 11
Page 12

© MuxLab Inc. CATV Distribution Hub Installation Guide
Pag
5. At each RF receiver/tuner or cable modem, connect a CATV Balun II
(500302).
6. Connect a Cat5 (or better) cable between the CATV Distribution Hub and
each CATV Balun II. Please note that only one twisted pair is required.
The three (3) unused twisted pairs may be used for other low voltage
services, including low voltage power, data, voice, video, audio and IR.
7. Power on the CATV Distribution Hub and each receiver/tuner/cable
modem.
8. At each receiver/tuner, select each video channel to ensure that each
channel is received clearly. If the images on some channels are not clear,
please consult the Troubleshooting section of this installation guide.
9. If a cable modem is connected, test the Internet connection to ensure that
both upstream and downstream communications are functional. If not,
please consult the Troubleshooting section of this installation guide.
10. The following diagrams show a couple of typical configurations.
e 12
Page 13

© MuxLab Inc. CATV Distribution Hub Installation Guide
Pag
Figure 3: Typical Configuration, RF Modulation
Figure 4: Typical Configuration, CATV & RF Modulation
e 13
Page 14

© MuxLab Inc. CATV Distribution Hub Installation Guide
Pag
4.
Troubleshooting
The following table describes some of the problem symptoms, the probable causes and
possible solutions. If the information below does not solve the problem, the technical
support contact information can be found at the end of this section.
Picture Power
LED
No image OFF Power off Check power supplies of CATV equipment
No image or
very noisy
Picture snowy ON Exceeded distance/bandwidth
Horizontal
upward moving
bands
Some channels do
not come in
Internet not
functioning
ON Wrong pin configuration Check pin configuration and verify straight-
ON Ground loop problem. Isolate CATV receiver from local ground.
ON Bandwidth limitation Check that the channel frequency is within the
ON Unsupport by CATV system Ensure that all RF components support bi-
Probable Causes Possible Solutions
through wiring
Check if distance spec is exceeded
specifications
Reduce cable length.
Lower grade UTP cable is
introducing high losses
Insufficient signal strength at input
Replace cable by higher grade
Check level
bandwidth limitation of the baluns and hubs
directional transmission
Over bright image ON Signal strength too high Attenuate signal by reducing amplifier gain or
by moving internal jumper.
When contacting your nearest MuxLab dealer or MuxLab Technical Support please have
the following information ready:
• Unit model number.
• List of tests performed.
• Cabling lay-out. Include model of
CATV receiver, cable modem, cable
length and type.
• Description of problem.
e 14
Page 15

© MuxLab Inc. CATV Distribution Hub Installation Guide
Pag
5.
Product Warranty Policy
Items under warranty - Company Policy
MuxLab guarantees its products to be free of defects in manufacturing and workmanship for the warranty period from the date of
purchase. If this product fails to give satisfactory performance during this warranty period, MuxLab will either repair or replace
this product at no additional charge, except as set forth below. Repair and replacement parts will be furnished on a exchange
basis and will be either reconditioned or new. All replaced parts and products become the property of MuxLab. This limited
warranty does not include repair services for damage to the product resulting from accident, disaster, misuse, abuse, or
unauthorized modifications or normal decay of battery driven devices. Batteries if included with the product, are not covered
under this warranty.
Limited warranty service can be obtained by delivering the product during the warranty period to the authorized MuxLab dealer
from whom you purchased the product, or by sending it to MuxLab. MuxLab will not accept any such product for repair without
a Return Material Authorization number (RMA#) issued by its Customer Service Department and a proof of purchase date. If
this product is delivered to MuxLab by mail, you agree to assume risk of loss or damage in transit, to prepay shipping charges to
the warranty service location, and to use the original shipping container or equivalent.
THE ABOVE LIMITED WARRANTY IS THE ONLY WARRANTY COVERING YOUR MUXLAB PRODUCT. THERE
ARE NO OTHER WARRANTIES, EXPRESSED OR IMPLIED, INCLUDING WARRANTIES OF MERCHANTABILITY
OR FITNESS FOR A PARTICULAR PURPOSE. SOME STATES DO NOT ALLOW LIMITATIONS ON IMPLIED
WARRANTIES, SO THE ABOVE LIMITATION MAY NOT APPLY TO YOU.
IF THIS PRODUCT IS NOT IN GOOD WORKING ORDER, YOUR SOLE REMEDY SHALL BE REPAIR OR
REPLACEMENT AS PROVIDED FOR ABOVE. IN NO EVENT SHALL MuxLab BE LIABLE TO YOU FOR ANY
DAMAGES, INCLUDING ANY LOSS OF PROFITS, LOST SAVINGS, OR OTHER INCIDENTAL OR CONSEQUENTIAL
DAMAGES ARISING OUT OF THE USE OF OR INABILITY TO USE THIS PRODUCT, EVEN IF MUXLAB OR AN
AUTHORISED MuxLab DEALER HAS BEEN ADVISED OF THE POSSIBILITY OF SUCH DAMAGES; NOR WILL
MUXLAB BE LIABLE FOR ANY CLAIM BY ANY OTHER PARTY. SOME STATES DO NOT ALLOW THE
EXCLUSION OR LIMITATION OF INCIDENTAL OR CONSEQUENTIAL DAMAGES FOR CONSUMER PRODUCTS,
SO THE ABOVE LIMITATIONS OR EXCLUSIONS MAY NOT APPLY TO YOU. THIS WARRANTY GIVES YOU
SPECIFIC LEGAL RIGHTS. YOU MAY ALSO HAVE OTHER RIGHTS WHICH MAY VARY FROM STATE TO STATE.
Warranty Periods
Any product found to be defective within three (3) months of invoice, including one (1) month shelf life, may be returned for
replacement by a new unit or a satisfactory repair within one (1) month of receiving any returned product. The customer must
provide MuxLab with the serial number and proof of purchase of the defective unit being returned. All R.M.A.’s issued are
subject to inspection by MuxLab, and will be returned to customer if not properly package – units must be returned in original
container or equivalent. MuxLab will not accept any such product for repair without an authorization for its Technical Support
department and without a return authorization number issued by MuxLab Customer Service department. For credit & replace
R.M.A., customer will be liable to pay replacement invoice if defective products are not returned.
Product more than six months old, including shelf life.
The defective unit must be returned prepaid to MuxLab and then the unit will be repaired or if repair is not possible, replaced by
an equivalent unit and returned to the customer within one (1) month of receiving any returned product.. There is no charge for
repair (parts and labor) during the full warranty period.
Items Defective and not under Warranty
For products which are no longer under warranty the policy is repair and return. An amount of 25% of the products published
list price at the time of purchase will be charged. Customer must issue a purchase order to cover the cost of repair.
Each unit will be returned to the customer within one (1) month from receipt of the unit by MuxLab. The defective unit must be
returned prepaid to MuxLab. The repaired unit will be returned to the customer FOB MuxLab. The repaired unit has a 90 day
warranty.
e 15
Page 16

© MuxLab Inc. CATV Distribution Hub Installation Guide
Pag
MuxLab Inc.
8495 Dalton rd, Montreal,
Quebec, Canada, H4T 1V5
Tel.: (+1) 514 905-0588 Fax: (+1) 514 905-0589
Toll Free (North America): 877 689-5228
URL: www.muxlab.com
E-mail: videoease@muxlab.com
e 16
 Loading...