

MuxLab 500401-WP-UK Quick Installation Manual
© MuxLab Inc. 2010-2013
Specifications
Environment
HDMI 1.3a
Devices
DVD, plasma, projectors, monitors, TV, PC, laptops, servers supporting
HDMI. Compatible with MuxLab p/n 500401.
Transmission
Transparent to the user
Bandwidth
225MHz
Signals
HDMI 1.3a protocol
Connectors
HDMI receptacle.
Two (2) RJ45S for Cat5 unshielded or shielded twisted pair.
HDMI cables not included.
Power Switch
Switch on rear panel to select between Power or No-Power. Factory setting:
Power
Max. Distance*
*Based on a maximum length
of 6.6 ft (2m) of HDMI cable
per end
480i/p: Cat5e: 300 ft (90 m) Cat6: 300 ft (90 m)
720p, 1080i: Cat5e: 200 ft (60 m) Cat6: 250 ft (76 m)
1080p 8-bit: Cat5e: 150 ft (45 m) Cat6: 200 ft (60 m)
1080p 12-bit Deep Color: not specified Cat6: 90 ft (27 m)
“No Power” Mode: Cat5e: 100 ft (30m) Cat6: 100 ft (30m)
When installed in an electrically noisy environment, STP cable must be
used. Also, cross-connection reduces the effective distance depending on
the grade of twisted cable used. Patch panels are not recommended with
1080p Deep Color.
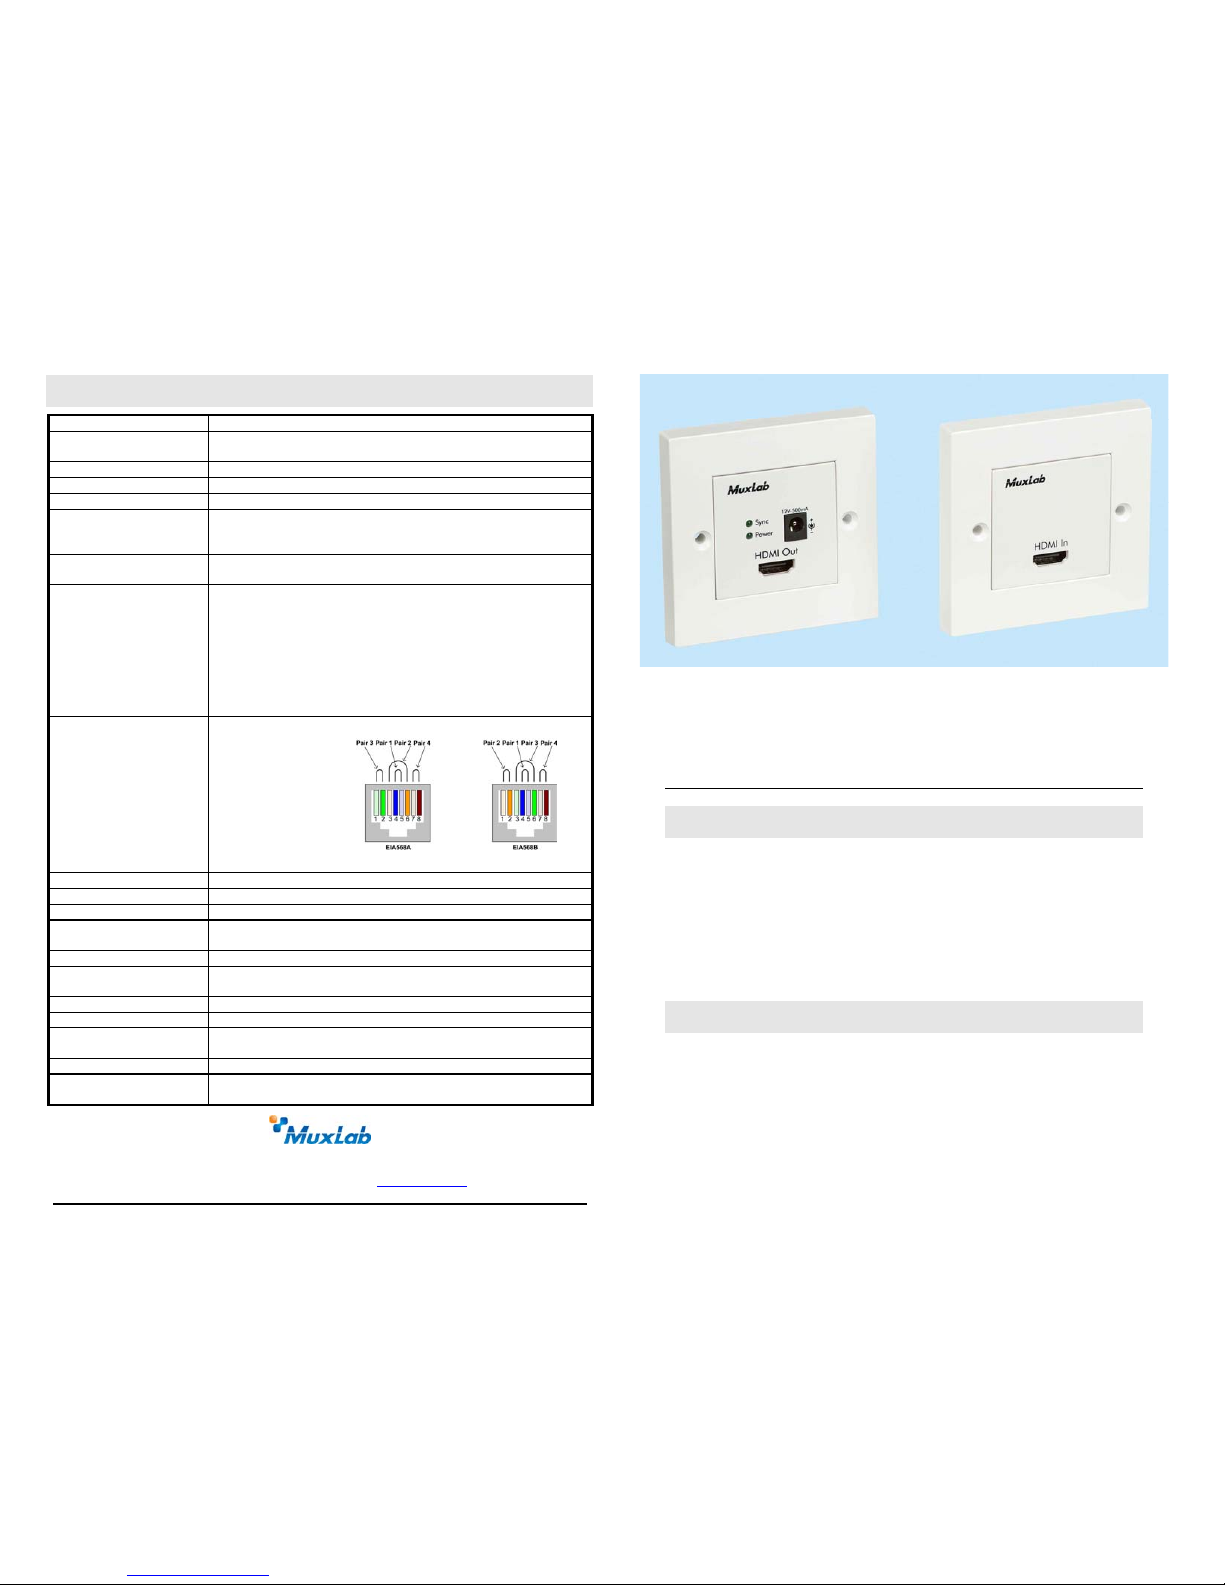
RJ45 Pin Configuration
Reverse Polarity Sensitive
Use EIA/TIA 568 A or B,
straight-through wiring.
RJ45 A (Video)
Pin 1 (R) Pin 2 (T)
Pin 3 (R) Pin 6 (T)
Pin 4 (R) Pin 5 (T)
Pin 7 (R) Pin 8 (T)
RJ45 B (DDC)
Pin 1 (R) Pin 2 (T)
Pin 3 (R) Pin 6 (T)
Pin 4 (R) Pin 5 (T)
Pin 7 (R) Pin 8 (T)
Cable
Two (2) Category 5e or better twisted pair cables required.
Power Supply
One (1) 110-240V/12VDC power supply with interchangeable blades
Power Consumption
3W
Temperature
Operating: 0º to 55º C. Storage: -20º to 85º C.
Humidity: up to 95% non-condensing.
Enclosure
ABS fire retardant plastic
Dimensions
86 mm x 86 mm x 36 mm. Choose 40-mm deep back box to allow for
Cat 5E/6 wiring connection.
Weight
1.6 LB/0.7 Kg
Mounting
Velcro pads included.
Compliance
Regulatory: FCC, CE, RoHS, Decora® faceplate.
Flammability: 94V0
Warranty
2 years
Order Information
500401-WP-UK HDMI Wall Plate Extender Kit
UPC: 6-27699-91401-4
Tel.: (514) 905-0588 Fax: (514) 905-0589
Toll Free (North America): (877) 689-5228
E-mail: videoease@muxlab.com URL: www.muxlab.com
94-000691-B SE-000691-B
HDMI Wall Plate Extender Kit
(500401-WP-UK)
Quick Installation Guide
Overview
The HDMI Wall Plate Extender Kit Wall Plate (500401-WP-UK) allows HDMI
equipment to be connected up to 200 ft (60m) @ 1080i via two (2) Cat5e unshielded
twisted pair cables in a point-to-point configuration. The product also supports
1080p Deep Color up to 90 ft (27m) via Cat6 cable. The kit comes with one (1)
Transmitter and one (1) Receiver. The receiver balun features a switch that allows
the device to function without a PSU connected. Applications include; commercial
and residential AV systems, classroom projector systems, digital signage,
boardroom systems, collaborative PC systems, medical information systems.
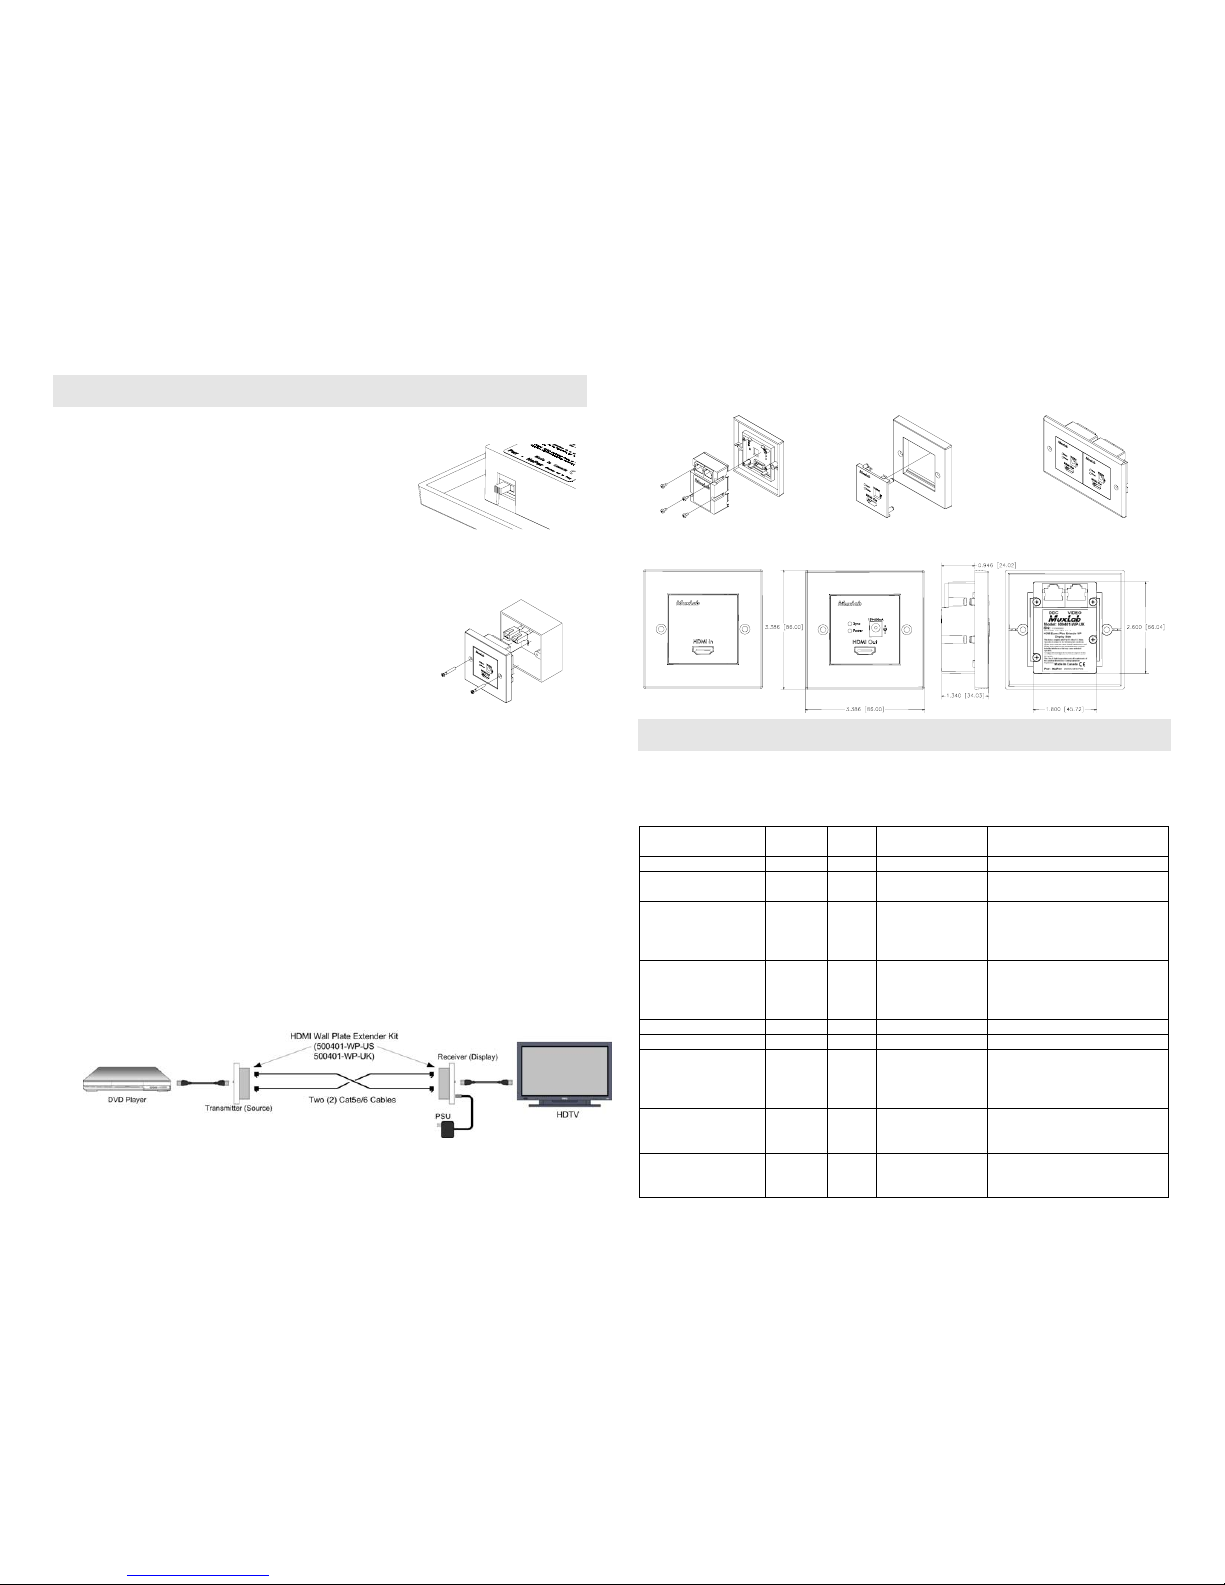
Pre-Installation Check
Identify the connectors on the Transmitter (Source side) and Receiver (Display
side). The Source side has an HDMI In connector. The Display side has an HDMI
Out connector, two LED indicators for Power and Sync, and a Power Supply
connector.
© MuxLab Inc. 2010-2013
Installation
Verify that the distance between the HDMI Transmitter and Receiver are within MuxLab
specifications (see Specifications table).
If the receiver is being used without a PSU then the switch
must be set to "No-Power" and if the receiver is being used
with PSU, then the switch must be set to "Power" (factory
setting)
Identify the pin configuration of the baluns. Two (2) Cat5e or better are required. The pin
configuration follows the EIA/TIA 568A/B standard. The HDMI Wall Plate Extender Kit is
reverse polarity sensitive. Please ensure that wiring is straight through (Ring to Ring, Tip to
Tip).
1. To install the HDMI Transmitter or Receiver in a single
back box, choose a back box with a depth of 40 mm or more
or a mud ring. Connect the RJ45 plug into the rear of the
extender. Secure the extender with the 2 front screws.
In order to install the Transmitter, please follow the steps below:
2. Connect the Transmitter to the HDMI video source with an HDMI compliant cable.
3. Connect two (2) lengths of Cat5e (or higher) grade UTP cables to the Video and DDC
OUT connectors on Transmitter.
In order to install the Receiver, please follow the steps below:
4. Connect the Receiver to the HDMI display equipment with an HDMI compliant cable.
5. Connect the two (2) Cat5e cables to the Video and DDC IN connectors of the Receiver.
Note: Verify that the cables are connected straight-through (i.e. Video to
Video, DDC to DDC) and not inverted.
6. Connect the 12 VDC power supply first to the Receiver and then plug the power supply
into an AC power outlet. If power is present, then the green power LED will be ON.
Note: Power the HDMI Wall Plate Extender Balun only after all connections are
made.
7. Power on the HDMI equipment and verify the image quality.
8. The following diagram shows the final configuration.
9. To mount the wall plate balun in a gang plate, you must first remove the rear 4 screws,
then remove the balun. Then unclip the balun front plastic panel.
10. Clip the front plastic panel to a standard gang plate and secure the balun using its
4 screws. Multiple wall baluns can be mounted side by side on a gang plate.
Source side Display side
Troubleshooting
The following tables describe some of the symptoms, probable causes and possible solutions
in respect to the installation of the HDMI Wall Plate Extender Kit Wall Plate. If you still
cannot diagnose the problem, please call MuxLab Customer Technical Support at 877-6895228 (toll-free in North America) or (+1) 514-905-0588 (International).
Picture/
Sound
Power
LED
Sync
LED
Probable Cause Possible Solution
No Image OFF OFF No power Check power connections
No Image OFF orONOFF No power or
not enough power
Check to make sure power
switch is in correct position.
No Image ON OFF Wiring Check continuity
Check correct wiring
Verify that Video and DDC Cat5
cables are not inverted.
No Image ON ON Synchronization Power off the source and the
display. Cycle power of the
HDMI Extender and power on
the devices.
Flickering Image ON ON Synchronization Check cable length
Choppy Sound ON ON Synchronization Check cable length
Noise in image ON ON Weak signal Check cable length
Verify that the HDMI cables are
certified HDMI 1.3a for 1080p
Deep Color.
Green or pink hue ON ON DDC cable Cycle power of the HDMI
Extender. Check DDC cable
and replace.
Image Flicker when
powering up
equipment nearby
ON ON Interference Use STP cables.
 Loading...