

0
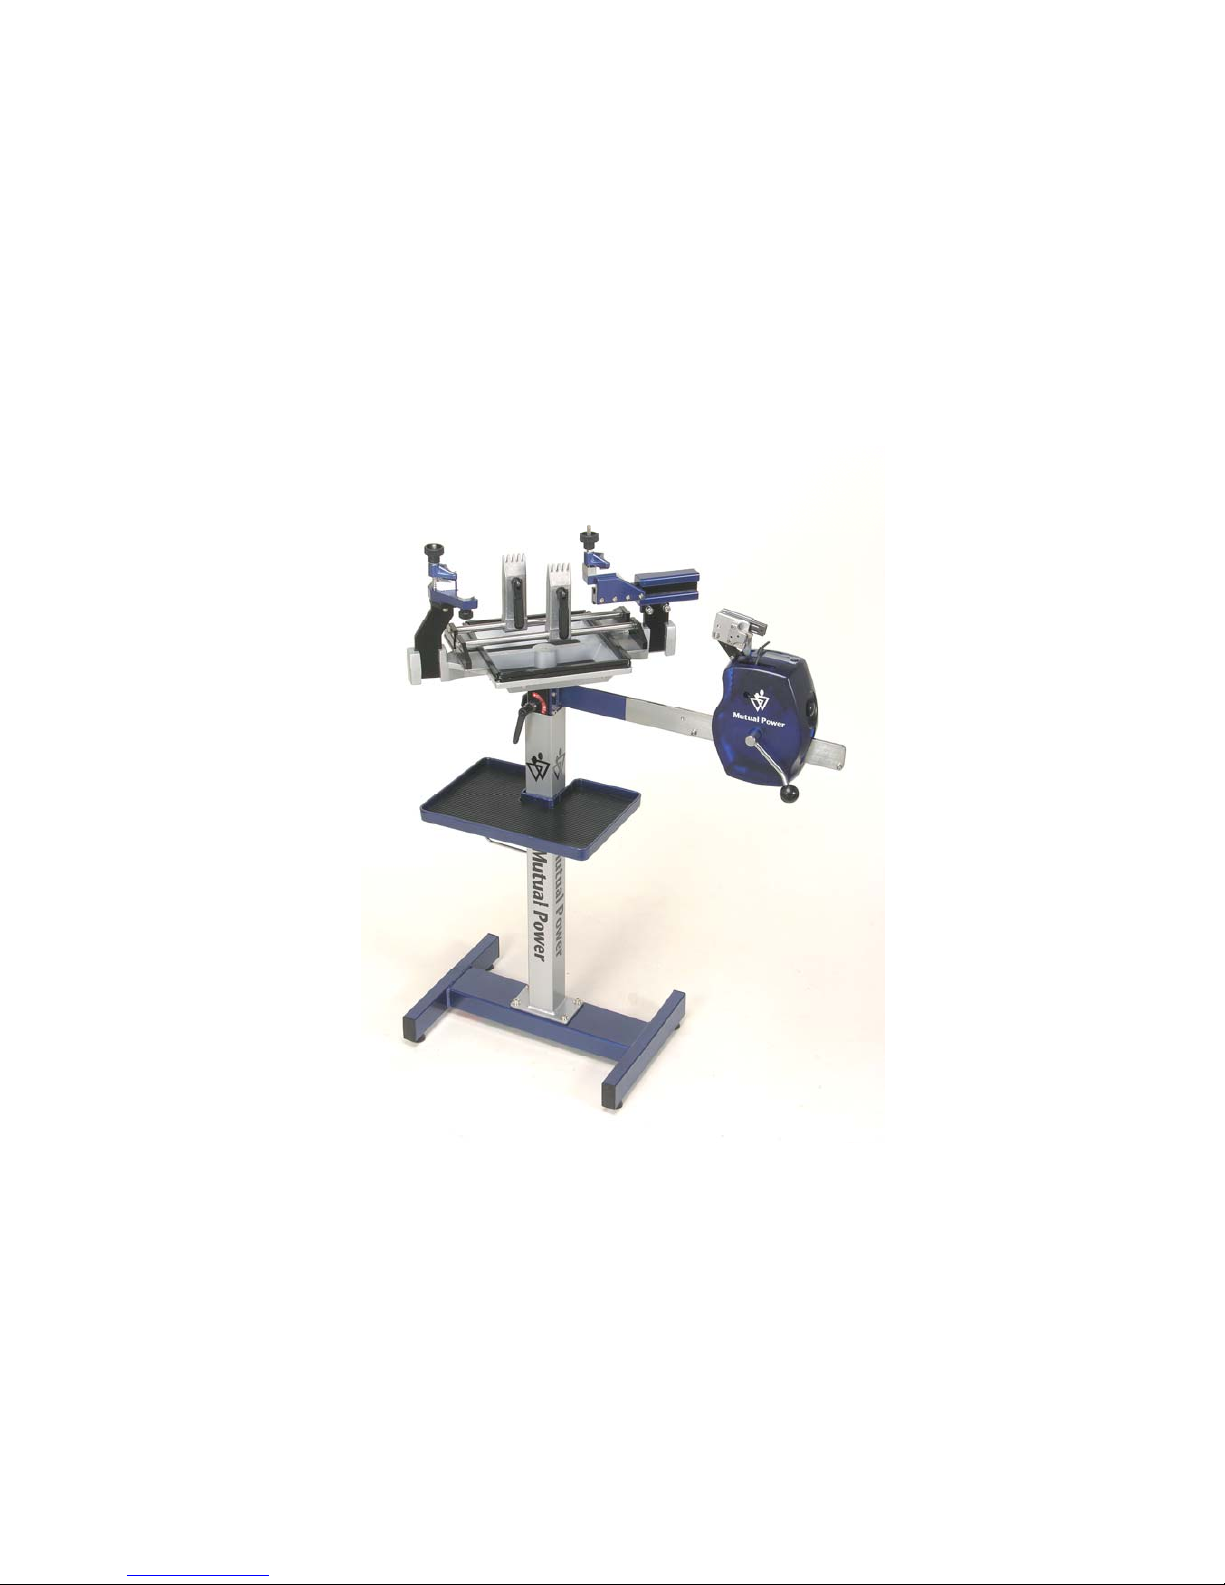
ALPINE 2600
STRINGING MACHINE
U
SER’S MANUAL
1
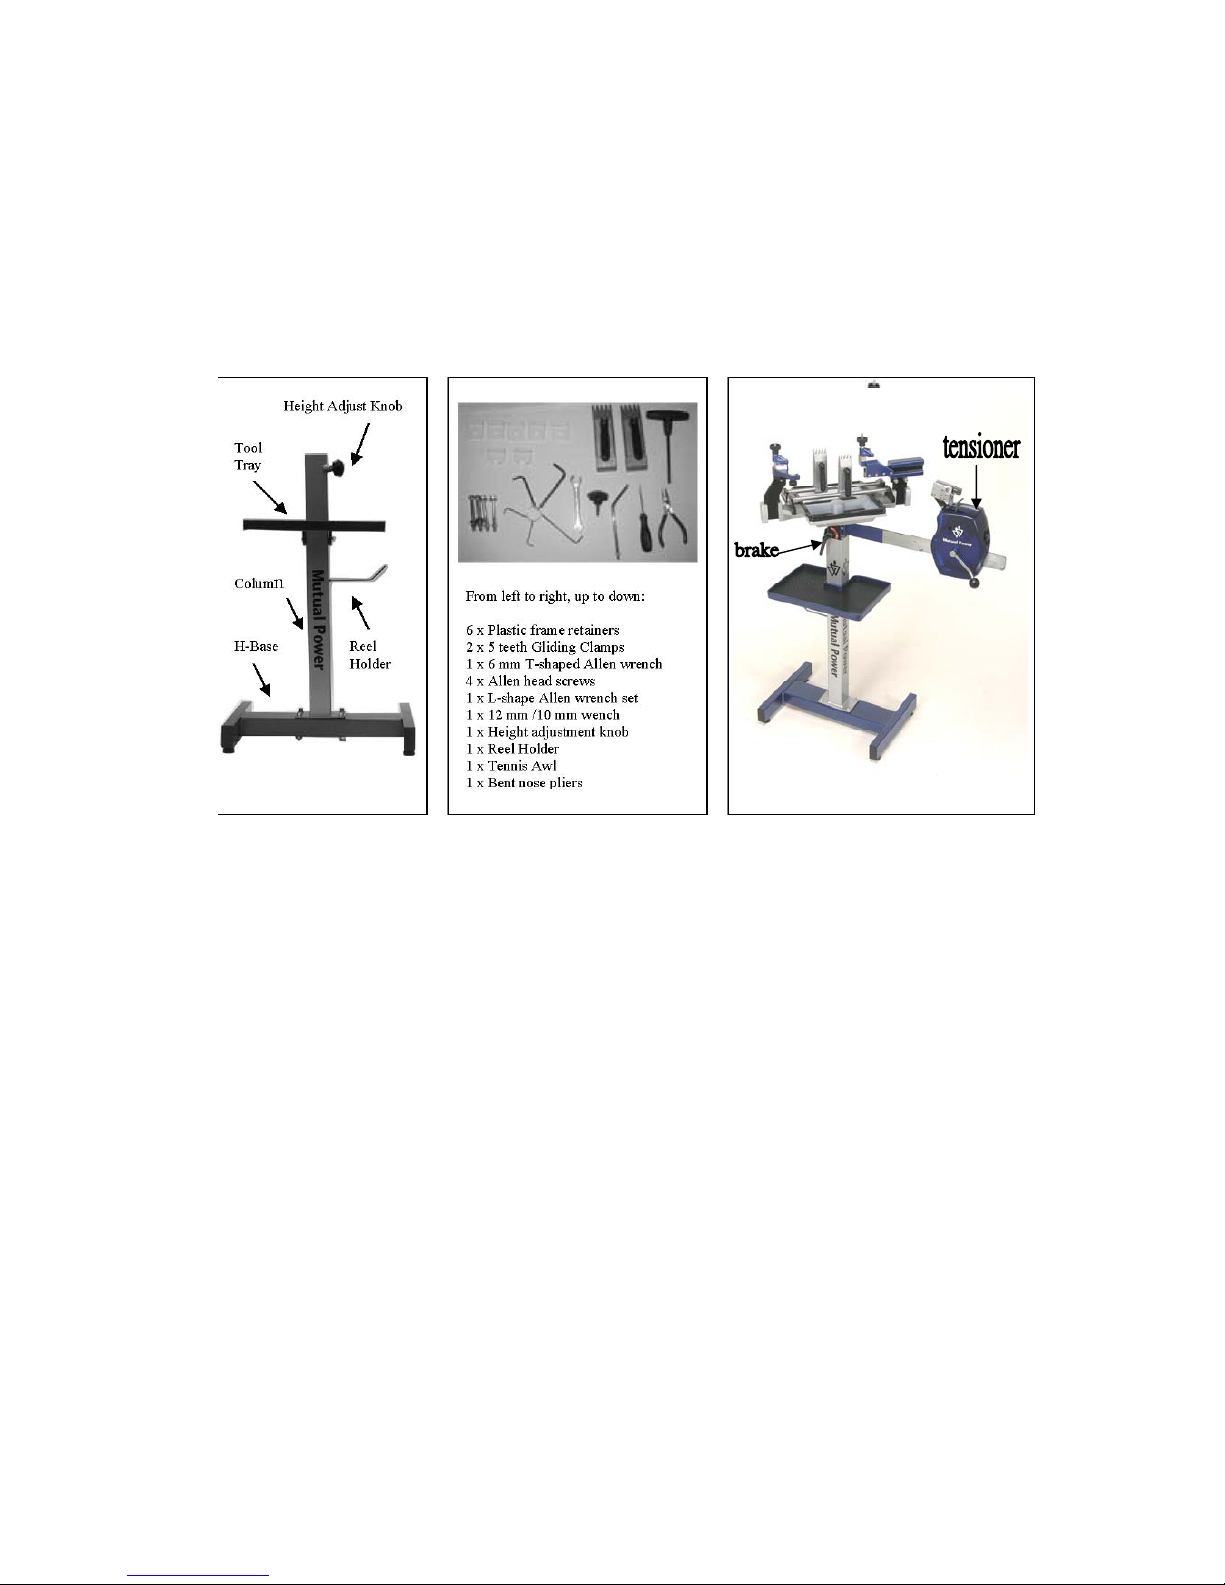
1. Components
Please inspect your package upon receipt and locate all components.
2. Assembly
Your machine is shipped one carton and comes in four parts: base, column, tool tray,
machine body and accessory bag. Remove all parts from the shipping carton.
1. Assemble the column to the H-shaped base with 4 Allen Head screws by 6 mm
T-shaped Wrench and 12/10 mm wrench.
2. Screw the reel holder into the column.
3. Mount the tool tray on the column by fastening with four 6 mm screws.
4. Insert the machine body into column top and allow setting.
5. Adjust the machine body to the desired height and lock into position with height
adjustment knob.
6. Pull up the clamp handle make the clamp foot opens to attach the clamps to each
of the glide bars.

2
3. Keypad operation instruction:
Step 1 : Battery Setting
Set one dry battery (9 volts) beneath the tension head.
Caution : position + and – correctly.
Step 2 : Power Button
To turn the machine on, press the black
POWER-KG/LB button for 1 second until
a tension appears on the display.
NOTE the power save function has been set
for 1 minute at factory before shipping so the
display will shut down automatically after 1
minute. To motivate the display, repeat the
procedure step 2 again.
To turn power off, press the black
POWER-KG/LB button for 2 seconds
until OFF appears on the display.
Or wait for 1 minute till the power save
function is motivated and display will
shut down automatically as well.
Step 3 : KG/LB Button
Press the black POWER-KG/LB button for 0.5 second to change tension display from
KG to LB. To set tension unit from LB to KG, press the black POWER-KG/LB button for
0.5 second again.
3
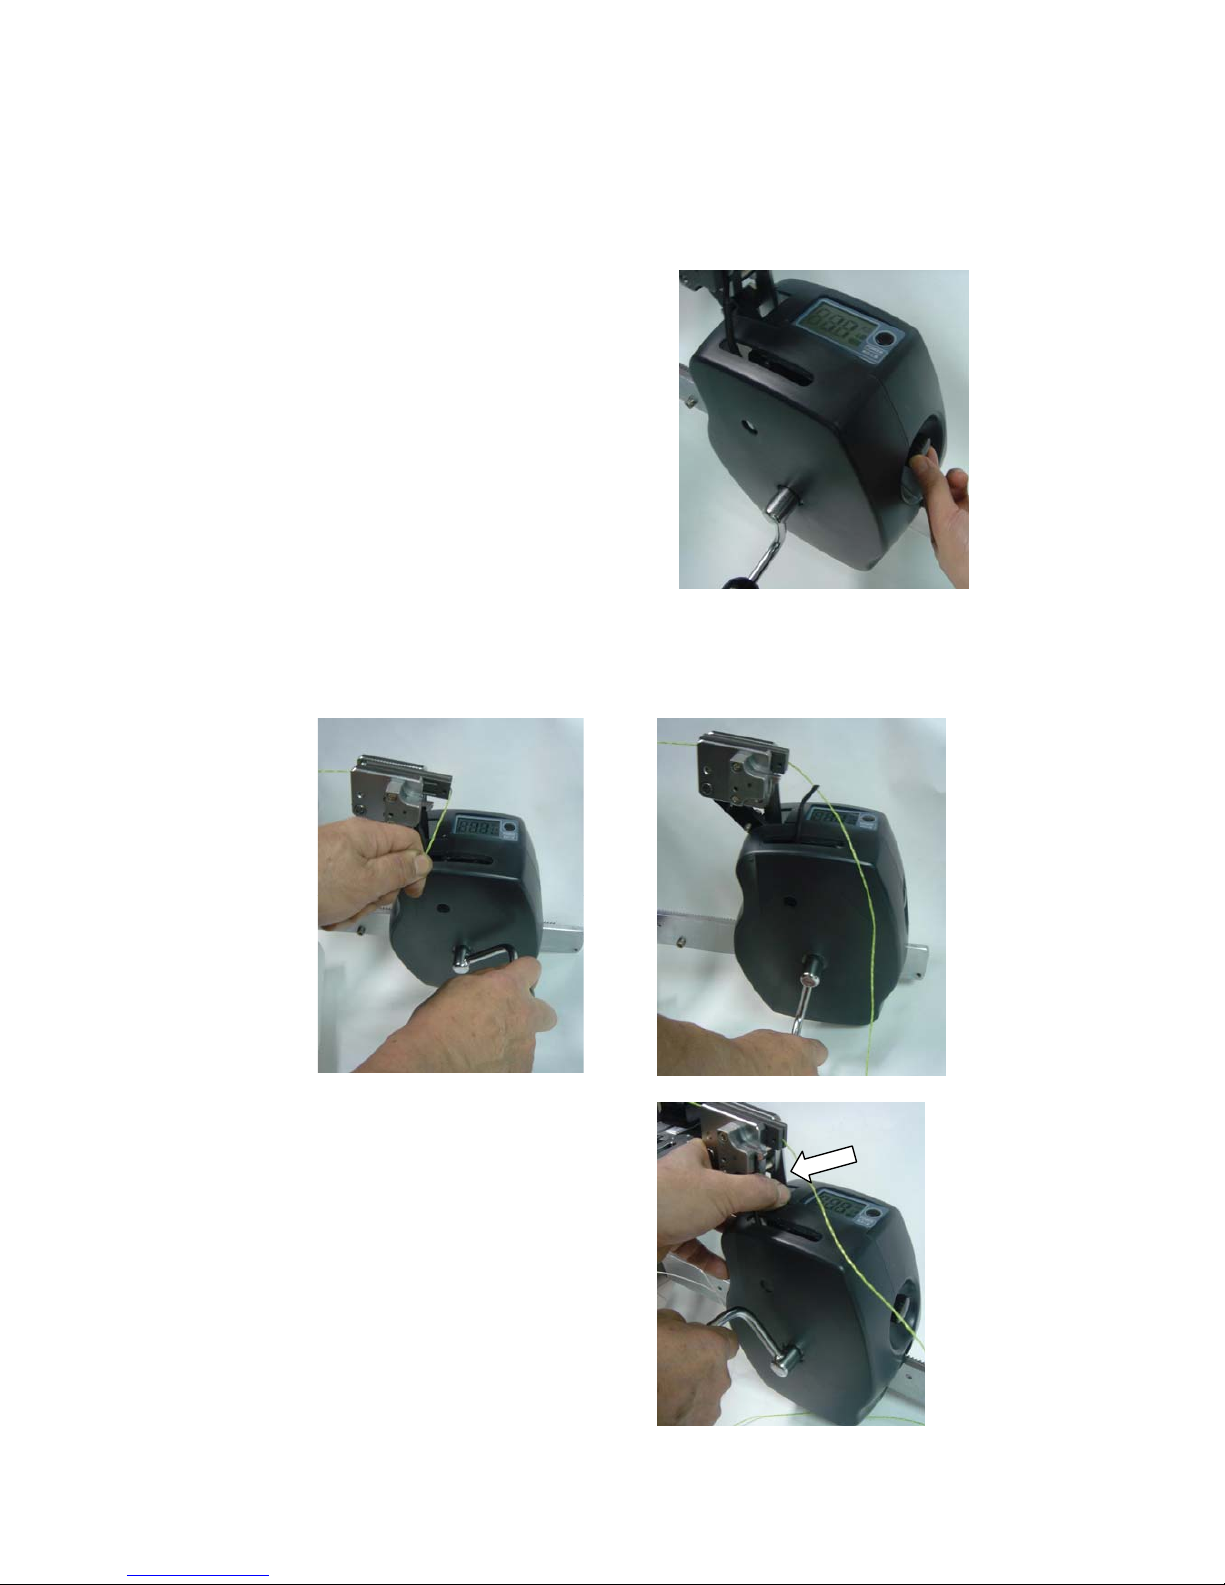
4. Tensioning
Step 1 : Setting Tension
Set the tension by rotating the tension setting knob
counter-clockwise to increase the tension or
clockwise to decrease the tension until the desired
tension appears on the display.
Step 2 : Pulling the Strings
To pull the string, continue rotating the tension head crank/handle backward until the
tension locking lever clicks out. This locks the tension head to the tension rail.
Step 3 : Releasing the Strings
To release the string after clamping,
hold on to tension head and push tension
locking lever back up into the catch on
the tension head. Lift the string out of
the string gripper for the next hole.

4
5. Adjusting the Gliding clamps
If gliding clamp is slipping on glide bar, adjust the
gliding clamp as shown. With one hand grasp clamp
firmly, turn bottom nut on clamp clockwise until clamp
grasps glide bar securely.
6. The Brake
The brake is used primarily when tying knots and when calibrating. The turntable should
turn freely during stringing tensioning to allow proper alignment of the racquet.
7. Tying Knots
Knots normally involve an
anchor string (a string that
is already installed and
tensioned) and a tying
string (a loose string end
that is threaded through the
same hole as the anchor
string and wrapped around
the anchor string in a
self-locking pattern). For
For tight knots, it is also
desirable to use tennis awl
to pull on the string. For
safety, pull down which is
away from your face. Also
for safety, it is advisable to
wear protective eye glasses
while stringing.

5
7. Mounting the Racquet
1. Begin by locating the center of the racquet at the
head and throat. The center is usually indicated by a
mark at the head of racquet.
2. Head hold-down clamp hold tightly for stringing. It
must loosen to allow all supports to touch the
racquet. Please center of the racquet frame on the
side support arm of the head mounting stock. Screw
head hold-down clamp to fix position.
3. Adjust bottom of the throat mounting stock to
ensure the racquet frame is parallel to the frame
stand (vertical adjustment). Lock into position with
Allen wrench.
4. Adjust top of the throat mounting stock to
accommodate various sized frames (horizontal
adjustment) and lock into position with Allen
wrench.
5. Insert throat hold down clamp into hole and press
the silver button with left hand. Fasten the throat
hold-down clamp into position. Check frame
positioned securely again by tightening up both the
head hold-down clamp and throat hold-down
clamp.
Racquet is now mounted securely

6
8. Racquet Patterns
Each racquet has a stringing pattern that is specified by the racquet manufacturer
.
You need to check with racquet manufacture for your racquet either by racquet’s
manual or manufacture’s web site or call manufacture for assistance.
To interpret stringing patterns correctly, it is important to know what each part
racquet is called. The tip of racquet is know as the “HEAD” and is referred to as “H” in
stringing patterns. The bottom of the racquet head is known as the “THROAT” and is
referred to as “T” in patterns. The strings that run from the throat to the head of racquet
are known as the “MAIN” and are referred to as “M” in stringing patterns.
The strings that run from side in the racquet head are known as the “CROSS” and are
referred to as “X” in stringing patterns. The holes in the racquet head are referred to by
number, counting in either direction from the center at the head (e.g. 7H) or the throat
(e.g. 7T).
Patterns Example:
Notice that the stringing pattern for PRINCE Accuracy 110 as patterns example contains
information for one-piece stringing and two-piece stringing. One-piece stringing is the
most common, but it is not always the best. A description of the two methods of stringing
follow along with a few of their advantages and disadvantages. When all is said and done,
both methods yield excellent results. To avoid unwanted stresses, some racquet
manufacturers occasionally specify only one method for stringing some of their frames.

7
One piece stringing is done with a single piece of string that is tied in two places only.
The string is divided into what is known as a "short side" and a "long side". The short
side is used to string the mains on one side of the racquet head, ending in one tie off,
while the long side is used to string the mains on the other side as well as all of the
crosses ending with the other tie off.
ٛ
.+ Two knots take less time than four (but don't worry, tying knots is really easy).
ٛ
.+ String usually comes in one coil and can be used with less cutting this way.
ٛ
.-The same type of string needs to be used for the mains and the crosses.
ٛ
.-The long side of the string is a bit cumbersome when lacing the mains
Two-piece stringing utilizes one piece of string for the mains and another for the crosses.
The piece used for the mains is divided into two equal parts around the center point of the
racquet and is laced symmetrically on both sides of the center point, ending in a tie off at
each end. The crosses are started at one end with a "starting knot", and are weaved to the
other end where they are tied off.
ٛ
.+ Allows the use of different strings for the mains and crosses.
ٛ
.+ Neither piece of string is very long, making it easier to lace the mains.
− Unless the string is packaged as a hybrid, a bit more measuring is necessary.
− Four knots are more intimidating for beginners than two (despite our reassurances).

8
9. Stringing Instruction
1. Stringing normally begins with the
mains at the center of the racquet and
proceeds outward to the sides of the
frame. Measure enough string for the
short side according to the racquet pattern
and form a loop at the head or throat
according to the pattern for the racquet
you are stringing. For two-piece
stringing, the string on each side of the
loop is of equal length.
2. Place a clamp on the loose string on one
side of the loop and tension the string on
the other side. The friction on the string
as it loops the grommet is necessary to
avoid slippage at the clamp. This is a
good time to check the adjustment of the
clamps. They should pinch the string
securely but not excessively. If you see
clamp marks on the strings, reduce the
tight-ness of the clamp by turning the
adjusting screw counterclockwise.
3. Allow the string gripper to come to rest
then clamp the first string with the
available clamp. Put the tensioner in
reverse after clamping the string. Now
tension the other string and move the
clamp that was at the throat to the head.
The thickness of the clamps necessitates
staged placement at the beginning.
Otherwise clamps should be placed as
close to the rim as possible, with
touching it.
4. To minimize stress on the racquet head,
it is desirable to work outward from the
center symmetrically. Rotate the racquet
and lace one string on each side of the
center line then tension and clamp them
one after the other. Take care never to
release tension in the tensioned string
bed. You will have to start from scratch again.

9
5. From this point on things get repetitive for a while. What is important is to lace and
tension one string at a time in alternation on each side of the center line. You don’t
want to miss skipping holes that will be used for crosses (holes 7 and 9 at the head
and throat in this frame). Just between you and us, a dead give away of inexperienced
stringers is that they count their strings at practically every tensioning operation, so if
you have to do it, do it discretely.
6. The pattern tells you where to tie off the short side. Note that there is already a
tensioned string in this hole and that the hole is larger than most other holes to
accommodate two strings. Recognize tie off holes is a valuable skill when a racquet
pattern is not available.
7. Remove the clamps and gliding bars from tray table. Installing the clamps and glide
bars to the tray table in cross way to strung the cross strings. Tension and clamp the
first cross. If you use a different gauge of string for the crosses than the mains you
may need to re-adjust the tightness of the string clamps for the crosses. In general it is
better to start under the first main because the last weave will be over the last main,
making it easier to insert the string in the grommet hole. Be mindful of the fact that
the first and last few crosses do not start in the same orientation (over or under) the
first main they encounter. Note this as you weave the second cross.
8. We are going repeat procedures again: weaving, tensioning and clamping in
successive open holes. This is where good stringing technique is important. On
occasion you will encounter heavy string traffic around holes you need to put a cross
through. Use the tip of an awl to open a passage. Also, when traffic gets heavy do not
allow strings to cross over each other on the outside of the frame.
9. The crosses are often crooked at the end of a string job. Straighten them and then look
carefully at the string bed. Make sure there is no missed weave.

10
10. Tension Calibration
Step 1 :
Set the tension scale on 60 lbs. Place a string attached to a tension calibrator in string
gripper. Tension calibrator will indicate the pounds of tension on tension head under
actual stringing conditions. Pull string until the locking lever releases. If it releases
before 60 lbs or after 60 lbs., the following adjustment is needed. CAUTIION:
Be sure to release string holding tension calibrator. You are now ready for adjustment.
Step 2 :
Loosen the safety screw A. If the locking lever release before 60 lbs., turn the
adjustment screw B counterclockwise until the scale reading matches the calibrator’s;
if the locking lever release after 60 lbs., turn the adjustment screw B clockwise.
WARNING: Be sure to tighten the safety screw A after the adjustment has been made.

11
11. Maintenance
Adjustment of Glide Bars
When glide bars will not slide smoothly, adjustment of glide bars is necessary.
First, check whether or not the slides are parallel to each other, if not, loosen
screws under the slides. Adjust the slides to make sure that they are parallel.
If this doesn’t solve the problem, loosen screws underneath the tray table and
adjust the rail. There should be a 0.01 to
0.02 mm end clearance between the slide and rail so that glides will move
freely.
Lubricating the machine
Use a modest application of light machine oil on the rail to ensure free
movement of slide and rail. Also use a small amount of light machine oil
on bearing wheels as required. WARNING: do not lubricate the brake
Cleaning the machine
Glide bars and clamps must be kept free of wax to prevent slippage. Use
alcohol or light, nonabrasive cleaning detergent to remove wax built-up and
dirt from the glide bars and attaching areas of the string clamps.
WARNING: Do not use sandpaper or any other abrasive material on the
glide bars and attaching area of the string clamps.
 Loading...