

Page 1
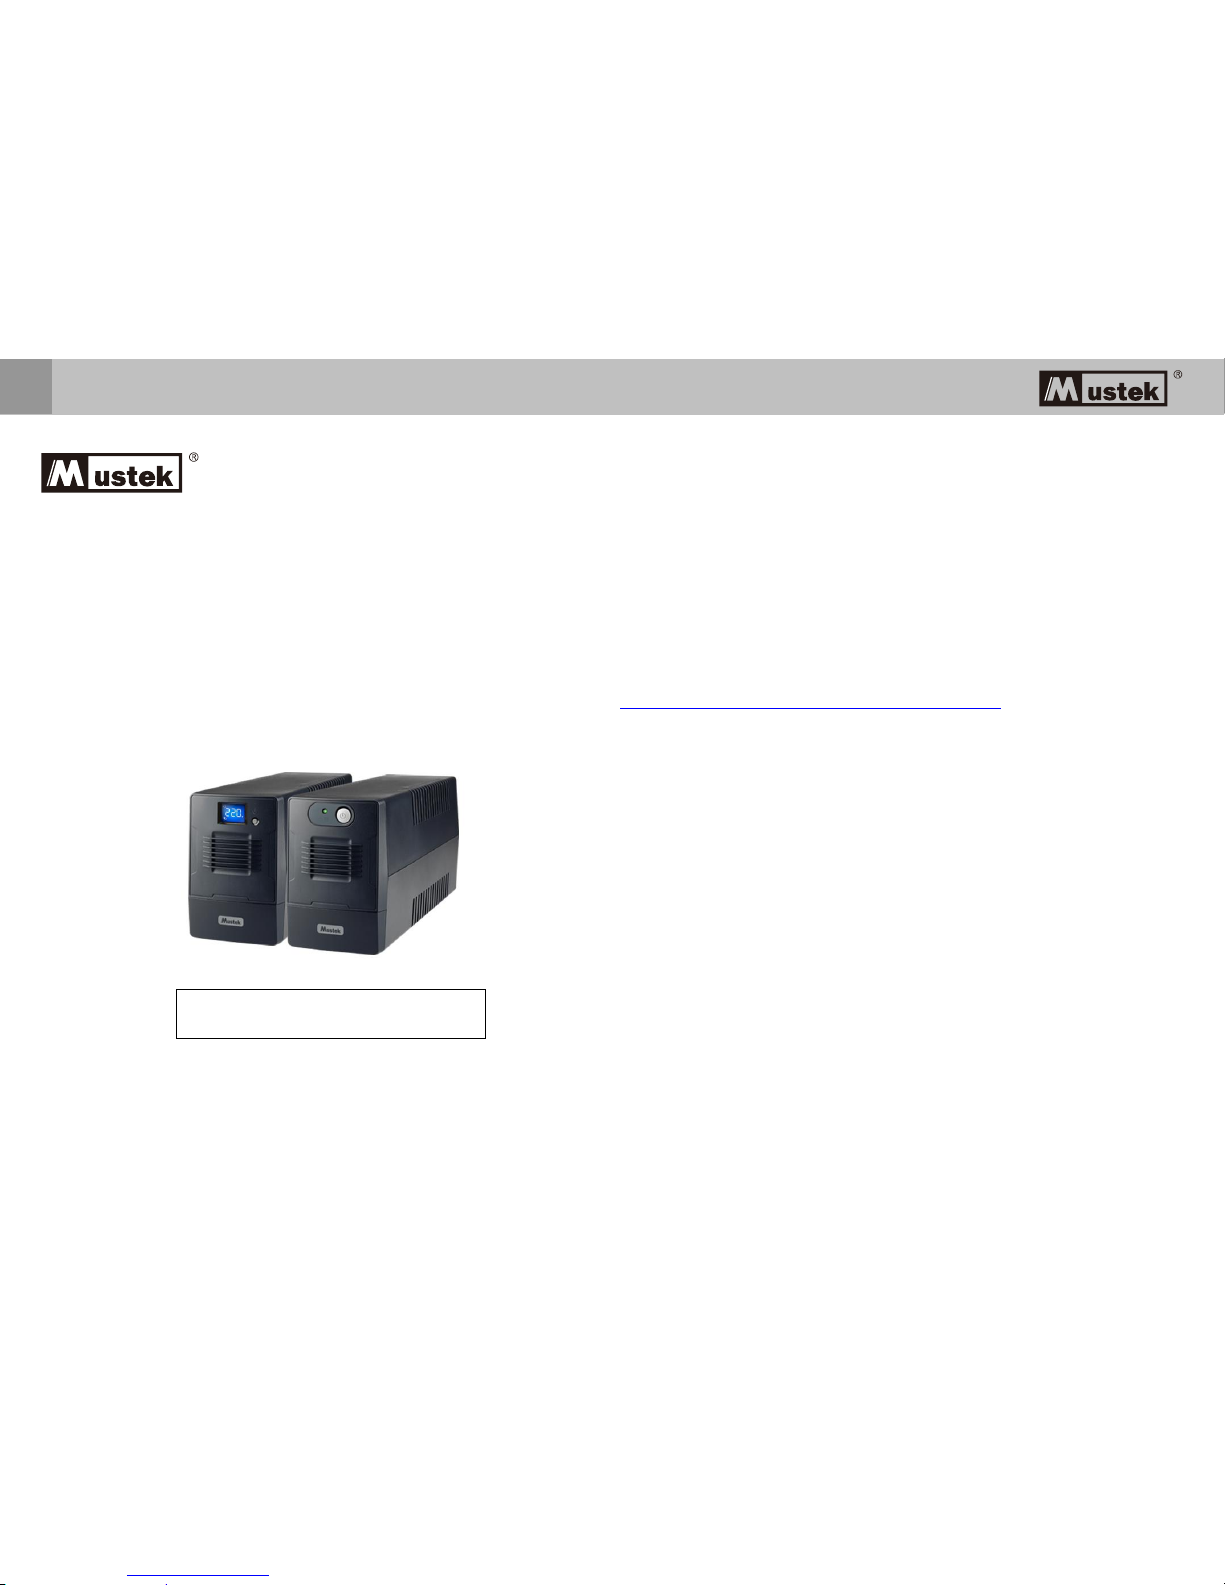
User Manual
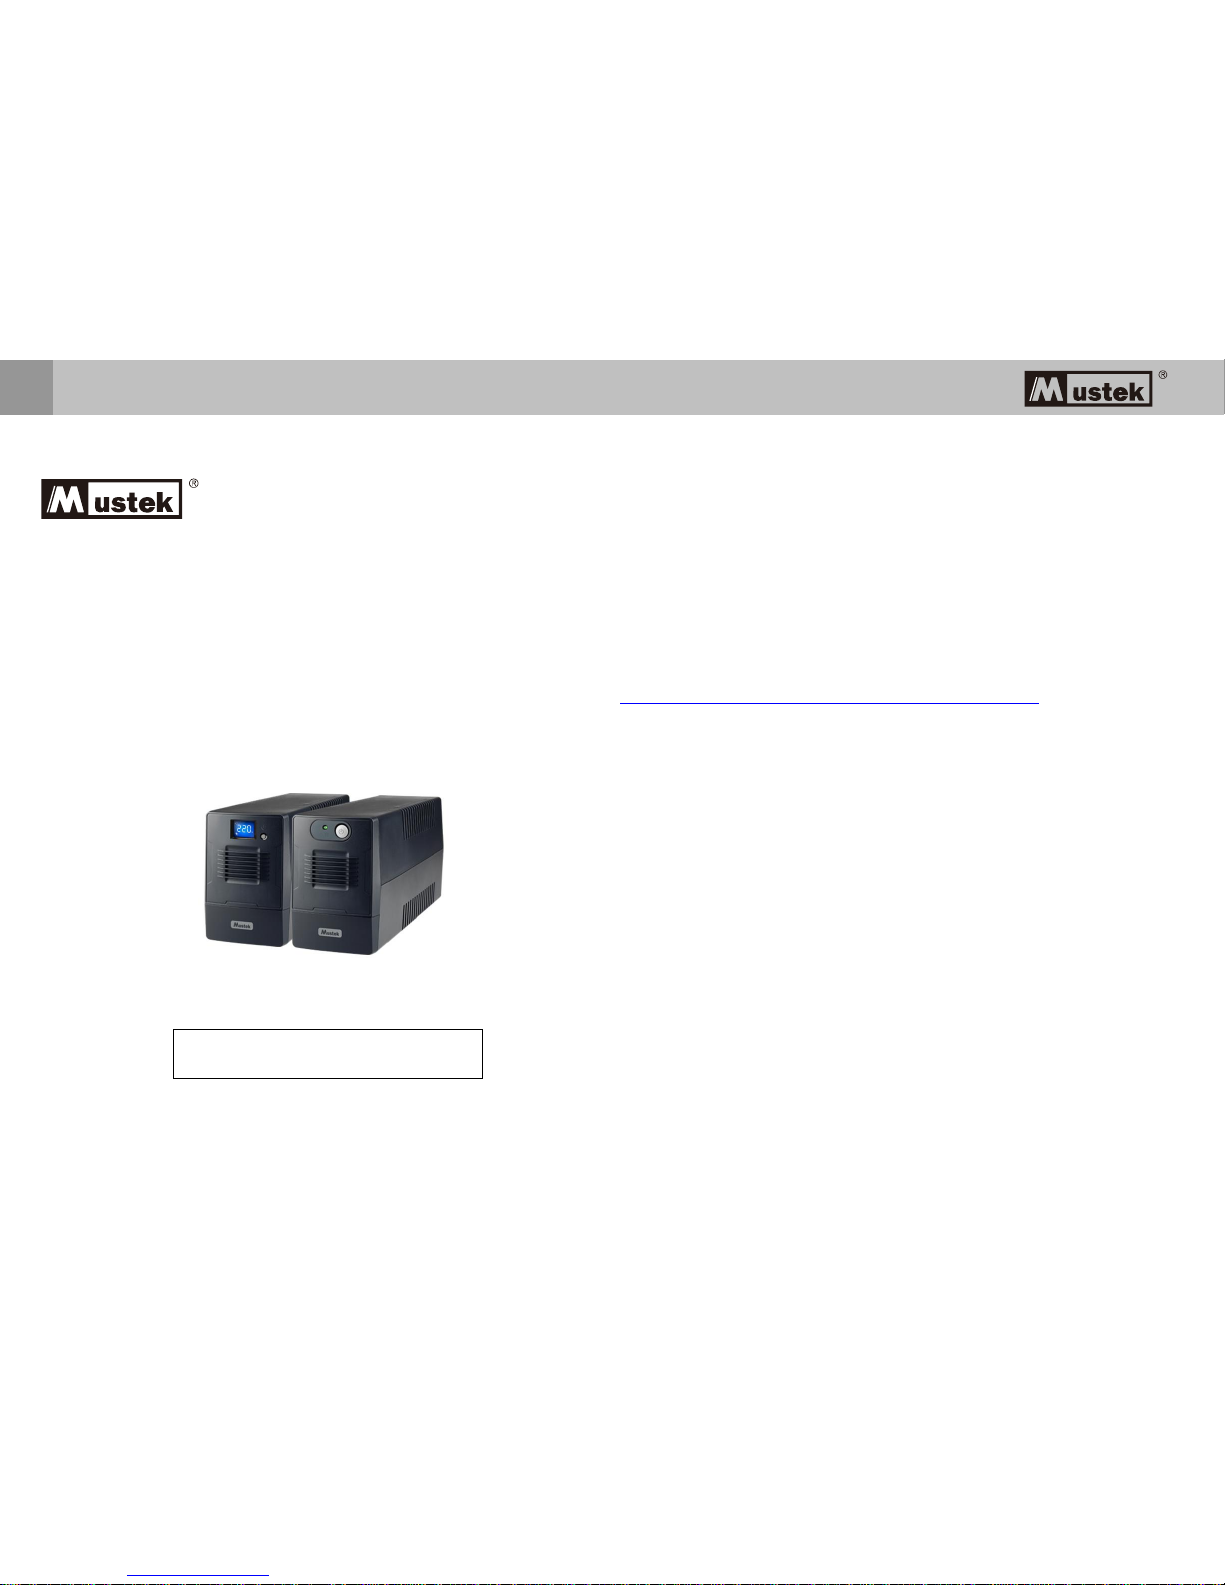
Line Interactive UPS
Warranty & Service Information
Thanks for buying this Mustek UPS product.
Please follow the instructions in the product manual and if applicable the
software installation manual, to have the maximum use of your product.
Installing the software:
If you product comes with software you will find a CD Rom in the box containing
the software.
Please follow the instructions when installing the software.
You can download the software, manual and short reference manual at the
following site:
http://www.power-software-download.com/viewpower.html
Warranty:
As a manufacturer we provide a minimum of 1 year warranty on our product.
However for the exact warranty period and the warranty terms you should
contact your reseller as both the warranty period and the terms may vary per
Country / Region.
Problem solving:
Please check the chapter in your manual (hardware and software) on problem
solving.
Additionally:
Please check our website (www.Mustek.eu) regularly for updates of the software
as well as Frequent Asked Questions (FAQ).
If this not solve your problem please contact your reseller for advice.
Service and Maintenance:
If the product requires service or maintenance in the warranty period always
contact your reseller for the procedures. If outside the warranty period we advise
you to contact your reseller as well. In any case always make sure that service or
maintenance on the product are performed by a qualified technician.
User Manual
EN
WARNING: This is a category C2 UPS product. In a residential environment,
this product may cause radio interference, in which case the user many be
required to take additional measures.
Page 2

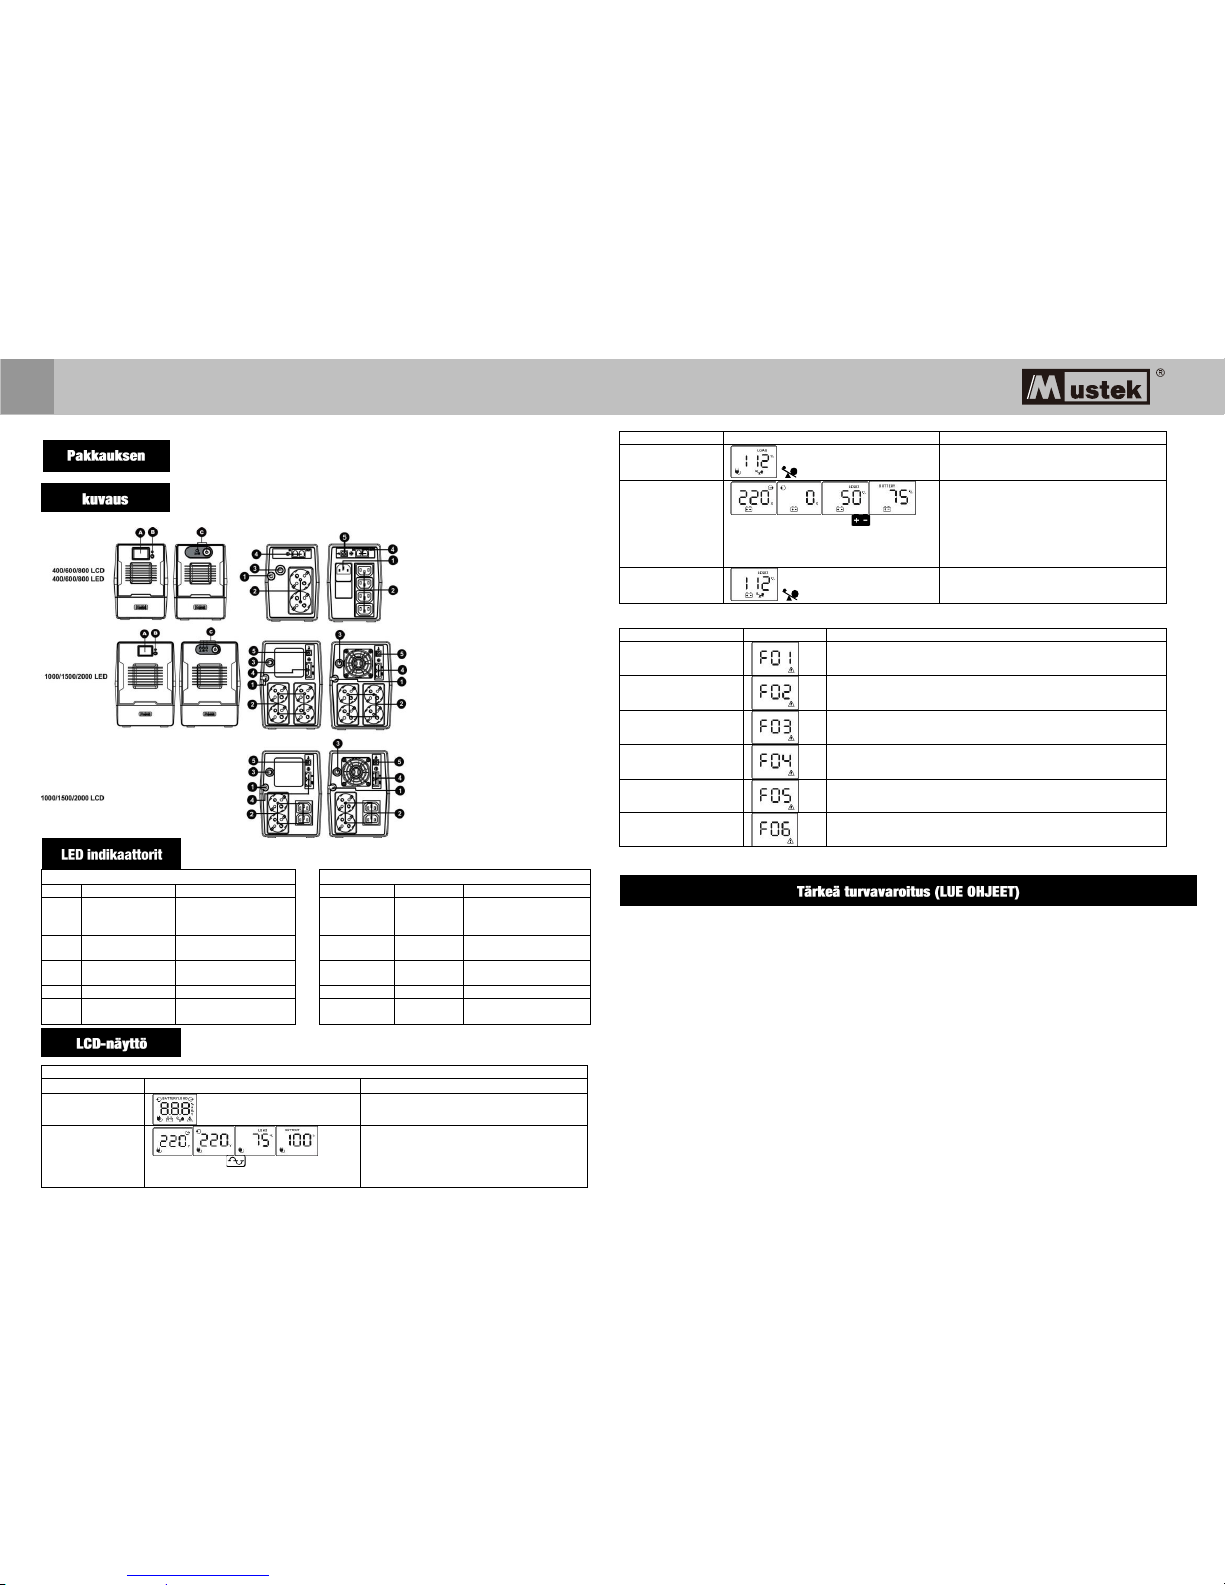
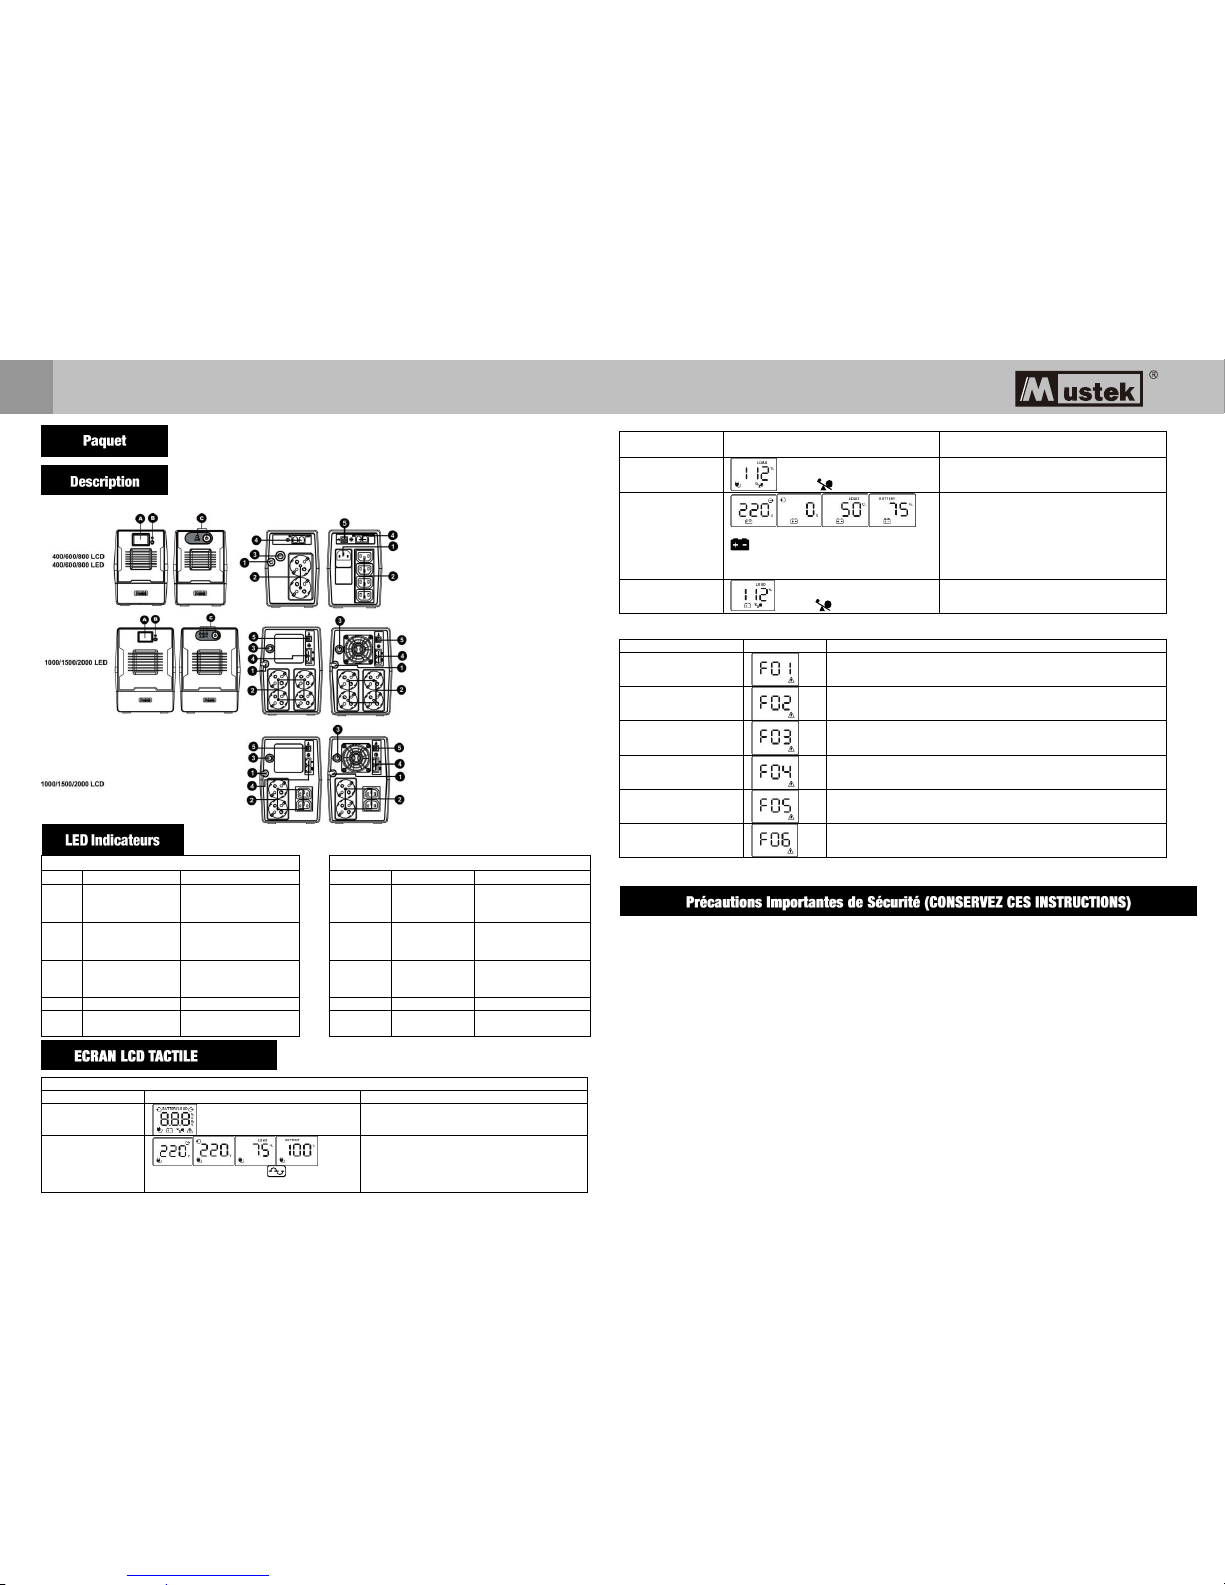
You should have received the following items inside of package:
- UPS Unit - Quick Guide - Warranty card
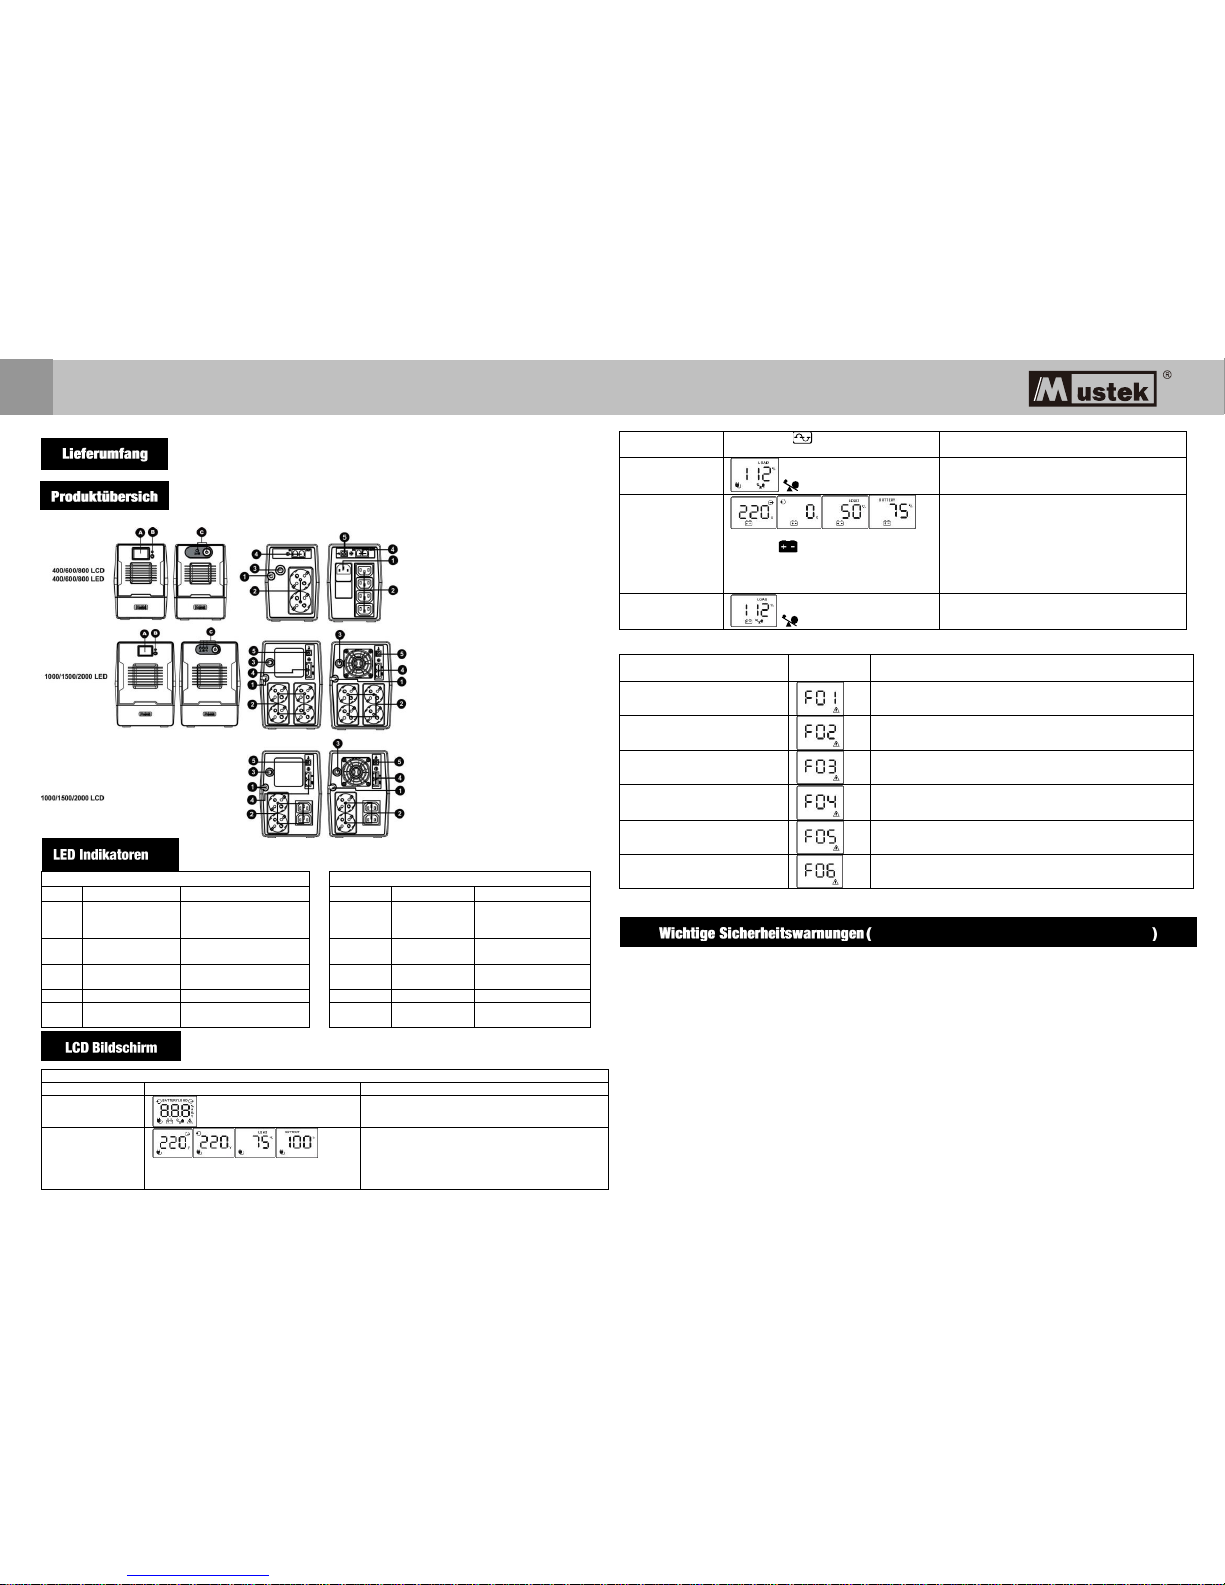
Front Panel Overview: Rear Panel Overview:
400VA/600VA/800VA
1000VA/1500VA/2000VA
LED
Alarm
UPS Status
LED
Alarm
UPS Status
●
Off
The mains is normal
and UPS is operated
normally.
●Green
Off
The mains is normal
and UPS is operated
normally.
★
Sounding every
10 seconds
Power failure occurs
and UPS is on battery
mode.
★Yellow
Sounding
every 10
seconds
Power failure occurs
and UPS is on battery
mode.
★
Sounding every
second
Low battery
★Yellow
Sounding
every second
Low battery
○
Off
UPS is off.
○Green
Off
UPS is off.
●
Continuously
sounding
UPS fault
●Red
Continuously
sounding
UPS fault
●LED on ○ LED Off ★ LED flashing
Operation Display
UPS Mode
LCD
Description
UPS Power on
When UPS is powered on, it will enter this
mode for 4 seconds.
AC Mode
When AVR is functioning, icon will flash
every second.
LCD information will be displayed in the
following order when LCD is touched.
1. Output voltage
2. Input voltage
3. Load level
4. Battery capacity
Overload in AC
mode
icon will flash.
When overload occurs, alarm will beep every
0.5 second.
Battery Mode
When battery level is low, icon will
flash.
Alarm will beep every 10 seconds and LCD
information will be displayed in the following
order when LCD is touched.
1. Output voltage
2. Input voltage
3. Load level
4. Battery capacity
Overload in battery
mode
icon will flash.
When overload occurs, alarm will beep every
0.5 second.
NOTE: If backlight shuts off, you may activate it by touching the screen.
Fault Code Table:
Fault condition
LCD
Solutions
Output short circuited
Disconnect short-circuited loads and restart the UPS again.
Overload fault
Disconnect all output loads and restart the UPS again.
Overcharge
Call for service immediately.
Bad or severely
discharged battery
Please replace the battery.
High output voltage
fault
Call for service immediately.
Over-temperature
1. Turn off the unit and wait for cooling.
2. Or remove excessive loads and wait for cooling.
If fault alarm occurs, please call for service immediately.
CAUTION! To prevent the risk of fire or electric shock, install in a temperature and humidity controlled
indoor area free of conductive contaminants. (See the specifications for the acceptable temperature and
humidity range.)
CAUTION! To reduce the risk of overheating the UPS, do not cover the UPS's cooling vents and avoid
exposing the unit to direct sunlight or installing the unit near heat emitting appliances such as space
heaters or furnaces.
CAUTION! Do not attach non-computer-related items, such as medical equipment, life-support equipment,
microwave ovens, or vacuum cleaners to UPS.
CAUTION! Do not plug the UPS input into its own output.
CAUTION! Do not allow liquids or any foreign object to enter the UPS. Do not place beverages or any other
liquid-containing vessels on or near the unit.
CAUTION! In the event of an emergency, press the OFF button and disconnect the power cord from the AC
power supply to properly disable the UPS.
CAUTION! Do not attach a power strip or surge suppressor to the UPS.
CAUTION! With the installation of this equipment, it should be prevented that the sum of the leakage current
of the UPS to the connected consumer exceeds 3.5mA.
User Manual
LCD Display
Power switch
Power switch with LED
indicator
AC input
Output receptacles
Circuit breaker
RJ-11
USB (optional)
RJ-45 (optional)
EN
EN
Page 3
4 hours
CAUTION: NEVER connect a laser printer or scanner to the UPS unit. This may
cause the damage of the unit.
Attention hazardous through electric shock. Also with disconnection of this unit from the mains, hazardous
voltage still may be accessible through supply from battery. The battery supply should be therefore
disconnected in the plus and minus pole at the quick connectors of the battery when maintenance or service
work inside the UPS is necessary.
CAUTION! Servicing of batteries should be performed or supervised by personnel knowledgeable of batteries
and the required precautions. Keep unauthorized personnel away from batteries.
CAUTION! When replacing the batteries, use the same number and type of batteries.
CAUTION! Internal battery voltage is 12VDC. Sealed, lead-acid, 6-cell battery.
CAUTION! Do not dispose of batteries in a fire. The battery may explode. Do not open or mutilate the battery
or batteries. Released electrolyte is harmful to the skin and eyes.
CAUTION! Unplug the UPS prior to cleaning and do not use liquid or spray detergent.
CAUTION! A battery can present a risk of electric shock and high short circuit current. The following precaution
should be observed before replacing batteries:
1) Remove watches, rings, or other metal objects.
2) Use tools with insulated handles.
3) Wear rubber gloves and boots.
4) Do not lay tools or metal parts on top of batteries.
5) Disconnect charging source prior to connecting or disconnecting batteries terminal.
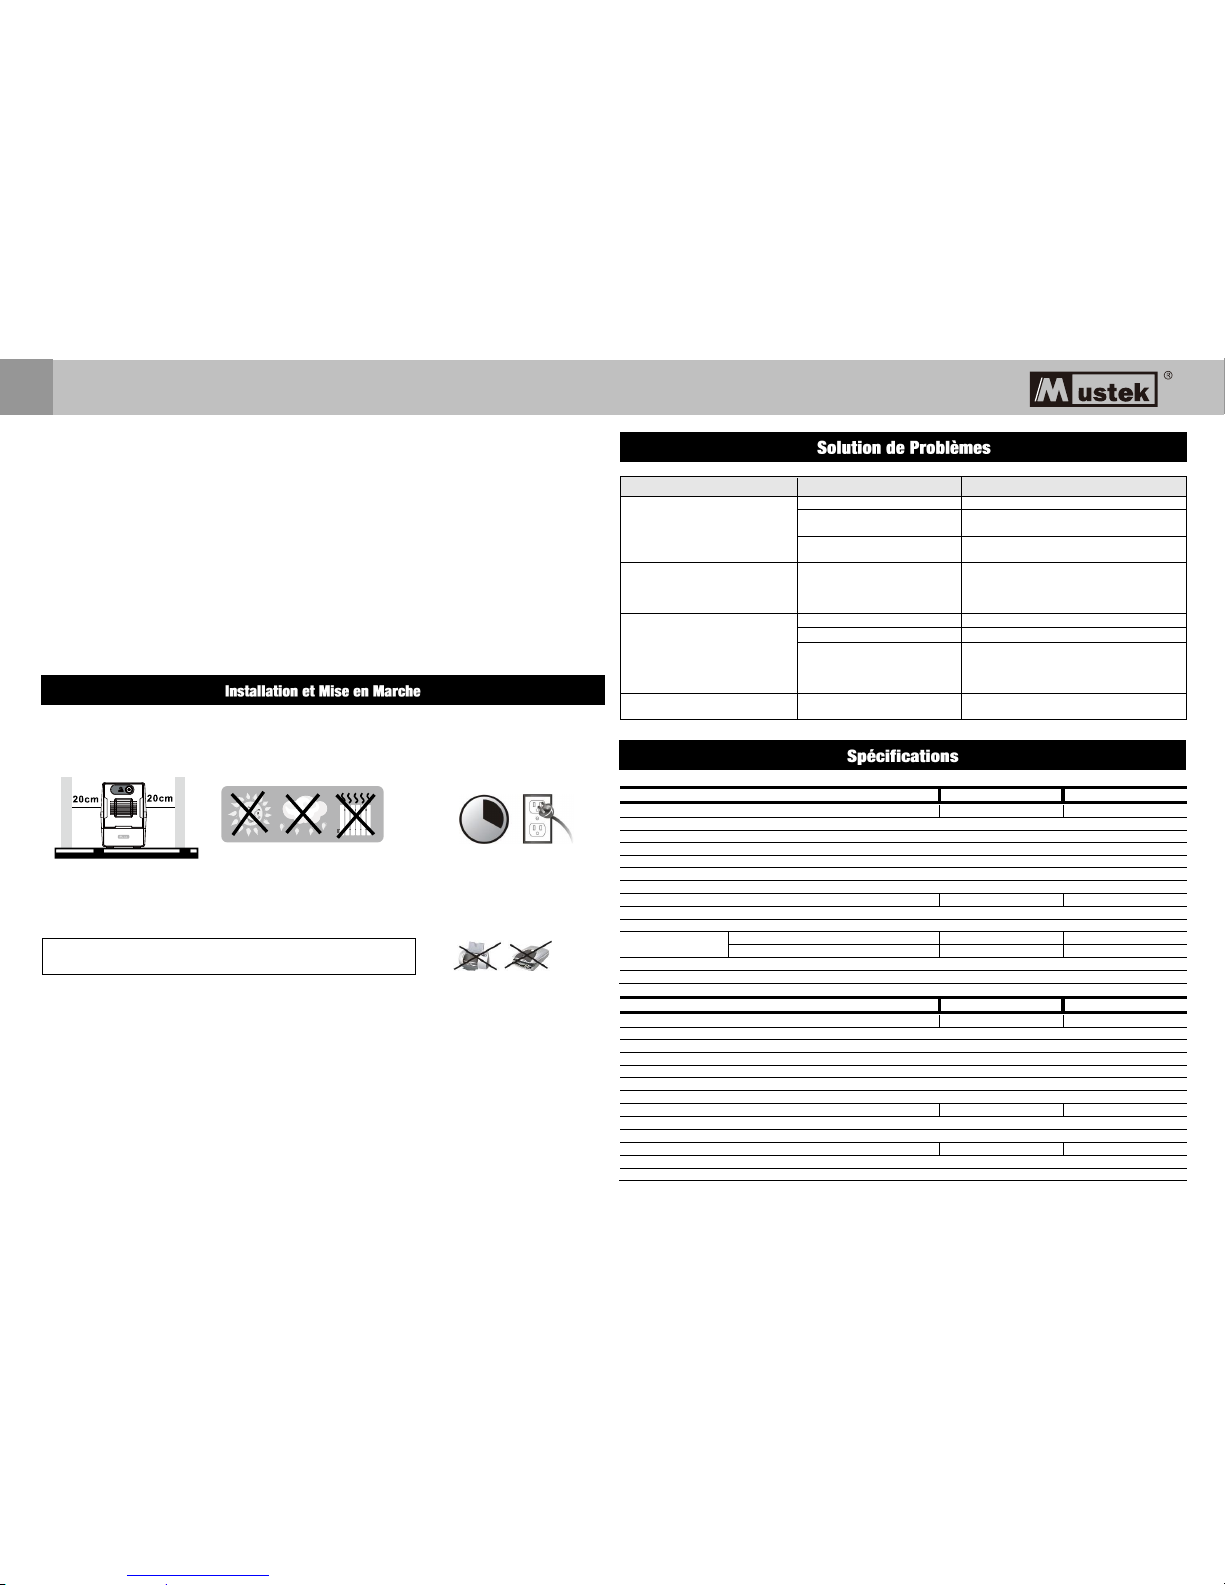
Before installation, please make sure nothing inside of package is damaged. To protect your equipment
from power failure, be sure that power switch must be kept in the “ON” position. Following below steps to
install your UPS unit.
❶
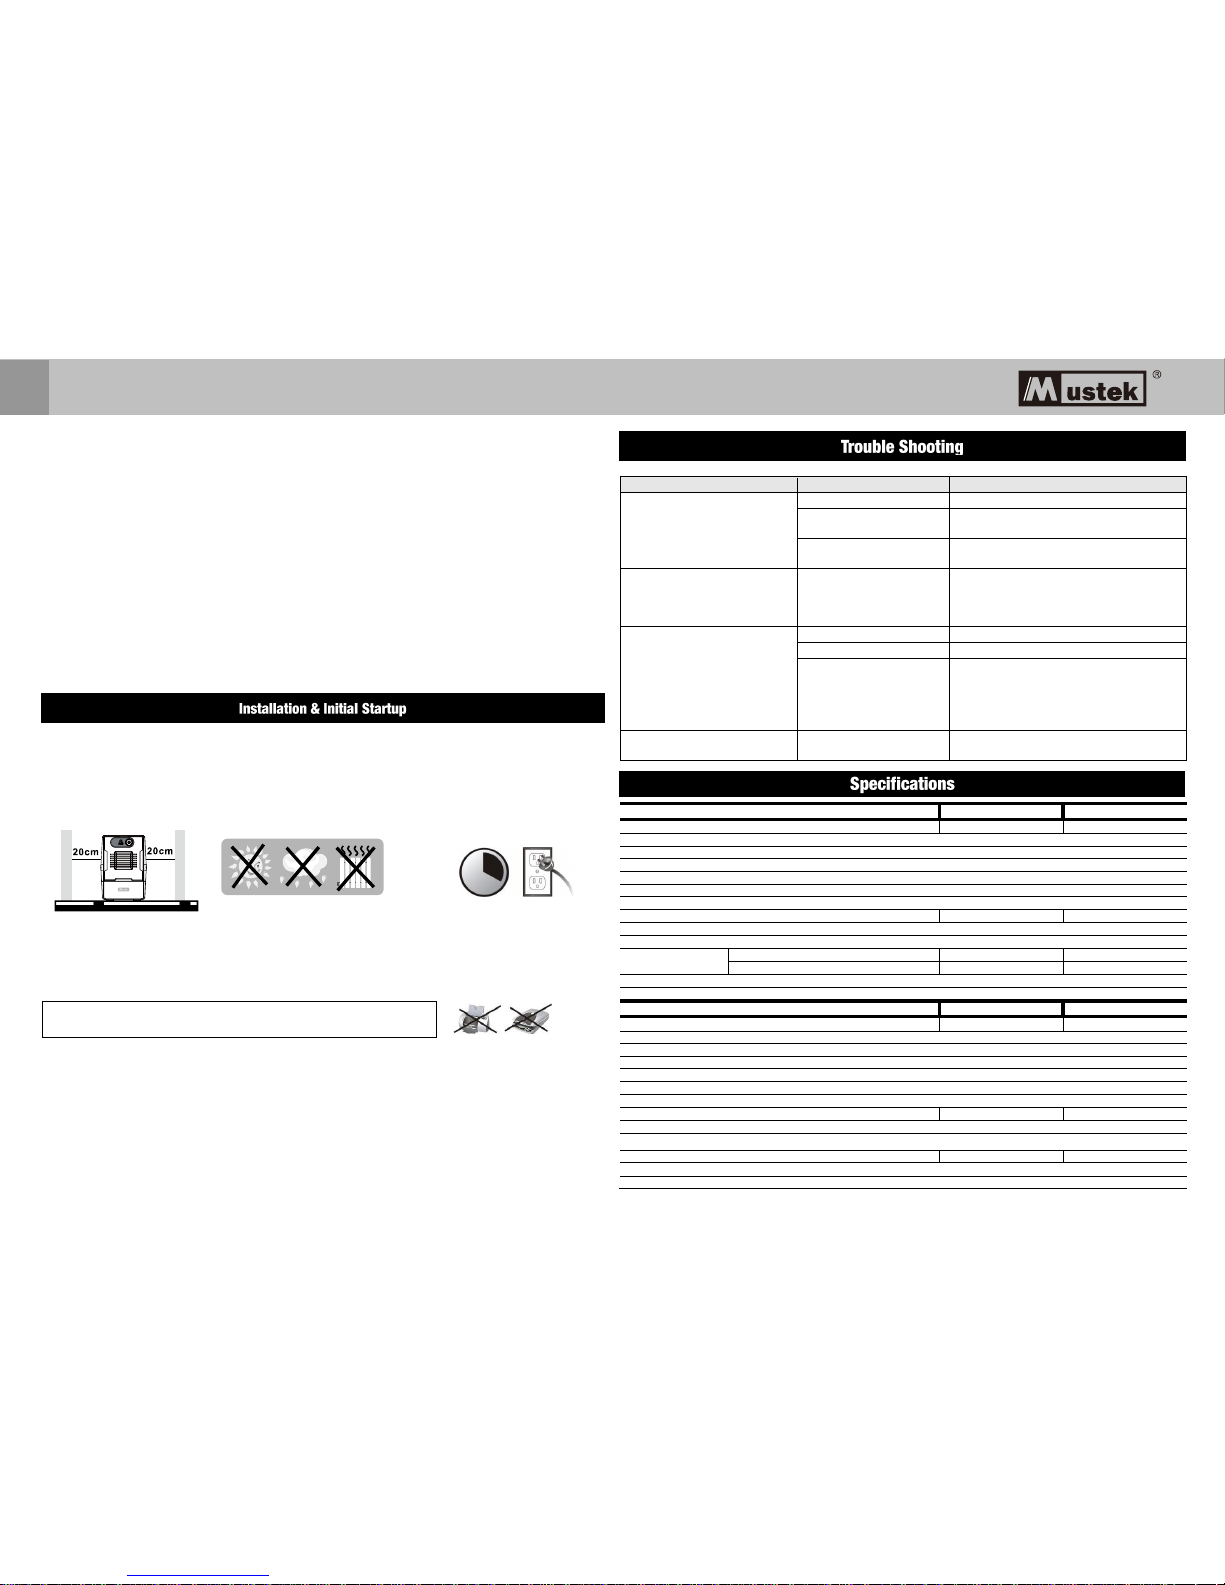
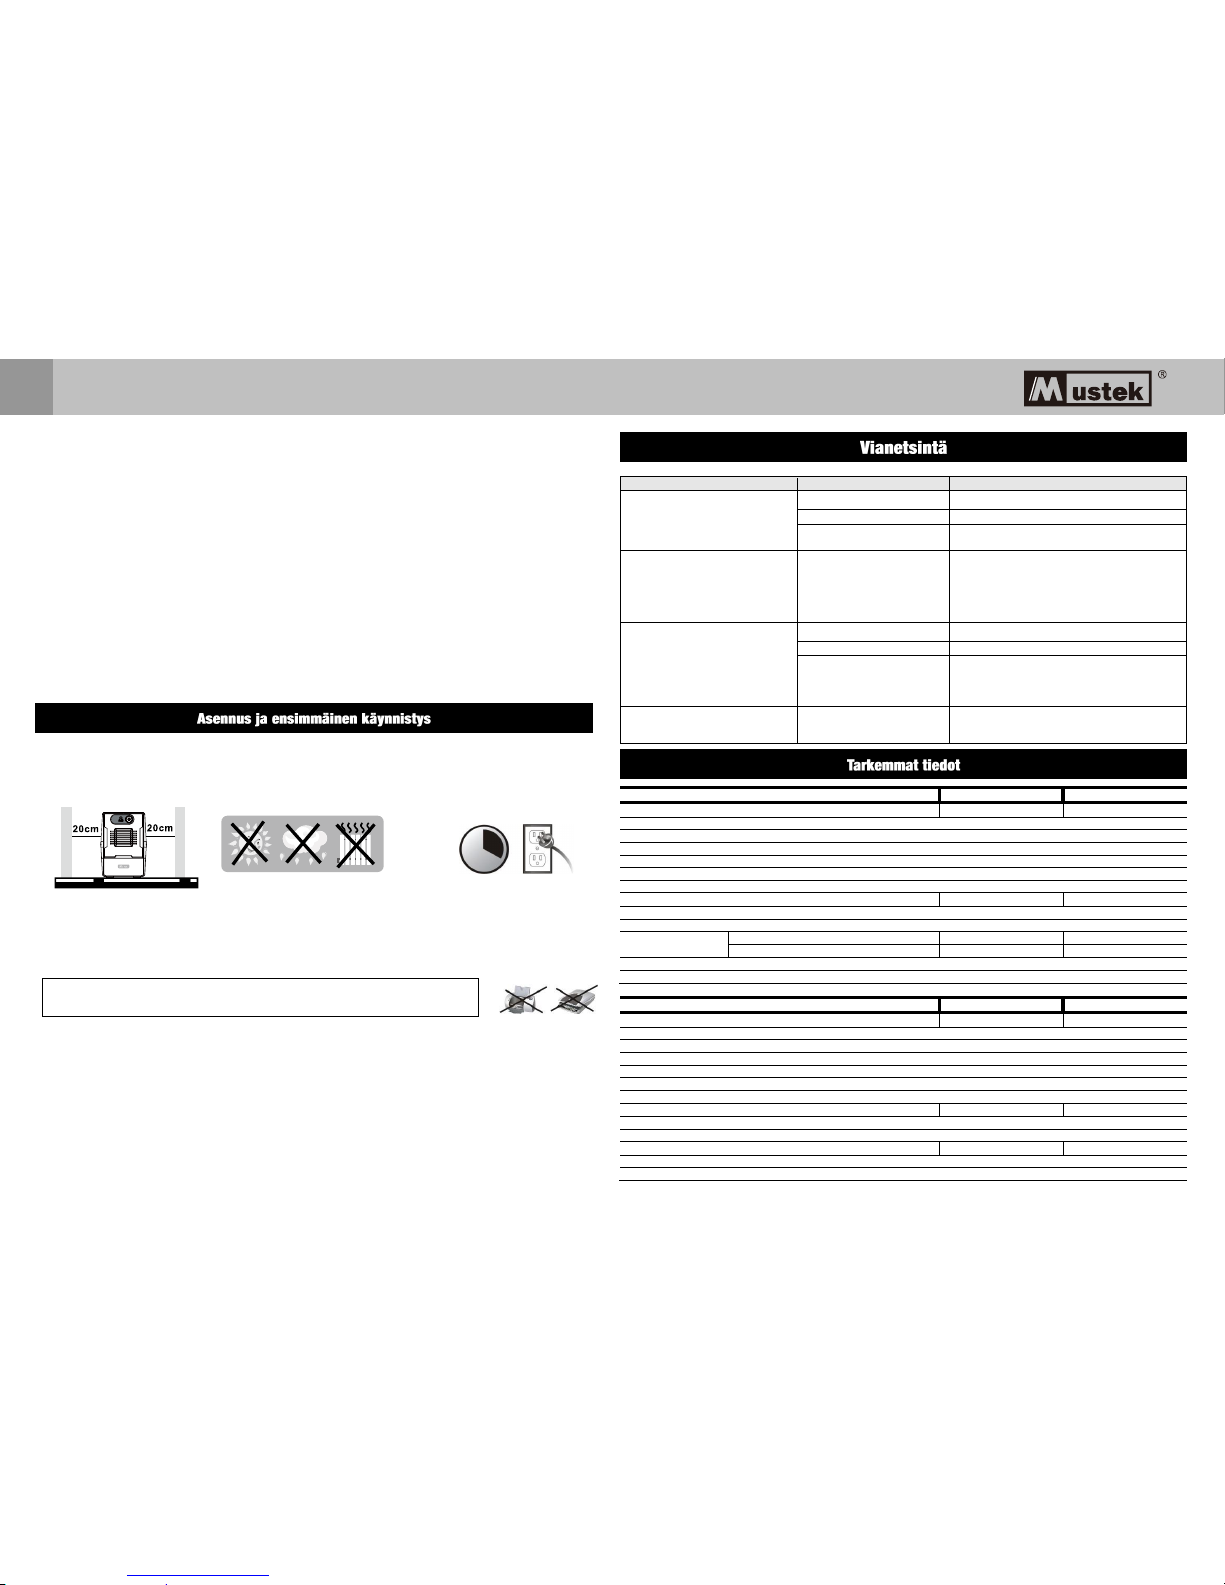
Placement & Storage Conditions
Install the UPS in a protected area that is free of excessive dust and has adequate air flow. Please place the
UPS away from other units at least 20 cm to avoid interference. Do NOT operate the UPS where the
temperature and humidity is outside the specific limits. (Please check the specs for the limitations.)
❷
Connect to Utility and Charging
Plug in the AC input cord to the wall outlet. For the best results, suggest to charge the battery at least 4 hours
before initial use. The unit charges its battery while connecting to the utility.
❸
Connect the Loads
Plug in the loads to output receptacles on the rear panel of the UPS. Simply turn on the power switch of UPS
unit, then devices connected to the UPS will be protected by UPS unit.
❹Connect Modem/Phone/Network for Surge Protection (Only for the model with RJ-11/RJ45)
Connect a single modem/phone line into surge-protected “IN” outlet on the back panel of the UPS unit. Connect
from “OUT” outlet to the computer with another phone line cable.
❺Connect Com. Port and Install Software (only for the model with RS-232/USB port)
To enable remote UPS shutdown/start-up and status monitoring, connect the communication cable from the
USB/RS-232 port and the other to the communication port of your PC. With the monitoring software installed,
you can schedule UPS shutdown/start-up and monitor the UPS status.
❻
Turn On/Off the Unit
Turn on the UPS unit by pressing the power switch. Turn off the UPS unit by pressing again the power switch.
MODEL
400
600
800
CAPACITY
400VA/240W
600VA/360W
800VA/480W
Input Voltage
220/230/240VAC
Input Voltage Range
162-290 VAC
Output Voltage Regulation
± 10 % (Bat. mode)
Frequency Range (Batt. Mode)
50Hz +/-1 Hz
Transfer Time
Typical 2-6 ms
Waveform
Simulated Sine Wave
Battery Type & No
12V/4.5Ahx1
12V/7Ahx1
12V/9Ahx1
Charging Time
4-6 hours recover to 90% capacity
Dimension (DxWxH) mm
LED: 279 x 101 x 142 / LCD: 300 x 101 x 142
Net Weight (kgs)
LED
3.55
4.2
4.9
LCD
3.7
4.4
5.0
Humidity
0-90% RH @ 0-40°C non-condensing)
Noise Level
Less than 40dB
MODEL
1000
1500
2000
CAPACITY
1KVA/600W
1.5KVA/900W
2KVA/1200W
Input Voltage
220/230/240VAC
Input Voltage Range
162-290 VAC
Output Voltage Regulation
± 10 % (Bat. mode)
Frequency Range (Batt. Mode)
50Hz +/-1 Hz
Transfer Time
Typical 2-6 ms
Waveform
Simulated Sine Wave
Battery Type & No
12V/7Ah x 2
12V/9Ah x 2
12V/9Ah x 2
Charging Time
4-6 hours recover to 90% capacity
Dimension (DxWxH)
320 x 130 x 182
Net Weight (kgs)
8.2
10.4
11
Humidity
0-90% RH @ 0-40°C (non-condensing)
Noise Level
Less than 40dB
Problem
Possible Cause
Solutions
No LED display on the front
panel.
Low battery.
Charge the UPS at least 6 hours.
Battery fault.
Replace the battery with the same type of
battery.
The UPS is not turned on.
Press the power switch again to turn on
the UPS.
Alarm continuously
sounds when the
mains is normal.
The UPS is overload.
Remove some loads first. Before
reconnecting equipment, please verify
that the load matches the UPS capability
specified in the specs.
When power fails, back-up time
is shorten.
The UPS is overload.
Remove some critical load.
Battery voltage is too low.
Charge the UPS at least 6 hours.
Battery defect. It might
be due to high
temperature operation
environment, or improper
operation to battery.
Replace the battery with the same type of
battery.
The mains is normal but the
unit is on battery mode.
Power cord is loose.
Reconnect the power cord properly.
User Manual
EN
Page 4

Benutzerhandbuch
Line Interactive UPS
Garantie & Service-Informationen
Vielen Dank, dass Sie sich für den Kauf eines Mustek UPS entschieden haben.
Bitte folgen Sie den Anweisungen im Handbuch und ggf. der
Software-Installationsanleitung, damit Sie die maximale Nutzung des Produkts zu
haben.
Installation der Software:
Wenn Ihr Produkt mit Software bedienbar ist, erhalten Sie eine CD-ROM in dem
Lieferumfang.
Bitte folgen Sie den Anweisungen, wenn Sie die Software installieren.
Sie können auch auf der folgenden Website die Software und Handbuch
herunterladen:
http://www.power-software-download.com/viewpower.html
Garantie:
Als Hersteller bieten wir mindestens 1 Jahr Garantie auf unser Produkt.
Doch für die genaue Garantiefrist und Garantiebedingungen sollten Sie Ihren
Händler kontaktieren, weil die Garantiezeit und die Bedingungen pro Land /
Region variieren können.
Problemlösung:
Ü berprüfen Sie bitte das Kapitel in Ihrem Handbuch (Hardware und Software) auf
Problemlösung.
Zusätzlich:
Bitte besuchen Sie unsere Website (www.Mustek.eu) regelmäßig und prüfen Sie
die Softwareupdates sowie Häufig gestellte Fragen (FAQ).
Wenn dies nicht Ihr Problem löst, fragen Sie Ihren Händler um Rat.
Service und Wartung:
Wenn Sie die Garantie oder Wartung in der Garantiezeit in Anspruch nehmen
müssen, wenden Sie sich immer an Ihren Händler. Außerhalb der Garantiezeit
raten wir Ihnen sich ebenfalls an Ihren Händler zu wenden um weitere
Informationen zu erhalten. Auf jeden Fall immer darauf achten, dass Service oder
Wartung des Produktes von einem qualifizierten Techniker durchgeführt werden.
Benutzerhandbuch
DE
WARNUNG: Dies ist eine USV der Klasse C2. In Wohnansiedlungen kann
dieses Erzeugnis Funkstörungen hervorrufen, dann muss der Benutzer
zusätzliche Maßnahmen ergreifen.
Page 5
Bitte diese Anweisungen aufbewahren
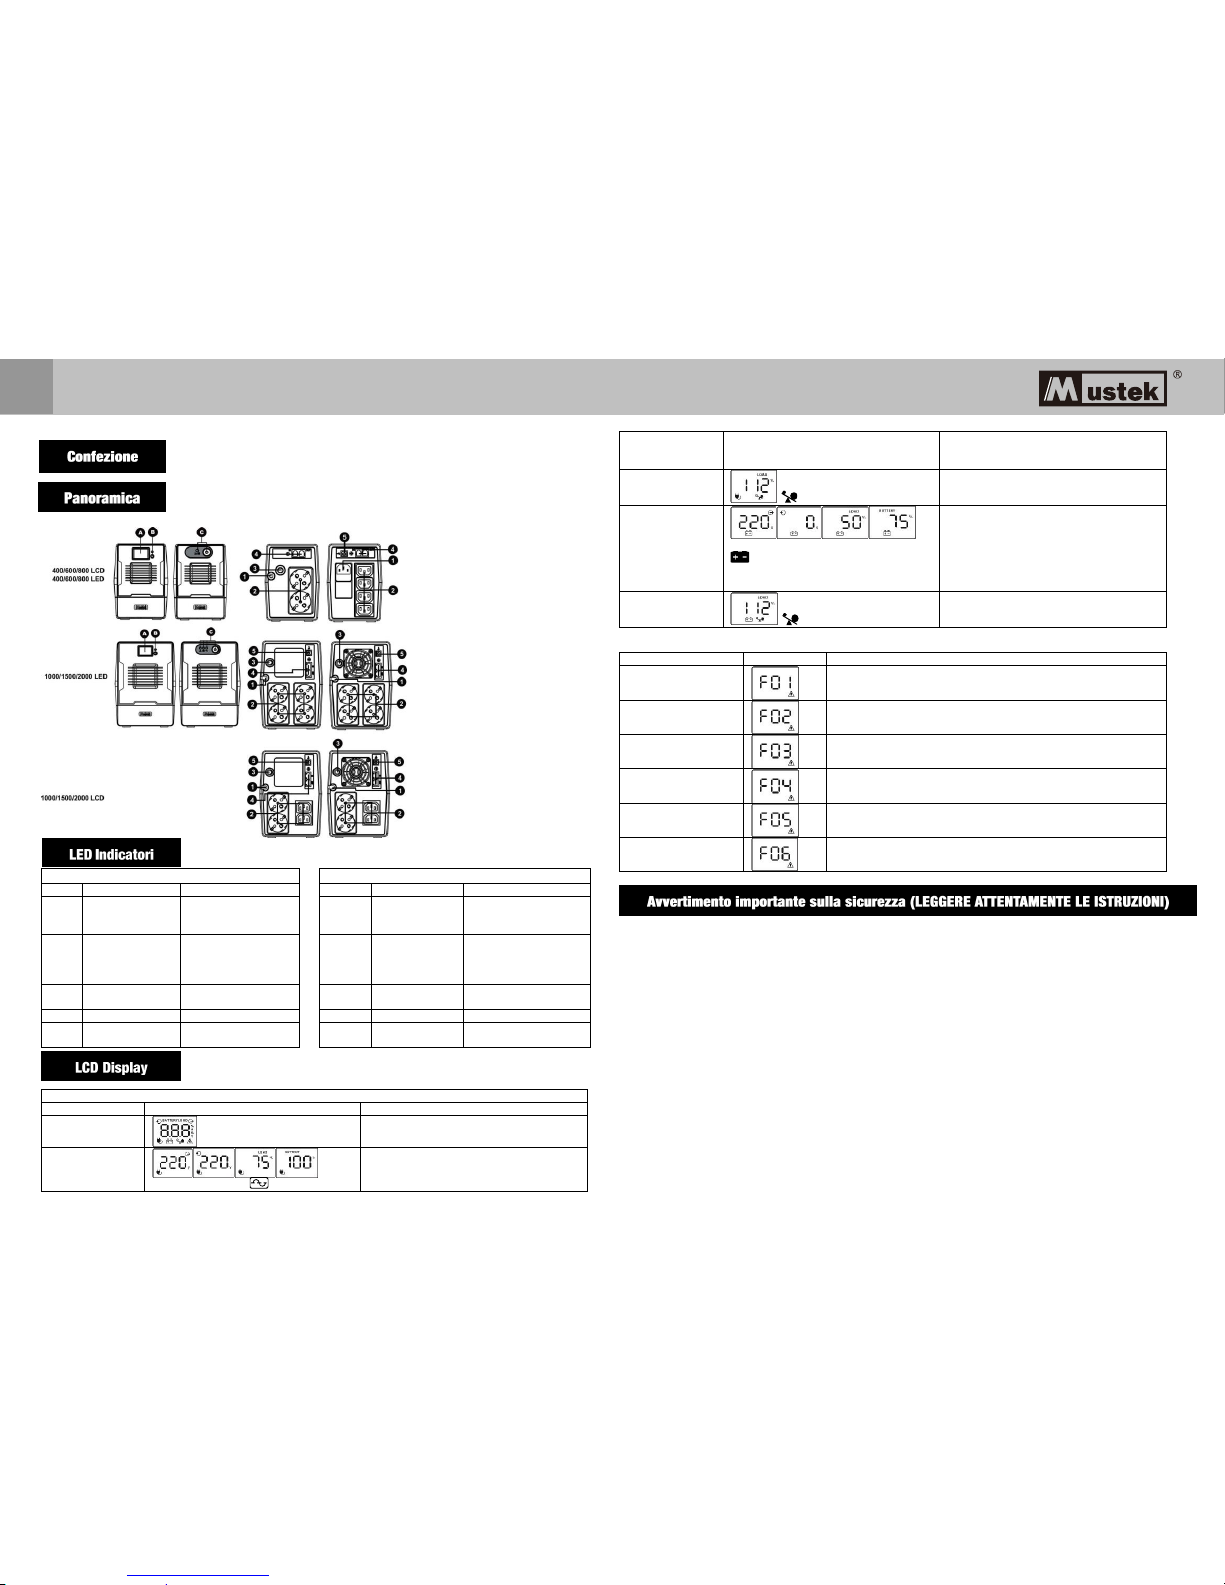
Im Lieferumfang sollten Sie folgendes finden:
- USV Einheit - Kurzanleitung - Garantiekarte
Vorderansicht: Rückansicht:
400VA/600VA/800VA
1000VA/1500VA/2000VA
LED
Alarm
USV-Status
LED
Alarm
USV-Status
●
Aus
Das Netz ist normal und
USV normal betrieben
wird
●Grün
Aus
Das Netz ist normal
und USV normal
betrieben wird.
★
Sounding alle 10
Sekunden
Stromausfall und USV auf
Batteriebetrieb .
★Gelb
Sounding alle
10 Sekunden
Stromausfall und USV
auf Batteriebetrieb .
★
Sounding jede
Sekunde
Niedriger Batteriestatus
★Gelb
Sounding jede
Sekunde
Niedriger
Batteriestatus
○
Aus
UPS ist ausgeschaltet.
○Grün
Aus
UPS ist ausgeschaltet.
●
kontinuierlich
klingender
USV-Fehler
●Rot
kontinuierlich
klingender
USV-Fehler
●LED auf ○ LED Aus★LED blinkt
BEDIENINGSDISPLAY
USV-Modus
LCD
Beschreibung
USV-Einschalten
Wenn die USV eingeschaltet ist, wird sie für einige 4
Sekunden in diesen Modus schalten.
Netzbetrieb
Bei automatischer Regelung der
Ausgangsspannung (AVR) blinkt jede
Durch Berühren des LCD-Displays werden die
Informationen in der folgenden Reihenfolge
angezeigt.
1. Ausgangsspannung
2. Eingangsspannung
Sekunde das Symbol.
3. Lastniveau
4. Batteriekapazität
Ü berlastung im
Wechselspannungs
-Modus
Symbol blinkt.
Bei Ü berlastung ertönt alle 0,5 Sekunden ein
Signalton.
Akkumodus
Wenn die Batterieladung zur Neige geht,
blinkt das Symbol.
Alle 10 Sekunden ertönt ein Signalton und durch
Berühren des LCD-Displays werden die
Informationen in der folgenden Reihenfolge
angezeigt.
1. Ausgangsspannung
2. Eingangsspannung
3. Lastniveau
4. Batteriekapazität
Ü berlastung im
Akkumodus
Symbol blinkt.
Bei Ü berlastung ertönt alle 0,5 Sekunden ein
Signalton.
HINWEIS: Wenn Hintergrundbeleuchtung abschaltet, können Sie es aktivieren, indem Sie den Bildschirm berühren.
Fehlercode -Tabelle:
Fehlerzustand
LCD
Lösungen
Ausgang kurzgeschlossen
Kurzgeschlossene Verbraucher trennen und die USV wieder
einschalten.
Ü berlastung
Alle Verbraucher trennen und die USV wieder einschalten.
Ü berladung
Sofort den Kundendienst benachrichtigen.
Batterie defekt oder stark
entladen
Batterie ersetzen.
Fehlerhafte Ausgangsspannung
Sofort den Kundendienst benachrichtigen.
Ü bertemperatur
1. Anlage ausschalten und abkühlen lassen.
2. Oder übermäß ige Belastungen entfernen und abkühlen lassen.
Wenn die Störung Alarm auftritt, wenden Sie sich bitte sofort den Kundendienst
ACHTUNG! Um das Risiko von Feuer oder einem elektrischen Schlag zu vermeiden, installieren Sie das Gerät in
Räumen mit angepassten Temperatur – und Luftfeuchtigkeitsverhältnissen (Siehe Spezifikationen für die Temperatur
und Luftfeuchtigkeitsverhältnissen)
ACHTUNG! Um eine Ü berhitzung des UPS Gerätes zu verhindern, decken Sie bitte NICHT die Lüftungsschächte ab,
setzen Sie das Gerät nicht der direkten Sonneneinstrahlung aus, stellen Sie das Gerät nicht in die Nähe eines
Heizkörpers.
ACHTUNG! Bitte schliessen Sie keine “Nicht-PC” Geräte an die USV an wie z.B. medizinische Geräte,
Lebenserhaltungsgeräte, Mikrowellen oder Staubsauger.
ACHTUNG! Bitte schließen Sie das UPS Gerät nicht am geräteigenen Ausgang an.
ACHTUNG! Es darf keine Flüssigkeit in das Gerät einlaufen. Bewahren Sie keine Flüssigkeit in der Nähe des Gerätes
auf!
ACHTUNG! Bei einem Notfall drücken Sie den AUS Knopf und ziehen Sie das Netzkabel aus der Steckdose, um das
Gerät ordnungsgemäß auszuschalten.
ACHTUNG! Schließen Sie keine Mehrfachsteckdose oder einen Überspannungsschutz an der USV an.
Benutzerhandbuch
LCD-Anzeige
Ein/Aus Schalter
Schalter mit LED indicato
AC Eingang
Ausgänge
Schutzschalter
RJ-11
USB com. Schnittstelle
(optional)
RJ-45 (optional)
DE
EN
Page 6
4 Stunden
ACHTUNG: Schliessen Sie niemals einen Laserdrucker oder einen Scanner an die USV an.
ACHTUNG! Sollte die USV in einem Metallgehäuse eingebaut werden, muss dieses aus Sicherheitsgründen während
des Betriebs geerdet sein, um den Leckstrom unter 3,5 mA zu halten.
VORSICHT: Selbst nach dem Trennen des Gerätes vom Hauptanschluss, besteht die Gefahr einer gefährlichen
elektrischen Spannung, da die Batterie geladen ist. Sollte eine Wartung nötig sein, trennen Sie auch die Plus- und
Minuspole der Batterie. Dadurch vermindern Sie die Gefahr eines elektrischen Schocks.
ACHTUNG! Die Wartung der Batterien darf ausschließlich Fachpersonal durchführen.
Unbefugtes Personal darf sich nicht in der Nähe der Batterien aufhalten.
ACHTUNG! Beim Austausch der Batterien achten Sie darauf, dass NUR die geeigneten Batterien verwendet werden.
ACHTUNG! Die interne Batteriespannung liegt bei 12VDC. (Versiegelte, Blei-Säure, 6-zellen Batterie)
ACHTUNG! Verbrennen Sie NIEMALS Batterien oder entsorgen diese im Hausmüll! Die Batterie könnte explodieren.
Die Batterien nicht gewaltsam öffnen! Die Akkumulatorsäure ist ätzend und eine Gefahr für Haut und Augen!
ACHTUNG! Vor einer Reinigung des UPS Gerätes, entfernen Sie dieses bitte vom Stromkreis.
ACHTUNG! Bei einer Batterie besteht immer das Risiko eines elektrischen Schlages und eines hohen
Kurzschlussstroms (Brandgefahr). Folgende Vorkehrungen sollten Sie treffen bevor Sie eine Batterie austauschen:
1) Entfernen Sie Uhren, Ringe oder andere metallene Gegenstände.
2) Benutzen Sie Werkzeuge mit isolierten Griffen.
3) Tragen Sie Gummihandschuhe und Stiefel.
4) Legen Sie keine Werkzeuge oder metallische Gegenstände auf die Oberseite der Batterien.
5) Trennen Sie die USV vom Netz, bevor die Batterie angeschlossen oder entfernt wird.
Dies ist eine USV der Klasse C2. In Wohnansiedlungen kann dieses Erzeugnis Funkstörungen hervorrufen,
dann muss der Benutzer zusätzliche Maßnahmen ergreifen.
❶
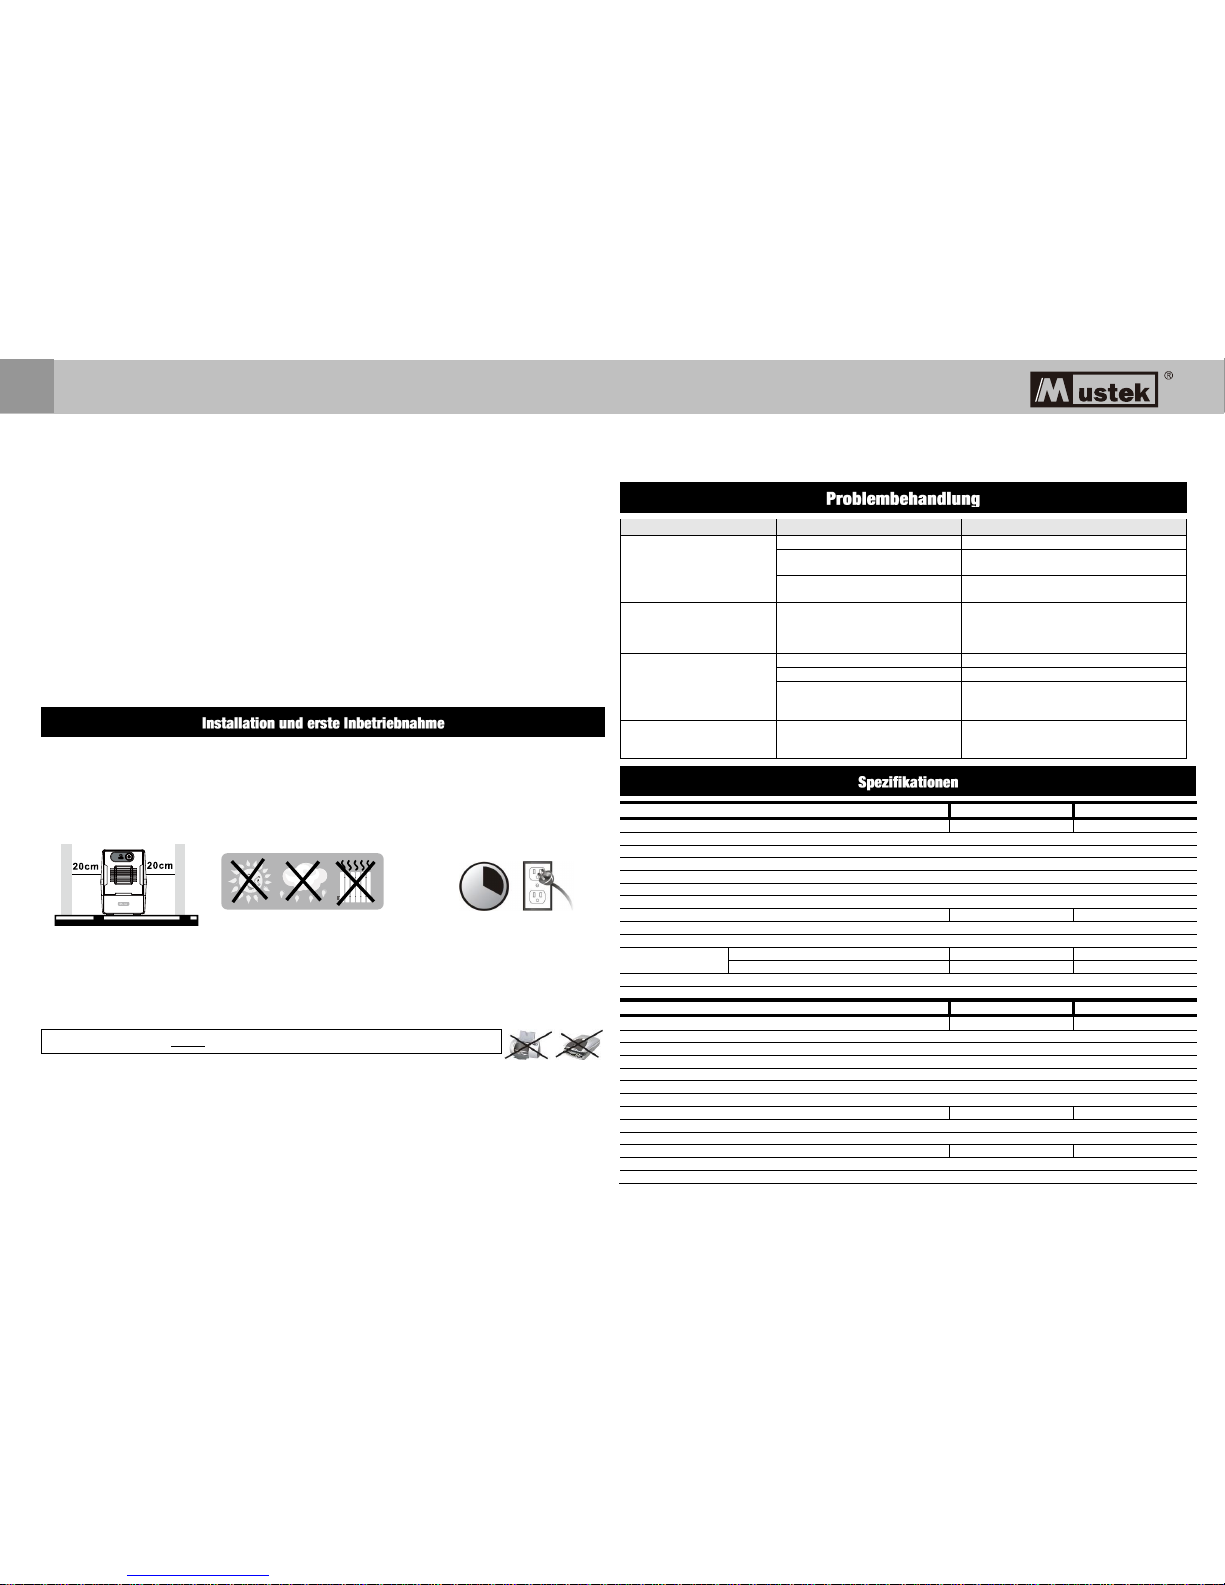
Aufstellung und Lagerungs-Bedingungen
Installieren Sie die USV in einer geschützten Umgebung, möglichst staubfrei und mit ausreichender
Luftzirkulation. Bitte halten Sie einen Mindestabstand von 20cm ein, um Interferenzen mit anderen
Geräten zu vermeiden. Betreiben Sie das Gerät nicht in einer Umgebung, in der die Werte für Temperatur
und Luftfeuchtigkeit die Spezifikationen überschreiten. (Bitte überprüfen Sie vorab die Spezifikationen.)
❷
Anschluß und Aufladen des Gerätes
Schließen Sie die USV mit dem Netzkabel an das Stromnetz an. Um ein optimales Ergebnis zu erlangen, sollte
die Batterie vor dem Erstgebrauch mindestens sechs Stunden aufgeladen werden. Das Gerät lädt die Batterie,
wenn sie angeschlossen ist.
❸
Anschluß der Verbraucher
Schließen Sie die Verbraucher an die Ausgänge auf der Rückseite der USV an. Schalten Sie einfach die USV ein,
und schon sind die Geräte geschützt.
❹ Anschluß von Modem/Telefon/Netzwerk für Ü berspannungsschutz (Nur für Modelle mit
RJ-11/RJ45 Anschluß)
Schließen Sie ein Modem-/Telefonkabel am “IN” Anschluss an der Rückseite des Gerätes an.
Am „Out“ Anschluss schließen Sie dann das Modem/Telefon an.
❺ Anschluss des Kommunikationskabels (nur für Modelle mit USB/RS-232)
Um ein automatisches Abschalten/Hochfahren sowie eine Statusüberwachung zu gewähren, schließen Sie das
Kommunikationskabel der USB/RS-232 Schnittstelle der USV an. Das andere Ende wird an Ihrem PC
angeschlossen. Mit der Überwachungssoftware können Sie ein Abschalten/Hochfahren zeitlich planen und
jederzeit den Status der USV überprüfen.
❻ Ein/Ausschalten des Gerätes
Schalten Sie die USV durch Drücken des Ein/Aus Schalters ein. Durch erneutes Drücken des Ein/Aus Schalters
schalten Sie das Gerät wieder aus.
Modell
400
600
800
KAPAZITÄ T
400VA/240W
600VA/360W
800VA/480W
EINGANG Spannung
220/230/240VAC
EINGANG Spannungsbereich
162-290 VAC
Spannungsregulierung
± 10 %
Frequenzbereich (Batteriebetrieb)
50Hz +/-1 Hz
Ü bertragungszeit
Typisch 2-6 ms
Schwingungsverlauf
Simulierte Sinus
Typ und Anzahl
12V/4.5Ahx1
12V/7Ahx1
12V/9Ahx1
Ladezeit
4-6 Stunden für 90% Kapazität
Dimensionen (BxHxT) mm
LED: 279 x 101 x 142 / LCD: 300 x 101 x 142
Nettogewicht
(kg)
LCD
3.55
4.2
4.9
LED
3.7
4.4
5.0
Luftfeuchtigkeit
0-90% RH @ 0-40°C (nicht kondensierend)
Geräuschpegel
Weniger als 40dB
Modell
1000
1500
2000
KAPAZITÄ T
1KVA/600W
1.5KVA/900W
2KVA/1200W
EINGANG Spannung
220/230/240VAC
EINGANG Spannungsbereich
162-290 VAC
Spannungsregulierung
± 10 %
Frequenzbereich (Batteriebetrieb)
50Hz +/-1 Hz
Ü bertragungszeit
Typical 2-6 ms
Schwingungsverlauf
Simulierte Sinus
Typ und Anzahl
12V/7Ah x 2
12V/9Ah x 2
12V/9Ah x 2
Ladezeit
4-6 Stunden für 90% Kapazität
Dimensionen (BxHxT)
320 x 130 x 182
Nettogewicht (kg)
8.2
10.4
11
Luftfeuchtigkeit
0-90% RH @ 0-40°C (nicht kondensierend)
Geräuschpegel
Weniger als 40dB
Problem
Mögliche Ursache
Lösungsansatz
LED Display auf der Frontseite
funktioniert nicht.
Leere Batterie
Laden Sie die USV mindestens 6 Stunden auf.
Defekte Batterie
Ersetzen Sie die Batterie mit einer Batterie
gleichen Typs.
Die USV ist nicht eingeschaltet
Drücken Sie den Ein/Aus Schalter nochmals, um
die USV einzuschalten.
Der Alarm ertönt dauerhaft obwohl
der Netzanschluss keine Probleme
aufweist.
Die USV ist überlastet.
Entfernen Sie zuerst einige Verbraucher. Bevor Sie
sie wieder anschließen, stellen Sie sicher, dass die
Belastung nicht über der Maximalleistung der USV
liegt.
Beim Stromausfall, ist die Back-Up
Zeit zu kurz.
Die USV ist überlastet.
Entfernen Sie alle angeschlosenen Geräte!.
Die Batteriespannung ist zu niedrig.
Laden Sie die USV mindestens für 6 Stunden auf.
Batterie defekt - evtl. durch hohe
Temperatur, oder falsche Nutzung der
Batterie.
Ersetzen Sie die Batterie mit einer Batterie
gleichen Typs.
Die Stromversorgung ist in
Ordnung aber das Gerät schaltet
immer in den Batteriemodus.
Das Netzkabel ist locker.
Schließen Sie das Netzkabel wieder
ordnungsgemäß an.
Bedienungsanleitung
DE
Page 7
Ohjekirja
Line Interactive UPS
Takuu- ja huoltotiedot
Kiitos, kun valitsit tämän Mustek UPS -tuotteen.
Toimi tuotteen käyttöoppaan ohjeiden mukaisesti, ja jos sovellettavissa, ohjelmiston
asennusoppaan mukaisesti voidaksesi käyttää tuotetta mahdollisimman tehokkaasti.
Ohjelmiston asennus:
Jos ohjelmisto kuuluu tuotteen toimitukseen, ohjelmiston sisältävä CD-ROM-levy on
mukana pakkauksessa.
Toimi ohjeiden mukaisesti asentaessasi ohjelmiston.
Voit ladata ohjelmiston, käyttöoppaan ja lyhyen viiteoppaan seuraavalta sivustolta:
http://www.power-software-download.com/viewpower.html
Takuu:
Valmistajana tarjoamme tuotteelle vähintään 1 vuoden takuun.
Saadaksesi tarkat tiedot takuuajasta ja takuuehdoista, sinun tulee kuitenkin ottaa
yhteyttä jälleenmyyjään, koska sekä takuuaika että -ehdot voivat vaihdella
maittain/alueittain.
Ongelmanratkaisu:
Katso ongelmanratkaisua koskeva luku käyttöoppaasta (laitteisto ja ohjelmisto).
Lisäksi:
Tarkista web-sivustoltamme (www. Mustek.eu) säännöllisesti ohjelmistopäivitykset sekä
Usein kysyttyä (FAQ) -osa.
Jollet pysty ratkaisemaan näillä ongelmaasi, ota yhteys jälleenmyyjään tuen saamiseksi.
Huolto ja kunnossapito:
Jos tuote vaatii huoltoa tai kunnossapitoa takuuajan ollessa voimassa, ota aina yhteyttä
jälleenmyyjään toimenpiteiden järjestämiseksi. Jos huoltoa tarvitaan takuuajan
ulkopuolella, on myös suositeltavaa ottaa yhteyttä jälleenmyyjään. Varmista aina kaikissa
tapauksissa, että tuotteen huollon tai kunnossapidon suorittaa pätevä sähköteknikko.
Ohjekirja
FI
VAROITUS: Kyseessä on C2 UPS-kategorian tuote. Asuinympäristössä tämä
tuote saattaa aiheuttaa radiohäirintää, missä tapauksissa käyttäjän on
vaadittaessa suoritettava lisää suojaustoimepiteitä.
Page 8
Pakkauksesi sisällä sinulla tulisi olla seuraavaa:
- UPS-laite - Pikaopas - Takuukortti
Edestä: Takaa:
400VA/600VA/800VA
1000VA/1500VA/2000VA
LED
Hälytys
UPS Status
LED
Hälytys
UPS Status
●
Pois
Sähköverkosta on
normaali ja UPS toimii
normaalisti.
●Vihreä
Pois
Sähköverkosta on
normaali ja UPS toimii
normaalisti.
★
Kuuluu joka 10.
sekunti
Sähköt katkeavat ja
UPS on akkutilassa .
★Keltainen
Kuuluu joka
10. sekunti
Sähköt katkeavat ja UPS
on akkutilassa .
★
Kuuluu joka
sekunti.
Akku vähissä
★Keltainen
Kuuluu joka
toinen
Akku vähissä
○
Pois
UPS on pois päältä .
○Vihreä
Pois
UPS on pois päältä.
●
jatkuvasti
kuulostava
UPS vika
●Punainen
jatkuvasti
kuulostava
UPS vika
●LED päällä ○ LED Pois ★LED vilkkuva
Käyttö Näyttö
UPS-tila
LCD
Description
UPS-virta päällä
UPS:n virta on päällä tämä tila näkyy
muutaman sekunnin ajan.
Virransyöttötila
Kun AVR toimii, kuvake vilkkuu joka
toinen .
LCD tiedot näytetään seuraavassa
järjestyksessä, kun LCD kosketaan.
1. Lähtöjännite
2. Tulojännite
3. kuormitus
4. akun kapasiteetti
Ylikuormitus
virransyöttötilassa
i kuvakkeet vilkkuvat.
Ylikuormituksen sattuessa hälytysääni toistuu
puolen sekunnin välein.
Akkutila
When battery level is low, icon will
flash.
Laite piippaa 10 sekunnin välein ja LCD tiedot
näytetään seuraavassa järjestyksessä , kun
LCD kosketaan.
1. lähtöjännite
2. Tulojännite
3. kuormitus
4. akun kapasiteetti
Ylikuormitus
akkutilassa
kuvakkeet vilkkuvat.
UPS-laitteessa on vika. Hälytysääni on jatkuva.
HUOMAUTUS: Jos taustavalo sammuu, voit aktivoida ja koskettamalla näyttö ä.
Vika -kooditaulukkoa
vikatilanne
LCD
Ratkaisut
Lähtö oikosulussa
Irrota oikosulku kuormat ja käynnistä UPS uudelleen.
ylikuormitusvika
Irrota kaikki teho kuormat ja käynnistä UPS uudelleen.
ylihinta
Soita huoltoon välittömästi.
Huono tai purkautunut
akku
Vaihda paristo.
Korkea jännite vian
Soita huoltoon välittömästi.
Over- lämpötilan
1. Sammuta laite ja odota jäähdytykseen.
2. Tai poistaa liiallinen kuormat ja odota jäähdytykseen.
Jos vika hälytys tapahtuu , ota yhteyttä huoltoon heti .
Varoitus! Estääksesi tulipalon tai sähköiskun käytä laitetta vain sisätiloissa missä lämpötilaa ja kosteutta
voidaan hallita sekä missä ei ole sähköä johtavia epäpuhtauksia (katso tarkemmat tiedot).
Varoitus! Vähentääksesi ylikuumenemisen riskiä älä peitä UPS-laitteen jäähdytysaukkoja. Vältä myös
laitteen altistumista suoralle auringonvalolle tai asentamasta laitetta lämmittimien ja tulen lähettyville.
Varoitus! Älä liitä muita kuin tietokoneita, älä kytke sellaisia laitteita kuten lääketieteelliset laitteet,
hengityslaitteet, mikroaaltouunit tai imurit UPS-laitteeseen.
Varoitus! Älä liitä UPS-sisääntuloa sen omaan ulostulopistokeeseen.
Varoitus! Älä aseta virvokkeita tai muita nesteitä sisältäviä esineitä laitteen päälle tai läheisyyteen.
Varoitus! Paina hätätapauksissa OFF-painiketta ja irroita virtajohto virtalähteestä sammuttaaksesi
UPS-laitteen tehokkaasti.
Varoitus! Älä kytke voimavirtaa tai ylijännitesuojaa UPS-laitteeseen.
Varoitus! UPS-kotelo on metallia, on turvallisuuden takaamiseksi maadoitus välttämätöntä asennuksen
aikana, jotta hävikkivirta laskisi alle 3.5 mA:n.
LCD paneli
Virtakytkin
Virtakytkin merkkivalolla
Virran sisääntulo
Ulostuloliittimet
Sulake
RJ-11
USB (valinnainen)
RJ-45 (valinnainen)
EN
Ohjekirja
FI
Page 9
4 tuntia
HUOMIO: Ä LÄ koskaan liitä lasertulostinta tai skanneria UPS-laitteeseen. Tämä saattaa
vaurioittaa laitetta
Varoitus! Korjaus- tai huoltotoimenpiteet saa suorittaa tai valvoa vain koulutettu henkilökunta.
Varoitus! Vaihtaessasi akun, vaihda se sellaiseen, jossa on sama numero ja tyyppi.
Varoitus! Akun sisäinen jännite on 12VDC. Se on sinetöity 6-kennoinen akku.
Varoitus! Älä hävitä akkuja polttamalla sillä ne saattavat räjähtää.
Varoitus! Älä avaa tai vaurioita akkua tai akkuja. Vapautuneet elektrolyytit ovat haitallisia iholle tai silmiin
joutuessaan.
Varoitus! Irroita UPS-laite verkkovirrasta ennen puhdistusta äläkä käytä nestemäistä tai suihkemaista
puhdistusainetta.
Varoitus! Akku voi muodostaa riskin sähköiskuille ja oikosululle. Seuraavat varotoimenpiteet tulisi ottaa
huomioon akkuja vaihdettaessa:
1) Poista käsistäsi kello, sormukset ja muut metalliesineet.
2) Käytä työkaluja, joissa on eristetyt tartuntapinnat.
3) Käytä kumihansikkaita ja -saappaita.
4) Älä aseta työkaluja tai metalliosia akkujen päälle.
5) Irroita latauslähde ennen kuin kytket tai irroitat akun navat.
Ennen asennusta tarkasta laite ja pakkauksen sisältö niin ettei mikään ole vaurioitunut eikä mitään puutu.
❶
Sijoittaminen ja varastointi
Asenna UPS suojattuun paikkaan, jossa ei ole runsaasti pölyä sekä ilmankierto on riittävä. Sijoita UPS
muista laitteista riittävän etäälle, ainakin 20 cm:n päähän välttääksesi häiriöitä. Ä LÄ käytä UPS-laitetta jos
lämpötila ja kosteus ylitttävät suositellut rajat (Katso yksityiskohtaiset lisätiedot)
❷
Liitä virtapistoke ja lataus
Liitä virtajohto seinäpistokkeeseen ja lataa UPS-laitetta ainakin 6 tuntia ennen käyttöä. Laite lataa akkunsa kun
virtajohto on kytkettynä seinäpistokkeeseen.
❸
Kytke laitteita
Kytke virtapistokkeet UPS-laitteen takaosaan. Käännä laitteen virta päälle painamalla kytkintä. UPS suojaa nyt
laitteita.
❹ Liitä modeemi/puhelin/verkko ylivirtasuojaan (vain malleissa, joissa on RJ-11/RJ45)
Liitä modeemi/puhelin/verkko ylivirtasuojan “IN”-liitäntään, joka on UPS-laitteen takaosassa, toinen pää on
liitettävä tietokoneen “OUT”-liitäntään, joka on tarkoitettu puhelinliitäntään
❺Liitä infokaapeli (Vain malleille, jossa on USB/RS-232-portti)
Mahdollistaaksesi UPS-laitteen sammuttamisen ja käynnistämisen sekä tilaseurannan etänä, liitä infokaapeli
USB/RS-232-portista tietokoneesi vastaavaan porttiin. Kun olet asentanut seurantaohjelmiston, voit ajastaa
UPS-laitteen sammuttamisen ja käynnistämisen sekä seurata UPS-laitteen tilaa.
❻Kä ynnistä/sammuta laite
Käynnistä UPS-laite painamalla siinä olevaa kytkintä. Sammuttaaksesi laitteen paina kytkintä 5 sekunnin ajan.
Malli
400
600
800
KAPASITEETTI
400VA/240W
600VA/360W
800VA/480W
SISÄ ÄNTULO Jä nnite
220/230/240VAC
SISÄ ÄNTULO Jännitealue
162-290 VAC
Jännitteen sä ätely
± 10 % (akun tila)
Taajuusalue (akun tila)
50Hz +/-1 Hz
Siirtoaika
Tavallisesti 2-6 ms
Aaltomuoto
Simuloitu siniaalto
AKKU Tyyppi ja numero
12V/4.5Ahx1
12V/7Ahx1
12V/9Ahx1
Latausaika
4-6 tuntia palauttaa 90% kapasiteetista
Mitat (SxLxK) mm
LED: 279 x 101 x 142 / LCD: 300 x 101 x 142
Oma paino (kg)
LED
3.55
4.2
4.9
LCD
3.7
4.4
5.0
Kosteus
0-90% RH @ 0-40°C (ei-kondensoiva)
Melutaso
Alle 40 dB
Malli
1000
1500
2000
KAPASITEETTI
1KVA/600W
1.5KVA/900W
2KVA/1200W
SISÄ ÄNTULO Jä nnite
220/230/240VAC
SISÄ ÄNTULO Jä nnitealue
162-290 VAC
Jännitteen sä ätely
± 10 % (akun tila)
Taajuusalue (akun tila)
50Hz +/-1 Hz
Siirtoaika
Tavallisesti 2-6 ms
Aaltomuoto
Simuloitu siniaalto
AKKU Tyyppi ja numero
12V/7Ah x 2
12V/9Ah x 2
12V/9Ah x 2
Latausaika
4-6 tuntia palauttaa 90% kapasiteetista
Mitat (SxLxK)
320 x 130 x 182
Oma paino (kg)
8.2
10.4
11
Kosteus
0-90% RH @ 0-40°C (ei-kondensoiva)
Melutaso
Alle 40 dB
Ongelma
Mahdollinen syy
Ratkaisu
LCD-panelinäytössä ei sanoja.
Heikko akku.
Lataa UPS ainakin 6 tunnin ajan.
Akkuvika.
Vaihda akku samantyyppiseen.
UPS-laitetta ei käynnistetty.
Paina virtapainiketta uudelleen käynnistääksesi
UPS-laitteen.
Hälytys on jatkuva, vaikka
verkkovirran syöttö on normaali.
UPS on ylikuormittunut.
Poista joitain laitteita. Ennen laitteiden
irrottamista tarkasta, että kuormitus noudattaa
UPS-laitteen kapasiteettia, joka on määritelty
ohessa.
Kun virta katkeaa, varmuusaika
lyhenee.
UPS on ylikuormittunut.
Poista joitain kriittistä kuormitusta.
Akun jännite on liian alhainen.
Lataa UPS ainakin 6 tunnin ajan.
Akku viallinen.
Toimintalämpötila voi olla liian
korkea tai akkua ei käytetä
asianmukaisesti.
Vaihda akku samantyyppiseen.
Verkkovirta on päällä mutta laite on
akkutilassa.
Virtajohto on löysällä.
Tarkasta ja kytke virtajohto uudelleen.
Ohjekirja
FI
Page 10
Manuel utilisateur
Line Interactive UPS
Informations de garantie et de service
Merci pour l'achat de ce produit Mustek UPS.
Veuillez suivre les instructions du manuel du produit et, le cas échéant, le manuel
d'installation du logiciel, afin d'utiliser votre produit de façon optimale.
Installation du logiciel:
Si votre produit est livré avec un logiciel, vous trouverez, dans la boîte, un CD-Rom
contenant le logiciel. Veuillez suivre les instructions lors de l'installation du logiciel. Vous
pouvez télécharger le logiciel, le manuel et le manuel de référence abrégé sur le site
suivant : http://www.power-software-download.com/viewpower.html
Garantie:
En tant que fabricant, nous garantissons notre produit pendant au moins 1 an.
Toutefois, pour la période de garantie exacte et les conditions de garantie, vous devez
contacter votre revendeur car la période de garantie et les conditions peuvent varier
selon le pays ou la région.
Résolution des problèmes:
Veuillez consulter le chapitre de votre manuel (matériel et logiciel) sur la résolution des
problèmes.
De plus: Veuillez consulter régulièrement notre site Web (www.Mustek.eu) pour
connaître les mises à jour du logiciel ainsi que les questions fréquemment posées
(FAQ).Si cela ne résout pas votre problème, contactez votre revendeur pour obtenir des
conseils.
Réparation et entretien:
Si le produit nécessite une réparation ou de l'entretien durant la période de garantie,
contactez toujours votre revendeur pour les procédures à suivre. En dehors de la période
de garantie, nous vous conseillons également de contacter
Manuel utilisateur
FR
ATTENTION: Ce produit est de catégorie C2. Pendant l’utilisation en milieu
résidentiel, ce produit peur émettre radiofréquences. En ce cas l’utilisateur
peut adopter des dispositions additionnelles.
Page 11
Vous devriez avoir reçu les éléments suivants dans le paquet:
- Unité UPS - Guide d’Usage Rapide - Carte de garantie
Vue Frontale: Vue Arrière:
400VA/600VA/800VA
1000VA/1500VA/2000VA
LED
Alarme
UPS Statut
LED
Alarme
UPS Statut
●
éteint
Le secteur est normal
et UPS fonctionne
normalement.
●vert
éteint
Le secteur est normal
et UPS fonctionne
normalement.
★
Sounding toutes
les 10 secondes
Panne de courant se
produit et UPS est en
mode batterie.
★Jaune
Sounding
toutes les 10
secondes
Panne de courant se
produit et UPS est en
mode batterie.
★
Sounding chaque
seconde
Batterie faible
★Jaune
Sounding
chaque
seconde
Batterie faible
○
éteint
UPS est éteint.
○vert
éteint
UPS est éteint.
●
sondage en
continu
UPS défaut
●Rouge
sondage en
continu
UPS défaut
●LED allumée ○ LED éteinte★ LED clignote
Ecran LCD Tactile
Mode Onduleur
LCD
Description
Onduleur sous
tension
Lorsque l'onduleur est sous tension, il entre
dans ce mode pendant quelques secondes.
Mode CA
Lorsque AVR fonctionne, l'icône
clignote une fois par seconde.
Les informations seront affichées dans l’ordre
suivant si pression sur l’écran :
1. Tension de sortie
2. Tension d’entrée
3. Niveau de charge
4. Capacité de la batterie
Surcharge en mode
CA
L’icône clignote
Lorsque la surcharge se produit, l'alarme émet
un bip toutes les 0,5 seconde.
Mode Batterie
Quand le niveau de batterie est faible, l’icône
clignote
L’alame émet un bip toutes les 10 secondes et
les informations seront affichées dans l’odre
suivant si pression sur l’écran :
1. Tension de sortie
2. Tension d’entrée
3. Niveau de charge
4. Capacité de la batterie
Surcharge en mode
batterie
L’icône clignote
Lorsque la surcharge se produit, l'alarme émet
un bip toutes les 0,5 seconde.
NOTE: si le rétroé clairage s'éteint, vous pouvez l'activer en appuyant sur l'écran.
Défaut:
Défaut
LCD
Solutions
Sortie en court-circuit
Déconnecter les charges en court-circuit et redémarrez l'onduleur.
Défaut de surcharge
Débranchez toutes les charges de sortie et redémarrez l'onduleur.
Surcharge de la batterie
Appelez le SAV.
Décharge profonde ou
batterie défectueuse
Remplacer la batterie
haute tension de sortie
Appelez le SAV.
Surchauffe
Eteignez l'appareil et attendre le refroidissement.
If fault alarm occurs, please call for service immediately.
PRÉ CAUTION! Pour éviter le risque de feu ou choc électrique, installez l’UPS en un endroit intérieur avec température et
humidité contrôlés, libre de polluants conducteurs. (Vous trouverez la portée de température et humidité dans les
spécifications.)
PRÉ CAUTION! Pour réduire le risque de sûrchauffage de l’UPS, ne couvrez pas les fentes d’aération et évitez exposer l’UPS
directement au soleil ou l’installer près de sources de chaleur.
PRÉ CAUTION! Ne pas brancher l’UPS á dispositifs qui n’ont pas de relation avec l’ordinateur, comme équipement médicaux
ou de soutien de la vie, fours microondes, ou aspirateurs.
PRÉ CAUTION! Ne pas connecter l’entrée de l’UPS avec sa propre sortie.
PRÉ CAUTION! Ne permettez pas que liquides ou objets étranges rentrent à l’UPS. Ne pas placer boissons ou bouteilles avec
liquides sur ou près de l’UPS.
PRÉ CAUTION! En cas d’émergence, appuyez le bouton OFF et débranchez le câble de la prise secteur pour vous assurer que
l’UPS est correctement déconnectée.
PRÉ CAUTION! Ne reliez pas un bloc multiprise ou protecteur contre sauts de courant a l’UPS.
PRÉ CAUTION! Si l’unité UPS a un châssis métallique, il est obligatoire par sécurité de la brancher à une prise terre pour
réduire des fuites de courant de moins de 3.5mA.
Panneau LCD
Bouton d’allumage
Interrupteur d'alimentation
avec indicateur LED
Entrée AC
Connecteurs de sortie
Interrupteur circuit
RJ-11
USB (facultative)
RJ-45 (facultative)
EN
Manuel utilisateur
FR
Page 12
4heures
PRÉCAUTION: JAMAIS connecter une imprimante laser ou scanner à l’unité
UPS. L’unité UPS peut être endommagée. damage of the unit.
PRÉ CAUTION! L’entretien des batteries doit être réalise ou supervisé par personnel spécialisé qui connait les précautions
nécessaires. Le personnel pas autorisé ne doit pas travailler avec les batteries.
PRÉ CAUTION! Si vous remplacez les batteries, utilisez le même nombre et genre de batterie.
PRÉ CAUTION! La batterie a 6 cellules au plomb, est scellé, avec voltage de 12V DC.
PRÉ CAUTION! Ne jetez pas les batteries au feu. La batterie peut exploser. Ne pas ouvrir ou manipuler les batteries.
L’électrolyte est dangereux pour la peux et les yeux.
PRÉ CAUTION! Débrancher l’UPS avant de la nettoyer et ne pas utiliser liquides ou sprays détergentes.
PRÉ CAUTION! La batterie peut poser risque de choc électrique et courant de court-circuit. Les précautions suivantes doivent
être prises en charge avant de remplacer les batteries:
1) Retirez montres, anneaux et autres objets métalliques.
2) Utilisez des outils avec poignés isolées.
3) Utilisez des gants et bottes en caoutchouc.
4) Ne pas laisser outils ou pièces métalliques sur les batteries.
5) Débrancher la source de courant avant de (dé)connecter le terminal de la batterie.
Avant de l’installation, veuillez examiner l’unité. Assurez-vous que rien dans le paquet n’est endommagé.
❶
Conditions d’Installation et Stockage
Installer l’unité UPS dans un endroit pro tégé, libre de poussière et suffisamment ventilé. Veuillez situer l’UPS au moins à 20
cm d’outres unités pour éviter les interférences. NE PAS UTILISER l’UPS là où la température et l’humidité surpassent les
limites spécifiques. (Vous trouverez les limites dans les spé cifications.)
❷
Connexion à la Prise Secteur et Recharge
Relier l’entrée AC à une prise secteur. Il est conseillé de charger la batterie au moins 6 heures avant de l’utiliser. L’UPS charge la
batterie lorsqu’elle est branchée a la prise secteur.
❸
Connecter les charges/dispositifs
Reliez les charges avec les connecteurs de sortie du panneau arrière de l’UPS. Démarrez l’unité UPS et tous les dispositifs
connectés seront protégés.
❹ Connexion d’un Modem/Téléphone/Réseau Ethernet pour le protéger contre sauts de courant (Seulement pour
modèles avec connecteur RJ-11/RJ45)
Reliez une seule ligne de modem/téléphone avec l’entrée protégée “IN” en panel arrière de l’unité UPS. Connectez l’ordinateur
avec un autre câble réseau à la sortie “OUT ”
❺ Connexion du Câble de Communication (Modèle avec port USB/RS-232)
Pour gérer le démarrage de l’UPS et contrôler son état, reliez un bout du câble de communication au port RS-232 et l’autre a
votre ordinateur. Une fois le logiciel de gestion installé, vous pouvez programmer les mises en marche et arrêts de l’UPS à
travers votre ordinateur, et contrôler son état.
❻
Allumer/Éteindre l’unité UPS
Allumez l’unité UPS en appuyant sur le bouton de démarrage. Pour l’éteindre, appuyez de nouveau sur ce même bouton.
Modèle
400
600
800
CAPACITÉ
400VA/240W
600VA/360W
800VA/480W
ENTRÉE Voltage
220/230/240VAC
ENTRÉE Portée de Voltage
162-290 VAC
SORTIE Régulation de Voltage
± 10 % (mode Bat.)
Gamme de fréquences (mode Bat.)
50Hz +/-1 Hz
Temps de réaction
Normal 2-6 ms
Forme d’Onde
Pseudo sinusoidale
BATTERIE Type et Quantité
12V/4.5Ahx1
12V/7Ahx1
12V/9Ahx1
Temps de charge
4-6 heures pour récupérer 90% de la c apacité
Mesures (PxLxH) mm
LED: 279 x 101 x 142 / LCD: 300 x 101 x 142
Poids Net (kg)
LED
3.55
4.2
4.9
LCD
3.7
4.4
5.0
Humidité
0-90% RH @ 0-40°C (sans condensation)
Niveau de Bruit
Moins de 40 dB
Modèle
1000
1500
2000
CAPACITÉ
1KVA/600W
1.5KVA/900W
2KVA/1200W
ENTRÉE Voltage
220/230/240VAC
ENTRÉE Portée de Voltage
162-290 VAC
SORTIE Régulation de Voltage
± 10 % (mode Bat.)
Gamme de fréquences (mode Bat.)
50Hz +/-1 Hz
Temps de réaction
Normal 2-6 ms
Forme d’Onde
Pseudo sinusoidale
BATTERIE Type et Quantité
12V/7Ah x 2
12V/9Ah x 2
12V/9Ah x 2
Temps de charge
4-6 heures pour récupérer 90% de la capacité
Mesures (PxLxH)
320 x 130 x 182
Poids Net (kg)
8.2
10.4
11
Humidité
0-90% RH @ 0-40°C (sans condensation)
Niveau de Bruit
Moins de 40 dB
Problème
Cause Possible
Solution
Le LCD du panel frontal ne
s’allume pas.
Faible charge de la batterie.
Chargez l’UPS 6 heures au minimum.
Défaut batterie.
Remplacez la batterie avec une du même
type.
L’unité UPS n’est pas allumée.
Pulse le bouton d’allumage pour redémarrer
l’UPS.
L’Alarme sonne sans cesse mais le
courant de la prise secteur est
normal.
L’UPS est surchargée.
Déconnectez quelques charges. Avant de
reconnecter los dispositifs, assurez-vous que la
charge est compatible avec celle indiquée dans
les spécifications de l’UPS.
Quand le courant arrête, le temps
de back-up est très court.
L’UPS est surchargée.
Déconnectez les charges principales.
Faible Voltage de la batterie.
Chargez l’UPS 6 heures au minimum.
Batterie défectueuse,
probablement à cause de haute
température ou un usage
incorrect.
Remplacez la batterie avec une du même
type.
Prise secteur normal, UPS en mode
Batterie.
Le câble d’alimentation n’est pas
connecté.
Reliez le câble d’alimentation correctement.
Manuel utilisateur
FR
Page 13
Manuale utente
Line Interactive UPS
Informazioni su garanzia e assistenza
Grazie per aver acquistato questo gruppo di continuità Mustek.
Seguire le istruzioni nel manuale del prodotto ed eventualmente nel manuale
d’installazione del software, per ottenere il massimo dall’utilizzo del prodotto.
Installazione del software:
Se il prodotto viene fornito con del software, nella confezione sarà presente un CD Rom.
Seguire le istruzioni di installazione del software. Visitare il seguente sito per scaricare il
software, il manuale e la guida rapida di riferimento:
http://www.power-software-download.com/viewpower.html
Garanzia:
Il produttore fornisce un minimo di 1 anno di garanzia sul prodotto. Tuttavia, è necessario
rivolgersi al rivenditore per conoscere il periodo e i termini esatti della garanzia, in quanto
possono variare da Paese a Paese.
Risoluzione dei problemi:
Consultare il capitolo sulla risoluzione dei problemi nel manuale (hardware e software).
Inoltre: Visitare periodicamente il nostro sito web (www.Mustek.eu) per aggiornamenti
software e sulle domande e risposte più frequenti (FAQ). Se i problemi persistono,
consultare il proprio rivenditore.
Assistenza e manutenzione:
Qualora il prodotto richieda assistenza o manutenzione durante il periodo di garanzia,
rivolgersi sempre per le procedure al rivenditore. In caso la garanzia sia scaduta,
rivolgersi comunque al rivenditore. In ogni caso, accertarsi sempre che l’assistenza e la
manutenzione vengano eseguite da personale qualificato.
Manuale utente
IT
ATTENTION: Ce produit est de catégorie C2. Pendant l’utilisation en milieu
résidentiel, ce produit peur émettre radiofréquences. En ce cas l’utilisateur
peut adopter des dispositions additionnelles.
Page 14
All’interno rdella confezione dovebbero essere presenti i seguenti articoli:
- Unità UPS - Guida rapida - Certificato di garanzia
Vista anteriore: Vista posteriore:
400VA/600VA/800VA
1000VA/1500VA/2000VA
LED
Allarme
UPS Stato
LED
Allarme
UPS Stato
●
spento
La rete è normale e
UPS è utilizzato
normalmente.
●verde
spento
La rete è normale e UPS
è utilizzato
normalmente.
★
Sounding ogni 10
secondi
si verifica
un'interruzione di
corrente e UPS è in
modalità batteria .
★Giallo
Sounding ogni
10 secondi
si verifica
un'interruzione di
corrente e UPS è in
modalità batteria.
★
Sounding ogni
secondo
Batteria scarica
★Giallo
Sounding ogni
secondo
Batteria scarica
○
spento
UPS è spento.
○verde
spento
UPS è spento.
●
continuamente
suono
Colpa UPS
●Rosso
continuamente
suono
colpa UPS
●LED acceso ○ LED spento ★ LED lampeggia
Operation Display
Modalità UPS
LCD
Descrizione
Accensione UPS
All’accensione, l’UPS entrerà in questa modalità
per alcuni secondi.
Modalità CA
Durante l’AVR l’icona lampeggerà ogni
Informazioni LCD verrà visualizzato nel
seguente ordine quando LCD viene toccato.
1. Tensione di uscita
secondo.
2. Tensione in ingresso
3. il livello di carico
4. Capacità della batteria
Sovraccarico in
modalità CA
lampeggeranno.
In caso di sovraccarico, l’allarme suonerà ogni
mezzo secondo.
Modalità batteria
Quando il livello della batteria è basso, l’icona
lampeggerà ogni secondo.
Emette un allarme acustico ogni 10 secondi e
informazioni LCD viene visualizzata nel
seguente ordine quando LCD viene toccato
1. Tensione d'uscita
2. Tensione di ingress
3. il livello di carico
4. Capacità della batteria
Sovraccarico in
modalità batteria
lampeggeranno.
In caso di sovraccarico, l’allarme suonerà ogni
mezzo secondo.
NOTA: Se la retroilluminazione si spegne, si può attivarlo toccando lo schermo
Codice anomalia Tabella:
condizione di guasto
LCD
soluzioni
Uscita in corto circuito
Scollegare i carichi in corto circuito e riavviare nuovamente il gruppo di
continuità.
Difetto di sovraccarico
Scollegare tutti i carichi in uscita e riavviare nuovamente il gruppo di
continuità.
sovraccarico
Chiamare per il servizio immediatamente.
Batteria Bad o
gravemente scaricata
Si prega di sostituire la batteria.
Guasto tensione ad alto
rendimento
Chiamare per il servizio immediatamente.
Sovratemperatura
1. Spegnere l'unità e attendere il raffreddamento .
2. O rimuovere carichi eccessivi e attendere il raffreddamento.
In caso di allarme di guasto, si prega di chiamare per il servizio immediatamente.
Per prevenire il rischio di incendio o scossa elettrica, utilizzare soltanto al chiuso in un’area priva di contaminanti conduttivi.
(Consultare le relative specifiche)
Per ridurre il rischio di surriscaldamento, non coprire le aperture di raffreddamento dell’UPS ed evitare di esporre l’unità
alla luce diretta del sole o d’installarla accanto ad apparecchi come caminetti, stufe o termosifoni.
Non collegare all’UPS dispositivi diversi da computer come apparecchiature mediche, apparecchiature di supporto vitale,
forni a microonde o aspirapolveri.
Non collegare l’ingresso dell’UPS alla propria uscita.
Non posizionare bevande o altri oggetti contenenti liquidi sopra o accanto all’unità.
In caso d’emergenza, premere il pulsante OFF e scollegare il cavo d’alimentazione CA dalla rete per disattivare
correttamente l’UPS.
Non collegare una presa multipla o un soppressore di picchi all’UPS.
Se l’alloggiamento dell’UPS è metallico, per ragioni di sicurezza, è necessario procedere con la messa a terra durante
l’installazione onde ridurre le perdite di corrente inferiori a 3,5 mA.
Gli interventi di riparazione o manutenzione vanno eseguiti o supervisionati solo da personale qualificato.
Pannello LCD
Interruttore d’alimentazione
Interruttore di alimentazione
con indicatore LED
Ingresso CA
Prese d’uscita
Interruttore
RJ-11
USB (opzionale)
RJ-45 (opzionale)
EN
Manuale utente
IT
Page 15
4 ore
ATTENZIONE: NON COLLEGARE MAI una stampante laser o uno scanner
all’unità UPS in quanto potrebbe danneggiare l’unità.
Sostituire le batterie soltanto con batterie dello stesso numero e tipo.
La tensione della batteria interna è di 12 VCC. Si tratta di una batteria a 6 celle all’acido di piombo, sigillata.
Non gettare le batterie nel fuoco in quanto potrebbero esplodere.
Non aprire o danneggiare le batterie. La perdita di elettroliti può irritare pelle e occhi.
Scollegare l’UPS prima di pulirlo e non utilizzare detergenti spray o liquidi.
La batteria comporta un rischio di scossa elettrica e di corto circuito a corrente elevata. Osservare le seguenti precauzioni
prima di sostituire le batterie:
1) Togliersi orologi, anelli o altri oggetti metallici.
2) Utilizzare utensili con manici isolati.
3) Indossare guanti e stivali di gomma.
4) Non appoggiare utensili o parti metalliche sopra alle batterie.
5) Scollegare la fonte di carica prima di collegare o scollegare I terminali della batteria.
Prima dell’installazione, ispezionare l’unità e il contenuto assicurandosi che non vi siano parti mancanti o danneggiate.
❶ Collocazione e condizioni di conservazione
Installare l’UPS in un’area protetta priva il più possibile di polvere e con un’adeguata aerazione. Tenere l’UPS lontano
almeno 20 cm dalle altre unità onde evitare interferenze. NON utilizzare l’UPS con temperature e umidità oltre il limite
consigliato (verificare le specif iche).
❷ Collocazione e condizioni di conservazione
Installare l’UPS in un’area protetta priva il più possibile di polvere e con un’adeguata aerazione. Tenere l’UPS lontano almeno 20
cm dalle altre unità onde evitare interferenze. NON utilizzare l’UPS con temperature e umidità oltre il limite consigliato
(verificare le specifiche).
❸
Collegamento alla rete elettrica e carica
Collegare il cavo d’ingresso dell’alimentazione CA alla presa a muro e caricare l’UPS per almeno 6 ore prima dell’utilizzo. L’unità
carica la batteria mentre è connessa alla corrente.
❹ Collegamento di modem/telefono/rete per protezione da picchi (solo per il modello con RJ-11/RJ-45)
Collegare la linea del modem/telefono alla connessione “IN” con protezione da picco sul retro dell’unità UPS, collegare l’altra
estremità alla connessione “OUT” per il telefono sul computer.
❺ Collegamento del cavo di comunicazione (solo per il modello con porta USB/RS-232)
Per abilitare lo spegnimento/avvio remoto dell’UPS e il monitoraggio dello stato, connettere mediante il cavo di comunicazione,
la porta USB/RS-232 alla porta di comunicazione del PC. Installando il software di monitoraggio, è possibile programmare
l’avvio/spegnimento dell’UPS e monitorarne lo stato.
❻
Accensione/spegnimento dell’unità
Premere l’interruttore per accendere l’UPS. Per spegnerlo, tenere premuto l’interruttore per 5 secondi.
Modello
400
600
800
CAPACITÀ
400VA/240W
600VA/360W
800VA/480W
INGRESSO Tensione
220/230/240VAC
INGRESSO Intervallo tensione
162-290 VAC
Regolazione tensione
± 10 % (Modalità batteria)
Intervallo di frequenze (Modalità
batteria)
50Hz +/-1 Hz
Tempo di trasferimento
Tipico 2-6 ms
Forma d’onda
Simulato onda sinusoidale
BATTERIA Tipo e numero
12V/4.5Ahx1
12V/7Ahx1
12V/9Ahx1
Tempo di carica
Recupero del 90% della capacità in 4-6 ore
Dimension (DxWxH) mm
LED: 279 x 101 x 142 / LCD: 300 x 101 x 142
Dimensioni
(PxLxA)
LED
3.55
4.2
4.9
LCD
3.7
4.4
5.0
Umidità
0-90% RH @ 0-40°C (senza condensa)
Livello di rumore
Meno di 40 dB
Modello
1000
1500
2000
CAPACITÀ
1KVA/600W
1.5KVA/900W
2KVA/1200W
INGRESSO Tensione
220/230/240VAC
INGRESSO Intervallo tensione
162-290 VAC
Regolazione tensione
± 10 % (Modalità batteria)
Intervallo di frequenze (Modalità
batteria)
50Hz +/-1 Hz
Tempo di trasferimento
Tipico 2-6 ms
Forma d’onda
Simulato onda sinusoidale
BATTERIA Tipo e numero
12V/7Ah x 2
12V/9Ah x 2
12V/9Ah x 2
Tempo di carica
Recupero del 90% della capacità in 4-6 ore
Dimension (DxWxH)
320 x 130 x 182
Dimensioni (PxLxA)
8.2
10.4
11
Umidità
0-90% RH @ 0-40°C (senza condensa)
Livello di rumore
Meno di 40 dB
Problema
Possibile causa
Soluzione
l display del pannello LCD anteriore
rimane vuoto.
Livello basso della batteria.
Caricare l’UPS per almeno 6 ore.
Batteria guasta.
Sostituire la batteria con una dello stesso
tipo.
L’UPS non è acceso.
Premere nuovamente il pulsante
d’alimentazione per accendere l’UPS.
L’allarme suona continuamente
anche se l’alimentazione è regolare.
L’UPS è in sovraccarico.
Rimuovere alcuni dispositivi. Prima di
ricollegare le apparecchiature, verificare che
il carico sia sopportabile dalla capacità
dell’UPS indicata nelle specifiche.
In caso di interruzione della corrente,
l’autonomia è ridotta.
L’UPS è sovraccarico.
Rimuovere alcuni carichi critici.
La tensione della batteria è troppo
bassa.
Caricare l’UPS per almeno 6 ore.
Batteria difettosa. La temperatura
operativa potrebbe essere troppo
alta oppure la batteria non è
utilizzata correttamente.
Sostituire la batteria con una dello stesso
tipo.
L’alimentazione è regolare ma l’unità
è in modalità batteria.
Il cavo di alimentazione è allentato.
Controllare e ricollegare il cavo
d’alimentazione.
Manuale utente
IT
Page 16

Instrukcja obsługi
Line Interactive UPS
Informacje o gwarancji i serwisie
Dziękujemy za zakupienie tego produktu UPS Mustek. Aby maksymalnie wykorzystać
możliwości produktu, należy wykonać instrukcje z podręcznika produktu i tam gdzie to
wymagane, z podręcznika instalacji oprogramowania.
Instalacja oprogramowania:
Jeśli produkt jest dostarczany z oprogramowaniem, w opakowaniu będzie się znajdować
płyta CD-ROM z oprogramowaniem. Podczas instalacji oprogramowania, należy się
zastosować do instrukcji. Oprogramowanie, podręcznik i skrócony podręcznik
referencyjny można pobrać pod następującym
adresem:http://www.power-software-download.com/viewpower.html
Gwarancja:
Jako producent zapewniamy minimum 1 rok gwarancji na nasz produkt.
Jednakże, aby uzyskać dokładne informacje o okresie i warunkach gwarancji, należy się
skontaktować z naszym sprzedawcą, ponieważ zarówno okres gwarancji, jak i warunki
gwarancji mogą być odmienne w różnych krajach/regionach.
Rozwiązywanie problemów:
Sprawdź rozdział podręcznika (sprzętu i oprogramowania) dotyczący rozwiązywania
problemów.
Dodatkowo: Regularnie sprawdzaj naszą stronę sieci web (www. Mustek.eu) pod kątem
aktualizacji oprogramowania, a także Często zadawane pytania (FAQ).
Jeśli to nie rozwiąże występującego problemu w celu uzyskania pomocy skontaktuj się z
naszym sprzedawcą.
Serwis i konserwacja:
Jeśli produkt wymaga serwisu lub konserwacji w okresie gwarancyjnym, należy się
zawsze kontaktować z naszym sprzedawcą w celu uzyskania procedur. Także poza
okresem gwarancyjnym, zalecamy kontakt z naszym sprzedawcą. W każdym przypadku
należy zawsze upewnić się, że serwis lub konserwacja produktu, będą wykonywane przez
wykwalifikowanego technika.
Instrukcja obsługi
PL
OSTRZEŻENIE: Jest to UPS kategorii C2. W środowisku mieszkalnym ten
produkt może wywoływać zakłócenia odbioru radiowego; w takim przypadku
użytkownik może zastosować dodatkowe środki zapobiegawcze.
Page 17

W opakowaniu powinienes dostac nastepujace element:
- Unidade UPS - Guia de consulta rápida - Karta gwarancyjna
Vista frontal: Vista traseira:
400VA/600VA/800VA
1000VA/1500VA/2000VA
LED
Alarm
UPS Status
LED
Alarm
UPS Status
●
Poza
Zasilania jest normalne
i UPS pracuje
normalnie.
●Zielony
Poza
Zasilania jest
normalne i UPS
pracuje normalnie.
★
Sygnał co 10
sekund
awaria zasilania i UPS
jest w trybie baterii.
★Żółty
Sygnał co 10
sekund
awaria zasilania i
UPS jest w trybie
baterii.
★
Sygnał co sekudę
niski poziom baterii
★Żółty
Sygnał co sekudę
niski poziom baterii
○
Poza
UPS jest wyłączony.
○Zielony
Poza
UPS jest wyłączony
●
Sygnał ciągły
usterka UPS
●Czerwony
Sygnał ciągły
usterka UPS
●LED na ○ LED Poza ★ LED błyskowy
Czynnosci na ekranie LCD
Modo UPS
LCD
Descriçã o
Alimentação do
UPS
Quando o UPS é ligado entrará neste modo
durante alguns 4 segundos.
Modo CA
Quando o RVA está a funcionar, o ícone
pisca a cada segundo.
Informacje na ekranie LCD w kolejnosci przy
dotknieciu ekranu
1. Napiecie zewnetrzne
2. Napiecie wewnetrzne
3. Poziom obciazenia
4. Pojemnosc baterii
Sobrecarga no
modo CA
O ícone ficará intermitente.
Quando ocorre uma sobrecarga o alarme emite
um sinal sonoro a cada 0,5 segundos.
Modo de bateria
Quando o nível da bateria estiver baixo, o ícone
i piscará a cada segundo.
Alarm bedzie wybrzmiewal co 10 sekund oraz
informacje beda wyswietlane na ekranie LCD w
podanej kolejnosci
1. Napiecie wyjsciowe
2. Napiecie wejsciowe
3. Poziom obciazenia
4. Pojemnosc baterii
Sobrecarga no
modo de bateria
O ícone ficará intermitente.
O alarme emitirá um sinal sonoro a cada 0.5
segundos.
WAZNE: Jesli podswietlenie sie wylaczy mozesz je aktywowac poprzez dotkniecie ekranu
Tabela Bledow
Stan błędu
LCD
Rozwiązania
Output short circuited
Odłączyć ładunki zwarte i znowu restart UPS.
Usterka
Pozbadz sie przeciazenia z urzadzenia a nastepnie restartuj je.
Koniec ladowania
Skontaktuj sie ze sprzedawca
Źle lub poważnie
rozładowany
akumulator
Proszę wymienić baterię.
High output voltage
fault
Skontaktuj sie ze sprzedawca
Powyżej temperatury
1. Wyłącz urządzenie i poczekać do chłodzenia.
2. Albo usunięcia nadmiernych obciążeń i czekać na chłodzenie
W przypadku wystapienia usterki prosze skontaktowac sie z serwisem.
• ATENÇ Ã O! Para evitar o risco de incêndio ou choque eléctrico, utilize o aparelho apenas dentro de casa
num local com temperatura e humidade controladas e sem substâncias contaminadoras. (Consulte as
respectivas especificações)
• ATENÇÃ O!Para reduzir o risco de sobreaquecimento, não obstrua as aberturas de ventilação da UPS e evite
expor a unidade a luz solar directa nem instale a unidade junto de aparelhos, tais como aquecedores ou
lareiras.
• ATENÇÃ O!Não ligue aparelhos que não estejam relacionados com o computador, tais como equipamento
médico, respiradores artificiais, fornos de microondas ou aspiradores à UPS.
• ATENÇÃ O! Não ligue a entrada da UPS à própria saída.
• ATENÇÃ O! Não coloque bebidas ou outros objectos que contenham líquidos sobre ou junto da unidade.
• ATENÇÃ O! Em caso de emergência, prima o botão OFF (Desligar) e retire o cabo de alimentação da fonte
de alimentação CA para desligar correctamente a UPS.
• ATENÇÃ O! Não ligue um extensão eléctrica ou um supressor de picos à UPS.
• ATENÇÃ O! Por motivos de segurança, se a UPS tiver um chassis metálico, deve ligá-la à terra durante a
instalação de modo a reduzir a corrente de fuga abaixo de 3,5 mA.
• ATENÇ Ã O! Os trabalhos de reparação ou assistência devem ser realizados ou supervisionados apenas por
pessoal devidamente formado.
• ATENÇÃ O! Quando substituir as baterias, utilize o mesmo número e tipo.
• ATENÇÃ O! A tensão interna da bateria é de 12 V CC. Bateria de 6 células, selada, de aço e chumbo.
Instrukcja obsługi
Painel LCD
Przelacznik zasilania
Przelacznik zasilania z
infomacjami na ekranie LCD
Entrada CA
Receptáculos de saída
Disjuntor
RJ-11
USB (opcja)
RJ-45 (opcja)
PL
EN
Page 18

4 godziny
ATENÇ ÃO: NUNCA ligue uma impressora laser ou um scanner à UPS, isso pode danificar a unidade.
• ATENÇÃ O! Não deite as baterias numa fogueira, uma vez que podem explodir.
• ATENÇÃ O! Não abra nem danifique a bateria ou as baterias. O electrólito derramado é nocivo para a pele e
os olhos.
• ATENÇ Ã O! Desligue a UPS antes de efectuar a limpeza e não utilize detergentes líquidos ou pulverizantes.
• ATENÇÃ O! Uma bateria pode representar um risco de choque eléctrico e corrente de curto-circuito elevada.
Antes de substituir as baterias, deve ter em conta as seguintes precauções:
1) Retire quaisquer relógios, anéis ou outros objectos metálicos.
2) Utilize ferramentas com pegas isolantes.
3) Use luvas e botas de borracha.
4) Não coloque ferramentas ou peças metálicas em cima das baterias.
5) Desligue a fonte de carga antes de ligar ou desligar os terminais da bateria.
Antes da instalação, inspeccione a unidade e o conteúdo para verificar que não existem danos nem
componentes em falta.
❶
Condições de instalação e armazenamento
Instale a UPS num local protegido sem excesso de poeira e com ventilação adequada. Coloque a UPS
afastada de outras unidades e a uma distância de pelo menos 20 cm para evitar interferências. Não utilize
a UPS se a temperatura e a humidade registarem valores superiores ao limite recomendado (consulte as
especificações)
❷
Ligação à corrente eléctrica e dispositivo de carga
Ligue o cabo de entrada CA à tomada de parede e carregue a UPS durante
pelo menos 6 horas antes de a utilizar. A unidade carrega a bateria quando é
ligada à corrente eléctrica.
❸
Ligação de dispositivos
Ligue os dispositivos às ligações de saída no painel traseiro da UPS. Prima o interruptor para ligar o aparelho. Os
dispositivos estão agora protegidos pela UPS.
❹ Ligar modem/telefone/rede protecção contra sobrecargas (apenas para o modelo com
RJ-11/RJ45)
Ligue o modem/linha telefónica à ligação “IN” (Entrada) da protecção contra sobrecargas na parte de trás da
unidade UPS. A outra extremidade deve ser ligada à ligação no computador “OUT” (Saída) para o telefone.
❺ Ligar cabo de comunicaçã o (apenas para modelos com porta USB/RS-232)
Para activar o encerramento/ligação da UPS e a monitorização de estado, ligue o cabode comunicação
USB/RS-232 e o outro à porta de comunicação do PC. Depois de instalar o software de monitorização, pode
agendar o encerramento/ligação da UPS e monitorizar o estado da UPS.
❻
Ligar/Desligar a unidade
Prima o interruptor para ligar a UPS. Para a desligar, prima e mantenha premido o interruptor durante 5
segundos.
Model
400
600
800
CAPACITATE
400VA/240W
600VA/360W
800VA/480W
INTRARE Tensiune
220/230/240VAC
INTRARE Interval tensiune
162-290 VAC
IEŞIRE Reglare tensiune
± 10 % (Tryb bateryjny)
Zakres częstotliwości (Tryb bateryjny)
50Hz +/-1 Hz
Timp de transfer
Tipic 2-6 ms
Formă undă
Symulacja sinusoidy
ACUMULATOR Tip & număr
12V/4.5Ahx1
12V/7Ahx1
12V/9Ahx1
Timp de încărcare
în 4-6 ore ajunge la 90% din capacitate
Dimensiune (Lxlxh) mm
LED: 279 x 101 x 142 / LCD: 300 x 101 x 142
Greutate netă
(kg)
LED
3.55
4.2
4.9
LCD
3.7
4.4
5.0
Umiditate
0-90% RH @ 0-40°C (non-condensare)
Nivel zgomot
Mai mic de 40 dB
Model
1000
1500
2000
CAPACITATE
1KVA/600W
1.5KVA/900W
2KVA/1200W
INTRARE Tensiune
220/230/240VAC
INTRARE Interval tensiune
162-290 VAC
IEŞIRE Reglare tensiune
± 10 % (Tryb bateryjny)
Zakres częstotliwości (Tryb bateryjny)
50Hz +/-1 Hz
Timp de transfer
Tipic 2-6 ms
Formă undă
Symulacja sinusoidy
ACUMULATOR Tip & număr
12V/7Ah x 2
12V/9Ah x 2
12V/9Ah x 2
Timp de încărcare
în 4-6 ore ajunge la 90% din capacitate
Dimensiune (Lxlxh)
320 x 130 x 182
Greutate netă (kg)
8.2
10.4
11
Umiditate
0-90% RH @ 0-40°C (non-condensare)
Nivel zgomot
Mai mic de 40 dB
Problemă
Cauză posibilă
Soluţie
Nu apar cuvinte pe afişajul de pe
panoul anterior.
Acumulator aproape descărcat.
Încărcaţi unitatea UPS timp de cel puţin 6 ore.
Defect acumulator.
Înlocuiţi acumulatorul cu acelaşi tip de
acumulator.
Unitatea UPS nu este pornită.
Apăsaţi întrerupătorul din nou pentru a porni
unitatea UPS.
Alarma sună continuu deşi
alimentarea cu curent este normală,
Unitatea UPS este supraîncărcată.
Îndepărtaţi câteva dispozitive. Înainte de a
conecta echipamentele, verificaţi că sarcina de
încărcare se potriveşte cu capacitatea unităţii
UPS indicată în specificaţii.
Când se întrerupe curentul, timpul
de recuperare este scurt.
Unitatea UPS este supraîncărcată.
Îndepărtaţi unele sarcini critice.
Tensiunea acumulatorului este
prea scăzută.
Încărcaţi unitatea UPS timp de cel puţin 6 ore.
Defect acumulator. Temperatura
de funcţionare ar putea fi prea
mare, sau acumulatorul nu este
folosit în mod corect.
Înlocuiţi acumulatorul cu acelaşi tip de
acumulator.
Alimentarea cu curent este normală
dar unitatea se află în mod
acumulator.
Cablul de alimentare este
deconectat.
Verificaţi şi reconectaţi cablul de alimentare.
Instrukcja obsługi
PL
ţ
Page 19

Manual do usuário
Line Interactive UPS
Informaçõ es de garantia e assistência
Obrigado por ter adquirido este produto UPS da Mustek.
Siga as instruções no manual do produto e, caso se aplique, no manual de instalação do
software, para tirar o máximo partido do seu produto.
Instalação do software:
Se os seus produtos incluírem software, irá encontrar um CD Rom na embalagem que
contém esse software. Siga as instruções durante a instalação do software.
Pode transferir o software, o manual e o manual de referência a partir do seguinte
website: http://www.power-software-download.com/viewpower.html
Garantia:
Como fabricantes, fornecemos um mínimo de 1 ano de garantia ao nosso produto.
No entanto, deve contactar o seu revendedor para obter informações sobre o período
exato da garantia e os termos da mesma, pois o período e os termos da garantia podem
variar de acordo com o país ou região.
Resolução de problemas:
Consulte o capítulo de resolução de problemas no seu manual (hardware e software).
Adicionalmente:
Visite regularmente o nosso website (www.Mustek.eu) para consultar as atualizações de
software, assim como as Perguntas Frequentes (FAQ).
Se, mesmo assim, não conseguir resolver o seu problema, contacte o seu revendedor
para obter ajuda.
Assistência e manutenção:
Se o produto necessitar de assistência ou manutenção durante o período de garantia,
contacte sempre o seu revendedor para obter informações sobre os procedimentos.
Recomendamos que contacte o seu revendedor mesmo que o produto se encontre fora
do período de garantia. Em qualquer caso, certifique-se de que as operações de
assistência e de manutenção são sempre executadas por um técnico qualificado.
Manual do usuário
PT
ADVERTÊNCIA: Trata-se de um produto de categoria UPS C2. Num ambiente
residencial este produto pode causar interferência nas radiofrequências, em
poderá ser necessário que o utilizador tome outras medidas.
Page 20

Você deve ter recebido os seguintes itens dentro da caixa:
- Unidade UPS - Guia de consulta rápida - Cartão de garantia
Vista frontal: Vista traseira:
400VA/600VA/800VA
1000VA/1500VA/2000VA
LED
Alarme
UPS Estado
LED
Alarme
UPS Estado
●
Fora
A alimentação é
normal e UPS é
operado normalmente.
●Verde
Fora
A alimentação é normal
e UPS é operado
normalmente
★
Soando a cada 10
segundos
Falha de energia e UPS
está em modo de
bacteria
★Amarelo
Soando a cada
10 segundos
Falha de energia e
UPS está em modo de
bacteria
★
Soando a cada
segundo
bateria fraca
★Amarelo
Soando a cada
segundo
bateria fraca
○
Fora
UPS está desligado.
○Verde
Fora
UPS está desligado.
●
continuamente
soando
culpa UPS
●Vermelho
continuamente
soando
culpa UPS
●LED em ○ LED Fora★ LED piscando
Indicaçã o operação
Modo UPS
LCD
Descrição
Alimentação do
UPS
Quando o UPS é ligado entrará neste modo
durante alguns 4 segundos.
Modo CA
Quando o RVA está a funcionar, o ícone
Informações LCD serão exibidos na seguinte
ordem quando LCD é tocado.
1. voltagem de saída
2. tensão de entrada
pisca a cada segundo.
3. nível de carga
4. Capacidade de carga
Sobrecarga no
modo CA
O ícone ficará intermitente.
Quando ocorre uma sobrecarga o alarme
emite um sinal sonoro a cada 0,5 segundos.
Modo de bateria
Quando o nível da bateria estiver baixo, o ícone
piscará a cada segundo.
Alarme emite um sinal sonoro a cada 10
segundos e informações de LCD serão
exibidos na seguinte ordem quando LCD é
tocado
1. Voltagem de saída
2. tensão de entrada
3. nível de carga
4. Capacidade de carga
Sobrecarga no
modo de bateria
O ícone f icará intermitente.
Quando ocorre uma sobrecarga o alarme
emite um sinal sonoro a cada 0,5 segundos.
NOTA: Se retroiluminação desliga, você pode ativá-lo tocando na tela
Falha Tabela de Có digos:
condiçã o de falha
LCD
Soluçõ es
Saída de curto-circuito
Cargas em curto-circuito desligar e reiniciar o UPS novamente.
Falha de sobrecarga
Desligue todas as cargas de saída e reiniciar o UPS novamente.
Sobrecarga
Chamada de serviço imediatamente .
Bateria ruim ou
severamente
descarregada
Por favor, substitua a bateria.
Falta de tensão de saída
de alta
Chamada de serviço imediatamente.
Over-temperature
Acima da temperatura
1. Desligue o aparelho e esperar para o resfriamento
2. Remover cargas excessivas e esperar para refrigeração
Se ocorrer alarme de falha, por favor ligue para o serviço imediatamente
ATENÇ Ã O! Para evitar o risco de incêndio ou choque eléctrico, utilize o aparelho apenas dentro de casa num local com
temperatura e humidade controladas e sem substâncias contaminadoras. (Consulte as respectivas especificações)
ATENÇ Ã O! Para reduzir o risco de sobreaquecimento, não obstrua as aberturas de ventilação da UPS e evite expor a
unidade a luz solar directa nem instale a unidade junto de aparelhos, tais como aquecedores ou lareiras.
ATENÇ Ã O! Não ligue aparelhos que não estejam relacionados com o computador, tais como equipamento médico,
respiradores artificiais, fornos de microondas ou aspiradores à UPS.
ATENÇ Ã O! Não ligue a entrada da UPS à própria saída.
ATENÇ Ã O! Não coloque bebidas ou outros objectos que contenham líquidos sobre ou junto da unidade.
ATENÇ Ã O! Em caso de emergê ncia, prima o botão OFF (Desligar) e retire o cabo de alimentação da fonte de alimentação
CA para desligar correctamente a UPS.
ATENÇ Ã O! Não ligue um extensão eléctrica ou um supressor de picos à UPS.
ATENÇ Ã O! Por motivos de segurança, se a UPS tiver um chassis metálico, deve ligá-la à terra durante a instalação de
modo a reduzir a corrente de fuga abaixo de 3,5 mA.
ATENÇ Ã O! Os trabalhos de reparação ou assistência devem ser realizados ou supervisionados apenas por pessoal
devidamente formado.
ATENÇ Ã O! Quando substituir as baterias, utilize o mesmo número e tipo.
ATENÇ Ã O! A tensão interna da bateria é de 12 V CC. Bateria de 6 células, selada, de aço e chumbo.
ATENÇ Ã O! Não deite as baterias numa fogueira, uma vez que podem explodir.
ATENÇ Ã O! Não abra nem danifique a bateria ou as baterias. O electrólito derramado é nocivo para a pele e os olhos.
Manual do usuário
Painel LCD
Interruptor de alimentação
Interruptor de alimentação
com indicador LED.
Entrada CA
Receptáculos de saída
Disjuntor
RJ-11
USB (opção)
RJ-45 (opção)
PT
EN
Page 21

4 horas
ATENÇ ÃO: NUNCA ligue uma impressora laser ou um scanner à UPS, isso pode danificar a
unidade.
ATENÇ Ã O! Desligue a UPS antes de efectuar a limpeza e não utilize detergentes líquidos ou pulverizantes.
ATENÇ Ã O! Uma bateria pode representar um risco de choque eléctrico e corrente de curto-circuito elevada. Antes de
substituir as baterias, deve ter em conta as seguintes precauções:
1) Retire quaisquer relógios, anéis ou outros objectos metálicos.
2) Utilize ferramentas com pegas isolantes.
3) Use luvas e botas de borracha.
4) Não coloque ferramentas ou peças metálicas em cima das baterias.
5) Desligue a fonte de carga antes de ligar ou desligar os terminais da bateria.
Antes da instalação, inspeccione a unidade e o conteúdo para verificar que não existem danos nem
componentes em falta.
❶Condiçõ es de instalação e armazenamento
Instale a UPS num local protegido sem excesso de poeira e com ventilação adequada. Coloque a UPS afastada
de outras unidades e a uma distância de pelo menos 20 cm para evitar interferências. Não utilize a UPS se a
temperatura e a humidade registarem valores superiores ao limite recomendado (consulte as especificações)
❷
Ligação à corrente eléctrica e dispositivo de carga
Ligue o cabo de entrada CA à tomada de parede e carregue a UPS durante
pelo menos 6 horas antes de a utilizar. A unidade carrega a bateria quando é
ligada à corrente eléctrica.
❸
Ligação de dispositivos
Ligue os dispositivos às ligações de saída no painel traseiro da UPS. Prima o interruptor para ligar o aparelho. Os
dispositivos estão agora protegidos pela UPS..
❹ Ligar modem/telefone/rede protecção contra sobrecargas (apenas para o modelo com
RJ-11/RJ45)
Ligue o modem/linha telefónica à ligação “IN” (Entrada) da protecção contra sobrecargas na parte de trás da
unidade UPS. A outra extremidade deve ser ligada à ligação no computador “OUT” (Saída) para o telefone.
❺ Ligar cabo de comunicaçã o (apenas para modelos com porta USB/RS-232)
Para activar o encerramento/ligação da UPS e a monitorização de estado, ligue o cabo de comunicação
USB/RS-232 e o outro à porta de comunicação do PC. Depois de instalar o software de monitorização, pode
agendar o encerramento/ligação da UPS e monitorizar o estado da UPS.
❻
Ligar/Desligar a unidade
Prima o interruptor para ligar a UPS. Para a desligar, prima e mantenha premido o interruptor durante 5
segundos.
Modelo
400
600
800
CAPACIDADE
400VA/240W
600VA/360W
800VA/480W
ENTRADA Tensão
220/230/240VAC
ENTRADA Gama de tensões
162-290 VAC
Regulação de tensã o
± 10 % (modo de bateria)
Alcance de frequência (modo de bateria)
50Hz +/-1 Hz
Tempo de transferência
Típica, 2-6 ms
Forma de onda
Simulado Sine Wave
BATERIA Tipo e nú mero
12V/4.5Ahx1
12V/7Ahx1
12V/9Ahx1
Tempo de carga
4 a 6 horas de recuperação para 90% da capacidade
Dimensão (PxLxC) mm
LED: 279 x 101 x 142 / LCD: 300 x 101 x 142
Peso líquido (kgs)
LED
3.55
4.2
4.9
LCD
3.7
4.4
5.0
Humidade
0-90% RH @ 0-40°C (sem condensação)
Nível de ruído
Menos de 40 dB
CAPACIDADE
1000
1500
2000
ENTRADA Tensão
1KVA/600W
1.5KVA/900W
2KVA/1200W
ENTRADA Gama de tensões
220/230/240VAC
Regulação de tensã o
162-290 VAC
Alcance de frequência (modo de bateria)
± 10 % (modo de bateria)
Tempo de transferência
50Hz +/-1 Hz
Forma de onda
Típica, 2-6 ms
BATERIA Tipo e nú mero
Simulado Sine Wave
Tempo de carga
12V/7Ah x 2
12V/9Ah x 2
12V/9Ah x 2
Dimensão (PxLxC)
4 a 6 horas de recuperação para 90% da capacidade
Peso líquido (kgs)
320 x 130 x 182
Humidade
8.2
10.4
11
Nível de ruído
0-90% RH @ 0-40°C (sem condensação)
CAPACIDADE
Menos de 40 dB
Problema
Causa possível
Solução
Não aparece texto no visor
do painel frontal.
Bateria fraca.
Carregue a UPS durante pelo menos 6
horas.
Bateria defeituosa.
Substitua a bateria por um modelo que
seja idêntico.
A UPS não está ligada.
Prima novamente o interruptor de
corrente para ligar a UPS.
O alarme soa
continuamente
embora a alimentação
eléctrica seja normal.
A UPS está sobrecarregada.
Remova alguns dispositivos. Antes de
voltar a ligar o equipamento, verifique
se a carga corresponde à capacidade da
UPS indicada nas especificações.
Quando ocorre uma falha de
energia, o tempo de reserva
é menor.
A UPS está sobrecarregada.
Remova alguma carga crítica.
A tensão da bateria é
demasiado fraca.
Carregue a UPS durante pelo menos 6
horas.
Bateria defeituosa. A
temperatura de
funcionamento pode ser
demasiado alta ou a bateria
não está a ser utilizada
correctamente.
Substitua a bateria por um modelo que
seja idêntico.
A corrente eléctrica é
normal mas a unidade está
no modo de bateria.
O cabo de alimentação está
solto.
Verifique e volte a ligar o cabo de
alimentação.
Manual do usuário
PT
Page 22

Manual de utilizare
Line Interactive UPS
Informaţii despre garanţie şi service
Vă mulţumim pentru cumpărarea acestei surse de alimentare neîntreruptibile Mustek.
Urmaţi instrucţiunile din manualul produsului şi, dacă este cazul, din manualul de
instalare a software-ului pentru o utilizare optimă a produsului.
Instalarea software-ului:
Dacă produsul este livrat împreună cu software, veţi găsi în cutie un CD-Rom care
conţine software-ul.
Urmaţi instrucţiunile atunci când instalaţi software-ul.
Puteți descărca software-ul, manualul și manualul de referințe rapide de pe următorul
site: http://www.power-software-download.com/viewpower.html
Garanție:
În calitate de producător, oferim o garanţie de minimum un an pentru produsul nostru.
Totuși, pentru perioada exactă de garanție și condițiile garanției, trebuie să contactați
revânzătorul, deoarece perioada și condițiile garanției pot să difere în funcție de
țară/regiune.
Rezolvarea problemelor:
Consultați capitolul din manual (pentru hardware și software) privind rezolvarea
problemelor.
În plus: Consultați periodic site-ul nostru Web (www. Mustek.eu) pentru actualizări de
software, precum şi Întrebări frecvente (FAQ) .
Dacă aceasta nu vă rezolvă problema, contactaţi revânzătorul pentru asistenţă.
Service şi întreţinere:
Dacă produsul necesită lucrări de service sau întreţinere în perioada de garanţie,
contactaţi întotdeauna revânzătorul pentru procedurile respective. Dacă s-a depăşit
perioada de garanţie, vă sfătuim să contactaţi revânzătorul şi în această situaţie. În
orice caz, asigurați-vă întotdeauna că lucrările de service sau întreținere asupra
produsului sunt efectuate de un tehnician calificat.
Manual de utilizare
RO
AVERTIZARE: Acesta este un dispozitiv UPS de categoria C2. Într-un mediu
rezidenţial acest dispozitiv poate cauza interferenţe radio. În acest caz
utilizatorul poate fi nevoit să ia măsuri suplimentare.
Page 23

ţ Ă Ă Ţ Ţ
Ar trebui să fi primit următoarele elemente din interiorul pachetului
- Unitate UPS - Ghid rapid de utilizare - Card de garantie
Vedere din faţă: Vedere din spate:
400VA/600VA/800VA
1000VA/1500VA/2000VA
LED
Alarma
UPS Stare
LED
Alarma
UPS Stare
●
de pe
Rețeaua de curent
este normal și UPS
funcționează în
mod normal
●Green
de pe
Rețeaua de curent
este normal și UPS
funcționează în mod
normal
★
Sondare la fiecare 10
secunde
Pană de curent are
loc și UPS este în
modul baterie.
★Yellow
Sondare la fiecare
10 secunde
Pană de curent are
loc și UPS este în
modul baterie.
★
Sondare în fiecare
secundă
Baterie descarcata
★Yellow
Sondare în fiecare
secundă
Baterie descarcata
○
de pe
UPS este oprit.
○Green
de pe
UPS este oprit.
●
continuu de sondare
Vina UPS
●Red
continuu de
sondare
Vina UPS
●LED pe ○ LED de pe ★ LED clipește
Funcționare Afișaj
Regim UPS
LCD
Descrierea
Conectare UPS
La conectarea UPS în funcţiune dispozitivul va
intra în acest regim pentru câteva 4 secunde.
Regim AC – curent
alternativ
Când funcţionează regimul AVR se afişează
Informatiile LCD vor fi afișate în ordinea
următoare când LCD este atins
1. Tensiunea de ieșire
iconiţa intermitent, o dată în secundă.
2. Tensiune de intrare
3. nivelul de încărcare
4. Capacitatea bateriei
Supraîncărcarea în
regim de curent
alternativ (AC)
se vor afişa intermitent
indicatoarele.
În caz de supraîncărcare semnalul de alarmă se
va auzi peste fiecare 0.5 secunde.
Regim de
alimentare de la
acumulator
Când acumulatorul este descărcat,
indicatorul se va afişa intermitent, o
dată în secundă.
Alarma va emite un semnal sonor la fiecare 10
secunde și informații LCD vor fi af ișate în
ordinea următoare când LCD este atins.
1. Tensiunea de ieșire
2. Tensiune de intrare
3. nivelul de încărcare
4. Capacitatea bateriei
Supraîncărcare în
regim de
funcţionare de la
acumulator
se vor afişa intermitent
indicatoarele.
În caz de supraîncărcare semnalul de alarmă se
va auzi peste fiecare 0.5 secunde.
NOTĂ: În cazul în care lumina de fundal se oprește, o puteți activa prin atingerea ecranului.
Fault Cod Tabel:
Stare defecțiune
LCD
soluţii
Ieșire scurt circuitat
loturile scurtcircuitată de deconectare și reporniți UPS
defect de suprasarcină
Deconectați toate sarcinile de ieșire și reporniți UPS
suprapreț
Apel pentru serviciu imediat.
baterie proastă sau
sever descărcat
Vă rugăm să înlocuiți bateria.
Defect de înaltă
tensiune de ieșire
Apel pentru serviciu imediat.
Temperatură peste
1. Opriți aparatul și așteptați să se răcească.
2. Eliminați încărcături excesive și așteptați răcirea
În cazul în care apare alarma de eroare, vă rugăm să sunați pentru service imediat.
ATENŢIE! Pentru a preveni riscul de incendiu sau electrocutare, folosiţi unitatea numai în încăperi închise cu o
temperatură şi umiditate controlate, fără substanţe contaminante conductoare. (Consultaţi specificaţiile).
ATENŢIE! Pentru a reduce riscul de supraîncălzire, nu acoperiţi orificiile de ventilaţie ale unităţii UPS şi evitaţi expunerea
unităţii la lumina directă a soarelui sau instalarea sa în apropierea unor aparate precum radiatoare sau sobe.
ATENŢIE! Nu conectaţi articole care nu sunt calculatoare, precum echipament medical, echipament de suport vital,
cuptoare cu microunde sau aspiratoare la unitatea UPS.
ATENŢIE! Nu conectaţi cablul de intrare UPS la propria sa conexiune de ieşire.
ATENŢIE! Nu aşezaţi băuturi sau alte articole ce conţin lichide pe sau lângă unitate.
ATENŢIE! În cazul unei urgenţe, apăsaţi butonul OFF (Oprit) şi deconectaţi cablul de alimentare de la sursa de alimentare
AC pentru a dezactiva unitatea UPS în mod corespunzător.
ATENŢIE! Nu conectaţi prelungitoare sau prize cu protecţie la supratensiuni la unitatea UPS.
ATENŢIE! Dacă unitatea UPS are o carcasă din metal, din motive de siguranţă, pământarea este obligatorie în timpul
instalării pentru a reduce scăderea curentului sub 3,5 mA.
ATENŢIE! Operaţiile de reparaţie sau de service trebuie efectuate sau supravegheate numai de personal calificat.
ATENŢIE! Atunci când înlocuiţi acumulatorii, folosiţi acelaşi număr şi tip.
ATENŢIE! Tensiunea internă a acumulatorului este de 12 VDC. Acumulator etanş cu gel de plumb, cu 6 celule.
ATENŢIE! Nu aruncaţi acumulatorii în foc fiindcă pot exploda.
Manual de utilizare
Panou LCD
Întrerupător curent
Comutator de alimentare cu
LED indicator
Intrare AC
Prize de ieşire
Întrerupător circuit
RJ-11
USB (opţional)
RJ-45 (opţional)
RO
EN
Page 24

4 ore
ATENŢIE: Nu conectaţi NICIODATĂ o imprimantă laser sau scanner la unitatea UPS, acestea
pot deteriora unitatea.
ATENŢIE! Nu deschideţi sau deterioraţi acumulatorii. Electrolitul eliberat este dăunător pielii şi ochilor.
ATENŢIE! Scoateţi unitatea UPS din priză înainte de curăţare şi nu folosiţi detergenţi lichizi sau sub formă de spray.
ATENŢIE! Un acumulator poate prezenta un risc de electrocutare şi scurtcircuitare. Următoarele precauţii trebuie
respectate înainte de înlocuirea acumulatorilor:
1) Îndepărtaţi ceasurile, inelele şi celelalte obiecte din metal de pe dvs.
2) Folosiţi scule cu mânere izolate.
3) Purtaţi mănuşi şi cizme de cauciuc.
4) Nu aşezaţi scule sau părţi metalice pe acumulatori.
5) Deconectaţi sursa de încărcare înainte de conectarea sau deconectarea terminalelor acumulatorilor.
Înainte de instalare, verificaţi unitatea şi conţinutul pachetului ca nimic să nu fie deteriorat sau să lipsească.
❶
Condiţii de amplasare şi păstrare
Instalaţi unitatea UPS într-o zonă protejată, fără praf şi care este ventilată adecvat. Aşezaţi unitatea UPS la
o distanţă de cel puţin 20 de cm faţă de alte unităţi pentru a evita interferenţa. NU puneţi unitatea UPS în
funcţiune dacă temperatura şi umiditatea depăşesc limitele recomandate (consultaţi specificaţiile).
❷
Conectare la sursa de alimentare şi încărcare
Băgaţi cablul de intrare AC în priza de perete şi încărcaţi unitatea UPS timp de
cel puţin 6 ore înainte de utilizare. Unitatea îşi încarcă acumulatorii în timp ce este conectată la sursa de
alimentare.
❸
Conectarea dispozitivelor
Conectaţi dispozitivele la conexiunile de ieşire de pe panoul posterior al unităţii UPS. Porniţi alimentarea cu
curent apăsând întrerupătorul; dispozitivele sunt acum protejate de unitatea UPS.
❹ Conectaţi protecţia de supratensiune pentru modem/telefon/reţea (disponibilă numai la modelul
cu RJ-11/RJ45)
Introduceţi cablul modemului/linia telefonică în conexiunea „IN” protejată împotriva supratensiunii de pe panoul
posterior al unităţii UPS, celălalt capăt trebuie introdus în conexiunea „OUT” a calculatorului pentru telefon.
❺ Conectarea cablului de comunicare (numai pentru modelul cu port USB/RS-232)
Pentru a activa oprirea/pornirea unităţii UPS şi monitorizarea stării de la distanţă, conectaţi cablul de
comunicare la portul USB/RS-232 şi celălalt capăt la portul de comunicare al calculatorului dvs. Cu software-ul
de monitorizare instalat, puteţi programa oprirea/pornirea unităţii UPS şi monitoriza starea sa
❻
Pornirea/oprirea unităţii
Apăsaţi întrerupătorul pentru a porni unitatea UPS. Pentru a o opri, menţineţi întrerupătorul apăsat timp de 5
secunde.
Model
400
600
800
CAPACITATE
400VA/240W
600VA/360W
800VA/480W
INTRARE Tensiune
220/230/240VAC
INTRARE Interval tensiune
162-290 VAC
IEŞIRE Reglare tensiune
± 10 % (modul baterie)
Gama de frecventa (modul baterie)
50Hz +/-1 Hz
Timp de transfer
Typical 2-6 ms
Formă undă
Simulată Wave sinus
ACUMULATOR Tip & număr
12V/4.5Ahx1
12V/7Ahx1
12V/9Ahx1
Timp de încărcare
în 4-6 ore ajunge la 90% din capacitate
Dimensiune (Lxlxh) mm
LED: 279 x 101 x 142 / LCD: 300 x 101 x 142
Greutate netă
(kg)
LED
3.55
4.2
4.9
LCD
3.7
4.4
5.0
Umiditate
0-90% RH @ 0-40°C (non-condensare)
Nivel zgomot
Mai mic de 40 dB
Model
1000
1500
2000
CAPACITATE
1KVA/600W
1.5KVA/900W
2KVA/1200W
INTRARE Tensiune
220/230/240VAC
INTRARE Interval tensiune
162-290 VAC
IEŞIRE Reglare tensiune
± 10 % (modul baterie)
Gama de frecventa (modul baterie)
50Hz +/-1 Hz
Timp de transfer
Typical 2-6 ms
Formă undă
Simulată Wave sinus
ACUMULATOR Tip & număr
12V/7Ah x 2
12V/9Ah x 2
12V/9Ah x 2
Timp de încărcare
în 4-6 ore ajunge la 90% din capacitate
Dimensiune (Lxlxh)
320 x 130 x 182
Greutate netă (kg)
8.2
10.4
11
Umiditate
0-90% RH @ 0-40°C (non-condensare)
Nivel zgomot
Mai mic de 40 dB
Problemă
Cauză posibilă
Soluţie
Nu apar cuvinte pe afişajul de pe
panoul anterior.
Acumulator aproape descărcat.
Încărcaţi unitatea UPS timp de cel puţin 6 ore.
Defect acumulator.
Înlocuiţi acumulatorul cu acelaşi tip de
acumulator.
Unitatea UPS nu este pornită.
Apăsaţi întrerupătorul din nou pentru a porni
unitatea UPS.
Alarma sună continuu deşi alimentarea
cu curent este normală,
Unitatea UPS este
supraîncărcată.
Îndepărtaţi câteva dispozitive. Înainte de a
conecta echipamentele, verificaţi că sarcina
de încărcare se potriveşte cu capacitatea
unităţii UPS indicată în specificaţii.
Când se întrerupe curentul, timpul de
recuperare este scurt.
Unitatea UPS este
supraîncărcată.
Îndepărtaţi unele sarcini critice.
Tensiunea acumulatorului
este prea scăzută.
Încărcaţi unitatea UPS timp de cel puţin 6 ore.
Defect acumulator.
Temperatura de funcţionare ar
putea fi prea mare, sau
acumulatorul nu este folosit în
mod corect.
Înlocuiţi acumulatorul cu acelaşi tip de
acumulator.
Alimentarea cu curent este normală
dar unitatea se află în mod
acumulator.
Cablul de alimentare este
deconectat.
Verificaţi şi reconectaţi cablul de alimentare.
ş
Manual de utilizare
RO
ţ
Page 25

Руководство пользователя
Line Interactive UPS
Информация о гарантии и обслуживании
Благодарим Вас за покупку этого устройства Mustek UPS.
Для эффективного использования устройства соблюдайте инструкции,
приведенные в этом руководстве и, если необходимо, в руководстве по
установке программы.
Установка программного обеспечения
Если изделие поставляется с программным обеспечением, оно должно
находиться в коробке на компакт-диске.
Следуйте инструкциям по установке программного обеспечения.
Программу, руководство и краткие инструкции можно загрузить с сайта:
http://www.power-software-download.com/viewpower.html
Гарантия
Производитель предоставляет гарантию на изделие не менее 1 года.
Чтобы точнее узнать гарантийный срок и гарантийные условия, обратитесь к
своему торговому посреднику, так как эти данные зависят от страны и региона.
Решение проблем
При возникновении проблем следует обращаться к настоящему руководству
(аппаратные средства и программное обеспечение).
Дополнительная информация:
Регулярно проверяйте на нашем сайте (www.Mustek.eu) обновление
программного обеспечения, а также часто задаваемые вопросы (FAQ).
Если проблемы остаются, проконсультируйтесь со своим торговым посредником.
Сервисное и техническое обслуживание
Если требуется ремонт и техническое обслуживание в течение гарантийного
срока, порядок проведения необходимо узнать у своего торгового посредника.
Если гарантийный срок истек, рекомендуется также обращаться к торговому
посреднику. В этом случае необходимо убедиться, что техническое
обслуживание или ремонт изделия проводится квалифицированным
специалистом.
Руководство пользователя
RU
ВНИМАНИЕ: Этот продукт представляет собой ИБП категории С2. При использовании в
жилых помещениях он может создавать радиопомехи, в таком случае может возникнуть
необходимость применения пользователем дополнительных мер.
Page 26

Общее
ЖК дисплей
поставки
В упаковке находятся следующие компоненты:
- Блок бесперебойного питании (сокращенно ИБП)
- Инструкцию - Гарантийный талон
Передняя панель: Задняя панель:
400VA/600VA/800VA
1000VA/1500VA/2000VA
СВЕТОДИ
ОД
Аварийная
сигнализация
Статус ИБП
СВЕТОДИ
ОД
Аварийная
сигнализация
Статус ИБП
●
выключено
Сети нормально и ИБП
работает в
нормальном режиме.
●зеленый
выключено
Сети нормально и ИБП
работает в
нормальном режиме.
★
Зондирование
каждые 10
секунд
Сбой питания
происходит и ИБП
находится в режиме
работы от батареи.
★желтый
Зондировани
е каждые 10
секунд
Сбой питания
происходит и ИБП
находится в режиме
работы от батареи.
★
Зондирование
каждую
секунду
низкий уровень заряда
батареи
★желтый
Зондировани
е каждую
секунду
низкий уровень заряда
батареи
○
выключено
ИБП выключен .
○зеленый
выключено
ИБП выключен .
●
Постоянно
звучащий
неисправность ИБП
●зеленый
Постоянно
звучащий
неисправность ИБП
●LET на ○LET выключен★ LED мигающий
Действие Дисплей
Режим ИБП
ЖК-дисплей
Описание
Включение ИБП
При включении ИБП находится в этом режиме в
течение нескольких секунд.
Режим
переменного тока
LCD информация будет отображаться в
следующем порядке, когда LCD прикосновении.
При функционировании автоматической
стабилизации иконка мигает раз в
секунду.
1. выходное напряжение
2. Входное напряжение
3. уровень нагрузки
4. Емкость батареи
Перегрузка в
режиме
переменного тока
Мигают иконки
В случае перегрузки каждые 0,5 сек слышится
звуковой сигнал.
Режим
аккумулятора
При низком заряде батареи иконка
мигает раз в секунду.
Сигнализация будет издавать звуковой сигнал
каждые 10 секунд и ЖК-дисплей информация
будет отображаться в следующем порядке, когда
LCD прикосновении.
1. выходное напряжение
2. Входное напряжение
3. уровень нагрузки
4. Емкость батареи
Перегрузка в
режиме
аккумулятора
Мигают иконки
В случае перегрузки каждые 0,5 сек слышится
звуковой сигнал.
ЗАМЕТКА: Если подсветка выключается, вы можете активировать его, прикоснувшись к экрану.
Код неисправности Таблица:
состояние отказа
ЖК-дисплей
Решения
Выход короткое
замыкание
Отсоедините короткозамкнутым нагрузки и перезапустить ИБП
снова.
неисправность
перегрузки
Отключите все выходные нагрузки и снова перезапустить ИБП.
перезарядка
Обратитесь в сервисную службу немедленно.
Плохой или сильно
разряженной батареи
Пожалуйста, замените батарею.
Неисправность
высокого выходного
напряжения
Обратитесь в сервисную службу немедленно.
Перегретый
1. Выключите устройство и дождитесь охлаждения.
2. Удалить чрезмерных нагрузок и ждать охлаждения.
При возникновении тревоги неисправности , пожалуйста, обратитесь в сервисную службу немедленно.
ВНИМАНИЕ! Для предотвращения риска возгорания или поражения электрическим током, установите ИБП в
помещении с контролируемой температурой и влажностью, свободном от веществ-загрязнителей с
электропроводными свойствами. (См. спецификацию по допустимой температуре и влажности.)
ВНИМАНИЕ! Во избежание перегрева ИБП, не закрывайте вентиляционные отверстия и не подвергайте
устройство воздействию прямых солнечных лучей, не устанавливайте ИБП вблизи приборов излучающих тепло,
такие как обогреватели или печи.
ВНИМАНИЕ! Не подключайте не компьютерное оборудование, такие как медицинское оборудование,
жизненно-вспомогательное оборудование, микроволновые печи, пылесосы к ИБП.
ВНИМАНИЕ! Не замыкайте вход и выход ИБП.
ВНИМАНИЕ! Не допускайте попадания жидкостей или посторонних предметов в ИБП. Не ставьте напитки или
другие ёмкости с жидкостями на/рядом с устройством.
ВНИМАНИЕ! При возникновении чрезвычайной ситуации, нажмите кнопку
«Power on/off»
и отсоедините кабель
питания от электросети, для правильного отключения ИБП.
ВНИМАНИЕ! Не подключайте сетевые фильтры к выходу ИБП.
ВНИМАНИЕ! Для ИБП с металлическим корпусом, заземление является обязательным условием при установке
для обеспечения безопасности. (Для снижения вытоков тока до уровня ниже 3.5mA.
Светодиодные индикаторы
Руководство пользователя
ЖК панель
Выключатель
Выключатель питания со
светодиодным индикатором
AC вход
Выходные разъемы
Предохранитель
RJ-11
USB com. Порт (опция)
RJ-45 (опция)
RU
Инструкция по безопасности (СОХРАНИТЕ ЭТУ ИНСТРУКЦИЮ)
EN
Page 27

Выявление и устранение неполадок См таблицу ниже для решения мелких проблем
4 часа
ВНИМАНИЕ: НЕ ПОДКЛЮЧАЙТЕ лазерные принтеры и сканеры к ИБП. Это может
ВНИМАНИЕ! Обслуживание батарей должно выполняться только компетентными специалистами или под их
наблюдением, знающими аккумуляторные батареи и необходимые меры предосторожности. Не допускайте
вмешательство посторонних лиц.
ВНИМАНИЕ! При замене аккумулятора, используйте один и тот же номер и тип.
ВНИМАНИЕ! Напряжение аккумулятора 12VDC. Герметичная, свинцово-кислотная,6-ти секционная
аккумуляторная батарея.
ВНИМАНИЕ! Не бросайте аккумулятор в огонь, он может взорваться. Не открывайте и не разрушайте корпус
аккумулятора. Электролит вреден для кожи и глаз.
ВНИМАНИЕ! Отсоедините ИБП от сети перед уборкой и не используйте жидкие или распыляемые моющие
средства.
ВНИМАНИЕ! Батарея может стать причиной поражения электрическим током и короткого замыкания.
Соблюдайте следующие предосторожности при замене аккумулятора:
1) Снимите часы, кольца и другие металлические предметы.
2) Используйте инструменты с изолированными ручками.
3) Оденьте резиновые перчатки и сапоги.
4) Не кладите на аккумулятор металлические предметы и и нструменты.
5) Отсоедините ИБП от электросети перед заменой аккумулятора.
Перед использованием проверьте комплектацию
и осмотрите ИБП на предмет отсутствия повреждений корпуса.
❶
Условия эксплуатации
Установите ИБП в защищенном от пыли месте с хорошим воздухообменом. Установите ИБП на
расстоянии не менее 20 см от других устройств для предотвращения создания радиопомех. НЕ
используйте ИБП при температуре и влажности не соответствующих указанным в спецификации.
(Внимательно ознакомьтесь с инструкцией)
❷
Подключение к электросети и зарядка
Подключите ИБП к розетке. Перед использованием рекомендуется заряжать аккумулятор не менее 6
часов. Аккумулятор ИБП заряжается при подключении кэлектросети.
❸
Подключение устройств
Подключите устройства к выходным разъемам на задней панели ИБП. Просто нажмите кнопку «Power
on/off», теперь устройства подключённые к ИБП будут защищены.
❹ ВНИМАНИЕ: НЕ ПОДКЛЮЧАЙТЕ лазерные принтеры и сканеры к ИБП. Это может повредить
устройство
Подключите линию modem/phone к разъему “IN” на задней панели ИБП. С помощью другого кабеля
подключите компьютер к разъему “OUT”
❺ Подключение коммуникационного кабеля (для моделей с портом USB/RS-232)
Для дистанционного включения/выключения устройства и контроля состояния ИБП подключите ваш ПК
коммуникационным кабелем к порту USB/RS-232. Установив программное обеспечения мониторинга,
устанавливайте время включения/выключения устройства а также контролируйте состояние ИБП.
❻
Включение / выключение устройства
Для включения ИБП нажмите на кнопку «Power on/off» . Для выключения ИБП нажмите еще раз на
кнопку «Power on/off»
Модель
400
600
800
МОЩЬНОСТЬ
400VA/240W
600VA/360W
800VA/480W
ВХОД Напряжение
220/230/240VAC
Диапазон напряжений
162-290 VAC
Стабилизация напряжения
± 10 % (аккумулятора)
Диапазон частот (аккумулятора)
50Hz +/-1 Hz
Время переключения
стандартное 2-6 мс
Форма волны
Моделированая синусоидальная волна
БАТАРЕЯ Тип и количество
12V/4.5Ahx1
12V/7Ahx1
12V/9Ahx1
Время зарядки
4-6 часов восстанавливает 90% емкости
Размер (DxWxH) mm
LED: 279 x 101 x 142 / LCD: 300 x 101 x 142
Вес (кг)
LED
3.55
4.2
4.9
LCD
3.7
4.4
5.0
Влажность
0-90% RH @ 0-40°C (без конденсата)
Уровень шума
Менее 40 дБ
Модель
1000
1500
2000
МОЩЬНОСТЬ
1KVA/600W
1.5KVA/900W
2KVA/1200W
ВХОД Напряжение
220/230/240VAC
Диапазон напряжений
162-290 VAC
Стабилизация напряжения
± 10 % (аккумулятора)
Диапазон частот (аккумулятора)
50Hz +/-1 Hz
Время переключения
стандартное 2-6 мс
Форма волны
Моделированая синусоидальная волна
БАТАРЕЯ Тип и количество
12V/7Ah x 2
12V/9Ah x 2
12V/9Ah x 2
Время зарядки
4-6 часов восстанавливает 90% емкости
Размер (DxWxH)
320 x 130 x 182
Вес (кг)
8.2
10.4
11
Влажность
0-90% RH @ 0-40°C (без конденсата)
Уровень шума
Менее 40 дБ
Проблема
Возможная причина
Решение
Не работает ЖК монитор на
передней панели.
Низкий заряд аккумулятора
Заряжайте ИБП не менее 6 часов
Неисправность батареи
Замените аккумулятор
ИБП отключен
Нажмите кнопку
«Power on/off»
снова и включите ИБП.
При подключения к сети сигнал
звучит постоянно.
ИБП перегружен
Отключите часть устройств от ИБП,
Перед повторным включением
убедитесь, что нагрузка не
превышает заявленные в
характеристиках ИПБ
При отключенном
электричестве, резервные
время сократилось
ИБП перегружен
Отключите часть устройств
Аккумулятор не полностью заряжен
Заряжайте ИБП не менее 6 часов.
Батарея дефектом. Это может быть
связано с высокой температурой
эксплуатации окружающей среды, или
неправильной эксплуатации к батарее.
Замените аккумулятор
При подключения к сети ИБП
работает от батареи
Шнур питания не подключен
правильно
Подключите шнур питания
должным образом.
Установка и запуск
Руководство пользователя
RU
Спецификация
Page 28

Упутство за коришћење
Line Interactive UPS
Informacije o garanciji i servisiranju
Zahvaljujemo vam se na kupovini ovog Mustek UPS proizvoda.
Pridržavajte se svih uputstava u ovom uputstvu za upotrebu i ukoliko je primenljivo u
uputstvu za instalaciju softvera, kako biste maksimalno iskoristili vaš proizvod.
Instalacija softvera:
Ako se vaš proizvod isporučuje sa softverom, pronaći ćete CD Rom disk u kutiji sa
softverom. Pridržavajte se uputstava prilikom instalacije softvera.
Softver, uputstvo za upotrebu i kratko informativno uputstvo možete da preuzmete sa
sledeće veb lokacije: http://www.power-software-download.com/viewpower.html
Garancija:
Kao proizvođač, obezbeđujemo minimalno 1 godinu garancije na naš proizvod.
Međutim, za konkretni period garancije i uslove garancije potrebno je da kontaktirate
vašeg prodavca, budući da se uslovi i period garancije mogu razlikovati u zavisnosti od
zemlje i regije.
Rešavanje problema:
Proverite poglavlje u uputstvu za upotrebu (hardver i softver) o rešavanju problema.
Dodatno: Redovno proveravajte našu veb lokaciju (www. Mustek.eu) za ažuriranja
softvera, kao i za najčešća pitanja (FAQ) .
Ako to ne reši vaš problem, obratite se vašem prodavcu za savet.
Servisiranje i održavanje:
Ako proizvod zahteva servisiranje ili održavanje u garantnom roku, uvek se obratite
vašem prodavcu u vezi postupaka. Ukoliko je proizvod van garantnog roka,
preporučujemo da se takođe obratite vašem prodavcu. U svakom slučaju, uvek vodite
računa da servisiranje ili održavanje proizvoda obavlja stručno tehničko lice.
Упутство за коришћење
SR
УПOЗOРEЊE: Ово је UPS производ категорије Ц2. У резиденцијалном
окружењу овај производ може да проузрокује радио сметње, a у том
случају корисник може бити дужан да предузме додатне корективне мере
Page 29

производа
ЛЦД дисплеј
паковања
Важна безбедносна упутства МОЛИМО ВАС ПРОЧИТАЈТЕ УПУТСТВА
У кутији се треба налазити следеће:
- УПС уређај - Кратко упутство - Гарантни лист
Приказ са предње стране: Приказ са задње стране:
400VA/600VA/800VA
1000VA/1500VA/2000VA
ЛЕД
Алармни
УПС- статус
ЛЕД
Алармни
УПС- статус
●
Ван
Мрежни је нормално
и УПС је нормално
ради.
●Зелен
Ван
Мрежни је
нормално и УПС је
нормално ради .
★
Звучни сваких
10 секунди
Нестанка струје
јавља и УПС је на
режиму батерије.
★жут
Звучни сваких 10
секунди
Нестанка струје
јавља и УПС је на
режиму батерије.
★
Звучни сваки
секунд
Батерија при крају
★жут
Звучни сваки
секунд
Батерија при крају
○
Ван
УПС је искључен
○Зелен
Ван
УПС је искључен
●
kontinuirano
звучни
УПС- грешка
● црвен
kontinuirano
звучни
УПС- грешка
●ЛЕД на. ○ЛЕД је искључен ★ЛЕД диода трепери.
Операција Екран
УПС режим
LCD
Опис
УПС је укључен
Када sе УПС укључи, ући ће у овај режим за
неколико секунди.
Режим напајања
наизменичном
струјом
Када функционише AVR, икона ће
светлети сваки секунд.
ЛЦД информације ће бити приказана у следећем
редоследу када се додирне ЛЦД
1. Излазни напон
2. Улазни напон
3. nivo оптерећења
4. kapacitet батерије
Преоптерећење у
режиму напајања
наизменичном
струје
иконе ће светлети.
Када се појави преоптерећење, аларм ће се
укључивати сваких 0,5 секунди.
Батериски режим
Када је батерија празна, икона ће
светлети сваки секунд.
Аларм ће се укључити на сваких 10 секунди и
ЛЦД информације ће бити приказана у следећем
редоследу када се додирне ЛЦД .
1. Излазни напон
2. Улазни напон
3. nivo оптерећења
4. kapacitet батерије
Преоптерећење у
батериском режиму
иконе ће светлети.
Када се појави преоптерећење, аларм ће се
уклучивати сваких 0,5 секунди.
БЕЛЕШКА: Ако позадинско осветљење искључује , можете га активирати додиром на екран.
Фаулт цоде Табле:
грешка услов
LCD
rešenja
Излаз кратког споја
Искључите кратког споја оптерећења и поново се УПС поново .
оверлоад грешка
Искључите све излазне оптерећења и поново покрените УПС.
преоптерећење
Позив за услугу одмах.
Лоше или тешко
испразни батерија
Замените батерију.
Високи излазни напон
грешка
Позив за услугу одмах.
Преко температуре
1. Искључите уређај и чекати за хлађење.
2. Уклоните прекомерне оптерећења и чекати за хлађење.
Ако се појави аларм грешке, позовите за услугу одмах.
ПАЖЊА! Да бисте спречили ризик од пожара или струјног удара, користите само унутар подручја
где је температура и влажност контролисана без проводних загађивача. (Видите спецификације)
ПАЖЊА! Да бисте смањили ризик од прегревања, немојте покривати отворе за хлађење УПС-а и
избегавајте изложавање уређаја на директну сунчеву светлост или инсталирање уређаја у близини
апарата као грејалица или пећи.
ПАЖЊА! Немојте прикачивати некомпјутерске производе, као што је медицинска опрема, опрема за
одржавање у живот, микроталасне пећнице или усисиваче на УПС.
ПАЖЊА! Немојте укључивати улаз УПС-а у властити излаз.
ПАЖЊА! Немојте стављати пића или друге предмете које садрже текућине на или у близини
уређаја.
ПАЖЊА! У случају хитности, притисните дугме за искључивање и искључите кабл за напајање из
напајања наизменичном струјом да бисте прописно искључили УПС.
ПАЖЊА! Немојте прикачивати продужни кабл или заштитник од пренапона на УПС.
ПАЖЊА! Уколико УПС има метални оквир, због безбедности, уземљење је обавезно у току
инсталације да би се смањило протицање струје под 3.5mA.
ПАЖЊА! Поправке или серисне радове треба обављати или надгледавати само обучени персонал.
ПАЖЊА! Када мењате батерије, користите исти број и врсту.
ПАЖЊА! Унутрашња волтажа батерије је 12VDC. Запечаћења, оловно-киселинска, 6-ћелиска
ЛЕД индикатори
Упутство за коришћење
LCD плоча
Прекидач за напајање
Прекидач за напајање са
ЛЕД индикатором
Улазни прикључак
Излазне утичнице
Прекидач кола
RJ-11
USB (oпција)
RJ-45 (oпција)
SR
EN
Page 30

4 сата
ПАЖЊА: НИКАД не повезујте ласерски штампач или скенер на УПС уређај. То може
оштетити уређај.
батерија.
ПАЖЊА! Не бацајте батерије у ватру пошто могу експлодирати.
ПАЖЊА! Немојте отварати или оштећивати батерију или батерије. Ослобођени електролити су
штетни за кожу и очи.
ПАЖЊА! Искључите УПС прије чишћења и немојте користити текуће или детерџенте у спреју.
ПАЖЊА! Батерија може претстављати ризик од струјног удара и кратког споја високог напона.
Следеће предострожности се требају користити пре замене батерија:
1) Уклоните сатове, прстење, или друге металне предмете.
2) Користите алат са изолованим рукохватима.
3) Носите гумене рукавице и чизме.
4) Не стављајте алат нити металне делове на врх батерија.
5) Искључите уређај са извора напајања пре повезивања и уклањања крајева батерије.
Пре инсталације, молимо проверите уређај и садржај да нешто није оштећено или недостаје.
❶ Услови чувања и складирања
Поставите УПС у заштићеној области без прекомерне прашине и са одговарајућим протоком ваздуха.
Молимо поставите УПС на растојању од најмање 20 цм од других уређаја да бисте избегли сметње.
НЕМОЈТЕ укључивати УПС тамо где су температура и влажност изнад препоручених граница
(Молимо проверите спецификације)
❷
Повезивање са главним напајањем и пуњење
Укључите кабл за наизменичну струју у утичницу и пуните УПС најмање 6 сати пре употребе. Уређај пуни
своју батерију док је повезан на главно напајање.
❸
Повежите уређаје
Укључите уређаје у излазне прикључке на задњој плочи УПС-а. Укључите напајање притиском на
прекидач, уређаји су сада заштићени УПС-ом.
❹ Повежите модем/телефон/мрежу за заштуту од преоптерећења напона (Само за моделе
са RJ-11/RJ45)
Укључите модем/телефонску линију у прикључак “IN” са заштитом од преоптерећења напона на задњој
страни УПС уређаја, други је крај потребно укључити у прикључак “OUT” за телефон на рачунару.
❺ Повежите комуникациски кабл (Само за модел са USB/RS-232 портом)
Да бисте омогућили даљинско искључивање/укључивање УПС-а и контролу статуса, повежите
комуникациски кабл из порте USB/RS-232 и других до комуникациске порте вашег рачунара. Са
инсталираним софтвером за контролу, можете поставити искључивање/укључивање УПС-а и контролу
статуса УПС-а .
❻
Укључивање и искључивање уређаја
Притисните прекидач да бисте укључили УПС. Да бисте искључили, притисните и задржите прекидач 5
секунди.
Moдел
400
600
800
КАПАЦИТЕТ
400VA/240W
600VA/360W
800VA/480W
УЛАЗ Волтажа
220/230/240VAC
УЛАЗ Опсег волтаже
162-290 VAC
Регулација волтаже
± 10 % (režim батерија)
Фреквенцијски опсег (režim батерија)
50Hz +/-1 Hz
Време преноса
Уобичајено 2-6 ms
Облик сигнала
Симулатед сине ваве
БАТЕРИЈА Тип и број
12V/4.5Ahx1
12V/7Ahx1
12V/9Ahx1
Време пуњења
4-6 часова за обнову капацитета до 90%
Димензија (ДxТxВ) mm
LED: 279 x 101 x 142 / LCD: 300 x 101 x 142
Нето тежина (kg)
LED
3.55
4.2
4.9
LCD
3.7
4.4
5.0
Влага
0-90% RH @ 0-40°C (некондензирајућа)
Ниво буке
Мање од 40 dB
Moдел
1000
1500
2000
КАПАЦИТЕТ
1KVA/600W
1.5KVA/900W
2KVA/1200W
УЛАЗ Волтажа
220/230/240VAC
УЛАЗ Опсег волтаже
162-290 VAC
Регулација волтаже
± 10 % (režim батерија)
Фреквенцијски опсег (režim батерија)
50Hz +/-1 Hz
Време преноса
Уобичајено 2-6 ms
Облик сигнала
Симулатед сине ваве
БАТЕРИЈА Тип и број
12V/7Ah x 2
12V/9Ah x 2
12V/9Ah x 2
Време пуњења
4-6 часова за обнову капацитета до 90%
Димензија (ДxТxВ)
320 x 130 x 182
Нето тежина (kg)
8.2
10.4
11
Влага
0-90% RH @ 0-40°C (некондензирајућа)
Ниво буке
Мање од 40 dB
Проблем
Могући разлог
Решење
Нема речи на екрану предње
LCD плоче.
Батерија на измаку.
Пуните УПС најмање 6 часова.
Дефект батерије.
Замените батерију са истом врстом
батерије.
УПС није укључен.
Поново притисните прекидач за
напајање да бисте укључили УПС.
Аларм се непрекидно
оглашава, мада је напајање
електричном енергијом
нормално.
УПС је преоптерећен.
Искључите неке уређаје. Пре накнадног
повезивања опреме, молимо проверите
да оптерећење одговара капацитету
УПС-а који је наведен у спецификацији.
Када нестане струја, време
одржавања система је
скраћено.
УПС је преоптерећен.
Искључите нека критична оптерећења.
Волтажа батерије је
преслаба.
Пуните УПС најмање 6 часова.
Дефект батерије. Радна
температура може бити
превисока или се
батерија не користи
исправно.
Замените батерију са истом врстом
батерије.
Напајање је нормално, али је
уређај на батериски режим.
Кабл за напајање је
олабављен.
Проверите и поново повежите кабл за
напајање.
Инсталација и почетно покретање
Спефикације
Решавање проблема
= Упутство за коришћење
SR
Page 31

Посібник користувача
Line Interactive UPS
Інформація про гарантію та обслуговування
Дякуємо за те, що придбали джерело безперебійного живлення Mustek.
Дотримуйтеся вказівок, що містяться в посібнику з використання пристрою та
посібника зі встановлення програмного забезпечення (за наявності), щоб
повноцінно використовувати ваш пристрій.
Встановлення програмного забезпечення
Якщо в комплект вашого пристрою входить програмне забезпечення, в коробці буде
компакт-диск з програмним забезпеченням.
Дотримуйтеся вказівок щодо встановлення програмного забезпечення.
Ви можете завантажити програмне забезпечення, посібник та скорочений
додатковий посібник на веб-сайті:
http://www.power-software-download.com/viewpower.html
Гарантія
Як виробник ми надаємо гарантію на нашу продукцію терміном, щонайменше, 1 рік.
Проте, щоб дізнатися точну тривалість гарантійного періоду та умови гарантії,
зверніться до торгового представника, оскільки ця інформація залежить від
країни/регіону.
Вирішення проблем
Див. розділ «Вирішення проблем» у Вашому посібнику (обладнання та програмне
забезпечення).
Додатково: регулярно відвідуйте наш веб-сайт (www. Mustek.eu), щоб
завантажувати оновлення програмного забезпечення та переглядати пункт «Часті
запитання» (FAQ). Якщо проблему не буде вирішено, зверніться за порадою до
торгового представника.
Сервісне та технічне обслуговування
Якщо пристрій потребує сервісного або технічного обслуговування впродовж
гарантійного періоду, зверніться до торгового представника, щоб дізнатися про цю
процедуру. Після завершення гарантійного періоду рекомендуємо також звернутися
до торгового представника. В будь-якому разі сервісне або технічне обслуговування
пристрою повинен проводити кваліфікований технік.
Посібник користувача
UA
ПОПЕРЕДЖЕННЯ: це ДБЖ відноситься до продукції категорії C2. В житлових
приміщеннях цей виріб може призвести до появи радіоперешкод, в цьому випадку
користувачеві може знадобитися вжити додаткових заходів.
Page 32

огляд товару
ЖК дисплей
поставки
Заходи безпеки Збережіть цю інструкцію УВАГА
Ви отримаєте наступні компоненти в коробці:
- Джерело безперебійного живлення (скорочено ДБЖ)
- Інструкцію -гарантійний талон
Фронтальна панель: Задня панель:
400VA/600VA/800VA
1000VA/1500VA/2000VA
LED
сигнал тривоги
статус ДБЖ
LED
сигнал
тривоги
статус ДБЖ
●
вимкнено
Мережі нормально і
ДБЖ працює в
нормальному режимі
●зелений
вимкнено
Мережі нормально і
ДБЖ працює в
нормальному режимі
★
Зондування
кожні 10 секунд
Збій харчування
відбувається і ІБП
знаходиться в режимі
роботи від батареї .
★жовтий
Зондування
кожні 10
секунд
Збій харчування
відбувається і ІБП
знаходиться в режимі
роботи від батареї.
★
Зондування
щосекунди
Низький заряд батареї
★жовтий
Зондування
щосекунди
Низький заряд батареї
○
вимкнено
ДБЖ вимкнений.
○зелений
вимкнено
ДБЖ вимкнений.
●
постійно
звучить
несправність ДБЖ
●червоний
постійно
звучить
несправність ДБЖ
● Світлодіод горить . ○ Світлодіод не горить.★світлодіод блимає
дія Дисплей
Режим ДБЖ
Індикація на ЖК дисплеї
Опис
Живлення ДБЖ
увімкнене
При включенні ДБЖ увійде в цей режим на
декілька 4 секунд.
Режим АС (режим
змінного струму)
При включеному автоматичному
регулюванні напруги (AVR) значок
буде блимати з інтервалом в 1 секунду.
LCD інформація буде відображатися в
такому порядку , коли LCD дотику.
1. вихідна напруга
2. вхідна напруга
3. Pівень навантаження
4. ємність акумулятора
Перевантаження в
режимі АС
Значки почнуть блимати..
В разі перевантаження сигнал тривоги буде
звучати з інтервалом 0,5 секунд.
Режим рівня
заряду
акумулятора
При низькому рівні заряду акумулятора
значок буде блимати з інтервалом в
одну секунду .
Сигналізація буде видавати звуковий сигнал
кожні 10 секунд і ЖК - дисплей інформація
буде відображатися в такому порядку , коли
LCD дотику.
1. вихідна напруга
2. вхідна напруга
3. рівень навантаження
4. ємність акумулятора
Перевантаження в
режимі
акумулятора
Значки почнуть блимати.
В разі перевантаження сигнал тривоги буде
звучати з інтервалом 0,5 секунд.
ПРИМІТКА: Якщо підсвічування вимикається , ви можете активувати його , доторкнувшись до екрану
Код несправності Таблиця:
стан відмови
LCD
рішення
Вихід коротке
замикання
Відключіть короткозамкненим навантаження і перезапустити ІБП
знову.
несправність
перевантаження
Вимкніть всі вихідні навантаження і знову запустити ДБЖ.
перезарядка
Зверніться до сервісної служби негайно.
Поганий чи сильно
розрядженою батареї
Будь ласка , замініть батарею.
Несправність високого
вихідної напруги
Зверніться до сервісної служби негайно.
надмірна температура
1. Вимкніть пристрій і дочекайтеся охолодження.
2. Видалити надмірних навантажень і чекати охолодження .
При виникненні тривоги несправності , будь ласка , зверніться в сервісну службу негайно .
• Для запобігання ризику займання або враження електричним струмом, встановіть ДБЖ у приміщенні з
контрольованою температурою та вологістю, вільному від речовин-забрудників з електропровідними
властивостями. (Див. Специфікацію щодо допустимих температур та вологості.)
• Для зменшення ризику перегріву ДБЖ, не закривайте вентиляційні отвори та не піддавайте пристрій
дії прямих сонячних променів. Не встановлюйте ДБЖ поблизу приладів, що випромінюють тепло:
нагрівачі, печ та інші.
• Не підключайте до ДБЖ не комп’ютерене обладнання, - таке як медичне обладнання, обладнання
забезпечення життедіяльності, мікрохвильові печі, пилососи.
• Не замикайте вхідні та вихідні роз’єми ДБЖ.
• Не допускайте потрапляння рідин та сторонніх предметів всередину ДБЖ. Не ставте напої або інші
ємності з рідинами на/поряд з пристроєм.
• У разі виникнення надзвичайних ситуацій, натисніть кнопку «Power on/off» та від'єднаєте кабель
живлення від електромережі для правильного відключення ДБЖ.
• Не підключайте мережеві фільтри до виходу ДБЖ.
світлодіодні індикатори
Посібник користувача
РК Панель
Кнопка «Пуск»
Вимикач живлення зі
світлодіодним індикатором
Роз’єм підключення
кабелю електроживлення
Роз’єми вихідної напруги
Запобіжник
RJ-11
USB (опція)
RJ-45 (опція)
UA
EN
Page 33

Виявлення та усунення неполадок
Таблиця виявлення та усунення дрібних неполадок
4 години
УВАГА: НІКОЛИ НЕ ПІДКЛЮЧАЙТЕ лазерний принтер або сканер до ДБЖ. Це може
вивести пристрій з ладу.
• Якщо ДБЖ має металевий корпус, для зниження витоків струму до межі нижче 3.5 мА, заземлення є
обовязковою умовою забезпечення безпеки.
• Обслуговування батарей повинно виконуватись лише кваліфікованим персоналом, або під його
наглядом, що знає аккумуляторні батареї та правила безпеки при їх обслуговуванні. Не допускайте
сторонніх осіб до обслуговування батарей.
• При заміні батареї, використовуйте той самий тип та номер.
• Напруга батареї 12 В. Акумуляторна батарея герметична, свинцово-кислотна, 6-секційна.
• Не кидайте батарею у вогонь. Батарея може вибухнути. Не відкривайте та не руйнуйте корпус батареї.
Електроліт із батареї є небезпечним для шкіри та очей.
• Від’єднайте ДБЖ від електричної мережі перед прибиранням та не використовуйте рідкі або
розприскувані миючі засоби.
• Батарея може представляти ризик враження електричним струмом та бути причиною короткого
замикання. Дотримуйтесь наступних правил безпеки при заміні батарей:
1) Зніміть годинник, кільця та інші металеві предмети.
2) Використовуйте інструменти з ізольованими ручками.
3) Одягніть гумові перчатки та взуття.
4) Не кладіть на батарею металеві предмети та інструменти.
5) Від’єднайте пристрій від мережі перед підключенням та відключенням клем батареї.
Перед інсталяцією, перевірте комплектацію, цілістність пристрою та комплектуючих.
❶
Умови експлуатації та зберігання.
Встановіть ДБЖ в захищеному від пилу місці з хорошою циркуляцією повітря. Встановіть ДБЖ на
відстані принаймні 20 см від інших приладів для запобігання створення радіоперешкод. Не
використовуйте ДБЖ при температурах та вологості, що не відповідають вказаним у специфікації.
(Уважно ознайомтесь з інструкцією)
❷
Підключення до електромережі та заряд
Вставте вилку кабелю електроживлення ДБЖ у розетку. Перед використанням зараджайте пристрій не
менше 6 годин. При підлюченні до електричної мережі пристрій заряджає батарею.
❸
Підключення пристроїв до ДБЖ
Підключіть пристрої до вихідних роз’ємів ДБЖ на задній панелі . Просто натисніть кнопку «Power on/off»,
тепер пристрої підключені до ДБЖ захищені.
❹ Підключення Модему/Телефону/ЛВС мережі (для моделей з роз’ємом RJ-11/RJ45) для
захисту від перепадів напруги
Підключіть лінію modem/phone до роз’єму “IN” на задній панелі ДБЖ. Інший кабель підключіть до роз’єму
“OUT” та підключіть до ПК у відповідний роз’єм.
❺ Підключення коммунікаційного кабелю (для моделей з USB/RS-232 портом)
Для дистанційного включення/виключення пристрою та контролю стану ДБЖ підключіть ваш ПК
коомунікаційним кабелем до потру USB/RS-232. Встановивши програмне забезпечення контролю,
встановлюйте час включення/виключення пристрою та спостерігайте за станом ДБЖ.
❻
Включення/ виключення пристрою
Для включення ДБЖ натисніть кнопку «Power on/off». Для виключення пристрою натисніть кнопку
«Power on/off» повторно.
Модель
400
600
800
Потужність
400VA/240W
600VA/360W
800VA/480W
ВХІД Напруга
220/230/240VAC
ВХІД Діапазон напруги
162-290 VAC
Стабілізація напруги
± 10 % (режим роботи від батареї)
Діапазон частот (режим роботи від батареї)
50Hz +/-1 Hz
Час перемикання
Типово 2-6 мс
Форма хвилі
Умовна синусоїда
БАТАРЕЯ Тип і кількість
12V/4.5Ahx1
12V/7Ahx1
12V/9Ahx1
Час заряду
4-6 годин відновлює 90% заряду
Розміри (DxWxH) mm
LED: 279 x 101 x 142 / LCD: 300 x 101 x 142
Вага (кг)
LED
3.55
4.2
4.9
LCD
3.7
4.4
5.0
Вологість
0-90% RH @ 0-40°C (без конденсату)
Рівень шуму
Менше 40 дБ
MODEL
1000
1500
2000
Потужність
1KVA/600W
1.5KVA/900W
2KVA/1200W
ВХІД Напруга
220/230/240VAC
ВХІД Діапазон напруги
162-290 VAC
Стабілізація напруги
± 10 % (режим роботи від батареї)
Діапазон частот (режим роботи від батареї)
50Hz +/-1 Hz
Час перемикання
4-6 годин відновлює 90% заряду
Форма хвилі
Умовна синусоїда
БАТАРЕЯ Тип і кількість
12V/7Ah x 2
12V/9Ah x 2
12V/9Ah x 2
Час заряду
4-6 годин відновлює 90% заряду
Розміри (DxWxH)
320 x 130 x 182
Вага (кг)
8.2
10.4
11
Вологість
0-90% RH @ 0-40°C (без конденсату)
Рівень шуму
Менше 40 дБ
Проблема
Можлива причина
Рішення
Відсутня індикація на РК панелі
Низький заряд батареї
Заряджайте ДБЖ не менше 6 годин
Батарея не справна
Замініть батарею на той самий тип
ДБЖ не увімкнений
Натисніть кнопку «Пуск» знову для
увімкнення ДБЖ.
Непреривний сигнал.
ДБЖ перевантажено
Спочатку відключіть частину пристроїв від
ДБЖ. Перед повторним підключенням
пристроїв, переконайтесь, що
навантаження не перевищує заявлених
характеристик ДБЖ.
Скорочення часу резервної
роботи при відлюченні від мережі
ДБЖ перевантажено
Відключіть частину пристроїв від ДБЖ.
Батарея не заряджена повністю
Заряджайте ДБЖ не менше 6 годин
Несправність батареї.
Трапляється при експлуатації в
середовищі з підвищеною
температурою, або не
правильній експлуатації батареї.
Замініть батарею на той самий тип
ДБЖ підключено до мережі але
працює від батареї
Не правильне підключення кабелю
електроживлення
Під’єднайте кабель живлення належним
чином.
Інсталяція та запуск
Посібник користувача
UA
Специфікація
Page 34

Ръководство за употреба
Line Interactive UPS
Информация за гаранция и сервиз
Благодарим Ви, че закупихте този UPS продукт на Mustek.
Следвайте указанията в ръководството на продукта и съответно в ръководството за
инсталиране на софтуера за максимално добра работа на продукта.
Инсталиране на софтуера:
Ако продуктът се предоставя със софтуер, в кутията със софтуера ще намерите
записан компакт диск (CD Rom).
Следвайте указанията за инсталиране на софтуера.
Можете да свалите софтуера, ръководството и кратък наръчник за справки от
следния сайт: http://www.power-software-download.com/viewpower.html
Гаранция:
Ние, в качеството си на производител, даваме най-малко 1 година гаранция за
нашия продукт.
За точния гаранционен период и условията на гаранцията се свържете с продавача,
тъй като както периодът, така и условията, могат да варират според страната и
региона.
Отстраняване на проблеми:
Вижте раздела за отстраняване на проблеми в ръководството (хардуер и софтуер).
Освен това: Посещавайте редовно нашия уеб сайт (www. Mustek.eu) за
актуализации на софтуера и често задавани въпроси (FAQ).
Ако проблемът не бъде отстранен, свържете се с продавача за съвет.
Обслужване и поддръжка:
Ако по време на гаранционния период продуктът се нуждае от обслужване или
поддръжка, винаги се свързвайте с продавача във връзка с тези процедури.
Обръщайте се към продавача дори и след изтичане на гаранционния период. Във
всеки случай, обслужването или поддръжката на продукта винаги трябва да се
извършва от квалифициран техник.
Ръководство за употреба
BG
"ВНИМАНИЕ: Това е UPS категория C2. В жилищна среда този продукт
може да причини радио интерференция, като в този случай от
потребителя може да се изисква да предприеме допълнителни мерки."
Page 35

продукта
LCD екран
Съдържание
Трябва да сте получили следните елементи вътре в опаковка
- Блок за непрекъсваемо захранване (UPS-устройство)
- Инструкции за експлоатация - Гаранционна карта
изглед отпред Обратно Преглед
400VA/600VA/800VA
1000VA/1500VA/2000VA
LED
Аларма
UPS статус
LED
Аларма
UPS статус
●
от
В мрежата е
нормално и UPS
работи нормално.
●зелен
от
В мрежата е нормално
и UPS работи
нормално.
★
Ракети на всеки
10 секунди
Спиране на тока се
случва и UPS е на
режим на батерията.
★жълт
Ракети на
всеки 10
секунди
Спиране на тока се
случва и UPS е на
режим на батерията.
★
Ракети всяка
секунда
Изтощена батерия
★жълт
Ракети всяка
секунда
Изтощена батерия
○
от
UPS е изключен.
○зелен
от
UPS е изключен.
●
Непрекъснато
звучене
UPS вина
●червен
Непрекъснато
звучене
UPS вина
●LED включи○ LED изключи★ LED мигане
Oперация показ
Режим на UPS
LCD
Описание
Включен UPS
Когато UPS-ът е включен, той ще влезе в този режим
за няколко 4 секунди.
Променливоток
ов режим
Когато действа AVR, иконата ще
примигва на всяка секунда.
LCD информация ще бъде показана в следната
последователност при LCD се докосна.
1. напрежение на изхода
2. Входен волтаж
3. ниво на натоварване
4. капацитет на батерията
Претоварване в
променливоток
ов режим
Иконите ще примигват.
Когато настъпи претоварване, сигнализацията ще
пиука на всеки 0,5 секунди.
Режим рівня
заряду
акумулятора
Значки почнуть блимати.
Аларма ще издаде звуков сигнал на всеки 10 секунди
и LCD информация ще бъде показана в следната
последователност при LCD се докосна.
1. напрежение на изхода
2. Входен волтаж
3. ниво на натоварване
4. капацитет на батерията
Перевантаженн
я в режимі
акумулятора
Значки почнуть
блимати.
Когато настъпи претоварване, сигнализацията ще
пиука на всеки 0,5 секунди.
ЗАБЕЛЕЖКА: Ако подсветка изключва , може да я активира чрез докосване на екрана.
Повреда Код Таблица:
Повреда
LCD
Solutions
продукция
късо съединение
Изключете накъсо товари и рестартиране на UPS отново.
вина от претоварване
Изключете всички изходни товари и рестартиране на UPS отново.
презареждане
Покана за стаж веднага.
Лошо или строго
изтощен акумулатор
Моля, сменете батерията.
вина Високо
напрежение на изхода
Покана за стаж веднага.
Над температура
1. Изключете уреда и изчакайте за охлаждане.
2. премахване на прекомерни натоварвания и да чакат за охлаждане.
Ако се появи аларма вина , моля, обадете се за стаж веднага .
• Для запобігання ризику займання або враження електричним струмом, встановіть ДБЖ у приміщенні з
контрольованою температурою та вологістю, вільному від речовин-забрудників з електропровідними властивостями.
(Див. Специфікацію щодо допустимих температур та вологості.)
• Для зменшення ризику перегріву ДБЖ, не закривайте вентиляційні отвори та не піддавайте пристрій дії прямих
сонячних променів. Не встановлюйте ДБЖ поблизу приладів, що випромінюють тепло: нагрівачі, печ та інші.
• Не підключайте до ДБЖ не комп’ютерене обладнання, - таке як медичне обладнання, обладнання забезпечення
життедіяльності, мікрохвильові печі, пилососи.
• Не замикайте вхідні та вихідні роз’єми ДБЖ.
• Не допускайте потрапляння рідин та сторонніх предметів всередину ДБЖ. Не ставте напої або інші ємності з рідинами
на/поряд з пристроєм.
• У разі виникнення надзвичайних ситуацій, натисніть кнопку «Power on/off» та від'єднаєте кабель живлення від
електромережі для правильного відключення ДБЖ.
• Не підключайте мережеві фільтри до виходу ДБЖ.
• Якщо ДБЖ має металевий корпус, для зниження витоків струму до межі нижче 3.5 мА, заземлення є обовязковою
умовою забезпечення безпеки.
• Обслуговування батарей повинно виконуватись лише кваліфікованим персоналом, або під його наглядом, що знає
аккумуляторні батареї та правила безпеки при їх обслуговуванні. Не допускайте сторонніх осіб до обслуговування
LED индикатори
Ръководство за употреба
LCD панел
Прекъсвач за захранване
Ключ за захранване с
индикатор LED індикатором.
AC вход
Изходящи портове
Прекъсвач
RJ-11
USB (опция)
RJ-45 (опция)
BG
Заходи безпеки (Збережіть цю інструкцію) УВАГА!
EN
Page 36

Виявлення та усунення неполадок
4 часа
УВАГА: НІКОЛИ НЕ ПІДКЛЮЧАЙТЕ лазерний принтер або сканер до ДБЖ. Це може
вивести пристрій з ладу.
батарей.
• При заміні батареї, використовуйте той самий тип та номер.
• Напруга батареї 12 В. Акумуляторна батарея герметична, свинцово-кислотна, 6-секційна.
• Не кидайте батарею у вогонь. Батарея може вибухнути. Не відкривайте та не руйнуйте корпус батареї. Електроліт із
батареї є небезпечним для шкіри та очей.
• Від’єднайте ДБЖ від електричної мережі перед прибиранням та не використовуйте рідкі або розприскувані миючі
засоби.
• Батарея може представляти ризик враження електричним струмом та бути причиною короткого замикання.
Дотримуйтесь наступних правил безпеки при заміні батарей:
1) Зніміть годинник, кільця та інші металеві предмети.
2) Використовуйте інструменти з ізольованими ручками.
3) Одягніть гумові перчатки та взуття.
4) Не кладіть на батарею металеві предмети та інструменти.
5) Від’єднайте пристрій від мережі перед підключенням та відключенням клем батареї.
Перед інсталяцією, перевірте комплектацію, цілістність пристрою та комплектуючих.
❶
Умови експлуатації та зберігання.
Встановіть ДБЖ в захищеному від пилу місці з хорошою циркуляцією повітря. Встановіть ДБЖ на
відстані принаймні 20 см від інших приладів для запобігання створення радіоперешкод. Не
використовуйте ДБЖ при температурах та вологості, що не відповідають вказаним у специфікації.
(Уважно ознайомтесь з інструкцією)
❷
Підключення до електромережі та заряд
Вставте вилку кабелю електроживлення ДБЖ у розетку. Перед використанням зараджайте пристрій не
менше 6 годин. При підлюченні до електричної мережі пристрій заряджає батарею.
❸
Підключення пристроїв до ДБЖ
Підключіть пристрої до вихідних роз’ємів ДБЖ на задній панелі . Просто натисніть кнопку «Power on/off»,
тепер пристрої підключені до ДБЖ захищені.
❹ Підключення Модему/Телефону/ЛВС мережі (для моделей з роз’ємом RJ-11/RJ45) для
захисту від перепадів напруги
Підключіть лінію modem/phone до роз’єму “IN” на задній панелі ДБЖ. Інший кабель підключіть до роз’єму
“OUT” та підключіть до ПК у відповідний роз’єм.
❺ Підключення коммунікаційного кабелю (для моделей з USB/RS-232 портом)
Для дистанційного включення/виключення пристрою та контролю стану ДБЖ підключіть ваш ПК
коомунікаційним кабелем до потру USB/RS-232. Встановивши програмне забезпечення контролю,
встановлюйте час включення/виключення пристрою та спостерігайте за станом ДБЖ.
❻ Включення/ виключення пристрою
Для включення ДБЖ натисніть кнопку «Power on/off». Для виключення пристрою натисніть кнопку
«Power on/off» повторно.
Проблема
Можлива причина
Рішення
Відсутня індикація на РК панелі
Низький заряд батареї
Заряджайте ДБЖ не менше 6 годин
Батарея не справна
Замініть батарею на той самий тип
ДБЖ не увімкнений
Натисніть кнопку «Пуск» знову для
увімкнення ДБЖ.
Непреривний сигнал.
ДБЖ перевантажено
Спочатку відключіть частину
пристроїв від ДБЖ. Перед повторним
підключенням пристроїв,
переконайтесь, що навантаження не
перевищує заявлених характеристик
ДБЖ.
Скорочення часу резервної роботи
при відлюченні від мережі
ДБЖ перевантажено
Відключіть частину пристроїв від
ДБЖ.
Батарея не заряджена повністю
Заряджайте ДБЖ не менше 6 годин
Несправність батареї. Трапляється
при експлуатації в середовищі з
підвищеною температурою, або не
правильній експлуатації батареї.
Замініть батарею на той самий тип
ДБЖ підключено до мережі але
працює від батареї
Не правильне підключення кабелю
електроживлення
Під’єднайте кабель живлення
належним чином.
Модель
400
600
800
КАПАЦИТЕТ
400VA/240W
600VA/360W
800VA/480W
ВХІД Напруга
220/230/240VAC
ВХІД Діапазон напруги
162-290 VAC
Стабілізація напруги
± 10 % (режим на батерията)
Честотен обхват (режим на батерията)
50Hz +/-1 Hz
Час перемикання
Типово 2-6 мс
Форма хвилі
Имитация на Sine Wave
БАТАРЕЯ Тип і кількість
12V/4.5Ahx1
12V/7Ahx1
12V/9Ahx1
Час заряду
4-6 часа възстановява 90% от капацитета
Розміри (DxWxH) mm
LED: 279 x 101 x 142 / LCD: 300 x 101 x 142
Тегло (кг)
LED
3.55
4.2
4.9
LCD
3.7
4.4
5.0
Влажност
0-90% RH @ 0-40°C (без конденз)
Ниво на шума
По-малко от 40 дБ
Модель
1000
1500
2000
КАПАЦИТЕТ
1KVA/600W
1.5KVA/900W
2KVA/1200W
ВХІД Напруга
220/230/240VAC
ВХІД Діапазон напруги
162-290 VAC
Стабілізація напруги
± 10 % (режим на батерията)
Честотен обхват(режим на батерията)
50Hz +/-1 Hz
Час перемикання
Типово 2-6 мс
Форма хвилі
Имитация на Sine Wave
БАТАРЕЯ Тип і кількість
12V/7Ah x 2
12V/9Ah x 2
12V/9Ah x 2
Час заряду
4-6 часа възстановява 90% от капацитета
Розміри (DxWxH)
320 x 130 x 182
Тегло (кг)
8.2
10.4
11
Влажност
0-90% RH @ 0-40°C (без конденз)
Ниво на шума
По-малко от 40 дБ
Інсталяція та запуск
Ръководство за употреба
BG
Специфікація
Page 37

Uputstvo za upotrebu
Line Interactive UPS
Informacije o garanciji i servisu
Hvala što ste kupili ovaj Mustek UPS proizvod.
Držite se uputstava u priručniku proizvoda i ako postoji, softverskom instalacijskom
priručniku, da najbolje iskoristite proizvod.
Instalacija softvera:
Ako proizvod dolazi sa softverom u ambalaži će biti CD sa softverom.
Držite se uputstava za vrijeme instalacije softvera.
Softver, priručnik i kratak referentni priručnik možete da preuzmete na sljedećoj stranici:
http://www.power-software-download.com/viewpower.html
Garancija:
Kao proizvođač, nudimo najmanje 1 godinu garancije za naš proizvod.
Ipak, tačno trajanje garancije i uslove garancije zatražite od prodavača jer se uslovi i
trajanje garancijskog perioda mogu razlikovati među zemljama/regijama.
Rješavanje problema:
Pogledajte poglavlje u priručniku o rješavanju problema (hardver i softver).
Dodatno: Provjerite našu web stranicu (www. Mustek.eu) redovno radi najnovijih
verzija softvera kao i radi učestalo postavljanih pitanja (FAQ).
Ako time ne riješite problem, zatražite savjet od prodavača.
Servis i održavanje:
Ako je potrebno servisiranje i održavanje proizvoda u garancijskom periodu, u vezi tih
postupaka uvijek kontaktirajte prodavača. Izvan garancijskog perioda savjetujemo da se
javite i prodavaču. U svakom se slučaju pobrinite da servis i održavanje uvijek obavlja
kvalifikovani tehničar.
Uputstvo za upotrebu
BS-BA
UPOZORENJE: Ovo je UPS proizvod kategorije C2. U stambenom okruženju
može izazvati štetne smetnje na radio komunikacijama i ukoliko se to desi biće
potrebno da korisnik preduzme dopunske mjere.
Page 38

Č
Trebalo bi da su dobili sljedeće stavke unutar paketa:
- Jedinica UPS - Uputstvo - Garantni list
Pogled s prednje strane Pogled sa zadnje strane:
400VA/600VA/800VA
1000VA/1500VA/2000VA
LED
Alarm
UPS Status
LED
Alarm
UPS Status
●
isključen
Mrežni je normalno i
UPS normalno radi.
●zelen
isključen
Mrežni je normalno i
UPS normalno radi.
★
Oglašava se svakih
10 sekundi
Nestanka struje javlja
i UPS na bateriju.
★žut
Oglašava se svakih
10 sekundi
Nestanka struje
javlja i UPS na
bateriju.
★
Pisak svake
sekunde
Prazna baterija
★žut
Pisak svake
sekunde
Prazna baterija
○
isključen
UPS je isključen.
○zelen
isključen
UPS je isključen.
●
kontinuirano zvuči
UPS kriv
●crven
kontinuirano zvuči
UPS kriv
●LED je uključen. ○ LED je isključen .★LED treperi
Operacija prikaz
UPS način rada
LCD
Opis
UPS je uključen
Kada je UPS uključen, ulazi u ovaj naćin rada za
nekoliko 4 sekundi.
Režim napajanja
naizmeničnom
strujom
Kada AVR funkcioniše, icon will flash
every second.
LCD informacije će biti prikazana u sljedećoj bi
kada je LCD dodirne.
1. izlazni napon
2. ulazni napon
3. nivoa opterećenja
4. kapacitet baterije
Preopterećenje u
režimu napajanja
naizmeničnom
strujom
ikone će trepteti.
Kad se javi preopterećenje, alarm će se oglasiti
svakih 0.5 sekundi.
Baterijski način
rada
Kada je nivo baterije nizak, ikona će
trepteti svaki sekund.
Alarm će se oglasiti svakih 10 sekundi i LCD
informacije će se prikazati u sljedećim
redoslijedom kada se LCD dodirne.
1. izlazni napon
2. ulazni napon
3. nivoa opterećenja
4. kapacitet baterije
Preopterećenje u
baterijskom načinu
rada
icon will flash.
Kad se javi preopterećenje, alarm će se oglasiti
svakih 0.5 sekundi.
BILJEŠKA: Ako pozadinsko osvjetljenje se gasi , možete aktivirati dodirom ekrana
Kod pogreške Tabela:
stanje Fault
LCD
rješenja
Izlaz kratkom spoju
Isključite Do kratkog spoja opterećenja i ponovo ponovo pokrenite UPS.
Overload kriv
Isključite sve izlaz opterećenja i ponovo ponovo pokrenite UPS.
Peopterećenje
Poziv za uslugu odmah.
Loše ili ozbiljno
ispražnjen akumulator
Molimo vas da zamijenite bateriju.
Visok izlaz napon kvara
Poziv za uslugu odmah.
Više temperature
1. Isključite uređaj i pričekajte za hlađenje.
2. Uklonite prekomjerne opterećenja i čekati za hlađenje.
Ako se pojavi alarm greška, pozovite za uslugu odmah.
Radi sprječavanja rizika izbijanja požara ili električkog kratkog spoja, koristite UPS u unutrašnjoj sredini, gdje se
temperatura i vlažnost mogu regulirati, te koja ne sadrži provodive smjese (detaljnije o povoljnoj temperaturi i vlazi možete
naći u dijelu Specifikacija ovog priručnika).
Kako biste spriječili pregrijavanje UPS, ne prekrivajte ventilacijske otvore UPS i UPS ne izlažite direktnom sunčevom
zračenju, te ga ne postavljajte u blizini aparata, koji regeneriraju toplotu, kao što su štednjak ili kamna.
Na UPS nikada ne priključujte neračunarske aparate, kao što su zdravstveni instrumenti, prije svega aparati za održavanje
ljudskog života, isto tako mikrovalne pećnice, usisavači i sl.
Nikada ne priključujte dovodni kabel UPS na neku od vlastitih izlaznih utičnica.
Spriječite da u UPS uđu tečnosti ili druge strane materije. Nikada ne stavljajte piće ili druge tečnosti na UPS ili u njegovoj
blizini.
U slučaju opasnosti pritisnite dugme za isključenje, te izvucite kabao iz dovoda električke energije, tako će UPS biti dobro
obezbijeđen.
Na UPS nikada ne priključujte produžni kabao ili kabao sa prenaponskom zaštitom.
Prilikom otvaranja UPS prijeti opasnost od udesa električkom strujom. I nakon isključenja UPS od električke energije, na
bateriji unutar UPS se stalno može nalaziti opasan napon. Zato je u slučaju održavanja ili servisnih poslova unutar UPS
baterije neophodno isključiti, tako da se skine konektor sa pozitivnog i negativnog pola baterije.
Bilo koji poslovi sa baterijom umetnutom u UPS može obavljati samo odgovorno povjerena osoba. Neautorizirane osobe ne
smiju doći u kontakt s baterijom.
Uputstvo za upotrebu
LCD ploča
Prekidač
Prekidač za napajanje sa
LED indikatorom
Ulaz dovodnog kabla
Izlazne utičnice
Dugme za resetiranje
RJ-11
USB (opcija)
RJ-45 (opcija)
BS-BA
EN
Page 39

4 sata
UPOZORENJE: U izlazne utičnice UPS nikada ne uključujte laserski štampač ili skener. Ovi
aparati bi UPS mogli važno oštetiti.
Kada je bateriju potrebno promijeniti, mijenjajte ju isključivo za isti tip.
Unutarnji napon baterija je 12 V istosmjerni. Radi se o začaurenoj bateriji sa šest članaka.
Bateriju nikada ne bacati u vatru, jer može eksplodirati. Bateriju ne otvarajte niti na drugi način ne uništavajte. Oslobođeni
elektrolit može važno oštetiti kožu i oči.
Ako želite UPS očistiti sa vanjske strane, najprije ga isključite od dovoda električke energije. Prilikom čišćenja ne koristite
tečna sredstva za čišćenje ili sprejeve.
Baterija može u slučaju neprofesionalne manipulacije ili prilikom kratkog spoja prouzrokovati udes električkom strujom. U
slučaju izmjene baterija pazite na slijedeća uputstva:
1) skinite ručni sat, prstenje i druge metalne predmete;
2) koristite alat sa izoliranom ručkom;
3) radite u gumenim rukavicama i nosite gumenu obuću;
4) nikada ne stavljajte alat ili bilo koje druge metalne predmete na gornji dio baterija;
5) prije priključenja ili isključenja baterija, izvucite dovodni kabel iz utičnice.
Prije instalacije aparata prekontrolirajte, da li se tokom transporta nije oštetio.
❶
Smještanje i skladišćenje
UPS smjestite na mjesto koje nije prašnjavo, te dovoljno ulazi zrak. Kada se UPS nalazi u blizini drugih
električkih aparata, ostavite među njima razmak minimalno 20 cm, tako da izbjegnete moguće smetnje.
UPS ne puštati u rad u sredini koja prekoračuje limite temperature i vlažnosti (tačna ograničenja možete
naći u dijelu Specifikacije).
❷
Priključenje na električku mrežu i punjenje
Dovodni kabao uključite u utičnicu. Radi postizanja potpune funkcije preporučujemo bateriju puniti minimalno 4
sata prije priključenja drugih aparata. UPS će baterije početi puniti automatski, odmah nakon uključenja u
električku utičnicu.
❸
Priključenje zaštićenih aparata
Aparate koje želite zaštititi od pada električke energije uključite u utičnice sa zadnje strane UPS. Dalje UPS
uključite pomoću prekidača sa prednje strane i iza toga uključite aparate, koji su na UPS priključeni. Aparati će
od tog momenta biti zaštićeni u slučaju pada električke struje.
❹
Priključenje modema/telefona/računarne mreže na prenaponsku zaštitu (jedino za model sa
konektorima RJ-11/RJ-45)
U utičnicu označenu sa IN, koja se nalazi sa zadnje strane UPS, uključite kabao koji vodi iz telefonske utičnice. U
izlaznu utičnicu OUT sada uključite drugi kabao u pravcu na računarni modem ili telefon.
❺ Priključenje komunikacionog kabla (samo za model sa portom RS-232)
Kada želite koristiti funkciju automatskog isključenja/uključenja UPS i monitoriranja stanja aparata, uključite u
port RS-232 komunikacijski kabel, njegov drugi kraj uključite u računar. Zahvaljujući programu monitoriranja,
koji morate instalirati, od priključenog računara možete planirati isključenje i uključenje UPS, te takođe
monitorirati njegovo stanje.
❻ Uključenje i isključenje UPS
UPS uključite pritiskom na glavno dugme za isključenje na prednjoj strani. USP isključite ponovljenim pritiskom
na isto dugme.
Model
400
600
800
KAPACITET
400VA/240W
600VA/360W
800VA/480W
ULAZ Napon
220/230/240VAC
ULAZ Tolerancija
162-290 VAC
Regulacija napona
± 10 % (Mode baterije)
Frekvencijski opseg (Mode baterije)
50Hz +/-1 Hz
Vrijeme transfera
Standardno 2–6 ms
Oblik vala
Simulirani Sine Wave
BATERIJA Tip i broj
12V/4.5Ahx1
12V/7Ahx1
12V/9Ahx1
Vrijeme punjenja
4–6 sati za punjenje na 90 % kapaciteta
Dimenzije (d x š x v) mm
LED: 279 x 101 x 142 / LCD: 300 x 101 x 142
Težina (kg)
LED
3.55
4.2
4.9
LCD
3.7
4.4
5.0
Vlažnost
0-90% RH @ 0-40°C (nekondenzirajuće)
Buka
Manja od 40 dB
Model
1000
1500
2000
KAPACITET
1KVA/600W
1.5KVA/900W
2KVA/1200W
ULAZ Napon
220/230/240VAC
ULAZ Tolerancija
162-290 VAC
Regulacija napona
± 10 % (Mode baterije)
Frekvencijski opseg (Mode baterije)
50Hz +/-1 Hz
Vrijeme transfera
Standardno 2–6 ms
Oblik vala
Simulirani Sine Wave
BATERIJA Tip i broj
12V/7Ah x 2
12V/9Ah x 2
12V/9Ah x 2
Vrijeme punjenja
4–6 sati za punjenje na 90 % kapaciteta
Dimenzije (d x š x v)
320 x 130 x 182
Težina (kg)
8.2
10.4
11
Vlažnost
0-90% RH @ 0-40°C (nekondenzirajuće)
Buka
Manja od 40 dB
Problem
Possible Cause
Rešenje
Kontrolna lampa LCD na prednjoj
strani UPS ne svijetli.
Prazna baterija.
Stavite puniti UPS minimalno u trajanju od 6
sati.
Pokvarena baterija.
Zamijenite bateriju za novu istog tipa.
UPS nije uključen.
Kratko pritisnite prekidač UPS, time će se pusti u
rad.
Alarm stalno zviždi, i kada električka
mreža sasvim funkcionira.
UPS je preopterećen.
Isključite dio opterećenja. Prije ponovnog
priključenja aparata, provjerite, da li
opterećenje odgovara kapacitetu UPS
navedenom u specifikaciji.
Prilikom pada električke energije,
UPS radi samo kraće vrijeme.
UPS je preopterećen.
Isključite dio opterećenja.
Napon baterije je niski.
Stavite puniti UPS minimalno u trajanju od 6 sati.
Loša baterija. Može se raditi o
kvaru, koji je prouzrokovan
previše visokom
temperaturom ili zbog
istrošenosti baterije.
Zamijenite bateriju za novu istog tipa.
Električka mreža sasvim funkcionira,
ali bateriju žmiga.
Mrežni kabel je slobodan.
Pažljivo prekontrolirajte priključak mrežnog
kabla.
č
Uputstvo za upotrebu
BS-BA
Page 40

Kasutusjuhend
Line Interactive UPS
Garantii- ja hooldusteave
Täname, et ostsite selle Mustek UPSi toote.
Palun järgige tootejuhendi nõudeid ja, kui see on kohaldatav, tarkvara installimise
juhendit, et saada ostetud tootest maksimaalset kasu.
Tarkvara installimine
Kui teie toodetega kaasneb tarkvara, siis leiate pakendist tarkvaraga CD ROM-i.
Tarkvara installimisel järgige ekraanijuhiseid.
Tarkvara, juhendi ja lü hikese käsiraamatu saate alla laadida järgmiselt aadressilt:
http://www.power-software-download.com/viewpower.html
Garantii
Tootjana anname me oma toodetele garantii, mis kehtib minimaalselt 1 aasta.
Täpse garantiiaja ja garantiitingimuste kohta teabe saamiseks pöörduge edasimüüja
poole, kuna nii garantiiaeg kui ka -tingimused on riigiti/regiooniti erinevad.
Probleemide lahendamine
Lugege riist- ja tarkvarajuhendi jaotist, mis käsitleb probleemide lahendamist.
Lisaks sellele: Vaadake regulaarselt meie veebisaidilt (www. Mustek.eu) uusi
tarkvaravärskendusi ja ka korduma kippuvaid küsimusi (KKK).
Kui see ei aita probleemi lahendada, siis pöörduge nõu saamiseks edasimüüja poole.
Remont ja hooldus
Kui toode vajab garantiiajal hooldust või remonti, pöörduge alati edasimüüja poole. Ka
väljaspool garantiiaega soovitame pöörduda edasimüüja poole. Igal juhul veenduge alati,
et toote remondib ja hooldab kvalifitseeritud tehnik.
Kasutusjuhend
ET
HOIATUS: see on C2 kategooria katkematu toite allikaga (Uninterruptible
Power Supply, UPS) toode, mis võib elamupiirkonnas tekitada raadioside
häireid. Sellisel juhul peab kasutaja vajadusel rakendama lisameetmeid.
Page 41

Teie pakendis peaks leiduma järgmised tooted:
- Puhvertoiteallikas (UPS) - kiirjuhend - Garantii kaart
Vaade eest: Vaade tagant:
400VA/600VA/800VA
1000VA/1500VA/2000VA
LED
Alarm
UPS staatus
LED
Alarm
UPS staatus
●
maha
Juhtmete on
normaalne ja UPS
töötab normaalselt.
●roheline
maha
Juhtmete on
normaalne ja UPS
töötab normaalselt.
★
Kõlav iga 10
sekundi
Voolukatkestuse ja
UPS on aku režiimis.
★kollane
Kõlav iga 10
sekundi
Voolukatkestuse ja
UPS on aku režiimis.
★
Kõlav iga teine
Madal akutase
★kollane
Kõlav iga
teine
Madal akutase
○
maha
UPS on välja lülitatud.
○roheline
maha
UPS on välja lülitatud.
●
Pidevalt kõlav
UPS süü
● punane
Pidevalt kõlav
UPS süü
●LED põleb ○ LED ei põle ★ LED vilgub
Töö ekraan
UPS-i režiim
LCD
Kirjeldus
UPS-i toide sees
UPS-i sisselülitamisel läheb see mõneks 4
sekundiks sellele režiimile.
Vahelduvvoolu
režiim
Vahelduvvoolu režiimi ajal vilgub kord
sekundis ikoon
LCD info kuvatakse järgmine , et kui LCD on
puudutanud.
1. väljundpinge
2. Sisendpinge
3. Load tasemel
4. Aku maht
Ülekoormus
vahelduvvoolu
režiimil
Ikoonid vilguvad.
Ü lekoormuse tekkides kostub iga 0,5 sekundi
järel alarm.
Battery Mode
When battery level is low, icon will
flash.
Alarm kostub iga 10 sekundi ja LCD info
kuvatakse järgmises järjekorras , kui LCD on
puudutanud.
1. väljundpinge
2. Sisendpinge
3. Load tasemel
4. Aku maht
Overload in battery
mode
icon will flash.
Ü lekoormuse tekkides kostub iga 0,5 sekundi
järel alarm.
MÄRGE: Kui taustvalgus lülitub välja , siis võib aktiveerida ekraani puudutades.
Veakood tabel:
veatingimus
LCD
Lahendused
Output lühistatud
Lahutage lühises koormusi ja uuesti UPS uuesti.
ülekoormus süü
Ü hendage kõik väljund koormusi ja uuesti UPS uuesti.
üle koormama
Küsi teenus koheselt.
Halb või tugevalt
tühjenenud aku
Palun vahetage aku.
Kõrge pinge viga
Küsi teenus koheselt.
Ü le - temperatuur
1. Lü litage seade ja oodake jahutamiseks .
2. Eemalda liigse koormuse ja oodata jahutamiseks.
Kui viga häire, siis palun helistada teenuse kohe.
ETTEVAATUST! Tule- ja elektrilöögi ohu vähendamiseks võib seadet kasutada ainult kontrollitud
temperatuuri ja niiskusega alal, milles ei leidu juhtivaid saasteaineid (vt seadme tehnilisi andmeid).
ETTEVAATUST! Ülekuumenemisohu vähendamiseks vältige UPS-i jahutusavade katmist, kaitske seadet
vahetu päikesevalguse eest ning ärge paigaldage seadet radiaatorite või tulekollete lähedusse.
ETTEVAATUST! Ärge ühendage UPS-iga arvutiseadmete asemel meditsiiniseadmed, elustamisseadmeid,
mikrolaineahjusid ega tolmuimejaid.
ETTEVAATUST! Ärge ühendage UPS-i sisendit selle enese väljundisse.
ETTEVAATUST! Ärge asetage seadme lähedusse jooke ega vedelikke sisaldavaid anumaid.
ETTEVAATUST! Hädaolukorra tekkimisel vajutage UPS-i täielikuks seiskamiseks väljalülitusnuppu ja
ühendage selle toitekaabel lahti.
ETTEVAATUST! Ärge ühendage UPS-iga toite pikendusjuhtme või liigpingepiirik.
ETTEVAATUST! Kui UPS-il on metallraam, siis tuleb sellele paigaldamise käigus ohutuse tagamiseks
ühendada maandusliin, et langetada lekkevool alla 3,5 mA.
ETTEVAATUST! Hooldus- ja remonttööd tuleb jätta vastava väljaõppega personalile või teostada nende
järelevalve all.
ETTEVAATUST! Akude asendamisel kasutage sama arvu ja tüüpi.
ETTEVAATUST! Siseakud töötavad 12V alalisvoolul. Tegu on 6 elemendiga suletud pliihappe-akuga.
ETTEVAATUST! Ärge pange akusid tulle, sest need võivad plahvatada.
Kasutusjuhend
LCD-paneel
Toitelüliti
Toitelüliti koos LED
indikaator
Toitesisend
Väljundpesad
Kaitselüliti
RJ-11
USB (valikuline)
RJ-45 (valikuline)
ET
EN
Page 42

ETTEVAATUST! ÄRGE KUNAGI ühendage puhvertoiteallikaga laserprinterit ega skännerit.
See võib seadet kahjustada.
ETTEVAATUST! Ärge avage ega vigastage akut või akusid. Vabaneda võiv elektrolüüt on nahale ja silmadele
kahjulik.
ETTEVAATUST! Ühendage UPS enne puhastamist lahti. Ärge kasutage vedelat või pihustatavat
puhastusainet.
ETTEVAATUST! Aku võib põhjustada elektrilöögi ohtu ja tugevat lühistusvoolu. Enne akude asendamist
tuleb rakenda alljärgnevaid ettevaatusabinõusid:
1) eemaldage käekellad, sõrmused ja muud metallesemed;
2) kasutage isoleeritud käepidemetega tööriistu;
3) kandke kummikindaid ja saapaid;
4) ärge asetage tööriistu ega metallesemeid akude peale;
5) ühendage laadijad lahti enne akuklemmide ühendamist ja lahtiühendamist.
Enne paigaldamist kontrollige palun seadet ja veenduge, et ükski komplekti osa ei ole kahjustunud või
puudu.
❶
Kasutus- ja hoiustamistingimused
Paigaldage puhvertoiteallikas kaitstud kohta, kus ei teki ülemäärast tolmu ja on tagatud piisav õhu
juurdepääs. Paigutage UPS teistest sarnastest seadmetest vähemalt 20 cm kaugusele, et vältida
häiringuid. ÄRGE KASUTAGE UPS-i soovitatud piirmäärasid ületavatel temperatuuridel ja niiskusel
(palun kontrollige tehnilisi andmeid).
❷
Toitevõrguga ühendamine ja laadimine
Enne kasutamist ühendage toitekaabel seinapistikusse ja laadige UPS-i vähemalt 6 tundi. Seade laeb akut,
kui on ühendatud toitepingega.
❸
Seadmete ühendamine
Ü hendage seadmed UPS-i tagapaneelil paiknevatesse väljundpesadesse. Lülitage UPS toitelülitist sisse.
Nüüd on ühendatud seadmed puhvertoitega kaitstud.
❹
Modemi/telefoni/võrgu ü hendamine kaitseks liigpinge eest (ainult RJ-11/RJ-45 ühendusega
mudel)
Ü hendage modemi-/telefoniliin UPS-i taga paikneva liigpingekaitsega pordiga „IN“. Kaabli teine ots tuleb
ühendada arvuti või telefoni pordiga „OUT“.
❺ Sidekaabli ü hendamine (ainult USB-/RS-232 pordiga mudelil)
UPS-i kaugväljalülituse/-käivituse ja oleku jälgimise võimaldamiseks ühendage selle USB-/RS-232 porti
sidekaabel, mille teine ots ühendatakse teie arvuti sidepordiga. Kui olete arvutile paigaldanud
jälgimistarkvara, siis saate ajastada UPS-i väljalülitusi/käivitusi ja jälgida seadme olekut.
❻ Seadme sisse-/väljalülitamine
Vajutage toitelülitit UPS-i sisselülitamiseks. Väljalülitamiseks hoidke lülitit 5 sekundit all.
Mudel
400
600
800
MAHTUVUS
400VA/240W
600VA/360W
800VA/480W
SISEND Pinge
220/230/240VAC
SISEND Pingevahemik
162-290 VAC
Pingeregulatsioon
± 10 %
Sagedus (Aku režiim)
50Hz +/-1 Hz
Üleminekuaeg
Tüüpiline 2-6 ms
Lainekuju
Simuleeritud Sine Wave
AKU Tü üp ja number
12V/4.5Ahx1
12V/7Ahx1
12V/9Ahx1
Laadimisaeg
4-6 tundi, et taastada 90% mahtuvusest
Mõõ tmed (S x L x K) mm
LED: 279 x 101 x 142 / LCD: 300 x 101 x 142
Netokaal (kg)
LED
3.55
4.2
4.9
LCD
3.7
4.4
5.0
Niiskus
0-90% RH @ (mittekondenseeruv)
Müratase
Alla 40 dB
Mudel
1000
1500
2000
MAHTUVUS
1KVA/600W
1.5KVA/900W
2KVA/1200W
SISEND Pinge
220/230/240VAC
SISEND Pingevahemik
162-290 VAC
Pingeregulatsioon
± 10 %
Sagedus (Aku režiim)
50Hz +/-1 Hz
Ü leminekuaeg
Tüüpiline 2-6 ms
Lainekuju
Simuleeritud Sine Wave
AKU Tü üp ja number
12V/7Ah x 2
12V/9Ah x 2
12V/9Ah x 2
Laadimisaeg
44-6 tundi, et taastada 90% mahtuvusest
Mõõ tmed (S x L x K)
320 x 130 x 182
Netokaal (kg)
8.2
10.4
11
Niiskus
0-90% RH @ 0-40°C (mittekondenseeruv)
Müratase
Alla 40 dB
Probleem
Võimalik põhjus
Lahendus
Eesmisel LCD-paneelil ei
ole teksti.
Tühjenenud aku.
Laadige UPS-i vähemalt 6 tundi..
Aku tõrge.
Asendage aku sama tüüpi akuga.
UPS ei ole sisse lülitatud.
Vajutage toitelülitit uuesti, et lülitada
UPS sisse.
Kostub püsitoon, kuigi
toitevarustus on korras.
UPS on ülekoormatud.
Ü hendage mõned seadmed lahti. Enne
seadmete tagasi ühendamist veenduge,
et nende võimsus vastab UPS-i
tehnilistele andmetele.
Toite katkemisel on
puhvertoide saadaval
lühikest aega.
UPS on ülekoormatud.
Eemaldage .
Aku pinge on liiga madal.
Laadige UPS-i vähemalt 6 tundi.
Aku tõrge. Liiga kõrge
töötemperatuur või vale
kasutusviis.
Asendage aku sama tüübiga.
Toitepinge on korras, kuid
seade töötab akurežiimil.
Toitekaabel on lahti.
Kontrollige toitekaablit. Vajadusel
ühendage uuesti.
Kasutusjuhend
ET
Page 43

Lietotāja rokasgrāmata
Line Interactive UPS
Garantijas un apkalpes informācija
Paldies, ka iegādājāties šo Mustek UPS izstrādājumu.
Lai maksimāli izmantotu izstrādājuma priekšrocības, izpildiet izstrādājuma rokasgrāmatā
un, ja piemērojams, programmatūras instalēšanas rokasgrāmatā sniegtos norādījumus.
Programmatūras instalēšana
Ja izstrādājums tiek piegādāts kopā ar programmatūru, programmatūras iepakojumā ir
pieejams lasāmatmiņas kompaktdisks (CD-ROM).
Lai instalētu programmatūru, izpildiet norādījumus.
Programmatūru, rokasgrāmatu un īso pamācību varat lejupielādēt šajā vietnē:
http://www.power-software-download.com/viewpower.html
Garantija
Kā ražotājs mēs saviem izstrādājumiem nodrošinām minimāli 1 gada garantiju.
Tomēr, lai uzzinātu par garantijas precīzu spēkā esamības laiku un garantijas
noteikumiem, sazinieties ar tālākpārdevēju, jo garantijas periods un noteikumi var
atšķirties atkarībā no valsts/reģiona.
Problēmu novēršana
Skatiet (aparatūras un programmatūras) rokasgrāmatas nodaļu par problēmu novēršanu.
Papildinformācija
Regulāri apmeklējiet mūsu vietni (www. Mustek.eu), lai ielādētu programmatūras
atjauninājumus, kā arī skatītu bieži uzdotos jautājumus (saraksts FAQ).
Ja problēma netiek novērsta, padoma saņemšanai sazinieties ar tālākpārdevēju.
Apkalpe un apkope
Ja izstrādājumam garantijas laikā nepieciešama apkalpe vai apkope, šo procesu veikšanai
vienmēr sazinieties ar tālākpārdevēju. Ja tas notiek pēc garantijas laika beigām, iesakām
arī šādā gadījumā sazināties ar tālākpārdevēju. Jebkurā gadījumā nodrošiniet, lai
izstrādājuma apkalpi vai apkopi veiktu kvalificēts personāls.
Lietotāja rokasgrāmata
LV
UZMANĪBU: Šis ir C2 kategorijas UPS produkts. Dzīvojamā vidē tas var izraisīt
radiosakaru traucējumus, kuru gadījumā lietotājam var nākties veikt papildu
pasākumus.
Page 44

ā
ī ī ī ā Ū Ā Ī
Jums jāsaņem šādi priekšmeti, kam jāatrodas iepakojuma iekšpusē:
- UPS iekārta; - īsa pamācība; - Garantijas karte
Skats no priekšpuses: Skats no aizmugures:
400VA/600VA/800VA
1000VA/1500VA/2000VA
LED
signalizācija
UPS statuss
LED
signalizācija
UPS statuss
●
no
Strāvas ir normāli un
UPS darbojas normāli.
●zaļš
no
Strāvas ir normāli un
UPS darbojas normāli.
★
Skan ik pēc 10
sekundēm
Power sabojājas un
UPS ir akumulatora
režīmā.
★dzeltens
Skan ik pēc 10
sekundēm
Power sabojājas un
UPS ir akumulatora
režīmā.
★
Skan katru
sekundi
Zems akumulatora
līmenis
★dzeltens
Skan katru
sekundi
Zems akumulatora
līmenis
○
no
UPS ir izslēgts.
○zaļš
no
UPS ir izslēgts.
●
nepārtraukti skan
UPS vaina
●sarkans
nepārtraukti
skan
UPS vaina
●LED ir ieslēgts ○ LED ir izslēgts . ★ LED mirgo
Darbība Displejs
UPS režīms
LCD
Apraksts
UPS strāva ieslēgta
Kad UPS ir ieslēgta strāva, tas dažu 4 sekunžu
laikā sāk darboties šajā režīmā.
Maiņstrāvas režīms
Kad darbojas AVR, ikona iegaismojas
ik sekundi.
LCD informācija tiks parādīti šādā secībā , kad
LCD ir pieskāries
1. izejas spriegums
2. ieejas spriegums
3. slodzes līmenis
4. Akumulatora ietilpība
Pie pārslodzes
maiņstrāvas režīmā
mirgos ikonas.
Notiekot pārslodzei, ik pēc 0,5 sekundēm
atskanēs trauksmes signāls.
Akumulatora
režīms
Kad akumulatora uzlādes līmenis ir
zems, ikona iegaismojas ik
sekundi.
Signalizācija pīkstiens ik pēc 10 sekundēm un
LCD informācija tiks parādīti šādā secībā , kad
LCD ir pieskāries.
1. izejas spriegums
2. ieejas spriegums
3. slodzes līmenis
4. Akumulatora ietilpība
Pie pārslodzes
akumulatora
režīmā
mirgos ikonas.
Notiekot pārslodzei, ik pēc 0,5 sekundēm
atskanēs trauksmes signāls.
Piezīme: Ja apgaismojums izslēdzas , jūs varat aktivizēt to, pieskaroties ekrānam .
Kļūme kodu tabulu :
Fault stāvoklis
LCD
Risinājumi
Output īssavienojums
Atvienojiet īssavienojums slodzes un atkal atsākt UPS .
pārslodzes vainaf
Atvienojiet visas izejas slodzes un restart UPS vēlreiz.
pieblīvēt
Aicinājums dienestam nekavējoties.
Slikti vai stipri izlādējies
akumulators
Lūdzu, nomainiet akumulatoru.
High izejas spriegums
vaina
Aicinājums dienestam nekavējoties.
Over - temperatūra
1. Izslēdziet ierīci un pagaidiet dzesēšanai.
2. Noņemt pārmērīgas slodzes un gaidīt dzesēšanai.
Ja rodas kļūme signalizācija , lūdzu, nekavējoties zvaniet uz pakalpojumu.
• Lai novērstu aizdegšanās vai elektriskās strāvas trieciena risku, izmantojiet ierīci tikai telpās, vietās ar
regulējamu temperatūru un mitruma, kur nav strāvu vadošu piesārņotāju (skatiet specifikācijas).
• Lai mazinātu pārkaršanas risku, neaizsedziet UPS dzesēšanas atveres un nenovietojiet iekārtu tiešos saules
staros, un neuzstādiet blakus siltuma avotiem, piemēram, sildītājiem vai kamīniem.
• Nepievienojiet UPS objektus, kas nav datori, piemēram, medicīnas iekārtas, dzīvības uzturēšanas iekārtas,
mikroviļņu krāsnis, vai putekļsūcējus.
• Nesavienojiet UPS ievadi ar tā izvadi.
• Nenovietojiet dzērienus vai citus objektus, kas satur šķidrumu, uz iekārtas vai tās tuvumā.
• Avārijas gadījumā nospiediet izslēgšanas (OFF) pogu un atvienojiet strāvas vadu no maiņstrāvas barošanas
avota, lai pareizi atvienotu UPS.
• Nepievienojiet pie UPS strāvas kontaktligzdu kopni vai pārsprieguma ierobežotāju.
• Ja UPS ir metāla šasija, drošības nolūkā uzstādīšanas laikā obligāti ir jāierīko zemējums, lai samazinātu
noplūdes strāvu zem 3,5 mA.
• Remonts vai apkopes darbi jāveic un jāuzrauga tikai apmācītam personālam.
• Nomaiņai izmantojiet tāda paša numura un tipa akumulatorus.
• Iekšējā akumulatora spriegums ir 12 V līdzstrāva. Hermētisks, svina-skābes, 6 elementu akumulators.
• Neizmetiet akumulatorus ugunī, jo tie var eksplodēt.
• Neatveriet un nesabojājiet akumulatoru vai akumulatorus. Izšļakstīts elektrolīts ir kaitīgs ādai un acīm.
LED rādītāji
Lietotāja rokasgrāmata
LCD panelis
Strāvas slēdzis
Barošanas slēdzis ar LED
indikatoru .
Maiņstrāvas ievade
Izvades rozetes
Strāvas ķēdes pārtraucējs
RJ-11
USB (opcija)
RJ-45 (opcija)
LV
EN
Page 45

ē ē
4 stundas
UZMANĪBU! NEKAD nepievienojiet pie UPS iekārtas lāzera printeri vai
• Atvienojiet UPS pirms tā tīrīšanas un neizmantojiet šķidru vai izsmidzināmu mazgāšanas līdzekli.
• Akumulators var radīt elektriskās strāvas trieciena risku un lielu īssavienojumu strāvu. Pirms akumulatora
nomaiņas jāievēro šādi piesardzības pasākumi:
1) Noņemiet pulksteņus, gredzenus vai citus metāla priekšmetus.
2) Izmantojiet instrumentus ar izolētiem rokturiem.
3) Valkājiet gumijas cimdus un zābakus.
4) Nenovietojiet instrumentus vai metāla daļas uz akumulatora.
5) Atvienojiet uzlādes avotu pirms akumulatora spaiļu pievienošanas vai atvienošanas.
Pirms uzstādīšanas, lūdzu, apskatiet iekārtu un saturu, un pārliecinieties, ka nekas nav bojāts un nekas
netrūkst.
❶ Novietošanas un uzglabāšanas apstākļi
Uzstādiet UPS aizsargātā zonā, kur nav pārmērīgu putekļu un ir atbilstoša gaisa plūsma. Lai izvairītos no
traucējumiem, lūdzu, novietojiet UPS no citām iekārtām vismaz 20 cm attālumā. Nedarbiniet UPS vietās, kur
temperatūra un mitrums ir virs ieteicamā ierobežojuma (lūdzu, skatiet specifikācijās).
❷
Savienošana ar elektrotīklu un uzlādēšana
Iespraudiet maiņstrāvas ievades vadu sienas kontaktligzdā un uzlādējiet UPS vismaz 6 stundas pirms lietošanas.
Kamēr iekārta ir pieslēgta elektrotīklam, tiek uzlādēts tās akumulators.
❸ Ierīču pievienošana
Iespraudiet ierīču kontaktdakšas UPS aizmugures panelī. Ieslēdziet strāvu, nospiežot slēdzi, ierīces tagad ir
aizsargātas ar UPS.
❹ Pievienojiet modemu/tālruni/tīklu aizsardzībai pret pārspriegumu (tikai modelim ar
RJ-11/RJ45)
Pievienojiet modema/tālruņa līniju pret pārspriegumu aizsargātā kontaktligzdā „ IN ”UPS iekārtas aizmugurē,
otram vada galam jābūt pieslēgtam datora kontaktligzdā „IN”, kas paredzēta tālrunim.
❺ Pievienojiet sakaru kabeli (tikai modelim ar USB/RS-232 portu)
Lai aktivizētu attālo UPS izslēgšanu/startēšanu un statusa pārraudzību, pievienojiet sakaru kabeli no USB/RS232
porta un otru galu pie sava datora sakaru porta. Ar instalēto pārraudzības programmatūru jūs varat ieplānot
UPS izslēgšanu/startēšanu un UPS statusa pārraudzību.
❻ Iekārtas izslēgšana/ieslēgšana
Nospiediet slēdzi, lai ieslēgtu strāvas padevi UPS. Lai izslēgtu, nospiediet slēdzi un turiet to 5 sekundes.
Modelis
400
600
800
JAUDA
400VA/240W
600VA/360W
800VA/480W
IEVADE Spriegums
220/230/240VAC
IEVADE Sprieguma diapazons
162-290 VAC
Spriegums regulēšana
± 10 % (Akumulatora režīms)
Frekvenču diapazons (Akumulatora režīms)
50Hz +/-1 Hz
Pārsūtīšanas laiks
Tipiski 2–6 ms
Viļņu forma
Simulated Sine Wave
AKUMULATORS Tips un numurs
12V/4.5Ahx1
12V/7Ahx1
12V/9Ahx1
Uzlādes laiks
4-6 hours recover to 90% capacity
Izmēri (garums x platums x augstums)
mm
LED: 279 x 101 x 142 / LCD: 300 x 101 x 142
Neto svars (kg)
LED
3.55
4.2
4.9
LCD
3.7
4.4
5.0
Mitrums
0–90 % rel. mitrums pie 0-40 °C (bez kondensācijas)
Skaņas līmenis
Mazāk par 40 dB
Modelis
1000
1500
2000
JAUDA
1KVA/600W
1.5KVA/900W
2KVA/1200W
IEVADE Spriegums
220/230/240VAC
IEVADE Sprieguma diapazons
162-290 VAC
Spriegums regulēšana
± 10 % (Akumulatora režīms)
Frekvenču diapazons (Akumulatora režīms)
50Hz +/-1 Hz
Pārsūtīšanas laiks
Tipiski 2–6 ms
Viļņu forma
Simulated Sine Wave
AKUMULATORS Tips un numurs
12V/7Ah x 2
12V/9Ah x 2
12V/9Ah x 2
Uzlādes laiks
4-6 hours recover to 90% capacity
Izmēri (garums x platums x augstums)
320 x 130 x 182
Neto svars (kg)
8.2
10.4
11
Mitrums
0–90 % rel. mitrums pie 0-40 °C (bez kondensācijas)
Problēma
Iespējamais cēlonis
Risinājums
Uz priekšējā LCD paneļa displeja nav
vārdu.
Zems akumulatora uzlādes
līmenis.
Uzlādējiet UPS vismaz 6 stundas.
Akumulatora kļūme.
Nomainiet akumulatoru, izmantojot tāda paša
tipa akumulatoru.
UPS nav ieslēgts.
Nospiediet barošanas slēdzi vēlreiz, lai
ieslēgtu UPS.
Tomēr nepārtraukti skan trauksme
elektrotīkla barošanas strāvas
padeve ir normāla.
UPS ir pārslogots.
Atvienojiet dažas ierīces. Pirms no jauna
pieslēgt aprīkojumu, lūdzu, pārbaudiet, vai tā
jauda atbilst specifikācijās norādītajai UPS.
Ja notiek strāvas padeves
pārtraukums, rezerves barošanas
laiks ir saīsināts.
UPS ir pārslogots.
Noņemiet atsevišķas būtiskas slodzes.
Akumulatora spriegums ir
pārāk zems.
Uzlādējiet UPS vismaz 6 stundas.
Akumulatora defekts. Darba
temperatūra var būt pārāk
augsta, vai akumulators
netiek pareizi izmantots.
Nomainiet akumulatoru, izmantojot tāda paša
tipa akumulatoru.
Elektrotīkla barošanas strāva ir
normāla,
bet iekārta ir ieslēgta
akumulatora režīmā.
Strāvas vadam nav kontakta.
Pārbaudiet un pievienojiet atkārtoti strāvas
vadu.
ā
ā ī ā ē ā ē
Lietotāja rokasgrāmata
LV
Page 46

Skaņas līmenis
Mazāk par 40 dB
Vartotojo vadovas
Line Interactive UPS
Garantija ir informacija apie techninę priežiūrą
Dėkojame, kad įsigijote šį „Mustek UPS“ gaminį.
Norėdami maksimaliai naudotis šiuo gaminiu, vadovaukitės šiame gaminio naudojimo
vadove ir, jei taikytina, programinės įrangos įdiegimo vadove pateiktais nurodymais.
Programinės įrangos įdiegimas
Jeigu gaminiai pateikiami kartu su programine įranga, programinės įrangos dėžutėje
rasite kompaktinį diską.
Diegdami programinę įrangą, vadovaukitės nurodymais.
Programinę įrangą, vadovą ir trumpą informacijos vadovą galite atsisiųsti iš šios
tinklavietės: http://www.power-software-download.com/viewpower.html
Garantija
Gamintojas šiam gaminiui suteikia mažiausiai 1 metų garantiją.
Visgi dėl tikslaus garantinio laikotarpio ir garantijos sąlygų turėtumėte kreiptis į vietos
pardavėją, nes ir garantinis laikotarpis, ir sąlygos, įvairiose šalyse / regionuose gali skirtis.
Problemų sprendimas
Žr. problemų spendimo skyrių savo gaminio (techninės ir programinės įrangos) vadove.
Papildoma informacija
Reguliariai lankykitės mūsų tinklavietėje (www. Mustek.eu), kurioje rasite programinės
įrangos naujinius ir dažnai užduodamus klausimus (DUK).
Jeigu tai Jūsų problemos išspręsti nepadėtų, kreipkitės pagalbos į vietos pardavėją.
Techninė priežiūra ir remontas
Jeigu garantiniu laikotarpiu gaminiui prireiktų techninės priežiūros arba remonto, visada
kreipkitės į vietos pardavėją dėl taikomos tvarkos. Jeigu gaminio garantinis laikotarpis
būtų jau pasibaigęs, taip pat patariame kreiptis į vietos pardavėją. Bet kuriuo atveju
visada užtikrinkite, kad gaminio techninę priežiūrą arba remontą atliktų kvalifikuotas
meistras.
Vartotojo vadovas
LT
ĮSPĖJIMAS: Tai yra C2 UPS kategorijos produktas. Gyvenamojoje aplinkoje
šis produktas gali sukelti radijo trikdžius, kurių atveju iš naudotojo gali būti
pareikalauta imtis papildomų priemonių.
Page 47

ė
į ė
Gaminio pakuotėje turi būti šie elementai
- UPS blokas - trumpas vadovas - Garantinė kortelė
Vaizdas iš priekio: Vaizdas iš galo
400VA/600VA/800VA
1000VA/1500VA/2000VA
LED
žadintuvas
UPS būsena
LED
žadintuvas
UPS būsena
●
nuo
Maitinimo normalu ir
UPS veikia normaliai.
●žalias
nuo
Maitinimo normalu ir
UPS veikia normaliai.
★
Skambanti kas 10
sekundžių
Maitinimo sutrinka ir
UPS baterijos režimu.
★geltonas
Skambanti
kas 10
sekundžių
Maitinimo sutrinka ir
UPS baterijos režimu.
★
Skambanti
kiekvieną
sekundę
Žemas baterijos
★geltonas
Skambanti
kiekvieną
sekundę
Žemas baterijos
○
nuo
UPS išjungtas.
○žalias
nuo
UPS išjungtas.
●
nuolat skamba
UPS kaltė
●raudonas
nuolat
skamba
UPS kaltė
●LED įsijungs. ○ LED išsijungia. ★ LED mirksi .
Operacija Ekranas
UPS režimas
LCD
Aprašymas
UPS maitinimas
įjungtas
Kai nepertraukiamo maitinimo šaltinis (UPS)
įjungiamas, jis keletą sekundžių veiks šiuo
režimu.
Kintamosios srovės
(AC) režimas
Kai veikia AVR, piktograma mirksi kas
Skystųjų kristalų informacija bus rodomi tokia
tvarka , kai skystųjų kristalų palietus .
1. Išėjimo įtampa
2. įėjimo įtampa
sekundę.
3. apkrovos lygis
4. baterijos talpa
Perkrova AC režimu
piktogramos mirksi.
Įvykus perkrovai, signalas pypsi kas 0,5
sekundės.
Baterijos režimas
Kai baterija baigia išsikrauti,
piktograma mirksi kas sekundę.
Alarm will beep every 10 seconds and LCD
information will be displayed in the following
order when LCD is touched.
1. Išėjimo įtampa
2. ėjimo įtampa
3. apkrovos lygis
4. baterijos talpa
Perkrova veikiant
baterijos režimu
piktogramos mirksi.
Įvykus perkrovai, signalas pypsi kas 0,5
sekundės.
PASTABA: Jei apšvietimas išsijungia , galite įrašyti jį aktyvuoti paliesdami ekraną.
Gedimo kodas lentelę:
gedimas būklė
LCD
sprendimai
Išėjimo trumpai
sujungtas
Atjunkite trumpas sujungimas krovinius ir perkraukite UPS dar kartą.
perkrovos kaltė
Atjunkite visus išvesties krovinius ir vėl iš naujo paleisti UPS.
užprašyti
nedelsiant iškviesti dėl aptarnavimo.
Blogai ar labai išsikrovęs
akumuliatorius
Prašome pakeisti bateriją .
Aukštos išėjimo įtampa
kaltė
nedelsiant iškviesti dėl aptarnavimo.
Per temperatūros
1. Išjunkite įrenginį ir palaukite, kol aušinimo.
2. Pašalinti pernelyg didelių apkrovų ir laukti aušinimo.
Jei įvyksta gedimas signalizacija, prašome nedelsiant kreiptis paslauga.
Siekdami išvengti gaisro ar elektros smūgio pavojaus, montuokite šį bloką tik patalpoje, kurioje
temperatūra ir drėgmė yra kontroliuojama ir nėra laidžių teršalų. (Žr. atitinkamą specifikaciją.)
Siekdami sumažinti perkaitimo pavojų, neuždenkite UPS vėdinimo angų, pasirūpinkite, kad UPS bloko
neveiktų tiesioginiai saulės spinduliai, ir nemontuokite jo arti buitinių įrenginių, pavyzdžiui, šildytuvų ar
židinių.
Nejunkite prie šio UPS nekompiuterinės įrangos, pavyzdžiui, medicininės įrangos, gyvybės palaikymo
įrangos, mikrobangų krosnelių arba dulkių siurblių.
Neįkiškite UPS įvesties kištuko į paties bloko išvestį.
Nedėkite ant bloko ar šalia jo gėrimų ir jokių kitų daiktų, kuriuose yra skysčio.
Įvykus avarijai paspauskite OFF (išjungimo) mygtuką ir atjunkite maitinimo laidą nuo AC maitinimo
šaltinio, kad tinkamai išjungtumėte UPS.
Nejunkite prie UPS lizdų bloko ar viršįtampio ribotuvo.
Jei UPS rėmas metalinis, saugos sumetimais montuojant UPS reikia įžeminti, kad nuotėkio srovė būtų
sumažinta iki mažiau kaip 3,5 mA.
Remonto ar priežiūros darbus turi atlikti arba juos prižiūrėti tik išmokyti darbuotojai.
Baterijas keiskite tik to paties numerio ir tipo baterijomis.
Vartotojo vadovas
LCD skydelis
Maitinimo jungiklis
Maitinimo jungiklis su
LED indikatoriumi
AC įvestis
Išvesties lizdai
Grandinės pertraukiklis
RJ-11
USB ryšio prievadas
(pasirinkimas)
RJ-45 (pasirinkimas)
LT
EN
Page 48

ų
4 valandos
ATSARGIAI: NIEKADA nejunkite lazerinio spausdintuvo arba skaitytuvo prie UPS
bloko, nes kitaip UPS blokas gali būti pažeistas.
Vidinė baterijos įtampa yra 12 V DC. Baterija yra sandarioji, švino-rūgšties, 6 elementų baterija.
Nemeskite baterijų į ugnį, nes kitaip jos gali sprogti.
Neatidarykite ir nepažeiskite baterijos ar baterijų. Ištekėjęs elektrolitas yra kenksmingas odai ir akims.
Atjunkite UPS prieš valydami, o valymui nenaudokite skysto arba purškiamo ploviklio.
Baterija gali kelti elektros smūgio ir stiprios trumpojo jungimo srovės pavojų. Prieš keičiant baterijas turi
būti imtasi šių atsargumo priemonių:
1) Nusiimkite laikrodžius, žiedus ar kitus metalinius daiktus.
2) Naudokite įrankius su izoliuotomis rankenomis.
3) Mūvėkite gumines pirštines ir aulinius batus.
4) Nedėkite įrankių ar metalinių dalių ant baterijų.
5) Atjunkite įkrovimo šaltinį prieš prijungdami arba atjungdami baterijos gnybtus.
Prieš montuodami apžiūrėkite bloką ir pakuotės turinį, patikrindami, ar niekas nepažeista ir ar nieko
netrūksta.
❶
Vietos parinkimas ir laikymo sąlygos
Montuokite UPS apsaugotoje vietoje, kur nėra per daug dulkių ir yra pakankama oro apytaka. Parinkite UPS
vietą bent 20 cm atstumu nuo kitų įrenginių, kad išvengtumėte trukdžių. NENAUDOKITE UPS ten, kur
temperatūra ir drėgmė viršija rekomenduojamas ribas (patikrinkite specifikaciją).
❷
Prijungimas prie elektros tinklo ir įkrovimas
Įstatykite AC įvesties laidą į sieninį elektros lizdą ir prieš naudodami įkraukite UPS bent 6 valandas. Blokas
įkrauna savo bateriją, kol yra prijungtas prie elektros tinklo.
❸
Prietaisų prijungimas
Įstatykite prietaisų kištukus į išvesties jungtis UPS galiniame skydelyje. Įjunkite maitinimą paspaudę jungiklį –
dabar prietaisai yra apsaugoti per UPS.
❹
Modemo / telefono / tinklo prijungimas apsaugai nuo viršįtampio (tik modeliui su
RJ-11/RJ-45)
Įstatykite modemo / telefono linijos kištuką į nuo viršįtampio apsaugotą „IN“ (įvesties) jungtį UPS bloko gale;
kito galo kištukas turi būti įstatytas į „OUT“ (išvesties) telefono jungtį kompiuteryje.
❺ Ryšio kabelio prijungimas (tik modeliui su USB/RS-232 prievadu)
Norėdami įgalinti nuotolinį UPS išjungimą / paleistį ir būsenos stebėjimą, įstatykite vieną ryšio kabelio galą į
USB/RS-232 prievadą, o kitą – į kompiuterio ryšio prievadą. Įdiegę stebėjimo programą, galite nustatyti UPS
išjungimo / paleisties grafiką ir stebėti UPS būseną.
❻ UPS bloko įjungimas / išjungimas
Paspauskite jungiklį, kad įjungtumėte UPS. Norėdami išjungti, 5 sekundes palaikykite jungiklį nuspaustą.
Modelis
400
600
800
PAJĖGUMAS
400VA/240W
600VA/360W
800VA/480W
ĮVESTIS Įtampa
220/230/240VAC
Įtampos diapazonas
162-290 VAC
Įtampos reguliavimas
± 10 % (Baterijos režimu)
Dažnių diapazonas (baterijos režimu)
50Hz +/-1 Hz
Perdavimo laikas
Tipiškas 2-6 ms
Bangos forma
Imituoti sinusoidė
BATERIJA Tipas ir numeris
12V/4.5Ahx1
12V/7Ahx1
12V/9Ahx1
Įkrovimo laikas
4-6 valandos pasiekti 90% pajėgumą
Išmatavimai (IxPxA)mm
LED: 279 x 101 x 142 / LCD: 300 x 101 x 142
Grynasis
svoris (kg)
LED
3.55
4.2
4.9
LCD
3.7
4.4
5.0
Drėgmė
0-90% RH @ 0-40°C (be kondensacijos)
Triukšmo lygis
Mažiau negu 40 dB
Modelis
1000
1500
2000
PAJĖGUMAS
1KVA/600W
1.5KVA/900W
2KVA/1200W
ĮVESTIS Įtampa
220/230/240VAC
Įtampos diapazonas
162-290 VAC
Įtampos reguliavimas
± 10 % (Baterijos režimu)
Dažnių diapazonas (baterijos režimu)
50Hz +/-1 Hz
Perdavimo laikas
Tipiškas 2-6 ms
Bangos forma
Imituoti sinusoidė
BATERIJA Tipas ir numeris
12V/7Ah x 2
12V/9Ah x 2
12V/9Ah x 2
Įkrovimo laikas
4-6 valandos pasiekti 90% pajėgumą
Išmatavimai (IxPxA)
320 x 130 x 182
Grynasis svoris (kg)
8.2
10.4
11
Drėgmė
0-90% RH @ 0-40°C (be kondensacijos)
Triukšmo lygis
Mažiau negu 40 dB
Problema
Galima priežastis
Sprendimas
Priekiniame LCD skydelyje nėra
žodžių.
Nusėdusi baterija.
Įkraukite UPS mažiausiai 6 valandas.
Baterijos gedimas.
Pakeiskite bateriją to paties tipo baterija.
UPS neįjungtas.
Dar kartą paspauskite įjungimo mygtuką, kad
įjungtumėte UPS.
Aliarmas nuolat skamba, nors
elektros tiekimas yra normalus.
Per didelė UPS apkrova.
Pašalinkite keletą įrenginių. Prieš iš naujo
prijungdami įrenginį, patikrinkite, kad apkrova
atitiktų UPS pajėgumą, nurodytą specifikacijoje.
Dingus elektros energijai, atsarginio
palaikymo laikas sutrumpėja.
Per didelė UPS apkrova.
Sumažinkite kritinę apkrovą.
Baterijos įtampa per žema.
Įkraukite UPS mažiausiai 6 valandas.
Baterijos defektas. Darbinė
temperatūra gali būti per
aukšta arba baterija
naudojama neteisingai.
Pakeiskite bateriją to paties tipo baterija.
Elektros tiekimas yra normalus,
tačiau įrenginys veikia baterijos
režimu.
Maitinimo laidas atsilaisvinęs.
Patikrinkite ir iš naujo prijunkite maitinimo laidą.
ė
Vartotojo vadovas
LT
 Loading...