

Mustee TOPAZ T6030, TOPAZ T6030R, TOPAZ T6030L, TOPAZ T6030LBN, TOPAZ T6030RBN Installation Instructions Manual
INSTALLATION INSTRUCTIONS
INSTRUCCIONES PARA LA INSTALACIÓN n INSTRUCTIONS D’INSTALLATION
READ ALL INSTRUCTIONS CAREFULLY AND INSPECT PRODUCT FOR DAMAGE BEFORE STARTING YOUR INSTALLATION.
LEA TODAS LAS INSTRUCCIONES DETENIDAMENTE Y VERIFIQUE QUE EL PRODUCTO NO ESTÉ DAÑADO ANTES DE COME NZAR LA INSTALACIÓN.
VEUILLEZ LIRE ATTENTIVEMENT TOUTES LES INSTRUCTIONS ET VÉRIFIER QUE LE PRODUIT N’E ST PAS ABÎMÉ AVANT DE PROCÉDER À L’INSTALL ATION.
INCLUDED IN CARTON: EN EL PAQUETE SE INCLUYE: CONTENU :
One (1) bathtub Una (1) bañera Une (1) baignoire
Six (6) mounting clips Seis (6) abrazaderas Six (6) fixations
Instructions Instrucciones Instructions
TOOLS AND MATERIALS REQUIRED FOR INSTALLATION:
HERRAMIENTAS Y MATERIALES PARA LA INSTALACIÓN DEL PRODUCTO: n OUTILS ET MATÉRIEL NÉCESSAIRES À L’INSTALLATION :
Models:
Modelos:
Modèles:
T6030
*
TOPAZ
™
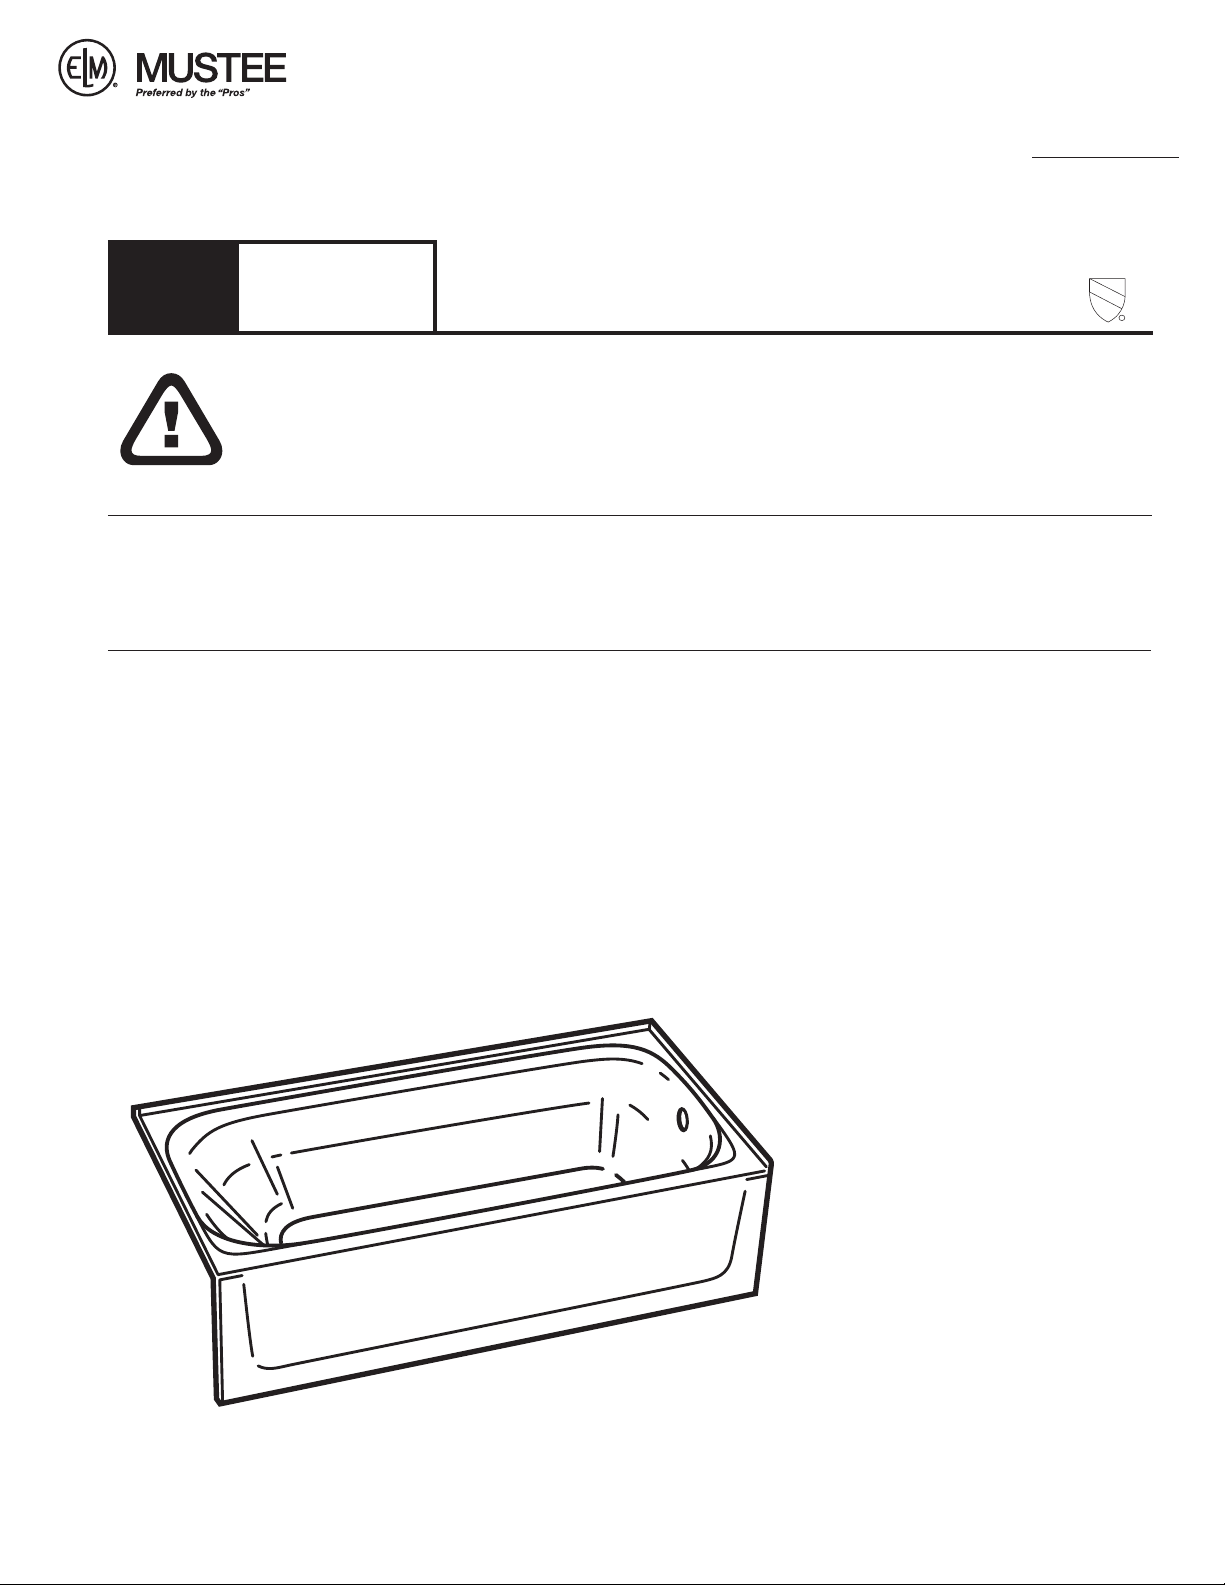
30" x 60" Bathtub
Bañera TOPAZ™ de 30" x 60"
n
Baignoire TOPAZ
™
d e 3 0 x 6 0 pouce s
U
P
C
R
E.L. Mustee & Sons, Inc.
5431 West 164th St.
Brook Park, OH 44142
Phone: 216.267.3100
Fax: 216.267.9997
Email: info@mustee.com
Web : w ww.mustee.com
E.L. Mustee & Sons, Inc.
INSTALLATION INSTRUCTIONS
INSTRUCCIONES PARA LA INSTALACIÓN n INSTRUCTIONS D’INSTALLATION
Models:
Modelos:
Modèles:
INCLUDED IN CARTON: EN EL PAQUETE SE INCLUYE: CONTENU :
One (1) bathtub Una (1) bañera Une (1) baignoire
Six (6) mounting clips Seis (6) abrazaderas Six (6) fixations
Instructions Instrucciones Instructions
TOOLS AND MATERIALS REQUIRED FOR INSTALLATION:
HERRAMIENTAS Y MATERIALES PARA LA INSTALACIÓN DEL PRODUCTO: n OUTILS ET MATÉRIEL NÉCESSAIRES À L’INSTALLATION :
T6030
READ ALL INSTRUCTIONS CAREFULLY AND INSPECT PRODUCT FOR DAMAGE BEFORE STARTING YOUR INSTALLATION.
LEA TODAS LAS INSTRUCCIONES DETENIDAMENTE Y VERIFIQUE QUE EL PRODUCTO NO ESTÉ DAÑADO ANTES DE COMENZAR LA INSTALACIÓN.
VEUILLEZ LIRE ATT ENTIVEMENT TOUTES LES INSTRUCTIONS ET VÉRIFIER QUE LE PRODUIT N’EST PAS ABÎMÉ AVANT DE PROCÉDER À L’INSTALLATION.
*
TOPAZ
Bañera TOPAZ™ de 30" x 60"
™
3 0 " x 6 0 " Bathtub
n
Baignoire TOPAZ
™
de 30 x 60 pouces
5431 West 164th St.
Brook Park, OH 44142
Phone: 216.267.3100
Fax: 216.267.9997
Email: info@mustee.com
Web: www.mustee.com
U
P
C
R
Screwdriver Destornillador Tournevis
Tape measure Cinta métrica Mètre ruban
Level (24" min.) Nivel (24" min.) Niveau (24 po min.)
Pencil Lápiz Crayon
1" x 4" support rails
(5 ft. pine)
Mounting screws (#8 x 1
Shims (optional) Cuñas (opcional) Cales (facultatif)
Felt paper or mortor cement Papel de fieltro o mortero de cemento Papier-feutre ou ciment à maçonner
Silicone sealant Impermeabilizador de silicona Mastic silicone
1
/2" min.) Tornillos de sujeción (Nro. 8 x 11/2" min.) Vis de fixation (8 x 1,5 po min.)
Rieles de soporte de 1" x 4"
(pino de 5 pies.)
Rails d’appui 1 x 4 po
(pin 5 pieds)
* Part No. Color Type
Nro. de pieza Color Tipo
N° de référence Couleur Type
T6030L White Left
Blanco Izquierda
Blanc Gauche
T6030R White Right
Blanco Derecho
Blanc Droite
T6030LBN Bone Left
Hueso Izquierda
Crème Gauche
T6030RBN Bone Right
Hueso Derecho
Désosser Droite
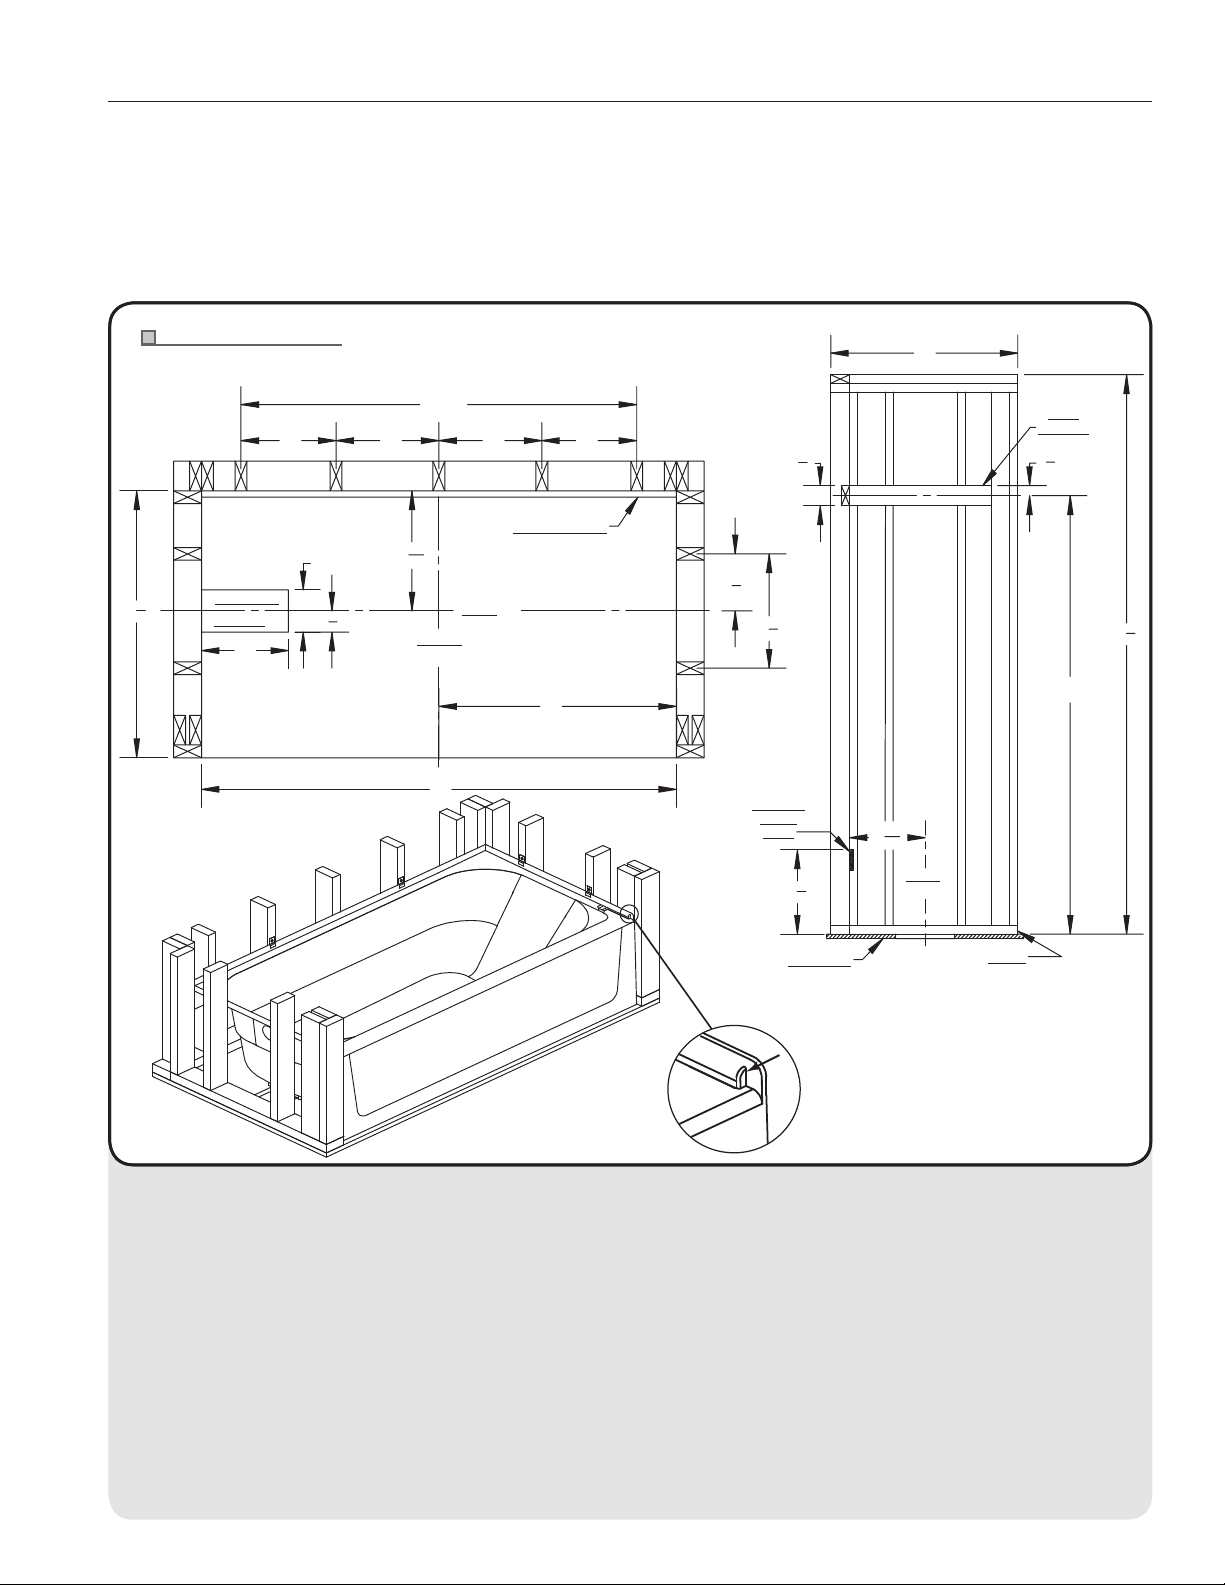
ROUGH-IN FRAMING
11 3/4"
*1
*2
*3
*4
ENCUADRE PRELIMINAR n SCHÉMA DE MONTAGE
NOTE: (Fig. 1) refers to installing a
standard bathtub with below fl oor drain.
Requires standard drain and overfl ow
assembly (not included). Left-hand drain
shown – reverse for right-hand drain
installation.
NOTA: En la (Fig. 1) se muestra la instalación
de una bañera estándar con drenaje en
el suelo. Debe colocarse un dispositivo
estándar para drenaje y desbordamiento
(no se incluye). En la fi gura se muestra el
desagüe por la izquierda (girar para ver la
instalación del desagüe por la derecha).
REMARQUE : Le schéma 1 se réfère à
l’installation d’une baignoire standard avec
évacuation sous plancher. Nécessite le
montage d’un siphon et d’un trop-plein
(non inclus). Siphon gauche (inversez pour
l’installation du siphon droit).
31
Fig. 1
12" 13" 13" 12"
5"
1
"
2
LEFT DRAIN
OPENING
11"
1
*2
2
"
2
Reverse for right-hand installation.
Girar para ver la instalación del desagüe por la derecha.
Inversez pour l’installation du siphon droit.
50"REF.
*1
14
1
"
4
ALCOVE
C
L
60"
*4
DRAIN
*5
SUPPORT BLOCK
C
L
*3
30"
6
3
"
4
13
SUPPORT
1
"
2
*3
BLOCK
1" x 4"
14
35"
*6
2" x 4"
BRACING
1
3
"
2
1
14
"
4
*4
5
"
8
DRAIN
C
L
3
1
"
4
REF.
WALL UNIT
*10
97
1
"
8
Cuadro 1 Le schéma 1
*1 Referencia
*2 Apertura del desagüe por el
lado izquierdo
*3 Bloques de soporte
*4 Desagüe
*5 Nicho
*6 Apuntalamientos
*7 Base del suelo
*8 Frenta
directamente a los postes,
podría ser necesario practicar
una ranura para la barrera
de estanqueidad, para ello se
necesitará una lima.
*10
Referencia bañera unidad
de pared
*1 Référence
*2 Ouverture du siphon
gauche
*3 Blocs de support
*4 Siphon
*5 Alcôve
*6 Contreventement
*7 Sous-plancher
SUB FLOOR
*7
IF USING A DIRECT TO STUD BATHTUB WALL
UNIT THE SIDE PANELS MAY NEED A CLEARANCE
SLOT ADDED TO ACCEPT WATER BARRIER DETAIL.
A FILE WILL BE NEEDED FOR THIS.
FRONT
*8
*9
*8 Avant
Si l’installation comprend un
*9*9 Si se sujeta un contorno
contour de bain fixé directement
aux montants, il se peut qu’il
soit nécessaire de pratiquer
une fente de dégagement du
côté des parois latérales pour
la barrière d’étanchéité. Pour
ce faire, une lime sera requise.
Référence unité murale
*10
2
 Loading...