

Mustang Survival MD2951, MD2953, MD2983, MD2981 Installation Instruction

FOR MODEL NUMBERS MD2951 / MD2953 / MD2981 / MD2983
AIS INSTALLATION
DLX 38 INFLATABLE PFD
DO NOT REMOVE PRIOR TO SALE.
HT1183 REV 14DEC2016
INSTALLATION INSTRUCTIONS FOR OCEAN SIGNAL
T
T
1
3
2
RESCUEME MOB1
ABOUT THE MOB1 SRS
When the MOB1 is properly installed on an inflatable PFD, it is
intended to automatically activate upon inflation. The MOB1 can be
attached to the oral inflation tube on the left side of the DLX Manual
and Automatic Inflatable PFD. As the DLX inflates, the activation slide
on the MOB1 is removed, releasing the antenna to send its signal. For
further information refer to the MOB1 User Manual.
INTEGRATING THE MOB1 SRS TO THE DLX INFLATABLE
FIG. 1
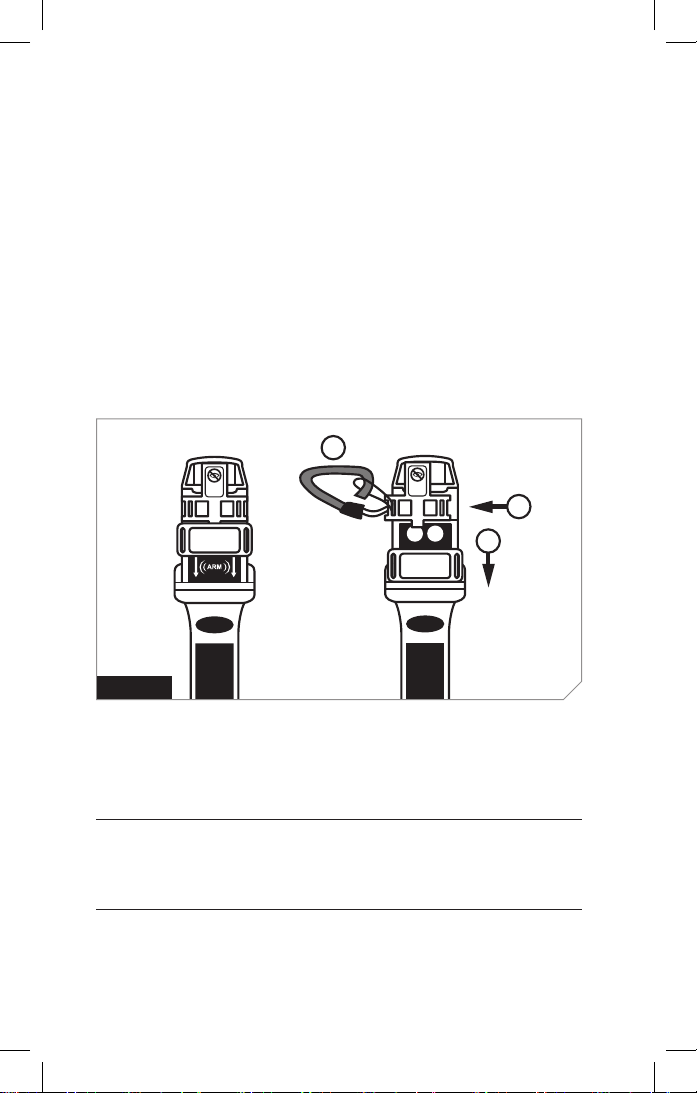
1. The MOB1 comes out of the box with the red arming slide locked
in the safe position. Move the red slide down, in the direction of
the white arrows on the unit, covering the word “ARM” (Fig. 1).
NOTE: DO NOT MOVE THE ACTIVATION SLI DE TOO FAR OR THE ANTENNA WILL BE
RELEASED AND THE MOB1 WILL ACTIVATE. IF ACTIVATED DURING THE INTEGRATION
PROCE SS, TURN THE MOB1 OFF BY PRESSIN G AND HOLDING THE TE ST/OFF KEY UNTIL
THE LED FLASHES RED TWICE. FOR FURTHER I NFORMATION, REFE R TO THE MOB1
USER MANUAL
2 MUSTANG SURVIVAL / AIS INSTALLATION
2. Carefully move the grey
activation slide to the left so
only the first slot is exposed
(Fig. 1)
3. Pass the loop at the end of
the activation tape through
4
T
the first slot that is exposed.
Pass the tape through the
loop (Fig. 1).
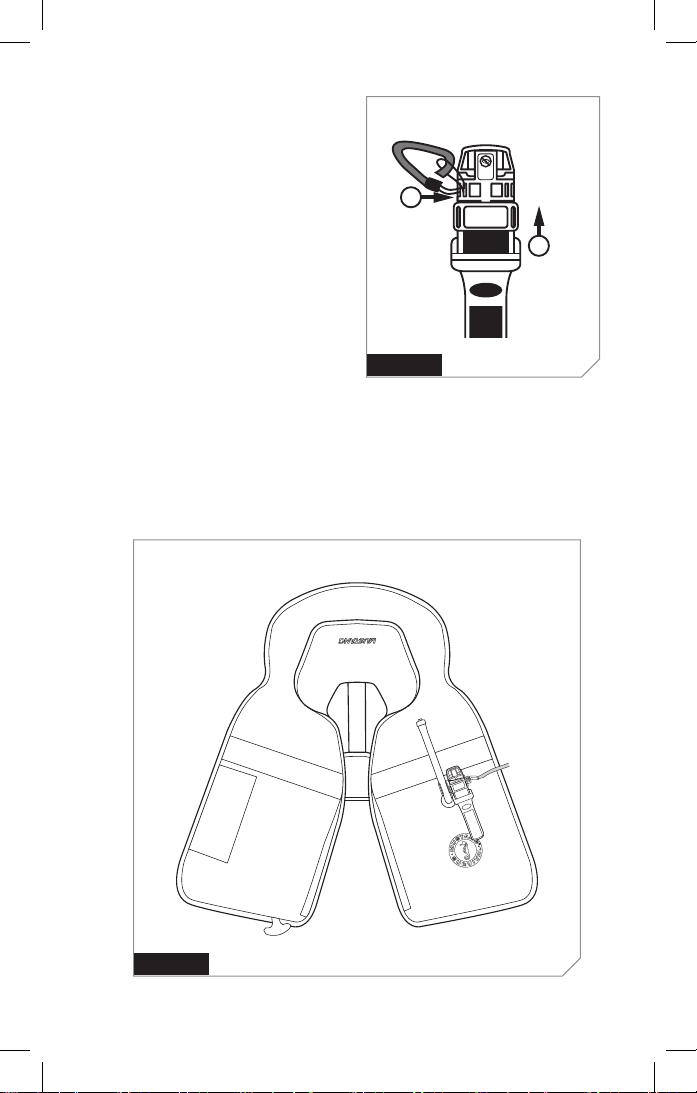
4. Push the grey activation slide
back to the center (Fig. 2)
and lock the slide in place
by pushing the red slide up
(Fig. 2).
FIG. 2
5. Install the oral tube mounting
bracket and install the unit between the oral tube and the outer
edge of the unit. Make sure MOB1 sits as low and possible on the
oral tube (Fig. 3 and 4).
5
FIG. 3
3
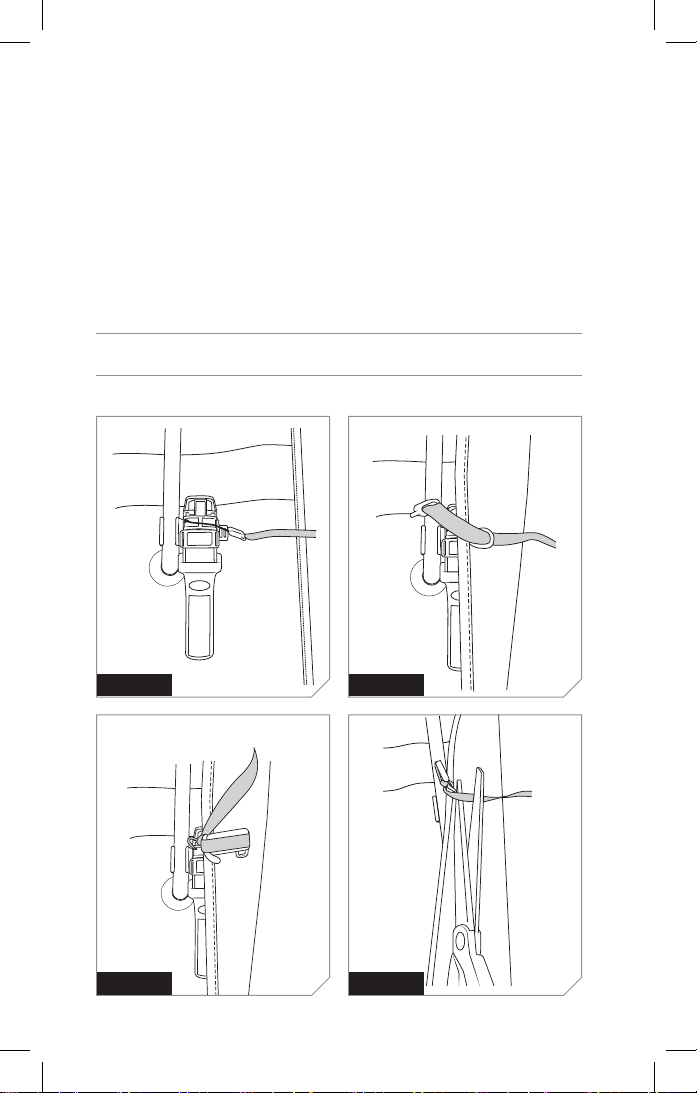
6. Flip over the outer edge of the bladder to expose AIS attachment
loop. Pass activation tape and the black plastic tab through the
attachment loop (Fig. 5).
7. Tightly knot the tape to make sure that the black plastic tab
cannot be pulled back through the attachment loop (Fig. 6).
8. Trim the excess tape and ensure that the remainder tape is longer
than ½ inch and less than 2 inches (Fig. 7).
9. Sear the end of the tape using a lighter (Fig 8).
10. Rearm MOB1 by pushing the red slider down over the “ARM” text”
(Fig. 1).
WARNIN G: FAILU RE TO ARM THE MO B1 WILL PREVENT AUTO AC TIVATION AND MAY
IMPEDE THE B REAKO UT OF TH E PFD AN D ACCESS TO THE OR AL TU BE.
FIG. 4 FIG. 5
FIG. 6 FIG. 7
4 MUSTANG SURVIVAL / AIS INSTALLATION
 Loading...