

Mustang Survival md2010 User Manual

INFLATABLE PFDs
MD2010
Manual Inflation Model
USCG APPROVALS:
RECREATIONAL: TYPE V WITH
TYPE III PERFORMANCE
APPROVED ONLY WHEN WORN,
SPECIAL USE DEVICE
MD2012
Manual with Automatic
Backup Inflation Model
USCG APPROVALS:
RECREATIONAL: TYPE V WITH
TYPE III PERFORMANCE
APPROVED ONLY WHEN WORN,
SPECIAL USE DEVICE
DO NOT REMOVE PRIOR TO SALE.
DO NOT CONVERT OR ALTER THIS PFD.
The MD2010 device will not inflate automatically upon immersion.
Tab must be pulled to activate inflation mechanism.
HT-1101 (Rev 09Aug2011)

CONTENTS
APPROVAL CONDITIONS AND CARRIAGE REGULATIONS ............ 1
MANDATORY CARRIAGE REQUIREMENTS .............................. 1
WHAT IS AN INFLATABLE PFD? ......................................... 2
INSTRUCTIONS FOR USE ................................................. 2
Check Your Inflatable PFD Before Using It ........................ 2
Sizing and Fit .......................................................... 4
Donning Instructions .................................................. 4
Inflating Your Inflatable PFD ........................................ 6
Re-arming Your PFD After Manual Inflation (MD2010) ......... 7
Special Consideration for Automatic Devices (MD2012) ........ 7
Re-arming Your PFD as Manual with Automatic
Backup (MD2012) ..................................................... 8
Deflating the Inflatable PFD ....................................... 10
Repacking .............................................................. 11
Usage Below Freezing ................................................ 11
IS YOUR PFD IN GOOD AND SERVICEABLE CONDITION? .......... 11
CARE AND MAINTENANCE INSTRUCTIONS .......................... 12
MUSTANG ACCESSORIES ................................................ 13
CLEANING AND STORING OF YOUR INFLATABLE PFD
(MD2010) .................................................................. 13

CLEANING AND STORING OF YOUR INFLATABLE PFD
(MD2012) .................................................................. 13
WHY ARE PFDS REQUIRED SAFETY EQUIPMENT? .................. 14
HOW AND WHY TO TEST YOUR PFD .................................. 14
(MD2010) .............................................................. 15
(MD2012) .............................................................. 15
HOW DO YOU TEST YOUR PFD USING THE MANUAL
INFLATOR?................................................................. 15
HOW DO YOU TEST YOUR PFD USING THE AUTOMATIC
INFLATOR? (MD2012)
................................................... 16
HOW DO YOU TEST YOUR PFD USING THE ORAL INFLATOR?
WEAR YOUR PFD
HYPOTHERMIA
......................................................... 17
............................................................ 18
EACH OF THESE DEVICES IS INTENDED TO HELP YOU
SAVE YOUR OWN LIFE
ADDITIONAL INFORMATION
DO NOT ATTACH PFD’S TO YOUR BOAT
.................................................. 19
............................................20
..............................20
AIRLINE OPERATOR POLICY ON CARRIAGE OF INFLATABLE
PDF’S AND CO
CARTRIDGES ...........................................20
2
.... 17
APPROVAL CONDITIONS AND CARRIAGE
A
REGULATIONS
This inflatable PFD is approved by the U.S. Coast Guard
for use as a Type V Personal Flotation Device (PFD). It
is not approved for water skiing or other high impact,
high speed activities. This inflatable PFD was designed
to be more comfortable and less restrictive to wear
than inherently buoyant PFDs. When worn, used, and
serviced according to this owner’s manual, this PFD can
greatly increase your chances of survival in the water.
Not recommended for non-swimmers or weak swimmers.
Users of inflatable PFDs must be at least 16 years old.
A Type V PFD must be worn to count as an approved PFD.
MANDATORY CARRIAGE REQUIREMENTS
Federal regulations in 33 CFR 175-1993 require you to
carry Coast Guard approved personal flotation devices
(PFDs) legibly marked with the Coast Guard approval
number which are in good and serviceable condition
and are the correct size for each person on board. To
be considered serviceable, this Inflatable PFD shall not
exhibit deterioration that could diminish its performance
such as broken or deformed hardware, detached
webbing, rotted structural components, air leaks, or
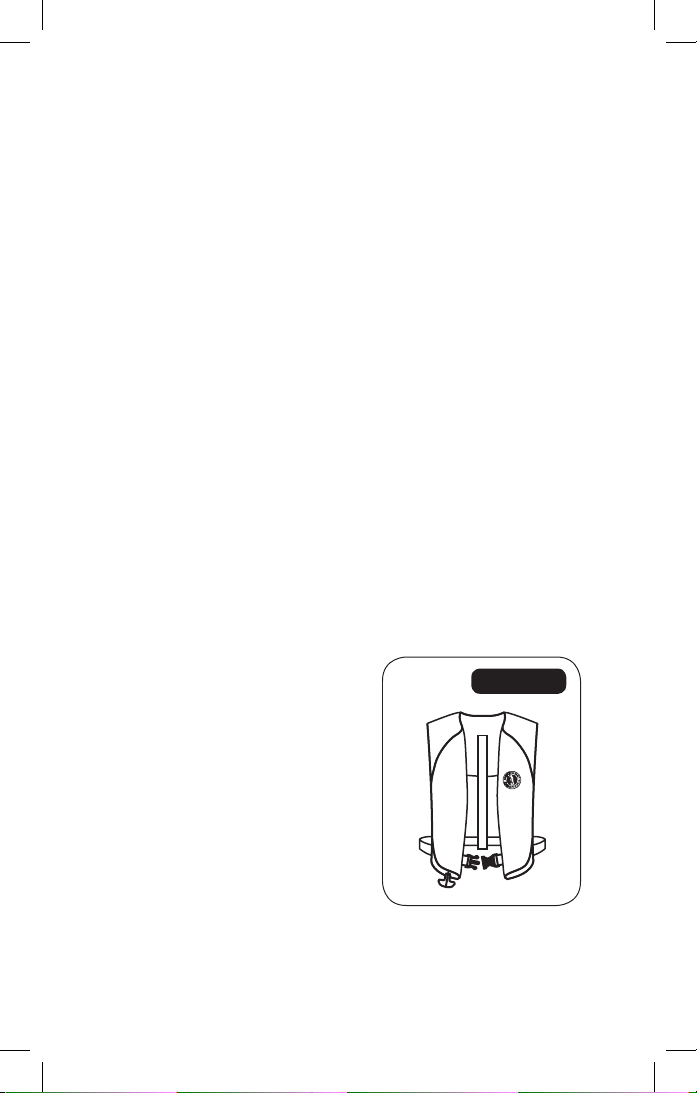
nonfunctional oral inflation tube. Unless worn inflated,
this Inflatable PFD must also be
properly armed with a full CO2
cylinder, inflation system status
indicator, and an accessible
manual inflation lanyard. A
PFD which is “approved only
when worn” or “required to be
worn” must be worn under the
specified conditions.
FIGURE 1
1

WHAT IS AN INFLATABLE PFD?
While traditional PFDs are inherently buoyant, inflatable
PFDs rely entirely on inflation for buoyancy. Uninflated,
the Inflatable PFD is a comfortable slim collar that can be
inflated at any time with a 20 gram CO2 gas cylinder. The
Inflatable PFD is designed to offer maximum mobility
with minimum bulk. The Inflatable PFD (MD2010) can
be inflated either manually by jerking a pull-tab, or
orally (by mouth). The Inflatable PFD (MD2012) can be
inflated either automatically during water immersion,
manually by jerking a pull-tab, or orally by mouth. It
is recommended that you familiarize yourself with the
procedures outlined in INSTRUCTIONS FOR USE (p. 2).
INSTRUCTIONS FOR USE
This manual supplies instructional, maintenance and
safety information for both models (MD2010 and
MD2012) unless specified otherwise. The model
number is listed on the back of the inflatable PFD.
Check Your Inflatable PFD Before Using It
After purchasing your Inflatable PFD, make sure
it has an unused 20 gram cylinder attached to
the inflator mechanism (Fig. 2 for the MD2010)
(Fig. 6 for the MD2012).
Check the components and how to assemble the inflator
by following these steps:
1. Undo the Velcro™ tabs on the wearer’s right-hand
side of the collar to expose the inflator (Fig. 3).
2. Unscrew and remove the CO2 gas cylinder from
the inflator and inspect its small end. If it is pierced
(Fig. 4), replace it!
For the MD2012 only – Examine the auto cap. Ensure
that the cap is screwed hand tight onto the inflator.
If the auto cap indicator (Fig. 8) shows red, the auto
capsule mechanism has been fired or is incorrectly
screwed on. If spent, replace the bobbin before
proceeding (Fig. 6). If either of these conditions
exist, the auto cap must be re-screwed or the
bobbin replaced!
2
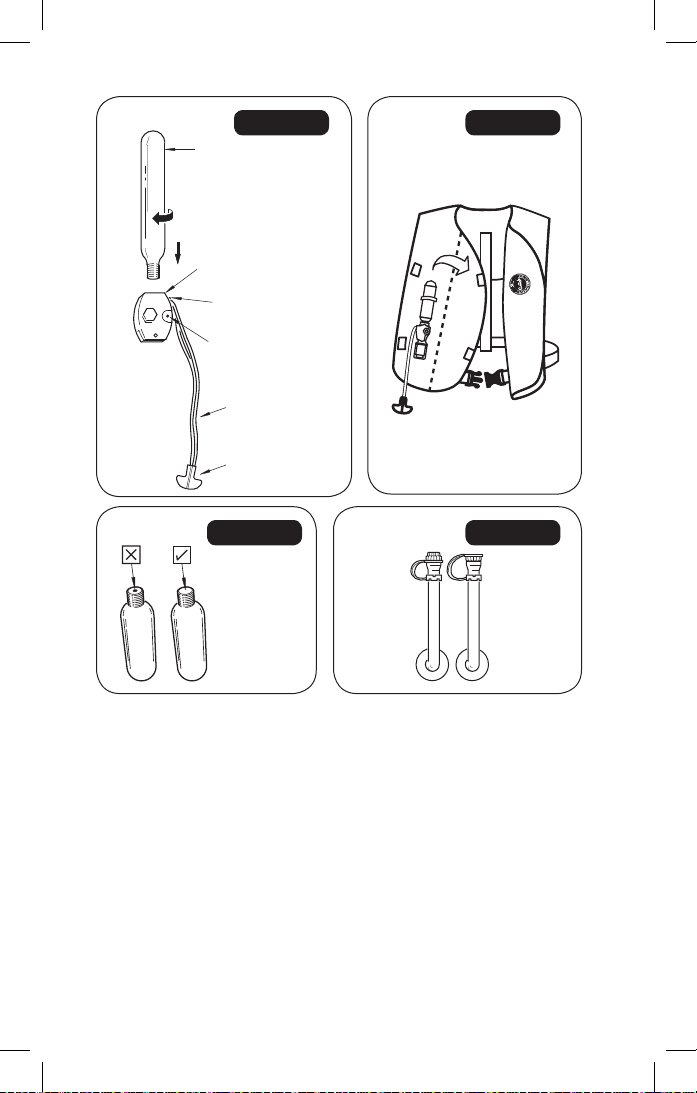
Pierced OK
Green Indicator
Red Spring
Cap In Deflate
Position
Cap In Deflation
Position
Piercing PIn
Pull
Down
Green Indicator
Pin
Manual/AutomaticModel
Pull
Down
Piercing Pin
Green Indicator
Pin
Manual Model
Green Indicator
Red Spring
Cap In Deflate
Position
Cap In Deflation
Position
Piercing PIn
Pull
Down
Green Indicator
Pin
Manual/AutomaticModel
Pull
Down
Piercing Pin
Green Indicator
Pin
Manual Model
FIGURE 2
CO2 Cylinder
Manual Inflator
Lever In
Up-and-Ready
Position
Green Indicator Pin
Lanyard
Pull Tab
FIGURE 3
3
FIGURE 4
Dust Cap
in stowed
position
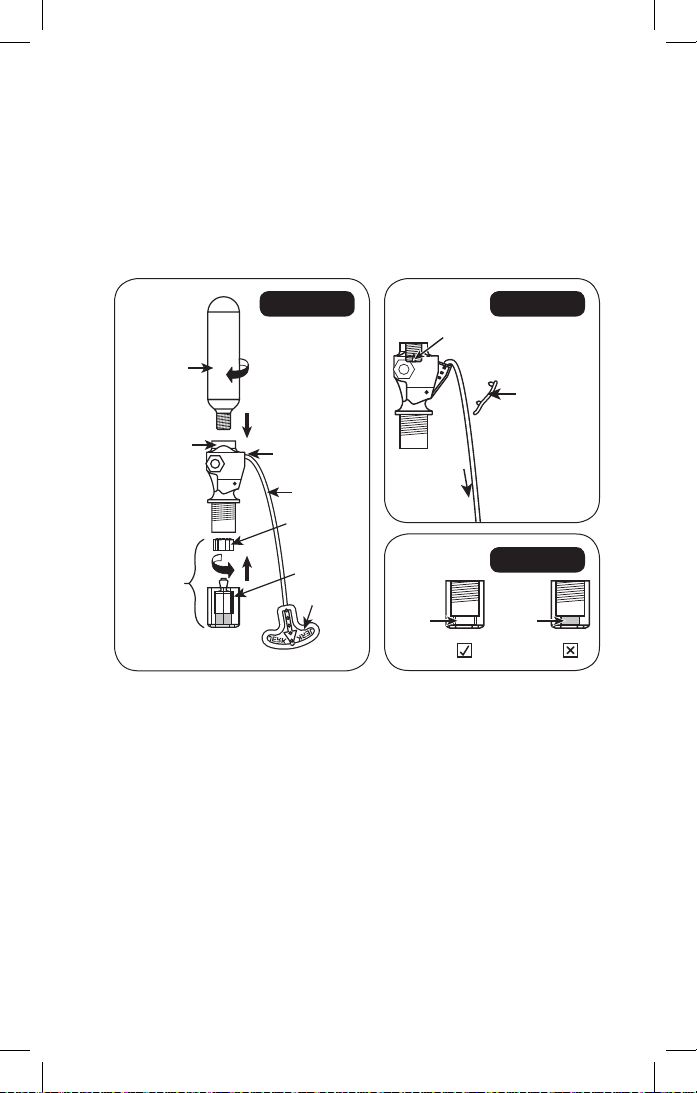
3. If your inflator has a metallic lever attached to
the pull tab, make sure the lever is in the up-and-
FIGURE 5
Dust Cap
in deflation
position
ready position and insert the green indicator pin
if not already in place. Make sure the CO2 cylinder
is screwed hand tight into the inflator (Fig. 2 for
the MD2010)
4. If your inflator has a red lever attached to the pull
tab, make sure the red lever is retracted and insert
the green indicator clip over the red lever if not
already in place. Make sure the CO2 cylinder is
screwed hand tight into the inflator (Fig. 6 for
the MD2012).
IMPORTANT! Ensure the PFD is properly armed with all
Green
Indicator
Red
Indicator
Green
Indicator Clip
Piercing Pin
Pull Down
CO2 Cylinder
Auto/Manual
Inflator Housing
Bobbin
Spring Loaded
Plunger
Lever In
Retracted & Ready
Position
Lanyard
Auto
Capsule
Pull Tab
indicators showing green.
5. Check that the oral-inflation dust cap is properly in
the stowed position (Fig. 5).
6. Refold the front flap and fasten with Velcro™. Refer
to the Repacking instructions (p. 11). If everything
checks out, your Inflatable PFD is ready for use.
FIGURE 6
FIGURE 7
FIGURE 8
SIZING AND FIT
The PFD provides a minimum of 22.5 lbs of buoyancy
and is designed for wearers with a chest range of 30-52
inches weighing over 80 pounds.
DONNING INSTRUCTIONS
It is important that the PFD is properly adjusted to fit the
person wearing it. An incorrect fit or improper fastening
of attachments could impede its effectiveness.
1. All belts and straps are already threaded correctly
and only need to be adjusted for fit. The waist belt
should fit securely.
4
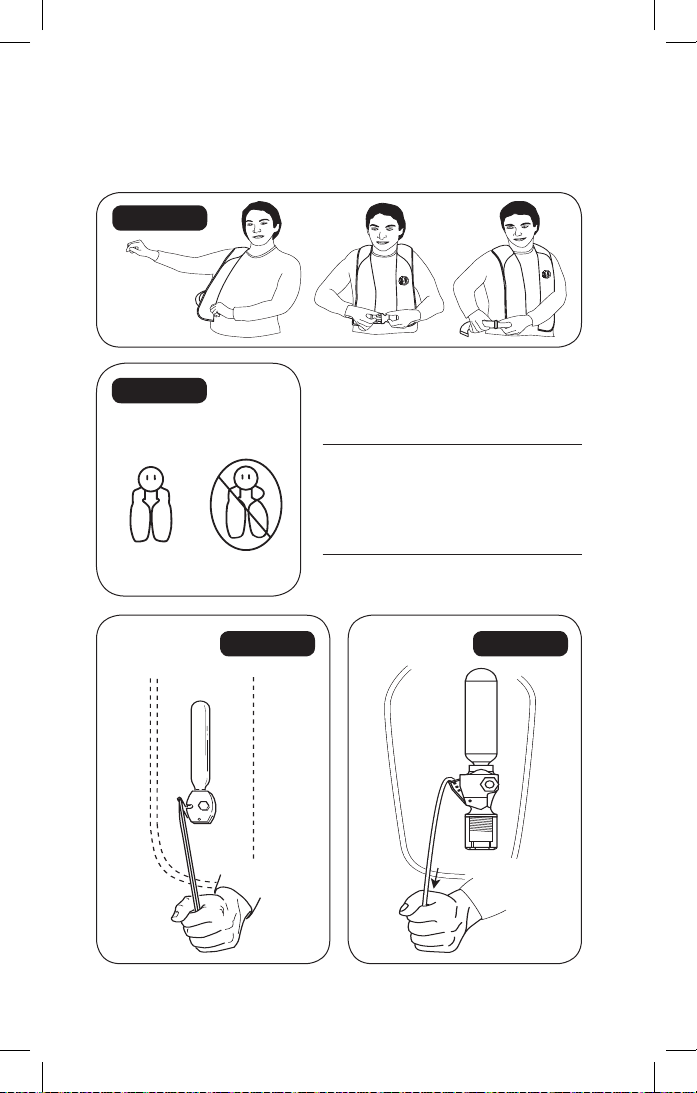
2. Put the Inflatable PFD on just like a jacket (Fig. 9)
Pull Down
A
B
C
B C
and fasten the front buckle. Adjust the waist belt
using the side buckle on the belt and secure the
belt’s loose end in the belt loop.
FIGURE 9
FIGURE 10
PUT ME ON LIKE
THIS:
BACKSTRAP
AT BACK
DO NOT
TWIST
FIGURE 11
3. Check to be sure the device
is flat against the body and
is not twisted (Fig. 10).
Warning: Do not wear
Inflatable PFDs under
clothing as the inflation
could be restricted or you
could be injured.
FIGURE 12
MD2010 MANUAL INFLATION
MD2012 MANUAL INFLATION
5
 Loading...