

Muskoka MM289CW, Whitemore MM289CW Assembly Instructions Manual

ELECTRIC FIREPLACE
MANTEL
with convertible back
for corner option
MANTEAU DU FOYER
ÉLECTRIQUE
avec dos convertible pour
option de coin
REPISA DEL HOGAR
ELÉCTRICO
con parte posterior
convertible para la
opción de esquina
Model / Modèle / Modelo: MM289CW
Assembly Instructions
Instructions d'assemblage
Instrucciones de ensamblado
TIPS FOR ASSEMBLY OF YOUR
NEW MANTEL
• Before you begin assembly, locate the instructions and hardware. Take out all the parts and
compare them to the diagrams below. Be sure you have all the parts and can identify them.
• A helping hand is always good: assemble your mantel with an adult assistant if possible. Some
pieces are heavy and will need to be held by a helper. Assembly time will be approximately
30-60 minutes.
• Locate a good Phillips-head screwdriver. You may also use an electric screwdriver but be careful not
to strip the head of the screw by over tightening them.
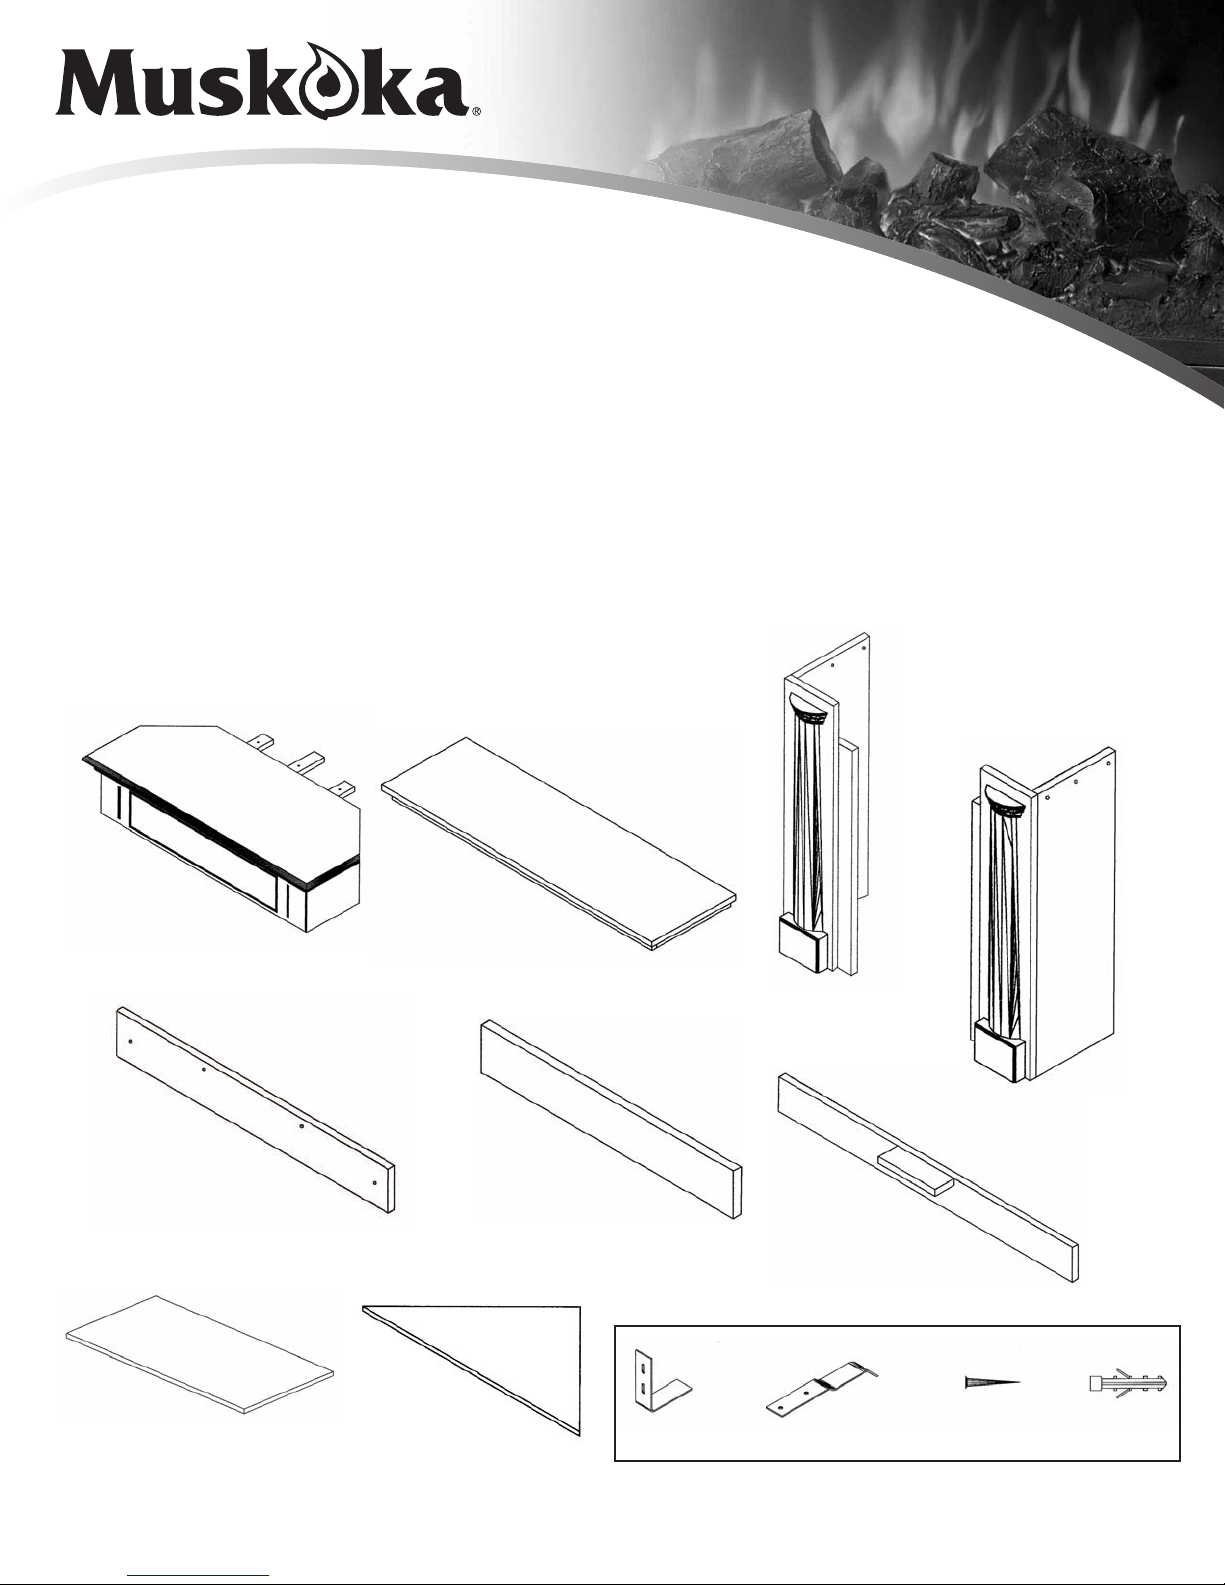
TOP 1PC
289CW.10
CENTRAL PANEL 1PC
289CW.06
BASE 1PC
289CW.01
LOWER
CENTRAL PANEL 1PC
289CW.07
LEFT FRONT
PANEL 1PC
289CW.04
LEFT SIDE
PANEL 1PC
289CW.02
RIGHT FRONT
PANEL 1PC
289CW.05
RIGHT SIDE
PANEL 1PC
289CW.03
FIREBOX SHELF 1PC
289CW.09
CORNER ATTACHMENT 1PC
289CW.11
FIREBOX SUPPORT 1PC
289CW.08
ANTI-TIP DEVICE 2 SETS

GET READY TO START
Before assembly, use scissors to unwrap the parts from the packaging. DO NOT use a box cutter or
exacto-knife as you may cut into the mantel pieces inside the box and damage the finish. Check for the
hardware bag which is red and located inside the packaging taped to the top box. Be sure you DO
NOT discard any pieces.
For the easiest assembly, use a power Phillips-head screwdriver. DO NOT over tighten the screws.
Step 1
Locate the hearth and place it on the floor. Do not put it up against
the wall at this point in the assembly as you need to get in behind
the mantel to insert several screws.
Step 2
Locate the left side panel and the left front panel. Facing the
front of the hearth, take the left side panel, positioning it so the
holes in the blocks on the bottom line up with the screw holes
in the hearth. Locate the left front panel and position it next to
the left side panel, lining up the holes in the blocks with the
screw holes in the hearth.
Step 3
Repeat Step 2, but with the right side panel and the right
front panel.
Step 4
Locate the lower central panel and the firebox support.
Attach the lower panel by placing the wide white side to the front
and inserting the 4 screws. Be careful as you tighten the screws to
ensure that you DO NOT come through the front of the panel. Attach
the firebox support behind the first panel in the same manner, lining
up the 2 holes (one on each side) with the holes in the legs. Insert
and tighten the 2 screws. Be careful as you tighten the screws to
ensure that you DO NOT come through the side of the mantel.
Place the firebox shelf onto the firebox supports. Attach the shelf to
the supports by inserting and tightening the 4 screws.
 Loading...