

Music Reference RM-200 MK-I, RM-200 MK-II Owner's Manual

Music Reference RM-200 MK-I and MK-II
100-Watts Per Channel Stereo Power Amplifier
Owner’s manual
2010
Music Reference/RAM Labs
Santa Barbara, CA
805 687 2236
www.ramlabs-musicreference.com
www.tubeaudiostore.com
2
LINEAGE
The RM200MkI/MkII evolved from Music Reference’s classic RM9, the RM10, and the
state-of-the-art Music Reference RM9 Special Edition. The RM200MkI/MkII achieves a
news standard for musicality in stereo amplification. Using only a single matched pair of
KT88 of 6550 output tubes per channel, the RM200MkI/MkII easily achieves 100 watts per
channel.
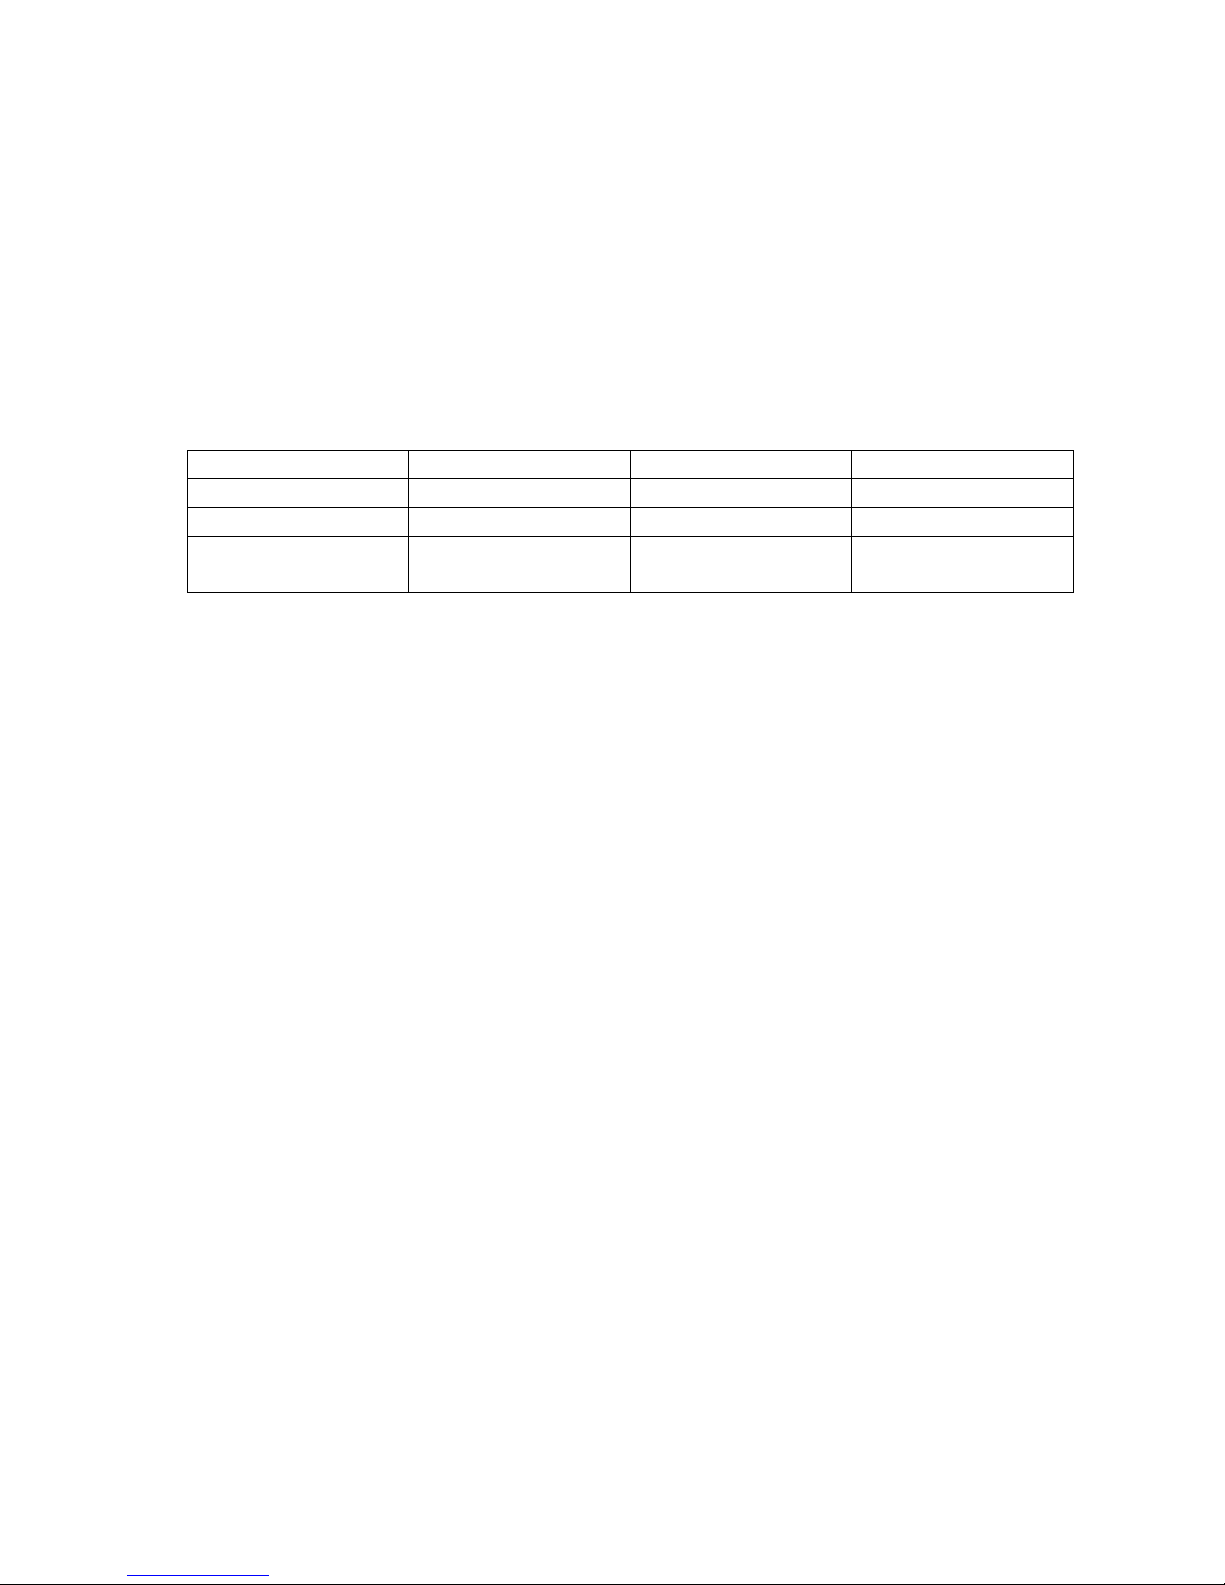
Let’s take a few moments to learn what the RM200MkI/MkII achieves relative to a typical
100 watts per channel stereo tube amplifier in terms of
True Music Power
TM
:
Amplifier
8-Ohm Load
4-Ohm Load
2-Ohm Load
RM200MkI/MkII
112 Watts
145 Watts
125 Watts
Typical Tube
Amplifier
100 Watts
65 Watts
40 Watts
These specifications are all gained with the speakers connected to the 8-Ohm tap, and
represent the amplifier’s
True Music Power
TM
, not simply the typical RMS rating…
INSTALLING THE TUBES AND SETTING-UP YOUR RM200MkI/MkII
Please remove the tube set from the accessory box found with your RM200MkI/MkII. Note
the “’V’ Number” marked on each tube. With your RM200MkI/MkII turned-off and
unplugged, please insert each tube into its corresponding position/socket as marked on
your RM200MkI/MkII’s top plate.
Please note your RM200MkII has two 70-Amp rated “high in-rush” power switches for long
switch life. One power switch is marked “Master/Forming,” and the other is marked “Play.”
Please make sure both power switches are in the “off” position.
Select a location for your RM200MkI/MkII that provides at least 2-feet of free air space
above your RM200MkI/MkII to allow for adequate ventilation of your RM200MkI/MkII. DO
NOT place your RM200MkI/MkII directly on a carpeted surface.
CONNECTIONS
Plug your RM200MkI/MkII into a 3-prong wall socket. If any other units in your system have
ground pins, we recommend you “float” the grounds of all your other units with an adapter
or “cheater-plug.” However, we recommend that you always ground your RM200MkI/MkII.
We find that the lowest hum is achieved in most systems when
only
the power amplifier is
grounded, as your power amplifier is the least sensitive component, and has the largest
ground current. You may also wish to defeat polarized 2-prong plugs in your other
components t allow you to reverse the plugs for the lowest noise and best sound. You
should do this systematically with your power amplifier first, followed by your preamplifier,

3
and each of your sources to determine the configuration for each component is your
system. Do not expect large differences in the change of hum…
Connect the INPUT to the LEFT and RIGHT XLR connectors located behind your
RM200MkI/MkII’s transformer cover. Should you be using your RM200MkI/MkII with a
preamplifier or other source that lacks balanced (XLR) inputs, then please use an RCA-toXLR adaptor or re-terminate your interconnects with XLR plugs. In accordance with
industry standard, Music Reference defines XLR Pin No. 2 as HOT.
Connect your speaker cables to the brass binding posts located behind your
RM200MkI/MkII’s transformer cover. Note the “Impedance” markings adjacent to each
speaker binding post. Since your RM200MkI/MkII is a fully balanced amplifier from input to
output, you will notice the 4-Ohm and 8-Ohm speaker outputs/binding posts are not ground
referenced. For these two impedances, the speakers are connected to the “+” and the “-“
terminals of the appropriate impedance.
Additionally, 2-Ohm and 1-Ohm speaker taps are provided. These quite low speaker
impedance taps can be very useful for loudspeakers that exhibit very low or unruly
impedances. Feel free to experiment with different impedance connections.
“LIGHT LOADING” YOUR RM200MkI/MkII
You may always connect an 8-Ohm speaker on your RM200MkI/MkII’s 4-Ohm speaker tap,
however, not the other way around. Your RM200MkI/MkII amplifier actually appreciates the
“lighter load,” and the tubes will last longer. As long as your system will play loud enough
without clipping, then “light loading” your RM200MkI/MkII is preferable. Your
RM200mkI/MkII amplifier will also have higher damping (woofer control) and lower
distortion.
Always use the same impedance value for your right and left channel.
TUBES
Your RM200MkI/MkII is factory-equipped with 2-each 6BQ7 driver tubes, and 2-each
matched pairs of KT88 or 6550 output tubes. Each of these tubes has been specially tested
and selected for your RM200MkI/MkII by RAM Labs (www.tubeaudiostore.com) using
specially developed testing and matching procedures that allow you to operate your output
tubes at a higher bias resulting in lower distortion!
Please record the serial number, Bias, and Transconductance (Gm) of each tube (marked
on the label of each tube box) on in the corresponding position on the Tube Seating Chart
located at the end of this owner’s manual. Please refer to these Bias and
Transconductance (Gm) values when ordering replacement tubes from your dealer or RAM
Labs (www.tubeaudiostore.com). Please keep this manual with your most
valued documents. It will be very important should you ever need replacement tubes.
4
OUPUT TUBES
The output tubes of your RM200MkI/MkII are set up as matched pairs by RAM Labs
(www.tubeaudiostore.com) for optimum performance when working in push-pull. The two
pairs are matched by RAM Labs (www.tubeaudiostore.com) to less than 10% variation
in bias and transconductance (Gm). Both output tubes in each pair will then share the
workload equally. They will also track evenly as they age and dissipate. For optimum
performance, always use RAM Labs matched output tubes as other vendors only match for
either bias or transconductance, but not both. They also may not test their tubes at the
correct operating values for your RM200MkI/MkII.
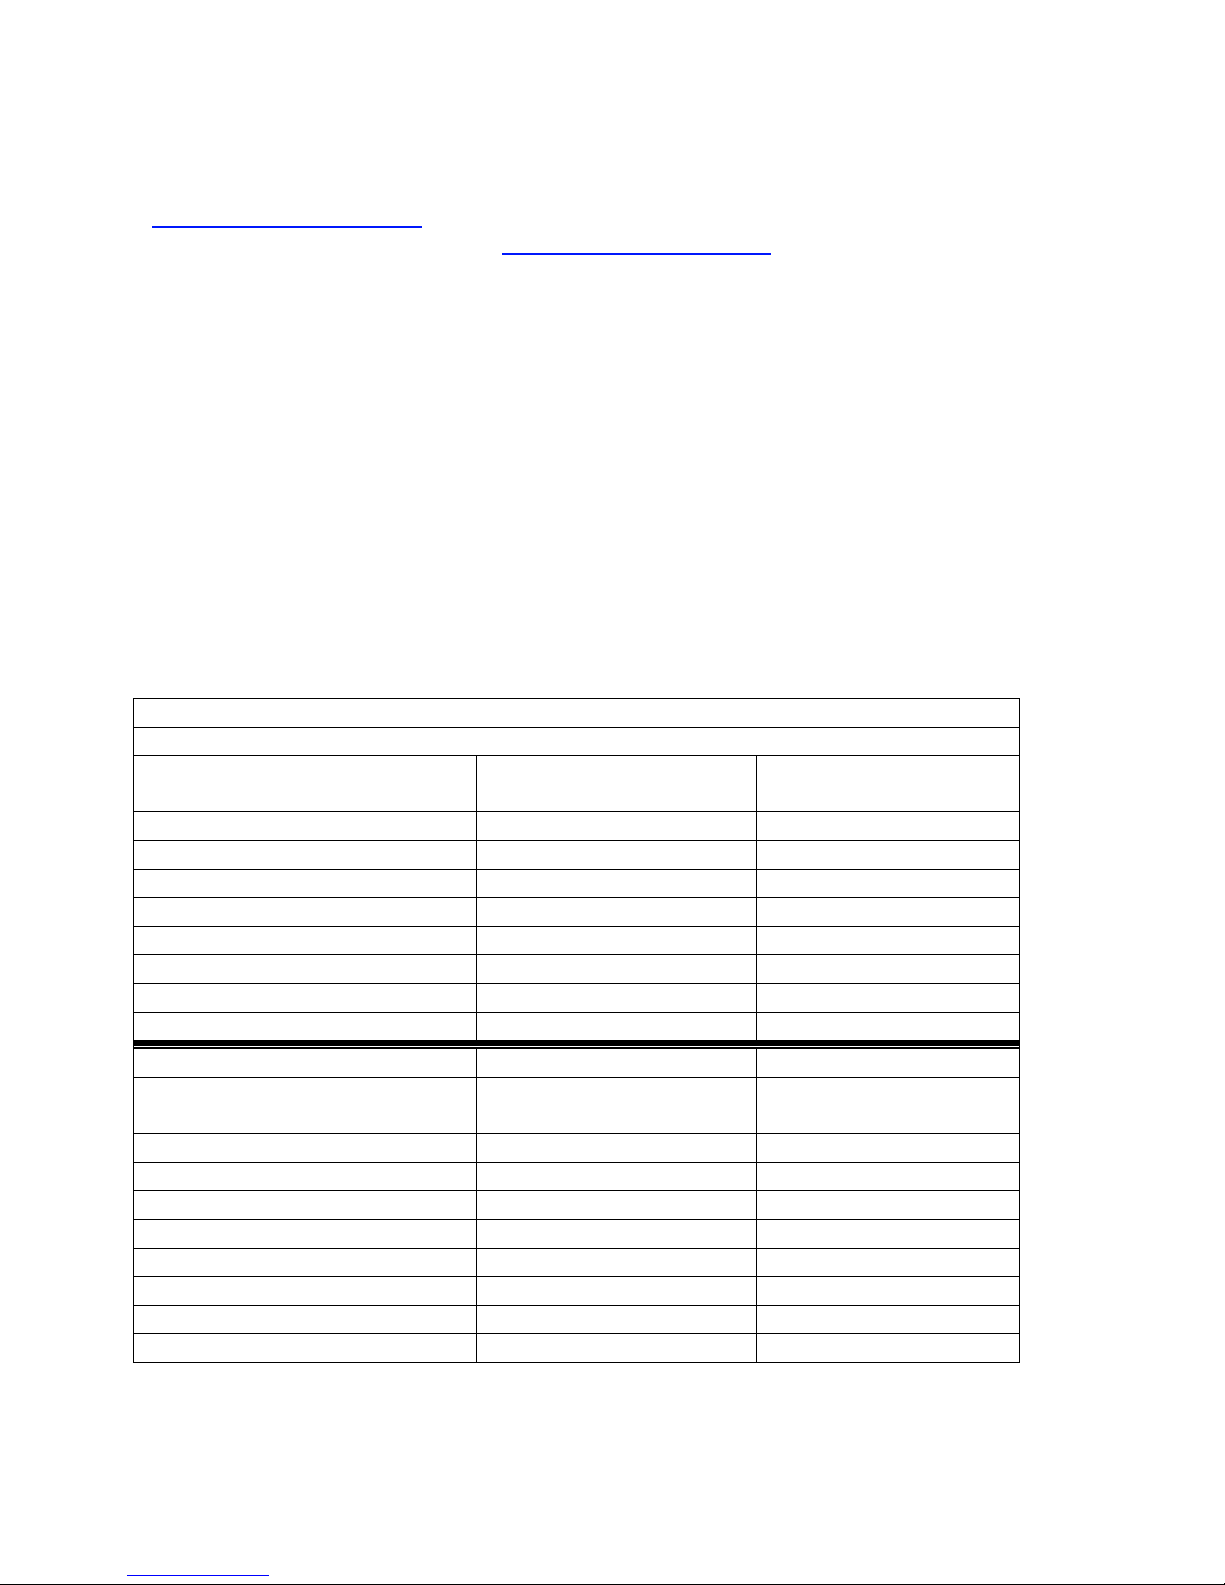
BIASING THE OUTPUT TUBES
Your RM200MkI/MkII was fully adjusted and calibrated at our factory. No further
adjustments are necessary.
However, we highly recommend checking the bias of your RM200MkI/MkII’s output
tubes every few months (check tube bias at least twice-a-year).
This is a simple procedure that requires the use of a voltmeter.
Output Tube Bias Values for your RM200MkI/MkII
Tube Types tested and
matched by RAM Labs
mV
(Recommended)
mV
(Maximum)
Genalex KT88 Gold Lions
40
44
RAM KT88
38
42
Shuguang (Chinese) KT88
35
38
6550 WE
38
42
6550 =C=
38
42
Tube Types tested by Others
mV
(Recommended)
mV
(Maximum)
Genalex KT88 Gold Lions
35
38
Sovtek KT88
31
35
Electro Harmonix (EH) KT88
31
35
Shuguang (Chinese) KT88
21
27
6550 WE
31
35
6550 =C=
31
35
 Loading...