

MUSIC HALL RDR-1 Operating Instructions Manual
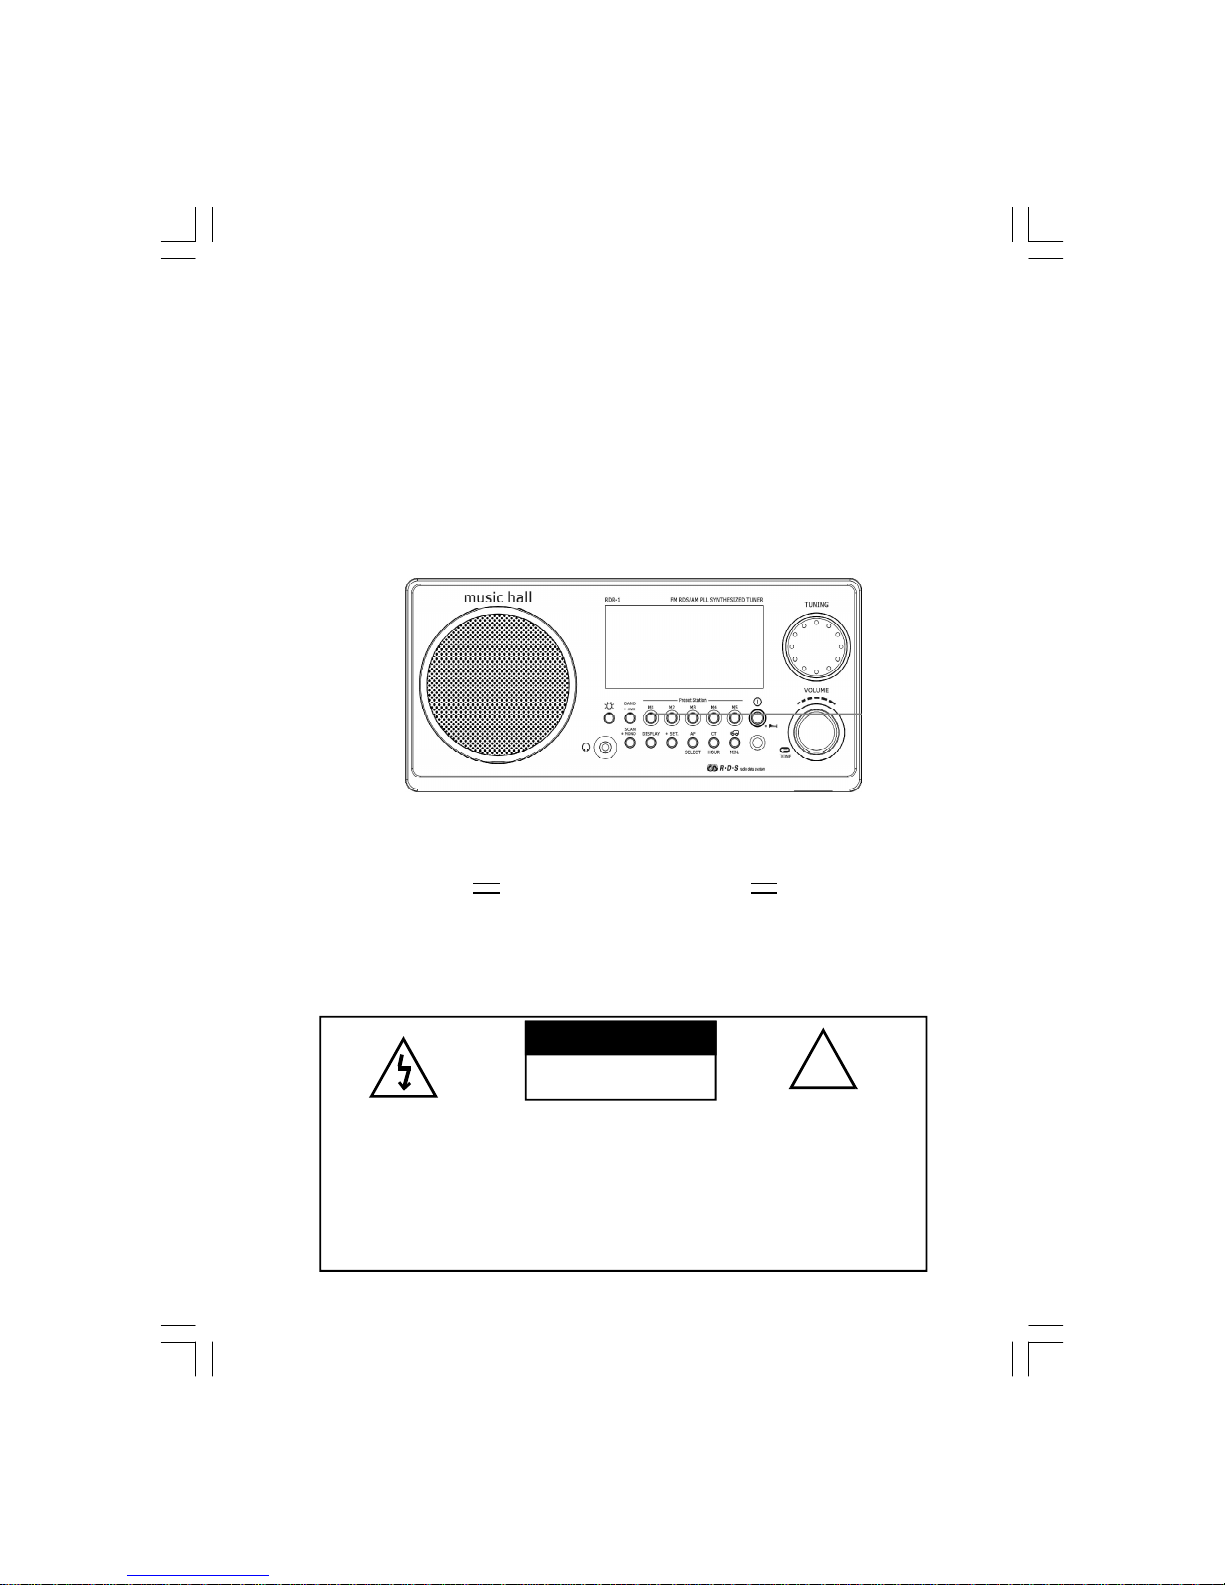
WA RNING:
TO PREVENT FIRE OR ELECTRIC SHOCK HAZARD, DO
NOT E XPOSE THIS PRODUCT TO RAIN OR MOISTURE.
THE LIGHTNING
FLASH A ND ARROWHEAD WITHIN THE
TRIANGLE IS A W ARNING SIGN ALERTING
YOU OF “DANGEROUS
VOLTA GE” INSIDE THE
RADIO.
CAUTION: TO REDUCE THE
RISK O F ELECTRIC
SHOCK, DO NOT REMOVE
THE BACK , NO USER SERVICEABLE PARTS INSIDE.
REFER SERVICING TO
QUALIFIED SERVICE PERSONN EL.
CAUTION
RISK OF ELECTRIC
SHOCK DO NOT OPEN
THE EXCLAMATION
POINT WITHIN THE
TRIANGLE IS A W ARNING SIGN ALERTING
YOU OF IMPORTANT
INSTRUCTIONS
ACCOMPANYING THIS
RADIO.
!
music hall
RDR-1
Operating instruction

1
IMPORTANT SAFETY INSTRUCTIONS
1. Read these instructions.
2. Keep these instructions.
3. Heed all warnings.
4. Follow all instructions.
5. Do not use this apparatus near water.
6. Clean only with dry cloth.
7. Do not block any ventilation openings. Install in accordance with
the manufacturer’s instructions.
8. Do not install near any heat sources such as radiators,
heat registers, stoves, or other apparatus (including amplifiers)
that produce heat.
9. Do not defeat the safety purpose of the polar ized or
grounding-type plug. A polarized plug has two bl ades with one
wider than the other. A grounding type plug has two blades and a
third grounding prong. The wide blade or the third prong are
provided for your safety. If the provided plug does not fit into your
outlet. consult an electrician for replacement of the obsolete outlet.

2
10. Protect the power cord from being walked on or pinched
particularly at plugs, convenience receptacles, and the point
w here they exit from the apparatus.
11. Only use attachments/accessories specified by the manufacturer.
12. Use only with the cart, stand, tripod, bracket, or table specified by
the manufacturer, or sold with the apparatus. When a car t is
used, use caution when moving the cart/apparatus com bination
to avoid injury from tip-over.
13. Unplug this apparatus during lightning storms or when unused for
long periods of time.
14. Refer all servicing to qualified service personnel. Servicing is
required when the apparatus has been damaged in any way,
such as power-supply cord or plug is damaged. liquid has been
spilled or objects have fallen into the apparatus, the apparatus
has been exposed to rain or moisture, does not operate
normally, or has been dropped.
15. To Reduce the Risk of Fire or Electric Shock, Do not Expose
This Appliance To Rain or Moisture.
16. The Shock Hazard Marking and Associated Graphical Symbol is
provided on the bottom panel of unit.
17. Apparatus shall not be exposed to dripping or splashing and no
objects filled with liquids, shall not be placed on the apparatus.
3
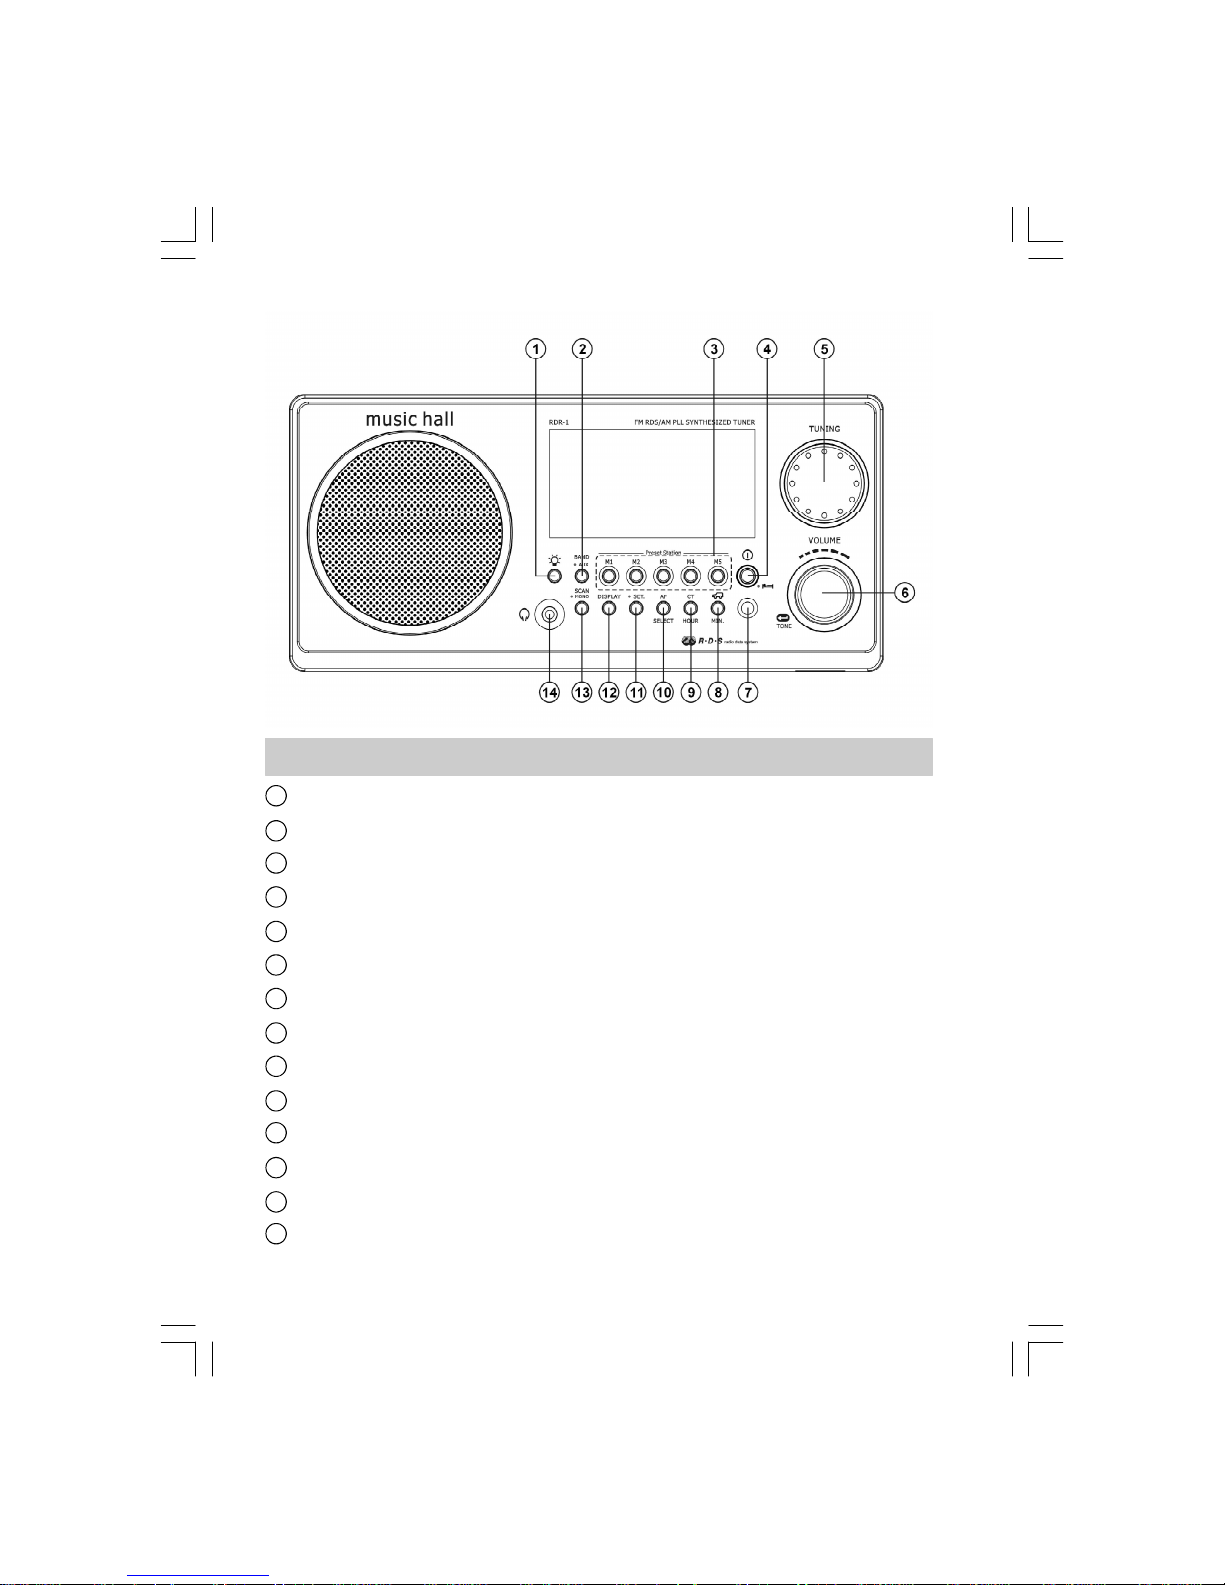
Con trols
Light button
Radio band/AUX IN selection
Memory presets
Power On/Off/Sleep button
Rotary Tuning Control
Volume/Tone control
IR sensor
Traffic information button and minute adjustment
Auto time button and hour adjustment
Alterative frequency and Select button
Set button
Display button
Station search and mono button
Earphones jack
10
1
2
3
4
5
6
7
8
9
11
12
13
14
4
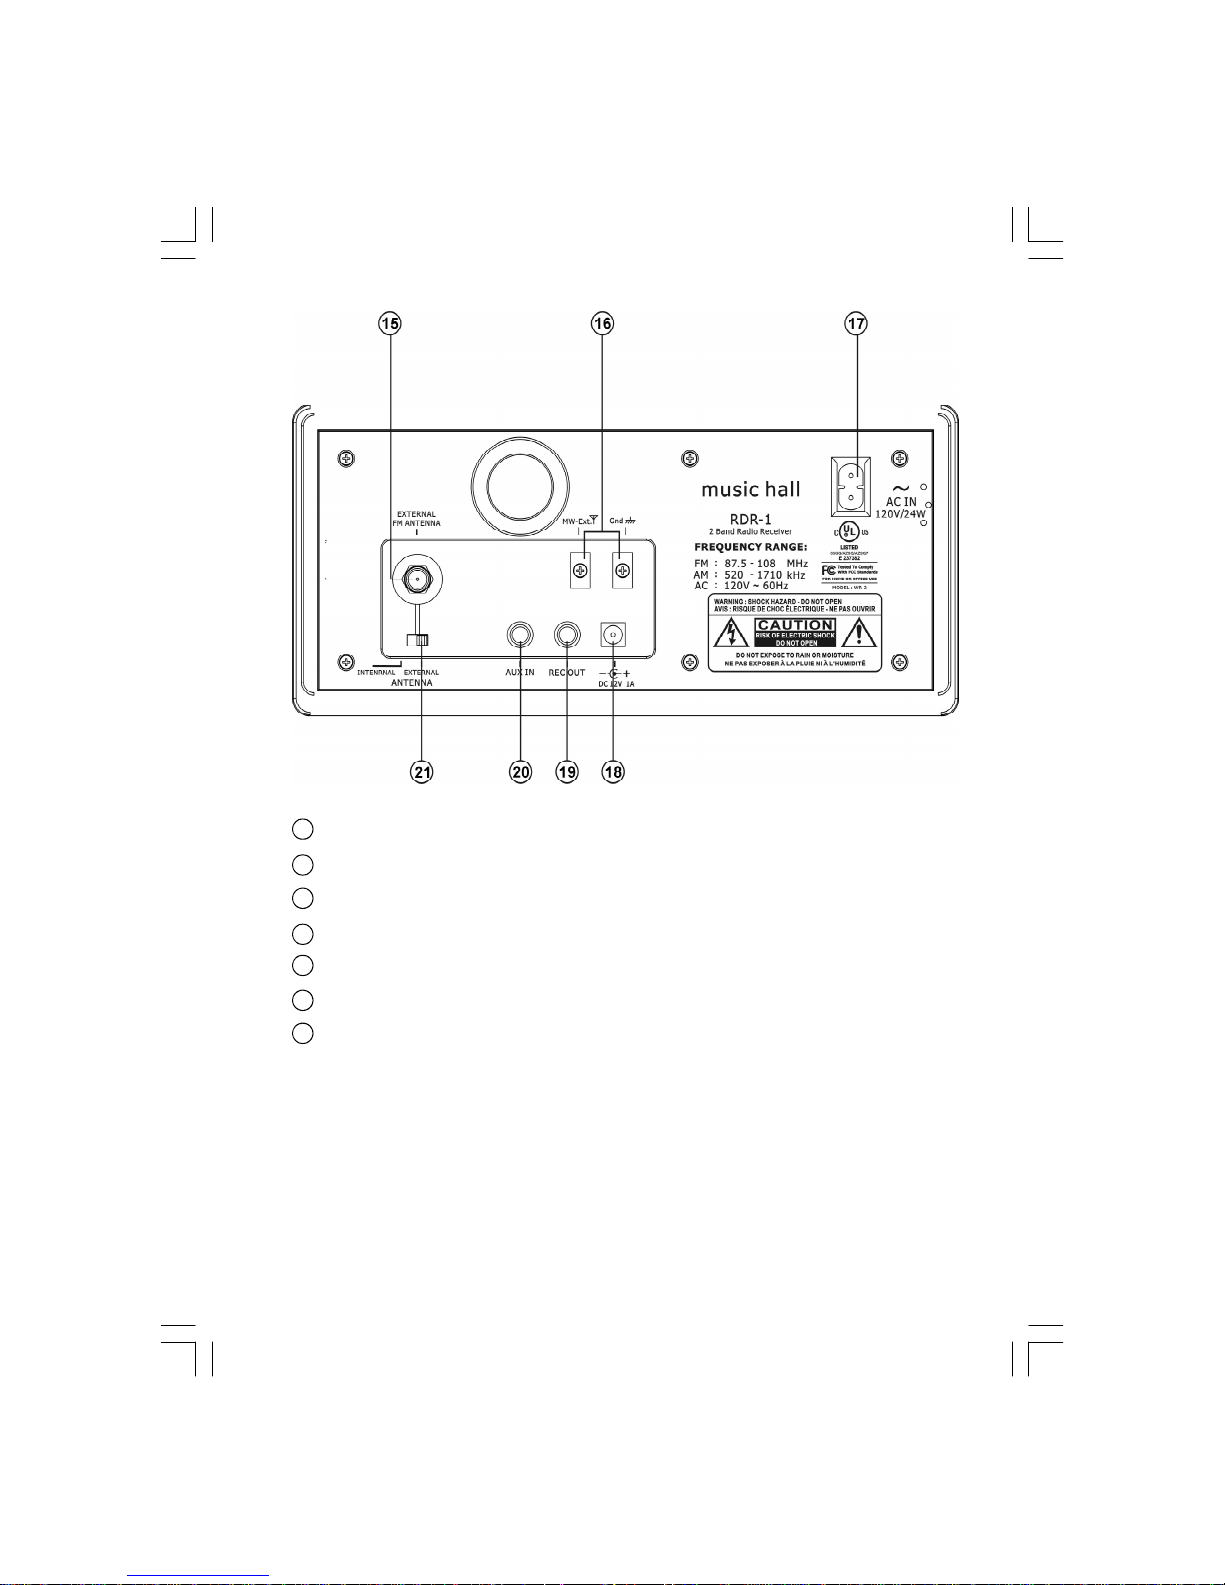
External F-type FM antenna terminal
External AM antenna terminal ( USA version only )
AC power cor d socket
12V DC input socket ( ideal for vehicles/boats )
REC out socket
Aux in socket
External/Internal antenna switch
15
16
17
18
19
20
21
5
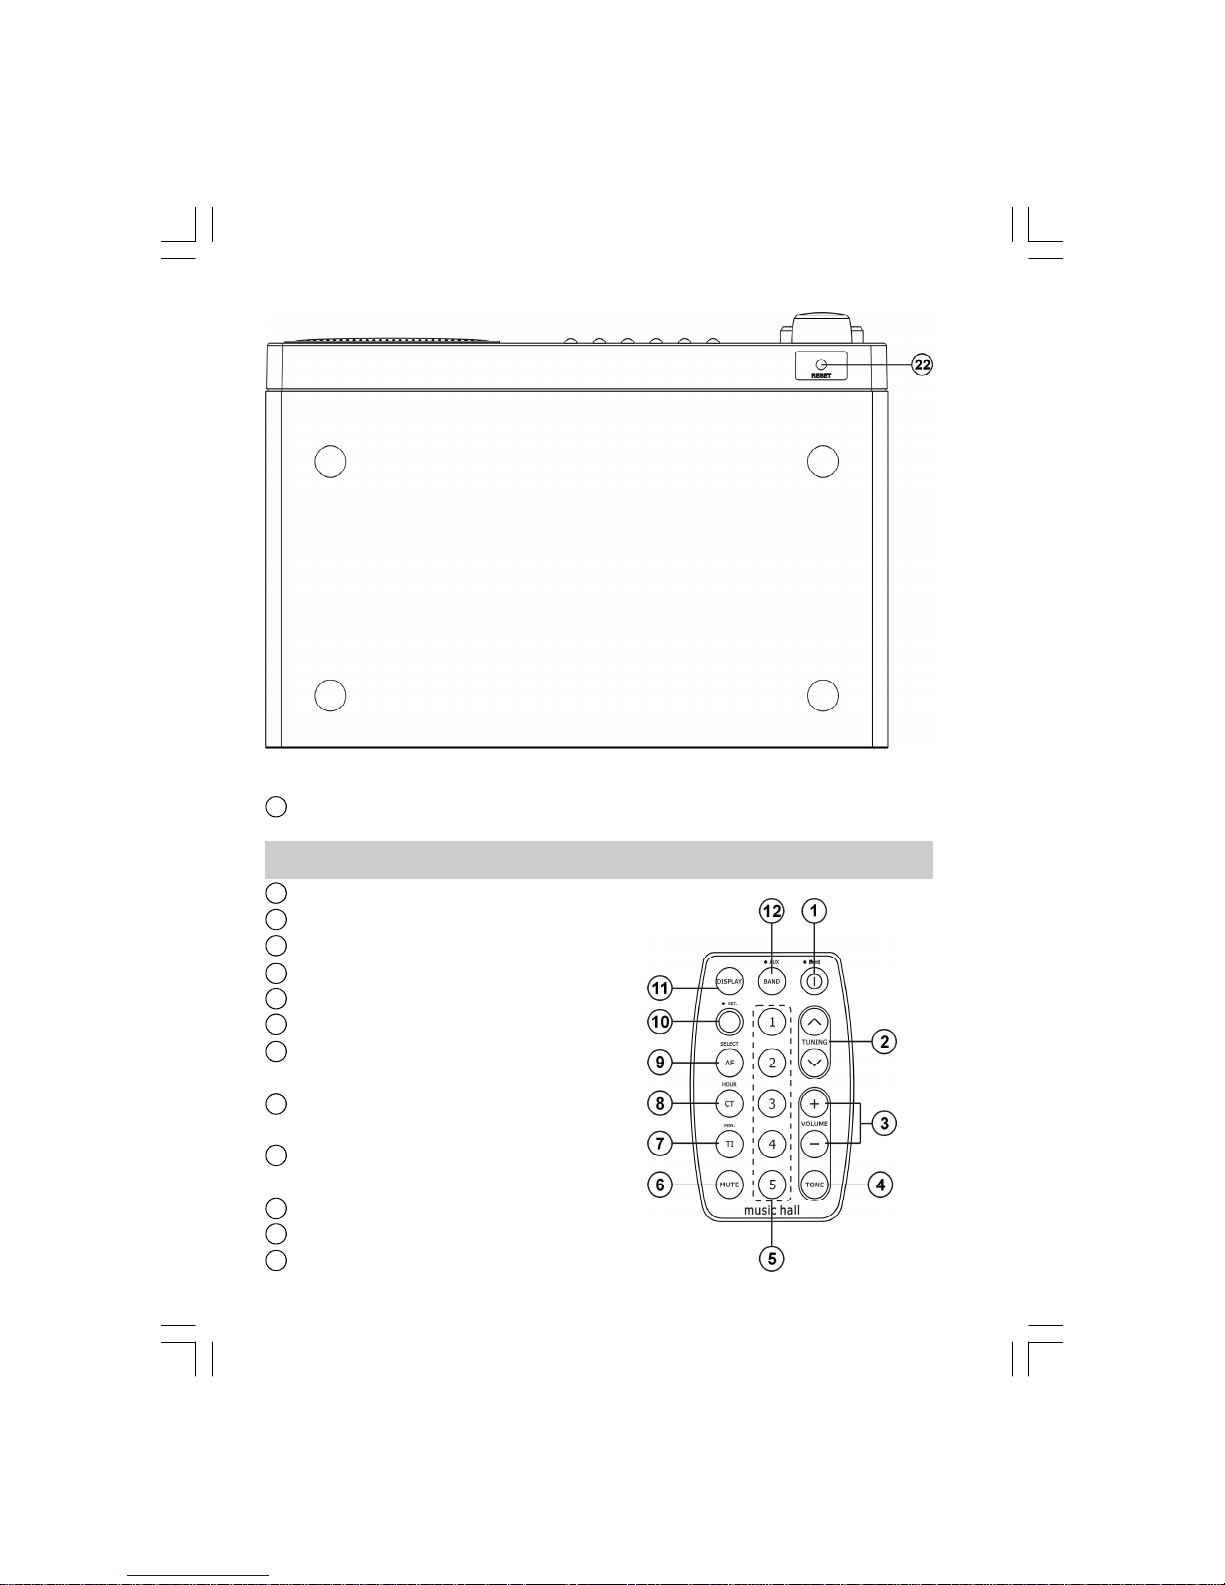
Reset button
Remote Control
Power on/off/Sleep button
Tuning control
Volume control
Tone control
Memory presets
Mute
Traffic button and
minute adjustment
Auto time button and
hour adjustment
Alternative Frequency and
Select button
Set button
Display button
Radio band and Aux in selection
22
1
2
3
4
5
6
7
8
12
11
10
9
6
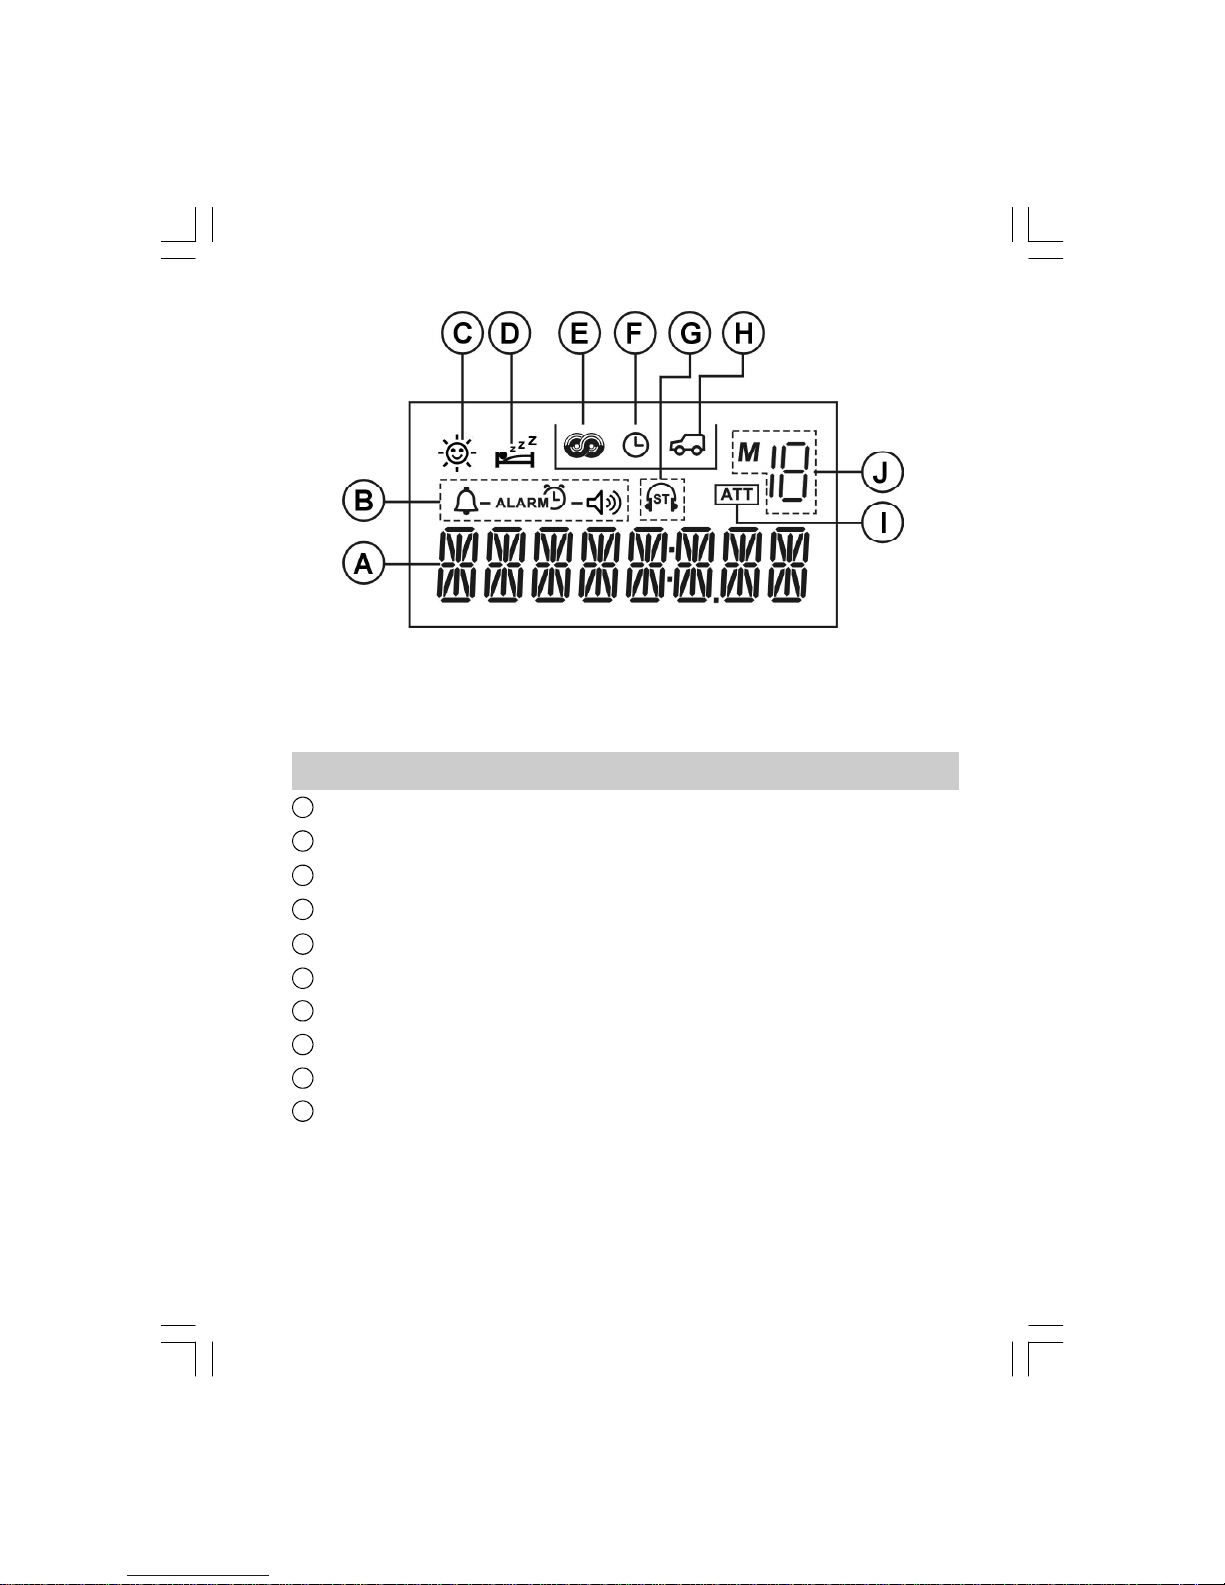
Display
Frequency/Time/Station display
Radio/Buzzer alarm symbol
Daylight Saving Time ( DST ), not applicable for RDR-1
Sleep/Snooze status
RDS indicator
Time indicator
Stereo indicator
Traffic indicator
Aux In level attenuation
Memory presets
F
A
B
C
D
E
G
J
I
H

7
Power your radio
AC operation
Befor e you plug the AC cord into the radio, be sure the AC voltage is
correct. Insert the plug on the end of the supplied power cord into the
AC power socket on the back of the radio.
DC operation
For outdoor s use, you can power the radio by using 12V DC input
socket from a DC power supply (example, from the power supply of
vehicl es or boats). An AC power adaptor with 1 Ampere and center
positi ve in polarity can also power the radio in house.
Operating your radio –
initialize radio setting and clock setting
1. The radio display will scroll “ RDS Setting “ w hen the radio is
connected to the mai ns supply or DC power supply.
2. The RDS (Radio Data System) setting requires approximate
one minute to search required RDS data from radio stations
for easier data read out.
3. You can skip the RDS setting by pressi ng and releasing the
power button once (recommended for non-RDS broadcasting
area). Display will show “ — — :— — “ for clock setting.
 Loading...