

Page 1
Instructions for use
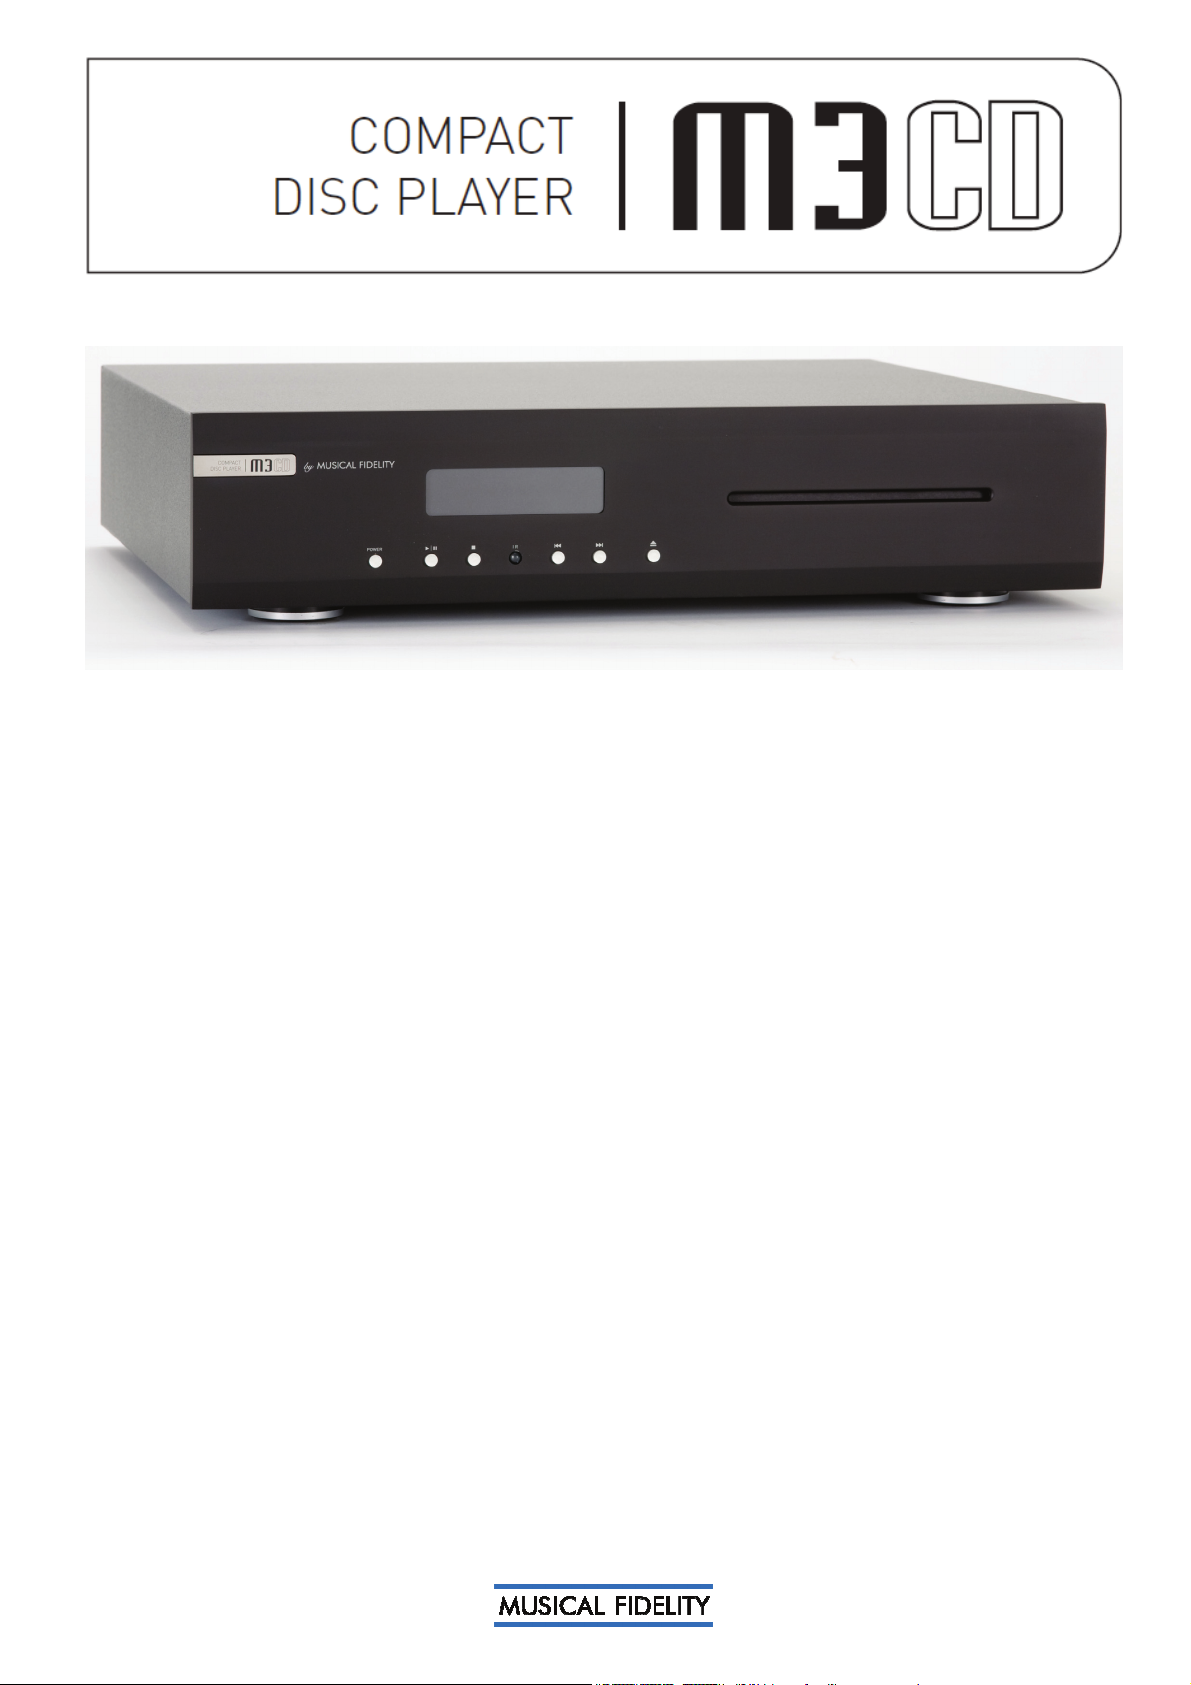
Thank you for purchasing the Musical Fidelity M3CD player.
The M3CD consists of a top quality CD slot-loading mechanism with unsurpassed playability and a top quality over
sampling 24 bit digital-to-analogue converter. This moves the digital artefacts to well outside the audio band, allowing
easy removal without detriment to the top end of the audio band. Our well tuned filtering circuit gives immeasurably
small jitter, noise and distortion artefacts allowing astounding imaging, detail and transparency, to deliver all music
types exactly as the artist originally intended.
The M3CD is designed to be partnered with present and future M3 and M6 series products. This combination yields
one of the best high-fidelity systems available at any price.
Used properly and carefully, it should give many years of outstanding musical reproduction.
Dust regularly with a soft duster or soft brush, but be careful when using cleaning or polishing agents - they may
harm the surface finish.
If there are any questions about the audio system, please consult the dealer who is there to help and advise.
Page 2
CONTENTS
Section Page
Safety Information
General advice
Disposal information
Installation
Facilities and connections
Remote control handset
Operation
– Laser information and warnings 3
– Mains plug (UK only), modification warning 4
– Installation precautions 5
– EU disposal information 6
– Introduction, cleaning, installation, power connections, audio
connections, digital connections
– Illustrations - main unit front & rear panels 8
– Operation and illustration 9
– Loading and playing compact disks
– Play
– Pause
– Stop
10
7
Problems?
Specifications
Manual history
– Track selection, 11
– Repeat playback
– Shuffle
– Scan
– Programmed playback
– Time
– Display
– Basic fault finding 15
16
17
12
13
14
M3 CD manual issue 1 Page 2 of 17
Page 3
SAFETY INFORMATION
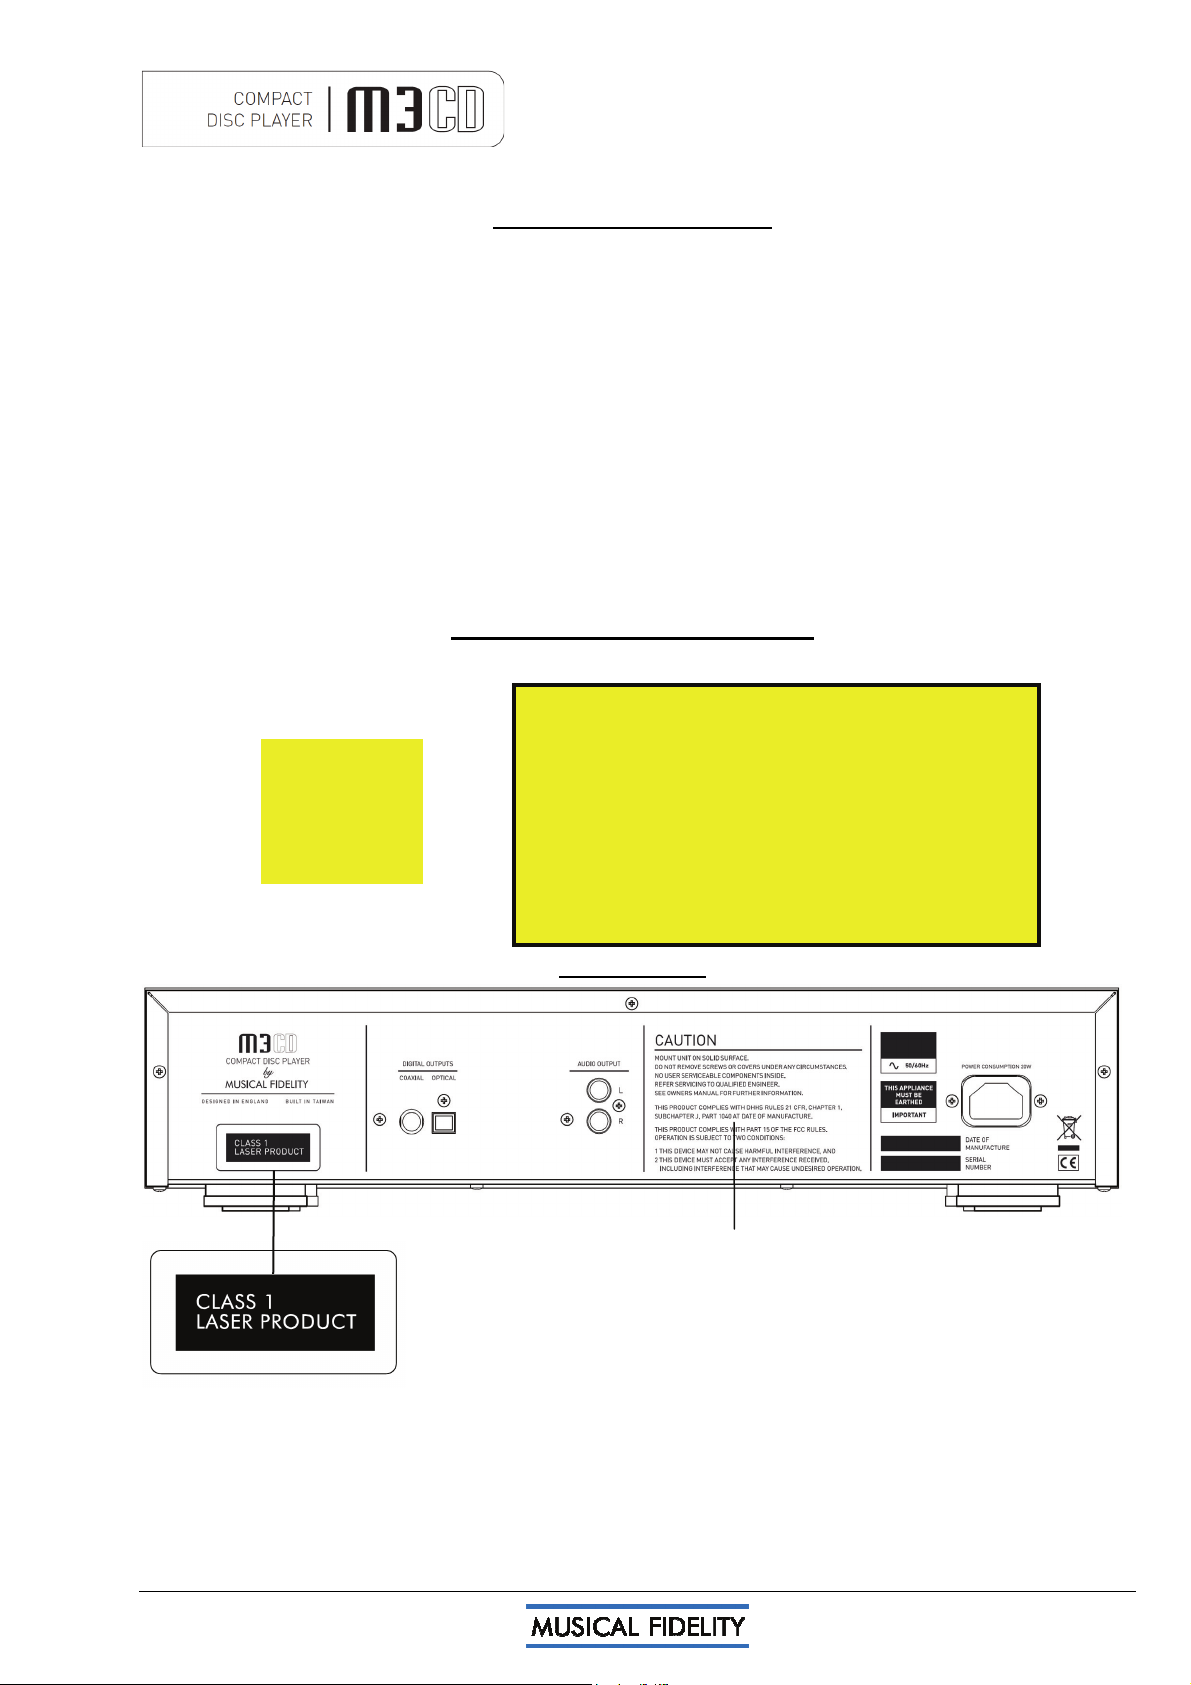
CLASS 1 LASER PRODUCTCLASS 1 LASER PRODUCT
The M3CD is a CD player which has been designed and manufactured according to FDA regulations "title 21,
CFR, chapter 1, sub-chapter J, based on the Radiation Control for Health and Safety Act of 1968", and is
classified as a Class 1 laser product. There is no hazardous radiation during normal use because invisible
radiation emitted inside this product is completely confined within the protective housing. However you must
observe the following important warnings:
CAUTION!
THIS CD PLAYER USES INVISIBLE LASER LIGHT. WHEN THE PLAYER OPERATES, LASER LIGHT IS
RADIATED INTERNALLY. DO NOT REMOVE THE PROTECTIVE HOUSINGS.
USE OF CONTROLS OR ADJUSTMENTS OR PERFORMANCE OF PROCEDURES OTHER THAN THOSE
SPECIFIED HEREIN MAY RESULT IN HAZARDOUS RADIATION EXPOSURE CAUSING EYE INJURY.
IF THIS PRODUCT DEVELOPS A FAULT, PLEASE CONTACT YOUR AUTHORISED MUSICAL FIDELITY
SERVICE AGENT. DO NOT ATTEMPT TO SERVICE IT YOUR-SELF AND DO NOT CONTINUE TO USE
THIS PRODUCT IN A FAULTY STATE.
INTERNAL LASER WARNING LABELS
CAUTION!
CLASS 1
LASER
PRODUCT
CAUTION - INVISIBLE LASER RADIATION WHEN OPEN AND
INTERLOCKS DEFEATED. AVOID EXPOSURE TO BEAM.
VORSICH! - UNSICHTBARE LASERSTRAHLUNG TRITT AUS,
WENN DECKEL GEÖFFNET UND WENN
SICHERHEITSVERRIEGELUNG ÖBERBRÖCT IST.
NICHT DEM STRAHL AUSSETZEN!
VARNING - OSYNLIG LASERSTRALNING NÄR DENNA DEL
AR ÖPPNAD OCH SPÄRR ÄR URKOPPLAD.
STRALEN AL FARLIG.
ADVARSEL - USYNLIG LASERSTRAKING VED ABNING, NAR
SIKKERHEDSAFBRYDEREER UDE AF FUNCTION UNDGA
UDSÆTTELSE FOR STRALING.
VAROITUSI - SUOJAKOTELOA EI SAA AVATA LAITE SISÄLTÄÄ
LASERDIODIN, JOKA LAHETTÄÄ (NAKYMATONTA)
SILMILLE VAARALLISTA LASERSATEILYA.
REAR PANEL
THIS PRODUCT COMPLIES WITH DHHS RULES 21 CFR, CHAPTER 1,
SUBCHAPTER J, PART 1040 AT DATE OF MANUFACTURE.
THIS PRODUCT COMPLIES WITH PART 15 OF THE FCC RULES.
OPERATION IS SUBJECT TO TWO CONDITIONS:
1. THIS DEVICE MAY NOT CAUSE HARMFUL INTERFERENCE, AND
2. THIS DEVICE MUST ACCEPT ANY INTERFERENCE RECEIVED,
INCLUDING INTERFERENCE THAT MAY CAUSE UNDESIRED
OPERATION.
M3 CD manual issue 1 Page 3 of 17
Page 4
SAFETY INFORMATION
IMPORTANT! (U.K. only)
This unit is supplied in the U.K. with mains lead fitted with a moulded 13 amp plug. If, for any reason, it is
necessary to remove the plug, please remove the fuse holder and dispose of the plug safely, out of reach of
children.
It must not be plugged into a mains outlet.
The wires in the mains lead supplied with this appliance are coloured in accordance with the following code:
Green
Blue................................................ Neutral
Brown ..................................................Live
and yellow .............................Earth
WARNING – This appliance MUST be earthed
As the colours of the wires of the mains lead of this appliance may not correspond with the coloured markings
identifying the terminals in the plug, proceed as follows:
• The wire which is coloured green-and-yellow must be connected to the terminal in the plug which is marked
with the letter E or coloured green or green-and-yellow, or by the earth symbol:
The wire which is coloured brown must be connected to the terminal which is marked with the letter L or
•
coloured red.
• The wire which is coloured blue must be connected to the terminal which is marked with the letter N or
coloured black.
• If connecting to a BS1363 plug, a 13 amp fuse must be used.
WARNING:
ANY MODIFICATIONS TO THIS PRODUCT NOT EXPRESSLY
APPROVED BY MUSICAL FIDELITY WHO IS THE PARTY RESPONSIBLE
FOR STANDARDS COMPLIANCE COULD VOID THE USER'S
AUTHORITY TO OPERATE THIS EQUIPMENT.
M3 CD manual issue 1 Page 4 of 17
Page 5
GENERAL ADVICE
Installation, Precautions & User Information
This new M3CD is designed and built to provide trouble-free performance, but as with all electronic devices it is
necessary to observe a few precautions:
• Heed all warnings shown on the back of the product.
• Only connect the M3CD to a mains outlet having the same voltage as marked at the back of the unit.
• Always ensure that when disconnecting and reconnecting your audio equipment the mains supply is
switched off.
• Position the mains lead and signal interconnects where they are not likely to be walked on or trapped by
items placed on them.
• Do not use near water, or place water-filled containers on the M3CD, for example, a flower vase or potted
plants. If water does spill inside, immediately pull out the mains plug from the wall socket and inform
the dealer, who should then check the unit before further use. Entry of liquid into the M3CD is
dangerous, and may cause electric shock or fire hazard.
• Do not place the unit near direct heat sources such as radiators, direct sunlight or other equipment.
• Do not remove any covers or try to gain access to the inside. There are no user adjustments or fuses to
change without qualification. Refer all service work to an authorised Musical Fidelity agent.
* Note: Unauthorised opening of the equipment will invalidate any warranty claim.
• Dust regularly with a soft cloth or soft brush but be careful when using cleaning or polishing agents - they
may harm the surface finish.
The electronics in modern hi-fi equipment is complex and may, therefore, be adversely affected or damaged by
lightning. For protection of the audio system during electrical storms, remove the mains plugs.
If after-sales service is required, to help the dealer identify the M3CD please quote the serial number located on
the rear panel of the unit.
M3 CD manual issue 1 Page 5 of 17
Page 6

ITEM DISPOSAL INFORMATION
DISPOSAL
The crossed out wheeled bin label that appears on the back panel of the product indicates that
the product must not be disposed of as normal household waste. To prevent possible harm to the
environment please separate the product from other waste to ensure that it can be recycled in an
environmentally safe manner. Please contact local government office or retailer for available collection
facilities.
DISPOSITION
La poubelle sur roulettes barrées X, qui apparaît en logo sur le panneau arrière du produit, indique que celui-ci ne
doit pas être traité comme un déchet domestique commun. Afin de protéger l'environnement, ce produit électronique devra
être géré séparément et donc recyclé selon les nouvelles normes Européennes Rohs concernant les déchets d'appareils
électroniques. Prière de contacter les services concernés gouvernementaux ou votre point de vente pour l'élimination et
l'enlèvement de déchets électroniques équipés de composants électroniques.
DISPOSAL
La etiqueta cruzada hacia fuera del compartimiento que aparece en el panel trasero del producto indica que el
producto no se debe reciclarse como basura normal de la casa. Para prevenir daños posible al ambiente separe por favor el
producto de otras basura para asegurarse de que puede ser reciclada de una manera ambientalmente segura. Entre en
contacto por favor a su oficina gubernamental local o a su minorista para las instalaciones disponibles de la colección.
RIFIU
TI
L'etichetta del cassonetto barrato riportato sul retro dell'apparecchio indica che il prodotto non deve essere
smaltito tramite la procedura normale di smaltimento dei rifiuti domestici. Per evitare eventuali danni all'ambiente, separare
questo prodotto da altri rifiuti domestici in modo che possa venire riciclato in base alle procedure di rispetto ambientale. Per
maggiori dettagli sulle aree di raccolta disponibili, contattate l'ufficio govenativo locale od il rivenditore del prodotto.
FACHGERECHT
Das auf der Geräterückseite angebrachte Label deutet darauf hin, dass das Produkt nicht mit konventionellem
Hauskehricht entsorgt werden darf. Um Schäden und Verschmutzungen an Umwelt und Mensch zu vermeiden, muss das
Produkt fachgerecht entsorgt und von anderem Abfall getrennt werden. Wenden Sie sich bei Fragen hierzu an Ihren
Fachhändler oder an eine öffentliche Informationsstelle.
AFVAL
Het label op de achterzijde van dit apparaat, een afvalbak op wielen met een kruis doorgehaald, geeft aan dat dit
apparaat niet samen met gewoon huishoudafval mag worden weggegooid. Om mogelijke schade aan onze leefomgeving te
voorkomen dient dit apparaat, gescheiden van gewoon huishoudelijk afval, te worden afgevoerd zodat het op een
milieuvriendelijke manier kan worden gerecycled. Neem voor beschikbare inzamelplaatsen contact op met uw gemeentelijke
reinigingsdienst of met uw elektronica leverancier.
HÄVITTÄMINE
Yliruksattua jäteastiaa kuvaava tarra tuotteen takalevyssä kertoo, että tuotetta ei saa käsitellä normaalina
talousjätteenä. Ympäristön suojelemiseksi on tuote pidettävä erillään muusta jätteestä ja se on kierrätettävä ekologisesti
kestävällä tavalla. Ota yhteyttä laitteen myyjään tai Pirkanmaan Ympäristökeskukseen lähimmän kierrätyskeskuksen
löytämiseksi.
AFSKAFNING
Logoet med en skraldespand med kryds over på bagsiden af apparatet indikerer at dette produkt ikke må kasseres
som normal husholdningsaffald. For at forebygge mulig skade på miljøet, bedes De separere dette produkt fra andet affald,
og sikre at det bliver genbrugt på en miljørigtig måde. Kontakt venligst de lokale myndigheder eller din forhandler for
oplysning om nærmeste tilgængelige opsamlingssted for elektronikaffald.
ΔΙΑΔΙΚΑΣΙΑ Α
ΤΟ ΣΗΜΑ ΜΕ ΤΟΝ ΔΙΑΓΕΓΡΑΜΜΕΝΟ ΤΡΟΧΗΛΑΤΟ ΚΑΔΟ ΑΠΟΡΡΙΜΑΤΩΝ ΣΤΗΝ ΠΙΣΩ ΟΨΗ ΤΟΥ
ΜΗΧΑΝΗΜΑΤΟΣ
ΔΗΛΩΝΕΙ ΟΤ
ΠΡΟΣ ΑΠΟΦΥΓΗ ΕΝΔΕΧΟΜΕΝΗΣ ΕΠΙΒΑΡΥΝΣΗΣ ΤΟΥ ΠΕΡΙΒΑΛΛΟΝΤΟΣ, ΞΕΧΩΡΙΣΤΕ ΤΟ ΠΡΟΙΟΝ ΑΠΟ ΤΑ ΑΛΛΑ
ΑΠΟΡΡΙΜΑΤΑ ΩΣΤΕ ΝΑ ΕΞΑΣΦΑΛΙΣΘΕΙ Η ΑΝΑΚΥΚΛΩΣΗ ΤΟΥ ΜΕ ΤΟΝ ΠΡΕΠΟΝΤΑ ΤΡΟΠΟ.
ΠΑΡΑΚΑΛΟΥΜΕ ΝΑ ΕΠΙΚΟΙΝΩΝΗΣΕΤ
ΓΙΑ ΠΕΡΙΣΣΟΤΕΡΕΣ ΛΕΠΤΟΜΕΡΕΙΕΣ.
Ι ΤΟ ΠΡΟΙΟΝ ΑΥΤΟ ΔΕΝ ΠΡΕΠΕΙ ΝΑ ΔΙΑΧΕΙΡΙΣΘΕΙ ΣΑΝ ΣΥΝΗΘΙΣΜΕΝΟ ΟΙΚΙΑΚΟ ΑΠΟΒΛΗΤΟ.
E ENTSORGUNG:
N
ΠΟΡΡΙΨΗΣ
Ε ΜΕ ΤΗΝ ΤΟΠΙΚΗ ΥΠΗΡΕΣΙΑ ΑΝΑΚΥΚΛΩΣΗΣ Η ΜΕ ΤΟ ΚΑΤΑΣΤΗΜΑ ΑΓΟΡΑΣ
M3 CD manual issue 1 Page 6 of 17
Page 7

INSTALLATION
Introduction
Congratulations on the purchase of the new M3CD player. This unit will give top quality performance when
used as a top quality CD player delivering the best performance possible from CD
Cleaning
Before cleaning the unit, switch off power at the mains switch and remove the mains plug from the wall socket.
Clean the cabinet and remote control unit using a moist cloth. Using solvents, white spirit or thinners is not
advised, as they could damage the surface finish.
Installation
Position the M3CD on a stable, horizontal surface where there is no risk of it being knocked, or subjected to
vibration such as from loudspeakers.
portant note:
Im
In normal operation, the unit dissipates a small quantity of power at all times, and it is important
that it is adequately ventilated. The top and bottom are perforated to allow the smooth flow of heat
through the unit. It is therefore not recommended that the unit is enclosed in a cabinet or placed
where the ventilation holes are impeded as this could result in excessive heat build-up.
The M3CD must be protected from humidity – if the unit is moved from a cold place to a warm
room, leave the unit for an hour or so to allow sufficient time for the moisture to evaporate.
Power Connections
The M3CD is supplied with a standard IEC mains cable which plugs into the IEC socket at the back of the unit
Audio Connections
RCA audio outputs: Use good quality RCA phono audio cables (fully connected signal and ground), for
optimum signal transfer.
Digital Connections
RCA digital (SP/DIF) output: Connect RCA digital receiver to RCA digital outputs. Use good quality fully
connected (signal and ground) coaxial digital cables for optimum RCA digital signal transfer.
Optical (TOSLINK) output: Connect optical digital receiver to optical output. Use good quality “Toslink” cables,
for optimum signal transfer.
M3 CD manual issue 1 Page 7 of 17
Page 8

FACILITIES & CONNECTIONS
1 2 3 4 5 6 7 8 9
1 POWER Mains
ON/OFF button
6
▐◄◄ - Track back button
2 DISPLAY
3
►|▐▐ - PLAY/PAUSE button
4
█ - STOP button
5 IR RECEIVER lens
7
►►▌ - Track forward button
8
▲ - EJECT button
9 CD SLOT
10 11 12
10 COAXIAL & OPTICAL digital outputs
11 RCA OUTPUTS right and left
12 IEC MAINS INPUT
M3 CD manual issue 1 Page 8 of 17
Page 9

REMOTE CONTROL HANDSET
The universal remote control shown below enables functions from this and related units to be operated from a
convenient distance.
Equivalent buttons on the remote control have the same functions as those on the front panel of the unit. Other
functions are only available by remote control.
As the handset uses an invisible infra-red light beam, the front edge must be pointed directly towards the
receiver window at the front of the player, without visual obstruction between them.
If the range of the remote control greatly decreases, replace the batteries with new ones. Do not mix old and
new batteries – two are required, size AAA, LR03 or SUM-4.
Please dispose of used batteries in accordance to local regulations.
A
mplifier section
TUNER - selects TUNER input
AU
X1/HT - selects AUX/HT input
X2 - selects AUX2 input
AU
AUX3 - selects AUX3 input
TA
PE - selects TAPE input
CD player section
TIME – displa
0-9 Bu
ttons – Used to select track
numbers
CHECK – check pre-programmed tracks
RAM – programs selection and
PROG
order of tracks
INTRO – plays first 10 seconds of each
track
AT – repeats whole disk or selected
REPE
tracks
SEARCH
forward/backward through track
STO
◄◄ ►► – fast
P █ – Stop playing CD
plifier)
ys track time/time remaining
CD - selects CD input (on am
MUTE - mut
(until pressed again).
LUME ▲ - increases volume
VO
VOLUME ▼ - reduces volume
DISPL
CLE
programmed track
A/B sets repeat start/end to repeat
section of track
SHUFF
random order
TRACK
track
PAUSE PLAY
playback
es speaker outputs
AY – dims display
AR – clears selected pre
LE – plays back tracks in
▐◄◄ ►►▌ next/previous
▐▐ ► – stop/start CD
M3 CD manual issue 1 Page 9 of 17
Page 10

OPERATION
PAUSE
STOP
PLAY
STOP
LOA
DING AND PLAYING COMPACT DISCS
Switch on unit. To load a CD gently introduce the CD into the slot in the front panel. The mechanism will sense
the presence of the CD and draw it in automatically.
There is no need to use any force, if a CD does not go in, please check there is no CD already in the unit, then
refer to the troubleshooting section P.15.
If a CD is already present at switch-on, it will be temporarily ejected to 2/3
rd
the way out. Change the CD if
required, or wait a few seconds until it is automatically returned into slot.
NO DISC
The unit
will scan the contents of the disc. After a short delay, the display window then shows the total number
of tracks available on the CD, and total playing time. In the following example there are 7 tracks, lasting a total
of 41 minutes 56 seconds
7 41:56
PLAY
►|▐▐
If ►|▐▐ button on front panel is pressed, the unit will begin playing from track 1, confirmed by the word PLAY
appearing on the left of the display, with 1 in the centre and elapsed time on the right.
1 0:01
Whe
n all tracks on the CD have been played, the display shows STOP and total number of tracks on the disc.
PAUSE
Pressing the
►|▐▐
►|▐▐ button on front panel when disc is playing will halt playback. PAUSE appears in the display
1 0:03
windows instead of PLAY. The disc will continue spinning, but the track does not advance and the CD's output
is muted. Pressing
►|▐▐ again resumes playback from the same place.
PAUSE (Remote control)
On the remote control, PLAY
Pressing
► will only control disc play, and pressing ▐▐ will not resume play.
►and PAUSE ▐▐ buttons have separate functions at each end of the same button.
█
STOP
Playback can be stopped at any time by pressing the █ button on front panel. On the remote control, press
either end of the button, not the middle part.
. 1 0:00
EJECT
▲
The CD may be removed by pressing the ▲ button on the front panel at any time. The CD will come out of the
slot to approx 2/3rds of the way to allow easy removal.
Note: If the CD is ejected but not removed, it will be retracted back into the mechanism for safety after a few
seconds. After the contents have been scanned, the CD is ready to be played or ejected again.
M3 CD manual issue 1 Page 10 of 17
Page 11
OPERATION
TRACK SELECTION
|◄◄ ►►|
To change track, the track skip buttons |◄◄ and ►►| on the front panel can be pressed to jump forwards or
backwards one track in either direction.
Corresponding TRACK buttons on the remote control are marked
If the unit has stopped playing, a specific track can be accessed directly by pressing either |
the required track number, then pressing
►|▐▐.
|◄◄ and ►►|.
◄◄ or ►►| to obtain
TRACK SELECTION BY NUMBER (Remote control)
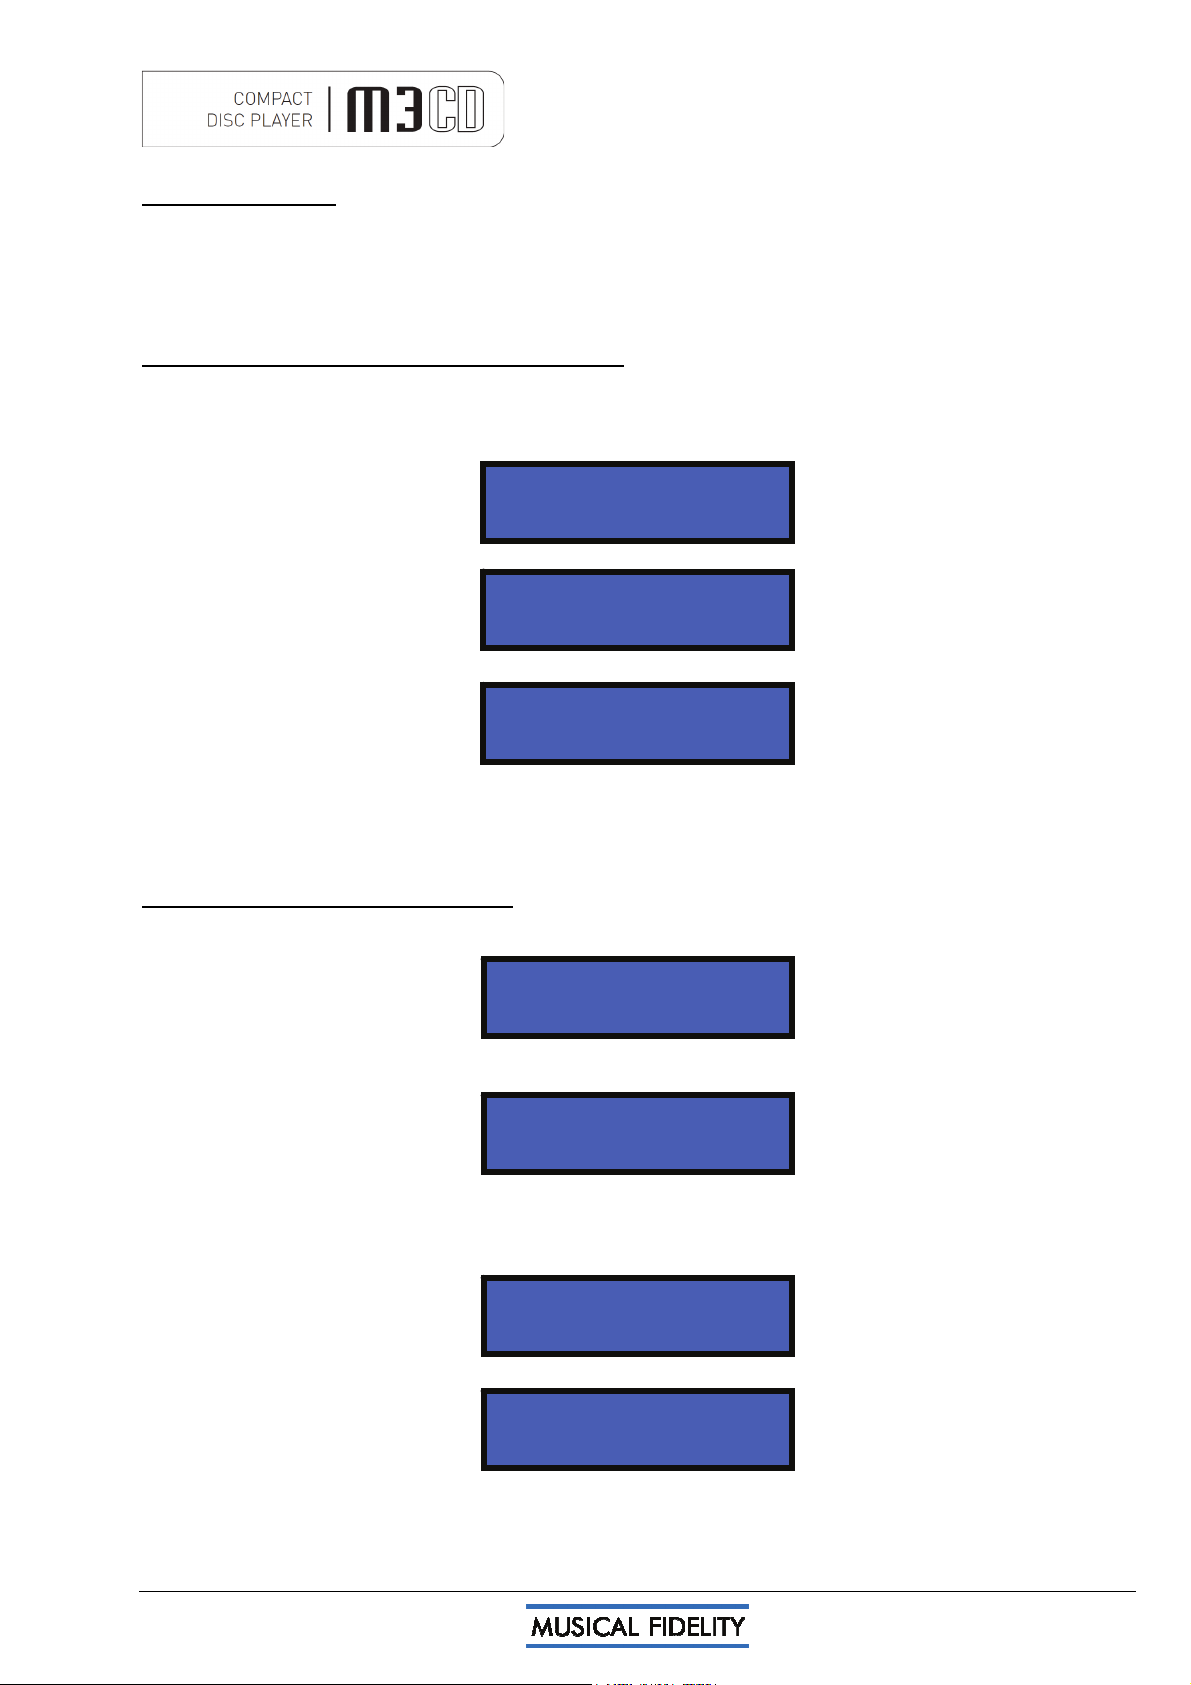
A specific track can be selected directly by pressing one of the ten track number buttons grouped in the centresection of the remote control. The chosen track then plays. To play a track number with two digits, press the
second digit button on the remote control within this delay period, example for track 17:
Press
1:
PLAY 1
Press
7:
PLAY 17
After a small pause, machine plays selected track:
PLAY 17 0:01
Note: Track access will be faster on a disk with 9 or less tracks, due to the unit automatically not waiting for a
second button press in the track number.
If a track number is chosen which is not available on the disc, the unit will ignore the entry.
TRACK SEARCH (remote control only)
To play a particular part of a track, a
◄◄ ►►
search feature is provided. The search feature may be used to navigate
forwards or backwards to find the required track part. The audio is heard in brief samples to aid searching.
))) 0:05
To search for a part ahead of the current track position, press the
►► button. The ► button will cancel and
return to normal playing speed.
))) ))) 0:15
To speed up the search, press
►► again. Pressing ►► a third time or ► reverts to normal playing speed.
To search for a part before the current track position, press the
◄◄ button. The ► button will cancel and return
to normal playing speed.
((( 0:05
To spe
ed up the search, press
◄◄ again. Pressing ◄◄ a third time or ► reverts to normal playing speed.
((( ((( 0:15
M3 CD manual issue 1 Page 11 of 17
Page 12
OPERATION
PLAY
PLAY
PLAY
55
PLAY
PLAY
REPEAT PLAYBACK
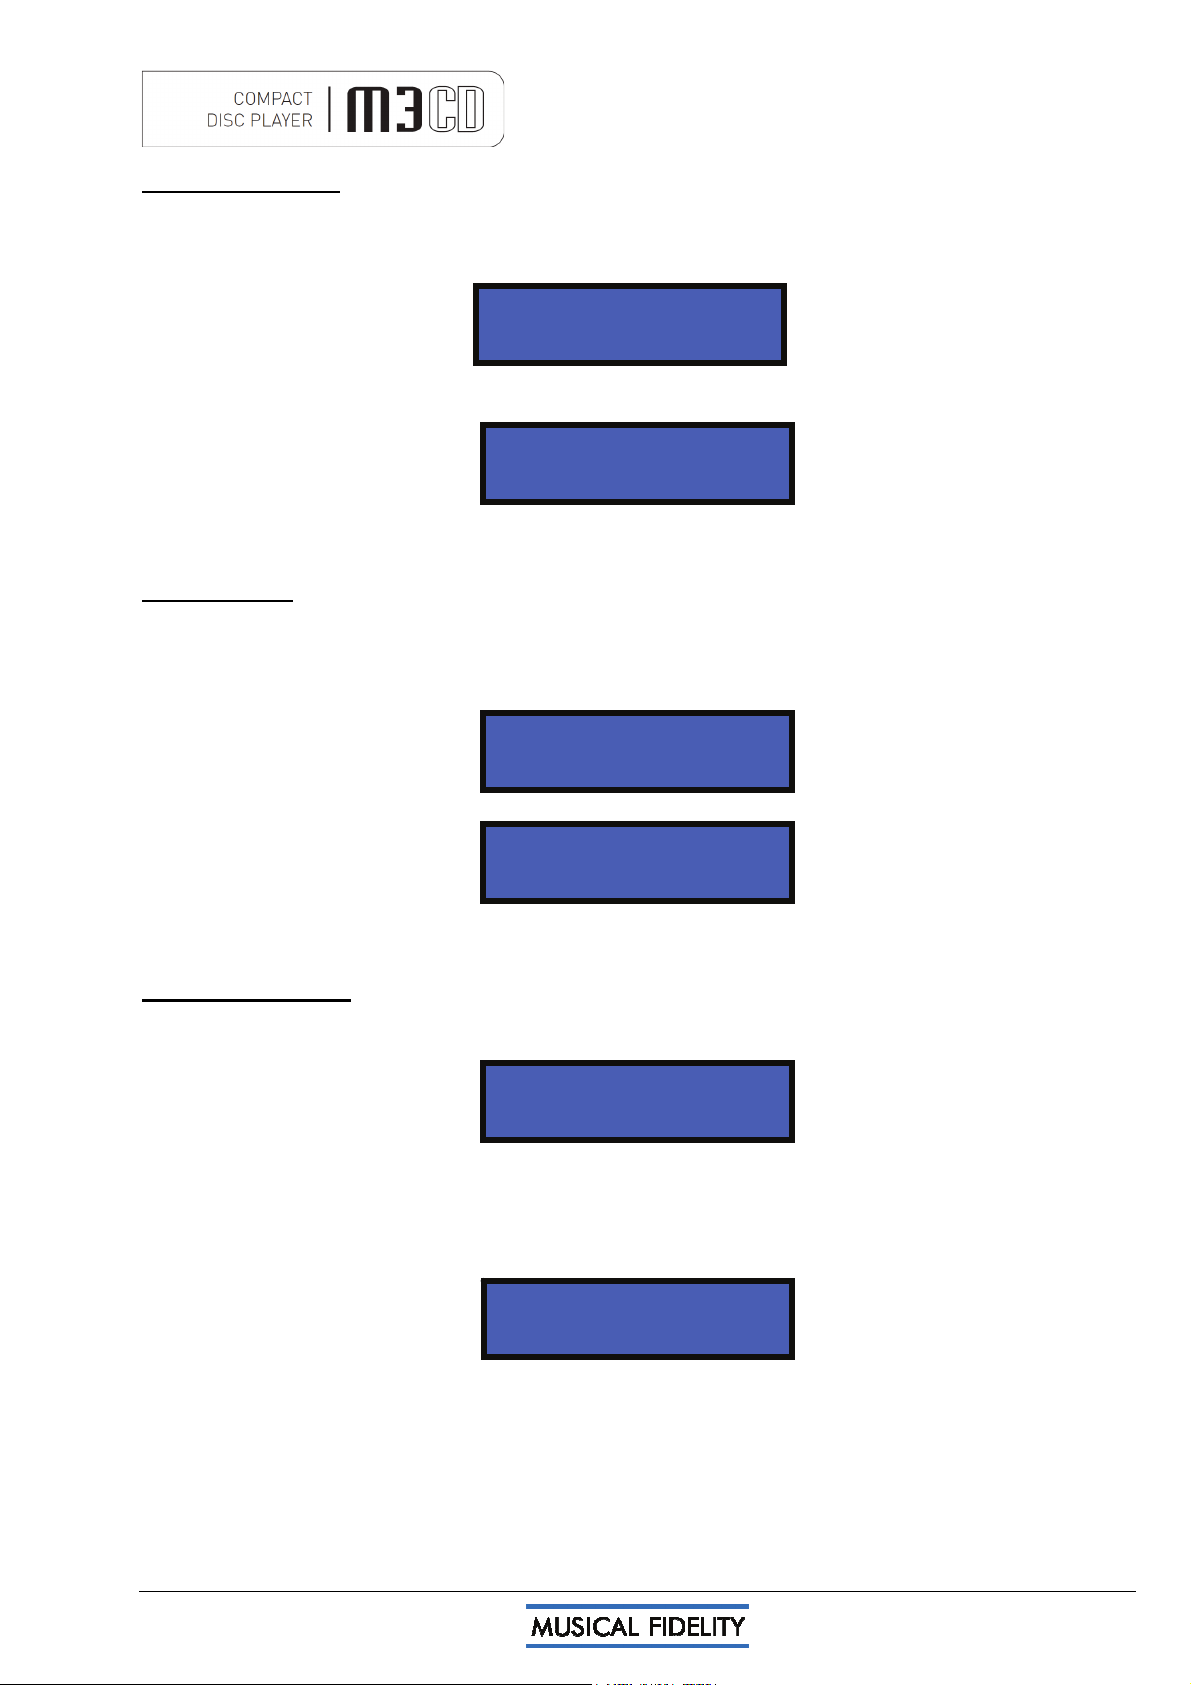
The REPEAT button on the remote control allows the repeated playback of either one track or all tracks on the
disc.
By pressing the REPEAT button once, only the current track is repeated, and the display shows
1 0:12
repeat track
If the REPEAT button is pressed a seco
nd time, “repeat disc” is displayed instead, and the entire disc is then
played repeatedly.
1 0:24
repeat disk
Press
ing REPEAT a third time cancels repeat mode.
A/B PLAYBACK
“A/B” provides the option of playing just a certain section of the disc over and over again.
Find the beginning of the required section either by listening, or using the display time as a guide.
When the desired starting point is reached, press button A / B on the remote control.
The display will show
1 0:34
repeat a-
n the disc has reached the end of the required section, press the A / B button again, to display
Whe
PLAY 1 1:
repeat a-b
and the unit continuously plays the selected part of the disc in this case, the segment of track 1 from 34
seconds to 1 minute 55 seconds. To cancel A/B repeat mode, press A/B on the remote control.
SHUFFLE PLAYBACK
The SHUFFLE feature allows tracks on the discs to be played in random sequence rather than the normal
consecutive order.
1 0:34
shuffle once
Tra
cks are also played in a different order each time the disc is restarted, or another disc loaded. This function
is obtained by pressing SHUFFLE on the remote control with the unit either stopped or playing. If the M3CD is
already playing, play will continue in random order until all tracks on the disc have been played.
Pressing SHUFFLE again will put the M3CD in continous Shuffle mode, endlessly repeat the disk with the
tracks in shuffled order
1 0:34
shuffle cont
Shuffle play
is cancelled by pressing the SHUFFLE button a third time. The unit resumes normal play
function, continuing to the end of the disc in normal order starting from wherever it was left by the previous
random selection.
From pause, pressing
►|▐▐ also continues shuffle play.
M3 CD manual issue 1 Page 12 of 17
Page 13
OPERATION
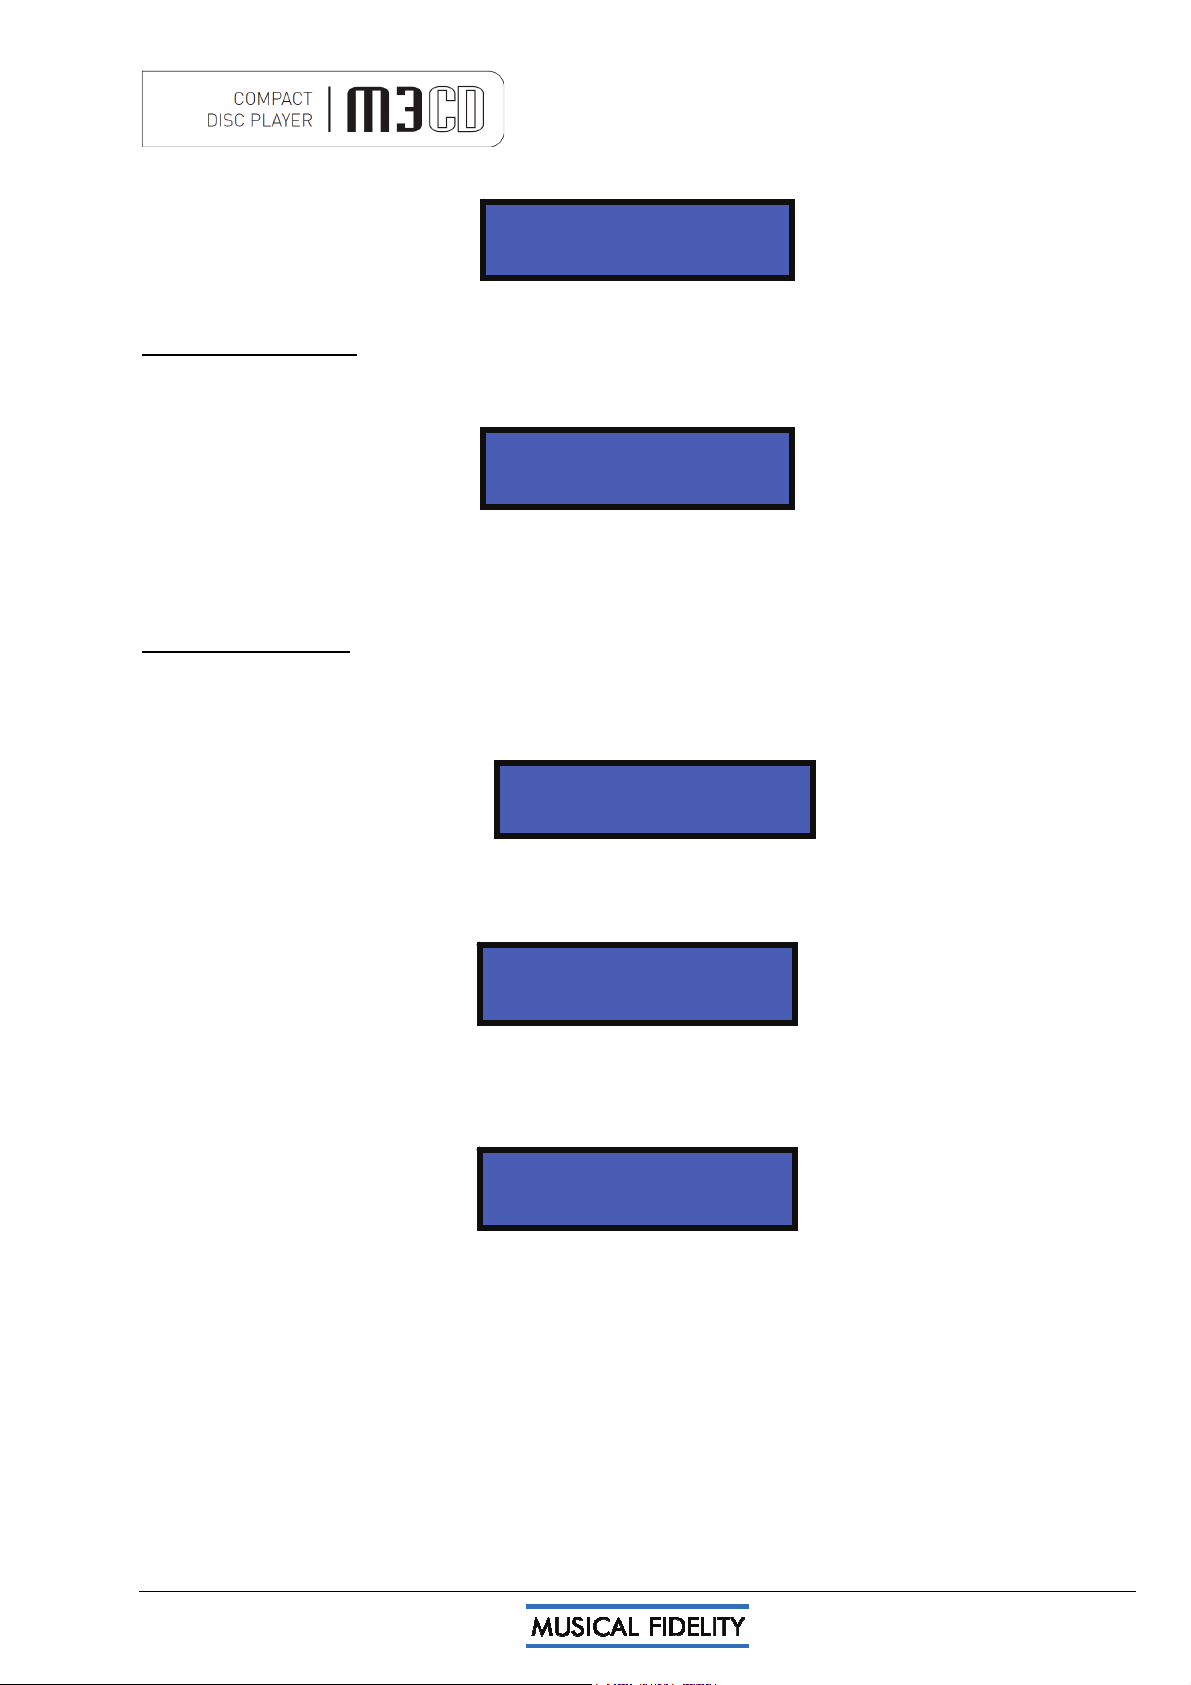
PLAY
prog
01
If REPEAT is then pre
ssed whilst in shuffle mode, machine reverts to repeat mode, cancelling shuffle function
7 0:39
repeat
Pressing
►►| selects the next track in random order.
SCAN INTRODUCTION
The scan-introduction function allows play back of just the start of each track on the disc, for instance to locate a
preferred track by ear.
Press INTRO on the remote control, and if the player has stopped, the display will show
STOP 74
scan disc
The first ten seconds (approximately) of each track on the CD can then be played in sequence by pressing
►|▐▐ on the front panel, or ► on the remote control.
either
Press INTRO again to cancel introduction search mode. If INTRO mode is cancelled while the M3CD is still
playing, the remainder of the entire disc will be played.
PROGRAMMED PLAY
The built-in program memory allows you to store up to 30 track numbers and then play them back in the held
order. Each track is stored as a “step” in the program.
With the CD loaded and the player stopped, first press PROGRAM on the remote control. The following is then
displayed:
STOP. 74
ram stp 01 tr
On the remote control, press the numeric button of the track number corresponding to the first track you wish to
store (number 3 for example). That track number will now appear in the display:
STOP. 74
program stp 01 tr 03
If a second digit is required for the track number, it may be pressed directly after the first. When the track
number is correct, press PROGRAM again on the remote control - the next program step is selected, (program
2) and the program number increases, ready for a new entry with previous programmed track number still
displayed.
STOP. 74
program stp 02 tr 03
Continue entering track numbers in the same way up to a maximum of 30. If more than 30 tracks are attempted
the memory will not accept any extra ones, and the display reverts to “PROGRAM 1”.
M3 CD manual issue 1 Page 13 of 17
Page 14
OPERATION
If at any time you wish to add a tra
ck to the list, press the CLEAR button to obtain the next step number.
Alternatively, to delete a previous entry, press CLEAR a second time to remove the last entry. Repeated
pressing of CLEAR will then erase each step in reverse order. So to delete an entire program sequence from
the memory, press CLEAR repeatedly until “PROGRAM 1” is shown in the display.
When the last track number has been entered, press PROGRAM a final time, then the
►|▐▐ button to start the
program sequence.
PLAY 1 0:41
program play
If you wish to check the selection before playing back your program, the CHECK button can be pressed to step
through each program entry in turn.
If during this check sequence the
►|▐▐ button is pressed, the remaining part of your programmed selection will
play to the end of the sequence.
Otherwise, to play all the programmed tracks from the beginning of the sequence, press
►|▐▐, or ► on the
remote control directly from programming. You can also start the sequence from any point by stepping through
the programmed sequence with CHECK button until the desired starting track is displayed.
►►| button may be pressed to jump to the next track in the programmed sequence, or |◄◄ button to obtain
The
the previous track in the sequence.
When all programmed tracks have played, the CD player stops. The same track selection can then be played
again by pressing the
To rep
eat a programmed sequence continually, press REPEAT whilst playing the program.
►|▐▐ button on the front panel, or ► on the remote control.
PLAY 1 0:41
program rpt
To cancel this mode, press PROGRAM.
Note: The program contents will be cleared if you switch off the power, or load another disc. If,
however, the same disc is loaded again with the power still switched on, the program sequence is
retained in the memory.
TIME (remote control only)
Pressing the TIME button displays the word TRACK followed by the current track elapsed time. Pressing a
second time displays the word DISC then the total disk time elapsed.
DISPLAY (remote control only)
The CD display brightness can be controlled in three levels by pressing the DISPLAY button on the remote
control.
The original setting is maximum brightness, but by pressing the DISPLAY button once, brightness is reduced,
and a further press turns the display off.
M3 CD manual issue 1 Page 14 of 17
Page 15

PROBLEMS?
Basic problem-solving with a CD player is similar to troubleshooting other electrical or electronic equipment. Always check the
most obvious possible causes first, such as the following examples:
Problem Probable Cause Remedy
No power / display Power plug is not inserted into socket correctly Plug in securely into unit’s IEC
socket.
No playback when disc is loaded,
“NO DISC” displayed
No audio output, or too low level
output
Hum Audio connector plug not fully pushed in
Miss-tracking (sound jumping) Player is receiving vibration or shock
Cannot insert or eject CD CD already present in unit
Remote control does not work
Remote control range has reduced Batteries are running out Change batteries – for a new set
Disc is loaded with label side down
Incorrect disc type
Dirty disc
Moisture/humidity or cold affecting laser lens
Incorrect or missing connections Check connections are secure.
Cable Fault
Unsuitable Cable
(e.g. cable grounds not connected)
Disc is dirty
Moisture/humidity or cold affecting laser lens.
CD misread
Moisture/humidity or cold affecting laser lens.
Power supply switch is set to off Set switch to on
Battery(ies) fitted the wrong way round Insert batteries correctly
Batteries are flat Change batteries for a new set
Control is not pointed directly towards the front
panel of the player
Re-load with label side up
Please load a standard audio CD
Clean disk and try again
Leave unit on for an hour to allow
moisture to evaporate.
Insert plug securely
Check cable is connected at both
ends.
N.B. some esoteric cables have
internal wiring intentionally
disconnected/modified. For best
results on all inputs analogue AND
digital, please use good quality
screened coax; signal and screen
directly connected both ends.
Move player away from loudspeakers
etc.
Clean disc surface
Leave unit on for an hour to allow
moisture to evaporate.
Remove existing CD by pressing ▲.
If CD does not eject, try switching
unit off; then on again.
Leave unit on for an hour to allow
moisture to evaporate.
Ensure there is no obstruction
between the remote control and
player front
This product contains a CD mechanism, which complies with the PHILIPS/SONY red book CDDA
standard. It is guaranteed to play all disks with the “compact disc digital audio” badge (see left) without any
problems.
Please note that due to “piracy” concerns, some record companies/pressing plants are creating disks that
do not adhere to this standard. Such disks may –or- may not play in some –or- all CD player products of
any manufacturer. We advise caution in using these disks, as the information contained therein has been deliberately
manipulated and can cause audio degradation and/or playability problems.
We also advise caution with using cheap and/or computer CD-R/RW disks for audio. To ensure optimum reliability and
performance we recommend all home-generated CDs intended for playback on
not
MP3, WAV, etc.) on good quality household brand AUDIO grade CD-Rs.
Remember - the most vulnerable part of a CD playing system is the disc itself. The most likely cause of a disc not playing is that
the disc itself is faulty, scratched or simply dirty. Never open the case of the unit yourself, as this will invalidate the guarantee. If
no e of the above actions affect a cure, please contact your dealer or Musical Fidelity service agent. n
this unit are recorded as CDDA AUDIO CDs (i.e.
M3 CD manual issue 1 Page 15 of 17
Page 16

SPECIFICATIONS
Output
Output impedance 50 ohms
Output, digital 0dB level RCA output - 2.2V r.m.s. nominal
DAC
DAC circuit 24 bit Delta-Sigma (bit stream) dual differential 8x over-sampling
Total correlated jitter <135 picoseconds peak to peak
Linearity <0.1dB down to -96dB
Frequency response 10Hz to 20 kHz -0.2dB max.
Channel separation >105dB 20 Hz to 20 kHz
Signal-to-noise ratio >117dB “a”- wtd.
Total harmonic distortion <0.003% 10Hz to 20 kHz
Connections
Line level outputs 1 pair line level RCA connectors, left and right outputs
Digital outputs 1 RCA coaxial connector SPDIF
1 TOSLINK optical connector
Power requirement
Mains voltages 115/230VAC 50/60Hz (factory pre-set)
100VAC 50/60Hz (alternative)
Consumption 20 Watts maximum
Weight
Unit only, unboxed 6.65 kg (14⅔ lbs)
In shipping carton 10.5 kg (23 lbs)
Dimensions
Wide 440 mm (17⅓”)
High, including feet 100 mm (4”)
Deep (front to back) including terminals 375 mm (14¾”)
Standard accessories
IEC type mains lead (10-Amp type)
M3 remote control
Batteries, LR03 or AAA, manganese alkaline type - 2 off
Musical Fidelity reserves the right to make improvements which may result in
specification or feature changes without notice.
M3 CD manual issue 1 Page 16 of 17
Page 17

MANUAL HISTORY
RELEASE DATE CHANGES
st
M3 CD manual issue 1 21 January 2010 1
issue
M3 CD manual issue 1 Page 17 of 17
 Loading...