

Page 1
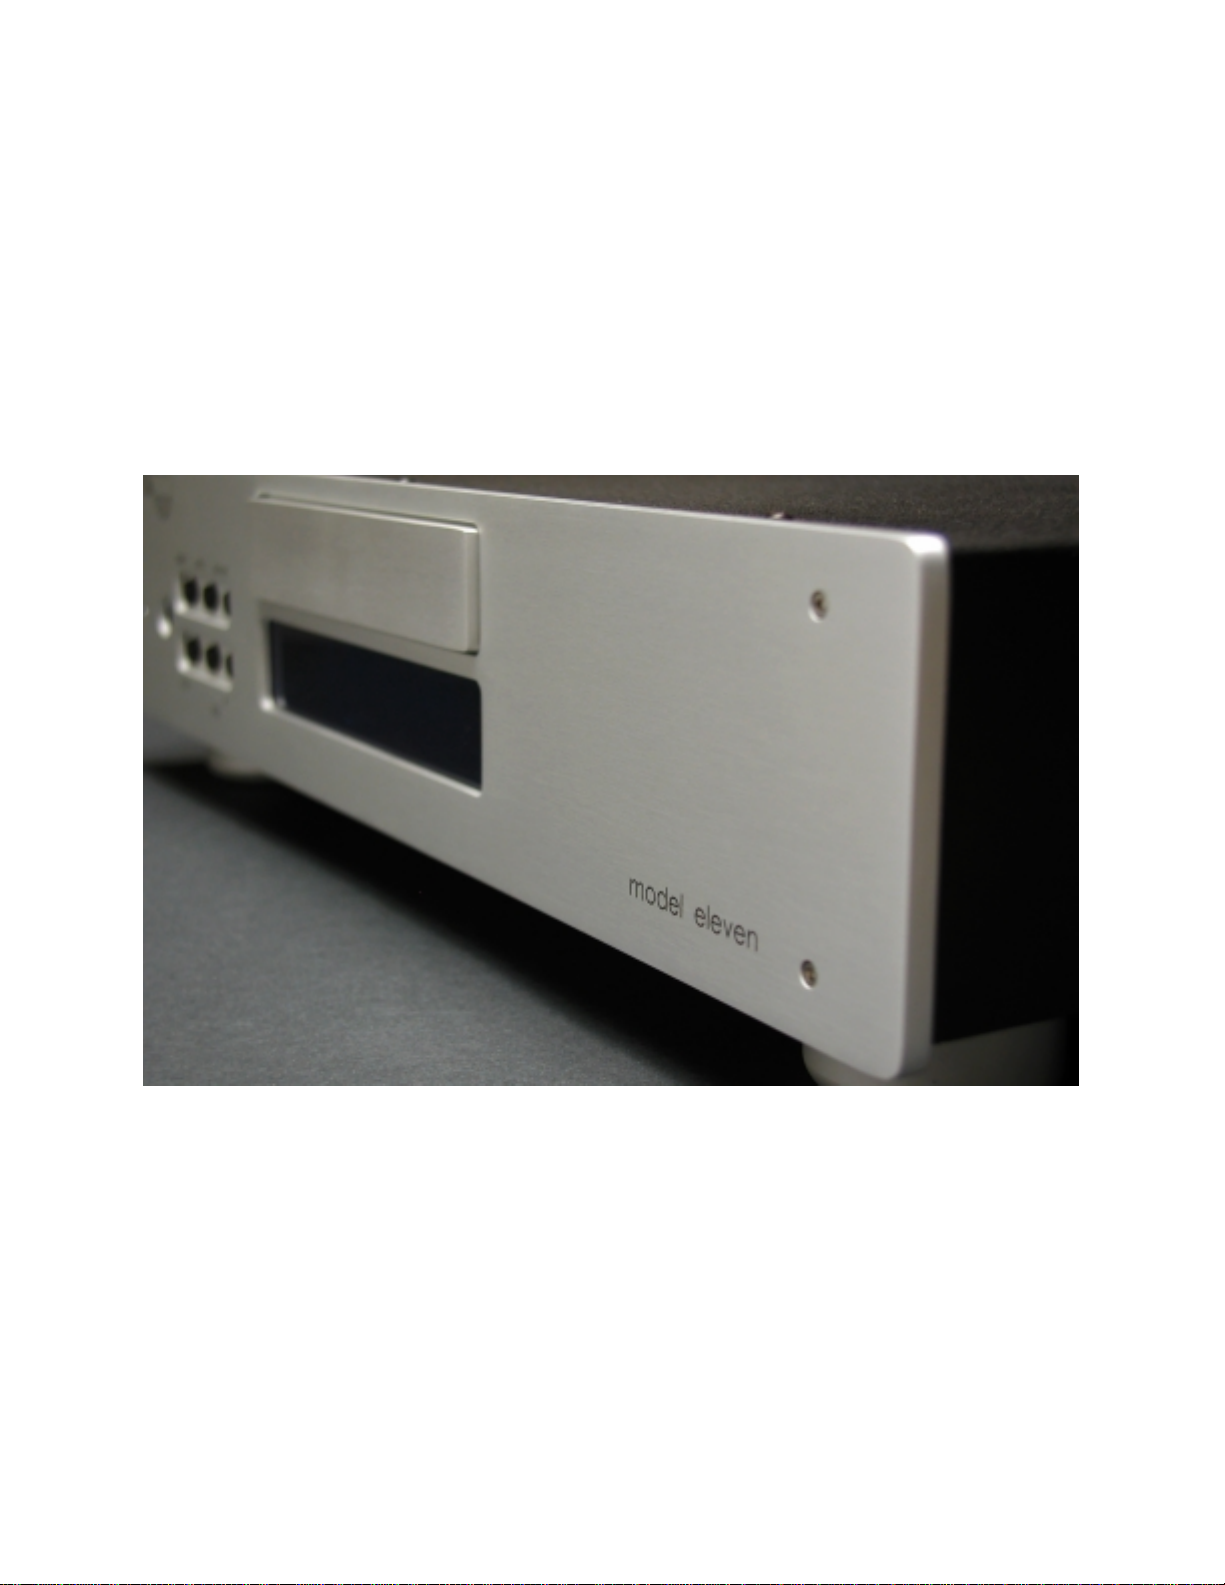
Owner’s Manual
Muse Electronics
Model Eleven
(optical disc playback system)
Preliminary Document
(Draft dated 5-2004)
Page 2

Thank you for selecting th e Muse Model Eleven
optical disc pla yback system. The Model El even
is capable of playing nearly every known disc
format, including CD, DVD Video, DVD Audio,
SACD and MP3. Support i ncludes both t wo and
multi-channel surround modes. Additional
capabilities includ e Video CD (VCD) as well as
photo discs. With numerous available m odules,
the Model Eleven can be configured to match
any audio or audio/video system.
Please take the time necessary to read and
study this owner’s manual, as it will provide
many insights as to the us e of this produc t. We
also recommend that you complete and m ail the
enclosed Extended W arranty Registration From ;
including a copy of the Bill of Sale from your
authorized Muse dealer to the address shown
on the form. Registration will not only extend
your warranty, but it will also allow Muse to
remain in contact with you should there be an y
updates or additional options for your Model
Eleven.
Included with all Model Ele vens are a number of
standard accessories as well as a number of
possible options. The standard accessories
include:
• Mains Cord Set
• Multi-Function Remote
• Rubber Self Adhesive Feet
• Spare Fuses
Possible options include:
• Machined Aluminum Feet
• Machined Aluminum Remote-1
• RCA multi-channel Module
• XLR multi-channel Module
• Input Module
• Attenuator Module
All Model Elevens come equipped with a two
channel analog audio output module (fixed or
attenuator version) a nd a digital audio – analo g
video module (either S/PDIF or AES-EBU) as
part of the standard configuration. Your Model
Eleven may also include one of three optional
accessory modules; multi-channel balanced,
multi-channel unba lanced or ana log audio inp ut.
Other possible options include the MAP series
machined feet and the machined Remote-1.
Additional options will be announced as they
become available.
Setup (location & cabling)
The location that you choose for your Model
Eleven should take into account a number of
factors including; adequate ventilation, line of
sight for both the displ ay and IR remote control
sensor as well as the cable requirements for
both the audio and video connections to other
products in your system.
The Model Eleven ge nerates notabl e waste heat
during operation; therefore the player should
never be used within a closed environment.
There are two vents on th e chas sis of the Mo del
Eleven, one on the underside located near the
front panel on the left side and one on the rear
panel near the po wer entry point. The natural
convection flow caused by the self-heating
draws fresh air into the underside vent and
expels the hot air from the rear vent. In ord er to
function properly the Model Eleven
elevated from the surf ace that it rests upon. If
the optional machined f eet were purchased with
your Model Eleven, the n t h ey should be installed
in the three installa tion points on the underside
of the chassis. Be certain to use the r igid nylon
washers included with the machined feet to
protect the chassis from damage. Use of non
Muse provided feet might damage the Model
Eleven as they lack the controlled fastener
length. Internal damage caused by the use of
non Muse supplied feet is not covered under
warranty. Please consult either Muse or your
Muse dealer before using any non Muse feet
with your Model Eleven. If the optional feet wer e
not included with your unit, then use the three
standard rubber self adhesive feet (prov ided) to
raise the Model Eleven to proper ventilation
height. The rubber feet should be adhered to
the three points (threaded fittings) normally
occupied by the machined feet.
The Model Eleven sho uld n ever be c onnec ted to
a mains source (power outlet) other than the
normal domestic service. Aftermarket “power
conditioners” of the active variety (regeneration
devices) can damage your Model Eleven and
should never be used. Use only agency
approved mains cords (such as provided with
the Model Eleven) to assure safe and trouble
must be
2
Page 3
free operation. Many aftermarket mains cord
sets are poorly constructed and can either
damage your Model Eleven and/or can present
a fire hazard.
Check the rear panel marking of the Model
Eleven to determine the mains voltage
requirements (either 115 or 230 Volts at either
50 or 60 Hz). If your Model Eleven does not
match the mains voltage of your area, contact
either Muse of your Muse dealer to have your
unit reconfigured for your area. The multifunction power entry module of the Model
Eleven provides filtration, fusing and a master
power switch. Once you have determined that
your Model Eleven is properly configured for
your area, the mast er switc h can be pl aced in its
operating state by pressing the rocker on the
side labeled “1” until it clicks into its “on”
position. The Model Eleven will be energized,
but will remain in standby until it is awaken by
either a front panel or remote button push.
Before awaking the Model Eleven, complete the
audio and video co nnections to other equi pment
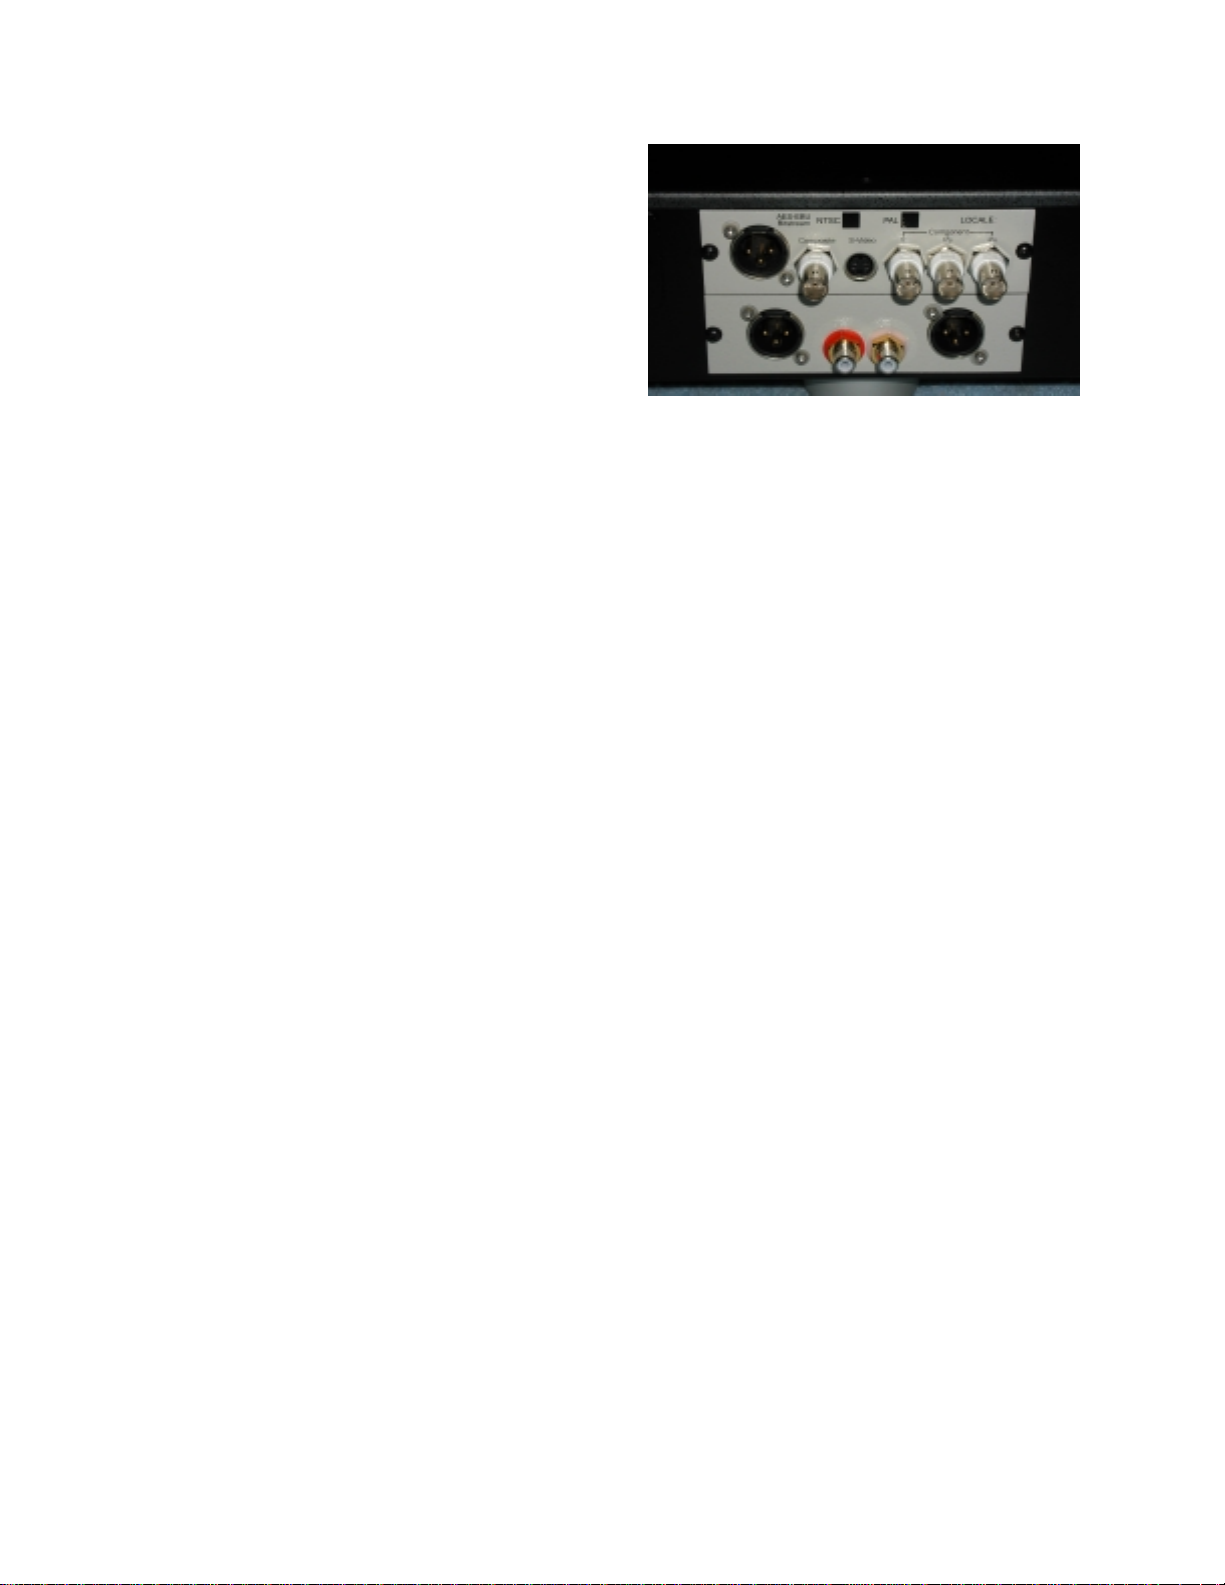
in your system. Located a t the c ent er of the rear
panel is a pair of outpu t m odules, one f or an alog
audio and one for digital
video. The lower module contains the analog
audio outputs for s tereo p layback or for the f ront
left and front right of a multi-channel system.
The main analog audio outputs include both
balanced (XLR) and un balanced (RCA) o utputs.
If your system accommodates balanced audio
inputs, then use the XLR connection points, as
this will provide the highest performance
possible. If your system only supports
unbalanced audio inputs, then use the RCA
connections points. If your Model Eleven is
equipped with the optional attenuator module,
then the Model Eleven can be direc t l y connec ted
to your power amplifier , as there will be no need
for a preamplifier. If supplied with the fixed
output module, then connect the Model Eleven
to your preamplif iers input (either XLR or RCA).
While it is possible to use both analog audio
outputs, better results will occur when only one
or the other is used.
audio and analog
The upper module contains the vi deo c on necti on
points as well as the digital audio o utput. There
are three different video outputs on the Model
Eleven: component video (via three 75-Ohm
BNC connectors), S-Video (via a 4 pin DIN
connector) and composite video (via a 75-Ohm
BNC connector). Depending upon which
module is instal led, your Mode l Eleven will have
either an S/PDIF (75-Ohm BNC) or and AESEBU (XLR) for connection to an external digital
audio processing device. Mark ed on the video
output module will be the indications for NTSC
and/or PAL video as well a s the locale coding of
your Model Eleven. If this doesn’t match your
video system or geographical location, please
contact either Muse or your Muse dealer.
Connection to your video device (monitor,
television or projector) will depend upon the
capabilities of the dev ice you choos e to use with
the Model Eleven. If your video dev ice supports
component video, then t his should be your first
choice, as it will provide the highest
performance. If your video device lacks
component video capability, then the next
highest performance choice would be S-Video.
If your device lack s both of these choices, then
use the composite video interface. It should be
noted that if you configure your Mo del Eleven to
provide progressive (de- interlaced) vi deo output,
only the component video connectors will be
active. To use either the S-Video or composite
video connectors, the Mo del Eleve n must be s et
to interlaced video (see setup menu).
It is possible to utilize all three sets of video
outputs concurrently, but keep in mind that the
Model Eleven’s progressive feature will affect
the available signals. The digital audio output
will provide either PCM or a bit-stream
depending upon the configuration of the Model
Eleven and the a vailable material on th e disc in
play (see setup menu).
3
Page 4
Setup Menu
If your Model Eleven will be used only to play
standard CDs no setup will be required. If,
however, you intend to play any of the higher
performance form ats such as DVD-V, DVD-A or
SACD, you will need to configure the Model
Eleven for your system. In order to setup the
Model Eleven a vi deo device will be requir ed to
view the various menus. Once configured, a
video device is not required for day-to-day
operation, though a video device may be helpful.
To enter the setup menu, press the “Shift” button
located on the lower left corner of the multifunction remote. T his will cause a blue LED to
illuminate on the front panel of the Model
Eleven. This LED indicates that all comm ands
will follow the blue labels on the multi-function
remote.
To access a red comm and, press the “Release”
button on the multi-function remote; this will
cause the front panel LED to extin guish and the
Model Eleven will now execute the com m ands in
red.
With the blue shift LED on the front panel
illuminated, press th e “Standb y” button, which is
located in the upper left corner of the multifunction remote. This will cause the Model
Eleven to wake up and enter its operational
state and will extinguish the shift LED on the
front panel.
To access the setup menu, make certain that
your video device is on and set to the proper
input to view the Model Eleven (see cabling
requirements under the section titled “Setup”).
Press the “Shift” button o n the rem ote ( blue LED
illuminates) followed by the “Action” button on
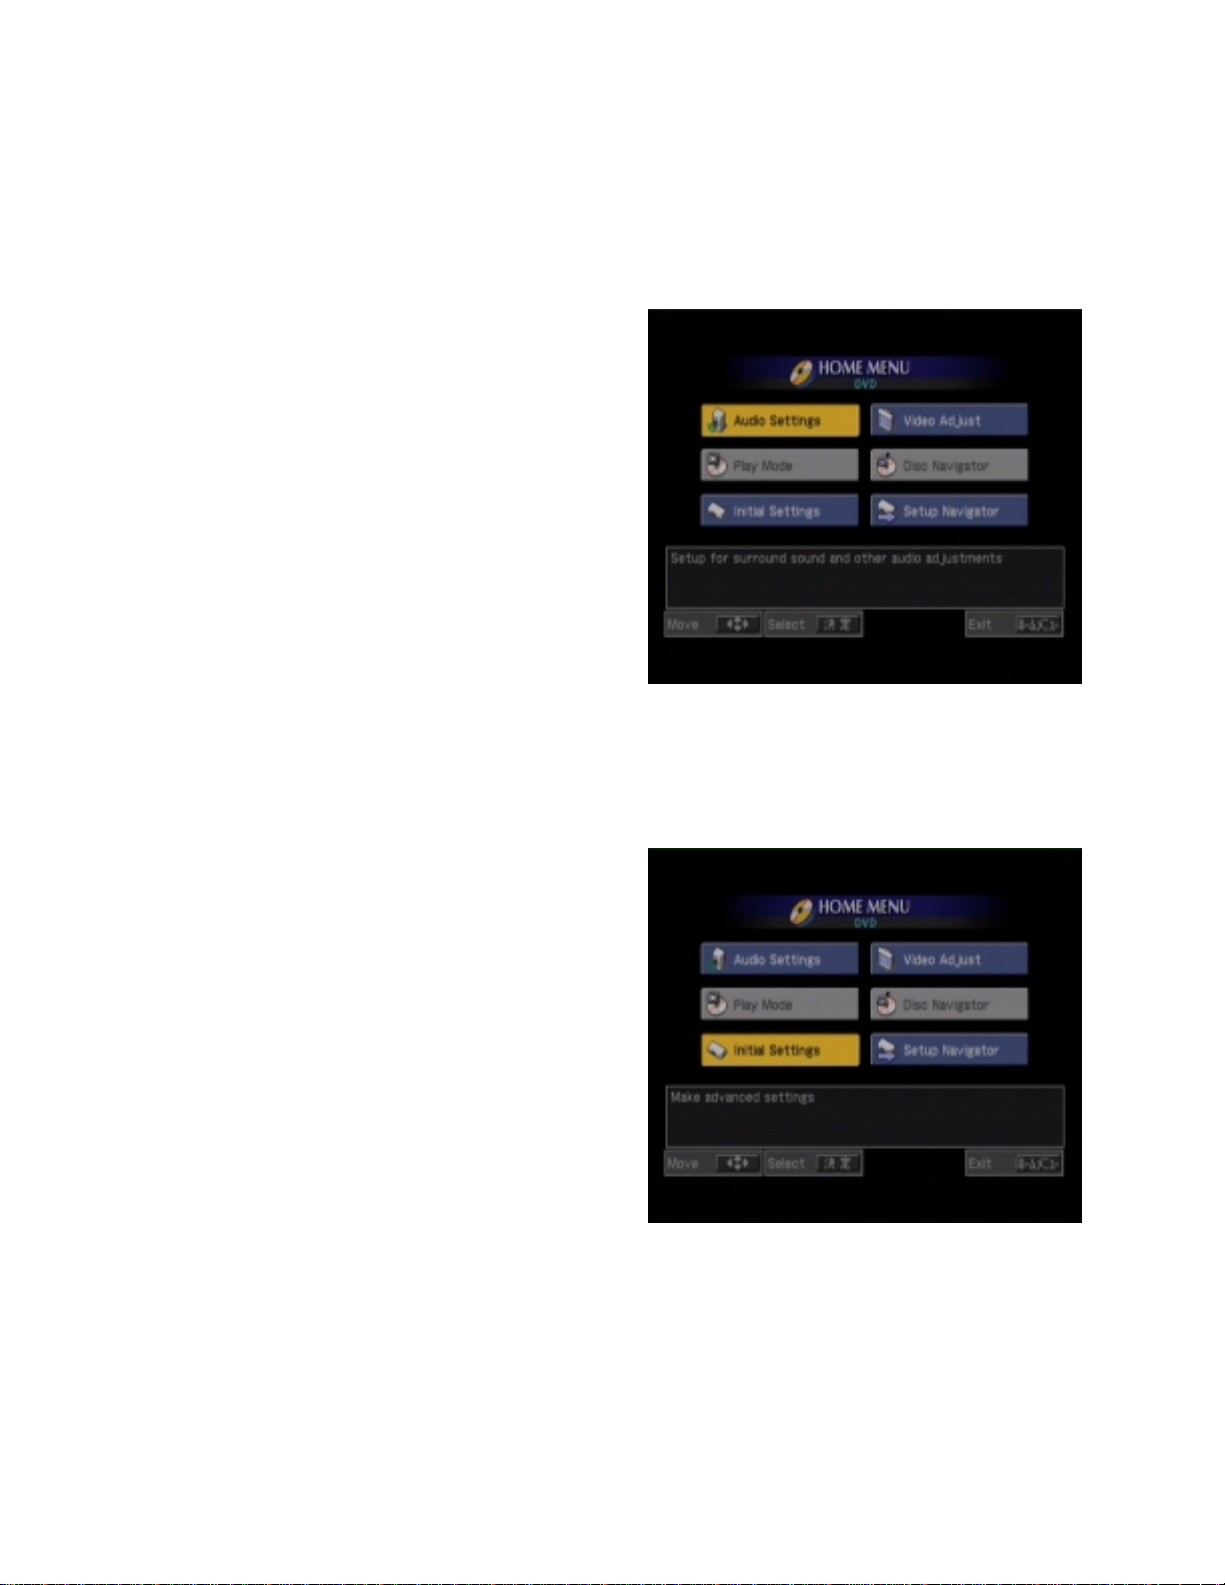
the remote. You will now see a menu of six
different groups of s ettin gs for the Model Eleven.
The upper left group titled “Audio Settings” will
be highlighted. Any of the six submenus can be
selected by navig ating around the displa y using
the four remote control navigation buttons.
These buttons are labeled “U p”, “Down”, “Lef t” &
“Right” and are label ed in red. Since all four of
these buttons are labeled red, you must make
certain
that the Model Eleven is not in shift
mode. Looking at the front panel and
determining if the blue shift LED is illuminated
can confirm this . Since your last c ommand was
“Action” which is labe led in blu e, you wil l need to
deactivate the shift m ode. This is accom plished
by pressing “Release” on the multi-function
remote and verifying that t he blue shift LED has
been extinguished. Now is a good time to
practice navigatin g the on screen menu choices
using the four remote buttons.
When you are finished, select the block titled
“Initial Settings” by first navigating to and
activating this button by pressing the “Select”
button (located in the middle of the four
navigation buttons).
Initial Settings
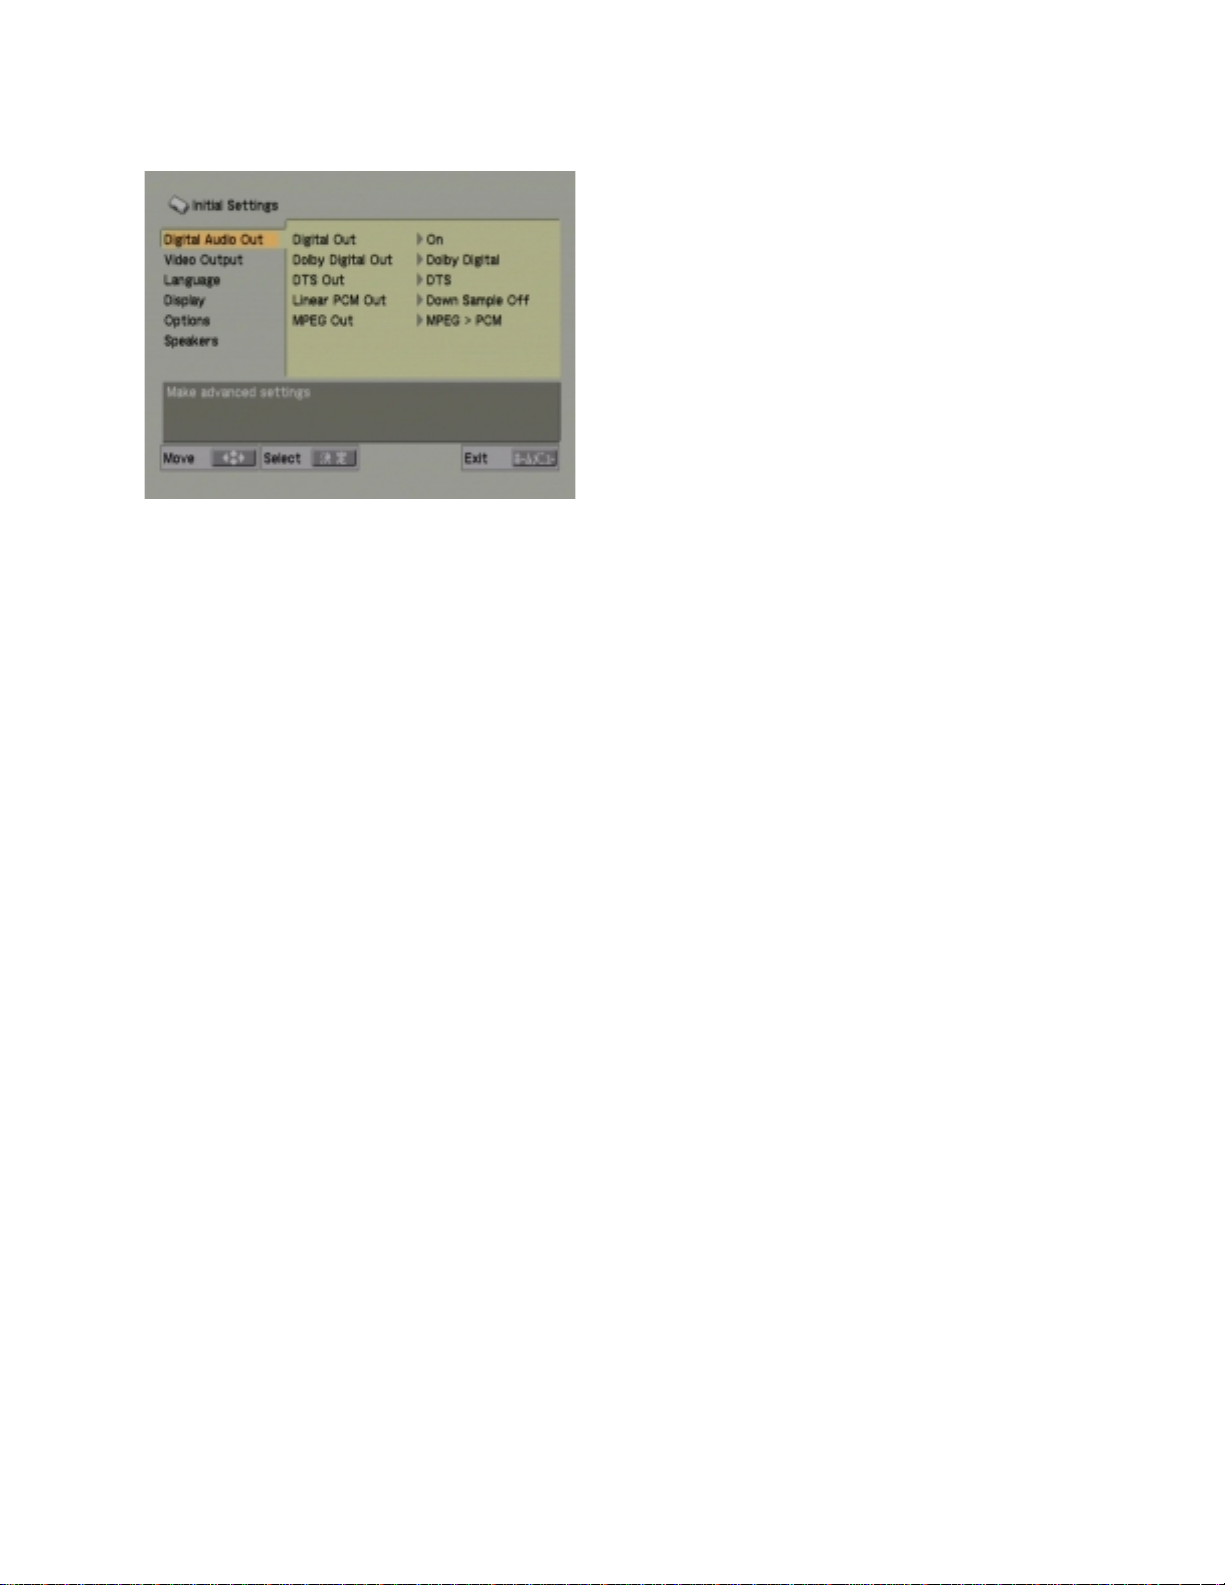
A submenu titled “Initial S ettings” will appear on
the video device. This page c ontains a column
of settings on the left side of the screen and a
list of sub-submenu and corresponding choices
on the right side of the screen.
4
Page 5
Digital Audio Out
“Digital Audio Out” is the first item in the left
hand column; make certain that this item is
highlighted, if it is not, then do so using the “ Up”
and “Down” navigatio n ke ys. To the right wil l be
a list of individual choices and their current
settings.
Digital Out
The first sub-submenu item is “Digital Out”.
Here there are two choices, either “ On” (default)
or “Off”. The current selec tion will have a small
square next to the selected entry. To change
the entry, press the “ Right” navig ation to access
the option pane and then using the “Up” and
“Down” navigation keys choose either “On” or
“Off” then press “Select” to indicate your choice.
The proper setting for “D igital Audio” will depend
upon your system. If you have a digital
processor connected to the either the S /PDIF or
AES-EBU (depending upon which module you
have installed) then you wil l want to select “On”.
If the digital audio ou tput is unused , then s et this
output to “Off” in order to reduce an y emissions
that would result from an terminated digital
connection.
Dolby Digital Out
The second sub-subm enu item is Dolby Digital.
Here there are two choices, either “ Dol b y Dig ital”
or “Dolby Digital > PCM”. Using the methods
defined previously, navigate and select the
configuration that is correct for your system.
The decision to use either “Dolby Digital” or
“Dolby Digital > PCM” will depend upon the
capabilities of your digital processor. If your
processor can accept Dolby Digital bit-streams
then select “Dolby Digital” if your processor is
only capable of PCM, then select “Dolby Digital
> PCM”. If uncertain, contact the m anufacturer
of your digital processor.
DTS Out
The third sub-submenu item is for DTS. Here,
like with Dolby Digital there are two choices,
either “DTS” or “DTS > PCM”. Again, the correct
choice will depen d upon the capabilities of your
digital processor. Using the navigation keys,
select the appropriate choice for your systems
capabilities.
Linear PCM Out
The fourth sub-subm enu it em is f or PCM. Her e,
like in the previous examples there are two
choices, either “Down Sample On” or “Down
Sample Off”. T he proper choice depends upon
the capabilities of your digital proces sor. If your
processor can handle medium speed digital
audio sample rates (like 88.2 kS/s or 96 kS/s)
then select “Down Sample Off”. If your
processor is only capable of low speed digital
audio sample rates (44. 1 kS/s or 48 kS/s) then
select “Down Sample On”. It should be noted
that this control will also affect ‘Packed PCM’
material like MLP. The disc content and the
protection scheme used by the disc will also
affect the available data for PCM or packed
PCM material. If copy protection is invoked o n
the disc, then the data rate will be reduced to
low speed (either 44.1 kS/s or 48 kS/s) with a
maximum word length of 16 bits, regardless of
the setting you choose for the “Down Sample”
option. High speed dig ita l aud io ( 17 6.4 kS/s and
192 kS/s) is not availab le from the digital audio
output regardless of its presence on the disc. If
playing a disc with high speed material,
digital audio output ( either S/PDIF or A ES-EBU)
will process the data to either
speed depending upon co py protection and the
setting used in this sub-submenu choice, the
lower of the two will prevail.
medium or low
the
5
Page 6
MPEG Out
The fifth sub-submenu item is for MPEG. It
should be noted that th is is for DVDs that have
MPEG audio not MP3s ( which are covered in a
different section of this manual). As in the
previous examples , there are t wo choic es, e ither
“MPEG” or “MPEG > PCM”. Again the proper
choice will depen d upon the capabilities of your
digital processor.
When you have fin ishe d m aking your choices for
the “Digital Audio Out” section, use the “Left”
navigation key to go back to the left hand
column. Now using the “ Down” navigation key,
select the next section labeled “Video Output”.
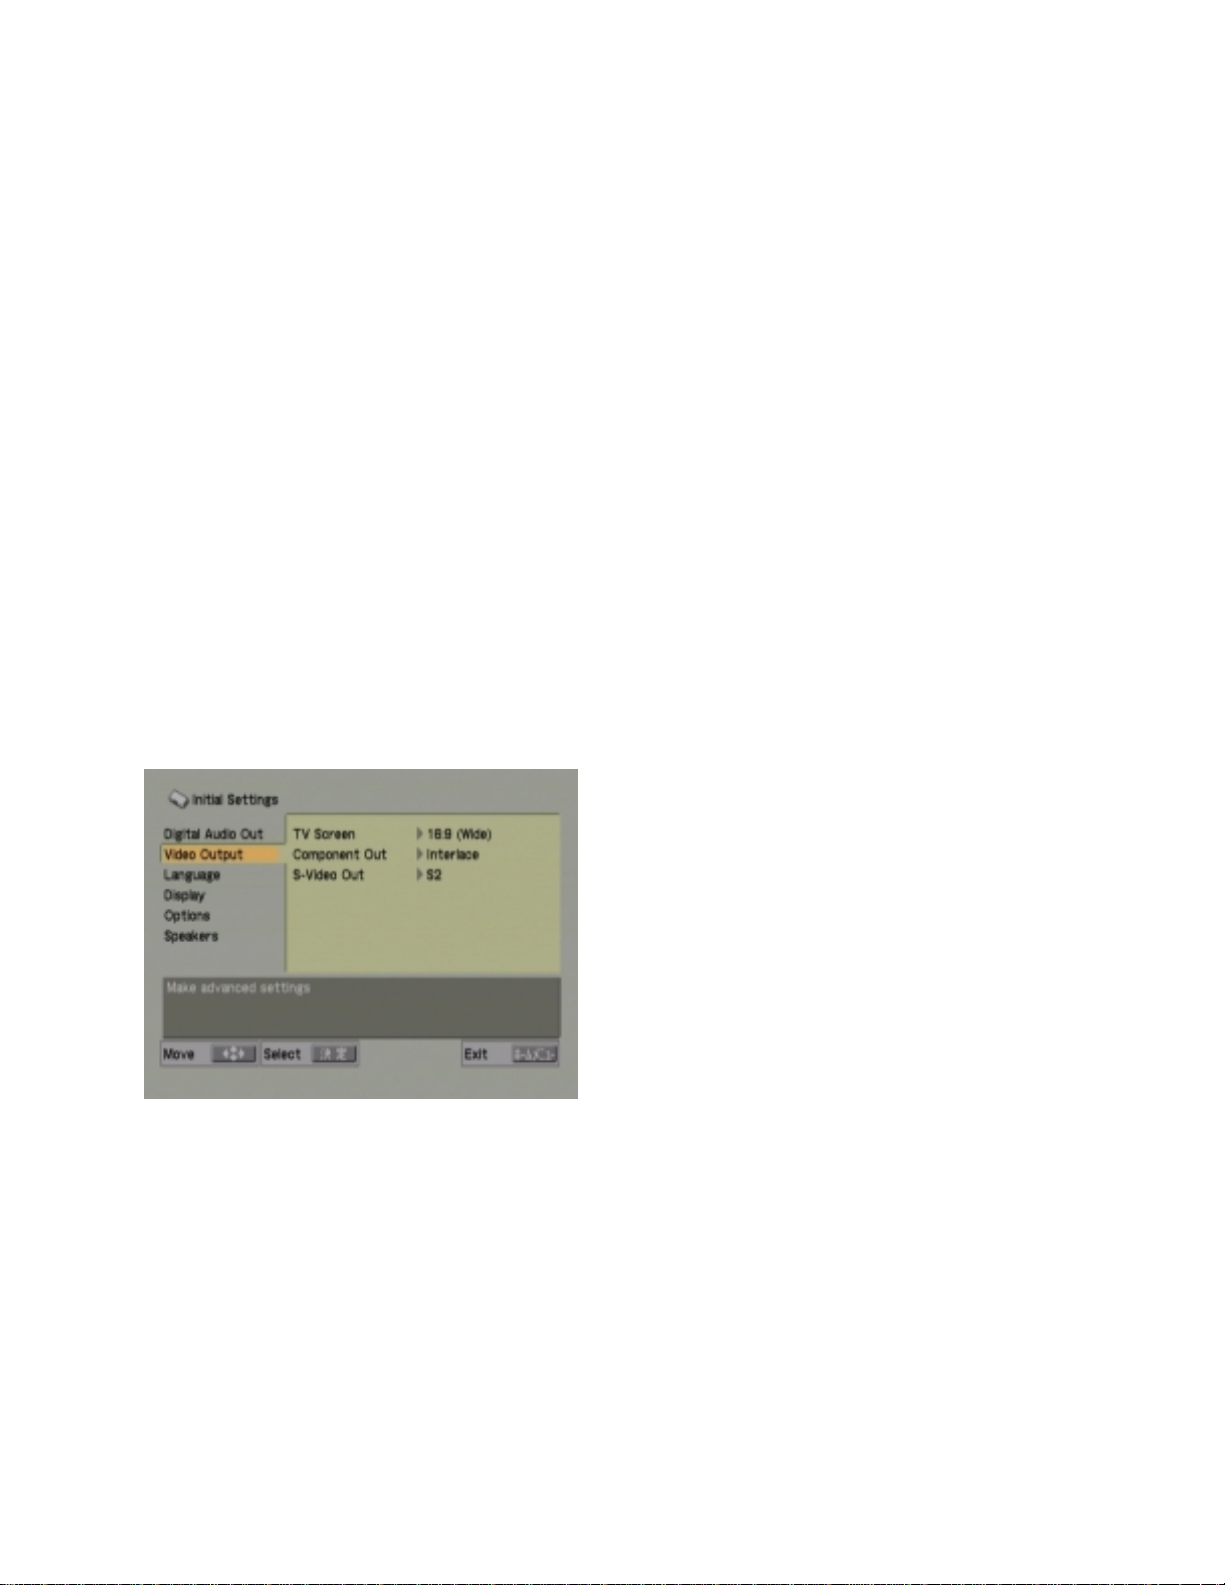
Video Output
There are three sub-submenu choices for the
“Video Out” section. T he correct settin gs will be
based upon the c apabilities of the video dev ice
used in your system. Using the “Right”
navigation key, select th e first of the three subsubmenu items.
TV Screen
Here there are a total of three different choices.
These include “4:3 (Letter Box)”, “4:3 (Pan &
Scan)” and “16:9 (W ide)” . The proper choic e wil l
depend upon the capabilities of your video
device and in the case of a 4:3 aspect ratio
monitor, your personal preference. Using the
navigation and “S elect” keys, choos e one of the
three configurations.
Component Out
The second of the sub-submenu includes, two
choices, either “Progres s iv e” or “ Inter laced” . It is
very important to understand that if the
“Progressive” option is selected and you are
using either the S-Video or composite video
output of the Model Elev en to your vi deo device,
you will no longer have any video available
when in “Progressive” mode. Also, if you are
connected via the Model
video output and your video device dose not
support progressive sig nals, you may also loos e
any video display. Be careful before invoking
the “Progressive” opti on. A confirmation sc reen
will appear giving you one final warning before
the “Progressive” m ode is enabled. Eith er press
“Select” to accept or any other k ey to reject this
final confirmation. Sh ould you make a mis take,
and select Progressive video configuration for
the Model Eleven even though you video device
lacks this capabili ty, there is a recovery routine
that can deactivate this option despite not
having a usable video disp lay. To learn how to
use the recovery routine, contact Muse
Electronics directly and request the instructions.
Eleven’s component
S-Video Out
The final sub-submenu item for this section
handles the wide scr een signa ling f eature o n the
S-Video connector. If you video device is
connected via the S-Video connector and your
monitor supports wide screen signaling, then
you can select the “S1” setting. If your video
device does not support wide screen signaling,
then select the “S2” (def ault) setting. Again, this
option only affects the S-Video output.
You may now navig ate to the left hand column
and using the “Down” navigation key, highlight
the “Language” section.
Language
This submenu item has four sub-submenus
associated with it. Each choice affects the
language default that the Model Eleven uses.
Using the navigation key, highlight the subsubmenu for “Audio Language”.
6
Page 7
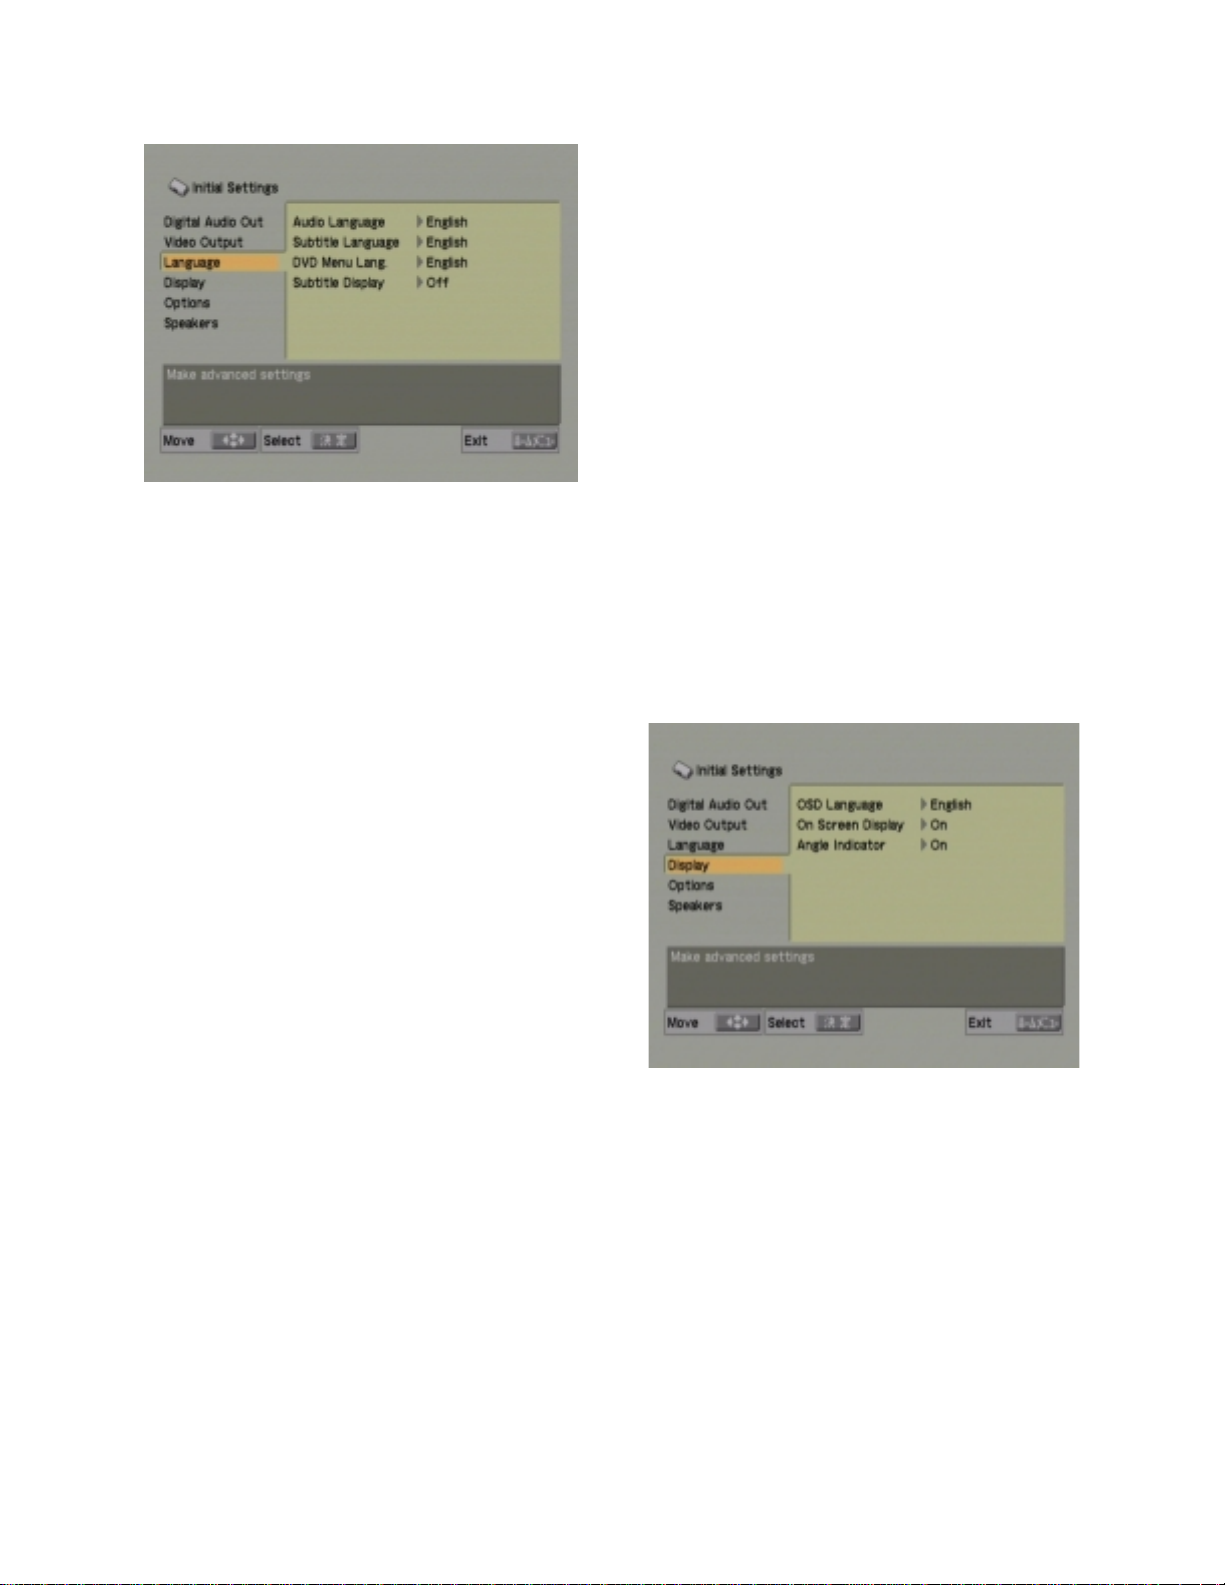
Audio Language
This sub-submenu item has three choices,
“Japanese”, “English” or “Other La nguage”. T he
“Other Language” option will bring up a
submenu which allows you to select additional
languages based up on either a numeric entry or
by using the “Up” and “Down” navigation keys.
It should be understood that this is your
language preference, but the disc in play may
not support the language you have selected or
may override the user choice based upon the
disc authoring. This affects only DVD-Video
discs; all other disc types do not support multiple
languages.
Subtitle Language
Like the previous section, this sub-submenu
allows you to select your preference. The
options are “Japanese”, “English” and “Other
Language”. As in the “A udio Lan guage” s ectio n,
you make your cho ice by using the appropriat e
navigation keys. Your choice may not be
available on the specific disc that you are
playing and may be over ridden by on screen
menus from the spec ific disc. This menu e ntry
simply established your preference. Again, only
DVD-Video discs provide subtitles, so when
playing any other type of disc, this entry will
have no affect.
DVD Menu Language
This sub-submenu has four options for the disc
menu (not all discs have multiple language
menus). The four choices are: “w/Subtitle
Lang”. “Japanese”, “English” and “Other
Language”. Using the navigation and “Select”
keys, make your decision.
Subtitle
This final sub-submenu has two options, either
“On” or “Off”. The entry here establishes your
preference; again the disc may allow this
preference to be overridden via an on screen
choice. Not all discs have subtitles, so despite
selecting “On” in this menu, a subtitle may not
be displayed.
Using the navigation keys, navigate back to the
left hand column and highlight the “Display”
option.
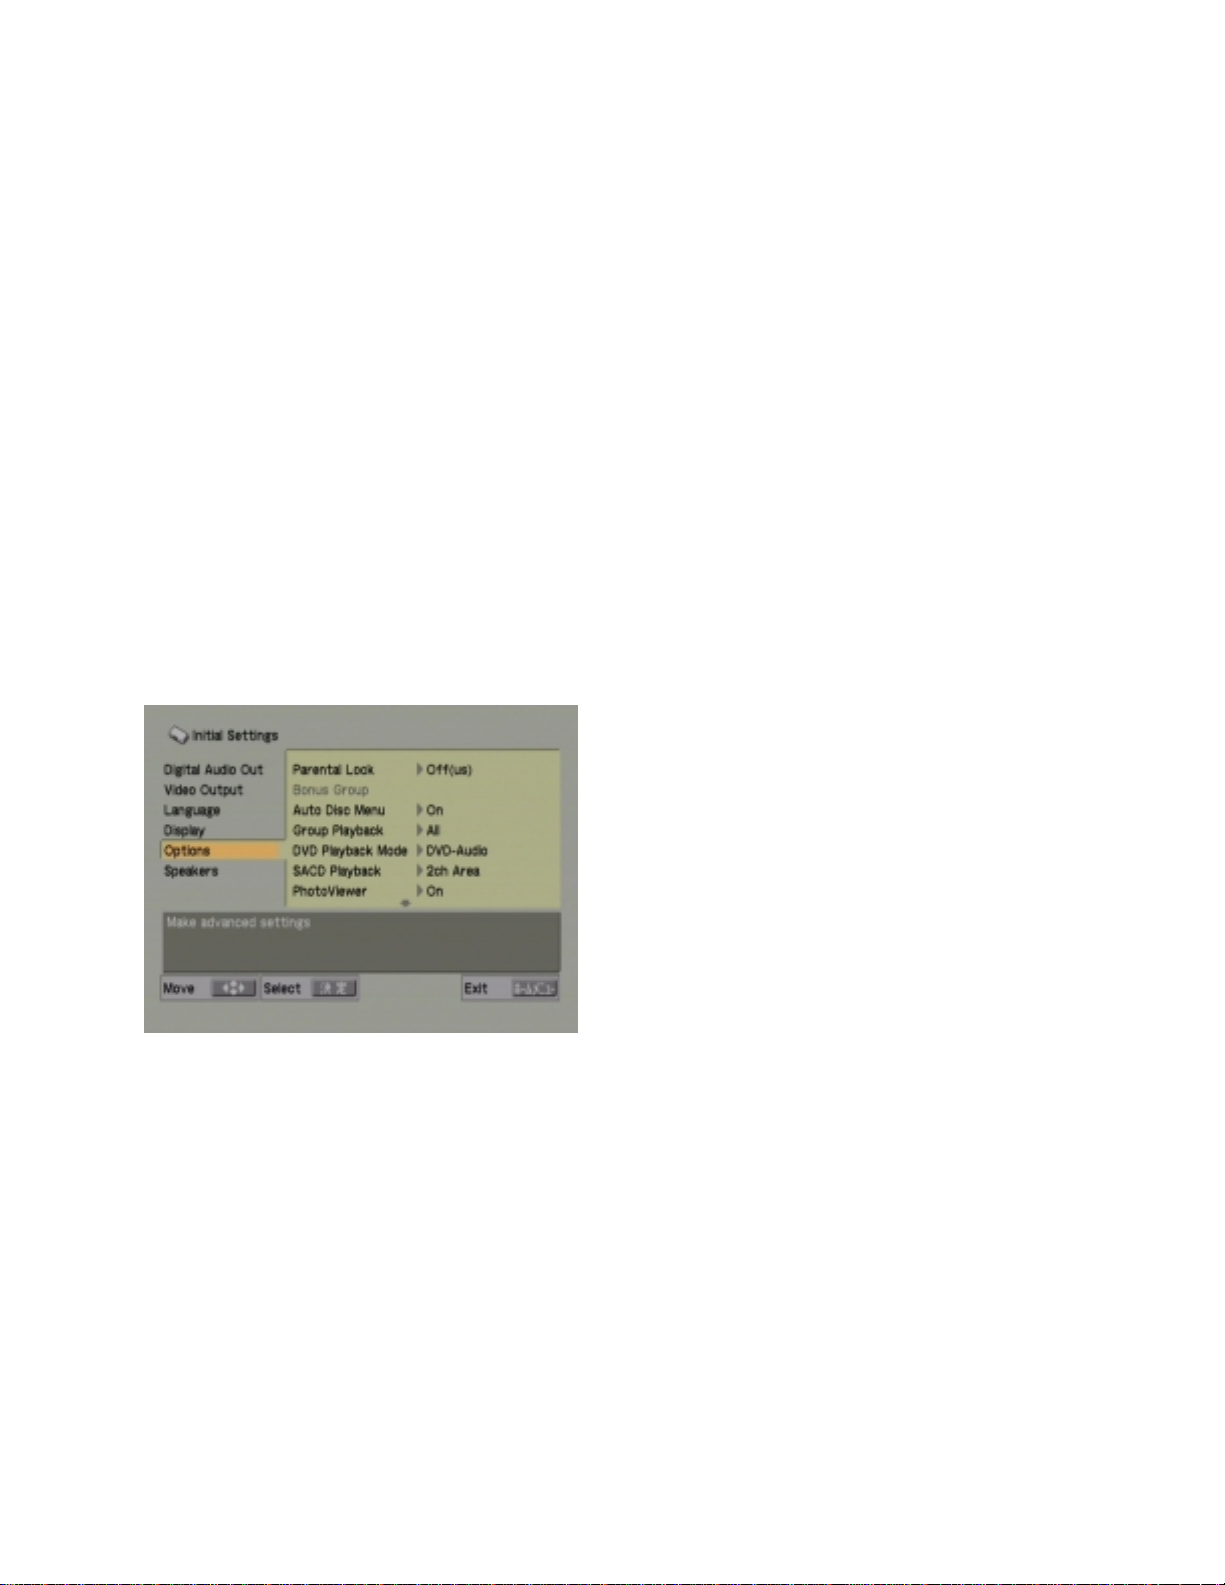
Display
This submenu has three sub-submenu options.
The first of which is the “OSD Dis play”. OSD or
On Screen Display is the display seen on the
video device.
OSD Language
This sub-submenu has two options, either
“Japanese” or “Englis h”. Make your ch oice and
select the appropriate language.
On Screen Display
This sub-subm enu has two options, either “On”
or “Off”. If set to “On” disc play selections will be
briefly displayed on the vid eo device when a ke y
is pressed. If set to “Off” , these messages will
7
Page 8
not be displayed. Make your choice using the
navigation keys.
Angle Indicator
This sub-subm enu has two options, either “On”
or “Off”. If set to “On” when playing a disc with
multiple angles an onscreen camera icon will
appear when an angle change is possible.
When set to “Off” the onscreen icon will not
appear. Not all discs have multiple camera
angles.
Using the navigation keys, navigate back to the
left hand column and highlight the “Options”
entry.
Options
This submenu has a number of sub-submenu
choices. Using t he navigation k eys, choose the
item of interest and make your selection.
Parental Lock
This sub-submenu item has three additional
menus that allow for the entry of a four digit
password, the selection of a maximum rating
allowed and a country code. If you choose to
use the “Parental Lock” feature it is important
that you retain your password. If lost, you will
not be able to play discs that have a rating
above that which was selected. It should be
noted that not all discs have a rating applied.
Despite the content, a disc may still be playable
if it lacks a parental lock rating.
Bonus Group
This sub-submenu applies only to DVD-Audio
discs that have a hidden area. To access this
area, you will need the “Bonus Group”
password. When playing DVD-Audio discs
without a bonus group or when playing any other
type of disc, this sub-submenu will not be
available.
Auto Disc Menu
This sub-submenu s elects the default action for
display on the t op menu of a dis c. The choices
are either “On” or “Off” . If you do not normally
have a video dev ice enabled, you may want to
select “Off”. The dis c in play may still force its
top menu to be played, depending upon the
authoring of the disc, des pite your choice f or this
entry.
Group Playback
This sub-submenu selects if all groups of a
DVD-Audio disc (there can be up to nine) are
played in sequence or if the top menu is
displayed after the f irst gro up is finis hed pla ying.
The choices are either “ All” or “Sin gle” . If you do
not normally have a video device enabled, you
may want to select “A ll” to ensur e that the entir e
contents of the disc plays without requiring an
On Screen selection.
DVD Playback Mode
This sub-subm enu selects eith er the DVD-A udio
or DVD-Video portion of a DVD-A/V disc. The
choices are either “D VD-Audio” or “D VD-Video”.
If you do not normally have a video device
enabled, you may want to select “DVD-Audio”.
If the disc in play has vid eo c ontent in a ddi tio n to
its DVD-Audio content, you will have to select
DVD-Video to view that portion. Remember to
return this setting to DVD-Audio when finished to
be certain that the Model E leven pla ys the DVDAudio section. This entry can also be used to
force the Model Eleven to beha ve as if it were a
DVD-V player.
8
Page 9
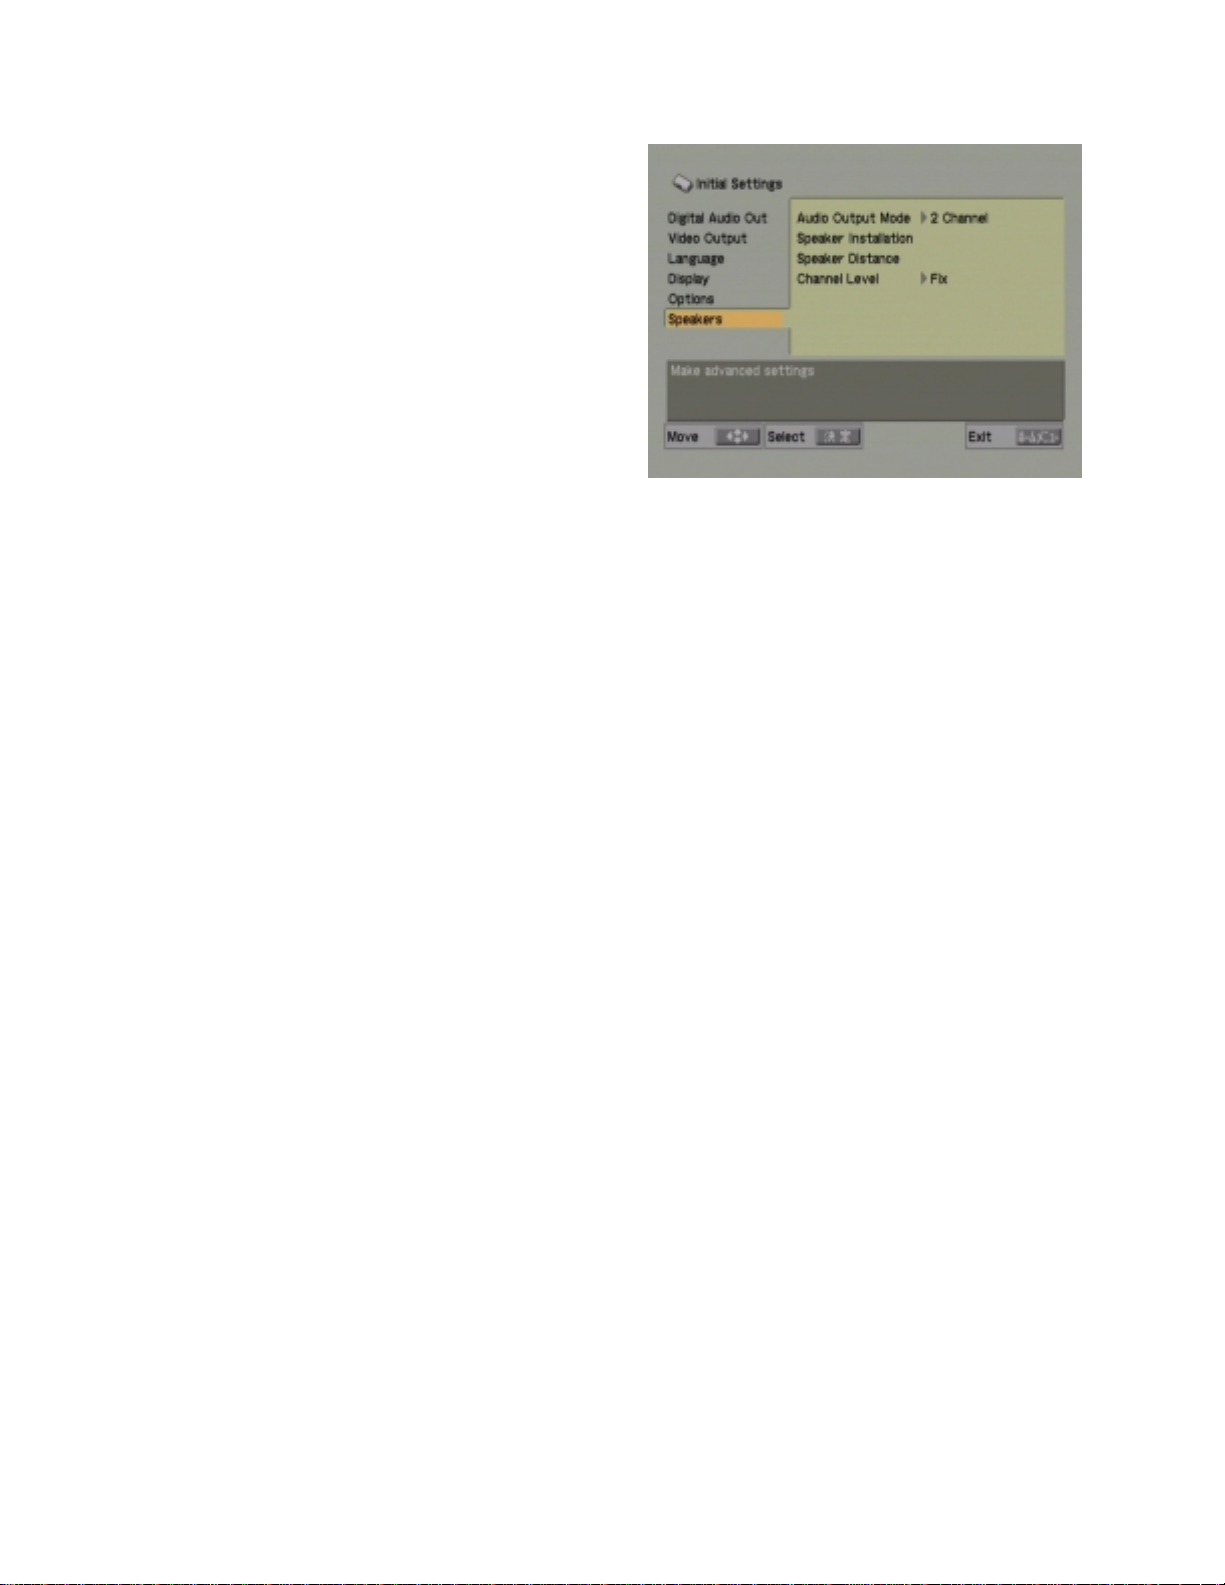
SACD Playback
This sub-submenu selects the behavior of the
Model Eleven when playing SACD discs. The
choices include “2ch area”, Multi-ch area” and
“CD Area. Some SACD discs contain both 2
channel and multi-channel information.
Additionally, some SACD discs contain a CD
area in addition to th eir SACD area. These are
often referred to as “Hybrid SACD” discs. Not all
SACD discs have multi-channel or CD areas.
This menu setting only establ ishes the preferred
behavior of the Model Eleven. The actual
playback will depend both upon the settings in
this menu and the disc in play.
PhotoViewer
This sub-submenu has two choices, either “On”
or “Off”. When set to “On” a dis c that contains
JPEG files will b e pla yed a s a phot o CD. T his is
regardless of an y oth er c on tent on th e d is c. The
setting for this option becomes valid upon the
subsequent disc loaded into the Model Eleven.
DTS Downmix
This sub-submenu has two choices, either
“STEREO” or “Lt/Rt”. W hen playing DTS discs
the and the “Digital Audio Out” section of the
Model Eleven has its “ DTS” option set t o “DT S >
PCM” the Model Eleven can matrix surround
information into a Dolby ProLogic compatible
configuration if the “ DTS Downmix” option is set
to “Lt/Rt”. If the converter connected to the
Model Elevens digital outputs is not Dolby
ProLogic capable, then set this option to
“STEREO”.
Using the navigation keys, navigate back to the
left hand column and highlight the “Speakers”
option.
Speakers
This submenu has four sub-submenu choices.
Using the navigation keys, select the “Audio
Output Mode” area.
Audio Output Mode
This sub-submenu has two choices, either “2
Channel” or “5.1 Chan ne l” . If your Mode l E le ve n
is equipped with either of the multi-channel
modules (balanced or unbalanced) and you
have these channels (c enter, LFE, surround left
or surround right) connected, select the “5.1
Channel” option. If you do not have either of the
multi-channel modules installed or you are not
using any of their out puts, s elec t th e “ 2 Ch ann el”
option.
Speaker Installation
This sub-submenu inv okes a graphical displa y of
the listening room. When selected, you can
provide the Model E leven with inform ation as to
the presence and t ype of speaker that you have
connected to each output. Eac h of the s peaker s
in use can have various different options,
depending upon the specific speaker. A
minimum of two speakers at the front left and
front right locations are assumed. You can
select either large or small for these two
locations. The ef fect that these choic es have is
to determine the use of bass management. If
small is selected for either of these locations,
then a subwoofer is as sumed to be connected to
the LFE output. You cannot select small for
either left or right front without also selecting
“On” for the subwoofer c hoice. Similarl y, when
small is selected f or either the center chan nel or
left and right surround ei ther the front speakers
must be set to large or the subwoofer must be
set to “On”. There must alwa ys be at least one
set of low frequency capable speakers in the
system (either a subwoofer or a large and full
range front pair).
9
Page 10
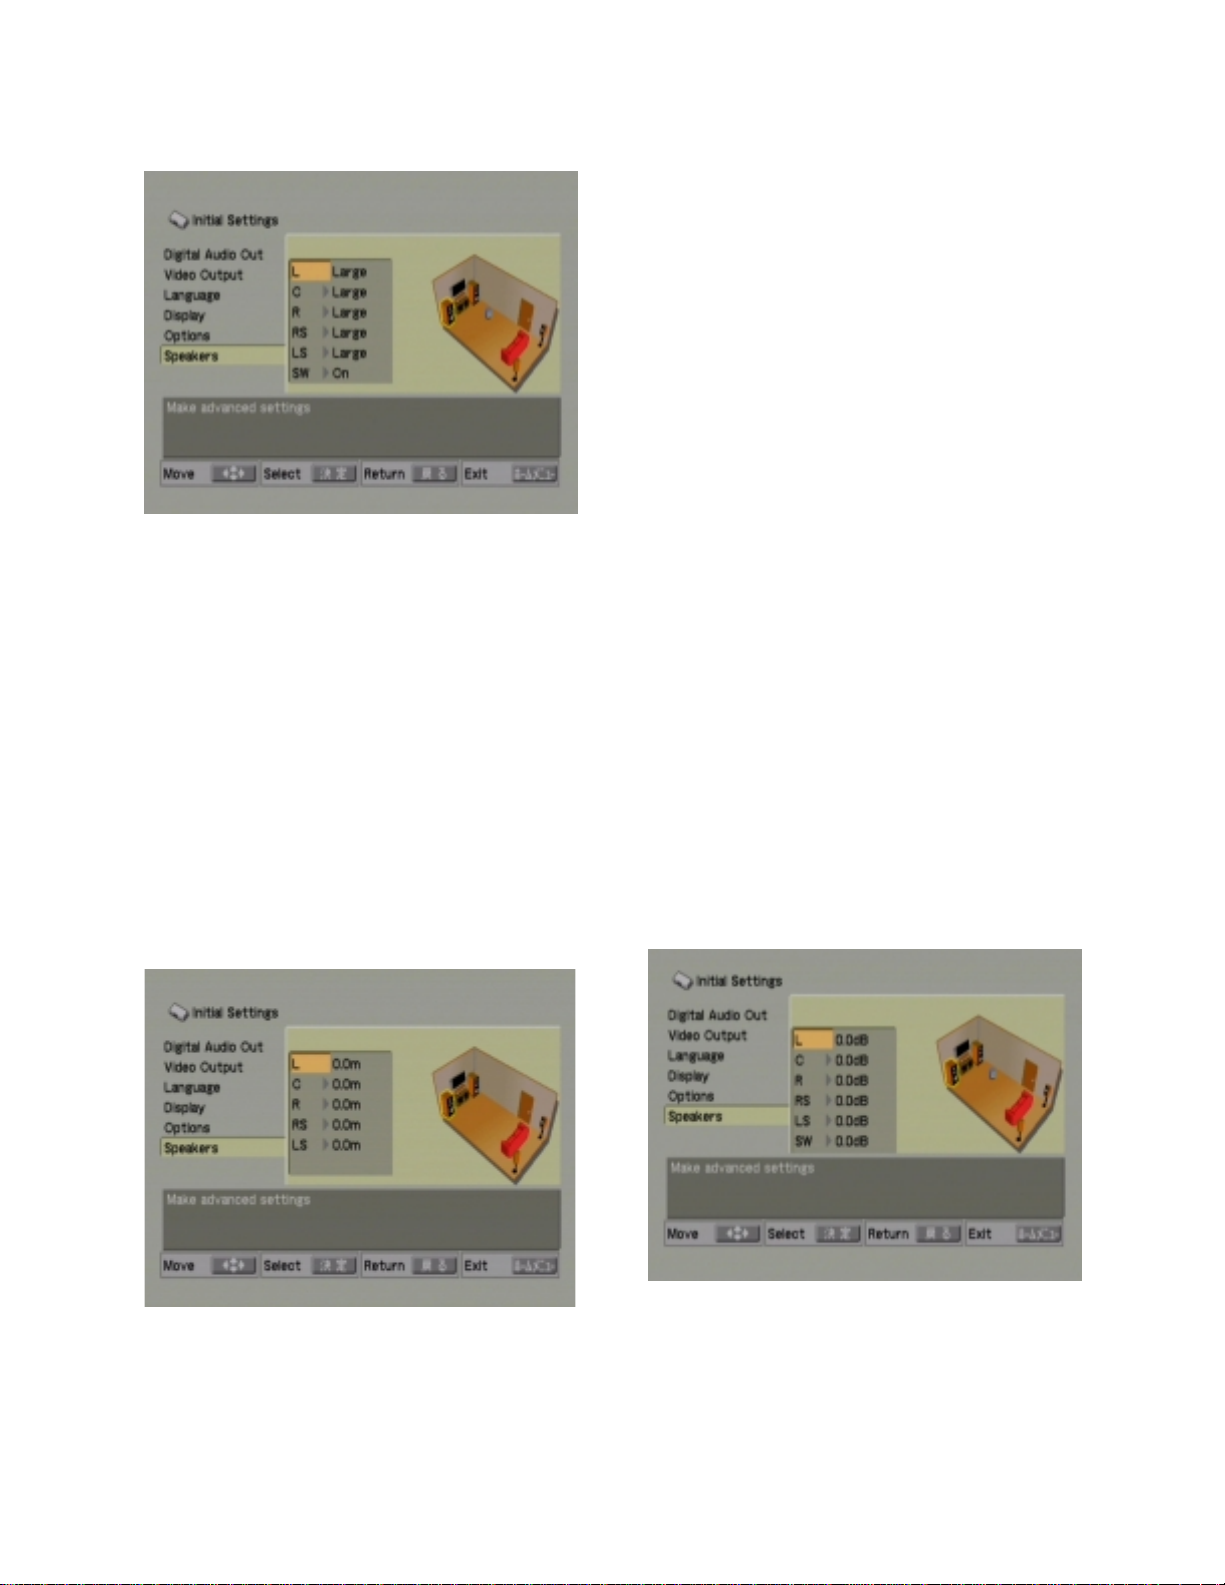
Speaker Distance
This sub-submenu invokes a similar graphical
display as in “Speaker Installation”. Here, for
each speaker shown as present in the “ Speaker
Installation” section, a distance setting (in
meters) is entered. This number entered is in
relationship to the main listening position. The
settings for the front main speakers (left and
right) are the master settings and any change
made to them will affect all other speakers.
After entering their distances, the remaining
three speakers (center, left and right surround)
can be entered. It should be noted that there
are no entries for the s ubwoofer (LFE) output or
any speaker that is not list ed as present in the
“Speaker Installation” settings.
with either of the multi-channel modules
(balanced or unbalanced) and has speakers
connected to any of their outputs (center, LFE,
left or right surround) then select “Variable”. If
your Model Eleven does not have either of the
multi-channel modules or no connections are
made to the multi-channel module, then select
“Fix”.
When you select, “Variable” another graphical
display appears on the video device. Here , for
each speaker shown as present in the “ Speaker
Installation” menu, a choice for level can be
entered. It is highly recomm ended that both the
left and right front s peakers have their level s et
to 0.0 dB. Adjust the other speakers (center,
subwoofer, left and right surround) up or down
as necessary to establish their level in
relationship to the main left and right pair.
Speakers that are not listed as present in the
“Speaker Installation” menu will not have a
corresponding entry in the “Speaker Level”
menu.
Once all six initia l settings s ubmenus have b een
correctly set, you can retur n to the m ain sett ings
menu by first pressing “Shift” followed by
“Return” on the remote. Be sure to press
“Release” once th e main settings menu p age is
displayed. You may now want to go to the
“Audio Settings” menu by navigating to and
highlighting the appropr i ate sec tion. O nc e there,
press “Select” to invoke the “Audio Settings”
menu.
Speaker Levels
This sub-subm enu has two choices, either “Fix ”
or “Variable”. If your Model Eleven is equipp ed
Audio Settings
A submenu titled “Audio Settings” will appear.
This menu has two pa ges, the first of which will
10
Page 11
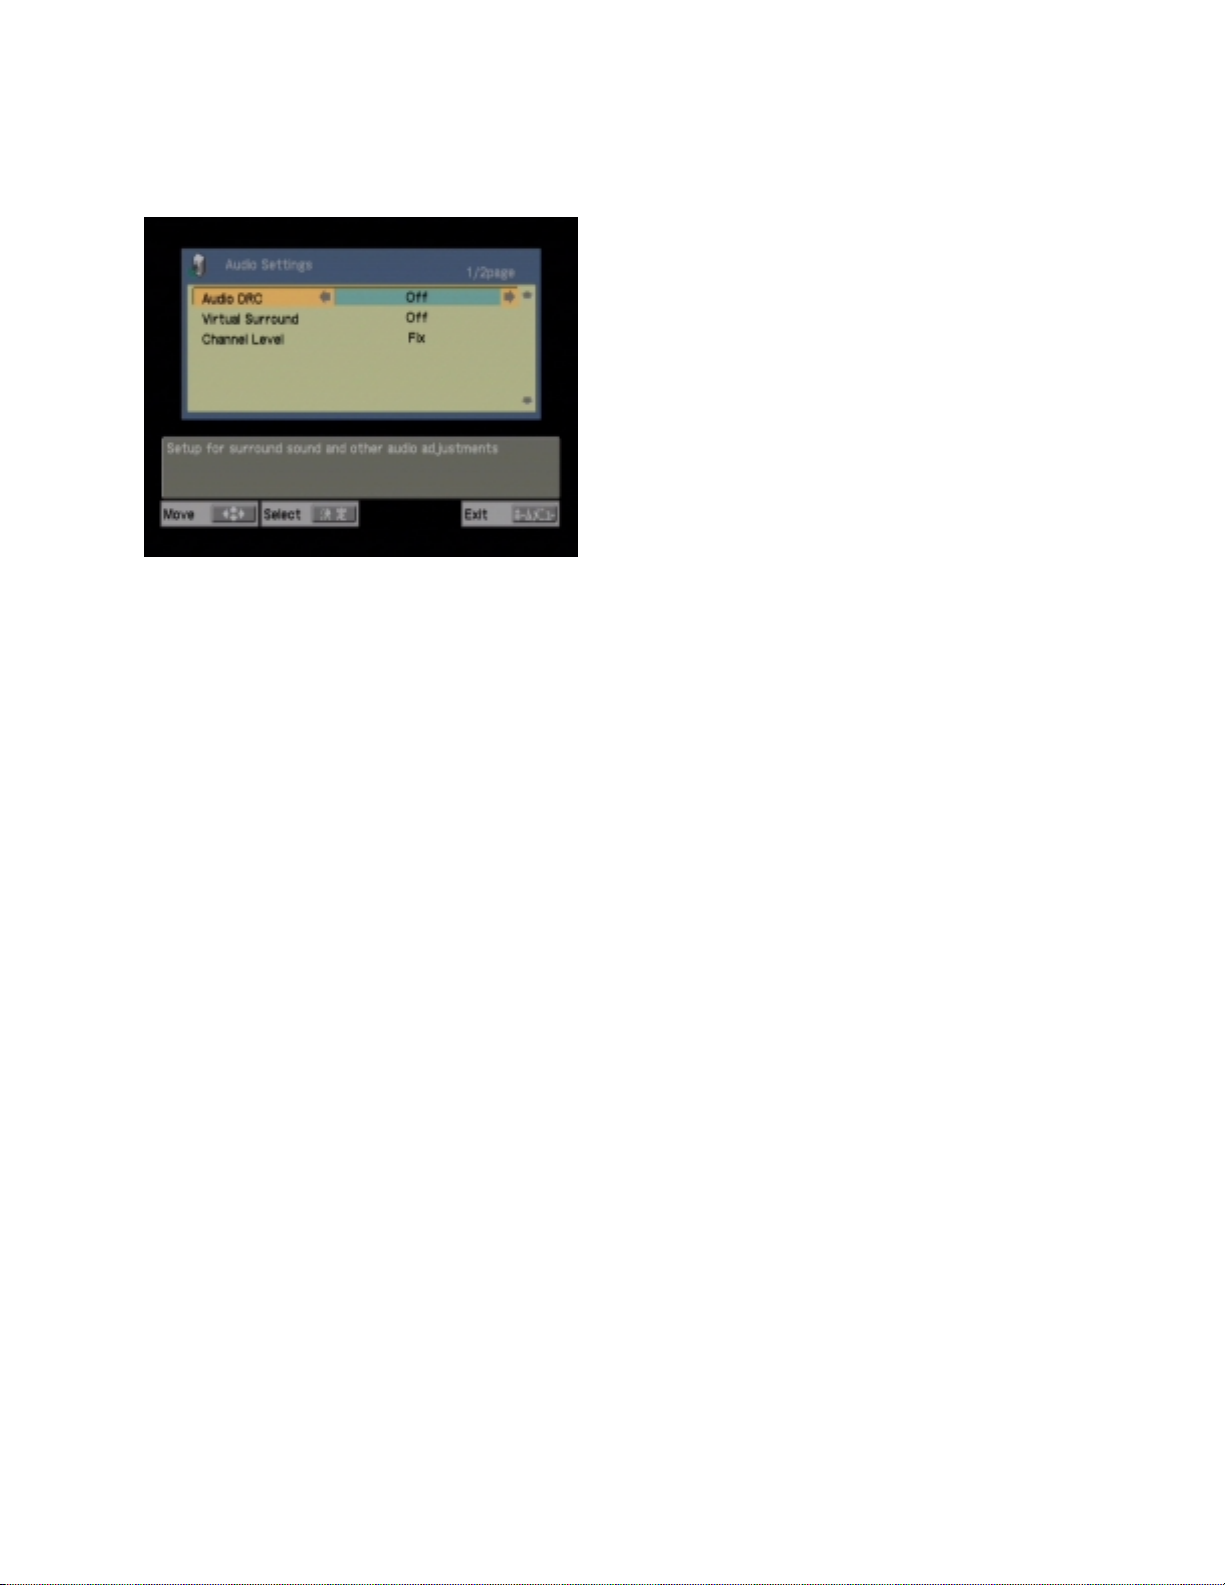
be visible now. The three choices are “Audio
DRC”, “Virtual Surround” and “Channel Level”.
Audio DRC
This menu option has two choices’ either “Off”
(default) or “On”. Audio DRC is a circuit that
reduces the total dynamic range of the audio
from discs encoded with Dolby Digital.
Normally, this setti ng would be “Off” in order to
provide the maximum dynamic range possible.
When listening at ver y low levels, such as m ight
be done to not disturb others in the household
late at night, the use of the DRC control will
raise low levels and reduce high levels making
the entire audio conte nt more even and easier t o
understand. This effect is most effective for
DVD Video discs and least effective for music
content. Again, it should be noted that the Audio
DRC control affects only discs that have Dolby
Digital audio coding. In order to change the
DRC setting use the “Left” and “Right”
navigation keys to c hange the setting to or from
“Off” to “On”.
Virtual Surround
To access the “Virtual Surround” menu choice,
use the “Down” navigation key on the remote.
When selected, “Virtual Surround” will be
highlighted. The choices for this control are
“Off” (default) and “V/SRS TruSurround”. The
use of this feature is based upon personal
choice and the configur ation of your system. If
your Model Eleven has either of the multichannel options installed and you have
configured your system for multi-channel
operation, “Virtual Surround” is not supported.
If, however, your system is equipped with only
two loudspeakers, then “Virtual Surround” can
be used to simulate lateral speaker locations.
This effect is enabled when both the “Virtual
Surround” option is selected and a disc with
multi-channel m aterial is being played. “Virtual
Surround” is most effective when playing
theatrical discs and least effective when playing
music ones. Selection of either mode is
accomplished while “Virtual Surround” is
highlighted via the “Right” and “Left” naviga tion
keys.
Channel Level
See “Initial Settings” menu “Channel Level”
submenu for information on this section.
Video Adjust
Be certain that the Model Eleven is not in shift
mode (blue LED illuminated) by pressing the
“Release” button on the r emote. Now, highlight
and select the “Vid eo Adjust” s ubmenu by using
the navigation and select keys of the remote.
There are three possible entries for this s ection.
“Standard” sets the video levels (white, black
and chrominance) to their factory defaults.
“Memory 1” and “Memory 2” each allow for
individual adjustments for each of the three
video levels. You can adjust and recall any of
these settings at anytime. It is recommended
that the “Standard” setting be used when
calibrating your video de vice. The two memory
settings can be used for video contents that
dose not conform to a calibrated video device.
To exit the “Video Adjust” submenu use the
Return remote command by first pres sing “Shift”
followed by “Return”. Remember to press
release once the main menu is displayed.
Other Home Menu choices will be covered later
in this manual. You are no w ready to begin to
use your Model Eleven. Despite the apparent
complexity of the setup section just covered,
day-to-day use of the Model Eleven is very
simple. You will not lik ely need to revisit these
setup menus unless your system configuration
changes.
11
Page 12
Disc Play – CD
To play a CD, first open the disc tray by pressing
“open” on the fr ont panel. Place the disc in the
tray with the data side down (label up). Then
either press “open” on the front panel or
“Play/play” on either the rem ote or front panel to
begin play. The table of contents of the CD will
be read, and play will begin at the first track.
You can stop play at anytim e by either opening
the tray by pressing “open” on the f ront panel or
by pressing “Stop/stop” on either the remote or
front panel.
CDs that have more than a single trac k can be
navigated between a vailable track s by using the
“Skip+/skip+” or “Skip-/skip-“ buttons on either
the remote of front panel. Navigatio n within any
track can be accomplished by using the
“Search+” and “Se arch-“ controls on the rem ote.
Disc play can be temporarily suspended by
pressing “Pause/pause” on either the remote or
front panel. Disc play can be resumed by
pressing “Play/pla y” on either the rem ote or f ront
panel.
With a CD playing in the Model Eleven,
information as to the track number and time in
track is displayed on the front panel. If the
“Display” control on the remote is pressed, the
display will change for time in track to time
remaining in trac k. If allowed in the s etu p menu,
the “Display” control will also display detailed
information on the disc on video device.
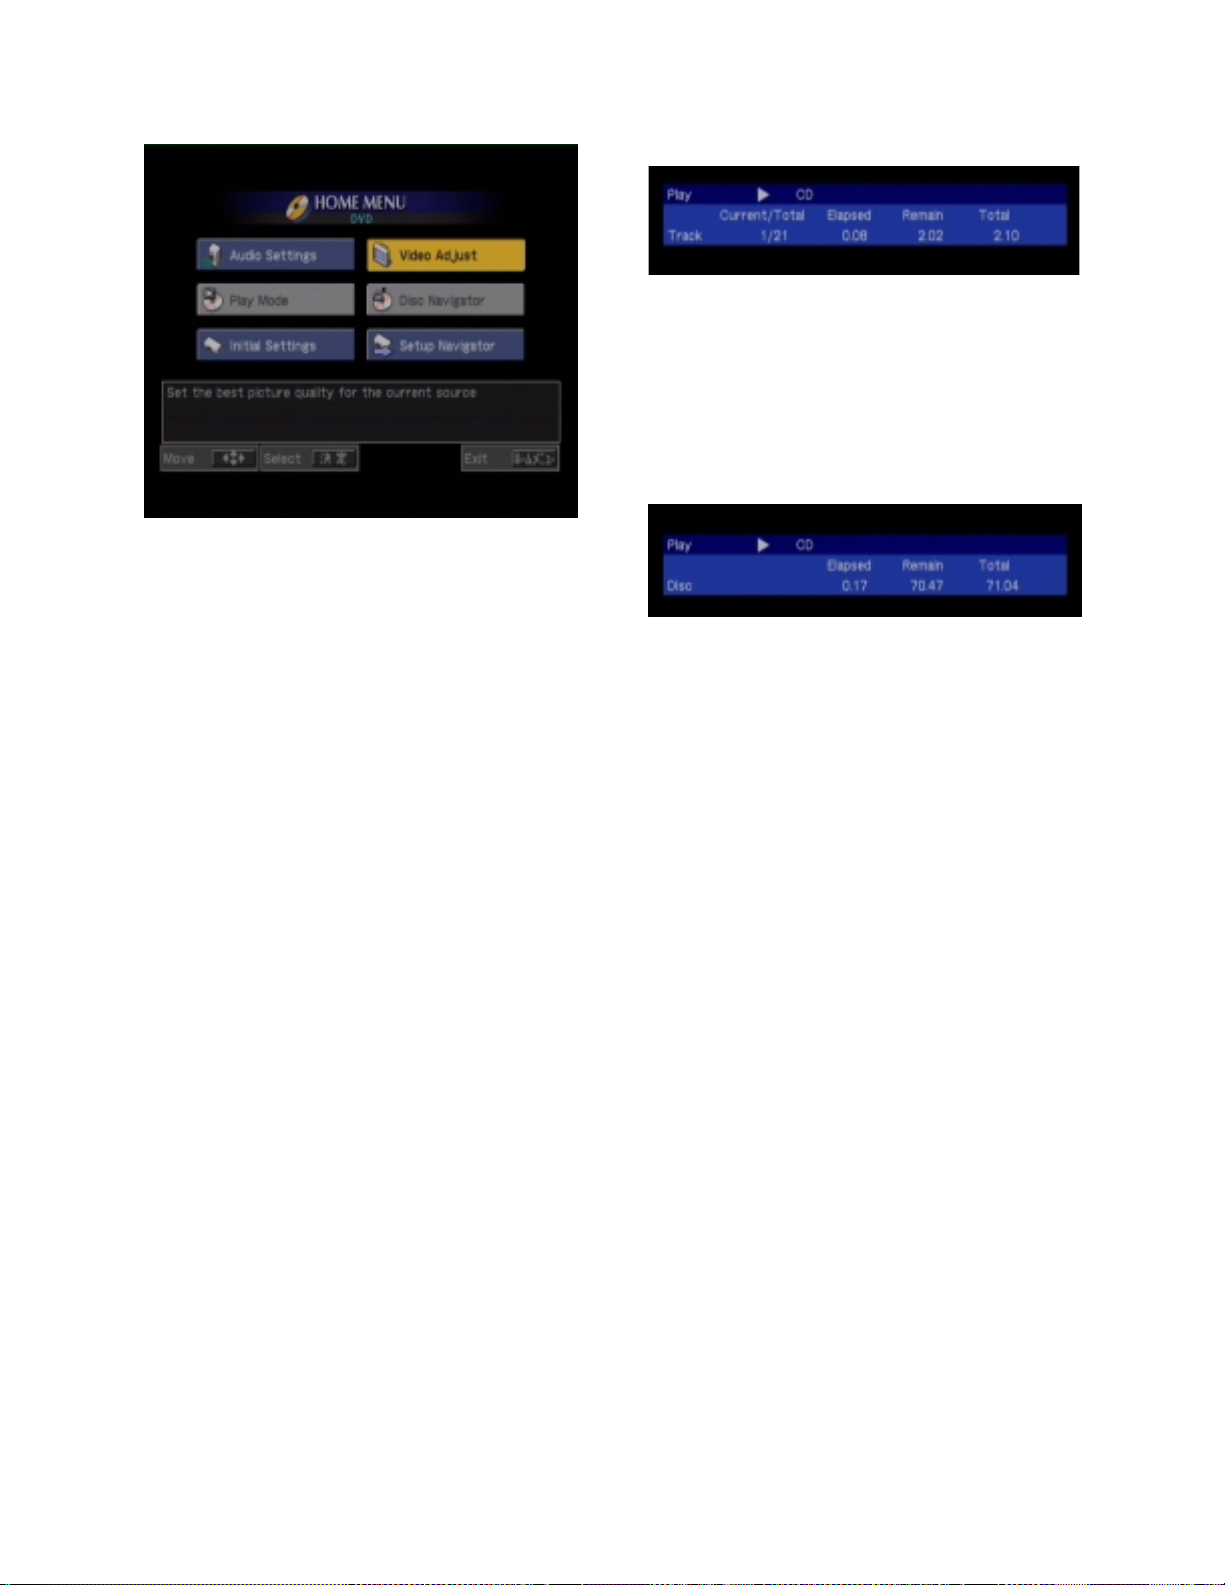
Information about the current and total number
of tracks, elapsed time in the curr ent track, tim e
remaining in the current track and total disc
playing time is displayed.
A second press of the “Display” button on the
remote will cause the f ront panel to display the
remaining time of the entire disc. The video
device (if allowed in s etup) will also now display
new information on the disc being played
including the elapsed time in play, the total
remaining time f or the disc and the total pla ying
time of the disc.
A third press of the “Display” button on the
remote will cause the front panel display to
return to its initial configuration and will
extinguish the disc information on the video
device.
Pressing the “Menu” butto n on the remote while
playing a CD will cause the video device to
display the “Disc Navigator”. This navigator
consists of a columnar listing of the tracks
numbers as well as the current track being
played. A subsequent press of “Display” will
cancel the OSD on the video devic e. During the
period when an OSD item is present, the front
panel of the Model Eleven will display GUI
(Graphical User Interface).
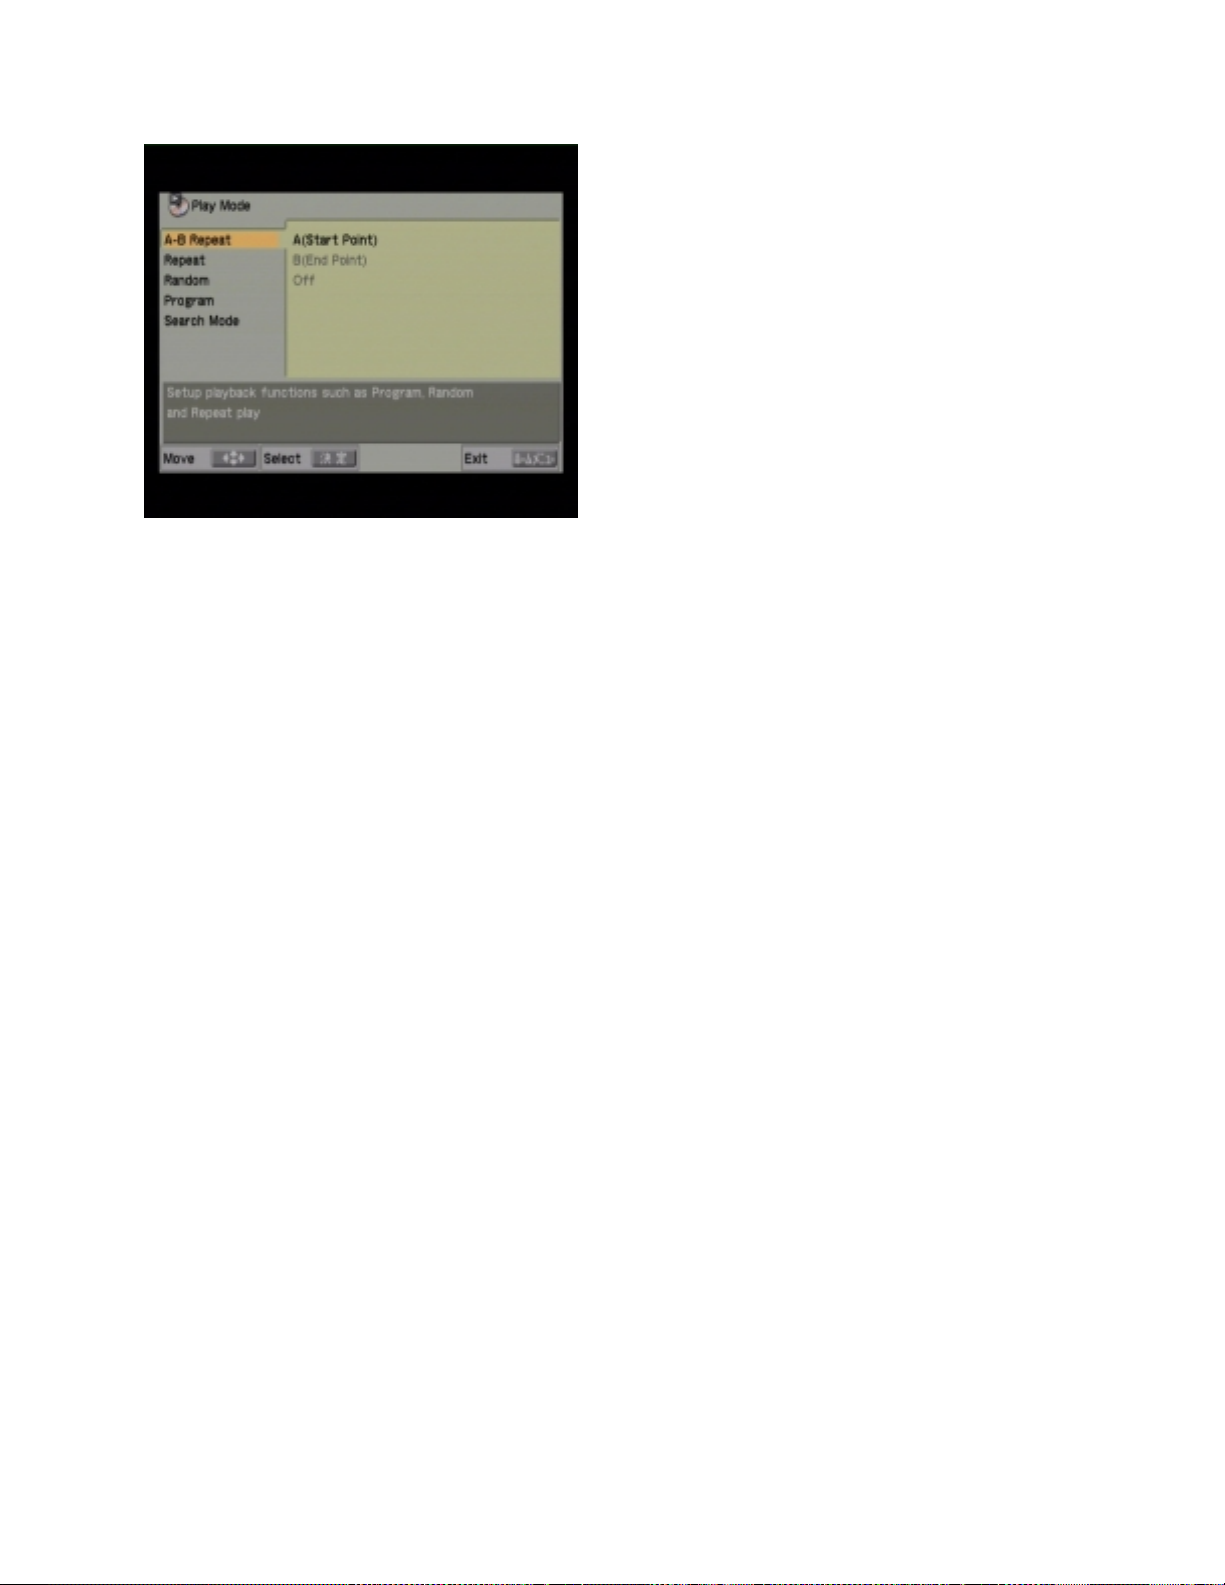
Pressing the “Repea t” button on the rem ote will
invoke a video dis play that allows for a n umber
of different pla y modes to be selected. Eac h of
the five submenus has a number of different
options.
12
Page 13
A-B Repeat
The first of the submenus, “A-B Repeat” has a
sub-submenu with three possible choices. “A
(Start Point)” is used to mark the beginni ng of a
loop. “B (End Point)” is used to mark the end of
a loop. When both A and B points are selecte d
play will endlessly loop f rom the starting point to
the ending point and then begin again.
Selecting the sub-su bm enu “O ff” option ends “ AB Repeat” mode.
Repeat
The second of the submenus, “Repeat” has a
sub-submenu with thr ee poss ible choices . “Disc
Repeat” causes the Model Eleven to play the
disc from beginn ing to end over and over, unt il
the disc is either ejec ted or the “Repeat” mode is
ended. “Track Repeat” behaves in a similar
fashion as “Disc Repeat” with in any given track.
“Repeat Off” ends either repeat mode.
Random
The third of the submenus, “Random” has a subsubmenu with two pos sible choices, either “On”
or “Off”. Selecting “On” for “Random” causes
the disc play order to be randomized.
Program
The forth of the submenus, “ Program ” has a f our
sub-submenus. The first of the sub-submenus
“Create/Edit” enabl es a two-column displa y with
the “Program Step” listed on the right and the
“Track” choice listed on the right. Entries for
each step can be from any of the available
tracks. To exit program, use the return
command by first pressing “Shift” and then
“Return”. Be sure to press “Release” when
exiting the “Create/Edit” function.
Playback Start – Playback Stop
For previously creat ed programs, the “Playback
Start” and “Playback End” entries enable and
disable the program.
Program Delete
This entry erases a previously created program.
Search Mode
This last submenu option allows for direct
numeric track entry. Keep in mind that all the
numeric functions on the remote at blue
therefore shifted f unctions. To enter a num eric
value, first press the “Shift” key on the rem ote,
when done with numeric entry, don’t forget to
press the “Release” key to return to normal
remote commands.
Disc Play – SACD
Despite being based upon DVD technology,
SACDs have their own, uniqu e behavior, which
is in many ways, is similar a standard CD. In the
case of the Model Eleve n, its pla yback functions
when playing a SACD are nearl y identical t o that
when playing a CD. Each of the controls
described in the Disc Pl ay – CD section of this
manual; A-B Repeat, Repeat, Random,
Playback Start, Playback Stop and Search Mode
for CD play can be applied when playing a
SACD. Do keep in mind that if your Model
Eleven is configured to play the multi-channel
portion and the disc in play has multi-channel
content, the Model Eleven will process the
surround channels based upon the setup of
each speaker as configured in the setup menu.
Disc Play – DVD Audio
DVD Audio discs have behaviors that are based
as much upon the disc in play as the
configuration of the Model Ele ven. Where DVD
Audio discs differ from the DVD Video
counterparts is in their support of loss less
13
Page 14
compression (MLP) and the total data rate that
can be applied to the audio portion of the
stream. DVDs, regardless of their type, have a
maximum data rate of about 9.8 Mega bits per
second. DVD Video discs have an upper data
rate limit for the audio portion of about 6.144
Mega bits per second, DVD Audio discs do not
have this same restriction and can use nearly
the entire 9.8 Mb limit. In practical terms, with
discs that have stereo material, both Audio &
Video versions can s upport sam pling rates of up
to 96 kS/s (kilo Sample per second). Where
DVD Audio discs show their advantages is in
their ability to supp ort high sam ple rate (176. 4 &
192 kS/s) stereo PCM content (either
uncompressed or loss less compressed) and
when playing surround material as it can be
PCM with up to six channels and up to 96 kS/s
rates.
DVD Audio discs may contain some video
content in the form of still images ( one or more
per track). DVD Audio discs can also contain
supplemental information such as lyrics and
links to motion video content (within the DVD
Video portion of the disc). Well-authored DVD
Audio discs behave in a manner very similar to
that, which has becom e to be expected of CDs.
With these discs, simply open the drawer and
press play, the disc will play for the first to the
last track. The organization of the tracks on a
DVD Audio disc can be organized into sections,
named groups. These groups can contain
different material t ypes, some might hav e stereo
content, and others might have surround
content. The disc itself predominantly
determines the actual b ehavior of a DVD Audio
disc. With this comment in mind, we will
describe some of the behavior that the Model
Eleven will have when playing DVD Audio discs.
The basic track navig ati on c ontrols , “ Skip-/skip-“,
“Skip+/skip+”, “Search-“ and “Search+” are
similar to CD disc play. “Pla y/play”, “Stop/stop”
and “Pause/pause” beh ave as most have come
to expect.
It is the presence of an OSD or On Screen
Display that is the major departure for DVD
Audio discs. This menu of options is displayed
on the video device by the Model Eleven.
Reviewing the disc pack aging will provide m uch
of the information necessary to determine the
available contents. Keep in mind that if you
have a video device attached, muc h information
on the track in pla y can be obtained b y pressing
the “Display” button on t he remote. Data rates,
word depths, type of coding, disc and track
playing time are but some of the available
information.
Even if you do not inten d to use a video device
with your Model Ele ven, it is recomm ended that
you temporarily attach one while you are
becoming familiar with its operation. After a
short period of time, you will find that the on
screen information is no longer necessary as
you will have fully master all the capabilities of
the Model Eleven.
When playing a DVD Audio disc, much
information on the disc contents is available b y
using the “Display” button on the remote.
The front panel of the Model Eleven will show
the group and track number currently being
played along with the time in the current track.
A first press of “Display” will cause the front
panel to display the time remaining in the current
track.
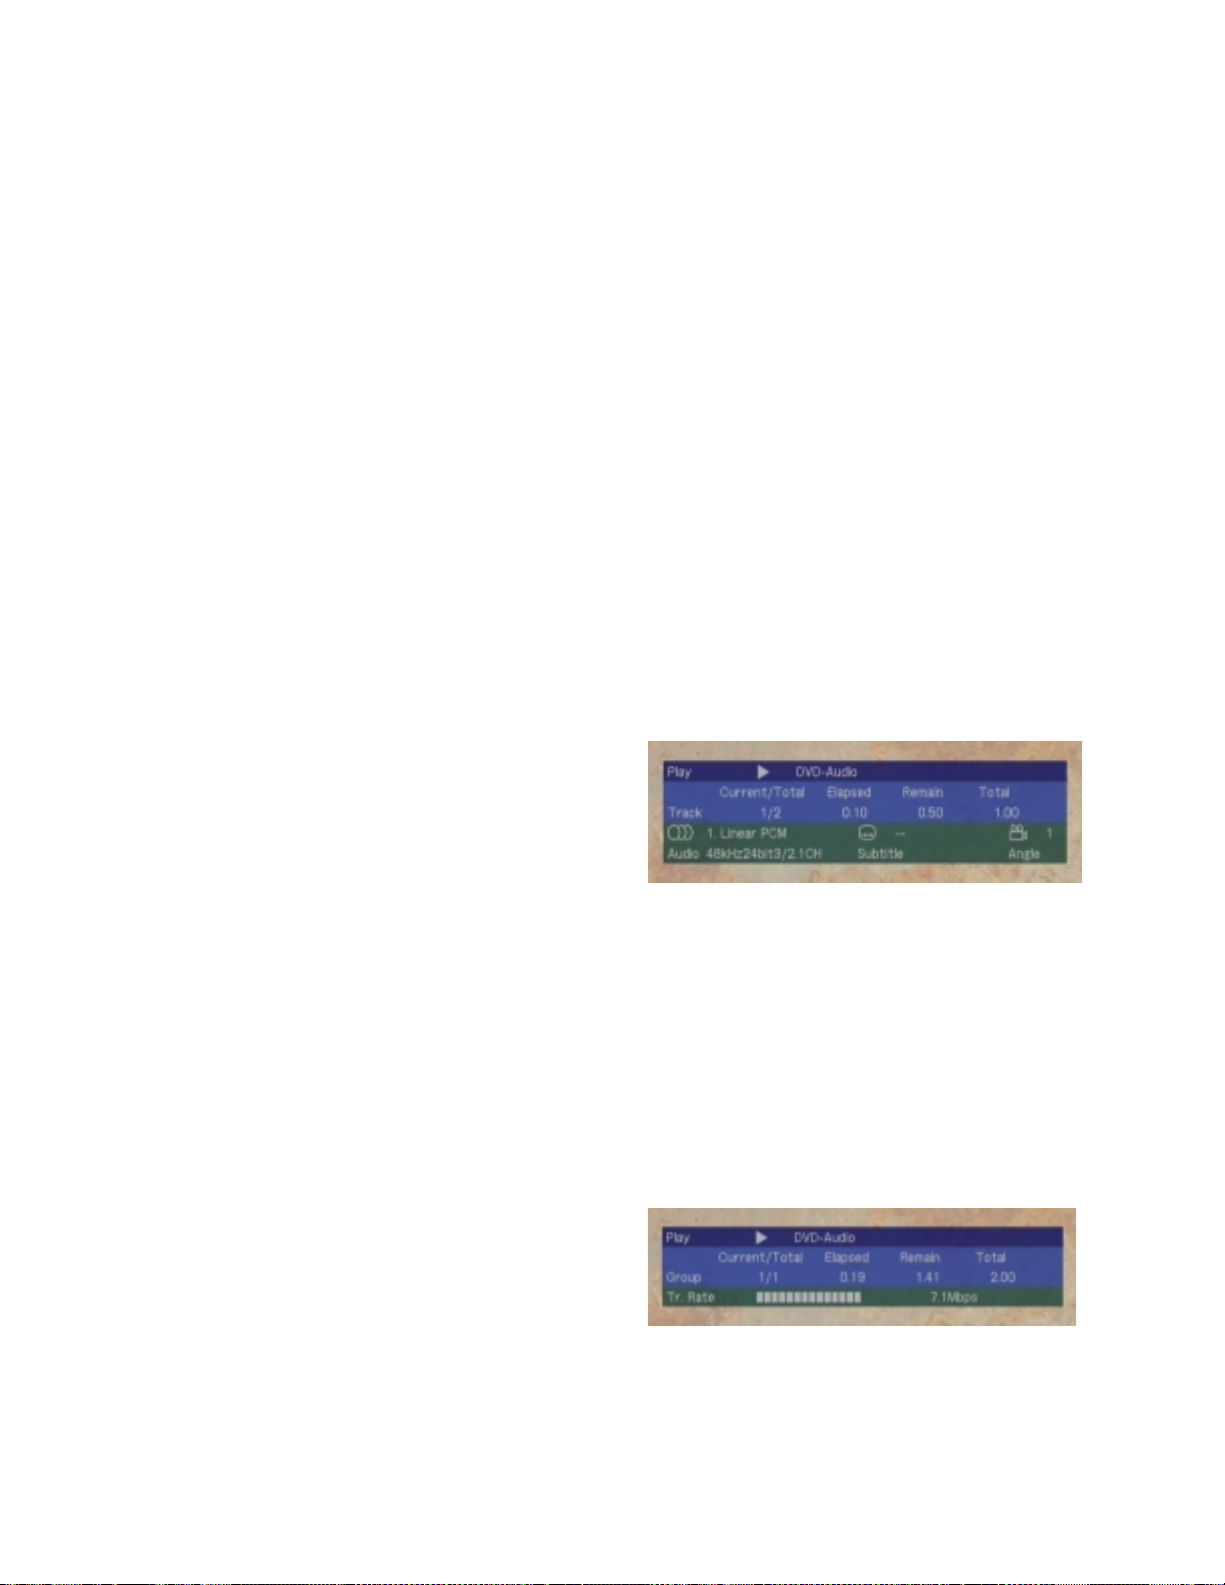
The OSD includes information on the current
and total number of track s in the current group.
The elapsed time in the c urrent track as well as
the remaining and total time for the current track.
The type of video coding, either PCM or PPCM
is indicated for the current group. Audio
sampling rates and word depth along with the
number and types of channels is also shown.
A second press of “Dis play” will cause the front
panel to display the time remaining in the current
group.
The OSD includes information on the current
and total number of groups contained on the
disc as well as the total playing time for the
14
Page 15
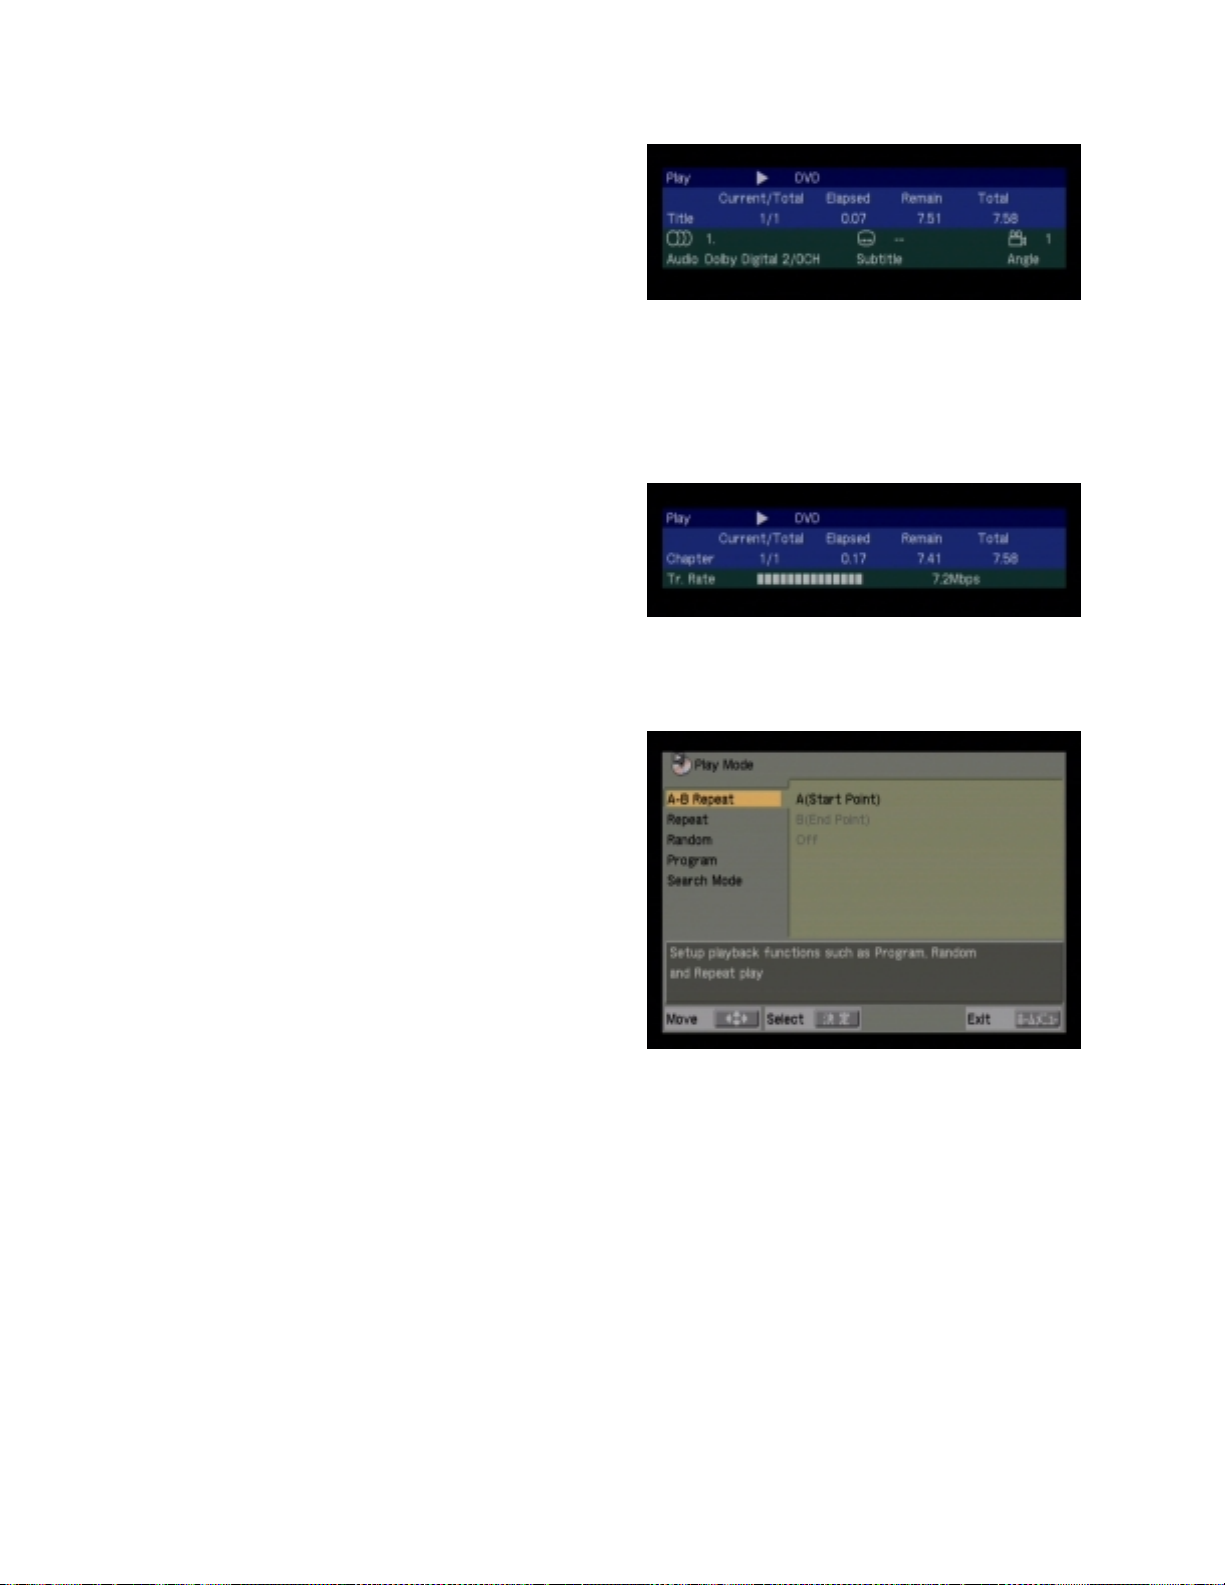
current group. A bar graph, along with a
numeric display, shows the disc data rate in a
dynamic manner.
A third press of “Display” will cause the front
panel display to return to its initial mode along
with extinguishing the OSD.
Disc Play – DVD Video
DVD Video discs will utilize the greatest number
of features of the Model Eleven. Like all DV Ds,
Video ones determine a great portion of the
nature of behavior exhibited by the Model
Eleven. Characteristics like aspect ratios,
subtitles, multiple languages, multiple camera
angles are but some of the unique differences
that each DVD Video can exhibit.
Two of the most often used controls while
playing Video discs are “Title” and “Menu”. The
title control forces play of the d isc to jum p to the
initial menu of the disc. No m atter where in t he
disc the Model Eleven is at, pres sing this c ontrol
will force the player to exe cute the first menu as
if the disc had just begun play. Often choices
such as language and s ubtitle usa ge are locate d
in the first menu.
The “Menu” control acts as a toggle be tween the
current playing point and another point.
Subsequent presses of “Menu” will jump back
and forth between two points on the disc.
The basic disc play contro l s ; “Stop” , “Paus e” and
“Play” behave in a fairly predictable manner.
Disc navigation controls; “Skip - / Skip +” and
“Search - / Search +” navigate between and
within chapters of the disc.
Pressing the “Display” control while playing a
Video disc will bring up a series of information
displays, in much the same was as previously
described for DVD Audio disc play. The first
press of “Displa y” will provide inf ormation on t he
current and total num ber of titles pr esent on the
disc, the elapsed and remaining time in the
current chapter and the t otal pla ying time for the
current title. Subtitle and Angle information
along with the audio c oding format and number
of and type of channels is also provided.
A second press of the “Display” button will
provide information on the current and total
number of chapters, the elapsed and remaining
playing time for the current chapter as well as a
bar graph showing the dynamic data rate from
the disc.
While playing a DVD Video pressing the
“Repeat” button on the remote will in voke an on
screen menu of options.
This menu provides ac cess to A-B Repeat, T itle
and Chapter Repeat, Random Chapter play,
Programmed Chapter Play and Chapter Search
modes. Each option is accessed v ia the remote
navigation and selec t keys. When finished with
this menu, you can return t o normal disc play by
simply pressing “Repeat” a second time.
During normal disc play, selecting the shifted
function “Action” on the remote can access the
Home Menu. Not all sub menu choices are
available during play. Those that are not
available will be grayed out and cannot be
selected with the “Select” button on the remote.
15
Page 16

A bit of practice will make the day-to-day
operation of the Model Eleven much more
intuitive. The optional Remote-1 can access
most of the functions that are required for
normal disc play; however, the multi-function
remote will be necessary for accessing any of
the setup menus.
Maintenance
The Model Eleven requires no maintenance
during its normal usage. The top cover and front
panel can be cleaned with eith er a dry soft cloth
or a soft cloth moistened with a m ild household
cleaner. The front panel display is easily
scratched so be especially careful when
cleaning it.
With the exception of the very rare possibilit y of
a blown mains fuse, no aspect of the Model
Eleven is user serviceable. The OPU (Optical
Pick Up) is considered a wear item and will
require occasional replacement as the Model
Eleven ages (se veral thousand hours). Should
you encounter difficulties p laying a known good
disc (especially dual layer discs) it may indicate
that the OPU has reac hed “end of life”; contact
either Muse or your Muse dealer to discuss
having the OPU replaced.
Additionally, there m ay be upgrades in the form
of software and hardware changes that have
occurred since your Model Eleven was
manufactured. Check the Muse websit e for any
update information that has become available
for your Model Eleven.
Warranty
All Muse products sold in North America are
covered by our stan dard 90 day parts and labor
warranty. This standard warranty can be
extended to a period of three years (one year on
the OPU and moving parts) by completing and
mailing to Muse the Extended Warranty
Registration form along with a copy of the Bill of
Sale from your authorized muse dealer. Both
the registration f orm and the copy of the Bill of
Sale must be mailed within ten days of your
purchase in order to be validated. When
received, Muse will record your purchase
information along with the ser ial number and list
of any options purchas ed for your Mode l Eleve n.
This information will be used by Muse both for
Warranty claim purposes as well as notification
should there be any recommended updates for
this product. Should you change your mailing
address after registration with Muse, please
provide us with a change of addr ess notification
so that we can contact you should it become
necessary.
Questions?
We invite you to contact either Muse of your
Muse dealer should you have an y q uestions or
concerns about your Mode l Eleven. To contact
Muse directly, we recommend email, as this is
the quickest and most efficient method. An
email addressed to our support address
([email protected]) will generate
the quickest response. Should you not have
access to email a fax or post can also be used.
Our fax number is +714-554-5643; our mailing
address is:
Muse Electronics
P.O. Box 2198
Garden Grove, CA 92842-2198
USA
If you feel that your inquiry requires immediate
attention, you may call our offices directly at
+714-554-8200. Keep in mind that Muse is
located on the West Coas t of the United States
and our office hours are generally from 9AM
until 5PM local tim e. Your local de aler m ay also
be a good source of information, so we
recommend that you mak e your initial telephon e
call to them.
In closing, we again thank you for your purch ase
of the Muse Model Eleven dis c playback system.
We hope that you will have many years of
enjoyment from this pr oduct and we lo ok forward
to serving your audio and video needs in the
future.
From everyone at Muse, we thank you.
16
 Loading...