

Page 1

Operator's Manual
7105382
Rev. A
22” WALK BEHIND
MOWER
Model No.Description
7800889 MD22550FC
7800890 M22550FC
en fr
Not for
Reproduction
!
Page 2

Thank You for purchasing this quality-built Murray product. We’re pleased that you placed your confidence in the Murray
brand. When operated and maintained according to the instructions in this manual, your Murray product will provide many
years of dependable service.
This manual contains safety information to make you aware of the hazards and risks associated with the machine and how to
avoid them. This machine is designed and intended only for finish cutting of established lawns and is not intended for any
other purpose. It is important that you read and understand these instructions thoroughly before attempting to start or operate
this equipment. Save these original instructions for future reference.
Complete the following information on your Murray purchase.
Date of Purchase_______________________________________________________________________________________
Retailer______________________________________________________________________________________________
Retailer's Phone Number________________________________________________________________________________
Equipment
Model Number_________________________________________________________________________________
Serial Number ______________________________________________________________________________
Engine
Model___________________________Type___________________________Code__________________________
Copyright © 2012, Briggs & Stratton Corporation
Milwaukee, WI, USA. All Rights Reserved.
Not for
Reproduction
Page 3

3
Table of Contents
Operator Safety . . . . . . . . . . . . . . . . . . . . . . . . . . . . . . . . . . . . . . . . . . . . . . . .4
Assembly . . . . . . . . . . . . . . . . . . . . . . . . . . . . . . . . . . . . . . . . . . . . . . . . . . . .8
Unpacking . . . . . . . . . . . . . . . . . . . . . . . . . . . . . . . . . . . . . . . . . . . . . . . . . . . . . . . . .8
Handle . . . . . . . . . . . . . . . . . . . . . . . . . . . . . . . . . . . . . . . . . . . . . . . . . . . . . . . . . . . .8
Handle Height . . . . . . . . . . . . . . . . . . . . . . . . . . . . . . . . . . . . . . . . . . . . . . . . . . . . . .9
Grass Bag . . . . . . . . . . . . . . . . . . . . . . . . . . . . . . . . . . . . . . . . . . . . . . . . . . . . . . . .10
Mulching Plate . . . . . . . . . . . . . . . . . . . . . . . . . . . . . . . . . . . . . . . . . . . . . . . . . . . .11
Mulching Tips . . . . . . . . . . . . . . . . . . . . . . . . . . . . . . . . . . . . . . . . . . . . . . . . . . . . .11
Side Discharge . . . . . . . . . . . . . . . . . . . . . . . . . . . . . . . . . . . . . . . . . . . . . . . . . . . .11
How to Prepare the Engine . . . . . . . . . . . . . . . . . . . . . . . . . . . . . . . . . . . . . . . . . . .12
Final Preparation . . . . . . . . . . . . . . . . . . . . . . . . . . . . . . . . . . . . . . . . . . . . . . . . . . .13
Operation . . . . . . . . . . . . . . . . . . . . . . . . . . . . . . . . . . . . . . . . . . . . . . . . . . .14
Engine Stop Lever . . . . . . . . . . . . . . . . . . . . . . . . . . . . . . . . . . . . . . . . . . . . . . . . . .14
How to Stop the Engine . . . . . . . . . . . . . . . . . . . . . . . . . . . . . . . . . . . . . . . . . . . . .14
How to Start the Engine . . . . . . . . . . . . . . . . . . . . . . . . . . . . . . . . . . . . . . . . . . . . .14
Rules for Safe and Effective Operation . . . . . . . . . . . . . . . . . . . . . . . . . . . . . . . . . .15
Adjusting the Height of Cut . . . . . . . . . . . . . . . . . . . . . . . . . . . . . . . . . . . . . . . . . . .15
Maintenance . . . . . . . . . . . . . . . . . . . . . . . . . . . . . . . . . . . . . . . . . . . . . . . . .16
Maintenance Chart . . . . . . . . . . . . . . . . . . . . . . . . . . . . . . . . . . . . . . . . . . . . . . . . .16
Mower Maintenance . . . . . . . . . . . . . . . . . . . . . . . . . . . . . . . . . . . . . . . . . . . . . . . .17
Engine Maintenance . . . . . . . . . . . . . . . . . . . . . . . . . . . . . . . . . . . . . . . . . . . . . . . .19
Storage . . . . . . . . . . . . . . . . . . . . . . . . . . . . . . . . . . . . . . . . . . . . . . . . . . . . . . . . . .20
Troubleshooting . . . . . . . . . . . . . . . . . . . . . . . . . . . . . . . . . . . . . . . . . . . . . . .21
Warranties . . . . . . . . . . . . . . . . . . . . . . . . . . . . . . . . . . . . . . . . . . . . . . . . . .22
Slope Guide . . . . . . . . . . . . . . . . . . . . . . . . . . . . . . . . . . . . . . . . . . . . . . . . .25
WARNING
Battery posts, terminals and related accessories contain
lead and lead compounds, chemicals known to the State of
California to cause cancer and birth defects or other
reproductive harm. Wash hands after handling.
!
!
WARNING
Engine exhaust, some of its constituents, and certain
vehicle components contain or emit chemicals known to
the State of California to cause cancer or other reproductive
harm.
!
!
en
Not for
Reproduction
Page 4
www.murray.com4
Operator Safety
Operating Safety
Power equipment is only as safe as the operator. If it is misused, or
not properly maintained, it can be dangerous! Remember, you are
responsible for your safety and that of those around you.
Use common sense, and think through what you are doing. If you are
not sure that the task you are about to perform can be safely done
with the equipment you have chosen, ask a professional: contact your
local authorized dealer.
Read the Manual
The operator’s manual contains important safety information you need to
be aware of BEFORE you operate your unit as well as DURING operation.
Safe operating techniques, an explanation of the product’s features and
controls, and maintenance information is included to help you get the
most out of your equipment investment.
Be sure to completely read the Safety Rules and Information found on the
following pages. Also completely read the Operation section.
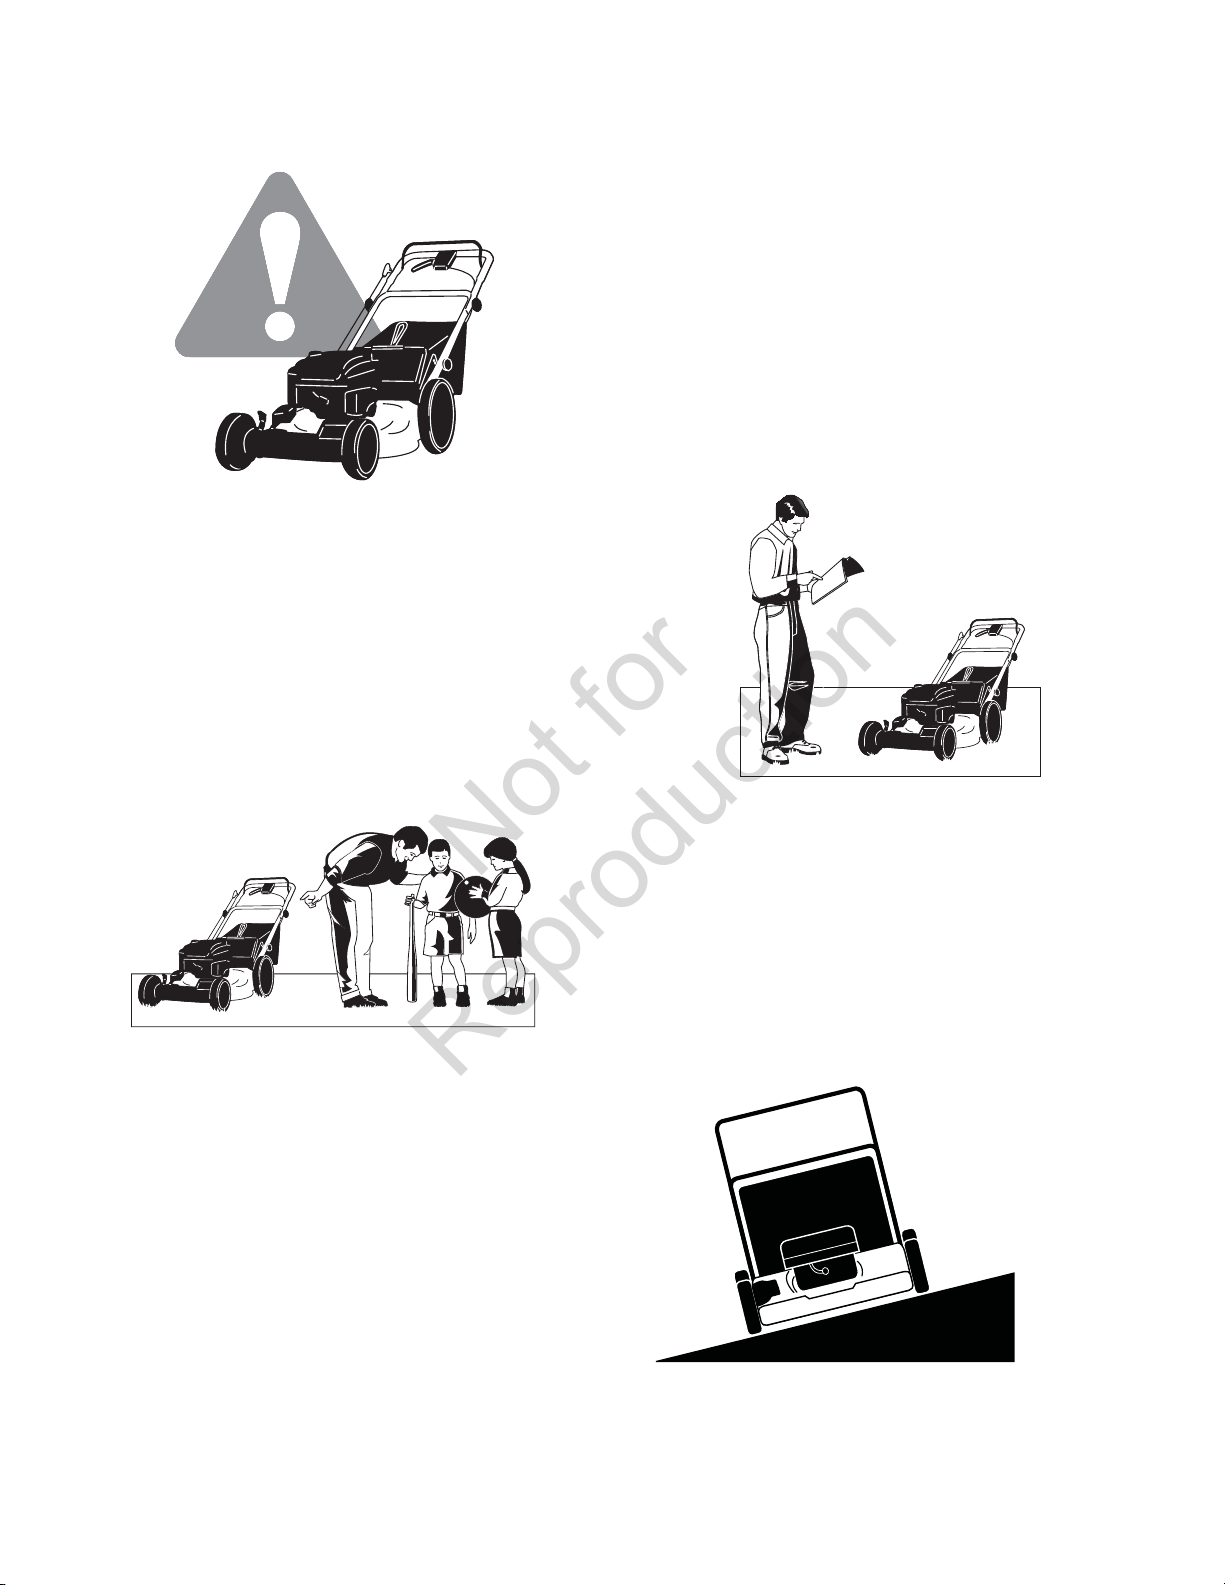
Children
Tragic accidents can occur with children. Do not allow them anywhere near the area of operation. Children are often attracted to the
unit and mowing activity. Never assume that children will remain
where you last saw them. If there is a risk that children may enter
the area where you are mowing, have another responsible adult
watch them.
Slope Operation
You could be seriously injured or even killed if you use this unit on
too steep an incline. Using the unit on a slope that is too steep or
where you don’t have adequate footing or traction can cause you to
lose control or slip and fall.
You should not operate on inclines with a slope greater than 10
degrees, which is a 3.5 ft (1,5 m) rise over 20.0 ft (6,0 m). Always
mow across slopes, never up and down.
Also note that the surface you are mowing can greatly impact control. Wet grass or leaves can seriously affect your footing and traction on a slope.
If you feel unsure about operating the unit on an incline, don’t do it.
It’s not worth the risk.
20.0 ft
(6,0 m)
3.5 ft
(1,5 m)
Not for
Reproduction
Page 5
5
Operator Safety
Moving Parts
This equipment has moving parts that can injure you or someone else.
However, if you stand behind the handle properly and follow all the rules in
this book, the unit is safe to operate.
The mower deck has a spinning mower blade that can amputate hands and
feet. Do not allow anyone near the equipment while it is running!
To help you, the operator, use this equipment safely, it is equipped with an
operator present safety system. Do NOT attempt to alter or bypass the system. See your dealer immediately if the system does not pass all the safety
interlock system tests found in this manual.
Thrown Objects
This unit has a spinning mower blade. This blade can pick up and
throw debris that could seriously injure a bystander. Be sure to clean
up the area to be mowed BEFORE you start mowing.
Do not operate this unit without the entire grass catcher or discharge
guard (deflector) in place.
Also, do not allow anyone in the area while the unit is running! If
someone does enter the area, shut the unit off immediately until they
leave.
Debris Accumulation
Accumulation of grass and debris can result in a fire. Be sure to clean any
accumulation of grass and debris with a brush or compressed air, before
and after operation.
Fuel and Maintenance
Gasoline is extremely flammable. Its vapors are also extremely flammable and can travel to distant ignition sources. Gasoline must only
be used as a fuel, not as a solvent or cleaner. It should never be
stored any place where its vapors can build up or travel to an ignition
source like a pilot light. Fuel belongs in an approved, plastic, sealed
gas can, or in the tractor fuel tank with the cap securely closed.
Spilled fuel needs to be cleaned up immediately.
Proper maintenance is critical to the safety and performance of your
unit. Be sure to perform the maintenance procedures listed in this
manual, especially periodically testing the safety system.
Not for
Reproduction
Page 6

www.murray.com6
!
WARNING: This powerful cutting machine is capable of amputating hands and feet and can throw objects that
can cause injury and damage! Failure to comply with the following SAFETY instructions could result in serious
injury or death to the operator or other persons. The owner of the machine must understand these instructions
and must allow only persons who understand these instructions to operate machine. Each person operating
the machine must be of sound mind and body and must not be under the influence of any substance, which
might impair vision, dexterity or judgment. If you have any questions pertaining to your machine which your
dealer cannot answer to your satisfaction, contact the Customer Service Department (1-800-661-6662 or
www.murray.com).
Protection for Children
Tragic accidents can occur if the operator is not alert to the
presence of children. Children are often attracted to the
machine and the mowing activity. Never assume that
children will remain where you last saw them.
1. KEEP children out of the mowing area and under the
watchful care of a responsible adult other than the operator.
2. DO NOT allow children in yard when machine is operated
and turn machine OFF if anyone enters the area.
3. DO NOT allow pre-teenage children to operate machine.
4. ALLOW only responsible adults & teenagers with mature
judgment under close adult supervision to operate machine.
5. DO NOT pull mower backwards unless absolutely
necessary. LOOK and SEE behind and down for children,
pets and hazards before and while backing.
6. USE EXTRA CARE when approaching blind corners,
shrubs, trees, or other objects that may obscure vision.
Slope Operation
1. Slopes are a major factor related to slip and fall accidents, which can result in severe injury. All slopes require
extra caution. If you feel uneasy on a slope, DO NOT mow
it.
2. Mow across slopes, never up-and-down. Exercise
extreme CAUTION when changing directions on slopes. DO
NOT mow steep slopes or other areas where stability or
traction is in doubt. Refer to the Slope Guide at the end of
this manual.
3. Use extra care with grass catchers or other attachments;
these affect the handling and the stability of the machine.
Preparation
1. Read, understand, and follow instructions and warnings
in this manual and on the mower, engine and attachments.
Know the controls and the proper use of the mower before
starting.
2. Only mature, responsible persons shall operate the
machine and only after proper instruction.
3. Data indicates that operators age 60 and above, are
involved in a large percentage of mower-related injuries.
These operators should evaluate their ability to operate the
mower safely enough to protect themselves and others
from serious injury.
Preparation
(Continued From Previous Column)
4. Handle fuel with extra care. Fuels are flammable and
vapors are explosive. Use only an approved fuel container.
DO NOT remove fuel cap or add fuel with engine running.
Add fuel outdoors only with engine stopped and cool. Clean
spilled fuel and oil from machine. DO NOT smoke.
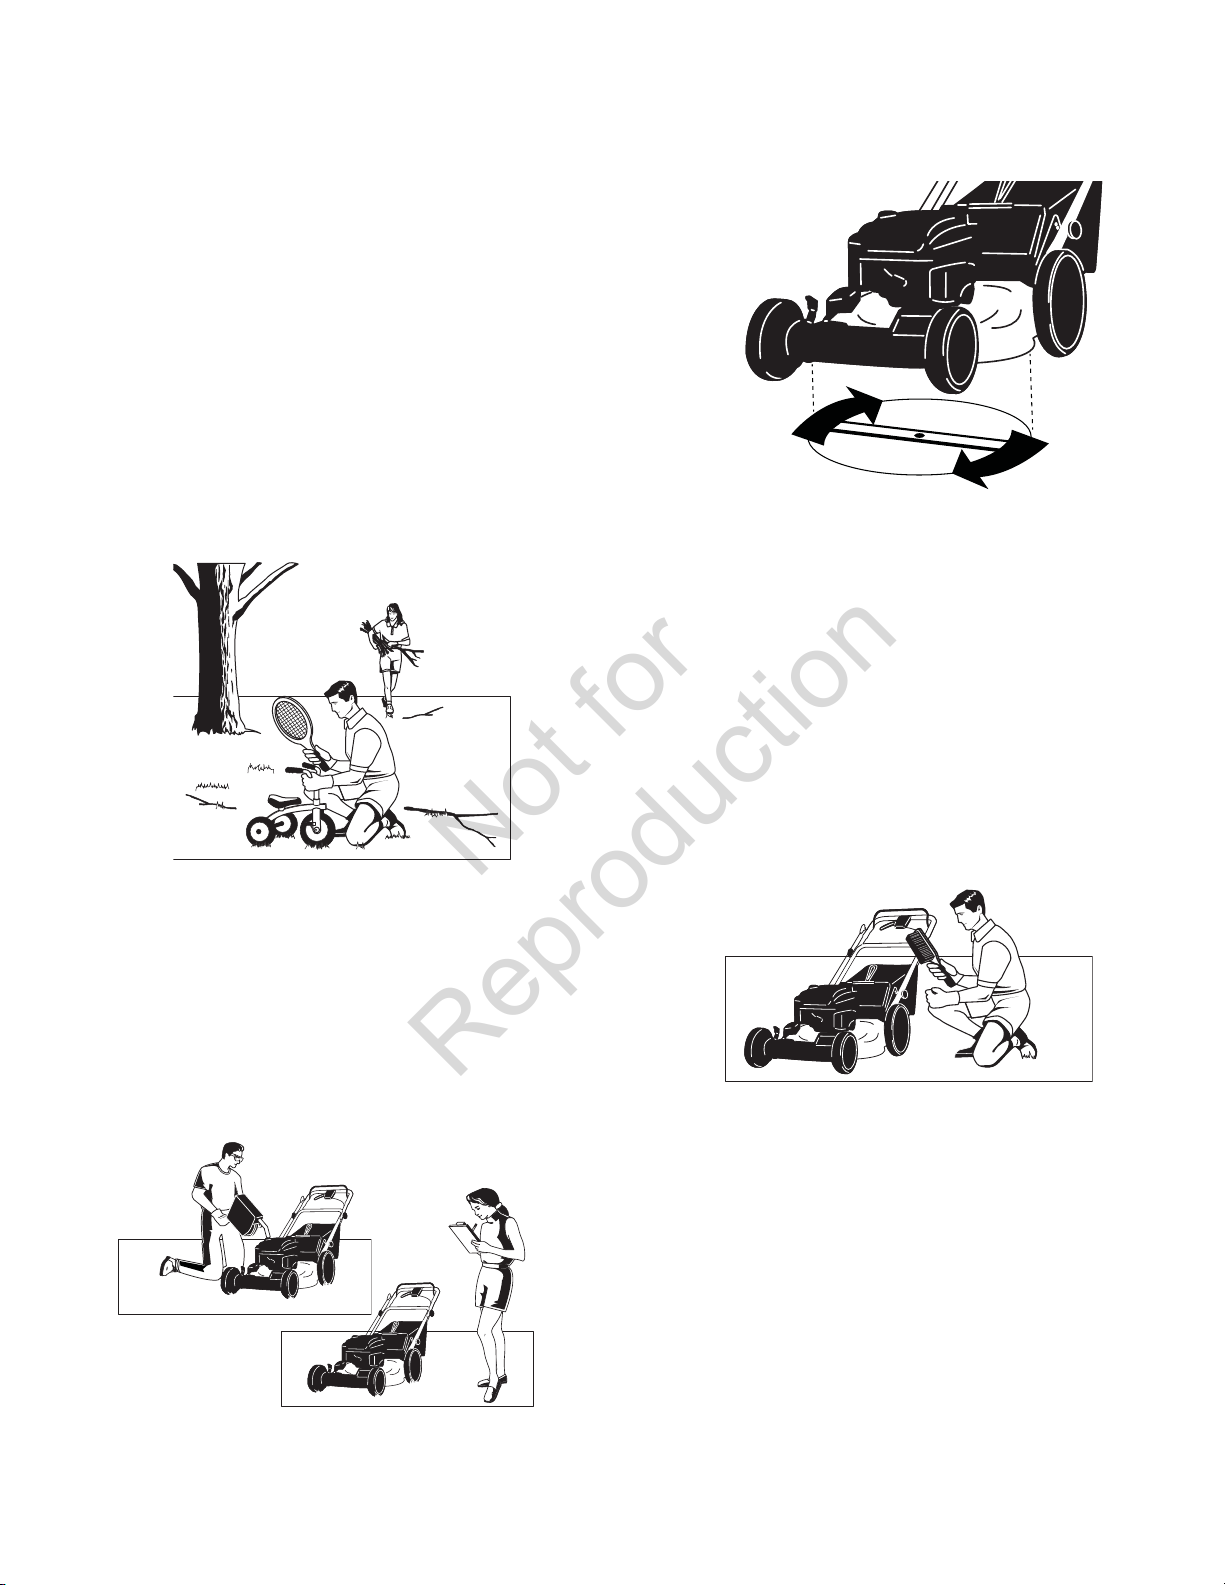
5. Check the area to be mowed and remove all objects such
as toys, wire, rocks, limbs and other objects that could
cause injury if thrown by blade or interfere with mowing.
Also note the location of holes, stumps, and other possible
hazards.
6. Keep people and pets out of the mowing area.
Immediately, STOP Blade, Stop engine and Stop mower if
anyone enters the area.
7. Check shields, deflectors, switches, blade controls and
other safety devices frequently for proper operation and
location.
8. Make sure all safety decals are clearly legible. Replace if
damaged.
9. Protect yourself when mowing and wear safety glasses, a
dust mask, long pants, and substantial footwear. DO NOT
mow barefooted or with sandals.
10. Know how to STOP blade and engine quickly in
preparation for emergencies.
11. Use extra care when loading or unloading the machine
into a trailer or truck.
12. Check grass catcher components frequently for signs of
wear or deterioration and replace as needed to prevent
injury from thrown objects going through weak or torn
spots.
Safe Handling of Gasoline
To avoid personal injury or property damage, use extreme
care in handling gasoline. Gasoline is extremely flammable
and the vapors are explosive.
1. Extinguish all cigarettes, cigars, pipes and other sources
of ignition.
2. Use only an approved fuel container.
3. DO NOT remove fuel cap or add fuel with the engine
running. Allow the engine to cool before refueling.
4. DO NOT refuel the machine indoors.
5. DO NOT store the machine or fuel container inside where
there is an open flame, spark or pilot light such as on a
water heater or other appliances.
Operator Safety
Not for
Reproduction
Page 7

7
Operator Safety
Safe Handling of Gasoline
(Continued From Previous Page)
6. DO NOT fill fuel containers inside a vehicle or on a truck
or trailer bed with a plastic liner. Always place the containers on the ground away from the vehicle before filling.
7. Remove gas-powered equipment from the vehicle or
trailer and refuel it on the ground. If this is not possible,
then refuel equipment using a portable container, rather
than a gasoline dispenser nozzle.
8. DO NOT start gas powered equipment in enclosed vehicles or trailers.
9. Keep the nozzle in contact with the rim of the fuel tank or
container opening at all times until fueling is complete. DO
NOT use a nozzle lock-open device
10. If fuel is spilled on clothing, change clothing
immediately.
11. DO NOT overfill a fuel tank. Replace fuel cap and tighten securely.
Operation
1. DO NOT put hands or feet near or under rotating parts.
Keep clear of discharge area while engine is running.
2. STOP engine when crossing gravel drives, walks, or
roads, and under any conditions where thrown objects
might be a hazard.
3. Mow only in daylight or good artificial light.
4. DO NOT operate mower while under the influence of
alcohol or drugs.
5. After striking a foreign object or if mower vibrates
abnormally, STOP the engine, disconnect and secure spark
plug wire. Inspect the mower for any damage and repair
the damage before starting.
6. DO NOT mow near drop offs, ditches or embankments.
Operator could lose footing or balance.
7. STAY ALERT for holes and other hidden hazards. Tall
grass can hide obstacles. Keep away from ditches,
washouts, culverts, fences and protruding objects.
8. DO NOT mow on wet grass. Always be sure of your
footing. Keep a firm hold on the handle and walk, never
run. Slipping could cause injury.
9. ALWAYS stay behind handle when engine (motor) is
running.
10. DO NOT leave the machine with the engine running.
STOP BLADE and STOP ENGINE before leaving the operators position for any reason.
11. Before cleaning, repairing or inspecting make certain
engine, blade and all moving parts have STOPPED.
Disconnect and secure spark plug wire away from plug to
prevent accidental starting.
12. STOP engine and wait until the blade comes to complete STOP before removing grass bag and/or clearing
grass.
Operation
(Continued From Previous Column)
13. DO NOT operate mower without the entire grass catcher, or guards in place discharge guard, rear guard or other
safety devices in place and working. DO NOT point discharge at people, passing cars, windows or doors.
14. DO NOT discharge material against a wall or obstruction. Material may ricochet back towards the operator.
15. Slow down before turning.
16. Watch out for traffic when near or crossing roadways.
17. DO NOT operate engine in enclosed areas. Engine
exhaust gases contain carbon monoxide, a deadly poison.
18. Only use accessories approved by the manufacturer.
See manufacturer’s instructions for proper operation and
installation of accessories.
Maintenance and Storage
1. DO NOT store mower or fuel container inside where
fumes may reach an open flame, spark or pilot light such as
in a water heater, furnace, clothes dryer or other gas appliance. Allow engine to cool before storing machine in an
enclosure. Store fuel container out of reach of children in a
well ventilated, unoccupied building.
2. Keep mower and engine free of grass, leaves or excess
grease to reduce fire hazard and engine overheating.
3. When draining fuel tank, drain fuel into an approved
container outdoors and away from open flame.
4. Keep all bolts, especially blade bolts, nuts and screws
properly tight. Check that all cotter pins are in proper
position.
5. Always provide adequate ventilation when running
engine. Engine exhaust gases contain carbon monoxide, a
deadly poison.
6. Service engine and make adjustments only when engine
is stopped. Removed spark plug wire from spark plug and
secure wire away from spark plug to prevent accidental
starting.
7. DO NOT change engine governor speed settings or
overspeed engine.
8. Check grass bag assembly frequently for wear or
deterioration to avoid thrown objects and exposure to
moving parts. Replace with new bag if loose seams or tears
are evident. Replace slider or bag adapter if broken or
cracked.
9. Mower blades are sharp and can cut. Wrap the blades or
wear heavy leather gloves and use CAUTION when handling
them.
10. DO NOT test for spark by grounding spark plug next to
spark plug hole; spark plug could ignite gas exiting engine.
11. Have machine serviced by an authorized dealer at least
once a year and have the dealer install any new safety
devices.
12. Use only factory authorized replacement parts or like
parts when making repairs.
en
Not for
Reproduction
Page 8
www.murray.com8
WARNING: Before doing any assembly or
maintenance to the mower, remove the wire
from the spark plug.
NOTE: In this instruction book, left and right describe the
location of a part with the operator standing behind the
handle.
Unpacking
The mower was fully assembled at the factory. When the
mower was put in the carton, the handle was put in the
storage position. To put the handle in the operating position,
follow the steps below.
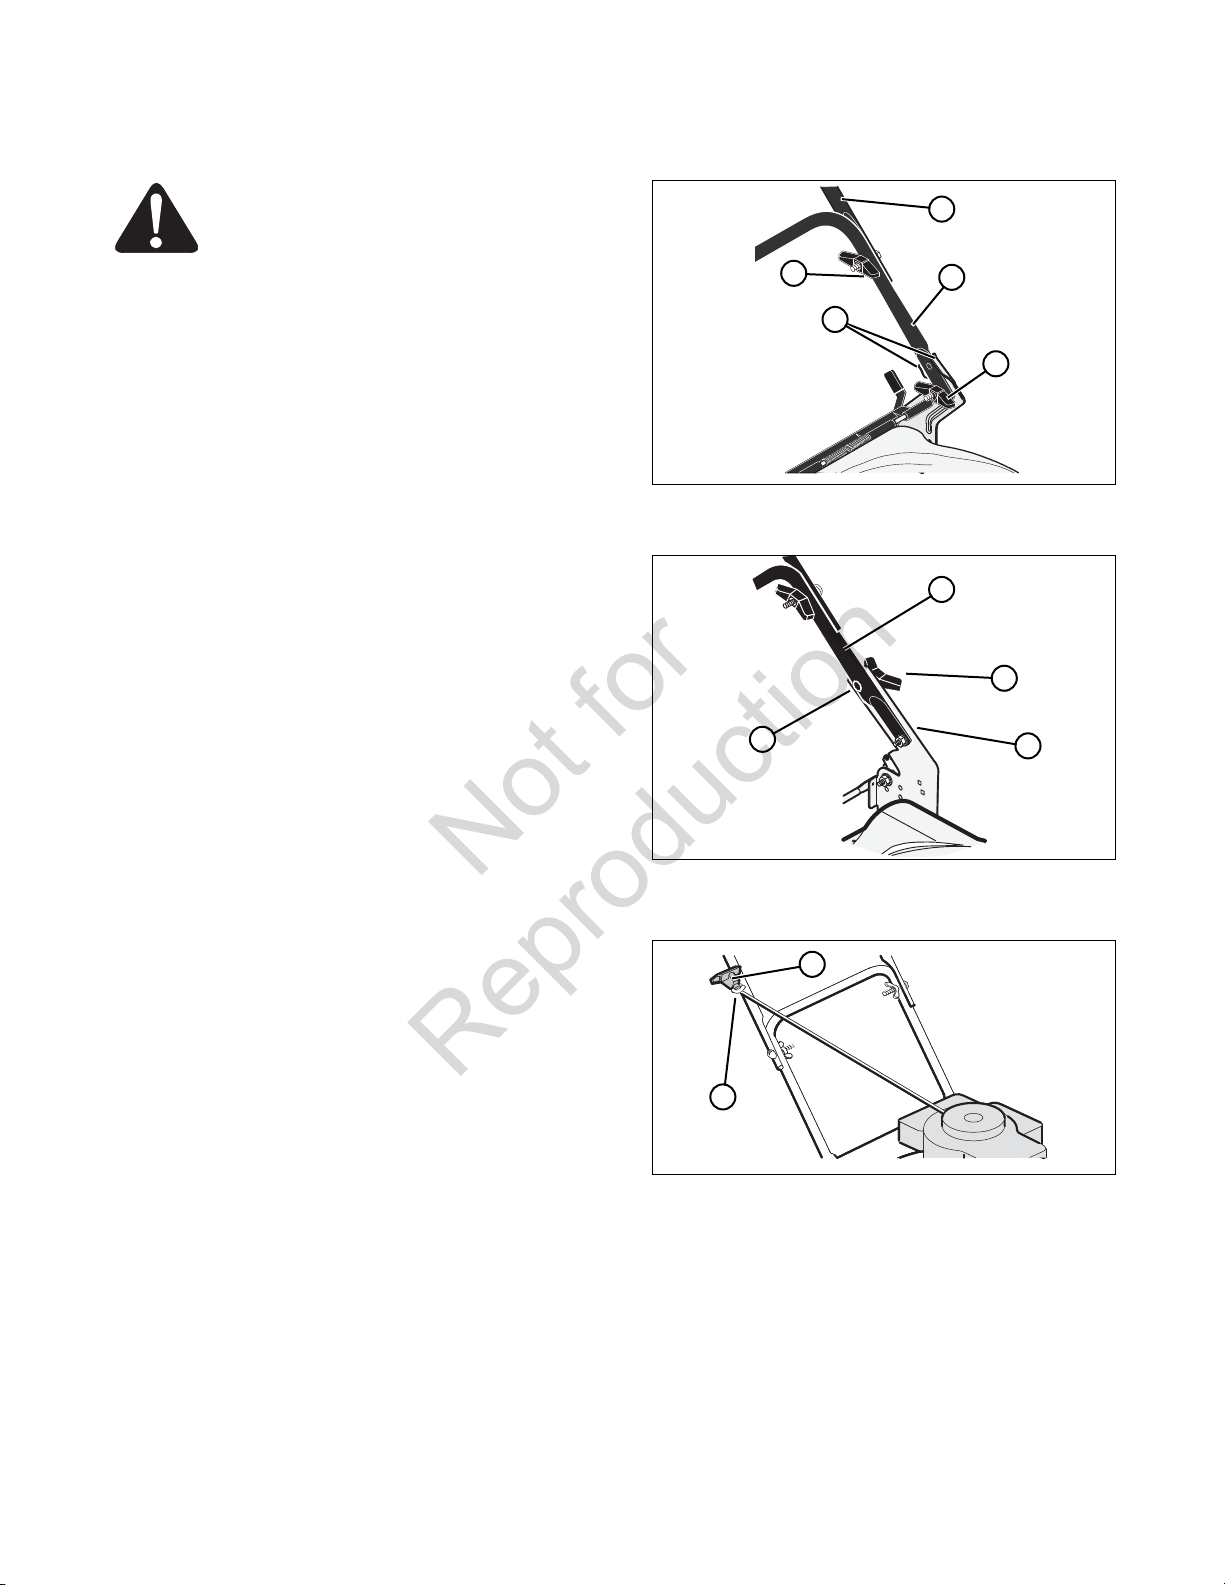
Handle
1. Remove the mower from the carton.
2. Remove all packing material from the mower and the
handle.
3. MD22550FC - Raise the lower handle (A, Figure 1).
Make sure the lower handle is between the locking tabs
(B). Tighten the lower wingnuts (C).
M22550FC - Remove the wingnut (A, Figure 2) and bolt
(B) from each handle bracket (C). Raise the lower handle (D), and secure with the removed bolt and wingnut.
4. Put the upper handle (D, Figure 1) in the operating
(upright) position. Tighten the upper wingnuts (E).
NOTE: The height of the handle can be set for operator
comfort. See “Handle Height”.
CAUTION: Be careful when you fold or raise the handle. Do
not damage the cables. A cable that is bent will not work
correctly. Before you use the unit, replace a bent or damaged
cable.
5. Hold the engine stop lever against the handle. (Refer to
section entitled ‘Engine Stop Lever’.) Slowly pull the
recoil-start grip (A, Figure 2). To attach the recoil-start
grip to the rope guide (B), twist the rope through the
rope guide mounted on the right side of the handle.
IMPORTANT: Operate the engine stop lever several times.
Make sure that the engine stop cable moves freely and that
the engine stop lever operates correctly.
A
Figure 1: Unfolding the handle (MD22550FC)
C
B
D
E
Figure 3: Attaching the recoil-start grip
A
B
A
Figure 2: Unfolding the handle (M22550FC)
B
Assembly
D
C
Not for
Reproduction
Page 9

9
Handle Height (MD22550FC)
1. Remove the wingnuts (A, Figure 4) and bolts (B) from
the right and left handle brackets (C).
2. To raise the handle, mount the lower handle (A, Figure
5) in the high position (B).
3. To lower the handle, mount the lower handle in the low
position (C).
4. Attach the lower handle to the handle brackets with the
bolts and wingnuts removed in Step 1.
Handle Height (M22550FC)
1. Remove the wingnuts (A, Figure 6) and bolts (B) from
the right and left handle brackets (C).
Note: Do not remove the lower set of bolts and nuts securing
the lower handle.
2. To raise the handle, mount the lower handle (D, Figure
6) to a higher adjustment hole (E).
3. To lower the handle, mount the lower handle to a lower
adjustment hole.
4. Replace the bolts and wingnuts removed in Step 1,
tightening securely.
B
Figure 4: Removing the handle adjustment hardware
C
A
Figure 6: Handle positions (M22550FC)
A
Assembly
B
C
D
E
B
Figure 5: Handle positions (MD22550FC)
A
C
en
Not for
Reproduction
Page 10
www.murray.com10
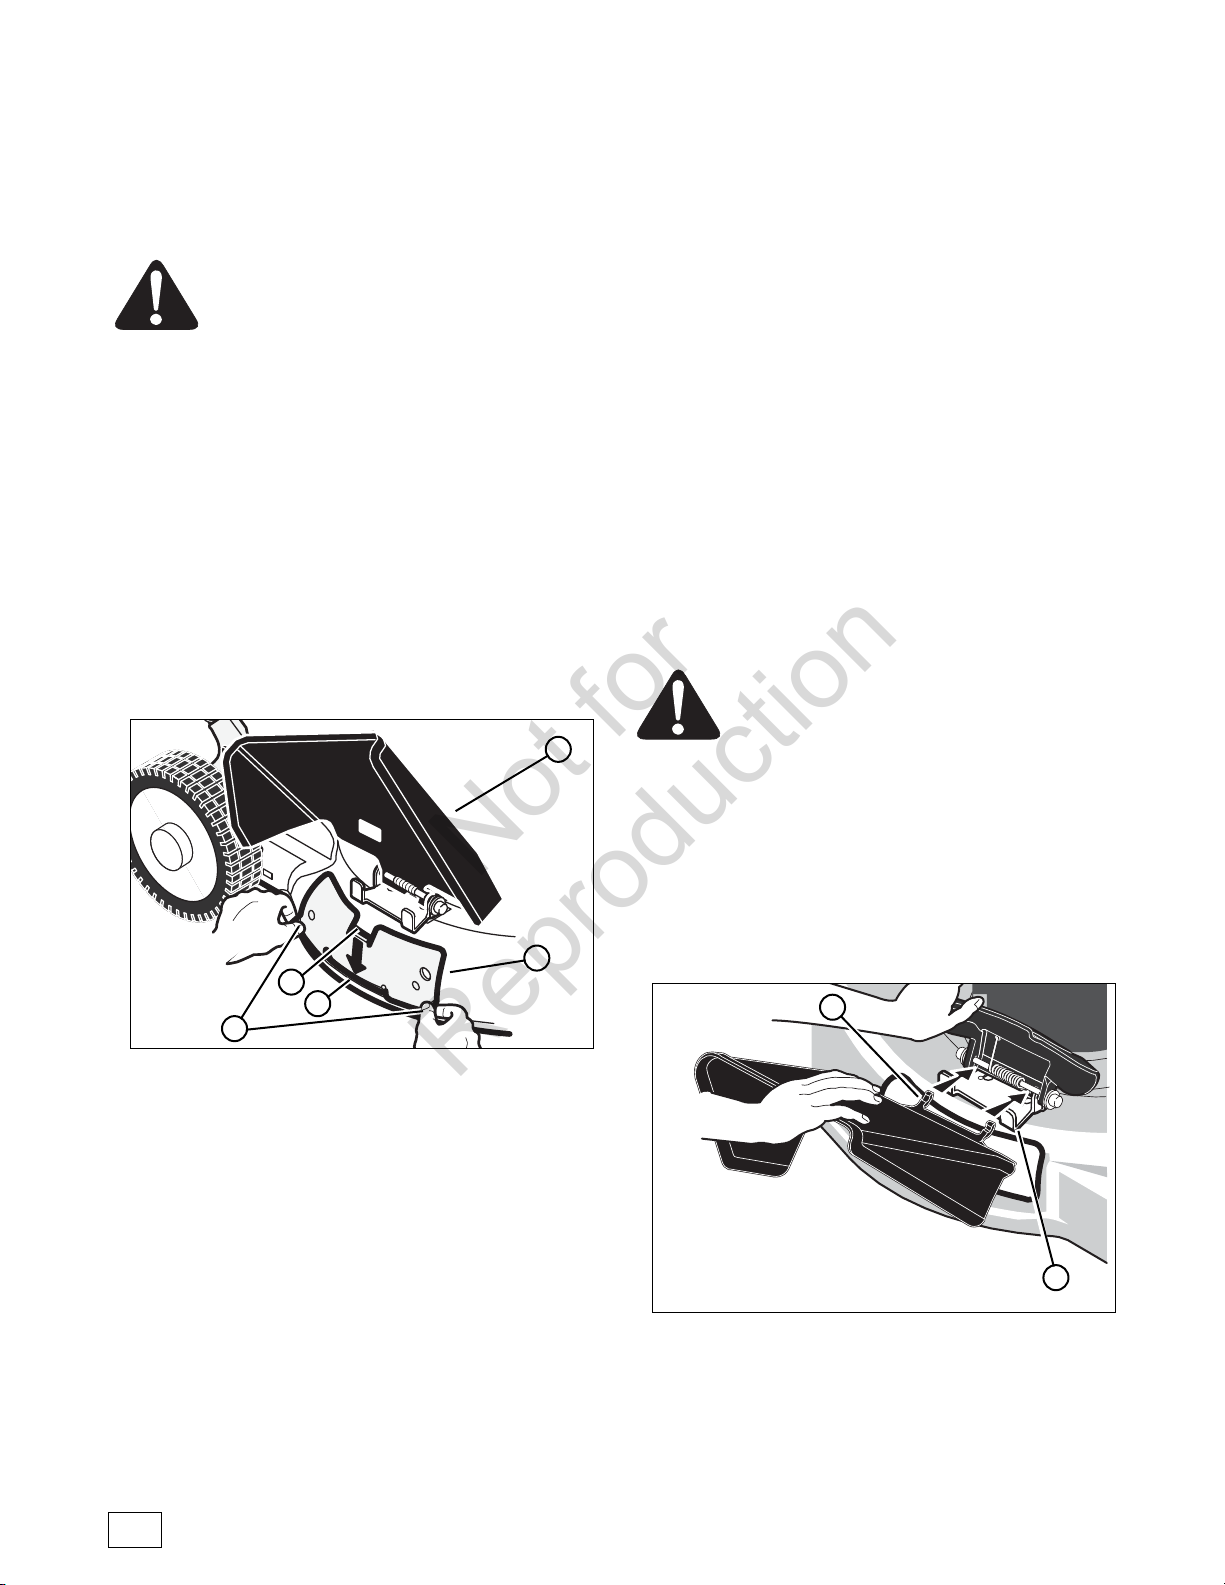
Assembling the Grass Bag (M22550FC)
Note: On some models, the side mounted discharge deflector
is temporarily attached (for shipping purposes) to the rear of
the mower. Before assembly of the grass bag, remove the
side mounted discharge deflector.
1. Slide the frame assembly (A, Figure 7) into the
grass bag (B).
2. Make sure the handle (A, Figure 8) is on the outside of
the grass bag.
3. First, attach the clips (B, Figure 8) to the side of the
frame assembly (C). Next, attach the clips to the top and
bottom of the frame assembly.
Mounting the Grass Bag (M22550FC)
1. To mount the grass bag on the mower, raise the rear
door (A, Figure 9). Holding the grass bag by the han-
dle (B), mount the hooks (C) on either end of the grass
bag frame assembly onto the rear door pivot rod (D).
Lower the grass bag against the rear of the mower.
Lower the rear door.
Important: Make sure both grass bag hooks are mounted on
the pivot rod.
WARNING: Check the condition of the grass
bag for wear or deterioration. If worn or
damaged, replace the parts only with
approved factory replacement parts.
Emptying the Grass Bag (M22550FC)
WARNING: Before you remove the grass bag,
stop the engine. Before you remove any grass
from the mower housing, disconnect the wire
from the spark plug.
1. Raise the rear door to a vertical position.
2. Hold the handle of the grass bag and lift the frame
assembly. Continue to lift the frame assembly until the
hooks are no longer mounted on the pivot rod. Remove
the grass bag.
3. Empty the grass from the grass bag.
4. To mount the grass bag on the mower, see “Mounting
The Grass Bag”.
B
Figure 7: Installing the frame assembly
A
B
Figure 8: Installing the bag clips
A
C
Figure 9: Mounting the grass bag
C
D
A
B
Assembly
Not for
Reproduction
Page 11
11
Attaching the Mulching Plate
(MD22550FC)
WARNING: To prevent the engine from
starting, disconnect the wire from the
spark plug.
1. Raise the chute deflector (A, Figure 10).
2. Align the mulcher plate (B) with the side discharge
opening. Make sure that the two alignment bumps (C)
are inside the opening.
3. Mount the tab (D) on the top of the mulcher plate to the
inside of the mower housing.
4. Mount the tab (E) on the bottom of the mulcher plate to
the inside of the mower housing.
5. Lower the chute deflector.
6. Attach the wire to the spark plug.
Note: On some models, the mulcher kit is installed at the
factory. To convert from a mulcher to a side discharge,
simply remove the mulching plate.
Mulching Tips
Mulching finely cuts the grass so that the grass can be easily
recycled. Because the nutrients are returned to the soil, the
lawn will need less fertilizer. To correctly mulch the lawn,
follow the tips below.
• The grass must be dry. If the grass is wet, it will be
difficult to cut and cause heavy clumps of grass.
• The grass must not be too tall. The maximum height to
effectively cut is 4 1/2 inches. Set the height adjusters
so that only the top third of the grass is cut.
• If the grass is more than 4 1/2 inches high, two
mowings will be necessary. For the first mowing, set the
height adjusters in the highest position. Then, lower the
height adjusters for the second mowing.
• Keep a sharp edge on the blade. A blade that is not
sharp will cause the ends of the grass to become brown.
• Clean the underside of the mower housing. Grass and
other debris can keep the mower from working
correctly.
If the quality of cut is marginal, try the following:
• Set the height adjusters at a higher cutting height.
• Cut the grass more frequently.
• Operate the mower at a slower ground speed.
• Overlap the cutting swaths instead of cutting a full
swath with each pass.
• Mow across the marginal areas a second time.
Convert to Side Discharge
(M22550FC)
WARNING: To prevent the engine from
starting, disconnect the wire from the
spark plug.
1. Ensure the grass bag is removed.
2. Lift the mulching cover.
3. Slide the two tabs (A, Figure 11) on the side deflector
under the pivot pin.
4. Lower the side deflector. Make sure the locking tabs (B)
go through the slots in the side deflector.
5. Release the mulching cover (it will lay on top of the side
discharge deflector).
Assembly
en
Figure 10: Installing the mulcher plate
(MD22550FC)
D
A
C
E
B
Figure 11: Side deflector (M22550FC)
A
B
Not for
Reproduction
Page 12

www.murray.com12
Assembly
How To Prepare The Engine
NOTICE: The engine does not contain oil. Before you start
the engine, make sure you add oil according to the instructions in this manual. If you start the engine without oil, it will
be damaged beyond repair and will not be covered under
warranty.
Oil Recommendations
We recommend the use of Briggs & Stratton Warranty
Certified oils for best performance. Other high-quality detergent oils are acceptable if classified for service SF, SG, SH,
SJ or higher. Do not use special additives.
Outdoor temperatures determine the proper oil viscosity for
the engine. Use the chart to select the best viscosity for the
outdoor temperature range expected.
* Below 40°F (4°C) the use of SAE 30 will result in hard
starting.
** Above 80°F (27°C) the use of 10W-30 may cause
increased oil consumption. Check oil level more frequently.
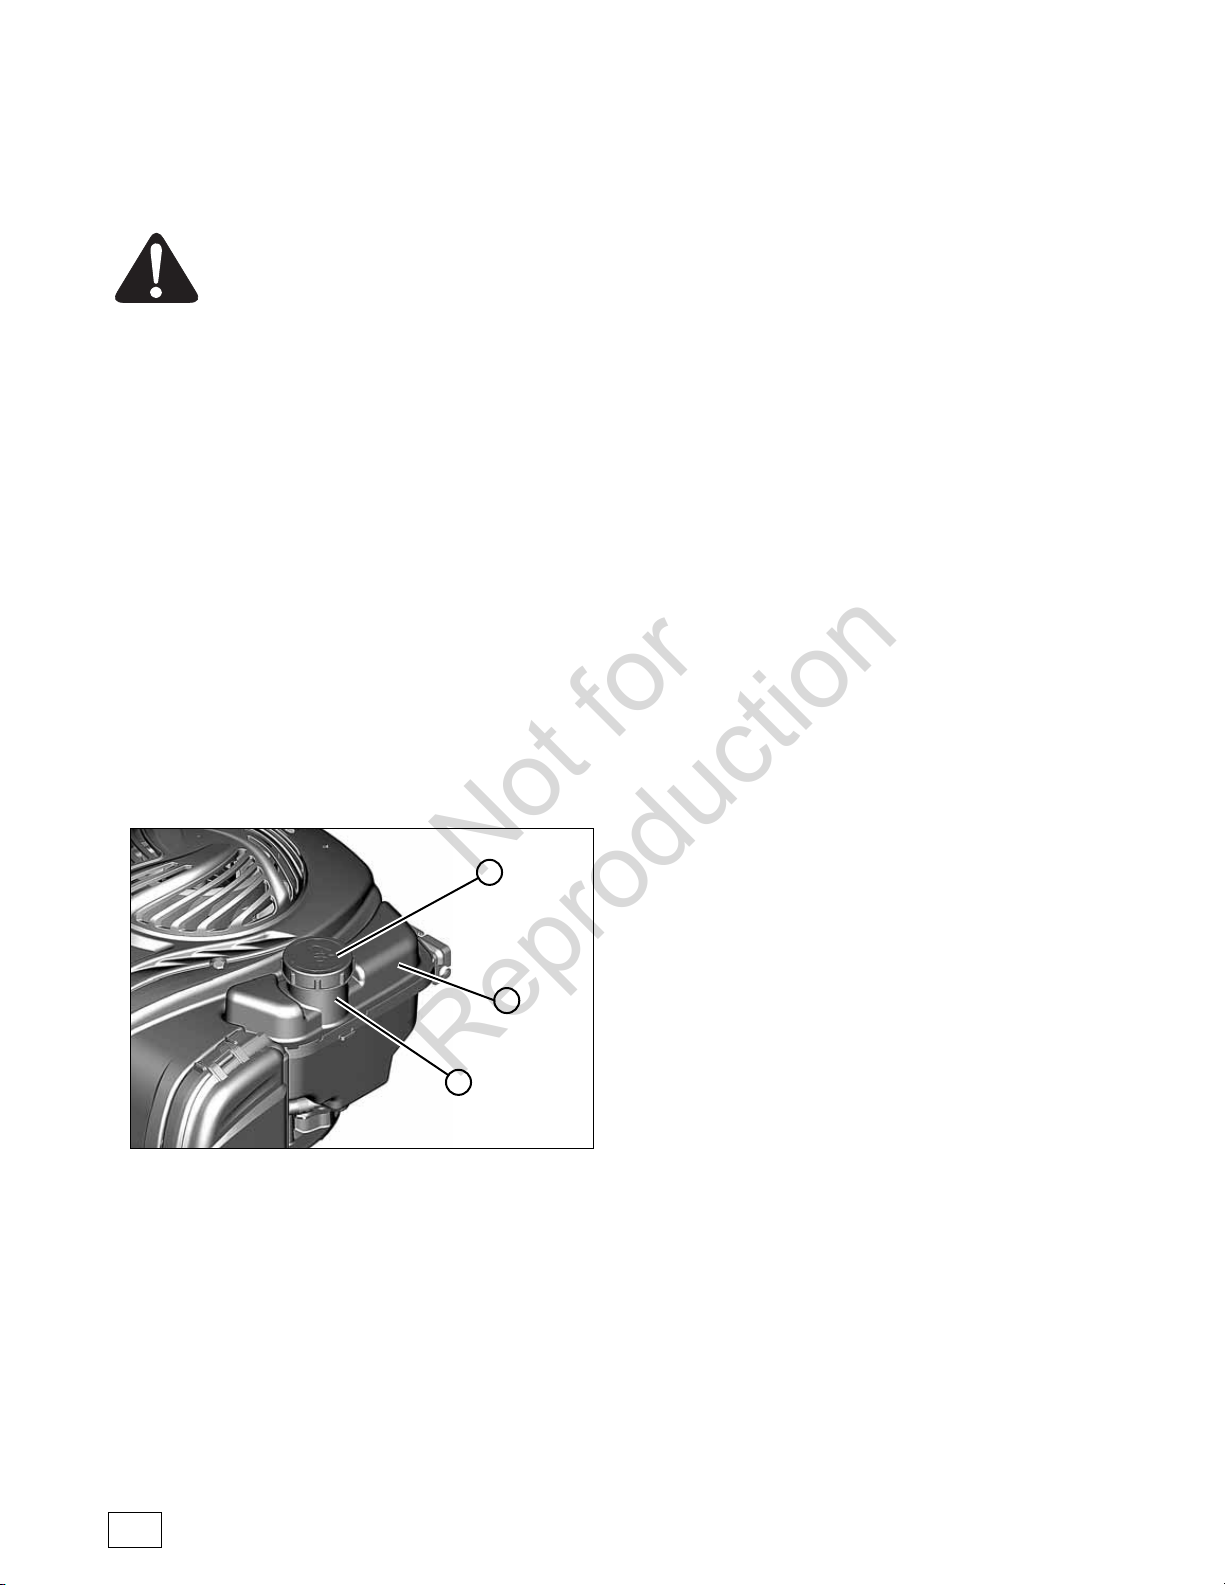
How To Check/Add Oil
Before adding or checking the oil
• Place engine level.
• Clean the oil fill area of any debris.
1. Remove the dipstick (A, Figure 12) and wipe with a
clean cloth.
2. Insert and tighten the dipstick.
3. Remove the dipstick and check the oil level. It should be
at the top of the full indicator (B) on the dipstick.
4. If low, add oil slowly into the engine oil fill (C). Do not
overfill. After adding oil, wait one minute and then
recheck the oil level.
5. Replace and tighten the dipstick.
Fuel Recommendations
Fuel must meet these requirements:
• Clean, fresh, unleaded gasoline.
• A minimum of 87 octane/87 AKI (91 RON). High altitude
use, see below.
• Gasoline with up to 10% ethanol (gasohol) or up to
15% MTBE (methyl tertiary butyl ether) is acceptable.
CAUTION: Do not use unapproved gasolines, such as E85.
Do not mix oil in gasoline or modify the engine to run on
alternate fuels. This will damage the engine components and
void the engine warranty.
To protect the fuel system from gum formation, mix a fuel
stabilizer into the fuel. See Storage. All fuel is not the same.
If starting or performance problems occur, change fuel
providers or change brands. This engine is certified to operate on gasoline. The emissions control system for this
engine is EM (Engine Modifications).
High Altitude
At altitudes over 5,000 feet (1524 meters), a minimum 85
octane/85 AKI (89 RON) gasoline is acceptable. To remain
emissions compliant, high altitude adjustment is required.
Operation without this adjustment will cause decreased performance, increased fuel consumption, and increased emissions. See a Briggs & Stratton Authorized Dealer for high
altitude adjustment information.
Operation of the engine at altitudes below 2,500 feet (762
meters) with the high altitude kit is not recommended.
Figure 12: Engine oil
B
A
C
Not for
Reproduction
Page 13
13
Assembly
How To Add Fuel
WARNING
Fuel and its vapors are extremely flammable and
explosive.
Fire or explosion can cause severe burns or
death.
When Adding Fuel:
• Turn engine off and let engine cool at least 2 minutes
before removing the fuel cap.
• Fill fuel tank outdoors or in well-ventilated area.
• Do not overfill fuel tank. To allow for expansion of the
fuel, do not fill above the bottom of the fuel tank neck.
• Keep fuel away from sparks, open flames, pilot lights,
heat, and other ignition sources.
• Check fuel lines, tank, cap, and fittings frequently for
cracks or leaks. Replace if necessary.
• If fuel spills, wait until it evaporates before starting
engine.
1. Clean the fuel cap area of dirt and debris. Remove the
fuel cap (A, Figure 13).
2. Fill the fuel tank (B) with fuel. To allow for expansion of
the fuel, do not fill above the bottom of the fuel tank
neck (C).
3. Reinstall the fuel cap.
IMPORTANT: This unit is equipped with an internal
combustion engine and must not be used on or near any
unimproved forest-covered, brush-covered or grass-covered
and unless the engine’s exhaust system is equipped with a
spark arrester meeting applicable local or state laws (if any).
If a spark arrester is used, it must be maintained in effective
working order by the operator.
In the State of California the above is required by law
(Section 4442 of the California Public Resources Code).
Other states may have similar laws. Federal laws apply on
federal lands. See an Authorized Service Center for a spark
arrester for the muffler.
Final Preparation
Before you use the mower, check the assembly of the
wheels, the handle, and the controls. Make sure all the
fasteners are tight. Make sure the throttle control (if
equipped) and the engine stop lever work correctly.
Before starting the engine, make sure each height adjuster is
set at the desired height. See “Adjusting The Height Of Cut”
in the Operation section.
en
Figure 13: Adding fuel
B
A
C
Not for
Reproduction
Page 14

www.murray.com14
Engine Stop Lever
Release the engine stop lever (A, Figure 14) and the engine
and the blade will automatically stop. To run the engine, hold
the engine stop lever in the Operating position (B).
Before you start the engine, operate the engine stop lever
several times. Make sure the cable moves easily.
How to Stop the Engine
To stop the engine, release the engine stop lever. Disconnect
the wire from the spark plug to prevent the engine from
starting.
Before you start the engine, check the engine stop cable.
Make sure the engine stop cable is assembled correctly.
Before you operate the unit, replace a bent or damaged
engine stop cable.
How To Start The Engine
WARNING: The blade will rotate when the
engine runs.
WARNING
Rapid retraction of starter cord (kickback) will
pull hand and arm toward engine faster than you
can let go.
Broken bones, fractures, bruises or sprains
could result.
• When starting engine, pull the starter cord slowly until
resistance is felt and then pull rapidly to avoid kickback.
WARNING
Fuel and its vapors are extremely flammable and
explosive.
Fire or explosion can cause severe burns or
death.
When Starting Engine
• Ensure that spark plug, muffler, fuel cap and air cleaner
(if equipped) are in place and secured.
• Do not crank engine with spark plug removed.
• If engine floods, set choke (if equipped) to OPEN/RUN
position, move throttle (if equipped) to FAST position
and crank until engine starts.
WARNING
Engines give off carbon monoxide, an odorless,
colorless, poison gas.
Breathing carbon monoxide can cause nausea,
fainting or death.
• Start and run engine outdoors.
• Do not start or run engine in enclosed area, even if
doors or windows are open.
Important: Before you start the engine, operate the engine
stop lever several times. Make sure that the engine stop
cable moves freely and that the engine stop lever operates
correctly.
1. Check the oil. See “How To Prepare The Engine”.
2. Fill the fuel tank. See “How To Prepare The Engine”.
3. Engines with primer: For most temperature conditions,
firmly push the primer bulb (A, Figure 15) three times.
In cooler weather, additional priming may be needed. A
warm engine will usually not require priming. Every time
you push the primer button, wait two seconds. Note:
When starting a new engine for the first time, push the
primer bulb five times.
Note: Excessive priming can flood the carburetor with
fuel. See “The Engine Will Not Start” in the
Troubleshooting section.
Figure 14: Operating the engine stop lever
A
B
Figure 15: Primer bulb
A
Operation
Not for
Reproduction
Page 15
15
4. Stand behind the mower. Use one hand to hold the
engine stop lever (A, Figure 16) in the operating position. Use the other hand to hold the recoil starter handle
(B).
5. Slowly pull the recoil starter handle until resistance is
felt, then pull quickly to start the engine. Slowly return
the recoil starter handle.
6. If the engine does not start in 5 or 6 tries, see the
Troubleshooting section.
Rules for Safe and Effective Operation
Refer to the ‘Operator Safety’ section of this manual for
important rules concerning safe and effective mower
operation.
Adjusting the Height of Cut
WARNING: The blade will rotate when the
engine runs. Before you change the height of
cut, stop the engine and disconnect the wire
from the spark plug.
To change the height of cut, move the position of the
adjuster arm at each wheel (A, Figure 17). Make sure each
adjuster arm is in the same position so that the mower will
cut level.
1. Disengage the adjuster arm.
2. Move the adjuster arm to another position.
Figure 16: Starting the engine
A
B
Operation
en
Figure 17: Adjusting the height of cut
A
Not for
Reproduction
Page 16
www.murray.com16
Maintenance
Maintenance Chart
WARNING: Before you make an inspection,
adjustment (except carburetor), or repair, stop
the engine and disconnect the wire from the
spark plug.
MOWER
Every 8 Hours or Daily
Check safety interlock system
Clean debris off mower
Every 25 Hours or Annually *
Check mower for loose hardware
See Dealer Annually to
Lubricate mower
Check mower blade **
Check mower blade stopping time
ENGINE
First 5 Hours
Change engine oil
Every 8 Hours or Daily
Check engine oil level
Every 25 Hours or Annually *
Clean engine air filter and pre-cleaner (if equipped) **
Every 50 Hours or Annually *
Change engine oil
Replace oil filter (if equipped)
Annually
Replace air filter
Replace pre-cleaner (if equipped)
See Dealer Annually to
Inspect muffler and spark arrester (if equipped)
Replace spark plug
Replace fuel filter (if equipped)
Clean engine air cooling system
* Whichever comes first
**Check blades more often in regions with sandy soils or
high dust conditions.
* Whichever comes first
**Clean more often in dusty conditions or when airborne
debris is present.
Not for
Reproduction
Page 17

17
Mower Maintenance
Emissions Control
Maintenance, replacement, or repair of the emissions control
devices and systems may be performed by any non-road
engine repair establishment or individual. However, to obtain
“no charge” emissions control service, the work must be
performed by a factory authorized dealer. See the Emissions
Warranty.
WARNING: Before you make an inspection,
adjustment (except carburetor), or repair, stop
the engine and disconnect the wire from the
spark plug.
Engine Tipping
When you service the engine, inspect the blade, or clean the
underside of the mower housing; make sure to always tip the
engine with the spark plug up (Figure 18). Transporting or
tipping the engine with the spark plug down will cause:
• Hard starting.
• Engine smoking.
• Spark plug fouling.
• Oil or gas saturation of the air filter.
Check Safety Interlock System
1. Start the mower.
2. Release the engine stop lever. The engine must stop
within 3 seconds.
If the engine does not stop, do not use the mower. Bring the
mower to an authorized dealer for service.
Cleaning the Mower Housing
WARNING: The blade will rotate when the
engine runs. Before you clean the mower
housing, stop the engine and disconnect the
wire from the spark plug.
Grass and other debris can keep the mower from working
correctly. After you mow, clean the mower housing as
follows.
1. Stop the engine.
2. Disconnect the wire from the spark plug.
3. Clean dirt and debris from the top and the bottom of the
mower housing.
Lubrication
For maximum performance, lubricate the wheels and all pivot
points with engine oil every 25 hours.
Note: Do not lubricate the engine stop cable. Lubricants will
damage the cable and prevent the cable from moving freely.
Replace the cable if bent or damaged.
Figure 18: No forward engine tipping
Maintenance
en
Not for
Reproduction
Page 18

www.murray.com18
Blade Service
WARNING: Before you inspect the blade or the
blade adapter, disconnect the wire to the
spark plug. If the blade hits an object, stop the
engine. Disconnect the wire to the spark plug.
Check the unit for damage.
Frequently check the blade for wear or damage such as
cracks. Frequently check the bolt that holds the blade. Keep
the bolt tight. If the blade hits an object, stop the engine.
Disconnect the wire to the spark plug. Check the blade
adapter (A, Figure 19) for damage. Check for a bent or
damaged blade, a badly worn blade, or other damage. Before
you operate the unit, damaged parts must be replaced with
factory replacement parts. For safety, replace the blade every
two years. Keep a sharp edge on the blade. A blade that is
not sharp will cause the ends of the grass to become brown.
Remove the blade as follows.
Removing the Blade
WARNING: Before you remove the blade,
disconnect the wire to the spark plug. The
blade has sharp edges. When you hold the
blade, use gloves or cloth material to protect
your hands.
1. Drain the fuel tank.
2. Lift the side of the mower that has the muffler or spark
plug.
3. Use a piece of wood to keep the blade from rotating.
4. Remove the bolt (B, Figure 19) that holds the blade
with a 9/16” (14mm) wrench.
5. Check the blade (C) according to the “Blade Service”
instructions. Replace a badly worn or damaged blade
with a factory replacement blade.
6. Mount the blade with the curved edges toward the
housing. If the blade is upside down, the blade will not
cut correctly and can cause an accident.
7. Fasten the blade with the original washer (D) and bolt.
Make sure the outside rim of the Belleville washer is
toward the blade.
8. Tighten the bolt that holds the blade to a torque of 30
foot pounds.
WARNING: Always keep the bolt that holds the
blade tight. A loose bolt or blade can cause an
accident.
Sharpening the Blade
WARNING: Vibration is the result if the blade
is not correctly balanced. A blade that is
damaged with cracks can break and cause
an accident.
1. Sharpen the blade two times a year or every 25 hours.
2. If the blade is on the unit, do not sharpen. Remove the
blade according to the instructions in “Removing The
Blade”.
3. Clean the blade with a brush, soap, and water. Check the
blade. Look for cracks, nicks, or other damage. Replace
a blade that is badly worn, bent, or damaged with a
factory replacement blade.
4. Sharpen the blade (A, Figure 20) with a file (B). Make
sure you keep the original beveled cutting edge.
5. Make sure the blade is balanced. Use a screwdriver (C)
and hold the blade parallel to the ground (D) as shown.
A blade that is balanced will stay parallel to the ground.
If the blade is not balanced, the heavy end will rotate
toward the ground. Sharpen the heavy end until the
blade is balanced.
6. A new blade will cut better than a badly worn blade.
Every two years replace the old blad6.
Checking the Level of Cut
Test the unit in a small area. If the height of cut is not level
or if the cut grass is not discharged, the cause can be: (1)
the blade is bent or damaged, (2) the blade is not sharp, (3)
a worn blade, (4) or a broken blade adapter. Before you use
the unit, correct the problem.
Figure 19: Removing the blade
D
B
D
C
B
C
A
A
Maintenance
Not for
Reproduction
Page 19

19
Maintenance
en
Engine Maintenance
Carburetor Adjustment
Never make adjustments to the carburetor. The carburetor
was set at the factory to operate efficiently under most conditions. However, if adjustments are required, see any Briggs
& Stratton Authorized Dealer for service.
How To Change The Oil
WARNING
Fuel and its vapors are extremely flammable and
explosive.
Fire or explosion can cause severe burns or
death.
• If you drain the oil from the top oil fill tube, the fuel tank
must be empty or fuel can leak out and result in a fire or
explosion.
Used oil is a hazardous waste product and must be disposed
of properly. Do not discard with household waste. Check
with your local authorities, service center, or dealer for safe
disposal/recycling facilities.
Remove Oil
You can drain the oil from the bottom drain hole, the side
drain hole, or from the top oil fill tube.
1. With engine off but still warm, disconnect the spark plug
wire and keep it away from the spark plug.
2. The engine is equipped with a bottom drain and/or a
side drain. Remove the oil drain plug. Drain the oil into
an approved container.
3. After the oil has drained, install and tighten the oil drain
plug.
4. If you drain the oil from the top oil fill tube (C, Figure
21), keep the spark plug end of the engine up. Drain the
oil into an approved container.
WARNING: If you drain the oil from the top oil
fill tube, the fuel tank must be empty or fuel can
leak out and result in a fire or explosion. To
empty the fuel tank, run the engine until it stops
from lack of fuel.
Add Oil
• Place engine level.
• Clean the oil fill area of any debris.
1. Remove the dipstick (A, Figure 21) and wipe with a
clean cloth.
2. Pour the oil slowly into the engine oil fill (C). Do not
overfill. After adding oil, wait one minute and then check
the oil level.
3. Install and tighten the dipstick.
4. Remove the dipstick and check the oil level. It should be
at the top of the full indicator (B) on the dipstick.
5. Install and tighten the dipstick.
Figure 20: Sharpening the blade
D
C
B
A
Figure 21: Engine oil
B
A
C
Not for
Reproduction
Page 20

www.murray.com20
Maintenance
How To Service The Air Filter
NOTICE: Do not use pressurized air or solvents to clean the
filter. Pressurized air can damage the filter and solvents will
dissolve the filter.
WARNING
Fuel and its vapors are extremely flammable and
explosive.
Fire or explosion can cause severe burns or
death.
• Never start or run the engine with the air cleaner assembly (if equipped) or the air filter (if equipped) removed.
1. Open the cover (A, Figure 22) and remove the filter (B).
2. Gently tap the filter on a hard surface. If the filter is
excessively dirty, replace with a new filter.
3. Install the filter and close the cover.
Storage
WARNING
Fuel and its vapors are extremely flammable and
explosive.
Fire or explosion can cause severe burns or
death.
When Storing Fuel Or Equipment With Fuel In Tank
• Store away from furnaces, stoves, water heaters or
other appliances that have pilot lights or other ignition
sources because they can ignite fuel vapors.
Fuel System
Fuel can become stale when stored over 30 days. Stale fuel
causes acid and gum deposits to form in the fuel system or
on essential carburetor parts. To keep fuel fresh, use Briggs
& Stratton FRESH START® fuel stabilizer, available as a liquid additive or a drip concentrate cartridge.
There is no need to drain gasoline from the engine if a fuel
stabilizer is added according to instructions. Run the engine
for 2 minutes to circulate the stabilizer throughout the fuel
system. The engine and fuel can then be stored up to 24
months.
If gasoline in the engine has not been treated with a fuel stabilizer, it must be drained into an approved container. Run
the engine until it stops from lack of fuel. The use of a fuel
stabilizer in the storage container is recommended to maintain freshness.
Engine Oil
While the engine is still warm, change the engine oil.
How To Prepare The Mower For Storage
1. Clean the dirt and debris from the cylinder cooling fins
and the engine housing.
2. Clean the bottom of the mower housing.
3. Completely clean the mower to protect the paint.
4. Put the unit in a building that has good ventilation.
5. Make sure the grass bag is empty of grass. Grass remaining in the bag during storage will damage the bag.
6. Fold the handles (if desired).
CAUTION: Be careful when you fold or raise the handle. Do
not damage the cables. A cable that is bent will not work
correctly. Before you use the unit, replace a bent or damaged
cable.
NOTICE: Store the engine level (normal operating position).
If the engine is tipped for storage, the fuel tank must be
empty and the spark plug side must be up. If the fuel tank is
not empty and if the engine is tipped in any other direction, it
may be difficult to start due to oil or gasoline contaminating
the air filter and/or the spark plug.
Figure 22: Air filter
B
A
Not for
Reproduction
Page 21

21
The engine will not start.
1. Make sure the fuel tank is filled with clean gasoline. Do not use old gasoline.
2. On a cold engine, push the primer button (optional on some models).
3. Make sure the wire for the spark plug is connected to the spark plug.
4. There is too much gasoline in the engine cylinder. Remove and dry the spark plug. Pull the recoil-start grip several times.
Install the spark plug. Connect the wire to the spark plug. Start the engine.
5. The engine is difficult to start in heavy or high grass. Move the mower to a clean dry surface.
6. Make sure the engine stop lever is in the operating position.
The engine will not stop.
1. Release the engine stop lever.
2. Check the engine stop cable. Replace the cable if bent or damaged.
Engine performance is bad.
1. Check the height of cut settings. Raise the height of cut if the grass is high.
2. Check the bottom of the blade housing. Clean the blade housing of grass and other debris.
3. Check the wire to the spark plug. Make sure the wire is connected.
4. Clean the engine cooling fins of grass and other debris.
5. Check the spark plug gap.
6. Check the amount of oil in the engine. Fill with oil if necessary.
7. Check the engine air cleaner.
8. The gasoline is bad. Drain and clean the fuel tank. Fill the fuel tank with clean gasoline.
Excessive vibration.
1. Remove the blade. Check the blade and balance if necessary. See the blade maintenance instructions.
2. Check for a bent or broken blade. A damaged blade is dangerous and must be replaced.
3. Check the blade adapter. Replace a broken blade adapter.
4. If the vibration continues, take the mower to an Authorized Service Center.
The grass will not discharge correctly.
1. Clean the bottom of the mower housing.
2. Check for a badly worn blade. Remove and sharpen the blade. For safety, replace the blade every two years with a factory
replacement blade.
The grass is not cut even.
1. Check the height adjustment at each wheel. The height adjustment must be the same for each wheel.
2. Make sure the blade is sharp.
3. Check for a bent or broken blade. A damaged blade is dangerous and must be replaced.
4. Check for a broken blade adapter. Replace a broken blade adapter.
Troubleshooting
en
Not for
Reproduction
Page 22

www.murray.com22
Warranties
Not for
Reproduction
BRIGGS & STRATTON POWER PRODUCTS GROUP, L.L.C. OWNER WARRANTY POLICY
LIMITED WARRANTY
Briggs & Stratton Power Products Group, LLC will repair and/or replace, free of charge, any part(s) of the equipment that is
defective in material or workmanship or both. Briggs & Stratton Corporation will repair and/or replace, free of charge, any
part(s) of the Briggs and Stratton engine* (if equipped) that is defective in material or workmanship or both. Transportation
charges on product submitted for repair or replacement under this warranty must be borne by purchaser. This warranty is
effective for the time periods and subject to the conditions stated below. For warranty service, find the nearest Authorized
Service Dealer using our dealer locator at www.BriggsandStratton.com or www.Murray.com.
There is no other express warranty. Implied warranties, including those of merchantability and fitness for a particular
purpose, are limited to one year from purchase or to the extent permitted by law. Liability for incidental or consequential
damages are excluded to the extent exclusion is permitted by law.
Some states or countries do not allow limitations on how long an implied warranty lasts, and some states or countries do
not allow the exclusion or limitation of incidental or consequential damages, so the above limitation and exclusion may not
apply to you. This warranty gives you specific legal rights and you may also have other rights which vary from state to state
or country to country.
WARRANTY PERIOD
The warranty period begins on the date of purchase by the first retail consumer or commercial end user, and continues for the
period of time stated above. “Consumer use” means personal residential household use by a retail consumer. “Commercial
use” means all other uses, including use for commercial, income producing or rental purposes. Once product has experienced
commercial use, it shall thereafter be considered as commercial use for purposes of this warranty.
No warranty registration is necessary to obtain warranty on Briggs & Stratton products. Save your proof of purchase receipt. If you
do not provide proof of the initial purchase date at the time warranty service is requested, the manufacturing date of the product will
be used to determine warranty eligibility.
ABOUT YOUR WARRANTY
We welcome warranty repair and apologize to you for being inconvenienced. Warranty service is available only through servicing
dealers authorized by Briggs & Stratton or BSPPG, LLC.
Most warranty repairs are handled routinely, but sometimes requests for warranty service may not be appropriate. This warranty
only covers defects in materials or workmanship. It does not cover damage caused by improper use or abuse, improper
maintenance or repair, normal wear and tear, or stale or unapproved fuel.
Improper Use and Abuse - The proper, intended use of this product is described in the Operator’s Manual. Using the product in
a way not described in the Operator’s Manual or using the product after it has been damaged will void your warranty. Warranty is
not allowed if the serial number on the product has been removed or the product has been altered or modified in any way, or if the
product has evidence of abuse such as impact damage, or water/chemical corrosion damage.
Improper Maintenance or Repair - This product must be maintained according to the procedures and schedules provided in the
Operator’s Manual, and serviced or repaired using genuine Briggs & Stratton parts. Damage caused by lack of maintenance or use
of non-original parts is not covered by warranty.
Normal Wear - Like all mechanical devices, your unit is subject to wear even when properly maintained. This warranty does not
cover repairs when normal use has exhausted the life of a part or the equipment. Maintenance and wear items such as filters,
belts, cutting blades, and brake pads (engine brake pads are covered) are not covered by warranty due to wear characteristics
alone, unless the cause is due to defects in material or workmanship.
Stale Fuel - In order to function correctly, this product requires fresh fuel that conforms to the criteria specified in the Operator’s
Manual. Damage caused by stale fuel (carburetor leaks, clogged fuel tubes, sticking valves, etc) is not covered by warranty.
Item Consumer Use Commercial Use:
Equipment 2 Years 90 Days
Engine* 2 Years 90 Days
Battery 1 Year 1 Year
* Applies to Briggs and Stratton engines only. Warranty coverage of non-Briggs and Stratton engines is provided by the engine manufacturer.
Page 23

23
en
Warranties
Not for
Reproduction
California, U.S. EPA, and Briggs & Stratton Corporation Emissions Control Warranty Statement
The California Air Resources Board, U.S. EPA, and Briggs & Stratton (B&S) are pleased
to explain the emissions control system warranty on your Model Year 2011--2012
engine/equipment. In California, new small off-road engines and large spark ignited
engines less than or equal to 1.0 liter must be designed, built, and equipped to meet the
State’s stringent anti-smog standards. B&S must warrant the emissions control system
on your engine/equipment for the periods of time listed below provided there has been
no abuse, neglect, or improper maintenance of your engine or equipment.
Your emissions control system may include parts such as the carburetor or fuel injection
system, fuel tank, ignition system, and catalytic converter. Also included may be hoses,
belts, connectors, sensors, and other emissions-related assemblies.
Where a warrantable condition exists, B&S will repair your engine/equipment at no cost
to you including diagnosis, parts, and labor.
Manufacturer’s Warranty Coverage:
Small off-road engines and large spark ignited engines less than or equal to 1.0 liter are
warranted for two years. If any emissions-related part on your engine/equipment is
defective, the part will be repaired or replaced by B&S.
Your Warranty Rights And Obligations
Owner’s Warranty Responsibilities:
x As the engine/equipment owner, you are responsible for the performance of the
required maintenance listed in your owner’s manual. B&S recommends that you
retain all receipts covering maintenance on your engine/equipment, but B&S cannot
deny warranty solely for the lack of receipts or your failure to ensure the performance
of all scheduled maintenance.
x As the engine/equipment owner, you should however be aware that B&S may deny
you warranty coverage if your engine/equipment or a part has failed due to abuse,
neglect, improper maintenance, or unapproved modifications.
x You are responsible for presenting your engine/ equipment to a B&S distribution
center, servicing dealer, or other equivalent entity, as applicable, as soon as a
problem exists. The warranty repairs should be completed in a reasonable amount of
time, not to exceed 30 days. If you have any questions regarding your warranty
rights and responsibilities, you should contact B&S at (414) 259-5262.
April 2011
Briggs & Stratton Emissions Control Warranty Provisions
The following are specific provisions relative to your Emissions Control Warranty Coverage. It is in addition to the B&S engine warranty for non-regulated engines found in the
Operator’s Manual.
1. Warranted Emissions Parts
Coverage under this warranty extends only to the parts listed below (the emissions
control systems parts) to the extent these parts were present on the B&S engine
and/or B&S supplied fuel system.
a. Fuel Metering System
x Cold start enrichment system (soft choke)
x Carburetor and internal parts
x Fuel pump
x Fuel line, fuel line fittings, clamps
x Fuel tank, cap and tether
x Carbon canister
b. Air Induction System
x Air cleaner
x Intake manifold
x Purge and vent line
c. Ignition System
x Spark plug(s)
x Magneto ignition system
d. Catalyst System
x Catalytic converter
x Exhaust manifold
x Air injection system or pulse valve
e. Miscellaneous Items Used in Above Systems
x Vacuum, temperature, position, time sensitive val ves and switches
x Connectors and assemblies
2. Length of Coverage
For a period of two years from date of original purchase, B&S warrants to the original
purchaser and each subsequent purchaser that the engine is designed, built, and
equipped so as to conform with all applicable regulations adopted by the Air
Resources Board; that it is free from defects in material and workmanship that could
cause the failure of a warranted part; and that it is identical in all material respects to
the engine described in the manufacturer ’s application for certification. The warranty
period begins on the date the engine is originally purchased.
The warranty on emissions-related parts is as follows:
x Any warranted part that is not scheduled for replacement as required
maintenance in the owner’s manual supplied, is warranted for the warranty
period stated above. If any such part fails during the period of warranty
coverage, the part will be repaired or replaced by B&S at no charge to the
owner. Any such part repaired or replaced under the warranty will be warranted
for the remaining warranty period.
x Any warranted part that is scheduled only for regular inspection in the owner’s
manual supplied, is warranted for the warranty period stated above. Any such
part repaired or replaced under warranty will be warranted for the remaining
warranty period.
x Any warranted part that is scheduled for replacement as required maintenance
in the owner’s manual supplied, is warranted for the period of time prior to the
first scheduled replacement point for that part. If the part fails prior to the first
scheduled replacement, the part will be repaired or replaced by B&S at no
charge to the owner. Any such part repaired or replaced under warranty will be
warranted for the remainder of the period prior to the first scheduled
replacement point for the part.
x Add on or modified parts that are not exempted by the Air Resources Board
may not be used. The use of any non exempted add on or modified parts by the
owner will be grounds for disallowing a warranty claim. The manufacturer will
not be liable to warrant failures of warranted parts caused by the use of a non
exempted add on or modified part.
3. Consequential Coverage
Coverage shall extend to the failure of any engine components caused by the
failure of any warranted emissions parts.
4. Claims and Coverage Exclusions
Warranty claims shall be filed according to the provisions of the B&S engine
warranty policy. Warranty coverage does not apply to failures of emissions parts
that are not original equipment B&S parts or to parts that fail due to abuse, neglect,
or improper maintenance as set forth in the B&S engine warranty policy. B&S is not
liable for warranty coverage of failures of emissions parts caused by the use of
add-on or modified parts.
Look For Relevant Emissions Durability Period and Air Index Information
Engines that are certified to meet the California Air Resources Board (CARB) small
off-road Emissions Standard must display information regarding the Emissions Durability
Period and the Air Index. Briggs & Stratton makes this information available to the
consumer on our emissions labels. The engine emissions label will indicate certification
information.
The Emissions Durability Period describes the number of hours of actual running time
for which the engine is certified to be emissions compliant, assuming proper
maintenance in accordance with the Operating & Maintenance Instructions. The
following categories are used:
Moderate:
Engine is certified to be emissions compliant for 125 hours of actual engine running time.
Intermediate:
Engine is certified to be emissions compliant for 250 hours of actual engine running time.
Extended:
Engine is certified to be emissions compliant for 500 hours of actual engine running time.
For example, a typical walk-behind lawn mower is used 20 to 25 hours per year.
Therefore, the Emissions Durability Period of an engine with an intermediate rating
would equate to 10 to 12 years.
On Your Small Off-Road Engine Emissions Label
Briggs & Stratton engines are certified to meet the United States Environmental
Protection Agency (USEPA) Phase 2 or Phase 3 emissions standards. The Emissions
Compliance Period referred to on the Emissions Compliance label indicates the number
of operating hours for which the engine has been shown to meet Federal emissions
requirements.
For engines less than 225 cc displacement.
Category C = 125 hours, Category B = 250 hours, Category A = 500 hours
For engines of 225 cc or more displacement.
Category C = 250 hours, Category B = 500 hours, Category A = 1000 hours
Page 24

www.murray.com24
Notes
Not for
Reproduction
Page 25

25
en
Slope Guide
Not for
Reproduction
Page 26

www.murray.com
Power Ratings: The gross power rating for individual gas engine models is labeled in accordance with SAE (Society of
Automotive Engineers) code J1940 (Small Engine Power & Torque Rating Procedure), and rating performance has been
obtained and corrected in accordance with SAE J1995 (Revision 2002-05). Torque values are derived at 3060 RPM; horsepower values are derived at 3600 RPM. The gross power curves can be viewed at www.BRIGGSandSTRATTON.COM. Net power
values are taken with exhaust and air cleaner installed whereas gross power values are collected without these attachments.
Actual gross engine power will be higher than net engine power and is affected by, among other things, ambient operating
conditions and engine-to-engine variability. Given the wide array of products on which engines are placed, the gas engine may
not develop the rated gross power when used in a given piece of power equipment. This difference is due to a variety of factors including, but not limited to, the variety of engine components (air cleaner, exhaust, charging, cooling, carburetor, fuel
pump, etc.), application limitations, ambient operating conditions (temperature, humidity, altitude), and engine-to-engine variability. Due to manufacturing and capacity limitations, Briggs & Stratton may substitute an engine of higher rated power for
this Series engine.
Product Specifications
MD22550FC M22550FC
Deck Size
(in / cm)
22 / 56 22 / 56
Height of Cut
(in / cm)
1.25 - 3.75 / 3.18 - 9.53 1.25 - 3.75 / 3.18 - 9.53
Engine Power
(ft lbs)
5.5 5.5
Engine Displacement
(cc)
140 140
Fuel Tank Capacity
(qt / l)
0.9 / 0.9 0.9 / 0.9
Oil Capacity
(oz / l)
15 / 0.44 15 / 0.44
Spark Plug Gap
(in / mm)
0.020 / 0.50 0.020 / 0.50
Spark Plug Torque
(lb-in / Nm)
180 / 20 180 / 20
Not for
Reproduction
Page 27

Manuel d'opérateur
TONDEUSE POUSSÉE
DE 22”
N° de modèle Description
7800889 MD22550FC
7800890 M22550FC
fr
Not for
Reproduction
!
Page 28

Merci de votre achat de ce produit Murray de qualité. Nous sommes heureux que vous ayez placé votre confiance sur la marque Murray. S’il est utilisé et entretenu suivant les instructions de ce manuel, votre produit Murray vous rendra des années de
loyaux services.
Ce manuel contient des informations de sécurité pour vous sensibiliser sur les dangers et risques associés avec la machine, et
sur la façon de les éviter. Cette machine a été conçue et n’est prévue que pour de la coupe de finition de pelouses entretenues,
et n’a pas d’autres finalités. Il est important que vous lisiez et assimiliez complètement ces instructions avant d’essayer de
démarrer et d’utiliser cet équipement. Conservez ces instructions d’origine pour vous y reporter dans le futur.
Complétez les informations suivantes suite à l’achat de votre Murray.
Date de l’achat__________________________________________________________________________________
Revendeur _____________________________________________________________________________________
N° de téléphone du revendeur______________________________________________________________________
Équipement
Référence de modèle _____________________________________________________________________
Numéro de série _________________________________________________________________________
Moteur
Modèle ___________________________Type___________________Code __________________________
Copyright © 2011, Briggs & Stratton Corporation
Milwaukee, WI, USA. Tous droits réservés.
Not for
Reproduction
Page 29

3
Sommaire
Sécurité de l’opérateur . . . . . . . . . . . . . . . . . . . . . . . . . . . . . . . . . . . . . . . . . . . . . . . . . . . . .4
Montage . . . . . . . . . . . . . . . . . . . . . . . . . . . . . . . . . . . . . . . . . . . . . . . . . . . . . . . . . . . . . . .8
Déballage . . . . . . . . . . . . . . . . . . . . . . . . . . . . . . . . . . . . . . . . . . . . . . . . . . . . . . . . . . . . . . . . . . . . .8
Guidon . . . . . . . . . . . . . . . . . . . . . . . . . . . . . . . . . . . . . . . . . . . . . . . . . . . . . . . . . . . . . . . . . . . . . . .8
Hauteur du guidon . . . . . . . . . . . . . . . . . . . . . . . . . . . . . . . . . . . . . . . . . . . . . . . . . . . . . . . . . . . . . .9
Bac à herbe . . . . . . . . . . . . . . . . . . . . . . . . . . . . . . . . . . . . . . . . . . . . . . . . . . . . . . . . . . . . . . . . . . .10
Plaque de déchiquetage (mulching) . . . . . . . . . . . . . . . . . . . . . . . . . . . . . . . . . . . . . . . . . . . . . . . .11
Conseils pour le déchiquetage . . . . . . . . . . . . . . . . . . . . . . . . . . . . . . . . . . . . . . . . . . . . . . . . . . . .11
Décharge latérale . . . . . . . . . . . . . . . . . . . . . . . . . . . . . . . . . . . . . . . . . . . . . . . . . . . . . . . . . . . . . .11
Comment préparer le moteur . . . . . . . . . . . . . . . . . . . . . . . . . . . . . . . . . . . . . . . . . . . . . . . . . . . . .12
Préparation finale . . . . . . . . . . . . . . . . . . . . . . . . . . . . . . . . . . . . . . . . . . . . . . . . . . . . . . . . . . . . . .13
Fonctionnement . . . . . . . . . . . . . . . . . . . . . . . . . . . . . . . . . . . . . . . . . . . . . . . . . . . . . . . . .14
Levier d'arrêt du moteur . . . . . . . . . . . . . . . . . . . . . . . . . . . . . . . . . . . . . . . . . . . . . . . . . . . . . . . . .14
Comment arrêter le moteur . . . . . . . . . . . . . . . . . . . . . . . . . . . . . . . . . . . . . . . . . . . . . . . . . . . . . .14
Comment démarrer le moteur . . . . . . . . . . . . . . . . . . . . . . . . . . . . . . . . . . . . . . . . . . . . . . . . . . . .14
Règles pour un functionnement sûr et efficace . . . . . . . . . . . . . . . . . . . . . . . . . . . . . . . . . . . . . . .15
Réglage de la hauteur de coupe . . . . . . . . . . . . . . . . . . . . . . . . . . . . . . . . . . . . . . . . . . . . . . . . . . .15
Maintenance . . . . . . . . . . . . . . . . . . . . . . . . . . . . . . . . . . . . . . . . . . . . . . . . . . . . . . . . . . . .16
Tableau du maintenance . . . . . . . . . . . . . . . . . . . . . . . . . . . . . . . . . . . . . . . . . . . . . . . . . . . . . . . . .16
Maintenance de la tondeuse . . . . . . . . . . . . . . . . . . . . . . . . . . . . . . . . . . . . . . . . . . . . . . . . . . . . . .17
Maintenance du moteur . . . . . . . . . . . . . . . . . . . . . . . . . . . . . . . . . . . . . . . . . . . . . . . . . . . . . . . . .19
Remisage . . . . . . . . . . . . . . . . . . . . . . . . . . . . . . . . . . . . . . . . . . . . . . . . . . . . . . . . . . . . . . . . . . . .20
Recherche des pannes . . . . . . . . . . . . . . . . . . . . . . . . . . . . . . . . . . . . . . . . . . . . . . . . . . . . .21
Garanties . . . . . . . . . . . . . . . . . . . . . . . . . . . . . . . . . . . . . . . . . . . . . . . . . . . . . . . . . . . . . .22
Utilisation sur pente . . . . . . . . . . . . . . . . . . . . . . . . . . . . . . . . . . . . . . . . . . . . . . . . . . . . . .25
AVERTISSEMENT
Les bornes de batterie, terminaisons et accessoires annexes
contiennent du plomb ou des composés au plomb, produit
chimique reconnu par l’état de Californie comme causant cancer
et anomalies congénitales ou autres atteintes à la reproduction.
Lavez-vous bien les mains après manutention.
!
!
AVERTISSEMENT
Les gaz d’échappement du moteur, certains de ses constituants
et certains composants de la machine contiennent ou émettent des
produits chimiques reconnus par l’état de Californie comme
causant cancer et anomalies congénitales.
!
!
fr
Not for
Reproduction
Page 30

www.murray.com4
Sécurité de l’opérateur
Sécurité de fonctionnement
Un matériel électrique est sûr tant que l'est son utilisateur. Il peut être dangereux
s'il n'est pas utilisé à bon escient ou s'il n'est pas correctement entretenu ! Rappel
: l'utilisateur est responsable de sa propre sécurité et de celle de ceux qui sont à
ses côtés.
Faire preuve de bon sens et bien penser à ce que l'on fait. En cas de doute sur une
opération à effectuer sans danger avec l'équipement choisi, s'adresser à un professionnel : Contacter le distributeur local homologué.
Lecture du manuel
Le manuel d'utilisation comporte d'importantes informations relatives à la sécurité
qu'il faut connaître AVANT d'utiliser la machine ainsi que PENDANT son fonctionnement.
Ce manuel comporte des techniques de fonctionnement en toute sécurité, une explication des caractéristiques et des commandes de la machine et des informations relatives à l'entretien pour profiter au maximum de l'investissement dans la machine.
S'assurer de lire, dans son intégralité, la section sur les règles et informations relatives à la sécurité figurant dans les pages suivantes. Lire également la section sur le
fonctionnement dans son intégralité.
Enfants
Des accidents tragiques peuvent se produire avec des enfants. Ne jamais leur
permettre de se tenir à proximité de la zone d'opération. Les enfants sont souvent attirés par la machine et l'activité de tonte. Ne jamais supposer que les
enfants resteront là où ils ont été vus pour la dernière fois. S'il existe un risque
que des enfants puissent venir à proximité de l'endroit où l'on tond, demander à
un autre adulte responsable de les surveiller.
Fonctionnement en pente
Il existe un danger grave de blessure, voire de mort, en cas d'utilisation de cette
machine dans une pente trop raide. Utiliser la machine sur une pente trop raide
ou sur laquelle la stabilité ou la traction est inadéquate peut entraîner la perte de
contrôle ou la chute et glissade.
Vous ne devez pas utiliser la machine sur des pentes de déclivité supérieure 10
degrées, ce qui est 1,5 m (3,5 pi) d’élévation pour 6,0 m (20,0 pi). Toujours
tondre les pentes en travers et jamais de haut en bas.
Noter également que la surface que vous êtes entrain de tondre peut considérablement affecter le contrôle. De l’herbe mouillée ou des feuilles peuvent
gravement affecter votre stabilité et traction sur une pente. En cas de doute sur
l'utilisation de l'unité sur un plan incliné, ne pas l'utiliser. Ça ne vaut pas le
coup.
20.0 ft
(6,0 m)
3.5 ft
(1,5 m)
Not for
Reproduction
Page 31

5
Sécurité de l’opérateur
Pièces en mouvement
Cette machine comporte des pièces en mouvement qui peuvent blesser l'utilisateur ou
autrui. Néanmoins si vous vous tenez derrière la poignée correctement et suivez
scrupuleusement toutes les règles figurant dans ce manuel, il n'y a aucun danger à se
servir de cette machine.
Le plateau de coupe de la tondeuse comporte une lame de tondeuse rotative susceptible
d'amputer les mains et les pieds. Ne jamais laisser qui que ce soit près de la machine
quand elle est en marche !
Pour vous aider, vous l’utilisateur, à utiliser ce matériel en toute sécurité, il est équipé
d’un système de sécurité détectant la présence du conducteur. NE PAS tenter d'altérer ni
de contourner le dispositif. Consulter le distributeur immédiatement si le dispositif ne
réussit pas tous les tests du système de verrouillage de sécurité figurant dans ce manuel.
Objets projetés
Cette unité comporte une lame de tondeuse rotative. Cette lame peut ramasser et
projeter des débris susceptibles de gravement blesser un spectateur. S'assurer de
bien nettoyer la zone à tondre AVANT de commencer à tondre.
Ne pas utiliser cette unité avant d'avoir mis le bac de ramassage complet ou la
protection d'évacuation (déflecteur) en place.
En outre, ne jamais laisser qui que ce soit près de la machine quand elle est en
marche ! Si quelqu'un se trouve dans la zone, arrêter immédiatement la machine
et attendre que cette personne parte.
Accumulation de débris
L’accumulation d’herbe et de débris peut provoquer un incendie. S’assurer de nettoyer
toute accumulation d’herbe et de débris avec une brosse ou de l’air comprimé, avant et
après utilisation.
Carburant et entretien
L'essence est extrêmement inflammable. Ses vapeurs sont également extrêmement inflammables et peuvent se déplacer vers des sources de combustion à distance. Utiliser l'essence uniquement comme carburant, non pas comme solvant
ou nettoyant. Ne jamais remiser l'essence dans des endroits où ses vapeurs peuvent s'accumuler ou se déplacer vers une source de combustion telle qu'une
veilleuse. Le carburant doit être remisé dans des bidons en plastique, hermétiques
et homologués, ou dans le réservoir d'essence du tracteur, le bouchon étant bien
fermé. Essuyer immédiatement toute éclaboussure d'essence.
Un entretien adéquat est essentiel à la sécurité et à la performance de la machine.
S'assurer d'effectuer les procédures d'entretien indiquées dans ce manuel et
surtout, de tester périodiquement le dispositif de sécurité.
Not for
Reproduction
Page 32

www.murray.com6
!
AVERTISSEMENT: Cette puissante tondeuse est capable de vous amputer d'un pied ou d'une main et peut projeter des
objets pouvant causer des accidents et des dommages. La non-observation des consignes de sécurité qui suivent pourrait entraîner des lésions graves voire la mort de l'utilisateur ou d'autres personnes. Le propriétaire de la tondeuse doit
comprendre toutes ces consignes de sécurité et ne doit en autoriser l'usage qu'aux personnes les ayant elles-mêmes
comprises. Les utilisateurs doivent être sains de corps et d'esprit et ne doivent être sous l'influence d'aucune substance qui pourrait affecter leur vue, leurs réflexes ou leur jugement. Si vous avez des questions concernant votre
machine auxquelles votre revendeur ne pourrait pas répondre, contactez le service client (1-800-661-6662 ou
www.murray.com).
Consignes pour les enfants
Des accidents dramatiques peuvent survenir si l'utilisateur n'est pas
conscient de la présence d'enfants. Les enfants sont souvent attirés
par les machines et par la tonte en général. Ne supposez jamais que
des enfants resteront à l'endroit où vous les avez vus pour la
dernière fois.
1. ELOIGNEZ les enfants de la zone à tondre et laissez- les sous la
surveillance d'un adulte responsable autre que l'opérateur de la
machine.
2. NE PERMETTEZ PAS à des enfants de se trouver dans la zone à
tondre lorsque la tondeuse est en marche et coupez le moteur si
quelqu'un s'introduit dans la zone à tondre.
3. NE LAISSEZ PAS de jeunes adolescents utiliser la machine.
4. N'AUTORISEZ l'utilisation de la tondeuse qu'à des adultes ou à
des adolescents responsables sous la surveillance d'adultes.
5. NE TONDEZ PAS en marche arrière à moins que cela soit absolument nécessaire. REGARDEZ bien en arrière et en bas avant et pendant la marche arrière pour détecter l'éventuelle présence d'enfants,
d'animaux ou de dangers.
6. SOYEZ EXTREMEMENT VIGILANT à l'approche de virages sans
visibilité, d'arbustes, d'arbres ou d'autres objets pouvant réduire
votre champ de vision.
Utilisation dans les pentes
1. Les pentes sont à l'origine d'une majorité des accidents résultant
de glissades ou de chutes. Ces accidents peuvent entraîner des
blessures graves. Si vous avez la moindre appréhension avant de
tondre une zone en pente, NE LA TONDEZ PAS !
2. Les pelouses en pente se tondent transversalement, jamais en
montant et en descendant. Faites très ATTENTION si vous êtes en
pente et que vous changez de direction. Ne tondez pas des pentes
abruptes ou d'autres endroits où la stabilité ou l'adhérence serait
douteuse. Reportez-vous en fin de ce manuel aux Conseils pour
utilisation sur pente.
3. Faites particulièrement attention avec les sacs de ramassage
d'herbe et autres accessoires, ils affectent la conduite et la stabilité
de la machine.
Préparation
1. Lisez et suivez les avertissements et les consignes concernant le
moteur, la machine et les accessoires. Avant le démarage, familiarisez-vous avec les commandes et la tondeuse.
2. L'utilisation de la tondeuse doit être uniquement réservée à des
personnes sûres, responsables et connaissant les consignes
d'utilisation de la tondeuse.
3. Les statistiques démontrent que les utilisateurs de 60 ans et plus
sont les personnes plus souvent impliquées dans les accidents liés
aux tondeuses. Il est conseillé à cette catégorie d'utilisateurs,
d'évaluer leurs capacités à manœuvrer la tondeuse sans risquer de
blesser autrui ou eux-mêmes.
Preparation
(suite de la colonne précédente)
4. Soyez particulièrement prudent lors de la manipulation de carburants. Ils sont inflammables et leurs vapeurs peuvent être la cause
d'explosions. Ne conservez du carburant QUE dans des bidons
prévus à cet effet. N'enlevez jamais le bouchon du réservoir
d'essence ou n'ajoutez jamais d'essence quand le moteur est en
marche. Ne rajoutez de l'essence que si vous vous trouvez à
l'extérieur et que le moteur de la tondeuse est arrêté et froid.
Attention à bien nettoyer si vous avez fait déborder de l'essence. NE
FUMEZ PAS en manipulant du carburant.
5. Inspectez la zone à tondre et enlevez tous les objets (jouets, fils
de fer, pierres, branches...) qui pourraient blesser quelqu'un s'ils
étaient projetés par la machine ou qui pourraient vous gêner pendant la tonte. Par ailleurs, notez bien l'emplacement des trous, des
souches d'arbres et des autres dangers.
6. Conservez une distance de sécurité entre la tondeuse et d'autres
personnes ou animaux.Si quelqu'un s'introduit dans la zone à tondre, DEBRAYEZ immédiatement la lame, coupez le moteur et arrêtez
la tondeuse.
7. Vérifiez fréquemment le bon fonctionnement des protections, des
déflecteurs, des commutateurs, des contrôles de lames et de tous
les dispositifs de sécurité.
8. Assurez-vous de la bonne lisibilité de tous les autocollants de
sécurité. Remplacez-les s'ils sont détériorés.
9. Pendant que vous tondez, protégez-vous et portez des lunettes de
protection, des pantalons longs et des chaussures résistantes. NE
TONDEZ PAS pieds-nus ou en sandales.
10. Apprenez à DEBRAYER la lame rapidement et à arrêter le moteur
en cas d'urgence.
11. Faites très attention lors du chargement ou du déchargement de
la tondeuse sur un camion ou une remorque.
12. Vérifiez fréquemment l'état d'usure du bac de ramassage et
remplacez-le si nécessaire, afin d'éviter qu'un objet ne soit projeté et
ne blesse quelqu'un en paraticulier s'ilest trové ou usé.
Manutention sécurisée de l'essence
Pour éviter des dommages corporels ou matériels, faites très attention en manipulant de l'essence. C'est un liquide très inflammable,
et ses vapeurs sont explosives.
1. Éteignez complètement cigarettes, cigares, pipes et autres
sources d'inflammation.
2. N'utilisez qu'un récipient prévu pour transporter de l'essence.
3. N'ENLEVEZ PAS le bouchon de réservoir et ne faites pas l'appoint
en essence avec le moteur qui tourne. Laissez le moteur refroidir
avant de refaire le plein.
4. NE FAITES PAS le plein dans un local.
5. NE STOCKEZ PAS la machine ou le bidon d'essence à l'intérieur
s'il y a une flamme nue, des étincelles, ou une veilleuse comme sur
un chauffe-eau ou d'autres appareils.
Sécurité de l’opérateur
Not for
Reproduction
Page 33

7
Sécurité de l’opérateur
Manutention sécurisée de l'essence
(suite de la page précédente)
6. NE REMPLISSEZ PAS les récipients d'essence dans un véhicule
ou sur un camion ou un plateau de remorque qui auraient un
revêtement plastique. Placez toujours les récipients sur le sol et loin
du véhicule pour le remplissage.
7. Enlevez les équipements fonctionnant à l'essence du véhicule ou
de la remorque et refaites-en le plein au sol. Si ce n'est pas possible, faites-le en utilisant un bidon portable plutôt que l'embout de la
pompe de distribution.
8. NE DÉMARREZ PAS des équipements fonctionnant à l'essence
dans des véhicules ou remorques fermés.
9. Gardez l'embout de distribution en contact avec le bord du réservoir ou du récipient à remplir en permanence jusqu'au plein.
N'UTILISEZ PAS un embout de distribution qu'on puisse bloquer en
position ouverte.
10. Si du carburant est renversé sur les vêtements, changez-en
immédiatement.
11. NE remplissez JAMAIS à ras le réservoir d'essence. Remettez le
bouchon du réservoir d'essence et serrez-le bien.
Utilisation
1. NE METTEZ PAS vos mains ou vos pieds à proximité ou en
dessous des éléments en rotation. Restez à l'écart de la zone
d'éjection lorsque le moteur tourne.
2. COUPEZ le moteur si vous devez traverser des allées de graviers,
des passages ou des routes ou bien lorsque des objets projetés
pourraient être source de dangers.
3. Tondez uniquement à la lumière du jour ou avec un bon éclairage
artificiel.
4. N'utilisez pas la tondeuse si vous êtes sous l'influence d'alcools
ou de drogues.
5. Si vous heurtez un objet ou si la tondeuse vibre de manière anormale, ARRÊTEZ immédiatement le moteur et retirez le fil de la
bougie et assurez-vous qu'ils n'entreront pas en contact. Inspectez
la machine pour vérifier si elle est endommagée et procédez aux
réparations avant de la redémarrer.
6. NE TONDEZ PAS des zones à proximité de ravins, de fossés ou
de berges.
7. FAITES ATTENTION aux trous et aux autres dangers cachés. Une
pelouse haute peut dissimuler des obstacles. Restez à l'écart des
fossés, des conduites, des clôtures ou tous autres objets pouvant
dépasser.
8. NE TONDEZ PAS un gazon humide. Ayez toujours un pas sûr.
Maintenez fermement la poignée et suivez la tondeuse en marchant,
vous ne devez jamais courir. Une glissade pourrait entraîner des
blessures.
9. TOUJOURS rester derrière la poignée quand la machine (moteur)
tourne.
10. NE QUITTEZ PAS la tondeuse si le moteur tourne. Arrêtez le
moteur et débrayez la lame avant de laisser de la tondeuse, pour
quelque raison que ce soit.
11. Avant de nettoyer, réparer ou inspecter la tondeuse, assurezvous que le moteur, la lame et tous les autres éléments en rotation
sont bien ARRETES. Retirez le fil de la bougie et assurez-vous qu'ils
n'entreront pas en contact pour éviter un démarrage intempestif.
12. ARRÊTEZ le moteur et s’assurer que la lame est à l’ARRÊT
avant d’enlever le bac à herbe ou nettoyer l’amas d’herbe.
Utilisation
(suite de la colonne précédente)
13. COUPEZ le moteur et attendez que la lame soit complètement
ARRETEE avant de retirer le sac de ramassage et/ou de déboucher
le conduit d'éjection. N'UTILISEZ PAS la tondeuse sans que les
déflecteurs, la protection de déversement, la pro tection arrière et
les autres dispositifs de sécurité ne soient en place et opérationnels,
ou le dispositif de ramassage soient correctement installés.
N'ORIENTEZ JAMAIS l'éjection en direction des personnes, des
voitures, des portes ou des fenêtres.
14. NE PAS décharger des matières contre un mur ou un obstacle.
Elles pourraient ricocher et repartir vers l'opérateur.
15. Ralentissez avant de prendre un virage.
16. Faites attention à la circulation lorsque vous vous trouvez près
d'une route ou lorsque vous devez en traverser une.
17. NE PAS OPERER la tondeuse dans un endroit sans aération. Las
gaz d'échappement contiennent du monoxyde de carbone et peuvent être dangereux.
18. N'utiliser que des accessoires approuvés par le constructeur. Se
reporter aux instructions du constructeur pour une installation et
une utilisation correctes des accessoires.
Entretien et remisage
1. NE STATIONNEZ JAMAIS une machine ou ne rangez jamais un
bidon de carburant dans un local où les vapeurs de carburant pourraient entrer en contact avec une flamme, une étincelle ou une
veilleuse comme on peut en trouver dans un chauffe-eau ou dans
une chaudière, un sèche-linge ou d'autres appareils thermiques.
2. Laissez refroidir le moteur avant de ranger la tondeuse dans un
local. Rangez le bidon de carburant dans un endroit bien ventilé,
inoccupé et hors de portée des enfants.
3. Pour réduire les risques d'incendie ou de surchauffe du moteur,
veillez à ce qu'il n'ait pas d'herbe, de feuilles ou de surplus de
graisse sur le moteur.
4. Si vous devez vidanger le réservoir de carburant, récupérez le
carburant dans un bidon prévu à cet effet et effectuez cette opération à l'extérieur et éloigné de toute flamme.
5. Assurez-vous du bon serrage des écrous, des boulons et des vis
de la tondeuse. Vérifiez que toutes les goupilles sont bien en place.
6. Si vous devez faire fonctionner la tondeuse à l'intérieur, faites-le
dans un pièce bien ventilée. Les gaz d'échappement contiennent du
monoxyde de carbone, un gaz inodore et mortel.
7. Ne procédez à l'entretien du moteur et aux réglages que si le
moteur est coupé. Retirez le fil de la bougie et assurez-vous qu'ils
n'entreront pas en contact pour éviter un démarrage intempestif.
NE MODIFIEZ PAS les réglages du régulateur de vitesse du moteur.
8. Inspectez fréquemment le dispositif de ramassage et vérifiez son
état d'usure et ses détériorations, ceci pour éviter la projection
d'éléments tondus. Remplacez le sac s'il est très détendu ou
déchiré. Remplacez la glissière ou l'adaptateur du sac s'ils sont
cassés ou fendus.
9. Les lames de la tondeuse sont affûtées et coupantes. Enveloppezles ou portez des gants de cuir épais et soyez particulièrement PRUDENT si vous devez les manipuler.
10. NE FAITES JAMAIS le test de l'étincelle en mettant votre bougie
à la masse sur le cylindre du moteur. L'étincelle pourrait mettre feu
au carburant qui se trouve dans le cylindre.
11. Faites vérifier votre machine par votre revendeur au moins une
fois par an. Faites installer tout nouveau système visant à améliorer
la sécurité de votre machine.
12. Utiliser uniquement des pièces de rechange homologuées par
l'usine ou semblables lors des réparations.
fr
Not for
Reproduction
Page 34

www.murray.com8
AVERTISSEMENT: Avant tout montage ou maintenance
de la tondeuse, débrancher le fil de la bougie.
NOTE: Dans ce livret d'instructions, la droite et la gauche décrivent
l'emplacement d'une pièce avec l'opérateur se tenant debout derrière le
guidon.
Déballage
La tondeuse a été entièrement montée à l'usine. Lorsque la tondeuse a
été placée dans le carton, le guidon a été placé en position de rangement. Pour placer lle guidon en position de fonctionnement, suivre les
étapes ci-dessous.
Guidon
1. Sortir la tondeuse du carton.
2. Retirer le matériau d'emballage autour de la tondeuse et du
guidon.
3. MD22550FC - Remonter le guidon inférieur (A, Figure 1).
S'assurer que le guidon inférieur se trouve entre les languettes de
verrouillage (B). Serrer les écrous à oreilles inférieurs (C).
M22550FC - Déposer l'écrou à oreille (A, Figure 2) et le boulon
(B) de chaque support du guidon (C). Lever le guidon inférieur (D)
et le fixer avec le boulon et l'écrou à oreilles déposés.
4. Placer le guidon supérieur (D, figure 1) en position de fonctionnement (droite). Serrer les écrous à oreilles supérieurs (E).
NOTE: La hauteur du guidon peut être réglée pour le confort de
l'opérateur. Voir "Hauteur du guidon".
ATTENTION: Soyez prudent lorsque vous pliez ou levez le guidon. Ne
pas endommager les câbles. Un câble qui est tordu ne fonctionne pas
correctement. Avant d'utiliser la tondeuse, remplacer un câble tordu ou
endommagé.
5. Maintenir le levier d'arrêt moteur contre le guidon. (Se référer à la
section intitulée "Levier d'arrêt moteur".) Tirer doucement sur la
poignée du lanceur (A, Figure 2). Pour fixer la poignée du lanceur
sur le guide de la corde (B), entortiller la corde au travers du
guide de corde monté sur le côté droit du guidon.
IMPORTANT: Veuillez faire fonctionner le levier d'arrêt du moteur
plusieurs fois. Assurez-vous que le câble d’arrêt du moteur se déplace
librement et que le levier d’arrêt du moteur fonctionne correctement.
A
Figure 1: Déploiement du guidon (MD22550FC)
C
B
D
E
Figure 3: Fixation de la manette de démarrage par recul.
A
B
A
Figure 2: Déploiement du guidon (M22550FC)
B
Montage
D
C
Not for
Reproduction
Page 35

9
Hauteur du guidon (MD22550FC)
1. Déposer les écrous à oreilles (A, Figure 4) et les boulons (B) des
supports droit et gauche du guidon (C).
2. Pour lever le guidon, placer le guidon inférieur (A, Figure 5) en
position haute (B).
3. Pour abaisser le guidon, placer le guidon inférieur en position
basse (C).
4. Fixer le guidon inférieur sur les supports du guidon avec les
boulons et écrous à oreilles déposés à l'étape 1.
Hauteur du guidon (M22550FC)
1. Déposer les écrous à oreilles (A, Figure 6) et les boulons (B) des
supports droit et gauche du guidon (C).
Note: Ne pas déposer le jeu inférieur de boulons et d'écrous fixant le
guidon inférieur.
2. Pour lever le guidon, placer le guidon inférieur (D, Figure 6) à un
trou de réglage plus haut (E).
3. Pour abaisser le guidon, placer le guidon inférieur à un trou de
réglage plus bas.
4. Replacer les boulons et écrous à oreilles déposés à l'étape 1, en
les serrant fermement.
B
Figure 4: Dépose de la quincaillerie de réglage du guidon
C
A
Figure 6: Positions du guidon (M22550FC)
A
Montage
B
C
D
E
B
Figure 5: Positions du guidon (Modèle MD22550FC)
A
C
fr
Not for
Reproduction
Page 36

www.murray.com10
Montage du bac à herbe (M22550FC)
Note: Sur certains modèles, le déflecteur d'évacuation monté latéralement est temporairement fixé (pour le transport) à l'arrière de la tondeuse. Avant d'assembler le bac à herbe, déposer le déflecteur
d'évacuation monté latéralement.
1. Glissez l'ensemble d'armature (A, Figure 7) dans le sac à
herbe (B).
2. S'assurer que la poignée (A, Figure 8) se trouve à l'extérieur du
bac à herbe.
3. Fixer d'abord les pinces (B, Figure 8) sur les côtés du cadre (C).
Fixer ensuite les pinces à la partie supérieure et la partie
supérieure du cadre.
Montage du bac à herbe (M22550FC)
1. Pour monter le bac à herbe sur la tondeuse, lever la porte arrière
(A, Figure 9). Tout en maintenant le bac à herbe par la poignée
(B), monter les crochets (C) aux deux extrémités du cadre du bac
à herbe sur la tige de pivotement de la porte arrière (D). Abaisser
le bac à herbe contre l'arrière de la tondeuse. Abaisser la porte
arrière.
Important: S'assurer que les deux crochets du bac à herbe sont montés
sur la tige de pivotement.
AVERTISSEMENT: Vérifier l'état du bac à herbe pour
toute usure ou détérioration. En cas d'usure ou de
dommage, remplacer les pièces seulement avec des
pièces de rechange approuvées par l'usine.
Vidage du bac à herbe (M22550FC)
AVERTISSEMENT: Avant de déposer le bac à herbe,
arrêter le moteur. Avant de retirer toute herbe du
carter de la tondeuse, débrancher le fil de la bougie.
1. Lever la porte arrière jusqu'en position verticale.
2. Tenir la poignée du bac à herbe et soulever le cadre tubulaire.
Continuer à soulever le cadre jusqu'à ce que les crochets ne
soient plus montés sur la tige de pivotement. Déposer le bac à
herbe.
3. Vider l'herbe du bac à herbe.
4. Pour remonter le bac à herbe sur la tondeuse, se reporter à
"Montage du bac à herbe".
B
Figure 7: Mise en place du cadre tubulaire
A
B
Figure 8: Mise en place des pinces sur le bac à herbe
A
C
Figure 9: Montage du bac à herbe
C
D
A
B
Montage
Not for
Reproduction
Page 37

11
Fixation de la plaque de déchiquetage (mulching)
(MD22550FC)
AVERTISSEMENT: Afin d'empêcher le
démarrage du moteur, débrancher
le fil de la bougie.
1. Soulever le déflecteur du déversoir (A, Figure 10).
2. Aligner la plaque de déchiquetage (B) avec l'ouverture latérale de
d'évacuation. S'assurer que les deux bossages d'alignement (C)
se trouvent à l'intérieur de l'ouverture.
3. Placer la languette (D) située à la partie supérieure de la plaque de
déchiquetage à l'intérieur du carter de la tondeuse.
4. Placer la languette (E) située à la partie inférieure de la plaque de
déchiquetage à l'intérieur du carter de la tondeuse.
5. Abaisser le déflecteur du déversoir.
6. Rebrancher le fil à la bougie.
Note : Sur certains modèles, le kit de déchiquetage est monté à l'usine.
Pour passer de tondeuse déchiqueteuse à la tondeuse à éjection
latérale, il suffit de déposer la plaque de déchiquetage.
Conseils pour le déchiquetage
La fonction déchiquetage coupe l'herbe de telle façon que celle-ci peut
être facilement recyclée. Étant donné que les nutriments sont retournés
à la terre, le gazon aura besoin de moins d'engrais. Pour un déchiquetage correct de l'herbe du gazon, suivre les conseils ci-dessous.
L'herbe doit être sèche. Si l'herbe est mouillée, il sera difficile de la
couper et cela conduira à des mottes d'herbe lourdes.
L'herbe ne doit pas être trop haute. La hauteur maximale pour une
coupe efficace est de 11,5 cm. Régler les régleurs de hauteur de
façon à ce que seul le tiers supérieur de l'herbe soit coupé.
Si l'herbe est plus haute que 11,5 cm, deux tontes seront nécessaires. Pour la première tonte, placer les régleurs de hauteur de
coupe sur la position la plus haute. Abaisser ensuite les régleurs de
hauteur de coupe pour la seconde tonte.
Maintenir la lame affûtée. Une lame non affûtée conduit à un brunissage de l'extrémité de l'herbe.
Nettoyer le dessous du carter de la tondeuse. L'herbe et autres
débris peuvent empêcher le bon fonctionnement de la tondeuse.
Si la qualité de la tonte est limite, essayer ce qui suit :
Placer les régleurs de hauteur de coupe à une hauteur supérieure.
Couper l'herbe plus fréquemment.
Faire fonctionner la tondeuse à une vitesse de déplacement plus
faible.
Réaliser des recouvrements d'andains au lieu de couper un andain
complet à chaque passage.
Tondre les zones limites une seconde fois.
Conversion à la décharge latérale (M22550FC)
AVERTISSEMENT: Afin d'empêcher le
démarrage du moteur, débrancher
le fil de la bougie.
1. Vérifier que le bac de ramassage est enlevé.
2. Relâcher le couvercle de déchiquetage.
3. Glisser les deux languettes (A, Figure 11) du déflecteur de
décharge latérale sous l’axe de pivotement.
4. Abaisser le déflecteur de décharge latérale. S’assurer que les
languettes de verrouillage (B) sont insère au travers de les fentes
dans le déflecteur de décharge latérale.
5. Relâcher le couvercle de déchiquetage (il se déposera sur le
dessus du déflecteur de décharge latérale).
Montage
fr
Figure 10 : Installation de la plaque de déchiquetage (MD22550FC)
D
A
C
E
B
Figure 11: Décharge latérale (M22550FC)
A
B
Not for
Reproduction
Page 38

www.murray.com12
Montage
Comment préparer le moteur
AVIS : Le moteur ne contient pas d'huile. Avant de démarrer le moteur,
s'assurer que vous avez ajouté de l’huile selon les instructions de ce
manuel. Si vous démarrez le moteur sans huile, il sera endommagé de
manière irréversible et ne sera pas couvert par la garantie.
Huiles recommandées
Nous recommandons l’utilisation d’huiles garanties et certifiées Briggs
& Stratton pour obtenir les meilleures performances. D’autres huiles
détergentes de haute qualité sont acceptables si elles sont de catégorie
SF, SG SH, SJ ou supérieure. Ne pas utiliser d’additifs spéciaux.
Les températures extérieures déterminent la viscosité de l’huile convenant au moteur. Utiliser le tableau pour sélectionner la meilleure viscosité pour la fourchette de températures extérieures prévues.
* En-dessous de 40° F (4° C), il sera difficile de démarrer le SAE 30.
** Au-dessus 80 °F (27 °C) l'utilisation de 10W-30 peut causer une
augmentation de consomption d'huile. Vérifier le niveau d'huile plus
fréquemment.
Comment vérifier/ajouter de l’huile
Avant de vérifier ou de faire le plein d’huile
• Mettre le moteur de niveau.
• Débarrasser de tout débris la zone de remplissage d’huile.
1. Retirer la jauge d’huile (A, Figure 12) et l’essuyer avec un chiffon
propre.
2. Insérer la jauge d’huile et la serrer.
3. Retirez la jauge d’huile et vérifiez le niveau d’huile. Il devrait atteindre le haut de la marque « plein » (B) sur la jauge d'huile.
4. Si le niveau est faible, ajoutez lentement de l’huile dans l’orifice de
remplissage du moteur (C). Ne pas trop remplir. Après avoir fait le
plein, attendre une minute et revérifier le niveau d’huile.
5. Replacer la jauge d’huile et la serrer.
Recommandations de carburant
Le carburant doit répondre aux critères suivants :
• Essence sans plomb, propre et fraîche.
• Au minimum 87 octanes/87 AKI (91 RON). Utilisation en haute
altitude, voir ci-dessous.
• De l’essence contenant jusqu’à 10 % d’éthanol (carburol) ou
jusqu’à 15 % d’éther méthyl-tertiobutylique est acceptable.
MISE EN GARDE :Ne pas utiliser d’essence non approuvée telle que
l’E85. Ne pas mélanger de l'huile avec l'essence ou modifier le moteur
afin qu'ils puissent utiliser des carburants alternatifs. Ceci endommagera les composants du moteur et ce dernier ne sera plus sous
garantie.
Pour empêcher que de la gomme ne se forme dans le circuit
d'alimentation, mélanger un stabilisateur de carburant à l’essence. Voir
Remisage. Tous les carburants ne sont pas identiques. Si des problèmes de démarrage ou de performance se produisent, changer de
fournisseur de carburant ou changer de marque. Ce moteur est certifié
pour fonctionner à l'essence. Le système de contrôle des émissions
pour ce moteur est EM (Modifications du moteur).
Haute altitude
À des altitudes supérieures à 1 524 mètres (5 000 pieds), de l’essence
d'au minimum 85 octanes/85 AKI (89 RON) est acceptable. Pour rester
en conformité avec les normes d’émissions, un réglage pour les hautes
altitudes est nécessaire. Faire fonctionner le moteur sans ce réglage
donnera lieu à des performances moindres, une consommation de carburant supérieure et une augmentation des émissions. Consultez un
revendeur agréé Briggs & Stratton Authorized pour avoir des informations sur les réglages de haute altitude.
Il n’est pas recommandé de faire fonctionner le moteur à des altitudes
inférieures à 762 mètres (2 500 pieds) avec le kit haute altitude.
Figure 12: Huile moteur
B
A
C
Not for
Reproduction
°F °C
SAE 30
10W-30
Synthétique 5W-30
5W-30
Page 39

13
Montage
fr
Comment ajouter du carburant
AVERTISSEMENT
Le carburant et ses vapeurs sont extrêmement inflammables et explosifs.
Un incendie ou une explosion peut provoquer des
brûlures graves voire la mort.
Quand vous faites l’appoint en carburant :
• Arrêter le moteur et le laisser refroidir au moins 2 minutes avant
de retirer le bouchon de réservoir.
• Remplir le réservoir de carburant à l'extérieur ou dans un local
extrêmement bien ventilé.
• Ne pas trop remplir le réservoir. Pour permettre à l’essence de se
détendre, ne pas dépasser pas la base du col du réservoir de carburant en le remplissant.
• Maintenir le carburant éloigné d’étincelles, de flammes nues, de
veilleuses, de la chaleur ou d’autres sources d’allumage.
• Vérifiez les conduits d’essence, le réservoir, le bouchon du réservoir et les raccords pour y détecter toute fissure ou fuite.
Remplacer si nécessaire.
• Si du carburant se répand, attendre jusqu’à ce qu’il s’évapore
avant de démarrer le moteur.
1. Nettoyez la zone autour du bouchon de réservoir en enlevant toute
la poussière et les débris. Retirer le bouchon du réservoir (A,
Figure 13).
2. Remplissez le réservoir de carburant (B) avec de l’essence. Pour
permettre à l’essence de se détendre, ne dépassez pas la base du
col du réservoir (C) de carburant en le remplissant.
3. Replacer le bouchon du réservoir.
IMPORTANT: Cette tondeuse est équipée d'un moteur à combustion
interne, elle ne doit pas être utilisée sur ou proche de zones couvertes
de forêts, de broussailles ou d'herbe non amendées, à moins que le
système d'échappement du moteur ne soit équipé d'un dispositif antiétincelle conforme aux lois applicables locales ou régionales (si c'est le
cas). Si un dispositif anti-étincelle est utilisé, celui-ci devra être maintenu en parfait état par l'utilisateur.
Dans l'État de Californie, ce qui précède est requis par la loi
(Paragraphe 4442 du Code des Ressources Publiques de Californie).
D'autres États peuvent avoir des lois similaires. Les lois fédérales
s'appliquent sur les terres fédérales. Consulter un centre de réparation
agréé pour un dispositif anti-étincelle pour le pot d'échappement.
Préparation finale
Avant d'utiliser la tondeuse, vérifier le montage des roues, du guidon et
des commandes. S'assurer que tous les dispositifs de fixation sont bien
serrés. S'assurer que la commande des gaz (si présente) et que le levier d'arrêt moteur fonctionnent correctement.
Avant de démarrer le moteur, s'assurer que chaque régleur de hauteur
de coupe est placé à la hauteur souhaitée. Se reporter à "Réglage de la
hauteur de coupe" dans les sections relatifs à la Fonctionnement.
Figure 13: Ajout de carburant
B
A
C
Not for
Reproduction
Page 40

www.murray.com14
Levier d'arrêt moteur
Le fait de relâcher le levier d'arrêt moteur (A, Figure 14) conduit à
l'arrêt automatique du moteur et de la lame. Pour que le moteur tourne,
maintenir le levier d'arrêt moteur en position de marche (B).
Avant de démarrer le moteur, actionner plusieurs fois le levier d'arrêt
moteur. S'assurer que le câble se déplace facilement.
Comment arrêter le moteur
Pour arrêter le moteur, relâcher le levier d'arrêt moteur. Débrancher le
fil de la bougie afin d'empêcher le moteur de démarrer.
Avant de démarrer le moteur, vérifier le câble d'arrêt moteur. S'assurer
que le câble d'arrêt moteur est correctement monté. Avant d'utiliser la
tondeuse, remplacer un câble d'arrêt moteur tordu ou endommagé.
Comment démarrer le moteur
AVERTISSEMENT : La lame tourne quand le moteur
tourne.
AVERTISSEMENT
L’enroulement rapide de la corde du démarreur (effet de
recul) aura pour effet de tirer la main et le bras vers le
moteur en moins de temps qu’on ne se l’imagine.
Des os cassés, des fractures, des bleus ou des entorses
pourraient se produire.
• Lors du démarrage du moteur, tirer lentement le cordon du
démarreur jusqu'à ce qu'une résistance se produise et tirer
ensuite rapidement pour éviter tout effet de rebond.
AVERTISSEMENT
Le carburant et ses vapeurs sont extrêmement inflammables et explosifs.
Un incendie ou une explosion peut provoquer des
brûlures graves voire la mort.
Mise en marche du moteur
• Assurez-vous que la bougie d'allumage, le silencieux, le bouchon
de carburant et filtre à air (si équippé) sont en place et bien fixés.
• Ne pas lancer le moteur quand la bougie est retirée.
• Si le moteur se noie, mettre le starter (si la machine en est
équipée) sur la position OUVERT/MARCHE, amener la manette des
gaz (si la machine en est équipée) sur la position RAPIDE et lancer
le moteur jusqu’à ce qu’il démarre.
AVERTISSEMENT
Les moteurs émettent du monoxyde de carbone, un gaz
toxique sans odeur ni couleur.
Respirer du monoxyde de carbone peut provoquer des
nausées, des évanouissements voire même la mort.
• Démarrer le moteur et le faire fonctionner à l'extérieur.
• Ne pas démarrer ou faire fonctionner le moteur dans un local
fermé, même si les portes et les fenêtres sont ouvertes.
Important : Avant de mettre en marche le moteur, veuillez faire fonctionner le levier d'arrêt du moteur plusieurs fois. Assurez-vous que le câble
d’arrêt du moteur se déplace librement et que le levier d’arrêt du
moteur fonctionne correctement.
1. Vérifier le niveau d'huile Voir « Comment préparer le moteur ».
2. Remplissez le réservoir de carburant. Voir « Comment préparer le
moteur ».
3. Moteur équipé d’un amorceur : Dans la plupart des conditions climatiques, appuyer à fond et à trois reprises sur le bouton de
l’amorceur (A, Figure 15). Par temps froid, un coup d'amorce supplémentaire peut s'avérer nécessaire. Habituellement, un moteur
chaud ne demandera pas d’être amorcé. Chaque fois que vous
appuyez sur le bouton starter attendez deux secondes. Remarque :
Si vous démarrez un nouveau moteur pour la première fois,
appuyez sur le bouton de l’amorceur à cinq reprises.
Remarque :
Faire appel de manière excessive à l’amorceur peut
noyer le carburateur. Voir « Le moteur ne démarre pas » dans la
section Dépannage.
Figure 14: Actionnement du levier d'arrêt moteur
A
B
Figure 15: Bouton de l’amorceur.
Fonctionnement
A
Not for
Reproduction
Page 41

15
4. Restez derrière la tondeuse. Utilisez une main pour tenir le levier
d’arrêt du moteur (A, Figure 16) en position de fonctionnement.
Utilisez l’autre main pour tenir la poignée du lanceur manuel (B).
5. Tirez lentement la poignée du lanceur manuel jusqu'à ce que vous
ressentiez une résistance, puis tirez rapidement pour démarrer le
moteur. Faites revenir lentement à sa position initiale la poignée du
lanceur manuel.
6. Si le moteur ne démarre pas après 5 ou 6 tentatives, consultez la
section ‘Recherche des pannes’.
Règles pour un fonctionnement sûr et efficace
Se référer à la section "Sécurité de l'opérateur" dans ce manuel pour les
règles importantes relatives au fonctionnement sûr et efficace de la tondeuse.
Réglage de la hauteur de coupe
AVERTISSEMENT: La lame tourne lorsque le moteur
est en marche. Avant de changer la hauteur de coupe,
arrêter le moteur et débrancher le fil de la bougie.
Pour changer la hauteur de coupe, déplacer la position du levier de
réglage à chaque roue (A, Figure 17). S'assurer que chaque levier de
réglage se trouve à la même position afin d'obtenir une coupe de
niveau.
1. Désengager le levier de réglage.
2. Déplacer le levier sur une autre position.
Figure 16: Démarrage du moteur.
A
B
Fonctionnement
fr
Figure 17: Réglage de la hauteur de coupe
A
Not for
Reproduction
Page 42

www.murray.com16
Maintenance
Tableau du maintenance
AVERTISSEMENT: Avant de réaliser un contrôle, un
réglage (sauf le carburateur) ou une réparation, arrêter
le moteur et débrancher le fil de la bougie.
TONDEUSE
Toutes les 8 heures ou chaque jour
Contrôler le système de verrouillage de sécurité
Nettoyer les débris de la tondeuse
Toutes les 25 heures ou chaque année *
Contrôler le serrage de la visserie
Voir le concessionnaire chaque année pour
Lubrifier la tondeuse
Contrôler la lame de coupe **
Contrôler le temps d’arrêt de la lame
MOTEUR
Premières 5 heures
Changer l’huile moteur
Toutes les 8 heures ou chaque jour
Vérifier le niveau d’huile moteur
Toutes les 25 heures ou chaque année *
Nettoyer le filtre à air moteur et le préfiltre (le cas échéant) **
Toutes les 50 heures ou chaque année *
Changer l’huile moteur
Changer le filtre à huile (le cas échéant)
Chaque année
Changer le filtre à air
Changer le préfiltre (le cas échéant)
Voir le concessionnaire chaque année pour
Contrôler le silencieux et le pare-étincelles (le cas échéant)
Changer les bougies d’allumage
Changer le filtre à essence (le cas échéant)
Nettoyer le système de refroidissement à air du moteur
* À la première de ces échéances
**Contrôler la lame plus souvent dans les régions à sols
sablonneux ou dans des conditions très poussiéreuses.
* À la première de ces échéances
**Nettoyer plus souvent dans les atmosphères poussiéreuses
ou en présence d’impuretés en suspension dans l’air.
Not for
Reproduction
Page 43

17
Maintenance de la tondeuse
Contrôle des émissions
L’entretien, le remplacement ou la réparation des dispositifs et des systèmes de contrôle des émissions gazeuses peut être effectué par tout
établissement ou individu spécialisé dans la réparation des moteurs
autres que les moteurs automobiles. Néanmoins, pour que les réparations soient prises en charge par Briggs & Stratton au titre de la
garantie, l’intervention doit être effectuée par un Réparateur Agréé. Voir
la garantie des émissions.
AVERTISSEMENT: Avant de réaliser un contrôle, un
réglage (sauf le carburateur) ou une réparation, arrêter
le moteur et débrancher le fil de la bougie.
Basculement du moteur
Lors de l'entretien du moteur, de l'inspection de la lame ou du nettoyage du dessous du carter moteur, s'assurer de toujours basculer le
moteur avec la bougie en haut (Figure 18). Tout transport ou basculement du moteur avec la bougie en bas conduira à :
• un démarrage difficile,
• un moteur fumant,
• un encrassement de la bougie,
• une saturation en huile ou carburant du filtre à air.
Contrôler le système de verrouillage de sécurité
1. Démarrez la tondeuse.
2. Relâchez le levier d'arrêt moteur. Le moteur doit s’arrêter dans les
3 secondes.
Si le moteur ne s’arrête pas, n’utilisez pas la tondeuse. Amenez la tondeuse chez un revendeur agréé pour la dépanner.
Nettoyage du carter de la tondeuse
AVERTISSEMENT: La lame tourne lorsque le
moteur est en marche. Avant de nettoyer le
carter de la tondeuse, arrêter le moteur et
débrancher le fil de la bougie.
L'herbe et autres débris peuvent conduire à un fonctionnement incorrect de la tondeuse. Après avoir tondu, nettoyer le carter de la tondeuse
comme suit.
1. Arrêter le moteur.
2. Débrancher le fil de la bougie.
3. Nettoyer la partie supérieure et la partie inférieure du carter de la
tondeuse de toute saleté et débris.
Lubrification
Pour des performances maximales, lubrifier les roues et tous les points
de pivotement avec de l'huile moteur toutes les 25 heures.
Note: Ne pas lubrifier le câble d'arrêt moteur. Les lubrifiants endommageront le câble et l'empêcheront de se déplacer librement.
Remplacer tout câble tordu ou détérioré.
Figure 18: Ne pas basculer le moteur vers l'avant.
Maintenance
fr
Not for
Reproduction
Page 44

www.murray.com18
Maintenance de la lame
AVERTISSEMENT: Avant d'inspecter la lame ou
l'adaptateur de la lame, débrancher le fil de la bougie.
Si la lame heurte un objet, arrêter le moteur.
Débrancher le fil de la bougie. Vérifier la tondeuse
pour tout dommage.
Vérifier fréquemment l'état de la lame pour toute usure ou dommage tel
que des fissures. Vérifier fréquemment le boulon qui maintient la lame.
S'assurer que le boulon est serré. Si la lame heurte un objet, arrêter le
moteur. Débrancher le fil de la bougie. Vérifier l'état de l'adaptateur de
la lame (A, Figure 19) pour tout dommage. Vérifier si la lame est tor-
due ou endommagée, présente une usure excessive ou tout autre dommage. Avant d'utiliser la tondeuse, les pièces endommagées doivent
être remplacées par des pièces de rechange d'usine. Par sécurité, remplacer la lame tous les deux ans. Maintenir le bord de la lame bien
affûté. Une lame non affûtée conduit à une extrémité d'herbe qui
devient brunâtre. Déposer la lame comme suit.
Dépose de la lame
AVERTISSEMENT: Avant de déposer la lame,
débrancher le fil de la bougie. La lame comporte des
bords coupants. Lors de la manipulation de la lame,
utiliser des gants ou des chiffons pour protéger vos
mains.
1. Vidanger le réservoir de carburant.
2. Lever le côté de la tondeuse qui comporte le pot d'échappement
ou la bougie.
3. Utiliser un morceau de bois pour empêcher la lame de tourner.
4. Déposer le boulon (B, Figure 19) qui fixe la lame avec une clé de
14mm (9/16").
5. Vérifier l'état de la lame (C) en se référant aux instructions
"Entretien de la lame". Remplacer une lame excessivement usée ou
endommagée par une lame de rechange d'usine.
6. Monter la lame avec les bords courbes vers le carter. Si la lame
est montée à l'envers, la lame ne coupera pas correctement et
peut causer un accident.
7. Fixer la lame avec la rondelle (D) et le boulon d'origine. S'assurer
que la couronne extérieure de la rondelle Belleville est dirigée vers
la lame.
8. Serrer le boulon qui maintient la lame à un couple de 41 N.m.
AVERTISSEMENT: Toujours s'assurer que le boulon qui
maintient la lame est serré. Un boulon desserré ou
une lame libre peut causer un accident.
Affûtage de la lame
AVERTISSEMENT: Des vibrations sont attendues si la
lame n'est pas correctement équilibrée. Une lame
endommagée par des fissures peut se casser et causer
un accident.
1. Affûter la lame deux fois par an ou toutes les 25 heures.
2. Si la lame est sur la tondeuse, ne pas l'affûter. Déposer la lame
selon les instructions "Dépose de la lame".
3. Nettoyer la lame avec une brosse, du savon et de l'eau. Vérifier
l'état de la lame. Rechercher toute fissure, entaille ou autre dommage. Remplacer une lame qui est trop usée, tordue ou endommagée par une lame de rechange d'usine.
4. Affûter la lame (A, Figure 20) avec une lime (B). S'assurer que
vous conservez le bord coupant en biseau d'origine.
5. S'assurer que la lame est équilibrée. Utiliser un tournevis (C) et
maintenir la lame parallèle au sol (D) comme montré. Une lame
qui est équilibrée va rester parallèle au sol. Si la lame n'est pas
équilibrée, l'extrémité lourde va basculer vers le sol. Affûter
l'extrémité lourde jusqu'à ce que la lame soit équilibrée.
6. Une lame neuve coupera mieux qu'une lame excessivement usée.
Remplacer la vieille lame tous les deux ans.
Vérification du niveau de la coupe
Tester la tondeuse sur une petite surface. Si la hauteur de coupe n'est
pas de niveau ou si l'herbe coupée n'est pas éjectée, la cause peut être :
(1) une lame tordue ou endommagée, (2) une lame non affûtée, (3) une
lame usée, (4) ou un adaptateur de lame cassé. Avant d'utiliser la tondeuse, corriger le problème.
Figure 19: Dépose de la lame
D
B
D
C
B
C
A
A
Maintenance
Not for
Reproduction
Page 45

19
Maintenance
fr
Maintenance du moteur
Réglage du carburateur
Ne jamais procéder à des réglages du carburateur. Le carburateur a été
réglé en usine pour fonctionner efficacement dans la plupart des conditions. Toutefois, si des réglages s’avèrent nécessaires, consulter un
revendeur agréé Briggs & Stratton pour une intervention.
Comment changer l’huile
AVERTISSEMENT
Le carburant et ses vapeurs sont extrêmement inflammables et explosifs.
Un incendie ou une explosion peut provoquer des
brûlures graves voire la mort.
• Si la vidange de l’huile est faite depuis la partie supérieure du tube
de remplissage d’huile, le réservoir de carburant doit être vide,
sinon une fuite de carburant peut être cause d’incendie ou
d’explosion.
L’huile vidangée est un produit de résidus dangereux et doit être jetée
de façon appropriée. Ne pas la jeter avec les déchets ménagers. Vérifier
le lieu de collecte ou de recyclage avec les autorités locales, le centre de
services ou le concessionnaire.
Vidanger l’huile
Vous pouvez vidanger l’huile depuis l’orifice de drain du fond, l’orifice
de drain inférieur ou encore depuis le tube graisseur supérieur.
1. Pendant que le moteur est arrêté mais encore chaud, déconnectez
le câble de la bougie et tenez-le à l’écart de la bougie.
2. Le moteur est équipé d’un drain inférieur et/ou d’un drain latéral.
Retirez le bouchon de vidange d'huile. Vidangez l’huile dans un
récipient approuvé.
3. Une fois que l’huile est vidangée, installez et resserrez le bouchon
de vidange d'huile.
4. Si vous vidangez l’huile depuis le tube graisseur supérieur (C,
Figure 21), tenir l’extrémité de la bougie à l’écart du moteur.
Vidangez l’huile dans un récipient approuvé.
AVERTISSEMENT : Si vous écoulez l'huile du dessus du tube d'huile de
remplissage, le réservoir de carburant doit être vide ou le carburant
peut s'écouler et peut résulter en feux ou explosion. Pour vider le réservoir de carburant, faire fonctionner le moteur jusqu’à ce qu’il s’arrête
par manque de carburant.
Faire le plein d’huile
• Mettre le moteur de niveau.
• Débarrasser de tout débris la zone de remplissage d’huile.
1. Retirer la jauge d’huile (A, Figure 21) et l’essuyer avec un chiffon
propre.
2. Versez lentement l’huile dans le graisseur du moteur (C). Ne pas
trop remplir. Après avoir ajouté de l’huile, attendez une minute,
puis vérifiez le niveau d’huile.
3. Replacer la jauge d'huile et la resserrer.
4. Retirez la jauge d’huile et vérifiez le niveau d’huile. Il devrait atteindre le haut de la marque « plein » (B) sur la jauge d'huile.
5. Replacer la jauge d'huile et la resserrer.
Figure 20: Affûtage de la lame
D
C
B
A
Figure 21: Huile moteur
B
A
C
Not for
Reproduction
Page 46

www.murray.com20
Maintenance
Comment intervenir sur le filtre à air
AVIS :Ne pas utiliser de l'air comprimé ou solvants pour nettoyer le filtre. L’air comprimé peut endommager le filtre, les solvants le dissoudre.
AVERTISSEMENT
Le carburant et ses vapeurs sont extrêmement inflammables et explosifs.
Un incendie ou une explosion peut provoquer des
brûlures graves voire la mort.
• Ne jamais démarrer ou faire fonctionner le moteur si l'épurateur
d'air (si équippé) ou le filtre à air est enlevé.
1. Ouvrir le couvercle (A, Figure 22) et retirer le filtre (B).
2. Tapoter doucement le filtre sur une surface dure. Si le filtre est
trop sale, le remplacer par un nouveau filtre.
3. Poser le filtre et fermer le couvercle.
Remisage
AVERTISSEMENT
Le carburant et ses vapeurs sont extrêmement inflammables et explosifs.
Un incendie ou une explosion peut provoquer des
brûlures graves voire la mort.
Quand vous entreposez du carburant ou de l’équipement ayant du carburant dans le réservoir
• entreposez-les en les tenant à l’écart de chaudières, poêles,
chauffe-eau ou autres appareils ménagers ayant une veilleuse ou
une autre source d’allumage pouvant enflammer les vapeurs
d’essence.
Système d’alimentation
Le carburant peut s’éventer quand il est stocké plus de 30 jours. Le carburant éventé entraîne la formation de dépôts d’acide et de gomme
dans le circuit d’alimentation ou sur les pièces essentielles du carburateur. Pour garder l’essence fraîche, utilisez le stabilisateur de carburant
FRESH START® de Briggs & Stratton qui est disponible sous forme
d’additif liquide ou de cartouche de concentré goutte à goutte.
Il n’est pas nécessaire de purger l’essence dans le moteur si un stabilisateur de carburant a été ajouté selon les instructions. Faire fonctionner le moteur pendant 2 minutes pour faire circuler le stabilisateur dans
le circuit d’alimentation. Le moteur et le carburant peuvent être stockés
pendant une période allant jusqu’à 24 mois.
Si le carburant dans le moteur n’a pas été traité avec un stabilisateur de
carburant, il doit être purgé dans un récipient approuvé. Faire fonctionner le moteur jusqu’à ce qu’il s’arrête par manque de carburant.
L’utilisation d’un stabilisateur de carburant dans le récipient de remisage est recommandée pour que le carburant conserve toutes ses propriétés.
Huile de moteur
Pendant que le moteur est encore chaud, changer l’huile du moteur.
Comment préparer la tondeuse pour son remisage
1. Nettoyez la poussière et les débris sur les ailettes de refroidissement du cylindre et le carter du moteur.
2. Nettoyez le dessous du carter de coupe.
3. Nettoyer complètement la tondeuse afin de protéger la peinture.
4. Mettre l'unité dans un bâtiment qui dispose d'une bonne aération.
5. Vérifier que le sac à herbe est vide. S'il restait de l'herbe ceci
pourrait endommager le sac.
6. Replier les guidons (si souhaité).
ATTENTION: Soyez prudent lorsque vous pliez ou relevez le guidon. Ne
pas endommager les câbles. Un câble qui est tordu ne fonctionnera pas
correctement. Avant d'utiliser la tondeuse, remplacer un câble tordu ou
endommagé.
AVIS : Remiser le moteur sur une surface plane (en position normale
de fonctionnement). Si le moteur est renversé pour son remisage, le
réservoir de carburant doit être vide et le côté où se trouve la bougie
doit être dirigé vers le haut. Si le réservoir de carburant n’est pas vide
et si le moteur est renversé dans toute autre direction, il sera peut-être
difficile de le faire démarrer par suite d’huile ou de carburant contaminant le filtre à air et/ou la bougie.
Figure 22: Filtre à air
B
A
Not for
Reproduction
Page 47

21
Le moteur ne démarre pas.
1. S'assurer que le réservoir de carburant est rempli avec de l'essence propre. Ne pas utiliser de l'essence ancienne.
2. Si le moteur est froid, appuyer sur le bouton d'amorçage (en option sur certains modèles).
3. S'assurer que le fil de la bougie est bien connecté à la bougie.
4. Il y trop d'essence dans le cylindre moteur. Déposer et sécher la bougie. Tirer plusieurs fois sur la poignée du lanceur. Brancher le fil sur la
bougie. Démarrer le moteur.
5. Le moteur est difficile à démarrer dans de l'herbe haute ou épaisse. Déplacer la tondeuse vers une surface propre et sèche.
6. S'assurer que le levier d'arrêt moteur est en position de fonctionnement.
Le moteur ne s'arrête pas.
1. Relâcher le levier d'arrêt moteur.
2. Vérifier le câble d'arrêt moteur. Remplacer le câble si celui-ci est tordu ou endommagé.
Les performances du moteur sont médiocres.
1. Vérifier les réglages de la hauteur de coupe. Relever la hauteur de coupe si l'herbe est haute.
2. Vérifier la partie inférieure du carter de la lame. Débarrasser le carter de la lame de toute herbe et autres débris.
3. Vérifier le fil de la bougie. S'assurer que le fil est bien connecté.
4. Débarrasser les ailettes de refroidissement du moteur de toute herbe et autres débris.
5. Vérifier le jeu entre électrodes de la bougie.
6. Vérifier la quantité d'huile dans le moteur. Faire l'appoint si nécessaire.
7. Vérifier le filtre à air du moteur. Se référer au manuel du moteur.
8. L'essence est de mauvaise qualité. Vidanger et nettoyer le réservoir de carburant. Remplir le réservoir de carburant avec de l'essence propre.
Vibrations excessives.
1. Déposer la lame. Vérifier la lame et l'équilibrer si nécessaire. Se reporter aux instructions de maintenance de la lame.
2. Vérifier si la lame est tordue ou cassée. Une lame endommagée est dangereuse et doit être remplacée.
3. Vérifier l'état de l'adaptateur de la lame. Remplacer un adaptateur de lame cassé.
4. Si les vibrations persistent, amener la tondeuse dans un centre de réparation agréé.
L'herbe ne s'éjecte pas correctement.
1. Nettoyer le dessous du carter de la tondeuse.
2. Vérifier si la lame est excessivement usée. Déposer et affûter la lame. Par sécurité, remplacer la lame tous les deux ans par une lame de
rechange d'usine.
L'herbe n'est pas coupée uniformément.
1. Vérifier le réglage de hauteur de coupe à chaque roue. Le réglage de hauteur doit être le même à chaque roue.
2. S'assurer que la lame est bien affûtée.
3. Vérifier si la lame est tordue ou cassée. Une lame endommagée est dangereuse et doit être remplacée.
4. Vérifier si l'adaptateur de lame est cassé. Remplacer un adaptateur de lame cassé.
Recherche des pannes
fr
Not for
Reproduction
Page 48

www.murray.com22
Garanties
Not for
Reproduction
BRIGGS & STRATTON POWER PRODUCTS GROUP, L.L.C. GARANTIE DU PROPRIÉTAIRE POLITIQUE
GARANTIE LIMITÉE
Si une pièce de cet équipement présente un vice de matériau ou de fabrication, Briggs & Stratton Power Products Group,
LLC la réparera ou la remplacera gratuitement. Si une pièce du moteur Briggs and Stratton (si équipé) présente un vice de
matériau ou de fabrication, Briggs & Stratton Corporation la réparera ou la remplacera gratuitement. Les frais de transport du
produit à réparer ou remplacer seront, dans le cadre de cette garantie, réglés par l’acheteur. Cette garantie est en vigueur pour
les périodes de temps et conformément aux conditions stipulées ci-dessous. Pour obtenir le service de garantie, veuillez vous
adresser au distributeur autorisé le plus proche dont vous trouverez les coordonnées sur www.BriggsandStratton.com ou
www.Murray.com.
Il n’existe aucune autre garantie expresse. Les garanties implicites, y compris celles de qualité marchande et d’adaptation à
un emploi particulier, sont limitées à une année à partir de la date d’acquisition ou conformément à ce qui est prévu par la loi.
La responsabilité juridique pour les dommages consécutifs ou indirects est excluse dans la mesure où l’exclusion est autorisée
par la loi.
Certains États ou pays ne permettent pas les limitations de durée de la garantie implicite. Certains États ou pays n’autorisent
pas l’exclusion ou la limitation des dommages consécutifs ou indirects. Dans ce cas, la limitation ci-dessus ne s’applique pas
à votre cas. La présente garantie vous offre des droits juridiques spécifiques et il se peut que vous ayez d’autres droits qui
varient d’une juridiction à une autre, ou de pays à pays.
PÉRIODE DE GARANTIE
La garantie commence à la date d’acquisition du produit par le consommateur au détail ou commercial final, et continue tout au
long de la période indiquée ci-dessus. « Utilisation par le consommateur » signifie que le produit sera utilisé par un consommateur
au détail dans un but privé. « Utilisation commerciale » indique toutes les autres utilisations possibles, y compris commerciales,
génératrices de revenus ou locatives. Une fois que le produit a été utilisé dans un but commercial, il sera considéré comme
d’utilisation commerciale dans le cadre de cette garantie.
Aucun enregistrement de la garantie n’est nécessaire pour obtenir la garantie des produits de marque Briggs & Stratton. Veuillez
garder le reçu de votre achat. Si vous ne pouvez pas fournir la preuve de l’achat au moment de faire une demande se rapportant à
la garantie, la date de fabrication du produit sera utilisée pour déterminer l’admissibilité à la garantie.
À PROPOS DE VOTRE GARANTIE
Nous sommes totalement disponibles à réaliser des réparations dans le cadre de la garantie et nous nous prions d’accepter
no excuses anticipées pour les désagréments éventuels. Le service de garantie est offert uniquement par l’intermédiaire des
distributeurs autorisés par Briggs & Stratton ou BSPPG, LLC.
Parfois les demandes de réparations dans le cadre de la garantie peuvent ne pas être pertinentes. Cette garantie couvre
uniquement les vices de matériau ou de fabrication. Elle ne couvre pas des dommages causés par une mauvaise utilisation ou des
abus, un mauvais entretien ou une réparation incorrecte, une usure normale ou l’utilisation de carburant vicié ou non approuvé.
Mauvaise utilisation et abus - Une bonne utilisation, telle que prévue, du produit est décrite dans le manuel de l’opérateur.
L’utilisation de la machine de façon autre que celle décrite dans le manuel de l’opérateur ou son utilisation après qu’elle ait été
endommagée annulera la garantie. Vous ne pourrez vous prévaloir de la garantie si le numéro de série sur la machine a été
supprimé ou si la machine a été modifiée d’une manière quelconque, ou si elle présente des preuves d’abus, tel que coups,
corrosion par l’eau ou des produits chimiques.
Mauvais entretien ou réparation - Cette machine doit être entretenue conformément aux procédures et aux intervalles indiqués
dans le manuel de l’opérateur, l’entretien et les réparations doivent être effectués avec des pièces d’origine Briggs & Stratton. Les
dommages causés par un manque d’entretien ou l’utilisation de pièces n’étant pas d’origine ne sont pas couverts par la garantie.
Usure normale - Comme tous les appareils mécaniques, malgré un bon entretien, le vôtre est sujet à une usure. La présente
garantie ne couvre pas les réparations lorsque la durée de vie de la machine s’est achevée après une utilisation normale.
Les articles d’entretien et d’usure, tels que filtres, courroies, lames et plaquettes de freins (les plaquettes de frein moteur sont
couvertes) ne sont pas couverts par la garantie, uniquement en raison de leur caractéristique d’usure, à moins que la cause soit
due à des vices du matériel ou de fabrication.
Carburant vicié - Afin de fonctionner correctement, cette machine doit être alimentée avec un carburant propre conforme au
critère précisé dans le manuel de l’opérateur. Les dommages causés par un carburant vicié (fuites de carburant, conduites
bouchées, soupapes collantes, etc.) ne sont pas couverts par la garantie.
Article Utilisation par le consommateur Utilisation commerciale :
sruoj 09 seénna 2 tnemepiuqÉ
sruoj 09 seénna 2 *ruetoM
na 1 na 1 eirettaB
* Concerne les moteurs Briggs and Stratton seulement. La couverture pour les moteurs autres que Briggs and Stratton est offerte par le fabricant
du moteur.
Page 49

23
fr
Garanties
Not for
Reproduction
Déclaration de garantie du système de contrôle des émissions de l’État de Californie, de l’U.S. EPA et
avril 2011
de Briggs & Stratton Corporation Droits et obligations du propriétaire au titre de la garantie
Le California Air Resources Board (CARB), l’U.S. EPA et Briggs & Stratton (B&S) ont le
plaisir de vous expliquer la garantie du système de contrôle des émissions pour votre
moteur/équipement fabriqué 2011--2012. En Californie, les petits moteurs à usage non
routier et les gros moteurs à explosion d’un litre ou moins, neufs, doivent être conçus,
fabriqués et équipés pour répondre aux normes sévères anti-effet de serre de l’État. B&S
doit garantir le système de contrôle des émissions de votre moteur/équipement pendant
les durées indiquées ci-après, en supposant que le moteur ou l’équipement n’ait pas fait
l’objet d’abus, de négligence ou d’un mauvais entretien.
Le système de contrôle des émissions peut comprendre des pièces comme le
carburateur ou le système d’injection de carburant, le réservoir de carburant, le système
d’allumage et le convertisseur catalytique. Des durites, des courroies, des connecteurs,
des capteurs et d’autres assemblages impliqués dans les émissions peuvent aussi en
faire partie.
Si la condition de garantie est remplie, B&S réparera gratuitement votre
moteur/équipement y compris le diagnostic, les pièces et la main-d’œuvre.
Couverture de la garantie du fabricant:
Les petits moteurs à usage non routier et les gros moteurs à explosion d’un litre ou
moins sont garantis pendant une période de deux (2) ans. Si une pièce liée aux
émissions de votre moteur/équipement est défectueuse, Briggs & Stratton la réparera
ou la remplacera.
Responsabilités du propriétaire au titre de la garantie:
x En tant que propriétaire d’un moteur/équipement, vous êtes responsable de
l’entretien nécessaire indiqué dans le manuel d’utilisation. B&S recommande de
conserver toutes les factures de maintenance de votre moteur/équipement mais
B&S ne peut renier la garantie uniquement à cause de l’absence de factures ou
parce que tous les entretiens n’ont pas été effectués en temps prévu.
x En tant que propriétaire d’un moteur/équipement, vous devez néanmoins savoir que
B&S peut refuser d’appliquer la garantie si la défectuosité de votre
moteur/équipement ou d’une partie de celui-ci est due à un abus, une négligence,
un entretien non correct ou des modifications non approuvées.
x Vous avez la responsabilité de confier votre moteur/équipement à un centre de
distribution, un Réparateur Agréé ou toute entité équivalente de B&S, selon la
solution applicable, dès que le problème apparaît. Les réparations effectuées sous
garantie doivent l’être en un temps raisonnable qui ne doit pas excéder trente (30)
jours. Si vous avez des questions concernant vos droits et vos responsabilités au
titre de la garantie, contactez B&S au (414) 259-5262.
Dispositions de la garantie du système de contrôle des émissions de Briggs & Stratton
Suivent les dispositions particulières de la couverture de la garantie du système de contrôle des émissions. Elles viennent en complément de la garantie des moteurs B&S pour les
moteurs non réglementés qui se trouve dans le manuel d’utilisation.
1. Pièces relatives au contrôle des émissions garanties
La couverture au titre de cette garantie ne s’étend qu’aux pièces énumérées
ci-dessous (celles du système de contrôle des émissions) dans la mesure où ces
pièces étaient présentes sur le moteur B&S et/ou le circuit d’alimentation prévu par
B&S.
a. Système de dosage du carburant
x Système d’enrichissement pour démarrages à froid (starter)
x Carburateur et pièces internes
x Pompe à carburant
x Durit et raccords de carburant, colliers
x Réservoir de carburant, bouchon et câble d’attache
x Réservoir à charbon activé
b. Système d’admission d’air
x Filtre à air
x Collecteur d’admission
x Conduite de vidange et de mise à l’air
c. Système d’allumage
x Bougie(s)
x Système d’allumage par volant magnétique
d. Système catalytique
x Convertisseur catalytique
x Collecteur d’échappement
x Système d’injection d’air ou soupape d’impulsion
e. Pièces diverses utilisées dans les systèmes ci-dessus
x Soupapes et contacteurs de dépression, de température, de position et de
durée
x Raccords et assemblages
2. Durée de la couverture
Pendant une période de deux (2) ans à compter de la date de l’achat initial, B&S
garantit à l’acheteur initial et à chaque acheteur suivant que le moteur est conçu,
fabriqué et équipé de manière à être en conformité avec toutes les réglementations
applicables adoptées par l’Air Resources Board, qu’il est exempt de tout défaut de
matière ou de construction susceptible d’entraîner la défaillance d’une pièce garantie
et qu’il est matériellement identique en tous points au moteur décrit dans la demande
de certification du fabricant. La période de garantie démarre à la date de l’achat
initial du moteur.
La garantie sur les pièces liées aux émissions est comme suit:
x Toute pièce garantie dont le remplacement n’est pas prévu dans le cadre de la
maintenance obligatoire indiquée dans le manuel d’utilisation fourni est garantie
pendant la période susmentionnée. Si cette pièce se révélait être défectueuse
au cours de la période de garantie, elle serait réparée ou remplacée par B&S
sans aucun frais pour le propriétaire. La pièce ainsi réparée ou remplacée sera
garantie pour la période restante.
x Toute pièce garantie dont seule une inspection régulière est prévue dans le
manuel d’utilisation fourni est garantie pendant la période susmentionnée. La
pièce réparée ou remplacée dans le cadre de la garantie sera garantie pour la
période restante.
x Toute pièce garantie dont le remplacement est prévu dans le cadre de la
maintenance obligatoire indiquée dans le manuel d’utilisation fourni est garantie
pendant la période précédant le premier remplacement prévu de cette pièce. Si
cette pièce se révélait être défectueuse avant le premier remplacement prévu,
elle serait réparée ou remplacée par B&S sans aucun frais pour le propriétaire.
La pièce ainsi réparée ou remplacée sera garantie pour la période restante
précédant le premier remplacement prévu de ladite pièce.
x Les pièces ajoutées ou modifiées qui ne sont pas exemptées par l’Air
Resources Board ne peuvent être utilisées. L’utilisation par le propriétaire de
pièces ajoutées ou modifiées non exemptées sera un motif de rejet de toute
réclamation. Le fabricant ne peut en aucun cas être tenu de garantir les
défaillances de pièces garanties dues à l’utilisation de pièces non exemptées
ajoutées ou modifiées.
3. Couverture des conséquences
La présente couverture s’étend à la défaillance de tout composant du moteur due à
la défaillance d’une pièce liée aux émissions garantie.
4. Réclamations et exclusions de garantie
Les réclamations sous garantie seront présentées selon les dispositions de la
police de garantie des moteurs de B&S. La garantie ne couvre pas les défaillances
de pièces liées aux émissions qui ne sont pas des pièces B&S d’origine ou les
défaillances de pièces qui ont fait l’objet d’abus, de négligence ou d’un mauvais
entretien ainsi qu’indiqué dans la police de garantie des moteurs de B&S. B&S n’est
pas tenu de couvrir la garantie des défaillances des pièces liées aux émissions
dues à l’utilisation de pièces rajoutées ou modifiées.
Consultez les informations sur la période de durabilité des émissions et l’indice d’air sur
l’étiquette d’émissions du petit moteur à usage non routier
Les moteurs qui sont certifiés conformes à la norme d’émissions relatives aux petits
moteurs à usage non routier du California Air Resources Board (CARB) doivent afficher
l’information concernant la période de durabilité des émissions et l’indice d’air. Cette
information est indiquée sur les étiquettes apposées sur les moteurs par Briggs &
Stratton. L’étiquette du moteur indique les informations de certification.
La période de durabilité des émissions indique le nombre d’heures d’utilisation
normale pour lequel le moteur est certifié conforme aux normes d’émissions sous
réserve d’un entretien approprié tel qu’indiqué dans le manuel d’utilisation et d’entretien.
Les catégories suivantes sont utilisées:
Modéré:
le moteur est certifié conforme pour 125 heures d’utilisation normale.
Intermédiaire:
le moteur est certifié conforme pour 250 heures d’utilisation normale.
Étendu:
le moteur est certifié conforme pour 500 heures d’utilisation normale. Par exemple, une
tondeuse à conducteur marchant classique est utilisée 20 à 25 heures par an. Par
conséquent, la période de durabilité des émissions d’un moteur de catégorie
intermédiaire équivaudrait à une douzaine d’années.
Les moteurs Briggs & Stratton sont certifiés conformes aux normes environnementales
d’émissions de la United States Environmental Protection Agency (U.S. EPA) Phase 2
ou Phase 3. La période de conformité d’émissions mentionnée sur les étiquettes indique
le nombre d’heures d’utilisation pour lequel le moteur est en conformité avec les normes
fédérales.
Pour les moteurs de cylindrée inférieure à 225 cm3.
Catégorie C = 125 heures, catégorie B = 250 heures et catégorie A = 500 heures.
Pour les moteurs de plus de 225 cm3.
Catégorie C = 250 heures, catégorie B = 500 heures et catégorie A = 1000 heures.
Page 50

www.murray.com24
Notes
Not for
Reproduction
Page 51

25
fr
Utilisation sur pente
CONSEILS POUR UTILISATION SUR PENTE
VISEZ EN ALIGNANT CE GUIDE DE NIVEAU AVEC LA VERTICALE D’UN ARBRE,
D’UN PAN DE STRUCTURE, D’UN POTEAU ÉLECTRIQUE OU D’UNE CLÔTURE.
Avec une tondeuse poussée, travaillez
latéralement par rapport à la pente,
jamais en montant ou descendant.
Avec une tondeuse autoportée,
travaillez en montant ou descen-
dant la pente, jamais en travers.
10 DEGRÉS
15 DEGRÉS
Avec une tondeuse autoportée, pour déterminer s’il est sans danger de tondre sur une pente : (1) débrayez la lame, (2) passez la tondeuse en marche arrière et (3) essayer de
remonter la pente en reculant. Si c’est faisable, il est généralement sûr d’y tondre. Cependant si vous ne vous sentez pas à l’aise ou avez des doutes, utilisez ce guide et ne ton-
dez pas si la pente fait plus de 15°. Si la tondeuse est utilisée avec une remorque ou un accessoire monté derrière, ne tondez pas si la pente fait plus de 10°.
Une pente à 15 degrés correspond à une élévation d’environ 2,5 mètres tous les 10 mètres.
Une pente à 10 degrés correspond à une élévation d’environ 1,7 mètres tous les 10 mètres.
Faites très attention en permanence et évitez les virages et manœuvres brusques. Suivez les autres instructions de ce manuel pour la sécurité pendant la tonte sur
pentes. Utilisez une tondeuse autoportée en montant ou descendant la pente, jamais en travers. Par contre avec une tondeuse autoportée, travaillez en montant ou
descendant la pente, jamais en travers. Soyez particulièrement attentif quand vous travaillez sur ou près de pentes et obstructions.
15 DEGRÉS
PLIEZ EN SUIVANT LES POINTILLÉS
Not for
Reproduction
Page 52

www.murray.com
Puissances nominales : Les étiquettes de puissance nominale brute pour les modèles de moteurs à essence individuels répondent au code J1940
(Small Engine Power & Torque Rating Procedure) de la SAE (Society of Automotive Engineers) ; et la performance nominale a été obtenue et corrigée
conformément à SAE J1995 (Révision 2002-05). Les valeurs de couple sont dérivées à 3 060 tr/min ; les valeurs de puissance sont dérivées à 3 600
tr/min. Les courbes de puissance brute peuvent être consultées sur le site www.BRIGGSandSTRATTON.COM. Les valeurs données pour la puissance nette sont mesurées avec l’échappement ou le filtre à air installé tandis que les valeurs données pour la puissance brute sont recueillies sans
ces accessoires. La puissance brute du moteur sera plus élevée que la puissance nette du moteur et elle affectée, entre autres, par les conditions
atmosphériques de fonctionnement et les variations entre les moteurs. Étant donné la gamme étendue de produits sur lesquels les moteurs sont
placés, il se peut que le moteur à essence ne développe pas la puissance nominale brute quand il est utilisé sous une version spécifique
d’alimentation électrique. Cette différence est due à différents facteurs, y compris, mais sans toutefois s'y limiter, la diversité des composants du
moteur (filtre à air, échappement, chargement, refroidissement, carburateur, pompe à carburant, etc.), la limite des applications, les conditions atmosphériques de fonctionnement (température, humidité, altitude) et les variations entre les moteurs. En raison des limites de fabrication et de capacité,
Briggs & Stratton peut substituer un moteur d'une puissance nominale supérieure pour le moteur de cette série.
Caractéristiques du produit
Taille du plateau de coupe
(po / cm)
22 / 56 22 / 56
Hauteur de coupe
(po / cm)
1,25 - 3,75 / 3,18 - 9,53 1,25 - 3,75 / 3,18 - 9,53
Puissance moteur
(ch)
5,5 5,5
Cylindrée moteur
(cm3)
140 140
Contenance du réservoir de carburant
(qt / l)
0,9 / 0,9 0,9 / 0,9
Capacité d'huile
(oz / l)
15 / 0,44 15 / 0,44
Écartement des électrodes
(po / mm)
0,020 / 0,50 0,020 / 0,50
Couple de serrage de bougie
(lb-po / N.m)
180 / 20 180 - 20
Not for
Reproduction
MD22550FC M22550FC
 Loading...