

Page 1
MOWER
Model
INSTRUCTIONBOOK
This Instruction Bookcontains informationfor several models.
Read and keep this book for future reference.
This book contains important informationon
SAFETY,,ASSEMBLY,OPERATION,AND MAINTENANCE
PRODUCT INFORMATION
Theownermustbe certainthatall
the productInformationisincludedwiththeunit.
ThisInformationincludes
the INSTRUC'nONBOOKS,
the REPLACEMENTPARTSandthe WARRANTIES.
ThisInformationmustbeincludedto makesurestatelaws
andotherlawsarefollowed.
22406x9A
RECORDTHEFOLLOWINGINFORMA'nONABOUTYOURUNIT.
THISiNFORMA11OHiS NECESSARYWHENORDERINGPARTS
ORIN CASEOF LOSSORTHEFT,
WIBF PIIRClIASI_:.
DATEPURCItASm:Mmh Day Yer.._.
MODO.NO.:. .DATEOFMANUFACTURE:. L_I_A
F-98529
EUILTIN THE
Page 2
MURRAY, INC. TwoYearUmitedWarranty
Murray,Inc.wan'antstotheodgineipurchaserthatthis unitshallbefroefromdefectsinma-
tedeiend workmanshipundernormaluseendservicefora periodofTwo (2)Years from
the date ofpurchase;however,thiswarrantydoesnotcoverengines,accessories(suchas
snowblowers,snowblades,grassbeggsrsendplows),transmissions,battadesandNor-
malWear Parts (exceptes notedbelow)ortransaxlusasthe companiesthatmanufacture
these item,sfurnishtheir ownwarrantesandprovideservicethroughtheirsuthedzedfield
servicefacilities.For eddiitanal information, see the warrantiescovedngtheseparticular
parts.Ifyou are uncertainwhetheryourunitcontainsoris equippedwithone ormore of
theseparts,ounsuttyourdealerpdorto purchase,Subjecttothetermsandcondtiionsnotad
inthisUmitedWarranty,we shall,at ouroption,repairorrePlaceat nocosttothe edginal
purchesaranypartcoveredbythisUmitedWarrantydudngtheeppliceble w_'rantyperiod.
Inthe eventthebatteryprovesdefec_vowithinninety(90)daysfromthe dateofpurchase,
we willrePlaceitwithoutchange.Ifthe batteryprovesdefectivee_er(90) daysbutwithinone
hundredtwenty(120) daysfromthe dateof purchese,we will replaceitfora charge of one
heft(1/2) of the retailpdoeof thebatteryin effectat the time of rotum.
NormalWear Partseredefinedasbelts,blades,bladeadeptsm, pneumatict_res,headlights
seat covers.These partsare warrantedtobe free fromdefectsin material and work-
menship as deliveredwiththeproduct.Anyclaimfor repairorreplacementofNormalWear
Partsmustbemadewithinthirty (30)daysofthedateofpurchase.Noclaimsinvolvingdarn-
egocausedfrommaterialuse, abuseor misusewill be honored.
ThisMurray,Inc.Two (2)year Umltad Wen'antyisyourexclusiveremedy;however,this
warrantyisvoidordoesnotepplyto anyunitthathasbeentamperedwith,altered,misused,
abusedorusedforrentalorothercommercialend/or professional(non-homeowner)uses.
Yourwarrantydoes notcoverminormechanical adjustmentswhich are notduoto anyde-
fastinmaterialorworkmanship.For assistanceinmakingsuchadjustments,consultyour
InstructionBook.
Tomakeaclaimunderthis Murray,Inc.Two (2)year Umltad Warranty,return_ unit(or
ifauthedzedinadvance,thedefectivepart)alongwithyourproofofpurchasetoanAutho-
dzad Service Centernearyou.To locatethe nearestAuthorizedServiceCenter,callthe
CentralPartsDistributorfor yourarea showninthe listprovidedwith yourunitor checkthe
YellowPegslistingsinyourlocaltalephooedirectory.Ifyoureturnthe entire unit,we will
repeirtheunit.If we authorizethe ratumofthedefectivepartonly,we will eitherreplaceor
repairthepart.Inthecaseofadefectinatransmission ordifforantial(asdistinguishedfrom
a transaxle), the entiretransmission ordifferentialmustbe returnedsincethey donotin-
elude userserviceableparts.
This Murray,Inc.Two (2)Year Umlted Warranty givesyouspecificlegalrights,andyou
may also haveother rightswhichvaryfromstatetostate, This Umlted Wsrnmty Isgiven
In lieu of sit other mqpreasedend Implied warmntlu Includingthe Implied warranty
of merchantability end warranty of fltnm for • partlculer purpose, Ifyou need addi-
tionalinformationonthiswrittenwarrantyorassistanceinobtainingservice, writeor call:
MURRAY,INC.
OutdoorPowerEquipment
CustomerServiceDePartment
Brentwood,Tennessee37027
P.O. Box268
1-800-251-8007
F-S6529 2
Page 3
OWNER'S INFORMATION
Thisinstructionbookiswrittenforapersonwithsomemechanicalability.Likemost servicebooks,
notellthe stepsaredescribed.Stepsanhowtoloosenortightenfsstenarsaresteps anyonecan
followwithsome mechanicalability. Reedandfollowtheseinstructions beforeyouusethe unit.
Knowyour product: Ifyou understandtheunitandhowthe unitoperates,youwillgetthe best
performance.Asyoureedthis manual,comparetheiUuatraSonstothe unit.LearntheIoc_ionend
thefunclJenofthe controls.Tohelppreventan accident,followthe operatinginstructionsandthe
safstymiss. Keep thismanuelforfuturereference.
IMPORTANT:.Manyunitsare notassembledendare soldincartons.Itistheresponsibilityof the
ownertomakesurethe ssssmblyinstructionsinthismanuelare exactlyfollowed.Otherunitsare
purchasedinan assembled condition.On assembledunits,itisthe responsibilityofthe ownerto
makesurethe unitis correctlyassembled.The ownermustcarefullychecktheunitaccordingto
the instructionsin this manualbeforeit is firstused.
RESPONSIBILITY OF THE OWNER
"llte req)onat blllty of the owner Isto follow thinfostruotlone below.
1. Carefullyrandand followthe rulesfar sat'eoperatlon.
2. Followallthe assemblyand preparstioninstructions.
3. Inapeotthe anit.
4. Makesurethstthe eperstor ofthe unitknowshowtocorrestlyuse ellstandard and acceosory
equipment.
5. Operatetheunitonlywithguards,shislds,endothorsafatyitemsinplaceendwoddngcerrectty.
8. Correctlyadjust the unit.
7. Servicethe unit onlywithanthodzed orapprovedreplacementports.
8. Completesitmalntenenceonthe unit.
F-gO529 3
Page 4
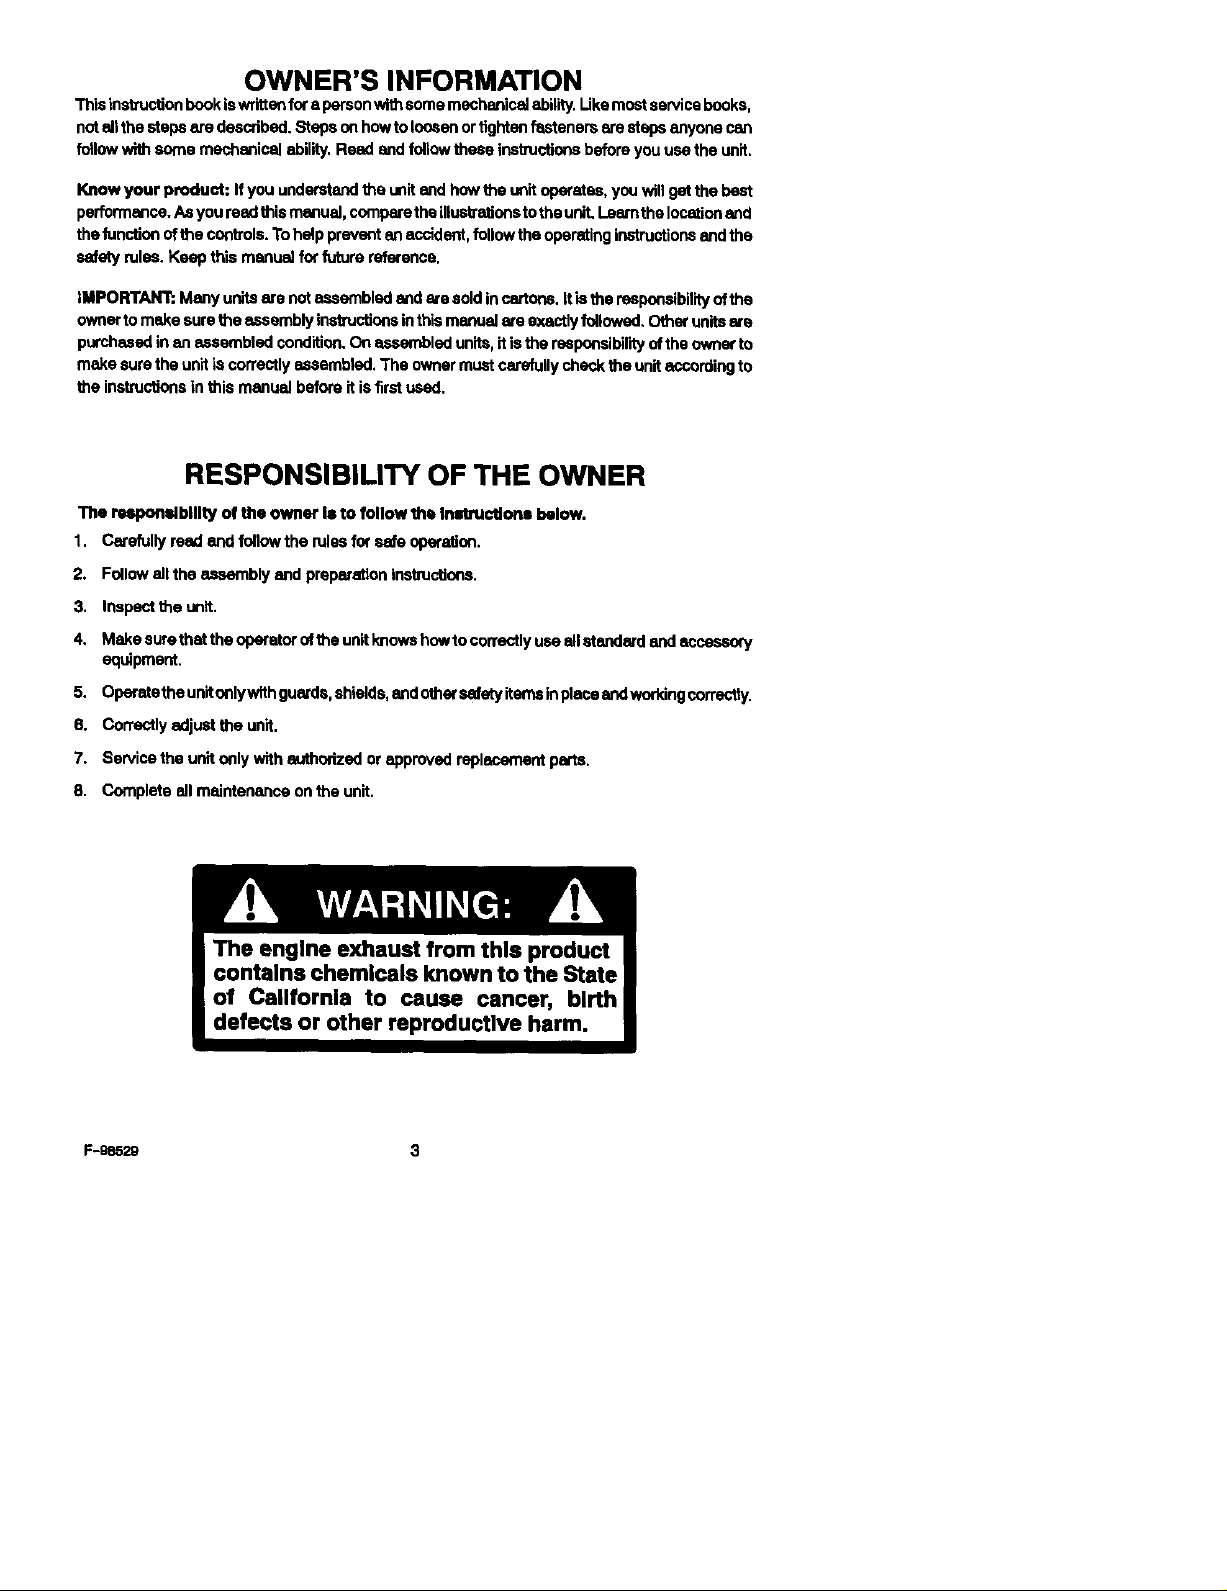
IMPORTANT
Safe Operation Practices for Walk-Behind Mowers.
Thiscuttingmachineiscapableofamputatinghandsandfeetendthrowingobjects.Failureto ob-
san/ethefollowingsafetyinstructionscouldresultin sedousinjuryordeath.
I. General Operation
1. Read, understand,and follow all Instruc-
ifons anthe machine and Inthe manual(s).
Bethoroughlyfamiliarwiththe controlsand
the properuseofthemowerbeforestealing.
2. Donotputhandsorrantneororunderrofat-
ingparts.Keepdeer of the dischargeopen-
ingat alltimes.
3. Only allow respor_alble individuals, who ere
familiar with the Instructions, to operate the
mower.
4. Thorougldyinspect the mower end area
wherethe equipmentisto be used. Clear
the areaof objectssuchesrouks,toys,wire,
bones,sticksetc.,whichcouldbe pickedup
andthrownby the bisde.
5. Be sure the area Is deer of other people be-
fore mowing. Stop mower if anyone enters
the area.
6. Do notaperatethe mowerwhan berefoot or
wearingopensandals.Always wear sub-
stantialfootwear.
7. Donotpullmowarbankwardsunlessaban-
lutelynesessery.Lookdownand behindbe-
fore andwhilemovingbackwards.
8. Do not operate the mower without proper
guards, plates, grass catcher or other cefety
protective devices In place.
9. See manufacturer'sInslzuctlonsfor proper
operationand installationof accessories.
Only use accessories approved by the
manufacturer.
10. Stop the blade(s) when crossing gravel
drives,walks,or roads.
11. Stop the engine (motor) whenever you
leave the equipment,beforecleaningthe
moweroruncloggingthe chute.
12. Shuttheangina (motor)offandwaltunltlthe
blade comesto completeatop before re-
movinggrasscatcher.
13. Mowonlyindaylightor goodartificial light.
14. Do not operate the mower while under the
influence of alcohol, drugs or other medica-
F-es529 4
tJonwhich can cause drowsinessor eJfest
yourabilityto operatethismachinesafely.
15. Neveroperatemowerinwetgrass.AJweys
be sureof yourfooting;keep8firm holdan
the handleand walk; neverrun.
16. Disengagethe salf-prepalledmechanism
ordriveclutchonmowers so equipped be-
foresteitingthe engine (motor).
17. Ifthe equipment shouldstarttovibratoab-
normally,stopthe engine(motor)endcheck
immediatelyforthecause.Vibrationisgen-
erally e.warningof troublesuchas a blade
thatisdamaged, e looseblade,or the en-
ginemountingboltsareloose.
18. Always wear setaty goggles or safety
glsssss withside shieldswhen oporaltng
mowerto protectyoureyesfromforeignob-
jestswhich can bethrownfrom the unit.
19. Plan your mowing patfam to ovoid dis-
chargeofmaterialtowardroads,sidewalks,
bystandersend the like.
20. Afteratdldng aforeignobject,atop the en-
gine.Removethe wire from the sparkplug.
Inspectthebladeand mowerfordernage,if
deJ'naged,repairbeforestartingendoperat-
Ingthe mower.
21. Keep any wsshoutportsand othermower
housing service openings closed when
mowing.
II. Slope Operation
Slopesereamajorfactorrelatedtoslipendfall
accidentswhich can resultineavere Injury.All
slopesrequireextracaution.Ifyoufeeluneasy
ona elope,donotmowit.
DO:
Mew across the face of slopes; never up
and down.Do not mow excessivelysteep
slopes (ma_imu_n15 degrees) or areas
where the groundis very rough.See the
"Guide"inthe back ofthis manualto check
e slope. Exemise extreme ceultan when
changingdirectiononslopes.
Removeobjectssuch asrocks,treelimb6,
etc.
Watch for holes, ruts, or bumps. Tall grass
can hide obstacles.
(Continued Following Page)
Page 5
IMPORTANT
DO NOn.
Donotmowneardrop-alia,ditches,orem-
bankments.The operatorcouldlossfooting
or balance.
Do not mowexceaelve_ysteepslopes.
Do notmowonwetgrass.Reducedfooting
couldcause slipping.
III. Children
Tragicaccidents canoccurifthe operator isnat
alert to the presencoof children.Childrenore
oftenattractedto the mower and the mowing
activity.Neverassumethatch|ldrenwillremain
where you lestsew them.
1. Keep childrenoat of the mowingarea and
underthe watchful care of 8 responsible
adult.
2. Be elart and turn mowor oft if children enter
the area.
3. Before andwhile movingbackwards,look
behindanddownfor smallchildren.
4. Neverallowchildrentooperatethsmower. 10.
5. Uce extra care when opproaching blindcor-
nero, shrubs, bees, or other objects that
may obscure vision,
IV. Service
"1. Use extra care inhandling gesoUne and oth-
er fuels, They are flammable and vapors are
explosive,
a. Use onlyan approvedcontainer.
b. Neverremovegas cap oraddfuel with
the enginerunning.Allowengine to cool
beforerefueling.Do notsmoke.
c. Never refuelthemachineindoors.
d. Neverstorethemachineorfuelcontoin-
or insidewhere thereisan open flame,
suchas a water heater.
*2. Never run an engine indoomor inside •
closedarea.
3. Never make edjustmants or repairs to items
such asthe height adjusters or grass catch-
er with the engine (motor) running. Discon-
4. Keep eli nuts and belts, eopenlally blade st-
5. Never tamper withsafety devices. Check
8. Toreducefirehazard,keepmowerfl'eeof
7. Stopandinopenttheequipmentifyoustrike
8. Nevorattempttomakewheel hoightedjust-
9. Alwaysdisconnectelantricmowem(liveop-
nect the sparkplugwire,and keepthe wire
awayfrom the plugto preventaccidental
starting.Alwaysweareye protectionwhen
you make adjustmentsor repelrs.
tanhmant bolts, tight and keep equipment In
good condition,
theirproperoperationregularly,
grass, leaves, or other debris build-up.
Cleanupoilorfue_spillage.Allowmowerto
coolbeforestoring.
an object.Repair,if necessary,beforem-
starting.
mentswhilethe engine (mator)isrunning.
erated) before cleaning,ropeldng,or ad-
justing.
Grasscatchercomponentsare subjectto
wear, damage, and dstedomtion, which
couldexposemovingpartsorallowobjects
tobethrown.Freduentlycheckcomponants
and replace with manufacturer'srecom-
mended parts, when necessary.For stor-
age, always make sure grass catcher is
empty.
11.
Mower blades are sharp and can cat, Wrap
the blede(s) or wear gloves, and use extra
caution when sendclng them.
12. Donatchangethe enginegovernorsetting
orover-speedthe engine.
13. Frequehtlychankthebledeforwearordam-
agessuchascracksandnicks.A bladethat
isbentordamegedmustbeimmediatelyre-
placed with a factoryreplacementblade.
Forsafety and goodcuttingpsrformonce,
replace the blade every two yeers. Fre-
quanifycheckthe bladeboltandtheengine
mounting bolts. Replace damaged bolts
andtightenloosebolts,
14. Use only odginelequipment oraathodzed
replacementparts.
F-98529
*Asterisked Items do not opply to electric mowers.
5
Page 6
SAFE MOWING GUIDE
= -anpro and
:'--"-'_.'_-,use safe andunsafemowing pran-
alv_'_H'="., _L. "oXt feW nages Cm't_tully,
tl_. R,m=,t.-.-:.,... Y_o_an themow-
"t'heycannmp_t_":'_-'_ not oroDeltV_-
u@==H nr hes not re/_l me iil_,ug_ul = _v.
_l'_u-cqions ontheun)tbeforeesir,g_t4o{
_e'fi_t'timo. This can result;n unsafewe
dangedngtheoperator,bystanders,andthe
equlpmont.Anomerresultcanbe apoer sp-
peeranceofthe ares mowed.
at_Jctions_ tn_oun%_.=k_..=_u de and o'_her
cordingtono uem MUW,-U"-".....
safetyrulesand recommendationsm mrs|n-
stru_onBoukandontheunR.M=es=o_y;
onewhousestheunithesre_ melnslru_"_M'0
andhas beentoldhowtooperatethe mower
sefely.
g_cv. Learn howto cutandhowto keepcon"
_ o_the mowerat alltimes.Ev t:4_sonwho uses power equipment
Manymowersesestartedmanually.Whenu_-
_n9 a _t sto_tor rope ate/t, plaseyour feet
5rm_ bnde_wsyfromtheblade.Holdthe rope
h_e securely, • er ri "
moundyourermorfingersfore "bAit g P.
"rh_mo_erisdesignedfor usebyoneperson.
-"- erc assangers.
A_wa mow_one, Nov am/p
wa't_ts_nS _senger is dangerousfor the
_=*' _" '_--_--_^_---_.v,emtor Amowersnotfor
_,sement orf(x ¢arr_ngOOle_.
le_ emayou _'e p_annk'.gto mowwet?Nev-
er cutawel |awn.Cutt_g wargrosecancau_se
an accident.;tcaneffectmows'=perform.ance
_rowthandappe_er_e. Wet _ess !e.s P._
_nd mi-" cease the operator to t_'l or
mower_ozdip, Someone could be hurt by
but never wrap the rope
your mower is designedto p_Id.e, g.o__,_:_t"
v,,,....... _ cedana
ting.itthemowortsnotproped_'.servl _..
main'minedorused onurtsuitable?erratau..,
_d.o_ .= _._, fo_.,mo_n_;c_U=
pedorrnanceends_ety wmDer_u .
rop= an m
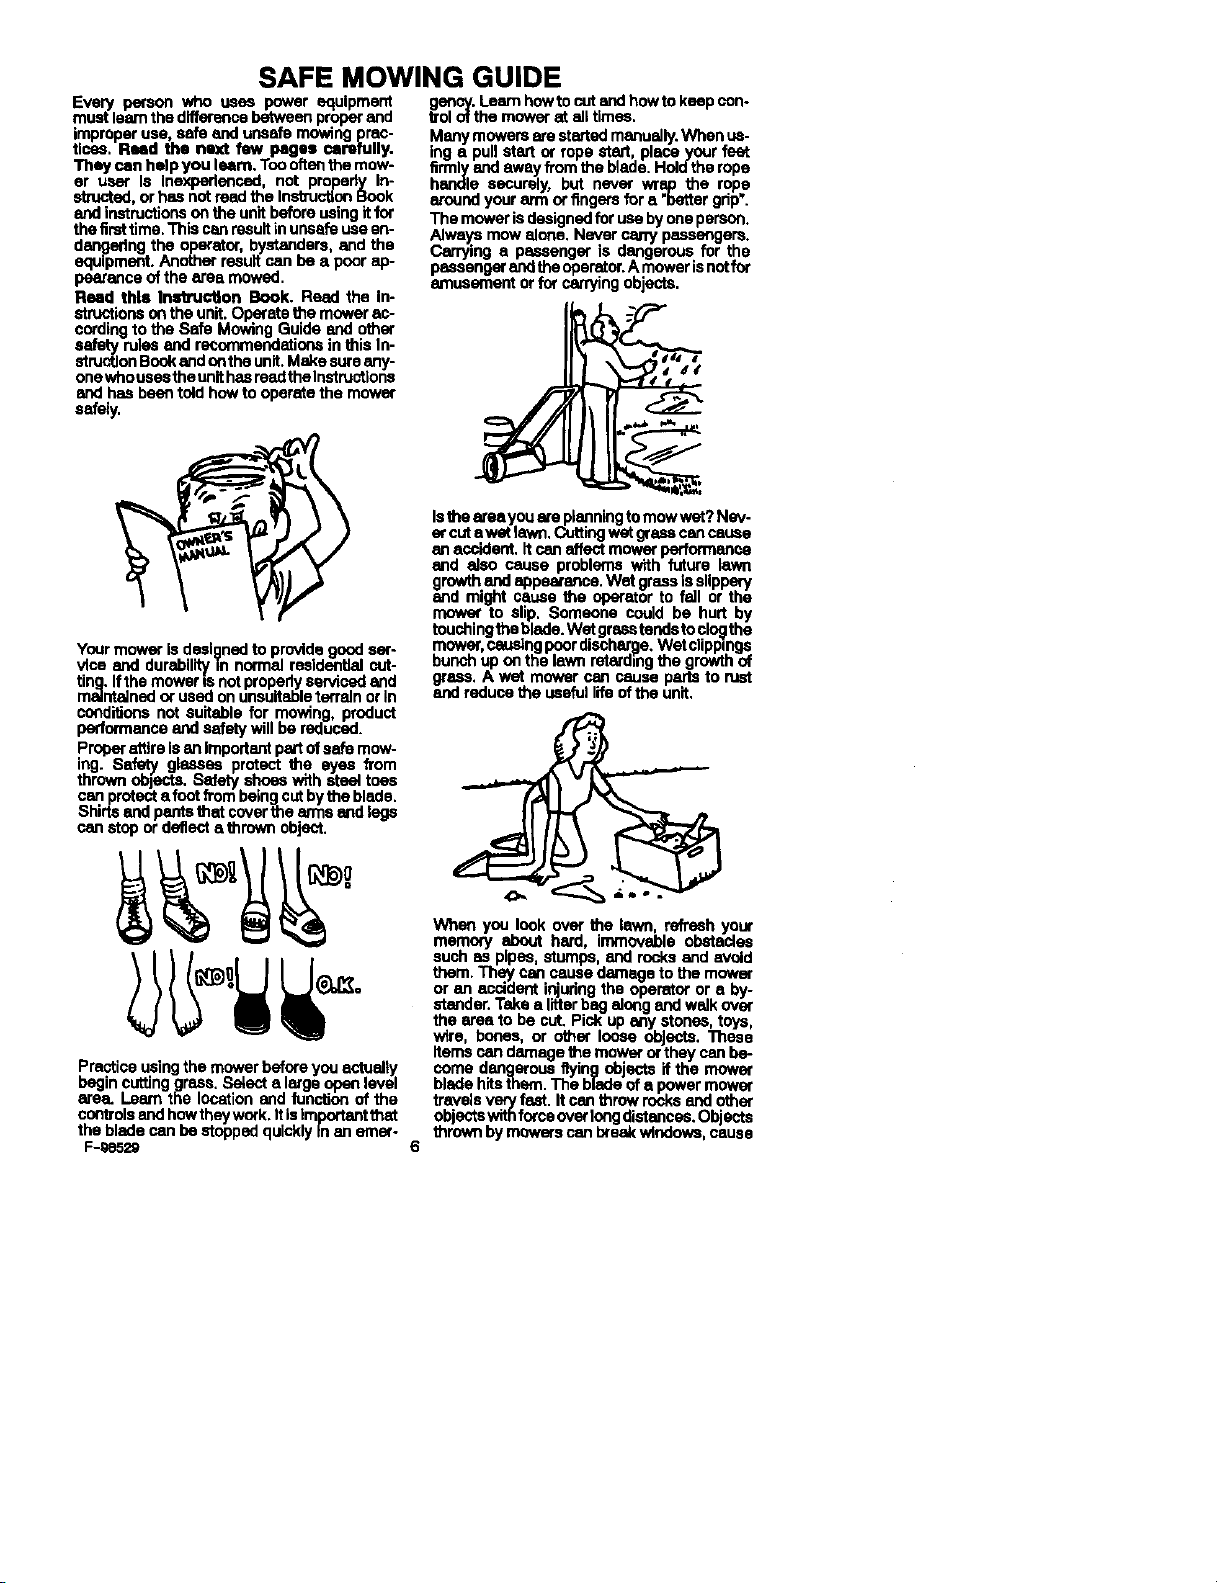
ing safety gtessse pr_ect_u.,._,,.eY_+,..=,_
thr_/n objeots.SMe_/.s_ _,_, _e'_lade_
n_n oroted_foot frombeun_c= uy _. .
_h_r_and pantsthat covermearmsarmrags
canatop orde_ect=zthrown object.
Practiceusingthemower beforeyouectuatiy
begincuttinggrass.Sstecta forgeopenrevel
erse. Learnme locationand lunctianof the
controlsandhowtheywork.ttis _. _t_
thebladecanbestoppedquicklytnartem_
F-I_e52_
1o_n_hopo_thelswnrm_ulng _ . _,__
g.=_,. Awet mower..,.,.,.,.,.,.,.,.c_.,c_...sepa_ts_o ,_,
_d reducethe usefullife orme u.,,.
wan yo__ _ tb.omwn_.r__h_
memO_ ebout herd, _mmoveuoteou_=.,_._,_
"" _-- -=-_ ,_Utlln'_ and rocke ana av_u
them.They _ .se._e damageto _e m_vm"
or an occidenti_onng the.operAtor.ora _y_
Atander.Tskea litterIp.egeJange_a=w_r_un_
+_,_,=m,_m be cut pick up any _tu,=,_o,-_m-,
u,- ------ " _SB
_re, berm, oro_erIoeseobLe__..o_n_be.
_temscendamagethe mower orrney
comedangerousflyingobje,:'tsif the m_ow_
bl_Klehitsthem.The blade Ora pgwe__
tmvetsveryfast. Itcanthrowro_keand o_
obectswithforceoverlongalstances,u.j,_,.
thrownbymowerscanbresk_ndows souse
6
Page 7

SAFE MOWING GUIDE
bruises,orevanputoutaneye. Oftanthe ger-
sonhurtbya thrownobjectisa bystandersuch
as a child,anotherfamilymemberora neigh-
ber. Keep people and iL_tScompletelyaway
fromthemowingarea,Directthe mower'sdis-
chorgeswayfromareaswherepeoplecanbe.
Planrllngyourmowing pettsm has a double
benefit.Itcanreducechancesofan inuryand
makethe c san up aftermowingeassr.
walls, or major in-
clinesintheareatobs
Are there dltch_,_
cut?Planthe mowing
pattemtoavoldsuch I[ v L_
danger areas. In- _\ F']
clinesand roughtar. _
rain must be mowed _'_A |_.,._L_,_'_.
oere_lyandsomef_ I_-_,r._,_
carefully end some
areasmust notbecut
areasmustnotbecut I _,_H1_'t_.,.,_*_'.,L_
with a mower at all.
with a mower at all./l _._ _._;_P_J_:_¢
WI_ walk behind" I l_..._f_._Ji_
equipment, mow __,_
aoross the inclineso __,_,
thatifyouarthemow.
er slip,youwon't run
intoeach uther.
Never mowslopes greaterthan 15 degrees.
See the "Guids'in the backofthisInstruotiou
Booktocheckanyslopes.
Readyto start cuffing?Notyet. Be sure the
mowerhasbeenfullyassembledaccordingto
direotlonsinthe InstructionBook.Even ifas-
semblywasdanebya lawnandgardenshop
orthe storewherethe unitwas purchased,it
must be checked. Are ell nuts, bolts and
screwstight?Doastheanginaheveoil?These
Itemsmustbecheckedpedodicailythroughout
the lifeofthe mower.
Yourmower has a gasolineengine. Gas is
dangerous.Storefuel onlyina approvedgas
container,Donotstorelargeamounts of gas.
Putoutall cigarettes,pipesandcigarsbefore
workingwithgasoline.Storefuelandthemow-
eritselfinawellventilatedareaawayfromany
possiblesourceof ignitionsucha pilotlighton
efumace. Ifthe mowerIstobestoredforanex-
tendedtime, remove the gasfromthe tank.
Thisminimizesthechanceof afireandkeeps
the tank clear of depositsand old gasoline,
thus improvingmowerperformance.Movethe
moweroutside beforeaddinggasoline.Use a
funnelandwigs upanyspUledfuelbeforestert-
ing. Remember, gasoline expands when
heatedsoleave someexpansionroom.Also,
most mower gas capsareventedto allow for
expansion.Always usathspropercap.People
areneedlesslyburnedby fires hurtinexplc-
sions, mowers and otherpropertyare dam-
aQedbecauseoffailureto followbasic safety
rulesrelatedto gasolineand fueling,
Neversadgasolinetoansnginethatisrunning
orthatishotfTomrecantuse,thiscancausean
accident.Removedrygrassandotherdehds
fromthe mower.Keepingthemowerdean will
F-g8529
Improvetheperformance,helpthean_ne stay
cooler,extendthe life of moving parts, and
minimizethedangeroffire.Peoplegetbemed
workingwithendaroundtheirmowers for oth-
er reasonsthan fireand e:,_ploslons.Ittakes
onlyafew secondsofoperationfor the engine
andthe mufflerto becomehot.Do nottouch
thesepartswhenthe moweris running.Stop
theengineandletitcooldownbeforeservicing
the mower.Remember,exhaustfumes canhe
dangerous.Neveroperatetheengineindoors
orIn an anclosed area.
GattJnga nowmowerconbe a bigeventfora
fernily.l.etfamilymemberssatisfytheircudos-
ny aboutthe mower andatthe semefime, tail
themaboutitadangers.Remember,a mower
isnatatoyandisnatforusebychildrenor any-
onelackinginage, strengthor experience.
Aswithany_ equipment,a mowercanbe
dangerousif notassembled,misused,ornot
properlymaintained, The mostimportantrule
istoalwaysusegoodjudgementandcommon
sense.
Your mowerwill cot thickgrass and heavy
plantstemswithease.Rngersandtoesareno
moreresistantto the mower'sblade. Many
peopleere iniursabecausethey "forgot"and
reachedintothedischargechute.Alwaystreat
your lawnmoweras if the bladeis rotating.
Neverperformany serviceortry tomakeany
sa ustmest,excaptcarburetor while the en-
gne is runnrig.
Use only eccessodas suited for your mower.
Use of improper anosasodes can reduce the
s_ety dasiQned into both the mower and the
accessory, it can even damagethe unit. Read
and fullowthelnstructions whfch come withthe
accessory and the mower.
7
Page 8
SAFE MOWING GUIDE
Useonlyodglnalequipmentorapprovedsub- inthereinisnofunanditisdangerous.Always
edtutioases esrvice parts.Ifyou nesdprofes- seekshatterInanaleotdcalstorrn.Inextmrne-
slonal cowIce, select e snop that is an lydrymowingconditions,yoursafaty.giasses
AuthorizedService Center for your brandof can serve a dual purposeby protectingyour
n-c:N_er,ifyouptentosewicatheup.ityourseif, eyes_om dustandthrownobecLs,_lso aduat
foflowdir_'ifonsinthe InstructionBook. orpollenmask can behalpfu.
i I
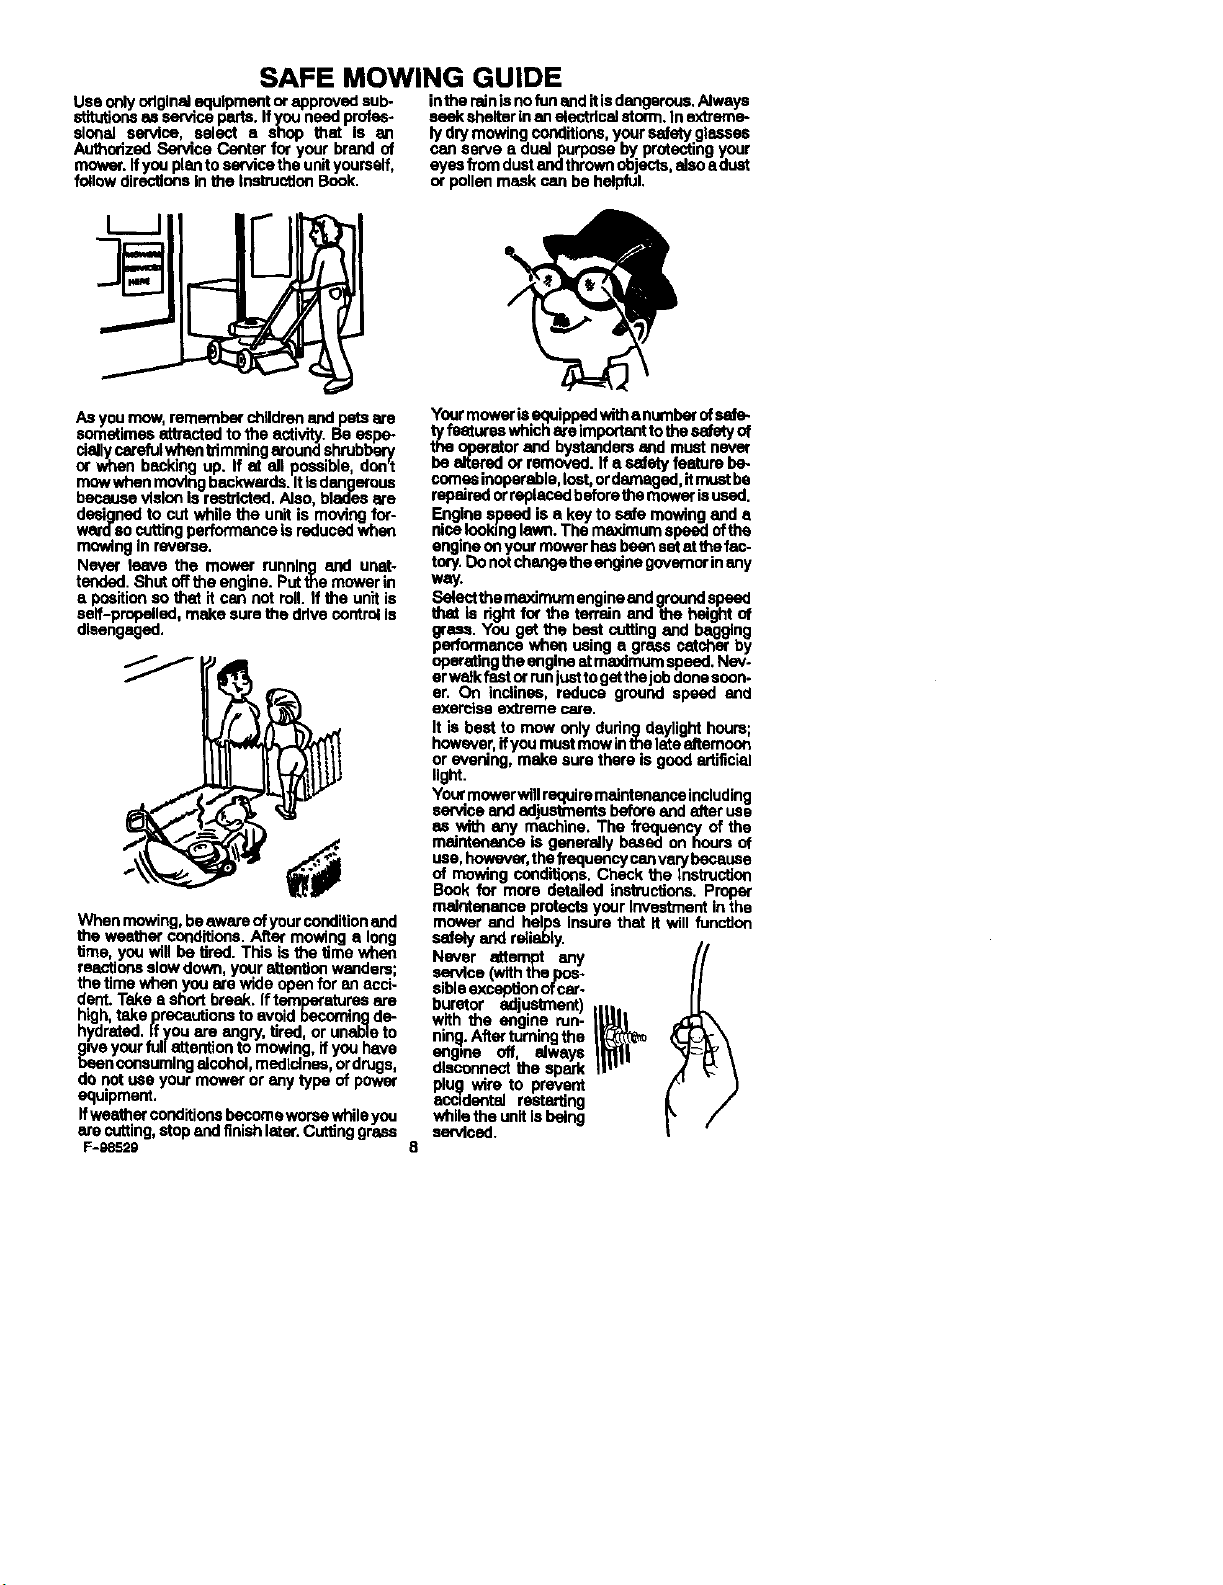
Asyoumow,rememberchildrenandpetsare
sometimesattracted tothe activity/.Be asps-
dallyc_efulwhentrimmingerounashrubby/_.
or when backingup. If at all possible,dont
mowwhenmovingbackwards.ItIsdangerous
becausevisionis restricted.Also,bladasare
designedtocut while the unit is movingfor-
wardso cuttingperformanceLsreducedwhen
mowingInreverse.
Never leave the mower runningand unat-
tended.Shutofftheengine.Putthe mowerin
a positionsothat itcan not roll.If the unitis
asrf-prupalled, make sure the ddve controlIs
disengaged.
Whan mowing be aware of your condition and
the weather conditions. After mowing a long
time, you will be tired. This is the time when
reactions slow down, your ntterdlon wanders;
the time 't,_en you Ore w_de open far en acci-
dent. Take a short break. If temperatures are
high, take precautions to avoid becoming de-
hydrated, If you ere angry, tired, or unable to
.giveyour ful/attention to mowing, if you have
=_en ounsumlng atcohol, medicines, ordr_gs,
do not use your mower or any type of power
equipment.
Ifweather conditions become worse while you
are cutting, stop and finish later. Cutting gross
F-98529
yow mowerisequippedwitha numbe_of se_--
tyfeatureswhichareimportanttothesafetyof
the operatorand bystandersandmustnever
be e_ered or removed.If a sefatyfeaturebe-
comesinoperable,last,ordamaged,it mustbe
repairedorreplacedbeforethemow_ isused.
Enginespeed is a keyto sofemowinganda
colookinglawn.The maximumspeedoftha
engineonyourmowerhasbeensetatthe fac-
tory.Donotchangetheenginegovernorinany
wal/.
Salentthemaximumengineandgroundspeed
that is rightfor the terrainand the heightof
grass.You get the best cuttingand bagging
pedonnancewhen using a grass catcherby
opmat_ngtheengine atma,x_l',urnspeed.Nev-
erwalkfastorrun usttogetthejobdoneeOon-
or. On inclnas, reduce ground speed and
exerOlseextremecare.
It is best to mew only dudngdeylight hours;
howsNer,ffyou rnuatmowinthe|atealtemoon
or evening, make sure there is goodartificial
light.
Yourmowerwifirequiremaintenanceincluding
serviceandedjualxnentsbeforeand offer use
as with any machine. The frequency/of the
maintenanceis generallybased on hoursof
use,howevor,thefl'equancyconvarybecause
of mewing conditions.Check the Instruction
Book for more detailed insbuctions,proper
_enance pmteotsyour Investmen';in+=ha
mowerand helps Insurethat it will funciton
safelyandreiiably.
Never attempt any
ear,doe(withthepos-
siblaexceptionofc_-
withtheenginemn-
nits.Aftertumingthe
angina off, always
dtsounneotthe abed<
plug wire to prevent
anQdantal restarting
whnathe unitIsbeing
asndced.
8
Page 9
SAFE MOWING GUIDE
While mowing, ifyouhitaforeign object,stop
the engine.Removethesped<plugwve.Cere-
fullyand thoreughlyinspect the mowerfor
damage.Make nassesanJrapalmbefore re-
starting.Iftheunitstartsto"_brsteabnormally,
stop the angina immediatelyandcheckforthe
cause. Vibration is generally a warningof
trouble.Keepail nuts,belts, andscrewstight.
The blade is the most dangerouspad of the
mowerandalsothemostimportantpadinob-
feJning s nice lawn appearance. Check the
bladeend the blade mountinghnrdwerefTe-
quonity.Keep ittight.Ifthe bladehitsa solid
object,checkit thoroughlyfor deformationor
cracksand replaceif damaged.Forsefety,re-
placethebladeeverytwoyears.Asharpblade
reducestheworkload ontheengineandcuts
grassmorecleanly,forabettorlookingcutwith
lesswork.Thebladeisalwaysclosetotheout-
sideof the mower housing.Forbesttrimming
on side discharge mowers, cutwith the left
sideofthe housingtowardthe areathatneeds
tdmmlng.
A useful accessoryfor yeur mowerisagrass
cat.hen Therearegrasscatchersavailablefor
most models.Forbestperformanceand safe-
ty, be surethe grasscatcheris approvedfor
usewith your mower. Assemble as directed
end followoperatingand as_ty instructions
withthe catcherandin the InstructionBook.
Before mounting,checkinger emptyingthe
grasscatcher,alwaysturntheengineoff.Re-
member to check the grass catcher before
eachuseforcracks,wear,ordstsdorstion.Re-
Puflacaany partthat isdamagedwiththe man-
acturer'erecommended replacementpart
beforeusingthe grasscatcheragain.
Propercuttingtechniqueis importantif you
wantyourtawntolookgood.Avoidthe tempta-
tiontocut grass too short. Cuttinggrasstoo
shortcankillthe plant,causegrasstoturnyel-
low,ormakethe lawnlookbrownandthstchy.
Usethe loweroutiinghaights In coo_months
whenthegrassislush.Usethe highercuffi.n.p
heightsinextremelydrypedods.CutUngwith
a dull blade or low engine speed braises,
shreds,and can uprootsomegrass making
the lawnlookdulland browna few daysafter
outting.Alwaysputthethrottle controlinFAST
F-g652g
_agltlon when mowing and bagging.When
glng,slowergroundspeedwillprovldothe
bestresults.
Changethe mowingpatternslightlyeachtime
you cut. If youalwayscutthe same way.,the
grasswilldevelopa"set*andclippingswillec-
cumulafe more heavily in soma areas more
than Inotherscausinggrassto getthinnerIn
those areas. Do natservice yourmower over
thogmas.Spilledoilandgascankillthegrass.
Intallgrassor very heavygrass,donottryto
cutit allat once. Raisethe heightof cutonthe
flintcuttingandloweritforthenextcuttingthe
sameday erwithinafewdays.Anotherwayis
tocut onlypart ofthewidthof the mower and
adjustyour groundspeed(notthe engine)to
movemoreslowlysothe mowercan clear it-
eadas it movesforward.
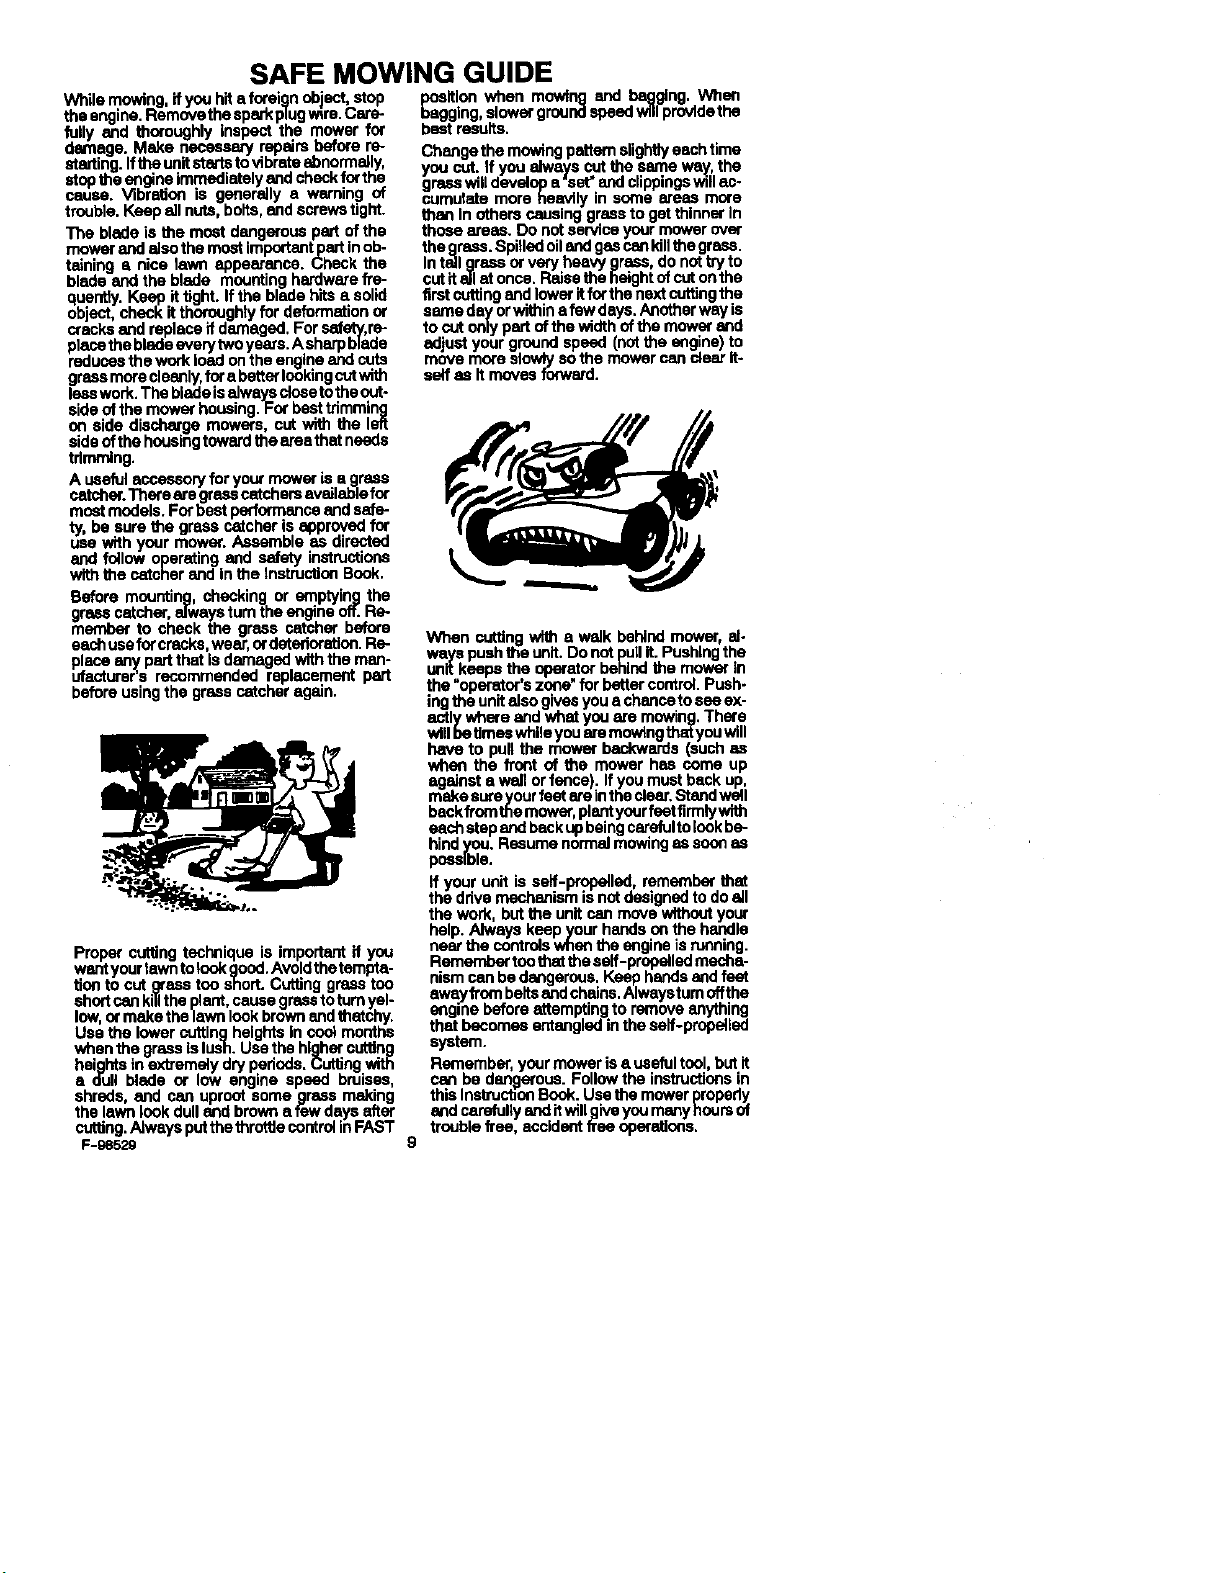
When cutting with a walk behind mower, el.
ways push the unit. Do not pull it. Pushing the
unit keeps the operator behind the mower in
the "operator's zone" for better control. Push-
ing the unit also gives you a chance to see ex-
antly where and what you are mowing. There
will be times while you are mowing thatyou will
have to pull the mower backwards (such as
when the front of the mower has come up
against a wall or fence). If you must back up,
make sure your feet am inthe clear. Stand wall
beckfromthemower, plantyoor feet firmly with
each step and beck up being carefulto look be-
hind you. Resume normal mowing as soon as
possible.
If your unit is sad-W.opellad, remember that
the ddvs mechanism ts not designed to do all
the work, but the unit can move without your
help. Always keep your hands onthe handle
near the controls when the engine is running.
Rem_ too that the self-propailed meche-
nism can be dangerous. Keep hands and feet
awa.y fram boltsand chains. Alweystum offthe
ongme before attempting to remove anything
that becomes entangled in the self-gropelied
system.
Remember, your mower is a useful tool, but it
con be dangerous. Follow the instructions in
this Insl_uctionBook. Use the mower propsdy
and caratulty and itwillgive you many nours of
trouble free, accident ftse operstions.
9
Page 10

STEPS TO FOLLOW
BEFORE MOWING
• Besumto dress corrantly.Weer herdshces,notsandalsortonnlsshoes.
• Examinetheblade.A bladethatisbent,cracked,or damagedmuatbereplauedwithafactory
replacementblade.
• Fillthefuel tank outside.Clean offspilledfuel.
• ReadendfollowtheOwner'sMenual,theinstructionswiththeengine,andtheinstructionswlth
anyattachments.Owner'sMenual instruc_onsarefor yourcefsty andthesafety of others.
• Exhaustfumesare dangerous.Starttheengineoutside.
• Make sureall _ devicesare in place andworkingcorrectly.
• Operationof the moweris onlyfora personthat has experience.
• Wat grasscan be dangarous.LStthegrassdry.
• Instructchildrenandothersto keepaway fromthe work area.
• Never cutthe gresswithoutgoodlight.
• Pick up loose objects.Removethem fromthe mowingmea.
WHILE MOWING
• Watchforfixedobjectsendavoidthem. Theycan damagethe mowerorcause injury.
• A hot engine end mufflerwillcausea bum.Do nottouch.
• Inclinesend alopeamustbecerofully mowed.Seethe "Guide"inthebeckofthis booktochesk
aslope.
• Lackof daylightorgooda,'lJficisllightiscauseto stopmowing.
• Examinethemower,the blade,end otherpartsfordamageafterhittingaforslgn objectorifthe
unitvibrates m(cessiv_y.
• Donot makeadjustments orrepairswithoutsteppingthe engine(exceptforce_urator). Dis-
connectthe spark plugwire.
• On or nearroads,watchoutfort_atfic.Directdischargeawayfrom roads.
• Whenmowing,avoidareaswharetrastionis unsure.Befereandwhilemovingbaskwards,look
behindenddownfor smallchildren.
• Inheavygress, raisethe cuttingheight.Cutslower.Stopthe engine toremovecloggedgrass
from the mower.
• Never removeanysafetyrelatedparts.
• Donot pourgasolineIntoa enginethat Is hotorruonlng.
AFTER MOWING
• Alwaysletthe mowercoolbeforestodng in an enclosed area.
• Foreignrrmtedslonthe moweris dangerous.Clean offgrass,leaves, greaseand oilbefore
storing.
• Tightenall Ioo6enuts,boltsandscrewsbeforeyou use the unit.
• Emptyandcleanany grass catcheror other accessory.
• Removethe keyor disconnectthe sparkplugwire to preventunauthorizeduse.
• Makesurethemowerisnotkeptnearasourceofignition.Gasfumes cencauseauexpiosion.
• Onlyoriginalpartsorfactoryapprovedsubstitutescan be usedto servicethe mower.
• When storing the mowerforan extendedpedod,removethe fuel from thefuel tank.
• Instructchildrento leavethe moweralone. It isnota toy.
• Never keep gasolinenear a sourceof igniOon.Alwaysuse an approved container.Keep
gasolineawayfromchildren.
• Lubdcsteaccording to the InstructionBook.See "Lubdcstion'.
IMPORTANT--Read the Instruction Book. Keep thls book for future use and
reference.
A WARNING:Lookfor this symbol to point out Important
F-g652g 10
safety precautions. It means: "Attention! Become
Alertl Your Safety Is Involved."
Page 11

PREPARATION
UNPACKING INSTRUCTIONS
The mower was fully assembled at the factory.
When the mower was put In the carton, the
handle was put in the storage position. To put
the handle in the opiating position, follow the
steps below.
1. Remove the mower from the carton.
2. Putthe lower handle In the operating pesl-
tlon. Make sure the lower handle Is be-
twsen the Iocldng tabs (Rgure 1).
3. Put the upper handle In the operating
position.Tightenthewlngnuts.
CAUTION: Be careful when you fold or
raise the handle. Do not damage the
cables. Acablethet Is bent will not work
correctly. Before you use the unit, re-
plumea bent or damaged cable.
4. To aifash the renoll-stert gdp to the rape
guide, twist the rope through the rope
guide mounted on the dght side ofthe han-
dle (Figure 2).
NOTE: If you cannot sttach the
recoil-tort gdp because therope Is too
short, hold the engine stop lever
against the handle. Slowly pull the
recoil-start gdp.
LowerHandle
Offset Hole
Recoil-Start
Gdp
HOWTOADJUSTTHEHANDLEHEIGHT
The lower handle has two assembly pesi-
_iens. A HIGH and a LOW position (Figure 3).
The HIGH pcalUon will raise the handle ap-
proximately four inches.
f
Figure
The mounting holes Inthe lower handle are
offset (Figure 1). To change the hole offset, ro-
tate the lower handle. This will change the
F-g852g
angle of the handle end make the height of the
handle higher or lower (Figure 3).
Removethe cabletias thst festen the €on-
trol cables to the lower handle (Figure 4).
The cable tin can be re-used. To remove
a cable tle, pull the tab on the cable tle to
free the cable.
2. Remove the bolts and wlngnots that fas-
ten the upper handle tothe lower handle.
3. Putthe upper handle on the groundbe-
hind the mower.
CAUTION: Do not bend the control
cables. A cable that Is bent or damaged
must be replaced.
4. Remove the wlngnutsfrom the dght end
left handle brackets (Figure 1).
5. Remove the lower handle from the han-
dle breoksta (Figure 1).
11
Page 12

PREPARATION
6. Rotate the lower handle around 8. Fasten the upper handle to the lower
(FIgum4).Mountthelowarhandlatothe handle with the bolts end wlngnuts
handle brackets. (Figure 4).
7. Attenh the Iowor handle to the handle
brackets w;th the bolls and wlngnuts. 9. Securethe control cables to the lower
(Figure1). handle withthe cable ties.
Bolt
Handle Bracket
F-S8529 12
Figure 4
Page 13

PREPARATION
HOW TO PREPARE THE ENGINE
ENGINE DOES NOT CONTAIN
OIL OR GASOLINE
Santheung_nemanufacturer'sinstructionsfor
thetypeofge_;olineandoilto use.Beforeyou
usetheunit,readtheinformstiononsafety,op-
era6ofl,maintenance,andstorage.
WARNING: Follow the engine
manufacturer's Instructions for
the type of gasoline and oil to
use. Always use a safety gseo-
whenadding gasoline to the en-
line container. Do not smoke
gine. When inside an enclosure,
do not fig with gseogne. Before
you add gaenllne, stop the
engine. Let the engine cool for
several minutes.
IMPORTANT:.This unitIs equippedwith an
internal combustion engine and must not
be used on or near any unimproved forest-
covered,brush-covered or grase-oovered
landunless theengine's exhaust systemIs
equlpbed with • spark arrestor msetlng
applicable local or state laws (If any). If s
spark arrestor Is used, It must be maln-
telned Ineffectiveworking order bythe op-
erstor.
In the State of California the above Is re-
quired by law (Section 4442 ofthe Cstifor-
nle Public Resources Code). Other states
may have similar laws. Federal laws apply
on federal lends. See an Authorized Ser-
vise Center for a spark mr for the
muffler.
FINAL ASSEMBLY
Beforeyouusethe mower,checkthe assem-
blyof thewheels, thehandle,andthecontrols.
Make sure all the fasteners are tight. Make
surethethrottlecontrolandtheenginestopIs,-
vet workcorrectly.
F-ge529 13
Page 14

PREPARATION
MULCHER PLATE
REMOVAL AND INSTALLATION
A WARNING: Before you remove
or Installthemulcherkit, dlscon-
nect the wire to the spark plug.
Onsomemodelsthemulcherkitisinstalledat
thefactory.Toconvertfromamulchertoaside
discharge,removethe mulcherplats.
Asidedischargemowercanbe convertedto a
mulching mower by installingthe mulcher
plateasfollows:
1. Raisethe chutedeflector(Figure5).
Chute
Deflector
2. Mount the tab on the top ofthe mulcher
pletetotheinsideofthe mowerhousing.
3. Mountthetab onthebottomofthemulcher
pleteto the insideofthe mower housing
(F_ures).
Chute
Deflectm
Mulcher Plate
Figure 6
MULCHING TIPS
Mulchingfinaly cuts the grass sothet the grass
can be easily recycled. Because the nuttlunts
ere returned to the soil. the lawn will need lass
fertilizer. To correctly mulch the lawn, follow
the tips below.
The grass must be dry. If the grass is wet,
it witl be difficult to cut and cause heavy
dumps of grass.
The grass must not be too tall. The maxi-
mum height to effectively cut is 4 1/2 in-
ches. Set the height adjusters so that only
the top third of the grass is cut.
Ifthe grass is more then 4 1/2 inches high,
two mowings will be necessary. For tbeflrst
mowing, set the height adjusters in the
highest position. Then, lower the height ad-
justers for the second mowing,
F-g8529
4. Lower the chute deflector.
Keep a sharp edge on the brads. A blade
that is not sharp will cause the ends ofthe
grass to become brown.
Cleon the underelde of the mower housing.
Grass end other debds can keep the mow-
er from working correctly.
If the quality of cut Is marginal, try the
following:
Set the height adjusters at a higher cutting
height.
Cut the grass mere fTequently.
Operate the mower at a slower ground
speed.
Ovedap the cutting swaths instead of cut-
tanga full swath with each pass.
Mow across the maPgineJ areas a second
time.
14
Page 15

OPERATION
ENGINE STOP LEVER
Releaeathe engine stop lever and the engine
end the blade will automatically stop. To run
the engine, hold the engine stop lever in the
Operating position (I-igure 7).
Before you start the engine, oporate the en-
gine stop lever severaiUmes. Make sure the
cable moves easily.
Figure 7
HOW TO STOP THE ENGINE
Toatop the engine relee,sethe engine stop
lever.Disconnectthe wire fromthesparkpug
to preventthe enginefromstarting.
Ifthe enginewill not stop,hold• screwddvef
againstthesparkplugend against the engine
coolingfin.s.The sparkwill goto groundand
the enginewill stop.Beforeyoustart the en-
gine checktheenginestop cable. Make sure
theengine stop cableIs assembledoerrectly.
Beforeyouoperatethe unit.replacea bentor
damagedenginestopcable.
HOW TO START ENGINE
WARNING: The blade will rotate
when the engine rune.
IMPORTANT:, Before you start the engine,
operate the engine stop lever several
times. Make sure the engine stop cable
movos freely.
NONE: A 'two speed throttle control Is lo-
cated on the engine. Sst the throttle control
In the FAST position for cutting grass, bag-
glng greas, and for extended engine life.
1. Check the o_1.
2. Fill the fust tank with regular unleaded
gosoline. Make sure the gosollne Isclean.
Leaded gasoline will increase doposit.s
and shorten the life of the valves.
NOTE: Do not use gasohol or methanol. Do
not use premium unleaded gasoline.
F-g8529
WARNING: Always usa • safety
gsaollnecontainer. Donot smoke
A when adding gasoline to the fuel
tank. When Inside an enclosure,
do not add gasoline. Before you
add gesollns, stop theengineend
let the engine cool for several
minutes.
3. Make sure the spark plug wire is con-
nectedtothe spark plug.
4. Move the throttle control,locatedonthe
engine,tothe FAST position.
5. Thepalmerbutfon isonthesideofthe en-
gine (Figure8). Pushthe primer button.
Everyifme you pushthe pdmer button.
waittwoseconds.Forthenumbe¢ofifmos
requiredtopushthe primer button, see
the enginemanufacturer'sinsVucifons.
Ill -
l'l I , i'^
t p Rgure it
NOTE: Do not use the primer button to
start • warm engine.
6. Standbehindthe mower(FigureS). Use
onehandtoholdtheengine stop leverin
the operatingpositionas shown.Use the
otherhandto holdthe recoll-stlt grip.
7. Rapidtypullthe recoil-start grip.Slowiy
returnthe recoil-start grip.
8. Iftheenginedoesnotstartin5 or 6 tdes,
See the "Problemend Repair' Inatruc-
tlens.
Hold the engine
stop lever in the
operating postlen.
Gdp
Figure 9
15
Page 16

MAINTENANCE
ENGINE MAINTENANCE
Uaethefollowingmaintenencesectiontokeep
your unitin good operaUnjJoonditlon. All the
maintenanceinformationforthe engine is in
the "EngineInstructionBook".Beforeyoustart
the engine,readthis book.
A Inspsatlon, adjustment (except
HOW TO CLEAN
THE MOWER HOUSING
A when the engine runs. Before
Grasssad o_er debriscan keep the mower
fTomworkingcon'ectly.After you mow,clean
the mowerhousingasfollows.
1. Stopthe engine.
2. Disconnectthewirefromthe sparkplug.
3. Cleanthetopend thebottomofthemower
WARNING: Before you make an
carburetor), or repair, stop the
engine and disconnect the wire
from the spark plug.
WARNING:"lTmblade will rotate
you clean the mower housing,
stop the engine end disconnect
the wire from the spark plug.
housing.
LUBRICATION
1. For maximum performsace,lubdcatethe
wheelsend all pivotpointswithengineoil
every25 hours.
2. To lubricatethe engine, refer to the =En-
gineInstructionBook".
NOTE: Do not lubricate the engine stop
cable. Lubrlcenta will damage the cable
and prevent the cable from moving freely.
Replace the cable If bent or damaged.
HOW TO ADJUST
THE HEIGHT OF CUT
WARNING: "me blade will rotate
A When the engine runs. Before
you change the height of cut,
stop the engine sad disconnect
the wire from the apark plug,
To change the height of cut, move the position
ofthe adjuster arm at each wheel (Figure 10).
Make sure each adjuster arm is In the same
posltlen so that the mower will cut lev_.
1. Disengage the adjuster arm.
2. Move the adjuster Mm to another posl-
tioo.
F-98529 16
Figure10
Page 17

MAINTENANCE
BLADE SERVICE s. Check the blade according to the "Blade
WARNING: Before you Inspect
the blade or the blade adapter,
A isconnect the wire to the spark
plug, If the blade hits an object,
stop the engine. Dlaconneet the
wire to the spark plug. Check the
unit for damage.
Frequentlycheckthe bladefor wearor dam-
agesuchas cracks.Frequentlycheckthe bolt
thatholdstheblade.Keep the bolttighLIfthe
bladehitsanobject,atopthe engine.Discon-
nectthe wire to the spark plug. Check the
bladeadapterfordamage. Checkforabentor
damagedblade,a badlywornblade,orother
damage. Beforeyou operatethe unit, dam-
a_)edpartsmustbe replacedwithfactoryre-
ptacernentparts.Forsafety,replacetheblade
everytwo years. Keep a sharp edgeon the
blade.A bladethatisnotsharpwillcausethe
endsofthe grasstobecomebrown.Remove
the bladeasfollows.
HOW TO REMOVE THE BLADE
WARNING: Before you remove
A tha blade, dlaconnect the wire to
1. Drain the fuel task.
2. Lift the =side of the mower that has the
3. Use a place of wood to keep the blade
4. Remove the bolt that holds the blade.
the spark plug. "nto blade has
sharp edges. When you hold the
bkKle, use gloves or cloth mind-
al to protoct your hands.
muffler or speck plug.
from rotaltng.
SaUce" inatzuctioos. Replace a badly
worn or damaged blade with a factory re-
plec,ernent blade.
6,
Msunt the blade with the curved edges to-
ward the housing. If the blade is upside
down, the blade will not cut correctly and
can cause an accident.
7.
Fasten the blade with the edginal wash-
ere and bolt. Make sure the outside drns
of the Ballerina washers are toward the
blade (Figure 11).
8.
Tighten the bolt that holds the blade to a
torque of 30 foot pounds.
WARNING: Always keep the bolt
A
that holds the blade tight. A Iooee
bolt or blade can CauSe an acol-
denL
HOW TO SHARPEN THE BLADE
WARNING: Vibration Is the result
A If the blade Is not correctly bel-mtued. A blsha that is damaged
1. Sharpen the blade _wo times a year or ev-
2. Ifthe blade is on the unit, do not sharper1.
3. Clean the blade with a brush, soap,
4. Sharpen the blade with a flllk Make sure
Continued following page)
with ¢re_ks can bnmk and cause
aft eccldant.
ery 25 hours.
Remove the blade according to the In-
sfructlens in "HowTo Remove The Blade'.
water. Check the blade. Look fer cracks,
nicks, or other damage. Replace a blade
that Is badly worn, bent, or damaged with
a factory replacement blade.
you keep the original beveled cuffing edge
(Figure t 2).
Blade
Ballevllle
Blade Adapter Washer
Mulching
Blade
FlatWasher
Bolt Figure11
F-06529 17
Blade
File
Blade Is balanced
I I
[ Ground I Figure 12
Page 18

MAINTENANCE
5. Make sure the blade is balanoad. Use a
=orewddver and hold t_e blade parallel to
the ground as shown. A blade that Is bal.
ancad will stay parallel to the ground. Ifthe
blade is not balanced, the heavy end will
rotatetoward the ground. Sharpen the
heavy end until the blade is balanced.
6. A new blade will cut better than a badly
worn blade. Every two years replace the
old blade with a factory replacement
blade.
CHECK THE LEVEL OF CUT
Testtheunitinasmallarea.Iftheheightofout
isnotlevelorifthecutgrassisnotdischarged,
the causecan be:(1)the bladeIsbentordarn-
aged, (2) the blade isnot sharp, (3) a worn
blade (4) ora brokenblade adaptor. Before
you usetheunit,correctthe probem.
CAUTION: Be careful when you fold or
reles the handle. Do not damage the
cables. A cable that la bent will not work
correctly.Befureyou usethe unit,replace•
bent or damaged cable.
How To Fold The Handle
1. Loosan the knobs that hotd the upper part
of the handle to the lower part of the han-
dle. As you fold the handle, make sure the
cables are not around the loose fastaners
and do not become damaged. Rotate the
upper part of the handle toward the back
of the unit (Figure 13).
2. Lcosan the knobs on the lower handle
(Figure 14). Push in on the ends of the
lower handle. Move the ends of the lower
handle past the locking tabs.
3. Rotate the handle fo_mrd over the en-
gine. Make sure the cables are not darn-
aged.
Push in on
lower handle.
Rgum 13
Lower HandleFOLDING HANDLE STORAGE
Knob.
Figure 14
How To Raise The Handle
1. Pullthe handle back until the ends of the
lower handle lock into poeltlon.
2. Uftthe upper pint of the handle into the op-
erator's position. "nghtan the fasteners
that hold the handle.
HOW TO PREPARE THE MOWER
FOR STORAGE
WARNING: Do not remove geso-
a tim, or while you smoke.
line while Inelde a building, near
Gesollna fumes can cause an
1, Drainthe fuel tank.
2. Lattheanginerununtilit isoatof gasoline.
3. Drainthe0ilfTomthewarm engine.Fillthe
F-98529
pxplokion or afire.
engine crankcasewithnewoil.
4. Removethe epark plugfromthe cylinder.
Pour one ounceof oil intothe cylinder.
Slowlypulltherecoil-startgdpsothat the
oil will protectthe cylinder.Installa new
sparkplug inthe cylinder.
5. Clean thedirtend debdsfromthe cylinder
coolingfinsandthe enginehousing.
6. Clean the bottomofthe mower housing.
7. Complotolydean the mowertoproteatthe
paint.
8. Puttheunitinabuilding thathasgoodven-
tllstlon.
18
Page 19

TROUBLE SHOOTING CHART
The Engine will not start.
1. Move the throttlecontrolleverto the FAST or START position.
2. Make surethe fueltankis filledwithclas_ gasoline.Do notusa old gasoline.
3. On e cold engine,pushthe primerbuttan(optionalon anme models)fivetimes.
4. Make surethe wirefor the spark plugis connectedtothe spark plug.
5. AdjusttheCarburetor.Seethe "EngineInstructionBook'.
6. There istoo muchgasolineinthe engine cylinder.Removeanddrythe sparkplug.Putthe
throttle controlinthe SLOW poeitian.Pullthe recoil-startgripseveraltimes.Installthe spark
plug.Connectthe wire to the sps_kptug.Startthe engine.
7. The engineis difficultto startinheavyor highgrass.Movethe mower to a cleandrysurface.
8. Make surethe engine stop lever is inthe operatingposi_on.
9. Make surethe fuel valve isinthe ON position.See the"Engine InslxuctianBook'.
10. On electric startmodels,makesurethe widng hemass is connected.Chargethe battery.
The Engine will not stop.
1. Releasethe enginestoplover.
2. Checkthe engine sfopceble. Replacethe ceble if banter damagad.
The Engine performance Is bad.
1. Check the heightof cutsettings. Raisethe heightofcutifthe grassishigh.
2. Checkthe bottomof thebladehousing.Cleanthe bledehousingof grassand otherdebds.
3. Checkthe wireto the sparkplug.Makesurethe wire is connected.
4. Clean the enginecoolingfins of grassandotherdebds.
5. Check the cerburstoradjustmonts.Seethe "EngineInstructionBook'.
6. Check the sperkpluggop.SStthe sperkpluggapst 0.030".
7. Check the amount of oilinthe engine.Fillwithoilifnecessery.
8. Check the engine air cleenecSee the "EngineInstructionBook'.
9. The gasolineisbad.Drain endclean the fuel tank.Flllthe fuel tank withcleangasoline.
10. Check the throttle control.Makesurethe leverisnot Inthe CHOKE position.
Excessive Vibration.
1, Removethe biede.Check the bladeand belanceif necessary.See the blademaintenance
ins_Jstlons.
2. Checkfor a bent or brokenblade.A DAMAGED BLADE IS DANGEROUS AND MUST BE
REPLACED.
3. Check the blade adapter.REPLACE A BROKEN BLADEADAPTER.
4. Ifthe vibretioncontinues, takethe mowerto enAuthorizedServiceCerder.
The grass will not discharge correctly.
1. Clean the bottomof the mower housing.
2. Check for e badlywornblade.RemoveendsheR)entheblade.Forse_3ty,replacethe blade
everytwoyearswitha foctory replacementblade.
3. Movethe throttlecontrollevertothe FAST poeltian.Checkthespeedofthe engineeccording
tothe "EngineInstructionBook'.
The grass Is not cut even.
1. Checkthe heightadjustmentateech whasl.Theheightedjustmant mustbetheseinefor eech
wheel.
2. Makesurethe blade Is sharp.
3. Checkfora bent or brokenblade.A DAMAGED BLADEIS DANGEROUS AND MUST BE
REPLACED.
4. Check for a brokenblade adapter. REPLACEA BROKEN BLADEADAPTER.
F-98529 19
Page 20

MODEL 22406x9A REPAIR PARTS
24
\
6
/
21
25
25
J
19
3
\
4
2
26
F-g852g 20
11
Page 21

MODEL 22406x9A REPAIR PARTS
KEY
NO. DESCRIPTION PART NO.
1 Engine €
2 Housing 776022
3 Height Adjuster, Left Rear 672641
4 Knob 71495
5 Wheel and "13re #
6 Locknut, Flange 15x84
7 BoR, Cerdage 2x81
9 BoR, Engine 25x6
10 Nut 15x68
11 Height Adjuster, Left Front 672639
12 Washer, Belleville 17x137
13 Washer 17x124
14 BoR, Hex lx142
15 Blade 71849E701
16 Adapter, Blade 71056
17 Height Adjuster, Right Front 672638
18 Height Adjuster, Right Rear 672640
19 Guard, Rear 672500
20 Screw 26x245
21 Deflector, Chute 672421
22 Push-On Cap 28x42
23 Pin, Pivot 215xll Z
24 Spring 166x5
25 Baffle 672332E700
26 Plate, Mulcher 672422 Z
- Book, Instruction F-98529
$ Parts are availablefrom an AuthodzedEngine Service Center. See "Engines,
Gasoline"or"Gasoline Engines"inthe yellowpagesof the telephonedirectory.
# See the =Wheel And "Rre Parts List = page.
F-g852g
21
Page 22

MODEL 22406x9A REPAIR PARTS
13
14
8
12
4
15
2
KEY
NO. DESCNPliON
1 Handle,Upper(Black)
2 Handle,Lower(Black)
3 Bolt
4 Knob,PleslJc
7 Locknut
F-98529 22
PARTNO.
672666E701
71137E701
2x77
71294
15x116
KEY
NO. DESCRIPllON PARTNO.
8 EngineStopCable 672558
12 Guide,Rope 7153O
13 EngineStopLever 43653E700
14 Bracket,StopLever 43628BC
15 Fastener,Cable 71372
Page 23

MODEL 22406x9A REPAIR PARTS
Look at the Illustrations, Select the wheel and the tire you want and order
from the following chart.
WHEELSIZE&TYPE
S-inchPias6c,White
7-1richPlastic,White
7-inch_ LightGray
7-inchP1a_, DarkGray
8-inchPI_ White
8_klchPlas_,_I_ Gray
8-1richPlaCe,DarkGray
8-inchMeted,White
B-inch_ Bearing,while
8-inchBallBearing,LightGray .................... 672087
8-inchBeBBearing,DarkGray
14-inch,White
14-_ch,uc_tGray
14-inch,DarkGray
14-bch,BellBearing,W_Ite
14-in,BallBeadn9,LightGnly
14-in,BelI_adng,DarkGn_y
F-g8529
A B C D E F G H
42174 ....................
.... 71148 20_70 42172 ................
.... 71596 672086 ....................
.... 71596 6720_5 ....................
20104 .... 20271 42173 20105 43618 ........
20104 .... 672080 672081 .... 6720_B2
71598 .... 672060 71_99 71600 71132
43273 .... 43414 .... 43274
.................... 43724 ........
.................... 71134
........................ 672073 872063
........................ 672075 672077
........................ 672074 71841
........................ 71902 672064
........................ 672076 672078
........................ 71841 71840
23
Page 24

NOTES
F-_5_ 24
Page 25

NOTES
F-_ 25
Page 26

NOTES
F-gSs2g 26
Page 27

SLOPE GUIDE
On a riding mowf to dsformlrmff • stops Issafe to mow: (1) disengage the blade{s), !2) put the unit In reverse, and (3) by to back Mrelgbt upthe
slope, it you uan backup the elope, it is 9anmldly safe to mow,However, it you do now_ anfe, or If you •re not €ompleis/y sure, uanthis guide
anddo not mow • Mope that Is greater than 15 degree_ If the riding mower Is used wlfll a pull-bahlnd or rear mounted attachment,
do not operate the unit on • slope that Is greaterthan 10 degrees.
A 1s degree Mope Is • hll!that In•ream In helgnt at approximately 2.5 _ In 10 feet.
A 10 degree •lope _ • hlHthat In•mean In height at •l_9€oxlmatMy t.7 feet In 10 feel
A anextrenm care st adit me•, end aVOidsuddenturns or maneuvers. Follow other Instmciton• in this manual for ssfety In mowing on
blopev. Operate • riding mower up or down s_pe_ nlMw •crmls _s face of stopee. Operate • waJk-lbMlJrldmow_ aucss the br,e
of slopes, never up or down slopes. Use extracare when operating on or near slopes and ob_-ucUone.
............................. " "" " _ _'_'u_'s'_ _._ .........." "'" " " "" "'" " "" " " "'" "" -- !
LL
Page 28

HOW TO ORDER REPAIR PARTS
Onlyuneafaotoryrepairpa_Repakpa_s,exceptfortheeaginaorthe_mmisal_. m _ _ _e _ _
theunitwespurchesod,aesMceshoprecomrnendedbytheotore,= mlaz_lodzed_ _ _nd In_ _
_..gesofthetelephonedirectofy.Ifyoucannotgetarepairpintores_ asdescdpsdebb.e,callorwritetotheCentral
PrateDistn_otorshownbek)w.Whenyouorder,includethefolowlnginlormalion:(1)_Cm'npleteModelNumber(see
name.plate),(2)DateofManufacture,(3)Comp_ePartNumber,(4)DeSCdl_on,(b")Quan_ty.
Repazrpartsfor_e eng"meorthetransmlssidnareavaiaMeIz'omINemanulactoror'sa_hodzodes_ineceoterfouod
Idmeyellowpagesofthetelephonediredon/.Seetheindividualengineortrtmmlssionwnnan_.
MURRAY,INC,LAWNMOWERCENTRALPARTSDISTRIBUTORS
BEBCO,INC.
22212nd.Ave.
SouthBkmth9ham,N_ 35233
(205)251-4600
-800-828-8094
A_ F_rt_ OeorS_
PuertoR/na
BILUOU'S,INC.
1343So_ MainSL
Penile, CK 93257
(209)784-4102
1-800-245-5488
FAX1-800-226-7337
Azinona,Ca//_m/a,
Nevedm
BROWN& WISER,INC.
9991S.W.AvmySb'oet
P.O.Box1109
Tualdn,OR.97062
(503)6S2-0_%
1-800-882-4782
ILenal_Idaho(countiesAda,
Adams,Bonewah,Bo_, Bonnet,
Boundry,Canyon,Clearwater,
Elmore,Gem,Idaho,Koran,
Lateh,Lewis,NEZPerce,Owyoe,
Payette,Ravelli,Sheshone,Valley,
Weshbgton),i_nme (counties
Fiothead,Lake,lincoln,Mineral,
Mlsesulo,RaValll,Sanders),
Oregon,Weahington
CANADAPOWERTECHNOLOGY
161WatiineAvenue
Miesissauga,Qr,t.L4Z-1P2
(9_) 890-6900
1-8Q0-88"/-9559
Edm_
13315-146ST
EdmontonN]
T5L4S8
{403)453-5791
_ La,r_
234Mignoron
QCH4TIY7
(514)73t-3559
Canada
CHILTONAIRCOOLEDENGINE
3194th.Ave.South
P.O.BOx'150806
Nashville,TN.37215
(615)254-1634
1-800-821-6934
F-98529
Arkanu=(countiesClay,
Cralghead,C,dttendan,Cross,
Greene,Jackson,Lawrence,Lee,
MNelsalppi,Mooroe,Phillips,
Poiesalt,Randolph,,St.Francis,
W_dna),W_._ (ce.n_
Desota,Panda,Qui_lan,Tale,
Tualne),m/mwur/(ceur_an
Dunk]n,NewModdd,Pemlscet),
T_namme,Wrginin(coun_es
Bbnd,Buchanan,Dickenesn,Lee,
Russell,Scott,Smyth,Tazew_,
Weshington,Y_e)
ENGINESSOUTHWEST
1255NO.Hearne
Stireoepo_l,Lk. 71107-710e
(318)222-3871
1-800~38ti-6995
Atinm_e (exceptthesec_nles:
Clay,CrnJghead,Chttendan,Cr_s,
Greene,Hempstead,Howard,
Jackson,Lafayette,Lewmnce,Lee,
LIItleRiver,Miller,Mlsdestppl,
MonroeNevada,Phips,pike,
Palnestt,Randolph,Se_, St.
Francis,Woodorff)Lou/4dWm,
m_ (except
coual_'.Desm,Pekin, Qui_an
Tare,T,,mls_,)
FRANKEDWARDSCO.
3653_ou_h500West
SaltLakeCtiy,UT 84101
(801)972-0128
1-800-366-4563
Colorado,Idaho(coun_an
BannockBoadake,Bingham,
Blskm,BoonevNe,Butte,Camas,
Cadbou,Casskz,Cesta,Franklin,
Fremont,Good'u_l,J_,
JoromeLeorhi,Lincoln,Madison,
Mnidoka,Drleida,Pov_r,Toton,
TwinFalls)Montana(allcounties
exceptl_'ownandWiser),Utah,
Wyoming
GARONER,INC.
1150ChesapeakeAve.
Columbuu,OH.43212
(614)488-7951
1-800-848-8946
Md_a, Kentucky,Jfinh_na
(exceptupperPeninsula),Ohin,
WesternP_mnaJ_in withz_p
codesuptoandincluding16999,
WeWWrginta
GULFCOASTENGINE,INC.
4202Rl._ssellDr.
P.O.Box9724
Corpus Christi, "rx.78408
(512)888-6_99
1-800-825-6999
Arkmnm(_our_sHempotead,
Howord,Le_yette,L.i_ River,
Miler,Ne',mda,Pike,Sevler)New
Ml_dna,Okinhom_Tens,
Me,lfco
OSCARWILSON
ENGINE&PARTS
826LoneStarDr.
O'Fallon,MO.63366
(314)978-1313
1-800-873-6722
Jnoin (S.ofHwy.80),inwe,
Ka_sna,_in=outl(allcour,_
exceptDunk]n,NewMadrid,
PemNeot)_e
R_k.CORPORA'nON
P.O.Box931ti
Richmond,VA.2_27
(804)550-2_10
1-800-888-7149
Connac_'ut,_ OkrUkt
otCoinmain,t,_ itar_,
m_u_h_, NewHem_lm,
NewJersey,NewYork,N.&S.
C_rolina,Pennayhmnbz_s
17000&up,R_de Man_
Vermont,_/nin (allcoun_e_
exceptBland,Buchanan,
Dic_enesn,Lee,Rues_l.,S_alt,
_h_Y_,Tazewall,Washthgton,
WISCONSINMAGNETO
(2LOC_'nON_
4727N.TeuloniaAve.
Milwaukee,WL53209
(414)445-2800
/-800-738-7388
Jno/e (N.ofHwy.ti0),_inh/mm
(upperPanlr_sula),W/_'onain
800McKinleySt.
kaolin,MN.553O3
612)323-7477
-800-248-4016
_inne_ Nor_ ,I Sou_
Dakota
 Loading...