

Page 1
Model
20606x9A
This InstructionBookcontainsinformationfor severalmodels.
Readandkeepthis bookfor futurereference.
Thisbookcontainsimportantinformationon
SAFETY,ASSEMBLY,OPERATION,AND MAINTENANCE.
PRODUCTINFORMATION
Theownermustbecertainthat all
theproductinformation isincludedwiththeunit.
Thisinformationincludes
theINSTRUCTIONBOOKS,
the REPLACEMENTPARTSandtheWARRANTIES.
Thisinformationmustbeincludedto makesurestatelaws
andother lawsare followed.
RECORD THE FOLLOWING INFORMATION ABOUT YOUR UNIT.
THIS INFORMATION IS NECESSARY WHEN ORDERING PARTS
OR IN CASE OF LOSS OR THEFT,
WHEREPURCHASED:
DATEPURCHASED:Month Day Year.
MODELNO,: DATEOFMANUFACTURE:
F-98528
BUILT INTHE
Page 2
MURRAY, INC. Two Year Limited Warranty
Murray, Inc. warrants to the original purchaser that this unit shall be free from defects in ma-
tedal and workmanship under normal use and service for a period of Two (2) Years from
the date of purchase;however, this warranty does not cover engines, accessories(such as
snow blowers, snow blades, grass baggers and plows), transmissions, batteries and Nor-
mal Wear Parts (except as noted below) or transaxles as the companies that manufacture
these items furnishtheir own warranties and provide service throughtheir authorized field
service facilities. For additional information, see the warranties covering these particular
parts. If you are uncertain whether your unit contains or is equipped with one or more of
these parts,consult your dealer priorto purchase. Subjectto the terms and conditions noted
in this Limited Warranty, we shall, at our option, repair or replace at no cost to the odginal
purchaser any part covered by this LimitedWarranty dudngthe applicable warranty pedod.
In the event the battery proves defective withinninety(90) days from the date of purchase,
we will replaceitwithoutcharge. If the battery provesdefective after(90) days butwithinone
hundred twenty (120) days from the date of purchase, we will replace itfor a charge ofone
half (1/2) of the retail pdce of the battery in effect at the time of return.
Normal Wear Partsare defined as belts,blades, blade adapters, pneumatictires, headlights
and seat covers. These parts are warranted to befree from defects in material and work-
manship as delivered with the product.Any claimfor repair or replacement of Normal Wear
Parts mustbe made withinthirty (30) daysof the dateof purchase. No claimsinvolvingdam-
age caused from material use, abuse or misuse will be honored.
This Murray, Inc. Two (2) Year Limited Warranty is your exclusive remedy; however, this
warranty isvoid or does notapply to any unitthathas been tampered with,altered, misused,
abused or used for rental or other commercial and/or professional(non-homeowner) uses.
Your warranty does not cover minor mechanical adjustmentswhich are not due to any de-
fect in material or workmanship. For assistance in making such adjustments, consult your
Instruction Book.
To make a claim under this Murray, Inc. Two (2) Year Limited Warranty, returnthe unit(or
if authorized inadvance, the defective part) along with your proofof purchase to an Autho-
rized Service Center near you. To locate the nearest Authorized Service Center, call the
Central Parts Distributorfor your area shown in the listprovidedwith your unit or checkthe
Yellow Page listings in your local telephone directory. If you return the entire unit, we will
repair the unit. Ifwe authorize the return of the defective part only,we will either replace or
repair the part. In the case of a defect in a transmissionor differential (as distinguishedfrom
a transaxle), the entire transmission or differential must be returned since they do not in-
clude user serviceable parts.
This Murray, Inc. Two (2) Year Limited Warranty gives you specific legal rights,and you
may also have other rightswhich vary from state to state. This Limited Warranty is given
in lieu of all other expressed and implied warranties including the implied warranty
of merchantability and warranty of fitness for a particular purpose. Ifyou need addi-
tional information on this written warranty or assistance in obtaining service, write or call:
MURRAY, INC.
Outdoor Power Equipment
Customer Service Department
P.O. Box 268
Brentwood, Tennessee 37027
1-800-251-8007
F-98528 2
Page 3
OWNER'S INFORMATION
This instructionbook iswdtten for a person with some mechanical ability.Like mostservice books,
not all the steps are described. Steps on how to loosen or tighten fasteners are steps anyone can
follow with some mechanical ability. Read and follow these instructions before you use the unit.
Know your product: If you understand the unit and how the unit operates, you will get the best
performance. As you read this manual, compare the illustrations to the unit.Learn the locationand
the functionof the controls. To help prevent an accident, follow the operating instructionsand the
safety rules. Keep this manual for future reference.
IMPORTANT: Many units are not assembled and are sold in cartons. It is the responsibilityof the
owner to make sure the assembly instructions in this manual are exactly followed. Other units are
purchased in an assembled condition. On assembled units, it isthe responsibilityof the owner to
make sure the unit iscorrectly assembled. The owner mustcarefully check the unitaccording to
the instructionsin this manual before it isfirst used.
RESPONSIBILITY OF THE OWNER
The responsibility of the owner is to follow the instructions below.
1. Carefully read and follow the rules for safe operation.
2. Follow all the assembly and preparation instructions.
3. Inspect the unit.
4. Make sure that the operator of the unitknows howto correctly use all standard and accessory
equipment.
5. Operate the unit only withguards, shields,and other safety itemsin placeand workingcorrectly.
6. Correctly adjust the unit.
7. Service the unit only with authorized or approved replacement parts.
8. Complete all maintenance on the unit.
The engine exhaust from this product
contains chemicals known to the State
of California to cause cancer, birth
defects or other reproductive harm.
F-98528 3
Page 4
IMPORTANT
Safe Operation Practices for Walk-Behind Mowers.
This cutting machine is capable of amputating hands andfeet and throwingobjects. Failureto ob-
serve the followingsafety instructionscould result in serious injury or death.
L
General Operation
1.
Read, understand, and follow all instruc-
tionson the machine and in the manual(s).
Be thoroughlyfamiliar with the controlsand
the properuse of the mower before starting.
2,
Do not puthandsor feet near or under rotat-
ing parts. Keep clear of the discharge open-
ing at all times.
3.
Only allow responsible individuals,who are
familiar with the instructions,to operate the
mower.
4.
Thoroughly inspect the mower and area
where the equipment is to be used. Clear
the area of objectssuch as rocks,toys,wire,
bones, sticksetc., which could be picked up
and thrown by the blade.
5.
Be sure the area is clear ofother people be- 19.
fore mowing. Stop mower ifanyone enters
the area.
6.
Do not operate the mower when barefootor
wearing open sandals, Always wear sub-
stantial foot wear.
7.
Do not pullmower backwards unless abso-
lutely necessary. Lookdown and behind be-
fore and while moving backwards.
8.
Do not operate the mower without proper
guards, plates, grass catcheror othersafety
protective devices in place.
g.
See manufacturer's instructionsfor proper
operation and installation of accessories.
Only use accessories approved by the
manufacturer.
10. Stop the blade(s) when crossing gravel
drives, walks, or roads.
11. Stop the engine (motor) whenever you
leave the equipment, before cleaning the
mower or unclogging the chute.
12. Shut the engine (motor)offend wait untilthe
blade comes to complete stop before re-
moving grass catcher.
13. Mow only in daylightor good artificial light.
14. Do not operate the mower while under the
influence of alcohol, drugs or other medica-
F-98528 4
tion which can cause drowsiness or affect
your ability to operate this machine safely.
15.
Never operate mower in wet grass. Always
be sure of yourfooting; keep a firm holdon
the handle and walk; never run.
16.
Disengage the self-propelled mechanism
or drive clutch on mowers so equipped be-
fore starting the engine (motor).
17.
Ifthe equipment should start to vibrate ab-
normally, stopthe engine (motor) and check
immediately for the cause. Vibration is gen-
erally a warning of trouble such as a blade
that is damaged, a loose blade, or the en-
gine mounting bolts are loose.
18.
Always wear safety goggles or safety
glasses with side shields when operating
mower to protect your eyes fromforeignob-
jects which can be thrown from the unit.
Plan your mowing pattern to avoid dis-
charge of material toward roads, sidewalks,
bystanders and the like.
20.
After striking a foreign object, stop the en-
gine. Remove the wire from the spark plug.
Inspect the blade and mower for damage. If
damaged, repairbeforestartingand operat-
ingthe mower.
21.
Keep any washout portsand other mower
housing service openings closed when
mowing.
II. Slope Operation
Slopes are a majorfactor related to slip and fall
accidents which can result in severe injury.All
slopes require extra caution. If youfeel uneasy
on a slope, do not mow it.
DO:
Mow across the face of slopes; never up
and down. Do not mow excessively steep
slopes (maximum 15 degrees) or areas
where the ground is very rough. See the
"Guide" in the back of this manual to check
a slope. Exercise extreme caution when
changing direction on slopes.
Remove objects such as rocks, tree limbs,
etc.
Watch for holes, ruts, or bumps. Tall grass
can hide obstacles.
(Continued Following Page)
Page 5

IMPORTANT
DO NOT:
Do not mow near drep-offs, ditches, or em-
bankments. The operator could losefooting
or balance.
Do not mow excessively steep slopes.
Do not mow on wet grass. Reduced footing
could cause slipping.
III. Children
Tragic accidents can occur if the operator isnot
alert to the presence of children. Children are
often attracted to the mower and the mowing
activity. Never assume that childrenwillremain
where you last saw them.
1. Keep children out of the mowing area and
under the watchful care of a responsible
adult.
2. Be alert and turn mower oftif children enter
the area.
3. Before and while moving backwards, look
behind and down for small children.
4. Never allow children tooperate the mower.
5. Use extra care when approachingblind cor-
ners, shrubs, trees, or other objects that
may obscure vision.
IV. Service
"1. Use extracare inhandling gasoline and oth-
erfuels. They are flammable andvapors are
explosive.
a. Use only an approved container.
nectthe spark plugwire, and keep the wire
away from the plug to prevent accidental
starting. Always wear eye protectionwhen
you make adjustments or repairs.
4. Keep all nutsand bolts, especially blade at-
tachment bolts,tightand keep equipment in
good condition.
5. Never tamper with safety devices. Check
their proper operation regulady.
.
To reduce fire hazard, keep mower free of
grass, leaves, or other debris build-up.
Clean up oil or fuel spillage.Allow mower to
cool before storing.
7. Stop and inspectthe equipment if you strike
an object. Repair, if necessary, before re-
starting.
8. Never attempt to make wheel height adjust-
ments while the engine (motor) is running.
9. Always disconnectelectdc mowers (live op-
erated) before cleaning, repairing, or ad-
justing.
10. Grass catcher components are subject to
wear, damage, and deterioration, which
could expose moving partsor allow objects
to be thrown. Frequently checkcomponents
and replace with manufacturer's recom-
mended parts, when necessary. For stor-
age, always make sure grass catcher is
empty.
11. Mower blades are sharp and can cut. Wrap
the blade(s) or wear gloves, and use extra
caution when servicing them.
b. Never remove gas cap or add fuel with
the engine running.Allow engine tocool
before refueling. Do not smoke.
c. Never refuel the machine indoors.
d. Never store the machineor fuel centain-
er inside where there is an open flame,
such as a water heater.
*2. Never run an engine indoors or inside a
closed area.
3. Never make adjustments orrepairs to items
such as the height adjustersor grass catch-
er with the engine (motor) running. Discon-
F-98528 5
* Asterisked items do not apply to electric mowers.
12. Do not change the engine governor setting
or over-speed the engine.
13.
Frequently checkthe blade for wear or darn-
ages such as cracks and nicks. A blade that
is bent or damaged must be immediately re-
placed with a factory replacement blade.
For safety and good cutting performance,
replace the blade every two years. Fre-
quently check the blade bolt and the engine
mounting bolts. Replace damaged bolts
and tighten loose bolts.
14. Use only original equipment or authorized
replacement parts.
Page 6
SAFE MOWING GUIDE
Every person who uses power equipment
must learn the difference between proper and
improper use, safe and unsafe mowing prac-
tices. Read the next few pages carefully.
They can help you learn. Toooften the mow-
er user is inexperienced, not properly in-
structed, or has not read the Instruction Book
and instructions on the unit before using it for
the firsttime. This can resultin unsafe use en-
dangering the operator, bystanders, and the
equipment. Another result can be a poor ap-
pearanca of the area mowed.
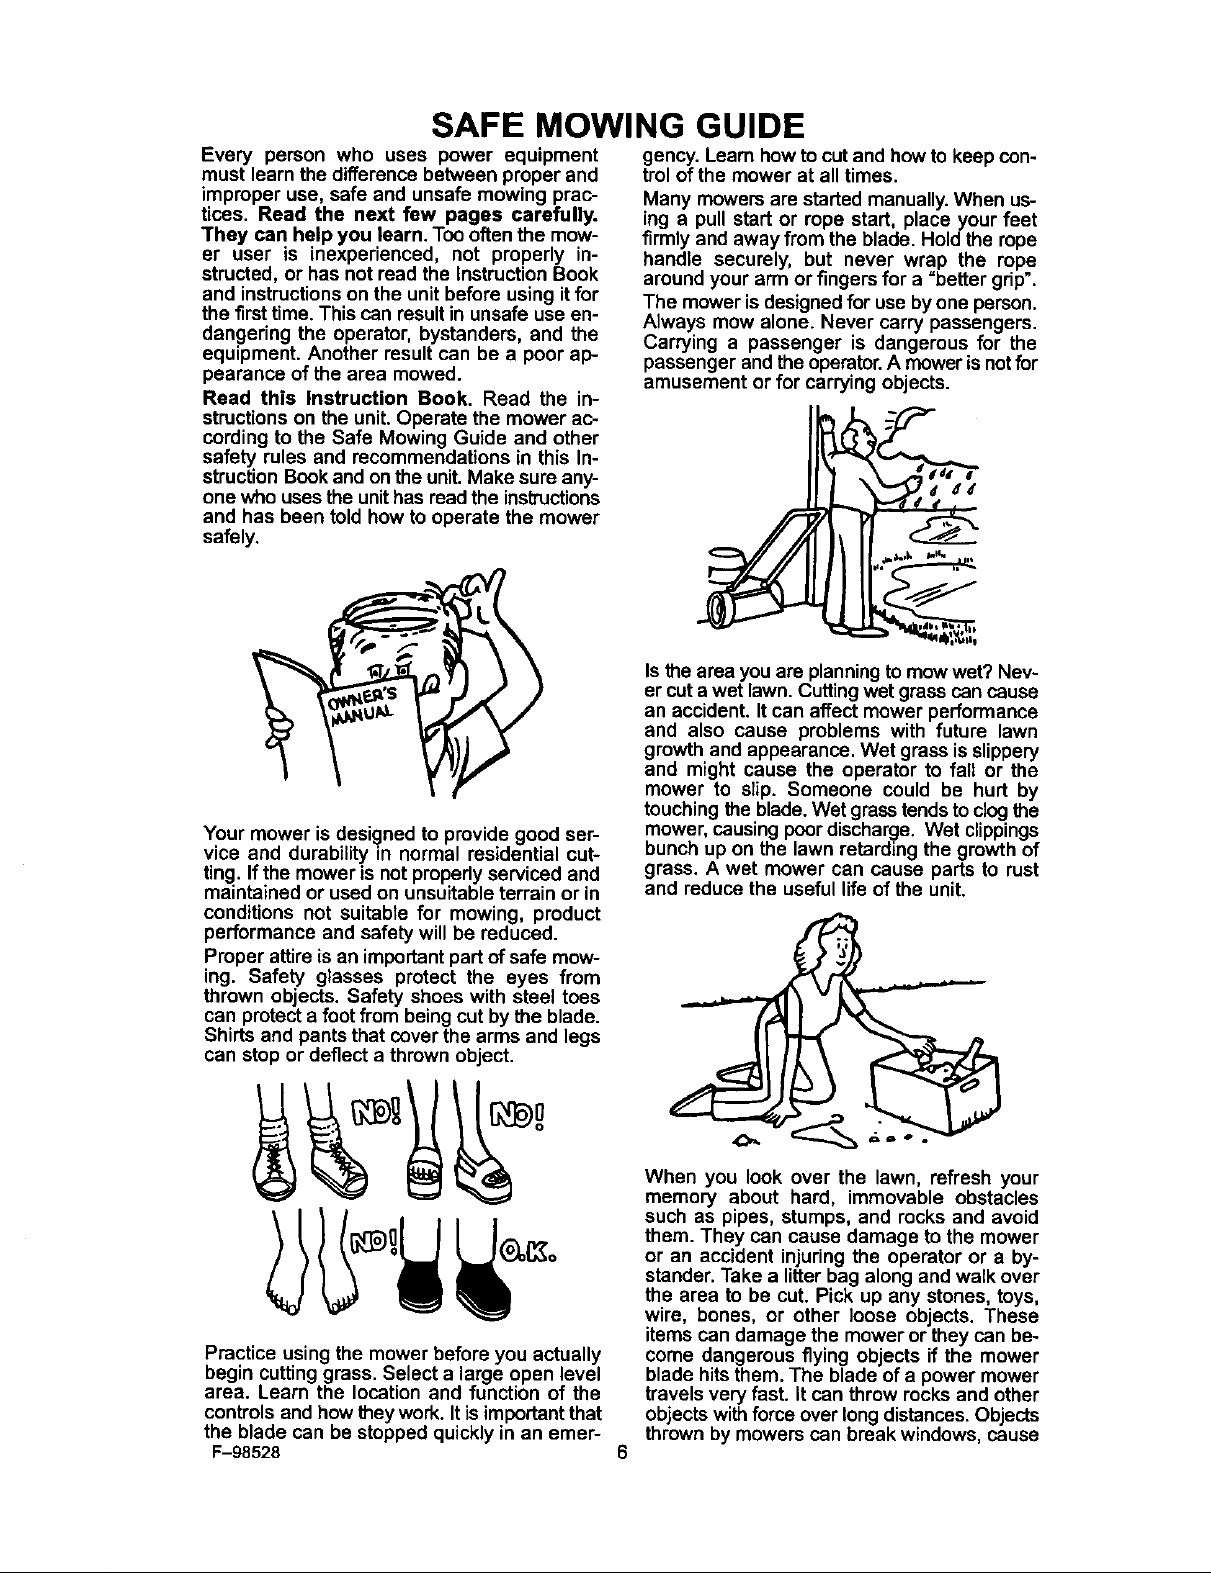
Read this Instruction Book. Read the in-
structionson the unit. Operate the mower ac-
cording to the Safe Mowing Guide and other
safety rules and recommendations in this In-
struction Bookand on the uniLMake sure any-
one who uses the unithas read the instructions
and has been told how to operate the mower
safely.
Your mower isdesigned to provide good ser-
vice and durability in normal residential cut-
ting. If the mower is not properlyserviced and
maintained or used on unsuitable terrain or in
conditions not suitable for mowing, product
performance and safety will be reduced.
Proper attire is an important part of safe mow-
ing. Safety glasses protect the eyes from
thrown objects. Safety shoes with steel toes
can protecta foot from being cut by the blade.
Shirts and pants that cover the arms and legs
can stop or deflect a thrown object.
gency. Learn howto cut and how to keep con-
trolof the mower at all times.
Many mowers are started manually.When us-
ing a pull start or rope start, place your feet
firmly and away from the blade. Hold the rope
handle securely, but never wrap the rope
around your arm or fingers for a "better gdp".
The mower isdesigned for use by one person.
Always mow alone. Never carry passengers.
Carrying a passenger is dangerous for the
passenger and theoperator.A mower isnotfor
amusement or for carrying objects.
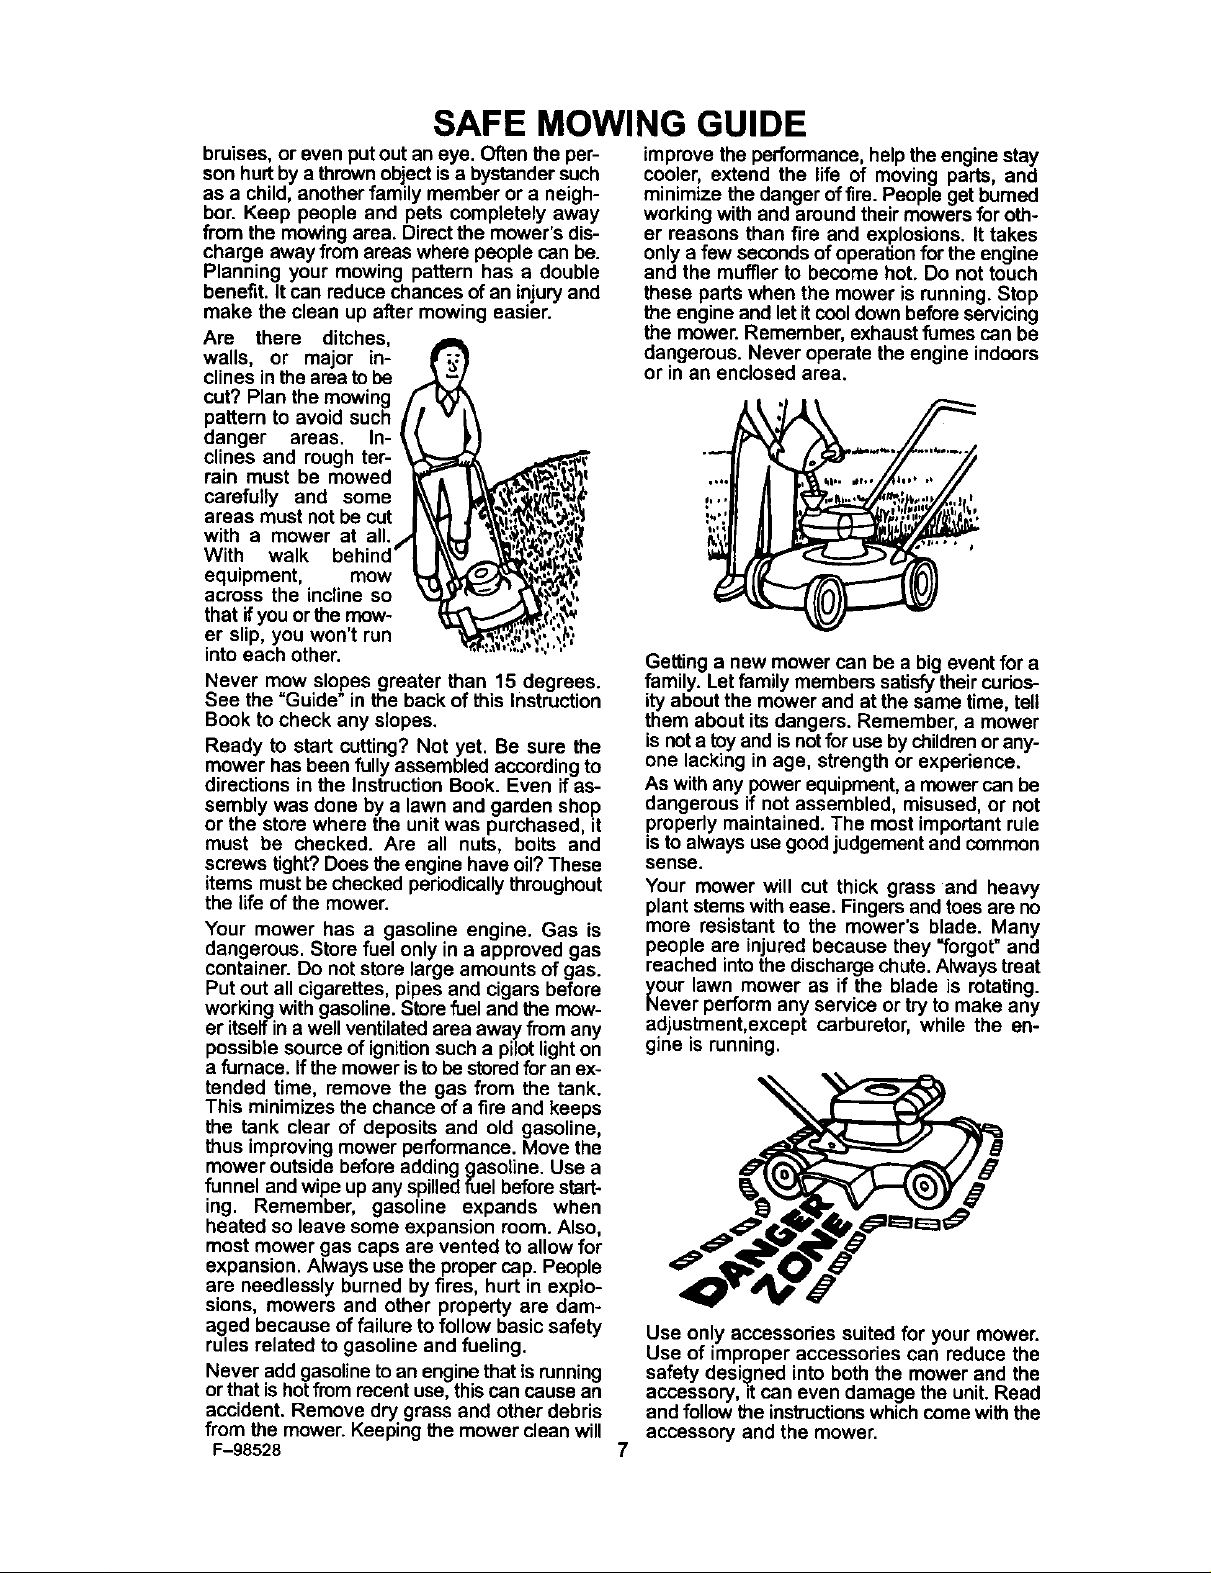
Is the area you are planningto mowwet? Nev-
er cuta wet lawn. Cutting wet grass can cause
an accident. It can affect mower performance
and also cause problems with future lawn
growth and appearance. Wet grass is slippery
and might cause the operator to fall or the
mower to slip. Someone could be hurt by
touching the blade.Wet grasstendsto clogthe
mower, causing poordischarge. Wet clippings
bunch up on the lawn retarding the growth of
grass. A wet mower can cause parts to rust
and reduce the useful life of the unit.
Practice usmg the mower before you actually
begin cutting grass. Select a large open level
area. Learn the location and function of the
controls and how they work. It is important that
the blade can be stopped quickly in an emer-
F-98528
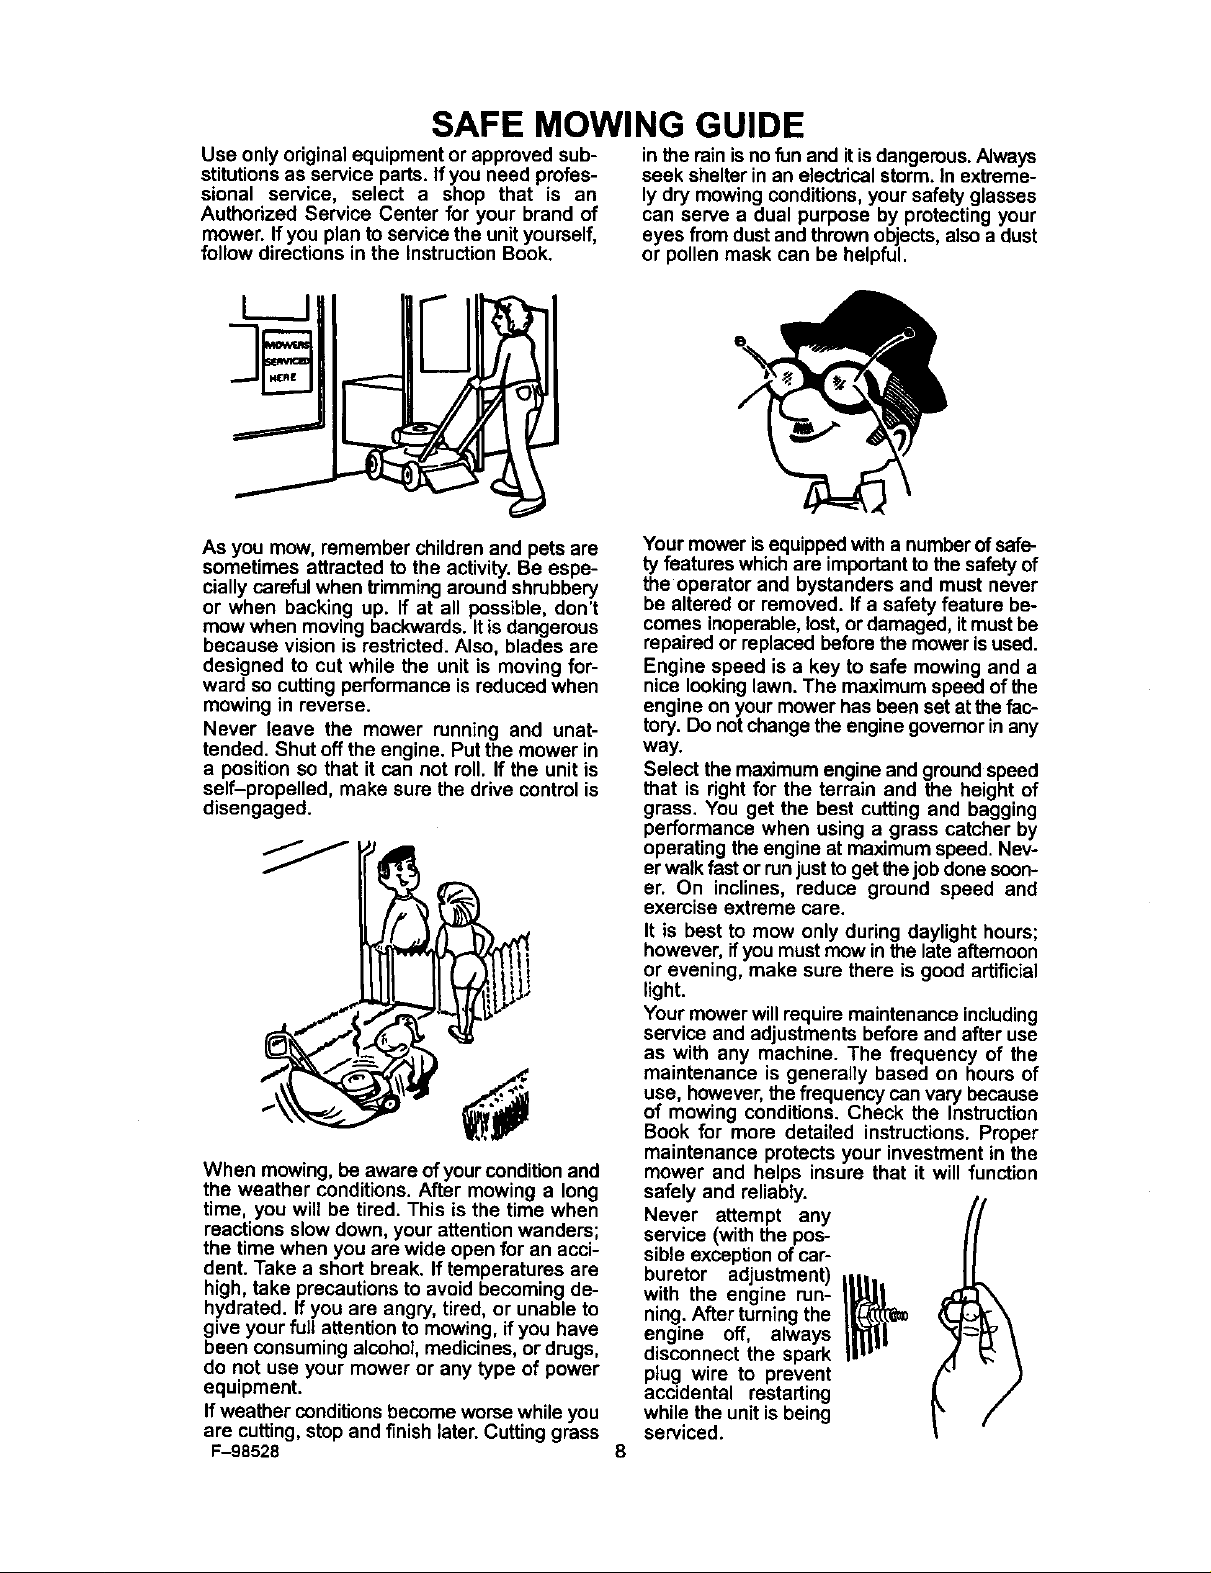
When you look over the lawn, refresh your
memory about hard, immovable obstacles
such as pipes, stumps, and rocks and avoid
them. They can cause damage to the mower
or an accident injuring the operator or a by-
stander. Take a litter bag along and walk over
the area to be cut. Pick up any stones, toys,
wire, bones, or other loose objects. These
items can damage the mower or they can be-
come dangerous flying objects if the mower
blade hits them. The blade of a power mower
travels very fast. It can throw recks and other
objects wit_force over longdistances. Objects
thrown by mowers can break windows, cause
Page 7
SAFE MOWING GUIDE
bruises, or even put out an eye. Often the per-
son hurtby a thrownobject is a bystandersuch
as a child,another family member or a neigh-
bor. Keep people and pets completely away
from the mowing area. Direct the mower's dis-
charge away from areas where people can be.
Planning your mowing pattern has a double
benefit. It can reduce chances ofan injury and
make the clean up after mowing easier.
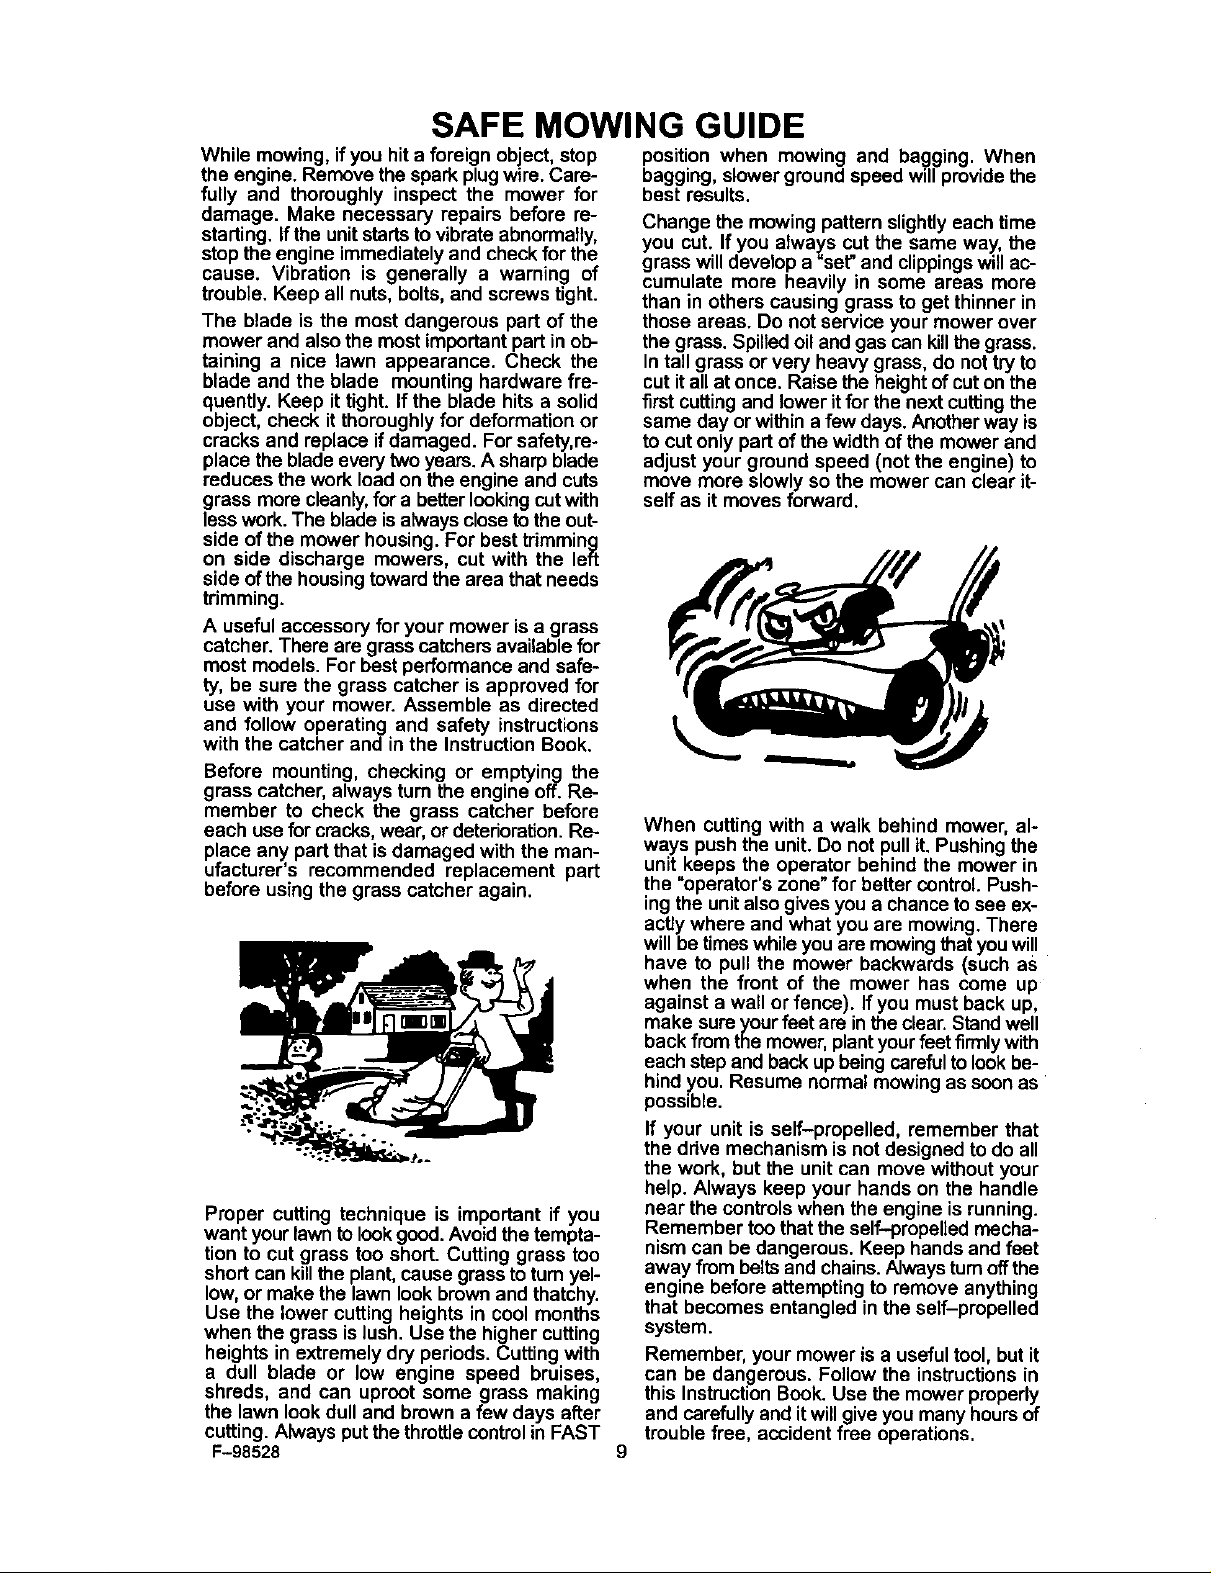
Are there ditches,
walls, or major in-
clines inthe areato be
cut? Plan the mowing
pattern to avoid such
danger areas. In-
clines and rough ter-
rain must be mowed
carefully and some
areas must not be cut
with a mower at all.
With walk behind'
equipment, mow
across the incline so
that ifyou orthe mow-
er slip, you won't run
into each other.
Never mow slopes greater than 15 degrees.
See the "Guide" in the back of this Instruction
Book to check any slopes.
Ready to start cutting? Not yet. Be sure the
mower has been fully assembled accordingto
directions in the InstructionBook. Even ifas-
sembly was done by a lawn and garden shop
or the store where the unit was purchased, it
must be checked. Are all nuts, bolts and
screws tight?Does the engine have oil?These
items must bechecked periodicallythroughout
the life of the mower.
Your mower has a gasoline engine. Gas is
dangerous. Store fuel only ina approved gas
container. Do not store large amounts of gas.
Put out all cigarettes, pipes and cigars before
working with gasoline. Storefuel and the mow-
er itselfin a well ventilated area away from any
possible source of ignitionsuch a pilotlighton
a furnace. If the moweristo bestoredfor anex-
tended time, remove the gas from the tank.
This minimizesthe chance of a fire and keeps
the tank clear of deposits and old gasoline,
thus improving mower performance. Move the
mower outside before adding gasoline. Use a
funnel and wipeup any spilledfuel beforestart-
ing. Remember, gasoline expands when
heated so leave some expansion room. Also,
most mower gas caps are vented to allow for
expansion. Always use the propercap. People
are needlessly burned by fires, hurt in explo-
sions, mowers and other property are dam-
aged because of failure to follow basic safety
rules related to gasoline and fueling.
Never add gasolineto anengine that is running
or that is hotfrom recant use,this can cause an
accident. Remove dry grass and other debris
from the mower. Keeping the mower clean will
F-98528
improve the performance, help the engine stay
cooler, extend the life of moving parts, and
minimize the danger offire. People get burned
working with and around their mowers for oth-
er reasons than fire and explosions. It takes
only a few seconds of operationfor the engine
and the muffler to become hot. Do not touch
these parts when the mower is running. Stop
the engine and letitcooldown before servicing
the mower. Remember, exhaustfumes can be
dangerous. Never operate the engine indoors
or in an enclosed area.
Getting a new mower can be a big event for a
family. Let family members satisfytheir curios-
ity aboutthe mower and at the same time, tell
them about its dangers. Remember, a mower
is nota toy and isnotfor useby children or any-
one lacking in age, strength or experience.
As with any powerequipment, a mower can be
dangerous if not assembled, misused, or not
preperly maintained. The most important rule
is to always use good judgement andcommon
sense.
Your mower will cut thick grass and heavy
plant sternswith ease. Fingers and toes are no
more resistant to the mower's blade. Many
people are injured because they "forgot" and
reached intothedischarge chute.Always treat
_our lawn mower as if the blade is rotating.
ever perform any service or try to make any
adjustment,except carburetor, while the en-
gine is running.
Use only accessories suited for your mower.
Use of improper accessories can reduce the
safety designed into both the mower and the
accessory, =tcan even damage the unit. Read
and followthe instructions which come withthe
accessory and the mower.
Page 8
SAFE MOWING GUIDE
Use only original equipmentor approved sub- in the rein is no fun and it is dangerous.Always
stitutionsas service parts. If you need profes- seek shelter in an electricalstorm. In extreme-
sional service, select a shop that is an lydry mowing conditions,your safetyglasses
Authorized Service Center for your brand of can serve a dual purpose by protecting your
mower. If you planto service the unit yourself, eyes from dust and thrownobjects, also a dust
follow directions in the InstructionBook. or pollen mask can be helpful.
L I
As you mow, remember children and pets are
sometimes attracted to the activity.Be espe-
cially carefulwhen I_'immingaroundshrubbery
or when backing up. If at all possible, don't
mow when moving backwards. Itis dangerous
because vision is restricted. Also, blades are
designed to cut while the unit is moving for-
ward so cutting performance is reduced when
mowing in reverse.
Never leave the mower running and unat-
tended. Shut offthe engine. Put the mower in
a position so that it can not roll. If the unit is
self-propelled, make sure the drive control is
disengaged.
When mowing, be aware of your conditionand
the weather conditions. After mowing a long
time, you will be tired. This is the time when
reactions slow down, your attention wanders;
the time when you are wide open for an acci-
dent. Take a short break. If temperatures are
high, take precautions to avoid becoming de-
hydrated. If you are angry, tired, or unable to
give your full attention to mowing, if you have
been consuming alcohol,medicines, or drugs,
do not use your mower or any type of power
equipment.
Ifweather conditions become worse while you
are cutting,stop and finish later. Cutting grass
F-98528 8
Your mower is equippedwitha number of safe-
ty features which are importantto the safety of
the operator and bystanders and must never
be altered or removed. If a safety feature be-
comes inoperable,lost, or damaged, itmustbe
repaired or replaced before the mower isused.
Engine speed is a key to safe mowing and a
nice lookinglawn. The maximum speed of the
engine on your mower has been set at thefac-
tory. Do notchange the enginegovernor in any
way.
Select themaximum engine and ground speed
that is right for the terrain and the height of
grass. You get the best cutting and bagging
performance when using a grass catcher by
operating the engine at maximum speed. Nev-
er walk fast or runjust toget thejob done soon-
er. On inclines, reduce ground speed and
exercise extreme care.
It is best to mow only during daylight hours;
however, ifyou must mow inthe late afternoon
or evening, make sure there is good artificial
light.
Your mower will require maintenance including
service and adjustments before and after use
as with any machine. The frequency of the
maintenance is generally based on hours of
use, however, the frequency can vary because
of mowing conditions. Check the Instruction
Book for more detaited instructions. Proper
maintenance protects your investment in the
mower and helps insure that it will function
safely and reliably.
Never attempt any
service (with the pos-
sible exceptionof car-
with the engine run-
ning.After turningthe
buretor adjustment) i_.1_
engine off, always
disconnect the spark
ptu9 wire to prevent
acctdental restarting
while the unitis being
serviced.
Page 9
SAFE MOWING GUIDE
While mowing, if you hit a foreign object, stop
the engine. Remove the spark plugwire. Care-
fully and thoroughly inspect the mower for
damage. Make necessary repairs before re-
starting. Ifthe unitstartstovibrate abnormally,
stop the engine immediately and check for the
cause. Vibration is generally a warning of
trouble. Keep all nuts, bolts, and screws tight.
The blade is the most dangerous part of the
mower and also the mostimportant part in ob-
taining a nice lawn appearance. Check the
blade and the blade mounting hardware fre-
quently. Keep it tight. If the blade hits a solid
object, check it thoroughly for deformation or
cracks and replace if damaged. For safety, re-
place the blade everytwo years. A sharp blade
reduces the work load on the engine and cuts
grass more cleanly, for a better looking cut with
less work. The blade is always close to the out-
side of the mower housing. For best trimming
on side discharge mowers, cut with the left
side of the housing toward the area that needs
trimming.
A useful accessory for your mower is a grass
catcher. There are grass catchers available for
most models. For best performance and safe-
ty, be sure the grass catcher is approved for
use with your mower. Assemble as directed
and follow operating and safety instructions
with the catcher and in the Instruction Book.
Before mounting, checking or emptying the
grass catcher, always turn the engine off. Re-
member to check the grass catcher before
each usafor cracks,wear, or deterioration.Re-
place any part that is damaged with the man-
ufacturer's recommended replacement part
before using the grass catcher again.
Proper cutting technique is important if you
want yourlawn to look good. Avoid the tempta-
tion to cut grass too short. Cutting grass too
short can killthe plant, cause grass to turn yel-
low,or make the lawn lookbrown and thatchy.
Use the lower cutting heights in cool months
when the grass is lush. Use the higher cutting
heights in extremely dry periods. Cuttingwith
a dull blade or low engine speed bruises,
shreds, and can uproot some grass making
the lawn look dull and brown a few days after
cutting. Always put the throttle controlin FAST
F-98528
position when mowing and bagging. When
bagging, slowerground speed will providethe
best results.
Change the mowing pattern slightlyeach time
you cut. Ifyou always cut the same way, the
grass will develop a "set" and clippingswillac-
cumulate more heavily in some areas more
than in others causing grass to get thinner in
those areas. Do not service your mower over
the grass. Spilledoiland gas can killI_e grass.
In tall grass or very heavy grass, do not tryto
cut itall at once. Raise the heightof cut on the
first cuttingand lower itfor the next cuttingthe
same day or withina few days. Another way is
to cut only part of the width of the mower and
adjust your ground speed (not the engine) to
move more slowly so the mower can clear it-
self as it moves forward.
When cutting with a walk behind mower, al-
ways push the unit. Do not pull it. Pushing the
unit keeps the operator behind the mower in
the "operator's zone" for better control. Push-
ingthe unitalso gives you a chance to see ex-
actlywhere and what you are mowing. There
will be timeswhile you are mowingthat youwill
have to pull the mower backwards (such as
when the front of the mower has come up
against a wall or fence). If you must back up,
make sure yourfeet are in the clear.Stand well
back fromthe mower,plantyour feet firmlywith
eachstep and backup beingcareful to look be-
hind you. Resume normal mowing as soonas
possible.
If your unit is self-propelled, remember that
the drive mechanism isnot designed to do all
the work, but the unit can move without your
help. Always keep your hands on the handle
near the controls when the engine is running.
Remember too that the self-propeUed mecha-
nism can be dangerous. Keep handsand feet
away from beltsand chains.Alwaysturnoffthe
engine before attempting to remove anything
that becomes entangled in the self-propelled
system.
Remember, your mower isa usefultool, but it
can be dangerous. Follow the instructionsin
this Instruction Book. Use the mower properly
and carefully and itwillgive you manyhours of
trouble free, accident free operations.
Page 10
STEPS TO FOLLOW
BEFORE MOWING
• Be sure to dress correctly.Wear hard shoes, not sandals or tennis shoes.
• Examine the blade. A blade that is bent, cracked, or damaged must be replacedwith a factory
replacement blade.
• Fill the fuel tank outside. Clean off spilled fuel.
• Read and followthe Owner's Manual, the instructionswith the engine, and the instructionswith
any attachments. Owner's Manual instructionsare for your safety and the safety of others.
• Exhaust fumes are dangerous. Start the engine outside.
• Make sure all safety devices are in place and working correctly.
• Operation of the mower isonly for a person that has experience.
• Wet grass can be dangerous. Let the grass dry.
• Instruct children and others to keep away from the work area.
• Never cut the grass without good light.
• Pick up loose objects. Remove them from the mowing area.
WHILE MOWING
• Watch for fixed objects and avoid them. They can damage the mower or cause injury.
• A hot engine and muffler witl cause a burn. Do not touch.
• Inclines and slopesmust be carefullymowed. See the "Guide" inthe back of thisbookto check
a slope.
• Lack of daylight or good artificial light is cause to stop mowing.
• Examine the mower,the blade, and other partsfor damage after hittingaforeign object or ifthe
unit vibrates excessively.
• Do not make adjustments or repairs withoutstopping the engine (except for carburetor). Dis-
connect the spark plug wire.
• On or near roads, watch out for traffic. Direct discharge away from reads.
• When mowing,avoid areas where tractionis unsure. Beforeand while moving backwards, look
behind and down for small children.
• In heavy grass, raise the cuttingheight. Cut slower. Stop the engine to remove clogged grass
from the mower.
• Never remove any safety related parts.
• Do not pour gasoline intoa engine that is hot or running.
AFTER MOWING
• Always let the mower cool before storing in an enclosed area.
• Foreign material on the mower is dangerous. Clean off grass, leaves, grease and oil before
storing.
• Tighten all loose nuts, bolts and screws before you use the unit.
• Empty and clean any grass catcher or other accessory.
• Remove the key or disconnect the spark plug wire to prevent unauthorized use.
• Make sure the mower isnot kept neara source of ignition.Gas fumes can cause an explosion.
• Only original parts or factory approved substitutes can be used to service the mower.
• When storing the mower for an extended period, remove the fuel from the fuel tank.
• Instruct children to leave the mower alone. It is not a toy.
• Never keep gasoline near a source of ignition. Always use an approved container. Keep
gasoline away from children.
• Lubricate according to the Instruction Book. See =Lubrication'.
IMPORTANT_ead the Instruction Book. Keep this book for future use and
reference.
_lb ARNING: Look for this symbol to point out important
F-98528 10
safety precautions. It means: "Attention! Become
Alert! Your Safety Is Involved."
Page 11

PREPARATION
UNPACKING INSTRUCTIONS
The mower was fully assembled at the factory.
When the mower was put in the carton, the
handle was put in the storage position. To put
the handle inthe operating position, follow the
steps below.
Offset Hole
1. Remove the mower from the carton.
2. Put the lower handle inthe opereting posi-
tion (Figure 1).
3. Remove the hair pins from the lower pin.
Attach the hair pins to the upper pins.
4. Put the upper handle in the operating
position. Tighten the knobs.
CAUTION: Be careful when you fold or
raise the handle. Do not damage the
cables. A cable that is bent will not work
correctly. Before you use the unit, re-
place a bent or damaged cable.
5. To attach the recoil-start grip to the rope
guide, twist the rope through the rope
guide mounted onthe rightsideof the han-
dle (Figure 2).
NOTE: If you cannot attach the
recoil-start grip because the rope is too
short, hold the engine stop lever
against the handle. Slowly pull the
recoil-start grip.
Lower
Handle
Bracket
Upper Pin
Figure 1
HOWTOADJUSTTHEHANDLEHEIGHT
The lower handle has two assembly posi-
tions. A HIGH and a LOW position(Figure 3).
The HIGH position will raise the handle ap-
proximately four inches.
HIGH
LOW
Figure 3
1:-98528
The mounting holes inthe lower handle are
offset (Figure 1). Tochange the hole offset,ro-
tate the lower handle. This will change the
angle ofthe handle and make the heightof the
handle higher or lower (Figure 3).
1. Remove thecable ties that fasten the con-
trol cables to the lower handle (Figure 4).
The cable ties can be re-used. Toremove
a cable tie, pullthe tab on the cable tie to
free the cable.
2. Remove the bolts and wingnuts that fas-
ten the upper handle to the lower handle.
3. Put the upper handle on the ground be-
hind the mower.
11
Page 12

PREPARATION
CAUTION: Do not bend the control
cables. A cable that is bent or damaged
must be replaced.
4. Remove the hair pin fromthe rightand left
handle bracket. (Figure 1)
5, Remove the lower handle from the han-
dle brackets (Figure 1).
6. Rotate the lower handle around
(Figure 4). Mount the lower handle to the
handle brackets.
7. Install thehair pin onthe rightand lefthan-
dle bracket (Figure 1).
8. Fasten the upper handle to the lower
handle with the bolts and wingnuta
(Figure 4).
9. Secure the control cables to the lower
handle with the cable ties.
Bolt
Cable Tie
Rotate Handle
Tab
\
F_8_8 12
Figure 4
Page 13

PREPARATION
HOWTOASSEMBLETHEGRASSBAG
1. To attach the supporttube, pull the rear of
the bag through the front opening
(Figure 5).
2. Look for a small opening in the grass bag
next to the tag START LOOP HERE
(Figure 6). Slide the smalt opening in the
grass bag onto the support tube.
Front
Opening
Figure 5
3. Slide t_e grass bag ontothe support tube
until the grass bag material is gathered
onto one side of the support tube
(Figure 7).
F-98528 13
Grass Ba Figure 7
Page 14

PREPARATION
4. Continue to slide the grass bag onto the
support tube until the grass bag material
is gathered onto the top of the support
tube (Figure 8).
Grass Bag
)port Tube
Figure 8
5. Push the support tube and bag through
the frontopening until onlythe two ends of
the support tube are visible (Figure 9).
6. Slide the frame assembly into the ends of
the support tube (Figure 9).
7. Make sure the handle is on the outside of
the grass bag (Figure 10).
8. Attach the clips to the frame assembly
(Figure 10).
Handle
Frame
Assembly
/
Clips
Figure 1(
Top
Cover
9. Close the top cover. When operating the
mower with the grass bag, the top cover
must be in the closed operating position
(Figure 11)
F-98528 14
Figure 11
Page 15

PREPARATION
HOW TO MOUNT THE GRASS BAG
1. To mount the grass bag on the mower,
raise the rear door. Hold the handle of the
grass bag. Put the grass bag in the
operating position (Figure 12). Lower the
rear door.
IMPORTANT: Make sure the hooks, on each
side of the frame assembly, are mounted
on the pivot rod.
WARNING: Do not use the grass
bag unless the cover is In the op-
erating postion.
Handle
Rear Door
Mount Frame
Hooks To Pivot Rod
HOW TO EMPTY THE GRASS BAG
WARNING: Before you remove
,_the grass bag, stop the engine.
1. Hold the rear door. Raise the rear door to
2. Lif_ the frame assembly over the two
3. Open the top cover (Figure 13). Emptythe
4. To mountthe grass bag on themower, see
Before you remove any grass
from the mower housing,
disconnect the wire from the
spark plug.
a vertical position (Figure 12).
handle notches.
grass from the grass bag.
"How To Mount The Grass Bag".
FINAL ASSEMBLY
Before you use the mower, check the
assembly of the wheels, the handle, and the
F-98528 15
Figure 12
controls. Make sure all the fasteners are tight.
Make sure the throttle controland the engine
stop lever work correctly.
Page 16

PREPARATION
HOWTODISCHARGEOUTTHESIDE
1. Stop the engine.
2. Loosen the wingnut (Figure 14).
3. Move the chute deflector to the open
SIDE DISCHARGE position.
4. Tighten the wingnut,
5. If equipped, remove the grass bag. Make
sure the rear door is completely closed.
HOWTOMULCH Chute Deflector
Wingnut
Figure 14
1. Stop the engine.
2. Loosen the wingnut (Figure 15),
3, Move the chute deflector to the closed
MULCH position.
4. Tighten the wingnut.
5. If equipped, remove the grass bag. Make
sure the rear door is completely closed, Chute Deflector
MULCHING TIPS
Mulching finely cuts the grass sothat the grass
can be easily recycled. Because the nutrients
are returned to the soil,the lawn will need less
fertilizer. To correctly mulch the lawn, follow
the tips below.
• The grass must be dry. If the grass is
wet, itwill be difficult to cut and cause
heavy clumps of grass.
• The grass must not be too tall. The
maximum height to effectively cut is 4 1/2
inches. Set the height adjusters so that
onlythe top third of the grass is cut.
• If the grass is more than 4 1/2 inches
high, two mowings will be necessary. For
the first mowing, set the height adjusters
in the highest position. Then, lower the
height adjusters for the second mowing.
• Keep a sharp edge on the blade. A blade
that is not sharp will cause the ends of
the grass to become brown.
• Clean the underside of the mower
housing. Grass and other debris can
keep the mower from working correctly.
If the quality of cut is marginal, try the
following:
• Set the height adjusters at a higher
cutting height.
• Cut the grass more frequently.
• Operate the mower at a slower ground
speed.
• Overlap the cutting swaths instead of
cutting a full swath with each pass.
• Mow across the marginal areas a second
time.
Wingnut
Figure 15
F-98528 16
Page 17

PREPARATION
HOW TO PREPARE THE ENGINE
ENGINE DOES NOT CONTAIN
OIL OR GASOLINE
See the engine manufacturer's instructions for
the type of gasoline and oilto use. Before you
use the unit,read the informationon safety,op-
eration, maintenance, and storage.
WARNING: Follow the engine
manufacturer's instructions for
the type of gasoline and oil to
use. Always use a safety gaso-
,_ line container. Do not smoke
IMPORTANT: This unit is equipped with an
internal combustion engine and must not
be used on or near any unimproved forest-
covered, brush-covered or grass-covered
land unless the engine's exhaust system is
equipped with a spark arrester meeting
applicable local or state laws (if any). If a
spark arrester is used, it must be main-
tained In effective working order by the op-
erator.
In the State of California the above is re-
quired by law (Section 4442 of the Califor-
nia Public Resources Code). Other states
may have similar laws. Federal laws apply
on federal lands. See an Authorized Ser-
vice Center for a spark arrester for the
muffler.
when adding gasoline to the en-
gine. When inside an enclosure,
do not fill with gasoline. Before
you add gasoline, stop the
engine. Let the engine cool for
several minutes.
FINAL ASSEMBLY
Before you use the mower, check the assem-
bly of the wheels, the handle, and the conb'ols.
Make sure all the fasteners are tight. Make
sure the throttlecontrol and the enginestop le-
ver work correctly.
F-98528 17
Page 18

OPERATION
ENGINE STOP LEVER
Release theengine stop lever and the engine
and the blade will automatically stop. To run
the engine, hold the engine stop lever in the
Operating position (Figure 17).
Before you start the engine, operate the en-
gine stop lever several times. Make sure the
cable moves easily.
)perating Position
Engine Stop
Lever
WARNING: For safe operation,
the drive system must immedi-
ately disengage when the drive
_IL lever is released. If the drive
system does not disengage
correctly, do not operate the
mower until the drive system is
adjusted or repaired by an
authorized service center.
Hold the eng
in the Operating position.
Figure 16
FRONT WHEEL DRIVE SYSTEM
The mower has a front wheel drive system.
Operate the drive system as follows.
1. Hold theengine stop lever inthe Operat-
ing Position (Figure 16 and Figure 17).
2. Push the drive lever completely forward.
When the drive lever clicks, release the
drive lever. The drive system is now en-
gaged.
NOTE: To stop the engine, release the
engine stop lever.
3. To disengage the drive system and stop
the engine, completelyrelease the engine
stop lever.
4. To disengage only the drive system, re-
lease theengine stop lever approximate-
ly two inches. The drive system will
disengage but the engine will continue to
run.
NOTE: When the drive system is
disengaged on a new unit, it is possible for
the front wheels to rotate if lifted off the
ground. This is normal with a new belt and
will stop after one or two hours of
operation.
F-98528
To go forward, move the
drive lever forward.
Figure 17
HOW TO STOP THE ENGINE
To stop the engine, release the engine stop
lever. Disconnectthe wire from the spark plug
to preventthe engine from starting.On models
equipped withan electric start engine, remove
the key from the key switch. Keep the key
away from children.
If the engine will not stop, hold a screwdriver
against the spark plug and against the engine
cooling fins. The spark will go to ground and
the engine will stop. Before you start the en-
gine, check the engine stop cable. Make sure
the engine stop cable is assembled correctly.
Before you operate the unit, replace a bent or
damaged engine stop cable.
18
Page 19

HOW TO START ENGINE
OPERATION
WARNING: To prevent an acci-
WARNING: The blade will rotate
when the engine runs.
IMPORTANT: Before you start the engine,
operate the engine stop lever several
times. Make sure the engine stop cable
moves freely.
NOTE: A two speed throttle control is lo-
cated on the engine. Set the throttle control
in the FAST position for cutting grass, bag-
ging grass, and for extended engine life.
1. Check the oil.
.
Fill the fuel tank with regularunleaded gas-
oline. Make sure the gasoline is clean.
Leaded gasoline willincrease depositsand
shorten the life of the valves.
NOTE: Do not use gasohol or methanol. Do
not use premium unleaded gasoline.
WARNING: Always use a safety
gasoline container. Do not smoke
_1= when adding gasoline to the fuel
3. Make sure the sparkplug wire isconnected
4. Move the throttleControl,located on the en-
5. Make sure the drive lever isin the DISEN-
tank. When inside an enclosure,
do not add gasoline. Before you
add gasoline, stop the engine and
let the engine cool for several
minutes.
to the spark plug.
gine, to the FAST position.
GAGED position.
_lb dent, make sure the drive lever is
6. Some modelshave a primer button on the
front or side of the engine (Figure 18).
NOTE: Do not use the primer button to
start a warm engine.
7. Stand behind the mower (Figure 19). Use
8. Rapidly pull the recoil-start grip. Slowly
9. If the engine does not start in 5 or 6 tries,
in the DISENGAGED position.
When the drive lever is in the EN-
GAGED position, do not start the
engine.
Push the primer button. Every time you
pushthe primer button, wait two seconds.
For the number of times required to push
the primer button, see the engine
manufacturer's instructions.
one hand to holdthe engine stop lever in
the operating position as shown. Use the
other hand to hold the recoil-start grip.
return the recoil-start grip.
See the "Problemand Repair" Instructions.
Hold the engine
stop lever in the
operating postion.
F-98528 19
Recoil-Start
Figure 19
Page 20

MAINTENANCE
ENGINE MAINTENANCE 7. Check the front wheels. Make sure the
Use the followingmaintenance sectionto keep front wheels tom freely.Ifthe drivesystem
your unit in good operating condition. All the ate the mower untilthe drive system is ed-
maintenance information for the engine is in justed orrepaired by an authorized service
the "EngineInstruclJonBook". Before you start center.
the engine, read this book.
WARNING: Before you make an
does not disengage correctly, do not oper-
_ inspection, adjustment (except
carburetor), or repair, discon-
nect the wire from the spark
plug.
LUBRICATION
1. For maximum performance, lubricate the
wheels and all pivot points with engine oil
every 25 hours.
2. To lubricate the engine, refer tothe =Engine
Instruction Book".
NOTE: Do not lubricate the engine stop
cable. Lubricants will damage the cable
and prevent the cable from moving freely.
Replace the cable if bent or damaged.
HOW TO CLEAN THE MOWER HOUSING
WARNING: The blade will rotate
when the engine runs. Before
you clean the mower housing,
stop the engine and disconnect
the wire from the spark plug.
Grass and other debris can keep the mower
from working correctly. After you mow, clean
the mower housing as follows.
1. Stop the engine.
2. Disconnect the wire from the spark plug.
3. Clean the top and the bottom of the mower
housing.
HOWTOCHECKTHEDRIVESYSTEM
Grass and other debriscan keep the drivesys-
tem from working correctly. Check the front
wheels as follows.
1. Stop the engine.
2. Disconnect the wire from the spark plug.
3. Check the front wheels. The front wheels
must turnfreely. If the front wheels do not
turn freely, remove the front wheels
(Figure 20).
4. Remove anygrass or debrisfrom thefront
drive wheels and the pinion gears.
5. Remove the belt cover. Use a fiat blade
screwdriver and remove any grass or de-
brisfrom under the belt cover.
6. Assemble the belt cover and the front
wheels.
F-98528
HOWTOADJUSTTHEHEIGHTOFCUT
WARNING: The blade will rotate
when the engine runs. Before
you change the height of cut, dis-
connect the wire to the spark
plug.
Models With Quick Type Adjusters
To change the heightof cut, move the position
of the adjuster arm at each wheel (Figure21).
Make sure each adjuster arm is in the same
position so that the mower will cut level.
1. Disengage the adjuster arm.
2. Move _ adjuster arm to another position.
Figure 21
2O
Page 21

MAINTENANCE
HOW TO REMOVE THE DRIVE BELT 8. Removethe belt fromthe idler bracket
(Figure 24).
_IL WARNING: Before you remove
1. Remove the belt cover (Figure 22).
2. Remove the front wheels.
the belt, disconnect the wire
from the spark plug.
Belt Cover
NOTE: Make sure you replace the ddve
belt only with a replacement belt from
the factory.
9. To assemble the drive belt, reverse the
above steps.
PinionGear
3. Remove the retainer ring and the spring
pin (Figure 23).
4. Remove the dust cover and pinion gear.
5. Remove the hair pin from the axle.
6. Slide theaxle as shown untilthe ddve belt
can be removed from the drive pulley.
7. Remove the drive belt from the engine
pulley.
F-98528
Washer
t Whe
Washer Figure 22
10. Note the three assemblyholes forthe idler
pulley (Figure 25). To install a new belt,
use the hole marked with a =B"for Briggs
and Stretton engines and use the hole
marked with a "1" for Tecumseh engines.
11. Ifthe drive belt is excessively worn, the
idler arm will move tothe top of theslot in
the idler bracket. If the idler arm is at the
top of the slot, the drive belt will be loose
and slip.If the drive belt isworn, move the
shoulder bolt forward to the next assem-
bly hole.
12. Before you begin to mow, make sure the
drive system will correctly disengage and
that the mower willstop. If the dr_vesystem
will not disengage, take the mower to an
authorized service center before you op-
erate the mower.
21
Page 22

BLADE SERVICE
WARNING: Before you inspect
the blade or the blade adapter,
MAINTENANCE
_k isconnect the wire to the spark
Frequently check the blade for wear or dam-
age such as cracks. Frequently check the bolt
that holdsthe blade. Keep the bolttight. If the
blade hits an object, stop the engine. Discon-
nect the wire to the spark plug. Check the
blade adapter for damage. Check for a bent or
damaged blade, a badly worn blade, or other
damage. Before you operate the unit, darn-
aged parts must be replaced with factory re-
placement parts. For safety, replace the blade
every two years. Keep a sharp edge on the
blade. A blade that is not sharp will cause the
ends of the grass to become brown. Remove
the blade as follows.
plug. If the blade hits an object,
stop the engine. Disconnect the
wire to the spark plug. Check the
unit for damage.
HOW TO REMOVE THE BLADE
WARNING: Before you remove
the blade, disconnect the wire to
the spark plug. The blade has
sharp edges. When you hold the
blade, use gloves or cloth materi-
al to protect your hands.
Drain the fuel tank.1,
2. Lif_the side of the mower that has the
muffler or spark plug.
3. Use a piece of wood to keep the blade
from rotating.
4. Remove the bolt that holds the blade.
5. Check the blade according to the "Blade
Service" instructions. Replace a badly
worn or damaged blade with a factory re-
placement blade.
6. Mount the blade with the curvededges to-
ward the housing. If the blade is upside
down, the blade will not cut correctly and
can cause an accident.
7. Fasten the blade with the original wash-
ers and bolt. Make sure the outside rims
of the Belleville washers are toward the
blade (Figure 26).
8, Tighten the bolt that holds the blade to a
torque of 30 foot pounds.
WARNING: Always keep the bolt
that holds the blade tight. A loose
bolt or blade can cause an acci-
dent.
F-98528
J
Blade Adapter
Belleville
Washer
Washer
Blade Adapter
Belleville Washer
Figure 26
HOW TO SHARPEN THE BLADE
WARNING: Vibration is the result
If the blade is not correctly bal-
anced. A blade that is damaged
with cracks can break and cause
an accidenL
1. Sharpen the blade two times a year or ev-
ery 25 hours.
2. Ifthe blade ison the unit, do not sharpen.
Remove the blade according to the in-
structions in=HowTo Remove The Blade".
3. Clean the blade with a brush, soap, and
water. Check the blade. Look for cracks,
nicks, or other damage. Replace a blade
that is badly worn, bent, or damaged with
a factory replacement blade.
4. Sharpen the blade with a file. Make sure
you keep the originalbeveled cuffing edge
(Figure 27).
5. Make sure the blade is balanced. Use a
screwdriver and hold the blade parallel to
the ground as shown. A blade that is bal-
anced will stay parallel to the ground. Ifthe
blade is not balanced, the heavy end will
rotate toward the ground. Sharpen the
heavy end until the blade is balanced.
6. A new blade will cut better than a badly
worn blade. Every two years replace the
old blade with a factory replacement
blade.
(Continued following page)
22
Blade
Page 23

Screwdrivel
MAINTENANCE
Blade
File
Bladeisbalanced
whenparallelto
theground.
die. Move the ends of the lower handle
past the locking pins or locking tabs.
3.
Rotate the handle forward over the engine
as shown. Make sure the cables are not
damaged.
Folding Handle I
Ground
I
I Figure 27
CHECK THE LEVEL OF CUT
Test the unitin a small area. Ifthe heightof cut
is not levelor ifthe cut grass isnot discharged,
the cause can be: (1) the blade isbent ordam-
aged, (2) the blade is not sharp, (3) a worn
blade, (4) or a broken blade adapter. Before
you use the unit, correct the problem.
STORAGEFORHANDLESTHATFOLD
CAUTION: Be careful when you fold or
raise the handle. Do not damage the
cables. A cable that is bent will not work
correctly. Before you use the unit, replace a
bent or damaged cable.
How To Fold The Handle
1. Loosen the fasteners that hold the upper
part of the handle to the lower part of the
handle. As you fold the handle, make sure
the cablesare notaround the loosefasten-
ers and do not become damaged. Rotate
the upper part of the handle back
(Figure 28).
2. Remove the hair pins from the lower han-
dle. Push in on the ends of the lower hart-
How To Raise The Handle
1. Pull the handle back until the ends of the
lower handle lock into position.
2. Liftthe upper partof the handleinto the op-
erator's position. Tighten the fasteners
that hold the handle.
STORAGE FOR
NON-FOLDING UPPER HANDLES
For storage, fold the handle forward.
How To Fold The Handle
1. Push in on the ends of the lower handle.
Move the ends of the lower handlepast the
locking tabs.
2. Rotate the handle forward over the en-
gine. Make sure the cables are not dam-
aged.
How To Raise The Handle
1. Pull the handle back untilthe ends of the
lower handle lock into position.
HOW TO PREPARE
THE MOWER FOR STORAGE
WARNING: Do not remove gaso-
line while inside a building, near
a fire, or while you smoke.
Gasoline fumes can cause an
explosion or a fire.
1. Drain the fuel tank.
2. Let the engine rununtilitisout of gasoline.
3. Drain the oil from the warm engine. Fillthe
engine crankcase with new oil
4. Remove the spark plug from the cylinder.
F-98528
Pour one ounce of oil into the cylinder.
Slowly pullthe recoil-start grip so that the
oil will protect the cylinder. Install a new
spark plug in the cylinder.
5. Clean the dirtand debrisfrom the cylinder
coolingfins and the engine housing.
6. Clean the bottom of the mower housing.
7. Make surethe grassbag isemptyof grass.
Grass remaining in the bag duringstorage
will damage the bag.
8. Completely clean the mower to protectthe
paint.
9. Putthe unit ina buildingthat hasgood ven-
tilation.
23
Page 24

TROUBLE SHOOTING CHART
The Engine will not start.
1. Move the throttle control lever to the FAST or START position.
2. Make sure the fuel tank is filled with clean gasoline. Do not use old gasoline.
3. On a cold engine, push the primer button (optional on some models) five times.
4. Make sure the wire for the spark plug is connected to the spark plug.
5. Adjust the Carburetor. See the =Engine InstructionBook".
6. There is too much gasoline in the engine cylinder. Remove and dry the spark plug. Put the
throttle control in the SLOW position.Pull the recoil-start grip several times. Install the spark
plug. Connect the wire to the spark plug. Start the engine.
7. The engine isdifficultto start in heavy or high grass. Move the mower to a clean dry surface.
8. Make sure the engine stop lever is in the operating position.
9. Make sure the fuel valve is in the ON position. See the "Engine Instruction Book".
10. On electdc start models, make sure the wiring harness is connected. Charge the battery.
The Engine will not stop.
1. Release the engine stop lever.
2. Check the engine stop cable. Replace the cable ifbent or damaged.
The Engine performance is bad.
1. Check the height of cut settings. Raise the height of cut if the grass is high.
2. Check the bottomof the blade housing. Clean the blade housing of grass and other debris.
3. Check the wire to the spark plug. Make sure the wire is connected.
4. Clean the engine cooling fins of grass and other debris.
5. Check the carburetor adjustments. See the "Engine Instruction Book".
6. Check the spark plug gap. Set the spark plug gap at 0.030".
7. Check the amount ofoil in the engine. Fill with oil if necessary.
8. Check the engine air cleaner. See the "Engine Instruction Book".
9. The gasoline is bad. Drain and clean the fuel tank. Fill the fuel tank with clean gasoline.
10. Check the throttle control. Make sure the lever is not in the CHOKE position.
Excessive Vibration.
1. Remove the blade. Check the blade and balance ifnecessary. See the blade maintenance
instructions.
2. Check for a bent or broken blade. A DAMAGED BLADE IS DANGEROUS AND MUST BE
REPLACED.
3. Check the blade adapter. REPLACE A BROKEN BLADE ADAPTER,
4. If the vibration continues, take the mower to an Authorized Service Center.
The grass will not discharge correctly.
1. Clean the bottom of the mower housing.
2. Check for a badly worn blade. Remove and sharpen the blade. For safety, replace the blade
every two years with a factory replacement blade.
3. Move the throttlecontrol leverto the FAST position.Check the speed of the engine according
to the "Engine InstructionBook".
The grass is not cut even.
1. Check the heightadjustment ateach wheel. The height adjustmentmustbe the same for each
wheel.
2. Make sure the blade is sharp.
3. Check for a bent or broken blade. A DAMAGED BLADE IS DANGEROUS AND MUST BE
REPLACED.
4. Check for a broken blade adapter. REPLACE A BROKEN BLADE ADAPTER.
F-98528 24
Page 25

MODEL 20606x9A
4
8
3
\
9
6
16
5
!
\
11
13
2
11
12
/
KEY
NO. DESCRIPTION
1 Handle,Upper(Black)
2 Handle,Lower(Black)
3 Bolt
4 Control,Drive
5 Locknut
6 Cable,Stop
11
PART NO.
672665E701
671917E701
26x256
672580
15x116
672551
KEY
NO. DESCRIPTION
8 Lever,Stop
9 Bracket,StopLever
11 Fastener,Cable
12 Bolt
13 Knob
16 Guide,Rope
PART NO.
672580E701
43628BC
71372
2x77
71294
71530
F-98528 25
Page 26

MODEL 20606x9A
41
38
37.
61
39
2
3
7
6
23
\
28
64
70 71
44
43
26
32
F-98528 26
48
29
/
, 39
0
41
45 44
42
Page 27

MODEL 20606x9A
KEY KEY
NO. DESCRIPTION PARTNO, NO. DESCRIPTION PART NO.
1 Housing 776002 37 Washer 17x38
2 Engine* * 38 Screw 4x21
3 Pulley,Engine 71434 39 Hub Cap - Optional 43615
4 Pin,Spring 32x64 40 Washer 17x169
6 Cover,Belt 671928 41 Nut, Flange 15x84
7 Screw 26x279 42 Wheel, Drive 672083
8 Adjuster,LeftHeight 672605A 43 Washer 17x120
9 Bolt, Shoulder 9x50 44 Cover,Dust 71780
10 Pulley 71779 45 Washer,BelleviUe 17x137
11 Spacer 71788 46 Washer 17x124
12 Bracket,IdlerSupport 671935 Z 47 Bolt lx153
13 Pulley,Idler 71778 48 Blade 671921E701
14 Bearing 71793 49 Adapter,Blade 672503
15 Nut, Push 28x49 50 Adjuster,RightFrontHeight 672602
16 Bracket,LeftHandle 672591 51 Bolt,Carriage 2x16
17 Bracket,Cable 671934 52 Screw 26x221
18 Nut, Hex t5x43 53 Bolt,Engine 25x6
19 Spacer 71789 55 Washer 17x146
20 Arm, Idler 671936 56 NUt,Flange 15x88
21 Bolt, Carriage 2x53 57 Rod, Pivot 215x17 Z
22 Bolt, Shoulder lx81 58 Door,Rear 672610
23 E-Ring 11x16 59 Spring 166x44
24 Gear, Pinion 71792 60 Guard,Rear 671970
25 Bolt lx85 61 Wheel, Rear 672082
26 Washer 17x186 63 Bracket,RightHandle 672590
27 Adjuster,LeftFrontHeight 672603 64 Adjuster,RightHeight 672604A
28 Belt 37x84 65 Screw 26x245
29 Pulley,Axle 71791 66 Wingnut 71495
30 Screw 26x263 67 Retainer,Push 28x64
31 Pin, Hair 31x9 68 Bezel 671926
32 Pin, Spring 43629 69 Pin, Pivot 215x18Z
33 Axle 671931 70 Deflector,Chute 671927
34 Cover,Axle 671943 71 Push On Cap 28x42
35 NUt,Flange 15x68 -- InstructionBook F-98528
36 Nut, Hex 15x102
PartsareavailablefromanAuthorizedEngineServiceCenter,See"Engines,Gasoline"or"Gasoline
Engines"intheyellowpagesofthetelephonedirectory.
F-es528 27
Page 28

MODEL 20606x9A
NOTE: On some models, the Grass Bag Assembly is an OPTIONAL
ACCESSORY and is not included with the unit. On these models, the
Grass Bag can be purchased and easily installed.
3
2
KEY
NO. DESCRIPTION PART NO.
1 Frame, Top 71592
2 Frame Assembly 672614
3 Bag, Cloth - Black 672070
Bag, Cloth - Gray 672714
F-98528 28
Page 29

NOTES
F-98528 29
Page 30

NOTES
F-98528 30
Page 31

SLOPE GUIDE
SIGHT AND HOLD THIS GUIDE LEVEL WITH A VERTICAL TREE,
A CORNER OF A STRUCTURE, A POWER LINE POLE, OR A FENCE,
I
I
I
bOperate a walk-behind mower
across the face of slopes,
never up or down slopes.
I
On s riding mower to determine if a slope is safe to mow: (1) disengage the blade(s) (2) put the unit In reverse and (3) try to back straight up the
slope. If you can back up the slope it Is generally safe to mow. However, If you do not feel safe or If you are not completely sure, use this guide
anddo not mow a alop.ethat Is greater than 15 degrees. If the riding mower is used with a pull-behind or rear mounted attachment,
do not operate the unit on a slope that Is greater than 10 degrees.
A 15 degree slope Is a hill that Increases in height st approximately 2.5 feet in 10 feet.
A 10 degree slope Is a hill that Increases in height at approximately 1.7 feet in 10 feet.
A se extreme care at all times, and avoid sudden turns or maneuvers. Follow other Instructions in this manual for safety in mowing on
slopes. Operate a riding mower up or down slopes, never across the face of slopes. Operate a walk-behind mower across the face
of slopes, never up or down slopes• Use extra care when operating on or near slopes and obstructions.
up or down slopes, never
across the face of slopes.
................................ " _u'TAE'__'O'U§E'S'L_P_&ulD'E.................................
g mower
€O
Co
Page 32

HOW TO ORDER REPAIR PARTS
Onlyuseafactoryrepairpart.Repairparts,exceptfortheengineorthetransmission,areavaila_._',om_ store_.ere
theunitwaspurchased,aserviceshoprecommendedbythestore,oranauthodzedserviceenopxouneinme yeaow
pagesofthetelephonedirectory.Ifyoucannotgetarepairpartorserviceasdescribedabove,callorwritetotheCee_d
PartsDistributorshownbelow.Whenyouorder,includethefollowinginformation:(1)CompleteModelNumber(see
nameplate)(2)DateofManufacture,(3)CompletePartNumber,(4)Descdption,(5)Quantity.
Repamrpadsfortheengineorthetransmissionareavailablefromthe manufacturer'sauthudzedsen/icecenterfound
intheyellowpagesofthetelephonedirectory.Seethe individualengineortransmissionwarranties.
MURRAY,INC. LAWNMOWERCENTRALPARTSDISTRIBUTORS
BEBCO,INC. Arkansas(countiesClay, GULFCOASTENGINE,INC.
22212od.Ave. Craighead,Cdttendan,Cross, 4202RussellDr.
SouthBirmingham,AL 35233
/_/2_a5)251-46001-800-828-8094
bama,Florida,Georgia,
PuertoRico
BILLIOU'S,INC.
1343SouthMainSt.
Portervilie,CA. 93257
_AX59)784-41021-877-245-5468
1-800-266-7337
Arizona,California,Hawaii,
Nevada
BROWN&WISER,INC.
9991S.W.AveryStreet
P.O.Box1109
Tualatin,OR. 97062
(503)692-03301-800-882-4782
Alaska,Idaho(countiesAda,
Adams,Benowah,Boise,Bonner,
Boundry,Canyon,Clearwater,
Elmore,Gem,Idaho,Kooten,
Latah,Lewis,NEZPerce,Owyee,
Payette,Ravalli,Shoshone,Valley,
Washington),Montana(counties
Flathsad,Lake,Lincoln,Mineral,
Missoulo,Ravalli,Sanders),
Oregon,Washington
CPTCANADAPOWER
TECHNOLOGYLIMITED
161WatfineAvenue
Mississauga,Ontado
L4Z-1P2
(905)890-69001-800-861-9559
13315-146Street
Edmonton,Alberta
T5L4S8
(403)453-57911-800-861-9559
234 MigneronStreet
vnieSt-Laurent,Quebec
H4T1Y7
(514)731-35591-800-861-9559
Canada
CHILTONAIRCOOLEDENGINE
3194th.Ave.South
P.O.BOx150806
Nashville,TN. 37215
(615)254-16371-800-621-6934
www.chiltencompanies.com
F-98528
Greene,Jackson,Lawrence,Lee,
Mississippi,Monroe,Phillips,
Poinsett,Randolph,St.Francis,
Woodruff),Mississippi(counties
Desota,Panela,Quit"man,"late,
Tunica),Missouri(counties
Dunkin,NewMaddd,Pemiscot),
Tennessee,Wrglnla (counties
Bland,Buchanan,Dickansen,Lee,
Russell,Scott,Smyth,Tazewell,
Washington,Wise)
ENGINESSOUTHWEST
1255NorthHasrne
Shreveport,LA.71107
POBOx67
Shreveport,I.A. 71161
(318)222-38711-800-388-6995
www.enginessw.com
Arkansas(exceptthesecounties:
Clay,Craighead,Crittendan,Cross,
Greene,Hempstead,Howard,
Jackson,Lafayette,Lawrence,Lee,
LittleRiver,Miller,Mississippi,
Monroe,Nevada,Phillips,Pike,
Poinsett,Randolph,Sevier,St,
Francis,Woodruff)Louisiana,
Mississippi(exceptthese
counties:Desota,Panela,Quitman
Tare,Tunioa,)
FRANKEDWARDSCO.
3626ParkwayBlvd.
WestValleyCity,LIT 84120
_:j_X1)736-80601-800-318-0201
1-800-570-049'1
Colorado,Idaho(counties
BannockBeadake,Bingham,
Blaine,Boonevilie,Butte,Comas,
Cadbou,Cassia,Custer,Franklin,
Fremont,Gooding,Jefferson,
Jerome,Lemhi,Lincoln,Madison,
Minidoka,Oneida,Power,Teton,
TwinFalls)Montana(allcounties
exceptBrownandWiser),Utah,
Wyoming
GARDNER,INC.
1150ChesapeakeAve.
Columbus.OH. 43212
(614)486-79511-800-848-6946
Indiana,Kentucky,Michigan
(exceptupperPeninsula),Ohio,
WesternPennsylvaniawithzip
codesupto andincluding16999,
WestVirginia
P.O.Box9724
CorpusChristi,TX. 78408
(512)888-69991-800-825-6999
Arkansas(countiesHempstead,
Howard,Lafayette,LittleRiver,
Miller,Nevada,Pike,Sevier)New
Mexico,Oklahoma,Texas,
Mexico
OSCARWILSON
ENGINE& PARTS
826LoneStarDr.
O'FaHon,MO. 63366
Iiiin314)978-13131-800-873-6722
ols (S.ofHwy.80),lows,
Kansas,Missouri(allcounties
exceptDunkin,NewMadrid,
Pemissot)Nebraska
R,B,I,CORPORATION
P.O.Box9318
Richmond,VA. 23227
t_X)550-2210 1-800-888-7149
1-800-947-1335
Connecticut,Delaware,Dlstrlol
ofColumbia,Maine,Marylan_
Massachusetts,NewHampshire,
NewJersey,NewYork,N.&S.
Carolina,Pennsylvaniazips
17000&up,RhodeIsland,
VermontVirginia{allcounties
exceptBland,Buchanan,
Dickenson,Lee,Russell,Scott,
Smyth,Tazewell,Washington,
Wise)
WISCONSINMAGNETO
4727N.TeutoniaAve.
Milwaukee,Wl. 53209
Iiiin414)445-28001-800-733-7388
ols (N.ofHwy.80),Mlobigan
(upperPeninsula),Wisconsin
800 McKinleySt.
Aneka,MN. 55303
(612)323-74771-800-248-4016
Minnesota,North&South
Dakota
 Loading...