

Page 1
Murphy PowerCore
Configurations
Installation Manual
1900003
Section 80
2019-01-18
Page 2

In order to consistently bring you the highest quality, full-featured products, we reserve the right to change our
specifications and designs at any time. The latest version of this manual can be found at enovationcontrols.com.
BEFORE BEGINNING INSTALLATION OF THIS MURPHY
PRODUCT:
• Read and follow all installation instructions.
• Observe all Warnings and Cautions in each section
of these instructions.
Contact Enovation Controls Technical Service if you have
any questions or concerns at: +1 918-317-4100.
Section 80 2 1900003
2019-01-18
Page 3

Table of Contents
USB Overview / Requirements ....................................................................................................5
PowerCore Products 5
USB Configuration Loading Methods ........................................................................................5
USB Thumb Drive 5
Necessary PowerCore Harnessing for USB Loading 5
Loading Configurations with USB 6
MPC20 & MPC10 Older Method 7
CAN Overview / Requirements ....................................................................................................8
Necessary PowerCore Harnessing for CAN Loading 8
Section 80 3 1900003
2019-01-18
Page 4

- THIS PAGE INTENTIONALLY LEFT BLANK -
Section 80 4 1900003
2019-01-18
Page 5

USB Overview / Requirements
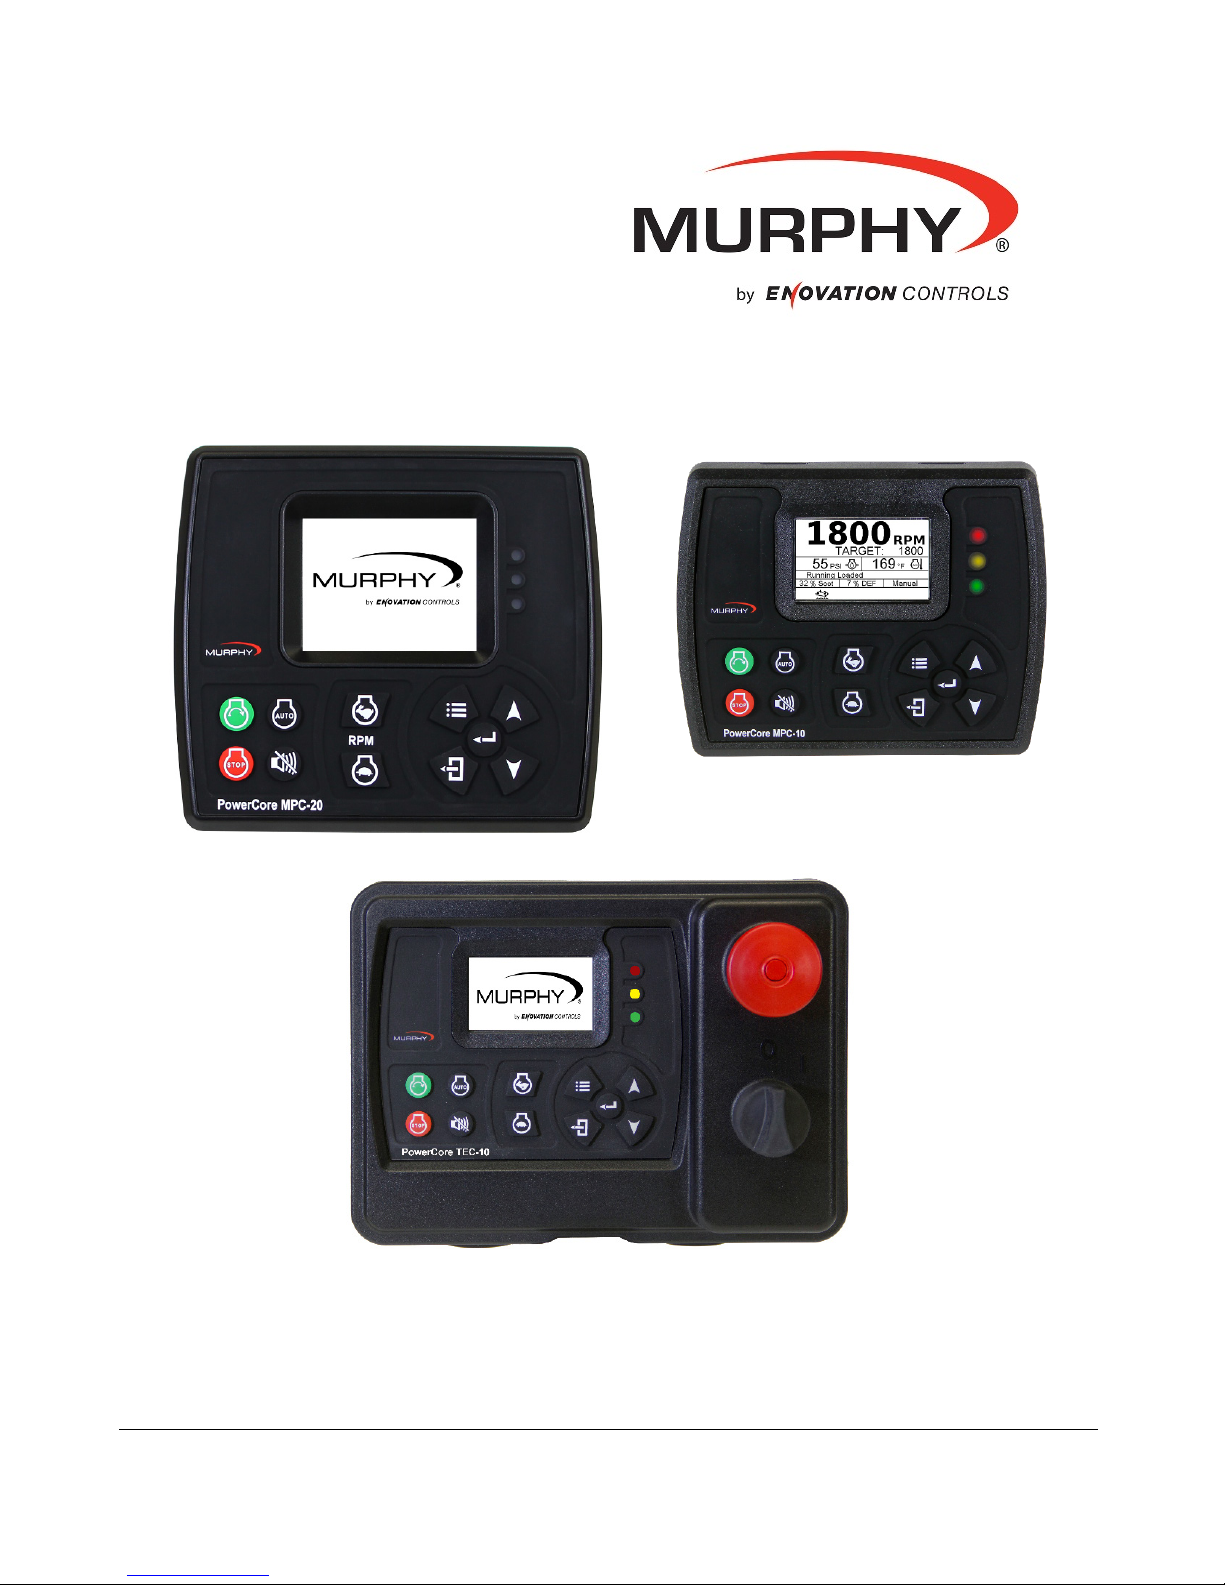
PowerCore Products
The PowerCore products include the MPC20, MPC10, and the TEC-10. The MPC’s are also
used in the ML series panels; ML2000 and ML1000 respectively.
USB Configuration Loading Methods
There are two methods used to load configurations; USB or CAN bus. However, the TEC-10
can only be loaded over the CAN bus.
NOTE: When loading a new configuration, the original setpoints will be changed
to the setpoints in the new configuration.
USB Thumb Drive
1. UDISK devices are not supported by PowerCore. With the Thumb drive installed, go to:
control panel\device manager\disk drives. Expand disk drives to verify UDISK is not in
the description.
2. Thumb Drive file system must be formatted for FAT. FAT32, EXFAT and NTFS are not
supported by PowerCore. With the Thumb drive installed, go to: computer\removable
disk. Right click on removable disk, click on Format. Check under File System to verify
the format is compatible.
Necessary PowerCore Harnessing for USB Loading
MPC20
Along with the 40000554 3’ 90 pin whip harness, the 40000566 USB programming
harness is required. The 40000566 harness plugs in to the Molex connector on the
40000554 harness.
ML2000
The 40000566 programming harness is included in the ML2000. Remove the four
screws holding the black inner panel to the enclosure. Gently pull the inner panel away
from the enclosure far enough to expose the 40000556 programming harness.
MPC10
Along with the 40000598 3’ 3x12 whip harness, the 78000668 USB programming
harness is required. The 78000668 harness plugs in to the USB receptacle on the back
of the MPC10.
ML1000
The 78000668 programming harness is not included in the ML1000. Remove the four
screws holding the black inner panel to the enclosure. Gently pull the inner panel away
from the enclosure far enough to expose the back of the MPC10. The 78000668
harness plugs in to the USB receptacle on the back of the MPC10.
Section 80 5 1900003
2019-01-18
Page 6

Step
Action
1
Go to the main menu and select Load Configuration.
2
Press Enter. The message No File Found will be displayed.
3
Install the Thumb drive, and select the correct file to be loaded. There can be
4
Press Enter and the display will prompt as follows:
Loading Configurations with USB
There are two types of configuration files: configuration.gciBin, and configurationFull.gciBin. It
is recommended to use the larger Full file, which includes the application portion of the
configuration.
There are two methods for loading configurations using the USB port. If the configuration is
PowerVision 2.9 or later, there is a Load Configuration choice in the main menu. This is
referred to as the Local method in this manual. If the configuration is an older version, that
choice is not there, and the older method must be used.
MPC20 & MPC10 LOCAL METHOD
The file name can be customized for easy reference, but the file must have .gciBin as the
extension (i.e., perkins.gciBin, model42.gciBin, etc.).
If you load a file with the file name from PowerVision, you must use configurationFull.gciBin.
Configuration.gciBin will not load using the local method.
several files on the same USB Thumb Drive.
Section 80 6 1900003
2019-01-18
Page 7

Step
Action
5
When Enter is pressed to confirm, the controller will begin to load the
steady. The loading process takes approximately 10 to 15 seconds.
6
Remove the thumb drive, and the controller will exit out of the bootload mode.
7
Power cycle the controller to return to normal operations.
Step
Action
1
Hold down both the back and down arrow buttons while powering up the
2
Once in bootload mode, insert the thumb drive. In a few seconds, the thumb
seconds.
configuration. During the load, the amber LED will blink. When the load is
finished, the amber and red LEDs will be blinking and the green LED will be on
NOTE: If the loading process is interrupted, or the power or thumb drive are
removed, the older method (detailed below) must be used.
MPC20 & MPC10 Older Method
Using this method, PowerCore products need to be put in the bootload mode to receive
configurations. Follow these steps:
controller.
Continue to hold both buttons until all three LEDs are blinking.
drive LED will start blinking. The loading process takes approximately 10 to 15
Section 80 7 1900003
2019-01-18
Page 8

Step
Action
3
When the load is complete, the green LED on the controller and the LED on the
thumb drive will quit blinking and remain on.
4
Remove the thumb drive, and the controller will exit out of the bootload mode.
5
Power cycle the controller to return to normal operation.
Step
Action
1
Install the ECOM device driver for 32-bit or 64-bit Windows. The drivers can be
downloaded from the website cancapture.com.
2
Connect the 40000625 programming kit to the controller and your PC.
3
Open the configuration to be loaded in PowerVision, and the version window
4
The Activity LEDs will be blinking on the ECOM dongle while the controller and
PowerVision are connected.
5
Click on Device and then click on Create Firmware. This process takes about 40
CAN Overview / Requirements
The TEC-10 does not support a USB port, therefore all configurations must be loaded using
the CAN bus via a PC with either PowerVision for Controllers or the full PowerVision Suite
installed.
Necessary PowerCore Harnessing for CAN Loading
The 40000625 programming kit or equivalent is required to load programs in to the TEC-10.
This same kit can be used on the ML PowerCore panels.
Loading Configurations with CAN
should appear as shown when the controller and PowerVision are connected.
seconds.
Section 80 8 1900003
2019-01-18
Page 9

Step
Action
6
Click on Load Firmware. This process takes about 3 to 4 minutes. During the
load, the amber LED will blink on the controller. When the load is finished, the
controller will reset and return to normal operation.
Section 80 9 1900003
2019-01-18
Page 10

 Loading...