

MURO VISLIDER CH7260 METAL PRO Instruction Manual
CCHH77226600 MMeettaall PPrro
o
Auto feed Screwdriver
IInnssttrruuccttiioonn MMaannuuaall
Congratulations on your purchase of a Muro Metal Pro Auto feeding Screwdriver! You have made an excellent choice. Muro high quality
tools and screws are the professional’s choice of automatic feed screw gun systems. Muro tools provide the successful builder and
contractor the ability to give their customers the advantages of screws with speed and convenience.
IF YOU HAVE ANY QUESTIONS OR COMMENTS ABOUT THIS OR ANY OTHER MURO TOOL, CALL US TOLL FREE AT 1800-665-6876
Muro tools are of high quality and are easy to use, but proper operating procedures are required for maximum efficiency and satisfaction.
Please take a few minutes to read the operational guide and safety instructions.
WARNING: Read and understand all instructions. Failure to follow all instructions listed below may result in electric shock, fire and/or
serious personal injury.
SAVE THESE INSTRUCTIONS
Keep your tool clean; remove dust and dirt by vacuuming or carefully blowing out regularly. Other tool service must be performed only
by qualified repair personnel: Service or maintenance performed by unqualified personnel could result in a risk of injury. Use of
unauthorized parts or failure to follow these Instructions may create a risk of electric shock or injury.
Hold tool by insulated gripping surfaces when performing an operation where the screws may contact hidden wiring or its own cord.
Contact with a “live” wire will make exposed metal parts of the tool "live" and shock the operator if in contact. Keep handles in good
condition, dry, clean, free from oil and grease. It is recommended to use rubber gloves if this may occur; this will also enable better control
Ver: 10/14/2004 1
and safety. Replace handle grips if worn. Do not work in the rain or with tool wet with any liquid.
DO NOT TOUCH ANY METAL PARTS OF THE TOOL when drilling or driving into walls, floors or wherever live electrical current
may be encountered. Hold the tool only by insulated grasping surfaces to prevent electric shock if you drill or drive into a live wire.
General Information
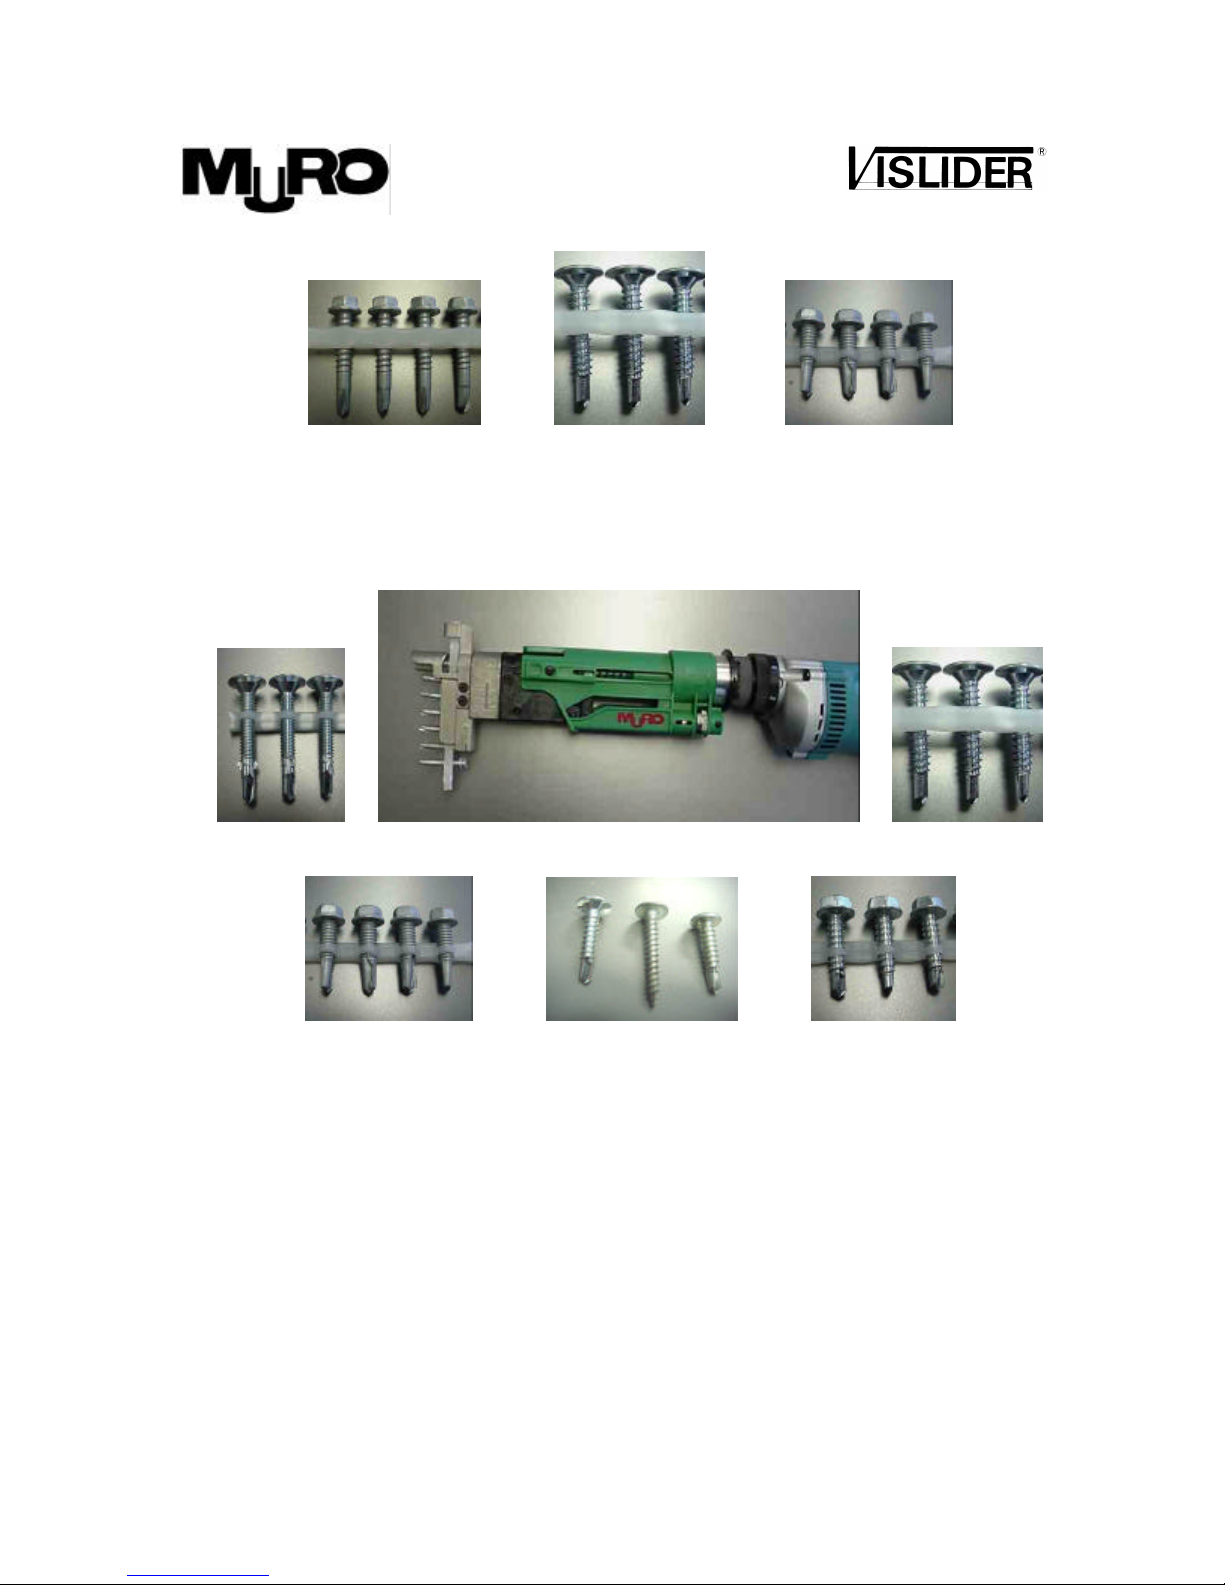
The tool series is designed to drill 5/16 head Hex screws from ½ inch up to 1-½
inches long and a variety of “wood to metal” and “metal to wood” screws with head
diameters of up to about 15/32 diameter with Square and some Phillips recesses. For metal
applications, the screws must fit the bit quite well, so if bits get worn, replace them for best
results. Muro North America Inc 1–800-665-6876 can provide a wide variety of screws to
meet your volume screw requirements.
Magnetic bits are recommended for the CH7260 metal pro tool only if the tip of the
screw is more than 3/8 of an inch from the metal being driven. For proper application,
versions of the metal pro tool with a shortened screw guide or additional chip clearance are
available to provide a custom tailored solution for your application (see CH7260 Series, page
13).
The MK6827 or HITACHI W8VB driver is recommended to work with the CH7260
Metal Pro attachment because they accept the hex bit directly. The 6827 torque adjustability
is required to allow Hex fasteners to be reliably driven without strip out in thin materials.
For thick (1/4”-1/2”) steel (Tek 4/5) applications the 1700-rpm HITACHI W8VB driver is
recommended. Very thick steel (3/8”-1/2”) usually requires screws with milled sides for
tapping as the tapping torque is high.
The Muro belt pouch provides a convenient way to carry a large number of strips
around easily while using the tool. An optional stand up extension Rod handle attachment is
available and can be added at any time.
Different Length Barrels for Volume Wood applications Hex Tool – Chip clearance
Ver: 10/14/2004 2
Maintenance and Inspection of CH7260
For best results keep your CH7260 Metal Pro Clean and Free of dirt and debris for
smooth operation. Inspect and Blow out or vacuum it after use. Built up dust and dirt may
cause tool wear. To clean the tool, use a damp cloth or soap and water damped cloth, do not
use thinners or gasoline or other solvents that would damage the unit, or fully immerse it in
water, which may cause rusting. Bits are consumable and must be replaced if worn, bits are
specially designed for the Muro auto feed system.
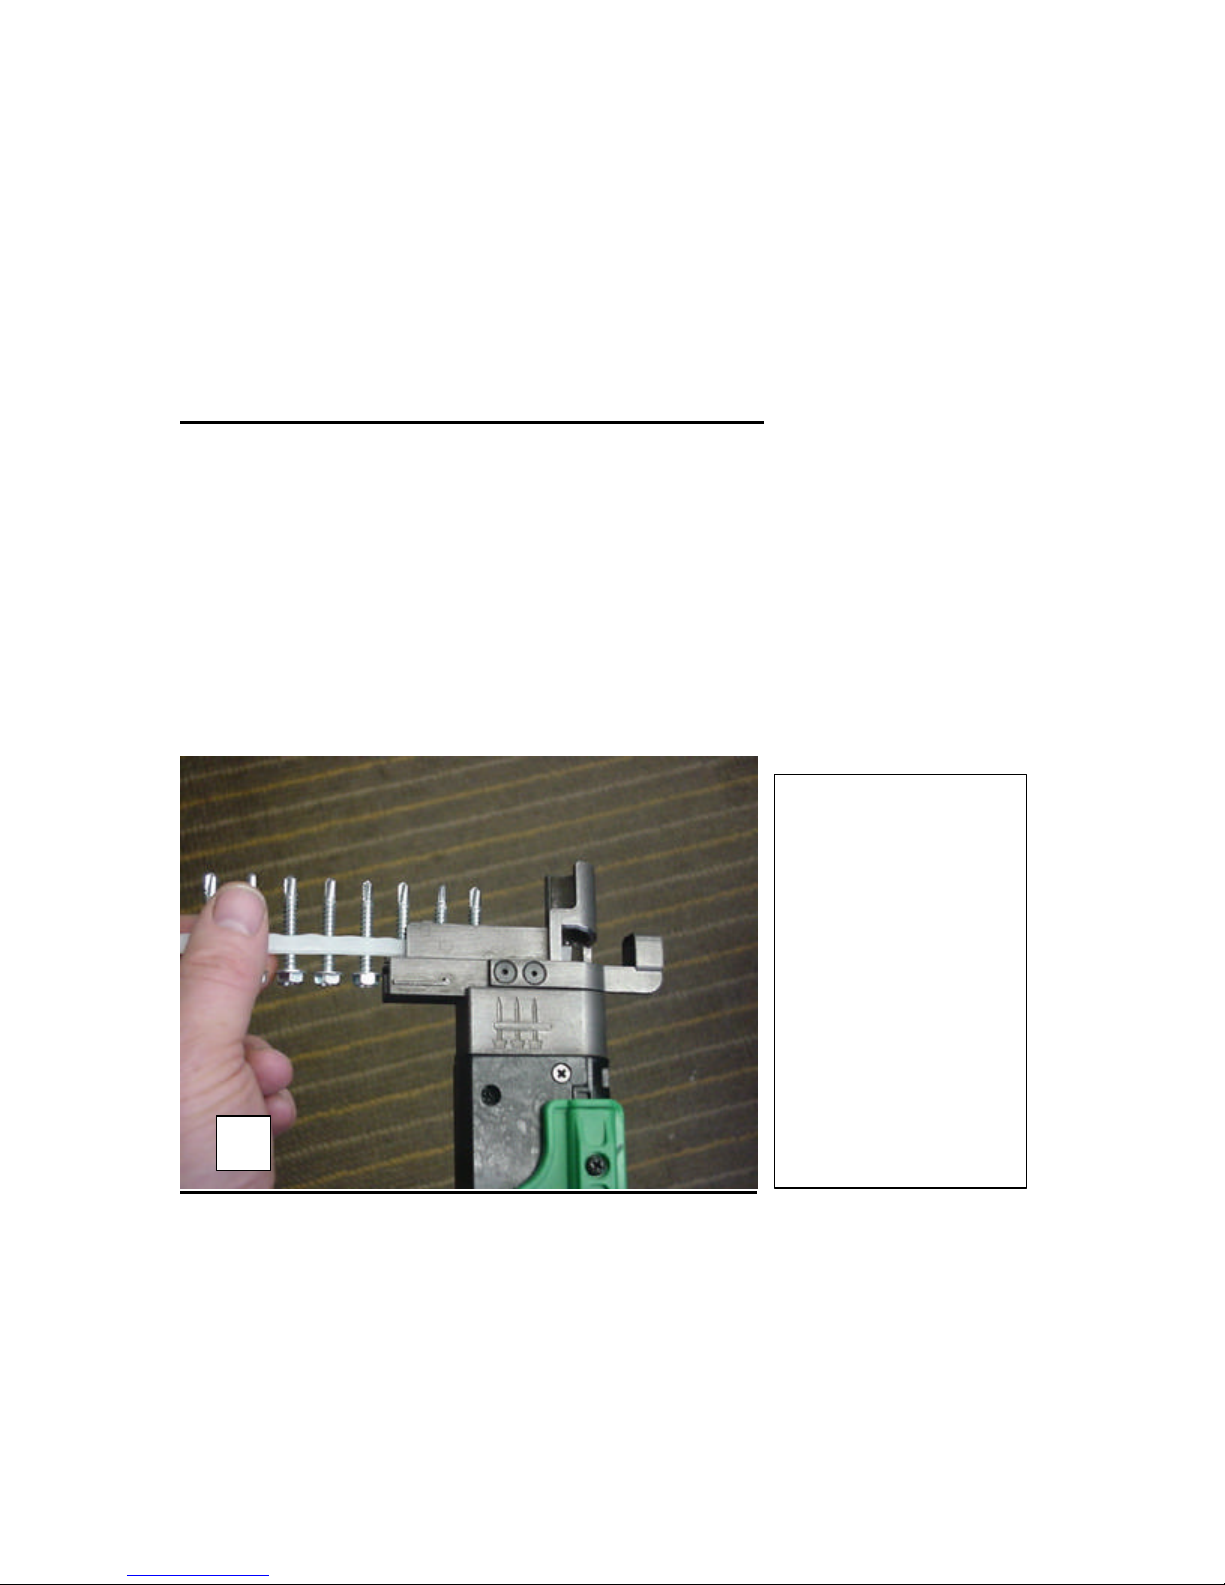
Loading Screws in the CH7260 Metal Pro
Ensure that screws are loaded into the CH7260 with the Plastic strip facing
outwards per the diagram on the side of the screwdriver. The strips must be inserted as
shown to work properly i.e. only one way works, if inserted backwards, they will jam.
Generally, the correct end of the strip will be longer. Check that the free end of the strip fits
into the strip guide, Latch (hook) the first screw with the feed latch (Photo 2).
The strip guide supports the screw strip, assisting in keeping the screws in the correct
position for pick up by the bit, particularly for the last screws to be driven. The strip spring
acts to keep tension and a ratchet on the screw strip, also keeping the screws in the correct
position.
1
The strips must be
inserted as shown to
work properly i.e.
only one way works,
if inserted backwards,
they will jam. Latch
in the first screw.
Ver: 10/14/2004 3
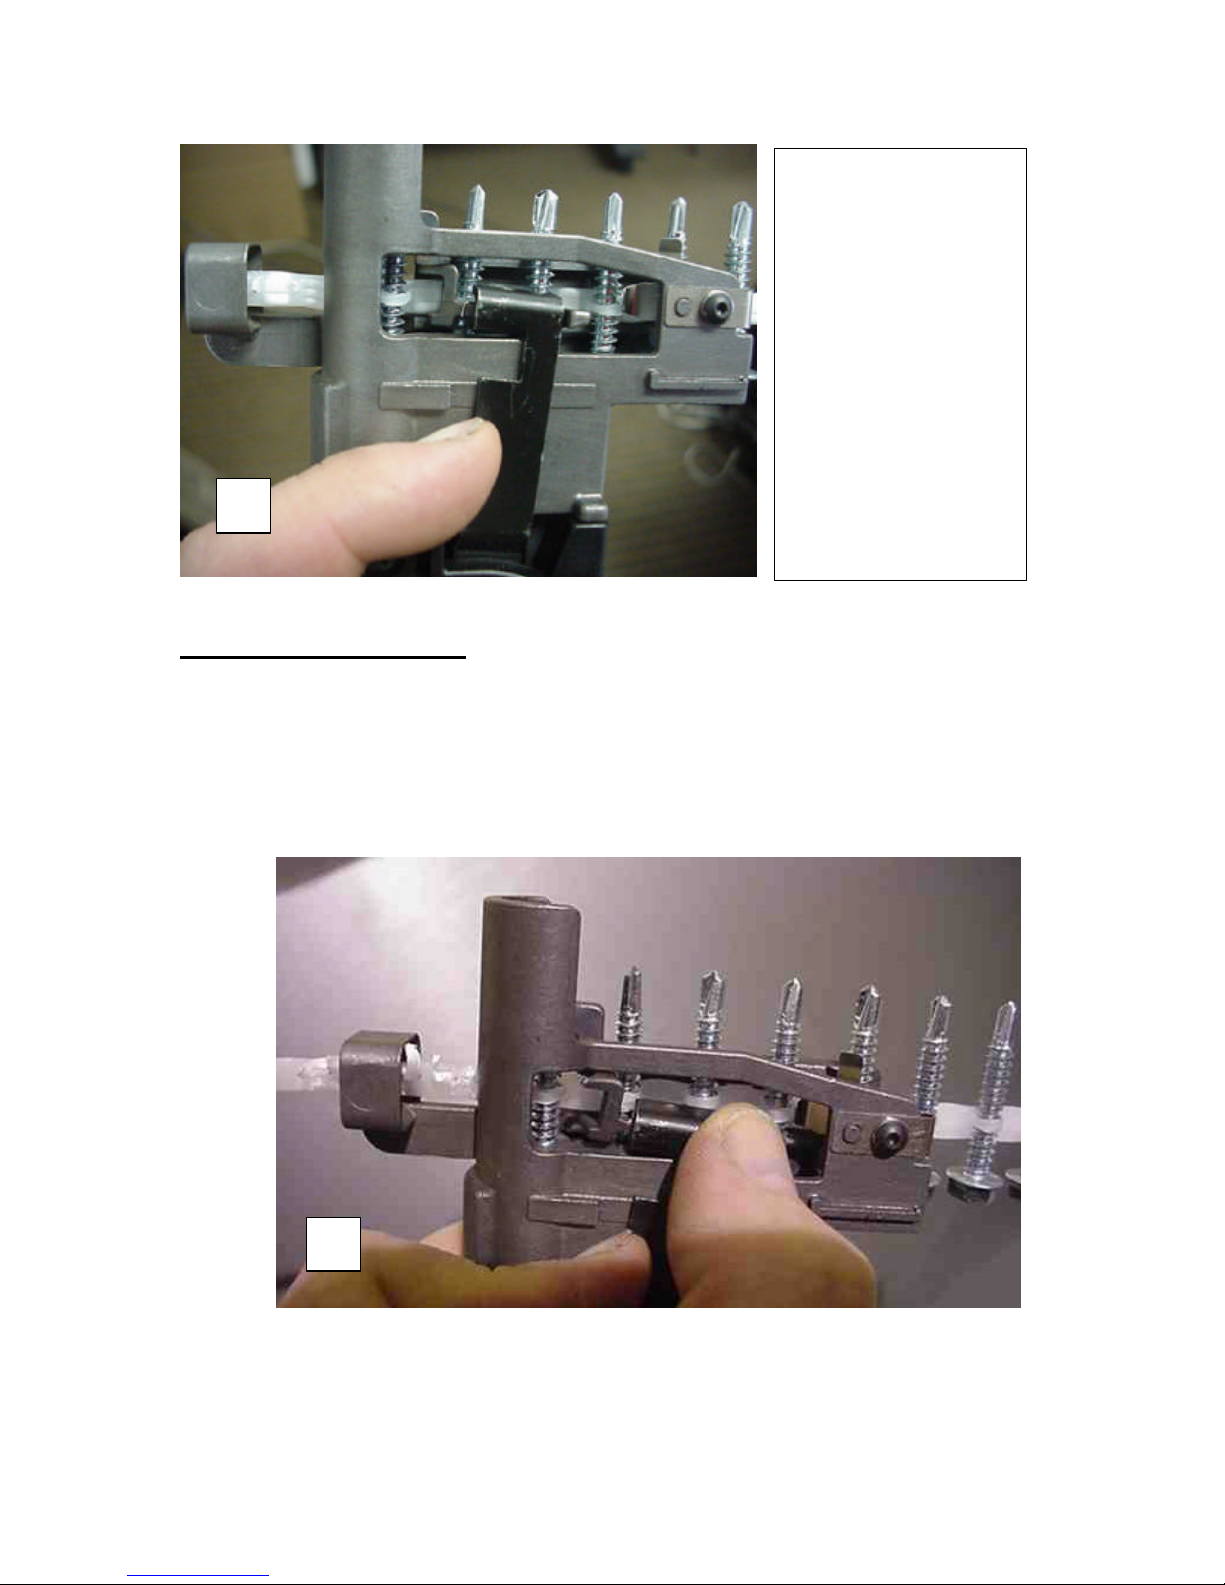
It should be noted that
fasteners with large
might not
directly latch into the
screw guide easily. If
this happens, push the
feed lever over with
your finger while
inserting the strip of
screws to latch the
first screw before
heads
2
using.
Removal of strips from Tool
1) Move the feed lever over slightly, and then press on the end of the feed latch as in
photo 3.
2) Move the feed lever back so it no longer centers the fastener as in Photo 4 and
release the feed latch. This frees the screw from the feed latch.
3) Then, pull the strip towards you and then out of the tool as shown in Photo 5. This
action will push over the strip tensioner spring to allow the strip to be removed easily.
3
Ver: 10/14/2004 4
 Loading...