

Page 1
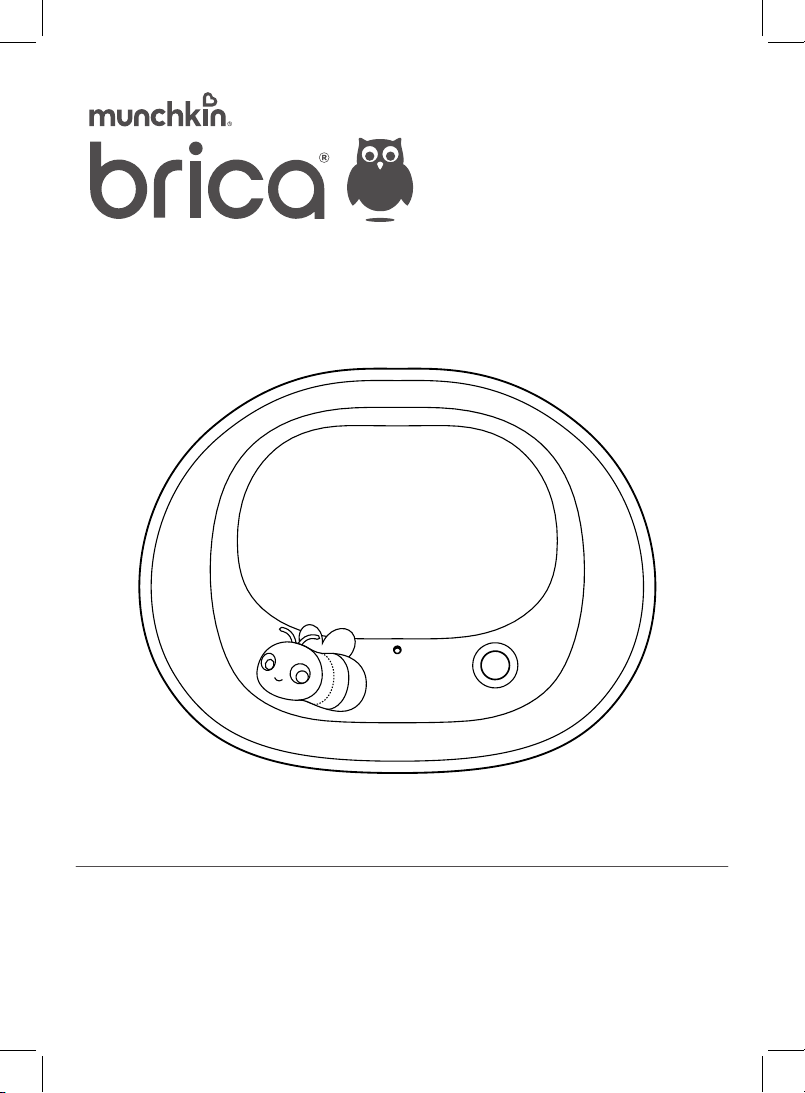
Firefly™ Baby In-Sight
®
KEEP FOR FUTURE REFERENCE
À CONSERVER POUR CONSULTATION FUTURE
GUARDE PARA FUTURA REFERENCIA
ZUM SPÄTEREN NACHLESEN AUFHEBEN
BEWAREN VOOR TOEKOMSTIG GEBRUIK
CCD-0176-000 REV2-011092-IBOI-1
Page 2
Included Parts | Pièces incluses | Piezas incluidas | Inkludierte Teile
Meegeleverde onderdelen | Peças Incluídas | Комплектация
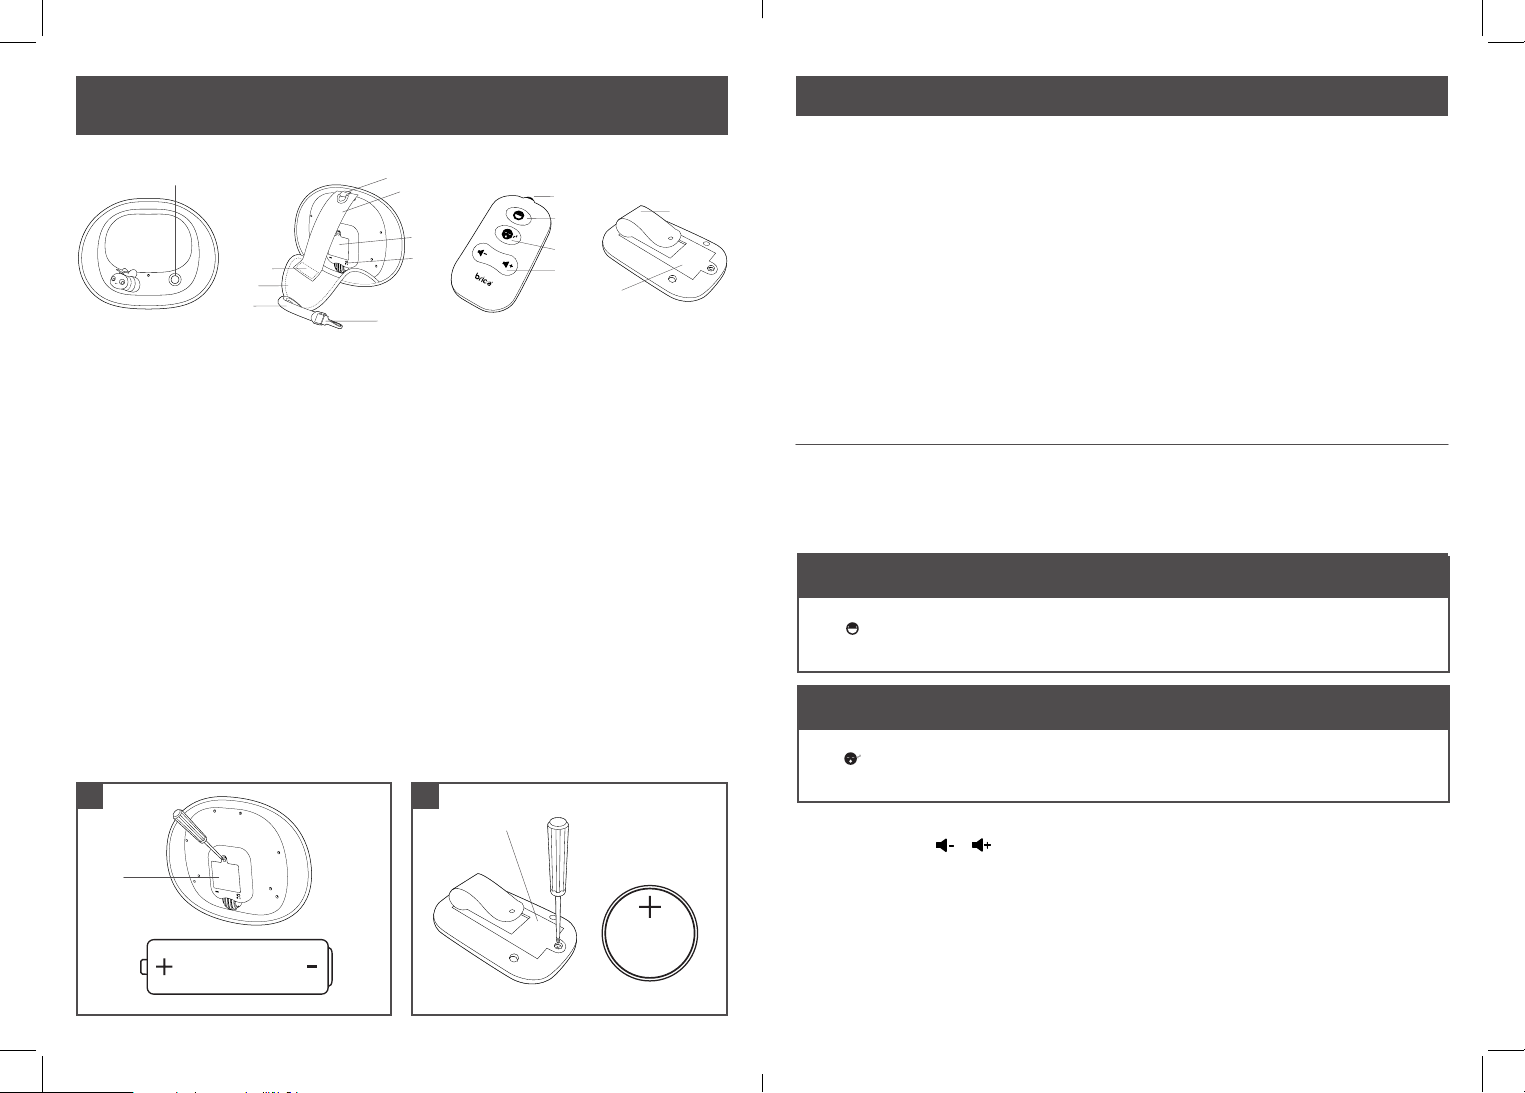
a.
EN.
a. Soothing Mode
b. D-Ring
c. Adjustable Stand
d. Battery Compartment
e. Power Switch (O/I)
f. Fastener
g. Clamp
h. Strap
i. Clip
j. Remote
k. Entertaining Mode
l. Soothing Mode
m. Volume Buttons
n. Visor Clip
o. Battery compartment
FR.
a. Mode apaisant
b. Anneau en D
c. Support réglable
d. Compartiment des piles
e. Interrupteur (O/I)
f. Fermeture
g. Pince
h. Sangle
i. Attache
j. Émetteur de télécommande
k. Mode ludique
l. Mode apaisant
m. Boutons de volume
n. Pince de xation au pare-soleil
o. Compartiment pour les piles
1
d.
1.5V x 3
“AA” (LR6)
“AA” (LR6)
f.
g.
h.
ES.
a. Modo relajante
b. D-Ring
c. Tira ajustable
d. Compartimento de pilas
e. Interruptor de encendido (O/I)
f. Sujetador
g. Abrazadera
h. Correa
i. Clip
j. Transmisor remoto
k. Modo entretenimiento
l. Modo relajante
m. Botones de volumen
n. Clip del visor
o. Batteriefach
DE.
a. Beruhigungsmodus
b. D-Ring
c. Anpassbarer Ständer
d. Batteriefach
e. Stromschalter (O/I)
f. Verschluss
g. Klemme
h. Gurt
i. Clip
j. Fernsteuerungssender
k. Unterhaltungsmodus
l. Beruhigungsmodus
m. Lautstärkeeinstellung
n. Sonnenblendenclip
o. Batterijcompartiment
1.5V x 3
b.
c.
d.
e.
i.
NL.
a. Rustgevende modus
b. D-Ring
c. Verstelbare steun
d. Batterijcompartiment
e. Aan/uit-schakelaar (O/I)
f. Bevestiging
g. Klem
h. Riem
i. Clip
j. Zender
k. Modo de Entreteniment
l. Rustgevende modus
m. Volumetoetsen
n. Zonneklepklem
o. Compartimento de Pilhas
PT.
a. Modo de Relaxamento
b. D-Ring
c. Apoio Ajustável
d. Compartimento de Pilhas
e. Interruptor de Alimentação
f. Fecho
g. Grampo
h. Correia
i. Clip
j. Transmissor Remoto
k. Modo de Entretenimento
l. Modo de Relaxamento
m. Botões de Volume
n. Clip do Visor
o. Compartimento de Pilhas
2
o.
j.
k.
n.
l.
m.
o.
RU.
a. Колыбельный режим
b. D-образное кольцо
c. Регулируемая опора
d. Батарейный отсек
e. Переключатель питания
f. Фиксатор
g. Хомут
h. Ремешок
i. Креплени
j. Дистанционный передатчик
k. Развлекательный режим
l. Колыбельный режим
m. Кнопки регулировки громкости
n. Зажим для крепления к козырьку
o. Батарейный отсек
CR2032
Lithium Battery
3 V
EN. How to Use
INSTALLING BATTERIES
1. MIRROR BATTERIES
3 “AA / LR6” batteries are included for in-store demonstration only. Battery life may be impaired. Replace with 3
new ”AA / LR6” alkaline batteries for normal use.
1. Unscrew the battery compartment door using a Phillips-head screwdriver.
2. Insert 3 new “AA / LR6” batteries. Ensure correct polarity as indicated in the battery compartment.
3. Close the compartment door and tighten the screw. Do not overtighten.
NOTE: Under normal use, the batteries in the mirror will require replacement more often than the battery in the
remote control. When the mirror’s music becomes faint, replace the batteries in the mirror.
2. REMOTE CONTROL BATTERY
Remote comes with battery already installed.
1. Unscrew the battery compartment door using a Phillips-head screwdriver.
2. Insert 1 new CR2032 button cell battery. Ensure correct polarity as indicated in the battery compartment.
3. Close the compartment door and tighten the screw. Do not overtighten.
NOTE: If the mirror does not respond to the remote control, please check the orientation of the battery
in the compartment.
Before use, remove the plastic demo tab located on the back of the mirror battery box to exit
“demo mode.”
1. Move the power switch (O/I) on the back of the mirror to the ON (I) position. NOTE: While the switch
is in the OFF (O) position, none of the mirror’s functions can be activated.
2. Select desired mode.
ENTERTAINING MODE (APPROXIMATELY 12 MINUTES
Press on the remote control to activate Entertainment Mode.
Press again during playback to stop.
SOOTHING MODE (APPROXIMATELY 12 MINUTES
Press on the remote control or on the front of the mirror to activate Soothing Mode.
Press again during playback to stop.
NOTE: For optimum performance, ensure the remote control has an unobstructed view of the mirror.
3. Adjust volume using or on the remote control.
AUTO STOP: All modes stop automatically after 12 minutes. Press the same button again to restart, or press
another button to activate a different mode.
COMPLETE SHUT-OFF: To shut off all mirror functions completely, move the power switch (O/I) on back of
mirror to the OFF (O) position.
Page 3

FR. Instructions d’utilisation
ES. Modo de empleo
INSTALLATIONS DES PILES
1. PILES POUR LE MIROIR
Des piles 3 “AA / LR6” sont incluses uniquement pour la démonstration en magasin. La durée de vie des piles
peut être altérée. Veuillez les remplacer par 3 nouvelles piles “AA / LR6” alcalines pour une utilisation normale.
1. Dévissez la porte du compartiment des piles en utilisant un tournevis cruciforme.
2. Insérez 3 nouvelles piles “AA / LR6”. Assurez-vous de respecter la polarité comme indiqué dans le
compartiment des piles.
3. Fermez la porte du compartiment et serrez la vis. Ne pas trop serrer.
NOTEZ BIEN : Dans le cadre d’une utilisation normale, les piles du miroir demanderont à être remplacées plus
souvent que la pile de la télécommande. Lorsque la musique du miroir s’affaiblit, veuillez remplacer les piles
du miroir.
2. PILE DE LA TÉLÉCOMMANDE
La télécommande est fournie avec une pile préalablement installée.
1. Dévissez la porte du compartiment des piles en utilisant un tournevis cruciforme.
2. Insérez 1 nouvelle pile bouton CR2032. Assurez-vous de respecter la polarité comme indiqué
compartiment des piles.
3. Fermez la porte du compartiment et serrez la vis. Ne pas trop serrer.
NOTEZ BIEN : Si le miroir ne réagit pas à l’utilisation de la télécommande, veuillez vérier l’orientation de la pile
dans le compartiment.
Avant l’utilisation, enlevez l’onglet de démonstration en plastique situé derrière le compartiment à piles
du miroir pour sortir du «mode démonstration».
1. Placez l’interrupteur (O/I) au dos du miroir en position ON (I). NOTEZ BIEN : Lorsque l’interrupteur est en
position OFF (0), aucune des fonctions du miroir ne peut être activée.
2. Sélectionnez le mode souhaité.
MODE LUDIQUE ENVIRON 12 MINUTES
Appuyez sur sur la télécommande pour activer le mode ludique. Appuyez à nouveau au
cours de la lecture pour arrêter.
INSTALACIÓN DE LAS PILAS
PILAS DEL ESPEJO
Se incluyen 3 pilas “AA / LR6” únicamente para demostraciones en tienda. La vida de las pilas podrá verse
disminuida. Sustitúyalas por 3 nuevas pilas “AA / LR6” alcalinas para el empleo normal.
1. Desatornille la tapa del compartimento para las pilas utilizando un destornillador de cabezal Phillips.
2. Inserte 3 pilas “AA / LR6” nuevas. Asegúrese de colocar la polaridad correctamente, tal como se indica en
el compartimento para pilas.
3. Cierre la tapa del compartimento y asegure el tornillo. No lo apriete demasiado.
NOTA: Con el uso normal, las pilas del espejo tendrán que cambiarse más a menudo que las del mando a
distancia. Cuando la música del espejo se debilite, reemplace las pilas del mismo.
PILA DEL CONTROL REMOTO
El control remoto ya viene con pila instalada.
1. Desatornille la tapa del compartimento para pilas utilizando un destornillador de cabezal Phillips.
2. Inserte una nueva pila de botón CR2032. Asegúrese de colocar la polaridad correctamente, tal como
se indica en el compartimento para pilas.
3. Cierre la tapa del compartimento y asegure el tornillo. No lo apriete demasiado. NOTA: Si el espejo no
responde al control remoto, compruebe la orientación de la pila en el compartimento.
Antes de usarlo, retire la pestaña de demostración de plástico que se encuentra en la parte trasera del
compartimento de pilas del espejo para salir del “modo demostración”.
1. Coloque el interruptor de encendido (O/I) que se encuentra en la parte de atrás del espejo en
posición de ON/encendido (I). NOTA: Mientras el interruptor esté en posición de OFF/apagado (O),
no se podrá activar ninguna de las funciones del espejo.
2. Seleccione el modo deseado.
MODO ENTRETENIMIENTO APROXIMADAMENTE 12 MINUTOS
Presione en el control remoto para activar el Modo entretenimiento. Presione de nuevo
durante la reproducción para detenerlo.
MODE APAISANT ENVIRON 12 MINUTES
Appuyez sur sur la télécommande ou sur la face avant du miroir pour activer le mode
apaisant. Appuyez à nouveau au cours de la lecture pour arrêter.
NOTEZ BIEN : Pour des performances optimales, assurez-vous que la télécommande a une vue dégagée
du miroir.
3. Ajustez le volume en utilisant les options ou de la télécommande.
ARRÊT AUTOMATIQUE : Tous les modes s’arrêtent automatiquement après 12 minutes. Appuyez à nouveau
sur le même bouton pour redémarrer, ou appuyez sur un autre bouton pour activer un mode différent.
POUR ARRÊTER COMPLÈTEMENT : Pour arrêter complètement toutes les fonctions du miroir,
placez l’interrupteur (O/I) au dos du miroir en position OFF (O).
MODO RELAJANTE APROXIMADAMENTE 12 MINUTOS
Presione en el control remoto o en la parte delantera del espejo para activar el Modo
relajante. Presione de nuevo durante la reproducción para detenerlo.
NOTA: Para un desempeño óptimo, asegúrese de que el control remoto tiene una visión sin obstáculos
del espejo.
3. Ajuste el volumen utilizando o en el control remoto.
DETENCIÓN AUTOMÁTICA: Todos los modos se detienen automáticamente tras 12 minutos. Presione el
mismo botón de nuevo para reiniciarlo, u otro para activar un modo diferente.
APAGADO COMPLETO: Para apagar completamente todas las funciones del espejo, coloque el interruptor de
encendido (O/I) que se encuentra en la parte trasera del espejo en la posición de OFF/apagado (O).
Page 4
DE. Gebrauchshinweise
NL. Gebruik
EINLEGEN VON BATTERIEN
1. SPIEGELBATTERIEN
3 “AA / LR6” Batterien sind nur zur Vorführung im Geschäft eingelegt. Die Batterielebensdauer kann
beeinträchtigt sein. Ersetzen Sie sie durch neue “AA / LR6” Alkalibatterien zur normalen Verwendung.
1. Schrauben Sie die Batteriefachabdeckung mit einem Kreuzschraubenzieher auf.
2. Legen Sie 3 neue “AA / LR6” Batterien ein. Stellen Sie die richtige Polung sicher, wie im
Batteriefach angegeben.
3. Schließen Sie die Fachabdeckung und ziehen Sie die Schraube fest. Nicht zu stark anziehen.
HINWEIS: Bei normaler Verwendung müssen die Batterien des Spiegels öfter gewechselt werden als die
Batterien in der Fernsteuerung. Wenn Die Musik aus dem Spiegel leise wird, ersetzen Sie die Batterien
im Spiegel.
2. BATTERIE DER FERNSTEUERUNG
Die Fernsteuerung verfügt bereits über eine eingelegte Batterie.
1. Schrauben Sie die Batteriefachabdeckung mit einem Kreuzschraubenzieher auf.
2. Legen Sie 1 neue CR2032 Knopfzellenbatterie ein. Stellen Sie die richtige Polung sicher, wie im
Batteriefach angegeben.
3. Schließen Sie die Fachabdeckung und ziehen Sie die Schraube fest. Nicht zu fest anziehen.
HINWEIS : Wenn der Spiegel nicht auf die Fernbedienung reagiert, überprüfen Sie bitte die Ausrichtung der
Batterie im Fach.
Vor der Verwendung entfernen Sie den Kunststoffdemotab, der an der Rückseite des Batteriefaches des
Spiegels angebracht ist, um den “Demomodus” zu beenden.
1. Stellen Sie den Stromschalter (O/I) an der Rückseite des Spiegels auf die AN (I) Position.
HINWEIS: Solange der Schalter auf der AUS (O) Position steht, können keinerlei Funktionen des Spiegels
aktiviert werden.
2. Wählen Sie den gewünschten Modus.
UNTERHALTUNGSMODUS ANNÄHERND 12 MINUTEN
Drücken Sie auf der Fernbedienung, um den Unterhaltungsmodus zu aktivieren. Drücken
Sie nochmals während der Wiedergabe, um ihn zu stoppen.
PLAATSEN VAN DE BATTERIJEN
1. SPIEGELBATTERIJEN
Er worden 3 “AA / LR6”-batterijen meegeleverd die uitsluitend zijn bedoeld voor demonstratie in de winkel. De
levensduur van de batterijen kan beperkt zijn. Voor normaal gebruik dienen de batterijen vervangen te worden
met 3 nieuwe “AA / LR6”-alkalinebatterijen.
1. Schroef het deksel van het batterijvak open met een kruiskopschroevendraaier.
2. Plaats 3 nieuwe “AA / LR6”-batterijen. Let op de juiste polariteit, zoals is aangegeven in het batterijvak.
3. Sluit het deksel van het batterijvak en draai de schroef vast. Niet te hard aandraaien.
LET OP: Bij normaal gebruik moeten de batterijen in de spiegel vaker vervangen worden vervangen dan de
batterij in de afstandsbediening. Wanneer de muziek van de spiegel afzwakt, moeten de batterijen in de spiegel
vervangen worden.
2. BATTERIJ VAN DE AFSTANDSBEDIENING
De afstandsbediening wordt geleverd met een al geplaatste batterij.
1. Schroef het deksel van het batterijvak open met een kruiskopschroevendraaier.
2. Plaats 1 nieuwe CR2032-knoopcelbatterij. Let op de juiste polariteit, zoals is aangegeven
in het batterijvak.
3. Sluit het deksel van het batterijvak en draai de schroef vast. Niet te hard aandraaien.
LET OP: Als de spiegel niet reageert op de afstandsbediening, moet u de plaatsing van de batterij in het
vak controleren.
Antes de usarlo, retire la pestaña de demostración de plástico que se encuentra en la parte trasera del
compartimento de pilas del espejo para salir del “modo demostración”.
1. Coloque el interruptor de encendido (O/I) que se encuentra en la parte de atrás del espejo en
posición de ON/encendido (I). NOTA: Mientras el interruptor esté en posición de OFF/apagado (O),
no se podrá activar ninguna de las funciones del espejo.
2. Seleccione el modo deseado.
AMUSEMENTSMODUS ONGEVEER 12 MINUTEN
Druk op op de afstandsbediening om de amusementsmodus te activeren. Druk hier
tijdens het afspelen opnieuw op om te stoppen.
BERUHIGUNGSMODUS ANNÄHERND 12 MINUTEN
Drücken Sie uf der Fernbedienung oder an der Vorderseite des Spiegels, um den
Beruhigungsmodus zu aktivieren. Drücken Sie erneut während der Wiedergabe, um ihn zu stoppen.
HINWEIS: Zur Erzielung optimaler Funktionalität stellen Sie sicher, dass sich keinerlei Hindernisse zwischen der
Fernbedienung und dem Spiegel benden.
3. Stellen Sie die Lautstärke mit oder auf der Fernbedienung ein.
AUTOSTOPP: Alle Modi stoppen nach 12 Minuten automatisch. Drücken Sie denselben Knopf, um den Modus
neu zu starten, oder drücken Sie einen anderen Knopf, um einen anderen Modus zu aktivieren.
VOLLSTÄNDIGES AUSSCHALTEN: Um alle Spiegelfunktionen völlig auszuschalten, stellen Sie den
Stromschalter (O/I) an der Rückseite des Spiegels auf die AUS (O) Position.
RUSTGEVENDE MODUS ONGEVEER 12 MINUTEN
Druk op op de afstandsbediening of op de voorzijde van de spiegel om de kalmerende
modus te activeren. Druk hier tijdens het afspelen opnieuw op om te stoppen.
LET OP: Voor optimale prestaties moet u ervoor zorgen dat de afstandsbediening een onbelemmerd zicht op de
spiegel heeft.
3. Adjust volume using or on the remote control.
AUTOMATISCHE STOP: Alle modi stoppen automatisch na 12 minuten. Druk nogmaals op de knop om
opnieuw te starten of druk op een andere knop om een andere modus te activeren.
VOLLEDIGE UITSCHAKELING: Om alle functies van de spiegel volledig uit te schakelen, verplaatst u de aan/
uit-schakelaar (O/I) op de achterzijde van de spiegel naar de stand UIT (O).
Page 5

PT. Modo de utilização
RU. Использование
INSTALAÇÃO DE PILHAS
1. PILHAS DO ESPELHO
Encontram-se incluídas 3 pilhas “AA / LR6” apenas para demonstração na loja. A duração da pilha pode estar
comprometida. Substitua com 3 novas pilhas “AA / LR6” alcalinas para uma utilização normal.
1. Desaperte os parafusos da porta do compartimento das pilhas utilizando uma chave de
fendas Phillips.
2. Insira as 3 novas pilhas “AA / LR6”. Certique-se de que as colocou com a polaridade correcta conforme
indicado no compartimento de pilhas.
3. Feche a porta do compartimento e aperte os parafusos. Não aperte demasiado.
NOTA: Em condições normais de utilização, as pilhas no espelho vão precisar de ser substituídas com mais
frequência do que as pilhas do comando. Quando a música do espelho car mais fraca, substitua as pilhas
no espelho.
2. PILHA DE COMANDO
O comando vem já com pilhas instaladas.
1. Desaperte os parafusos da porta do compartimento de pilhas utilizando uma chave de fendas Phillips.
2. Insira 1 nova pilha de tipo botão CR2032. Certique-se de que as colocou com a polaridade correcta
conforme indicado no compartimento de pilhas.
3. Feche a porta do compartimento e aperte os parafusos. Não aperte demasiado.
NOTA: Se o espelho não responder ao comando, verique a orientação da pilha no compartimento.
Antes de utilizar, remova o separador de demonstração de plástico que se encontra na parte posterior da
caixa de pilhas do espelho para sair do “modo demo”.
1. Faça deslizar o interruptor de alimentação (O/I) na parte posterior do espelho para a posição ON (I).
NOTA: Enquanto o interruptor estiver na posição OFF (O), nenhuma das funções do espelho pode
ser activada.
2. Seleccione o modo desejado.
MODO DE ENTRETENIMENTO APROXIMADAMENTE 12 MINUTOS
Prima no comando para activar o Modo de Entretenimento. Prima novamente durante a
reprodução para parar.
УСТАНОВКА БАТАРЕЕК
1. БАТАРЕЙКИ ЗЕРКАЛА
В комплект входят 3 батарейки АА, предназначенные исключительно для демонстрации работы зеркала
в магазине. Заряд этих батареек может быть недостаточным. Замените их 3 новыми щелочными
батарейками АА перед началом эксплуатации зеркала.
1. Открутите крышку батарейного отсека с помощью крестообразной отвертки.
2. Вставьте 3 новые батарейки АА. Удостоверьтесь в том, что полярность батареек соответствует
обозначениям в батарейном отсеке.
3. Закройте и закрутите крышку батарейного отсека. Не закручивайте слишком сильно.
ПРИМЕЧАНИЕ. При нормальном использовании батарейки зеркала потребуют более частой замены,
чем батарейка в пульте дистанционного управления. Замените батарейки зеркала, когда громкость
проигрываемой музыки ослабнет.
2. Батарейка в пульте дистанционного управления
Пульт дистанционного управления поставляется с установленной батарейкой.
1. Открутите крышку батарейного отсека с помощью крестообразной отвертки.
2. Вставьте одну новую батарейку CR2032 таблеточного типа. Убедитесь в том, что полярность
батарейки соответствует обозначениям в батарейном отсеке.
3. Закройте и закрутите крышку батарейного отсека. Не закручивайте слишком сильно.
ПРИМЕЧАНИЕ. Если зеркало не реагирует на пульт дистанционного управления, проверьте ориентацию
батарейки в батарейном отсеке.
Перед использованием снимите пластиковый язычок демонстрационного режима с обратной
стороны зеркала.
1. Переведите переключатель питания (O/I) на обратной стороне зеркала в положение
«включено» (I). ПРИМЕЧАНИЕ. Когда переключатель находится в положении «выключено»
(O), функции зеркала не могут быть активированы.
2. Выберите желаемый режим.
РАЗВЛЕКАТЕЛЬНЫЙ РЕЖИМ (ПРИБЛИЗИТЕЛЬНО 12 МИНУТ)
Чтобы активировать развлекательный режим, нажмите на пульте дистанционного
управления. Чтобы остановить воспроизведение, снова нажмите ту же кн
MODO DE RELAXAMENTO APROXIMADAMENTE 12 MINUTOS
Prima no comando ou na frente do espelho para activar o Modo de Relaxamento. Prima
novamente durante a reprodução para parar.
NOTA: Para um excelente desempenho, certique-se de que o comando tem uma visão desobstruída
do espelho.
3. Ajuste o volume utilizando ou no comando.
PARAGEM AUTOMÁTICA: Todos os modos param automaticamente após 12 minutos. Prima o mesmo botão
novamente para reiniciar, ou prima outro botão para activar um modo diferente.
DESLIGAR COMPLETAMENTE: Para desligar completamente todas as funções do espelho, faça deslizar o
interruptor de alimentação (O/I) na parte de trás do espelho para a posição OFF (O).
КОЛЫБЕЛЬНЫЙ РЕЖИМ (ПРИБЛИЗИТЕЛЬНО 12 МИНУТ)
Чтобы активировать колыбельный режим, нажмите на пульте дистанционного управления
или на лицевой стороне зеркала. Чтобы остановить воспроизведение, снова нажмите
ту же кнопку.
ПРИМЕЧАНИЕ. Чтобы обеспечить оптимальное функционирование, удостоверьтесь в том, что между
пультом дистанционного управления и зеркалом отсутствуют преграды.
3. Регулируйте громкость звука с помощью кнопок и на пульте дистанционного управления.
АВТОМАТИЧЕСКИЙ ОСТАНОВ. Воспроизведение в обоих режимах автоматически останавливается
через 12 минут. Чтобы продолжить воспроизведение, снова нажмите кнопку выбранного режима или
выберите другой режим.
ПОЛНОЕ ВЫКЛЮЧЕНИЕ. Чтобы полностью выключить все функции зеркала, переведите переключатель
питания (O/I) на обратной стороне зеркала в положение «выключено» (О).
Page 6

Strap
Clamp
Clip
D-ring
Adjustable
stand
Strap
Clamp
ClipD-ring
Adjustable
stand
Fastener
Attache
Clamp
Pince
Adjustable
stand
Clamp
Attaching the Mirror | Attacher le Miroir | Colocación del Espejo | Anbringung des Spiegels
De Spiegel Bevestigen | Fixar o Espelho | Установка Зеркала
EN.
a. D-Ring
b. Adjustable Stand
c. Clamp
d. Strap
e. Clip
FR.
a. Anneau en D
b. Support réglable
c. Pince
d. Sangle
e. Interrupteur (O/I)
ES.
a. D-Ring
b. Tira ajustable
c. Abrazadera
d. Correa
e. Clip
DE.
a. D-Ring
b. Anpassbarer Ständer
c. Klemme
d. Batteriefach
e. Clip
NL.
a. D-Ring
b. Verstelbare steun
c. Klem
d. Riem
e. Clip
PT.
a. D-Ring
b. Apoio Ajustável
c. Grampo
d. Correia
e. Clip
RU.
a. D-образное кольцо
b. Регулируемая опора
c. Фиксатор
d. Ремешок
e. Креплени
a
b
c
e
a
d
b
c
b
c
EN. Attaching the Mirror | FR. Attacher le Miroir
EN. KEEP FOR FUTURE REFERENCE
On Backseat Headrest
1. Raise backseat headrest and slide clamp underneath.
2. Wrap adjustable stand over top of headrest.
3. Bend clamp upward to conform to headrest.
4. Attach strap’s clip to D-ring.
5. Lower headrest to secure mirror in place.
6. Tighten strap and adjust mirror to desired angle so that the child is visible to the driver in the vehicle’s
rearview mirror.
On Bench Seat
1. Position mirror on top of seat back.
2. Bend clamp to conform to top of seat back.
3. Squeeze clamp rmly to secure mirror in place.
4. Unfasten adjustable stand from clamp and tilt mirror to desired angle so that the child is visible to the driver
in the vehicle’s rearview mirror.
NOTE: If a tether anchor is accessible and not in use by a child safety seat, attach strap’s clip to tether anchor
and tighten strap. This will help increase the stability of the mirror.
On Frontseat Headrest
IMPORTANT: This method is used for mounting mirror to backside of front seat to entertain forward-facing children.
1. Raise headrest and slide clamp underneath.
2. Wrap adjustable stand over top of headrest.
3. Bend clamp to conform to shape of seat back.
4. Attach strap’s clip to D-ring.
5. Lower headrest to secure mirror.
6. Tighten strap and adjust mirror so that the child can see themselves.
FR. À CONSERVER POUR S’Y RÉFÉRER ULTÉRIEUREMENT
1. Sur l’appuie-tête du siège arrière
1. Lever l’appuie-tête du siège arrière et faites glisser la pince en-dessous.
2. Enroulez le support réglable sur le sommet de l’appuie-tête.
3. Pliez la pince vers le haut pour qu’elle s’adapte à l’appuie-tête.
4. Attachez l’attache de la sangle à l’anneau en D.
5. Baisser l’appuie-tête pour maintenir en place le miroir.
6. Serrez la sangle et ajustez le miroir à l’angle souhaité pour que le conducteur/la conductrice voie l’enfant
par l’intermédiaire du rétroviseur du véhicule.
Sur la banquette
1. Posez le miroir sur le sommet du dossier du siège.
2. Pliez la pince pour qu’elle s’adapte au sommet du dossier du siège.
3. Serrez fermement la pince pour maintenir en place le miroir.
4. Détachez le support réglable de la pince et inclinez le miroir à l’angle souhaité pour que le conducteur/la
conductrice voie l’enfant par l’intermédiaire du rétroviseur du véhicule.
NOTEZ BIEN : Si un dispositif d’ancrage est accessible et n’est pas utilisé pour un siège d’enfant, veuillez
attacher la pince de la sangle au dispositif d’ancrage et serrer la sangle. Cela permettra d’augmenter la stabilité
du miroir.
Sur l’appuie-tête du siège avant
IMPORTANT: Cette méthode est utilisée pour installer le miroir à l’arrière du siège-avant pour divertir les enfants
assis vers l’avant.
1. Levez l’appuie-tête et faites glisser la pince en-dessous.
2. Enroulez le support réglable sur le sommet de l’appuie-tête.
3. Pliez la pince pour qu’elle s’adapte à la forme du dossier du siège.
4. Attachez l’attache de la sangle à l’anneau en D.
5. Baissez l’appuie-tête pour maintenir en place le miroir.
6. Serrez la sangle et ajustez le miroir pour que l’enfant puisse se voir.
Page 7

ES. Colocación del Espejo | DE. Anbringung des Spiegels
NL. De Spiegel Bevestigen | PT. Fixar o Espelho
ES. GUARDAR PARA CONSULTA FUTURA
En el reposacabezas del asiento trasero
1. Levante el reposacabezas del asiento trasero y deslice la abrazadera que se encuentra debajo.
2. Coloque la tira ajustable en la parte superior del reposacabezas.
3. Doble la abrazadera hacia arriba para ajustarla al reposacabezas.
4. Sujete el clip de la correa al anillo en D.
5. Baje el reposacabezas para asegurar el espejo en su lugar.
6. Apriete la correa y ajuste el espejo en el ángulo deseado para que el conductor pueda ver al niño por el retrovisor.
En el banco de asientos
1. Posicione el espejo en la parte trasera del asiento.
2. Doble la abrazadera para ajustarla a la parte superior de la parte trasera del asiento.
3. Apriétela rmemente para asegurar el espejo en su lugar.
4. Desabroche la tira ajustable de la abrazadera y coloque el espejo en el ángulo deseado para que el
conductor pueda ver al niño por el retrovisor.
NOTA: Si hay anclajes de amarre accesibles y no están utilizándose para el asiento de seguridad infantil, sujete
el clip de la correa en el anclaje de amarre y ajuste la correa. Esto ayudará a aumentar la estabilidad del espejo.
En el reposacabezas del asiento delantero
IMPORTANTE: Este método se utiliza para montar el espejo en la parte trasera del asiento delantero para
entretener a los niños que van mirando hacia delante.
1. Levante el reposacabezas y deslice la abrazadera que está debajo.
2. Coloque la tira ajustable sobre la parte superior del reposacabezas.
3. Doble la abrazadera para ajustarla a la forma de la trasera del asiento.
4. Sujete el clip de la correa al anillo en D.
5. Baje el reposacabezas para asegurar el espejo.
6. Apriete la correa y ajuste el espejo para que el niño pueda verse a sí mismo.
DE. ZUM NACHSCHLAGEN AUFBEWAHREN
An der Kopfstütze des Rücksitzes
1. Ziehen Sie die Kopfstütze des Rücksitzes nach oben und führen Sie die Klemme darunter durch.
2. Schlagen Sie den anpassbaren Ständer über den oberen Rand der Kopfstütze.
3. Biegen Sie die Klemme nach oben und passen Sie sie der Form der Kopfstütze an.
4. Verbinden Sie den Gurtclip mit dem D-Ring.
5. Lassen Sie die Kopfstütze herunter, um den Spiegel an seinem Platz zu xieren.
6. Ziehen Sie den Gurt fest und stellen Sie den Spiegel auf den gewünschten Winkel ein, sodass das Kind vom
Fahrer vom Rückspiegel des Fahrzeuges aus sichtbar ist.
Auf der Sitzbank
1. Positionieren Sie den Spiegel oben auf der Sitzrückenlehne.
2. Biegen Sie die Klemme so, dass sie sich der Form der Sitzrückenlehne anpasst.
3. Drücken Sie die Klemme fest, um den Spiegel an seinem Platz zu xieren.
4. Lösen Sie den anpassbaren Ständer von der Klemme und bringen Sie den Spiegel in die gewünschte
Position, sodass das Kind vom Fahrer aus im Rückspiegel des Fahrzeuges gesehen werden kann.
HINWEIS: Wenn eine Gurthalteverankerung verfügbar ist und nicht für einen Kindersichereheitssitz benötigt
wird, bringen Sie den Clip des Gurtes an der Gurthalteverankerung an und ziehen Sie den Gurt fest. Das wird
die Stabilität des Spiegels erhöhen.
An der Kopfstütze des Vordersitzes
WICHTIG: Diese Anbringungsart wird für die Montage des Spiegels an der Rückseite des Vordersitzes
verwendet, um nach vorne blickende Kinder bei guter Laune zu halten.
1. Ziehen Sie die Kopfstütze nach oben und führen Sie die Klemme darunter hindurch.
2. Schalgen Sie den anpassbaren Ständer über den oberen Rand der Kopfstütze.
3. Bringen Sie die Klemme in Form, sodass sie sich der Form der Rückenlehne anpasst.
4. Bringen Sie den Gurtclip am D-Ring an.
5. Lassen Sie die Kopfstütze herunter, um den Spiegel zu xieren.
6. Ziehen Sie den Gurt fest und positionieren Sie den Spiegel so, dass die Kinder sich selbst sehen können.
NL. BEWAREN VOOR NASLAG IN DE TOEKOMST
Op de hoofdsteun van de achterbank
1. Plaats de hoofdsteun van de achterbank omhoog en schuif de klem eronder.
2. Wikkel de verstelbare steun over de bovenkant van de hoofdsteun.
3. Buig de klem omhoog om deze aan de hoofdsteun aan te passen.
4. Bevestig de riemclip aan de D-ring.
5. Laat de hoofdsteun weer zakken om de spiegel vast te zetten.
6. Trek de riem aan en stel de spiegel af in de gewenste hoek, zodat het kind voor de bestuurder zichtbaar is
in de achteruitkijkspiegel van de auto.
Op een bankzitting
1. Plaats de spiegel bovenop de rugleuning van de bank.
2. Buig de klem in de vorm van de bovenkant van de rugleuning.
3. Knijp de klem stevig in om de spiegel vast te zetten.
4. Ontkoppel de verstelbare steun van de klem en kantel de spiegel in de gewenste hoek, zodat het kind voor
de bestuurder zichtbaar is in de achteruitkijkspiegel van de auto.
LET OP: Als er een tuiverankering toegankelijk is en niet wordt gebruikt door door het kinderzitje, bevestigt u de
riemclip aan de tuiverankering en haalt u de riem aan. Dit helpt de stabiliteit van de spiegel te verhogen.
Op de hoofdsteun van de voorstoel
BELANGRIJK: Deze methode wordt gebruikt om de spiegel aan de achterkant van de voorstoel te monteren om
kinderen te amuseren die in de rijrichting zitten.
1. Plaats de hoofdsteun omhoog en schuif de klem eronder.
2. Wikkel de verstelbare steun over de bovenkant van de hoofdsteun.
3. Buig de klem in de vorm van de rugleuning.
4. Bevestig de riemclip aan de D-ring.
5. Laat de hoofdsteun weer zakken om de spiegel vast te zetten.
6. Haal de riem aan en stel de spiegel af zodat het kind zichzelf kan zien.
PT. GUARDAR PARA FUTURA REFERÊNCIA
No Descanso de Cabeça no Banco Traseiro
1. Levante o descanso de cabeça do banco traseiro e faça deslizar o grampo por baixo.
2. Envolva o apoio ajustável sobre o topo do descanso de cabeça.
3. Dobre verticalmente o grampo para ajustar ao descanso de cabeça.
4. Fixe o clip da correia ao anel em D.
5. Desça o descanso de cabeça para se certicar que o espelho está no local.
6. Aperte a correia e ajuste o espelho para o ângulo desejado de forma a que a criança que visível ao
condutor no espelho retrovisor do veículo.
No Banco Corrido
1. Posicione o espelho em cima do banco traseiro.
2. Dobre o grampo para ajustar ao topo do descanso de cabeça.
3. Aperte o grampo rmemente para xar o espelho no local.
4. Desaperte o apoio ajustável do grampo e incline o espelho para o ângulo desejado de forma a que a
criança que visível ao condutor no espelho retrovisor do veículo.
PT. NOTA: Se existir um cabo de xação que não esteja em utilização na cadeirinha da criança, xe o clip da
correia ao cabo e aperte a correia. Desta forma, vai ajudar a reforçar a estabilidade do espelho.
No Descanso de Cabeça do Banco da Frente
IMPORTANTE: Este método é utilizado para a montagem de espelhos na parte de trás do assento frontal para
entreter crianças viradas para a frente.
1. Levante o descanso da cabeça e faça deslizar o grampo por debaixo.
2. Envolva o apoio ajustável sobre o topo do descanso da cabeça.
3. Dobre o grampo para se ajustar à forma do banco de trás.
4. Fixe o clip da correia ao anel em D.
5. Desça o descanso da cabeça para xar o espelho.
6. Aperte a correia e ajuste o espelho para que a criança se possa ver.
Page 8

RU. УСТАНОВКА ЗЕРКАЛА
EN. WARNING! | FR. AVERTISSEMENT !
RU. BEWAREN VOOR NASLAG IN DE TOEKOMST
На подголовник заднего сиденья
1. Поднимите подголовник заднего сиденья и протяните хомут под подголовником.
2. Положите регулируемую опору сверху на подголовник.
3. Загните хомут вверх так, чтобы он повторял форму подголовника.
4. Закрепите крепление на ремешке за D-образное кольцо.
5. Опустите подголовник, чтобы зафиксировать зеркало на месте.
6. Затяните ремешок и отрегулируйте угол наклона зеркала так, чтобы водитель видел ребенка в
зеркало заднего вида.
На сиденье диванного типа
1. Поместите зеркало на спинку сиденья.
2. Согните хомут так, чтобы он прилегал к верхней части спинки сиденья.
3. Плотно прижмите хомут к спинке сиденья, чтобы зафиксировать зеркало.
4. Отстегните регулируемую опору от хомута и наклоните зеркало так, чтобы водитель видел ребенка в
зеркало заднего вида.
ПРИМЕЧАНИЕ. Если имеется скоба для страховочного ремня автокресла и она не используется,
закрепите крепление на ремешке за скобу для страховочного ремня и затяните ремешок. Это увеличит
устойчивость зеркала.
На подголовник переднего сиденья
ВАЖНО. Этот способ используется для установки зеркала на обратной стороне переднего сиденья для
детей, размещенных по ходу движения автомобиля.
1. Поднимите подголовник и протяните хомут под подголовником.
2. Положите регулируемую опору сверху на подголовник.
3. Загните хомут так, чтобы он повторял форму подголовника.
4. Закрепите крепление на ремешке за D-образное кольцо.
5. Опустите подголовник, чтобы зафиксировать зеркало на месте.
6. Затяните ремешок и отрегулируйте угол наклона зеркала так, чтобы ребенок мог видеть себя
в зеркале.
EN. BATTERY INFORMATION
Do not mix old and new batteries or batteries of different types. Do not mix alkaline, standard (carbon-zinc), or
rechargeable (nickel-cadmium, lithium-ion) batteries. Do not charge non-rechargeable batteries. Insert batteries
in the correct polarity position as indicated inside the battery compartment. Never short circuit battery terminals.
Use only batteries of the same or equivalent type as recommended. Remove batteries during long periods of
non-use. Always remove exhausted batteries from product. Dispose of batteries safely and properly. Do not
dispose of product in a re. The batteries inside may explode or leak. Rechargeable batteries are to be removed
before being charged. Rechargeable batteries are only to be charged under adult supervision. Do not submerge
in water or other liquids.
TO CLEAN:
Wipe the mirror with a soft, dry cloth. Do not use any cleaning solutions. Fabric is surface washable with a damp
cloth and mild soapy water. Air dry. Do not bleach. Do not submerge mirror in water.
For your child’s safety and health. WARNING! This product is not a toy and is for adult use only. Keep all parts
including packaging out of reach of children. Never adjust mirror whilst driving. Regularly check attachment to
ensure secure t. Do not attach to vehicle’s tether anchor if child safety seat is installed with the same tether
anchor. Keep mirror out of baby’s reach and direct sunlight. Always follow car seat manufacturer’s directions for
correct installation and position of child safety seat. Do not operate while driving. Always verify that the mirror
is properly secured. Check frequently. Discard and replace if damaged. Cut the plastic attachments with wire
cutters and discard the pieces. Dispose of used batteries immediately. Keep new and used batteries away from
children. If you think batteries might have been swallowed or placed inside any part of the body, seek immediate
medical attention. Read and retain packaging for future reference.
FR. INFORMATIONS SUR LES PILES
Ne mélangez pas des anciennes piles avec des nouvelles piles ou avec des piles de différents types. Ne
mélangez pas des piles alcalines, standard (carbone-zinc) ou rechargeables (nickel-cadmium, lithium-ion). Ne
rechargez pas des piles non rechargeables. Insérez les piles en respectant la polarité correcte comme indiqué à
l’intérieur du compartiment des piles. N’utilisez jamais de bornes de piles en court-circuit Utilisez uniquement
des piles du même type ou d’un type équivalent comme recommandé. Retirez les piles pendant des longues
périodes de non utilisation. Retirez toujours les piles usées du produit. Mettre les piles au rebut en toute sécurité
et proprement. Ne jetez pas ce produit au feu. Les piles qui s’y trouvent pourraient exploser ou fuir.Les piles
rechargeables doivent être retirées avant d’être rechargées. Les piles rechargeables ne peuvent être rechargées
que sous la surveillance d’un adulte. Ne pas plonger dans de l’eau ou dans d’autres liquides.
NETTOYAGE :
Nettoyez le miroir à l’aide d’un chiffon doux et sec. N’utilisez aucun produit de nettoyage. Le tissus est une
surface lavable à l’aide d’un chiffon humide et d’eau savonneuse douce. Laissez sécher à l’air. Ne pas utilisez
d’eau de Javel. N’immergez pas le miroir dans l’eau.
Pour la sécurité et la santé de votre enfant. AVERTISSEMENT ! Ce produit n’est pas un jouet et son utilisation
est réservée à l’adulte. Maintenez toutes les pièces, y compris l’emballage hors de la portée des enfants.
N’ajustez jamais le miroir en conduisant. Vériez régulièrement le système d’attache pour vous assurez d’un
maintien sûr. N’attachez pas au dispositif d’ancrage si le siège enfant est installé avec le même dispositif
d’ancrage. Gardez le miroir hors de la portée du bébé et de la lumière directe du soleil. Suivez toujours les
instructions du fabricant de sièges auto pour l’installation et la position correctes du siège enfant. Ne pas
utiliser lors de la conduite. Vériez toujours que le miroir est correctement xé. Vériez fréquemment. Jetez-le
et remplacez-le s’il est endommagé. Coupez les attaches en plastique à l’aide d’un coupe-l et jetez les pièces.
Éliminez immédiatement les piles usées. Gardez les nouvelles piles et les piles usagées hors de la portée des
enfants. Si vous pensez que les piles peuvent avoir été avalées ou placées dans toute partie du corps, consultez
immédiatement un médecin. Lisez et conservez l’emballage pour vous y référer ultérieurement.
Page 9

ES. ¡ATENCIÓN! | DE. WARNUNG!
NL. WAARSCHUWING! | PT. AVERTISSEMENT !
ES. INFORMACIÓN SOBRE LAS PILAS
No mezcle pilas nuevas y viejas ni pilas de distintos tipos. No mezcle pilas alcalinas, estándar (carbón-zinc),
ni recargables (níquel-cadmio, ion-litio). No cargue las pilas que no sean recargables. Inserte las pilas en la
posición de polaridad correcta, tal como se indica en el interior del compartimento de pilas. Nunca ocasione
un cortocircuito en las terminales de pilas. Utilice únicamente pilas del mismo tipo o equivalente, tal como
se recomienda. No tire las pilas al fuego, ya que el interior puede explotar o derramarse. Retire las pilas si no
va a utilizar el producto durante un período largo de tiempo. Retire siempre las pilas agotadas del producto.
Elimínelas de forma segura y adecuada. Las pilas recargables deben desecharse antes de cargarlas. Las pilas
recargables solo deberán cargarse bajo supervisión de un adulto. No sumergir en agua ni otros líquidos.
PARA LIMPIAR:
Frote el espejo con un paño suave y seco. No utilice soluciones de limpieza. La supercie de la tela puede
lavarse con un paño húmedo y agua jabonosa. Deje secar al aire. No utilice blanqueantes. No sumerja el espejo
en el agua.
Por el bien de la salud y seguridad de su hijo. ¡ATENCIÓN! Este producto no es un juguete y es para uso
exclusivo de adultos. Mantenga todas las piezas, incluido el embalaje, fuera del alcance de los niños. No ajuste
nunca el espejo mientras está conduciendo. Compruebe la sujeción con regularidad para asegurar que se
encuentra bien jado. No lo sujete al anclaje de amarre del vehículo si hay instalado un asiento de seguridad
para niños con el mismo anclaje de amarre. Mantenga el espejo fuera del alcance de bebés y de la luz del sol
directa. Siga siempre las indicaciones del fabricante de los asientos del coche para una correcta instalación y
posicionamiento del asiento de seguridad infantil. No lo manipule mientras conduce. Verique siempre que
el espejo está bien asegurado. Compruebe frecuentemente. Deseche y reemplace si está dañado. Corte las
sujeciones de plástico con unos alicates para cortar alambre y deseche las piezas. Deseche las pilas usadas
inmediatamente. Mantenga las pilas nuevas y usadas fuera del alcance de los niños. Si cree que pueden haberse
tragado o introducido pilas en alguna parte del cuerpo, busque atención médica inmediata. Lea y guarde el
envoltorio para consultas futuras.
DE. INFORMATIONEN ZU DEN BATTERIEN
Verwenden Sie keine alten und neuen Batterien oder unterschiedliche Batterietypen gleichzeitig. Verwenden Sie
keine Alkalibatterien, Standard (Zink-Kohle) Batterien oder wiederauadbare (Nickel-Cadmium, Lithium-Ionen)
Batterien gemeinsam. Laden Sie keine nicht-wiederauadbaren Batterien. Entsorgen Sie das Produkt nicht
in einem Feuer. Die darin enthaltenen Batterien können explodieren oder auslaufen. Legen Sie die Batterien
korrekt gepolt, wie im Batteriefach angegeben, ein. Schließen Sie nie Batterieklemmen kurz. Verwenden Sie
nur Batterien derselben oder einer gleichzuhaltenden Type, wie empfohlen. Entfernen Sie die Batterien, wenn
Sie das Gerät längere Zeit über nicht verwenden. Entfernen Sie immer leergelaufene Batterien aus dem Gerät.
Entsorgen Sie die Batterien sicher und korrekt. Wiederauadbare Batterien müssen aus dem Gerät entfernt
werden, bevor sie wieder aufgeladen werden. Wiederauadbare Batterien dürfen nur unter Aufsicht eines
Erwachsenen wieder aufgeladen werden. Nicht in Wasser oder andere Flüssigkeiten tauchen.
REINIGUNG:
Wischen Sie den Spiegel mit einem weichen, trockenen Tuch ab. Verwenden Sie keinerlei Reinigungslösungen.
Die Oberäche des Gewebes kann mit einem Feuchttuch und mit Wasser mit ein wenig Seife gereinigt werden.
Lufttrocknen. Kein Bleichen. Den Spiegel nicht in Wasser tauchen.
Für die Sicherheit und Gesundheit Ihres Kindes. WARNUNG! Dieses Produkt ist kein Spielzeug und ist nur zur
Verwendung durch Erwachsene geeignet. Bewahren Sie alle Teile, einschließlich der Verpackung, außerhalb der
Reichweite von Kindern auf. Stellen Sie den Spiegel nie während der Fahrt ein. Überprüfen Sie regelmäßig den Sitz,
um den sicheren Halt zu gewährleisten. Befestigen Sie das Gerät nicht an der Gurthalteverankerung, solange der
Kindersicherheitssitz an der betreffenden Gurthalteverankerung befestigt ist. Halten Sie den Spiegel außerhalb der
Reichweite von Babys und setzen Sie ihn nicht direkter Sonneneinstrahlung aus. Befolgen Sie immer die Anweisungen
des Fahrzeugherstellers hinsichtlich der korrekten Anbringung und Positionierung des Kindersicherheitssitzes. Bedienen
Sie ihn nicht, während Sie fahren. Stellen Sie immer sicher, dass der Spiegel ordnungsgemäß gesichert ist. Überprüfen
Sie dies häug. Entfernen und ersetzen Sie den Spiegel, wenn er schadhaft ist. Schneiden Sie die Plastikapplikationen
mit einem Drahtschneider ab und entsorgen Sie die Teile. Entsorgen Sie gebrauchte Batterien unverzüglich. Halten Sie
neue und gebrauchte Batterien außerhalb der Reichweite von Kindern. Wenn Sie den Verdacht haben, dass Batterien
verschluckt worden sein könnten oder in irgendeine Körperöffnung gelangt sein könnten, suchen Sie unverzüglich einen
Arzt auf. Lesen Sie und heben Sie die Verpackung zum späteren Nachlesen auf.
NL. INFORMATIE OVER DE BATTERIJEN
Meng geen oude en nieuwe batterijen of verschillende typen batterijen met elkaar. Meng geen alkaline,
standaard (koolstof-zink) of oplaadbare (nikkel-cadmium, lithium-ion) batterijen met elkaar. Probeer nooit om
niet-oplaadbare batterijen op te laden. Plaats de batterijen in de juiste polariteitspositie, zoals aangegeven
in het batterijvak. Voorkom kortsluiting van de batterijpolen. Gebruik alleen batterijen van hetzelfde of een
vergelijkbaar type, zoals aanbevolen. Verwijder de batterijen als ze lange tijd niet gebruikt worden. Verwijder
altijd lege batterijen uit het product. Voer de batterijen veilig en op de juiste wijze af. Oplaadbare batterijen
moeten worden verwijderd voordat ze opgeladen worden. Oplaadbare batterijen mogen alleen onder toezicht
van een volwassene opgeladen worden. Niet in water of andere vloeistoffen onderdompelen.
REINIGING:
Veeg de spiegel schoon met een zachte, droge doek. Gebruik geen schoonmaakmiddelen. De stof kan op het
oppervlak worden gewassen met een vochtige doek en een mild sopje. Aan de lucht drogen. Niet bleken. De
spiegel niet onderdompelen in water.
Voor de veiligheid en het welzijn van uw kind. WAARSCHUWING! Dit product is geen speelgoed en is
alleen bedoeld voor gebruik door een volwassene. Houd alle onderdelen inclusief de verpakking buiten het
bereik van kinderen. De spiegel mag niet worden afgesteld tijdens het rijden. Controleer regelmatig op een
stevige bevestiging. Niet aan de tuiverankering van het voertuig bevestigen als het kinderzitje aan dezelfde
tuiverankering is geïnstalleerd. Houd de spiegel buiten bereik van de baby en buiten direct zonlicht. Volg altijd
de aanwijzingen van de fabrikant van het kinderzitje voor de juiste installatie en positie van het kinderzitje.
Bedien de spiegel niet als u zelf achter het stuur zit. Controleer altijd of de spiegel goed is bevestigd.
Regelmatig controleren. Het product bij beschadigingen afvoeren en vervangen. Knip de plastic bevestigingen
los met een tang en gooi de stukjes weg. Voer de gebruikte batterijen onmiddellijk af. Houd nieuwe en
gebruikte batterijen uit de buurt van kinderen. Schakel direct medische hulp in als u vermoedt dat batterijen
mogelijk zijn ingeslikt of in een lichaamsdeel terecht zijn gekomen. Lees en bewaar de verpakking voor naslag in
de toekomst.
PT. INFORMAÇÃO SOBRE PILHAS
Não misture as pilhas novas e as antigas ou pilhas de tipos diferentes. Não misture pilhas alcalinas, normais
(carbono-zinco), ou recarregáveis (níquel-cádmio, íon de lítio). Não carregue pilhas não recarregáveis. Insira as
pilhas na posição correcta em termos de polaridade conforme indicado no compartimento de pilhas. Nunca
provoque curto-circuitos em terminais de pilhas, Utilize apenas pulhas do mesmo tipo ou equivalentes conforme
recomendado. Remova as pilhas em períodos longos de não utilização. Remova sempre as pilhas gastas do
produto. Elimine as pilhas de forma segura e adequada. As pilhas recarregáveis devem ser removidas antes de
serem carregadas. As pilhas recarregáveis só devem ser carregadas sob supervisão de um adulto. Não mergulhe
em água ou outros líquidos.
PARA LIMPAR:
Limpe o espelho com um pano macio e seco. Não utilize soluções de limpeza. O tecido pode ser lavável na
superfície com um pano húmido e detergente suave. Seque ao ar. Não utilize lixívia. Não mergulhe o espelho
na água.
Pour la sécurité et la santé de votre enfant. AVERTISSEMENT ! Este produto não é um brinquedo e destina-se
apenas a utilização por parte de um adulto. Mantenha todas as peças, incluindo a embalagem, afastadas da
criança. Nunca ajuste o espelho enquanto está a conduzir. Verique regularmente a xação para se certicar
da segurança da mesma. Não xe a cabo de xação do veículo se a cadeirinha de segurança da criança estiver
instalada no mesmo cabo de xação. Mantenha o espelho fora do alcance do bebé e da luz directa do sol. Siga
sempre as instruções do fabricante do assento do carro para uma correcta instalação e posição da cadeira de
segurança da criança. Não manuseie enquanto conduz. Verique sempre se o espelho está devidamente xado.
Verique regularmente. Elimine e substitua se estiver danicado. Corte as xações plásticas com cortador de
os e elimine as peças. Elimine as pilhas utilizadas imediatamente. Mantenha as pilhas novas e utilizadas fora
do alcance das crianças Se pensa que pode existir a possibilidade de as pilhas terem sido engolidas ou estarem
numa parte do corpo, procure imediatamente ajuda médica. Leia e mantenha a embalagem para
futura referência.
Page 10

RU. ПРЕДУПРЕЖДЕНИЕ
RU. ИНФОРМАЦИЯ ОБ ИСПОЛЬЗОВАНИИ БАТАРЕЕК
Не используйте вместе старые и новые батарейки, а также батарейки разных типов. Не используйте
вместе щелочные, стандартные (угольно-цинковые) и перезаряжаемые (никель-кадмиевые, литийионные) батарейки. Не заряжайте неперезаряжаемые батарейки. Вставляйте батарейки с соблюдением
полярности, как указано внутри батарейного отсека. Не замыкайте клеммы батареек. Используйте
только батарейки рекомендованного типа или эквивалентные. Вынимайте батарейки перед
длительными периодами неиспользования. Всегда вынимайте отработавшие батарейки из изделия.
Утилизируйте батарейки надлежащим образом. Вынимайте перезаряжаемые батарейки перед зарядкой.
Перезаряжаемые батарейки должны всегда заряжаться под присмотром взрослых. Не погружайте
батарейки в воду и другие жидкости.
ОЧИСТКА
Вытирайте зеркало мягкой сухой тканью. Не используйте чистящие средства. Тканевые элементы можно
протирать тканью, смоченной в слабом мыльном растворе. Сушите на воздухе. Не отбеливайте. Не
погружайте зеркало в воду.
Для безопасности и здоровья ребенка. ПРЕДОСТЕРЕЖЕНИЕ! Данное изделие не является игрушкой
и предназначено только для использования взрослыми. Держите все элементы, включая упаковку,
вне досягаемости детей. Никогда не регулируйте зеркало во время вождения. Регулярно проверяйте
надежность фиксации зеркала. Не крепите зеркало к скобе для страховочного ремня автокресла, если к
ней уже прикреплен страховочный ремень. Держите зеркало вне досягаемости детей и вне зоны действия
прямых солнечных лучей. Всегда следуйте инструкциям производителя автокресла по установке и
размещению автокресла. Не взаимодействуйте с зеркалом во время вождения. В случае повреждения
утилизируйте и замените. Разрежьте пластиковые элементы с помощью кусачек и утилизируйте их
части. Сразу же утилизируйте отработавшие батарейки. Держите новые и отработавшие батарейки вне
досягаемости детей. Если вы подозреваете, что ребенок проглотил батарейку или поместил ее внутрь
какой-либо части тела, немедленно обратитесь за медицинской помощью. Ознакомьтесь с информацией
на упаковке и сохраните ее для обращения в будущем.
Page 11

Customer Service | Service clientèle | Atención al cliente | Kundenservice
Klantenservice | Serviço de apoio ao cliente | Поддержка клиентов
CARELINE@MUNCHKIN.COM
ITEM NUMBER: 011092
MODEL NUMBER: MKTR0465 Rev2
PRODUCT AND DESIGN ARE TM & ©2017 MUNCHKIN, INC. CA 91406. IMPORTED BY LINDAM LTD (THE EUROPEAN
DIVISION OF MUNCHKIN INC), SUITE 1A1, CENTRAL HOUSE, OTLEY ROAD, HARROGATE, HG3 1UF, ENGLAND. MADE
IN CHINA. MUNCHKIN, THE HEART LOGO, IT’S THE LITTLE THINGS AND WE KNOW JOURNEYS ARE TRADEMARKS OR
REGISTERED TRADEMARKS OF MUNCHKIN, INC. 011092-IB01-1(A)
 Loading...