

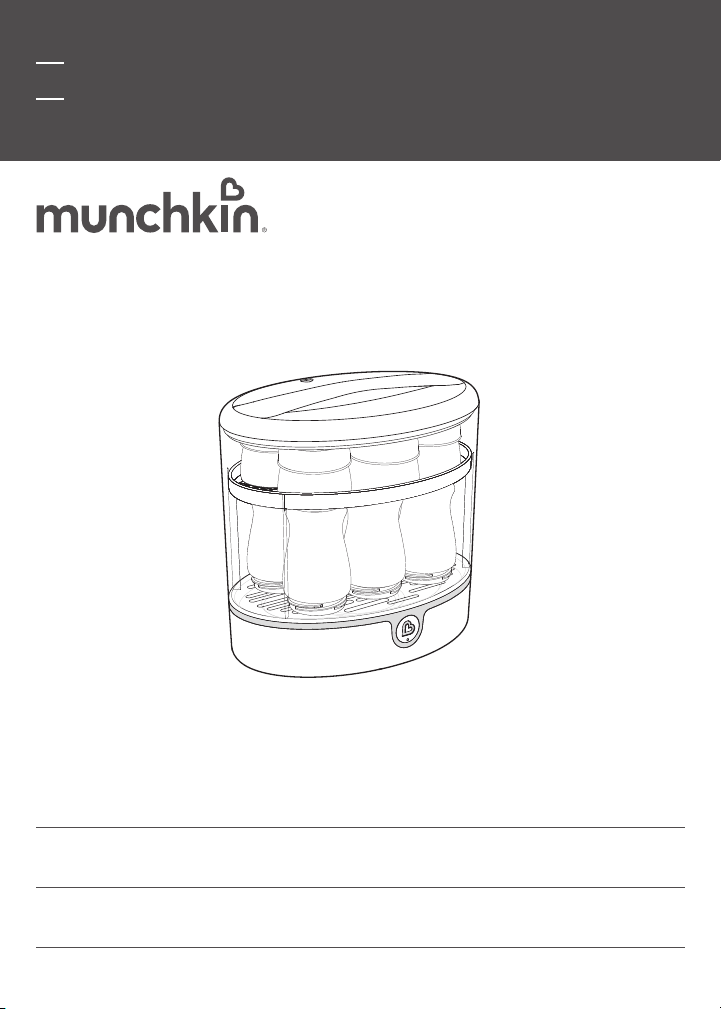
Munchkin Clean Electric Sterilizer Owner's Manual
Owner’s Guide
Manual del Usuario
Notice d’utilisation
Munchkin® Clean™ Electric Sterilizer
Esterilizador Eléctrico Clean
Stérilisateur électrique Clean
™
™
MKCL0573 Rev 1
KEEP FOR FUTURE REFERENCE
Please read the instructions carefully before using this product.
GUARDE PARA FUTURA REFERENCIA
Lea las instrucciones detenidamente antes de usar este producto.
À CONSERVER POUR CONSULTATION FUTURE
Veuillez lire attentivement ces instructions.
CCD-198-000 Rev 1
Contents | Contenido | Contenu Contents | Contenido | Contenu
IMPORTANT INFORMATION
Introduction ........................................................................................................................................... 4
Warnings ................................................................................................................................................ 4
HOW TO USE
Included Parts ....................................................................................................................................... 8
Using the Sterilizer .............................................................................................................................. 9
Cool Down............................................................................................................................................ 10
Removing Items ................................................................................................................................. 10
Daily Maintenance .............................................................................................................................. 11
Self-cleaning/Descaling ..................................................................................................................... 11
Power Button Operation ...................................................................................................................12
Trouble-Shooting Guide ....................................................................................................................14
CUSTOMER SERVICE
One Year Limited Warranty ..............................................................................................................15
Contact Us ........................................................................................................................................... 16
INFORMACIÓN IMPORTANTE
Introducción ........................................................................................................................................ 18
Precauciones Importantes ............................................................................................................... 18
CÓMO USAR
Piezas Incluidas ..................................................................................................................................22
Cómo Usar El Esterilizador ..............................................................................................................23
Enfriamiento ....................................................................................................................................... 24
Para Retirar Los Artículos .................................................................................................................24
Mantenimiento Diario ....................................................................................................................... 25
Limpieza Automática / Cómo Quitar El Sarro De La Base Del Esterilizador ........................25
Operación Del Botón De Encendido ..............................................................................................27
Guía De Resolución De Problemas ................................................................................................29
RENSEIGNEMENTS IMPORTANTS
Introduction .........................................................................................................................................34
Précautions..........................................................................................................................................34
MODE D’EMPLOI
Pièces comprises ...............................................................................................................................38
Utilisation du stérilisateur ...............................................................................................................39
Refroidissement .................................................................................................................................40
Retrait des articles .............................................................................................................................40
Entretien quotidien.............................................................................................................................41
Auto-nettoyage / Détartrage de la base du stérilisateur ..........................................................41
Fonctions du bouton d’alimentation .............................................................................................43
Résolution de problèmes .................................................................................................................45
SERVICE À LA CLIENTÈLE
Garantie limitée d’un an...................................................................................................................46
Contactez-nous ..................................................................................................................................47
SATISFACCIÓN DEL CLIENTE
Garantía Limitada De Un Año .........................................................................................................30
Contáctenos .........................................................................................................................................31
2 3

Important Information Important Information
INTRODUCTION
Thank you for choosing Munchkin® to help protect your family’s health.
Your Munchkin Clean™ Electric Sterilizer kills 99.9% of common bacteria by using the
natural power of steam—without any chemicals. The sterilizer will keep bottles sterile
for up to 24 hours, provided that the lid is not removed.
WARNINGS
WARNING!: Strangulation hazard!
• Always keep the electric sterilizer and its plug out of reach of small children.
• Close supervision is necessary when any appliance is used near children.
• This appliance is not intended for use by persons (including children) with reduced
physical, sensory or lack of experience and knowledge unless they have been given
supervision or induction concerning the use of the appliance by a person responsible
for their safety.
• Children should be supervised to ensure they do not play with the appliance.
• This is NOT a toy. Children shall not play with the appliance.
• HOUSEHOLD USE ONLY. Not for space heating purposes.
CAUTION!: Hot surface. Avoid contact with the lid.
This appliance has a polarized plug (one blade is wider than the other). To reduce the risk
of electric shock, this plug is intended to fit in a polarized outlet only one way. If the plug
does not fit fully in the outlet, reverse the plug. If it still does not fit, contact a qualified
electrician. Do not modify the plug in any way. Please contact your retailer or suitably
qualified person if the power cord shows signs of damage.
1. The shorter power cord will help reduce the risk of entanglement or tripping over
a longer cord.
2. Extension cords are available and may be used if care is exercised in
their use.
3. If an extension cord is used:
a. The marked electrical rating of the detachable power-supply cord or extension
cord should be at least as great as the electrical rating of the appliance,
b. If the appliance is of the grounded type, the extension cord should be a
grounding-type 3-wire cord, and
c. The longer cord should be arranged so that it will not drape over the counter-
top or tabletop where it can be tripped over, snagged, or pulled on unintentionally (especially by children).
Changes or modifications not expressly approved by the party responsible for compliance
could void the user’s authority to operate the equipment.
When using electrical appliances, basic safety precautions should always be followed
including the following:
• Read all instructions.
• Check the voltage that is indicated on the appliance corresponds to the local voltage
before connecting the appliance.
• Ensure your sterilizer is placed on a firm and even surface when in use.
• Do not place on or near a hot gas or electric burner or in a heated oven.
• Do not let cord hang over edge or table or counter; or touch hot surface.
• Never move or open the unit when in use as this product contains boiling water.
• Use CAUTION when removing the lid as hot steam escaping from the vents can
cause burns.
• Do not cover the vent.
• Never place items on top of the sterilizer.
• Take care when opening, as the handles will be hot.
• Do not turn on the sterilizer without adding water. Operating a dry heating element may
damage the unit.
• Always add 120ml / 4oz of water before sterilizing. Too little or too much water in sterilizer will not operate correctly.
• If you do ever need to stop the sterilizer mid-cycle, press and hold the power button to
switch off anytime (contents will not be sterile).
• Always unplug from the wall when not in use. Allow to cool before putting on or taking
off any parts.
• Do not use appliance other than intended use.
• Do not use outdoors.
• DO NOT attempt to dismantle or repair the sterilizer unless done by a qualified person
or an authorized service agent. Damaged supply cord or parts must be replaced by the
manufacturer or authorized service agent to prevent any injuries and hazards.
• Cleaning and user maintenance shall not be made by children without supervision.
• Do not wipe the heating element if it is still hot.
4 5

Important Information Important Information
• Do not use abrasive cleaning brush/sponge to clean the heating plate.
• Do not use chemical solutions or bleach in sterilizer to clean the unit.
• Do not pour excess water out of the base. Wipe dry with clean cloth.
• DO NOT IMMERSE cord or plug or sterilizer base in water or other liquid when cleaning.
• Do not place any items into the sterilizer during the self-clean cycle.
• Do not sterilize very small parts, which can fall through the holes of the containers.
• Only sterilize products that have been approved for sterilization.
• Use only distilled water, bottled water or fresh running water to sterilize.
Never use additives.
• Always clean and rinse bottles and items before placing them in the sterilizer.
• Never use sterilizer without Lid or Bin. Objects placed directly on the Heating Plate will
cause damage to the object and the plate.
• Do not use for purposes other than those outlined in this user guide.
• SAVE THESE INSTRUCTIONS
NOTE: This equipment has been tested and found to comply with the limits for a Class B
digital device, pursuant to Part 15 of the FCC Rules. These limits are designed to provide
reasonable protection against harmful interference in a residential installation. This equipment generates, uses and can radiate radio frequency energy and, if not installed and
used in accordance with the instructions, may cause harmful interference to radio
communications.
However, there is no guarantee that interference will not occur in a particular installation.
If this equipment does cause harmful interference to radio or television reception, which
can be determined by turning the equipment off and on, the user is encouraged to try to
correct the interference by one or more of the following measures:
• Reorient or relocate the receiving antenna.
• Increase the separation between the equipment and receiver.
CAN ICES-3(B)/NMB-3(B)
Clean Electric Sterilizer
Model Number MKCL0573 Rev 1
120VAC, 60Hz, 1000W
• Connect the equipment into an outlet on a circuit different form that to which the
receiver is connected.
• Consult the dealer or an experienced radio/TV technician for help.
This device complies with Part 15 of the FCC Rules. Operation is subject to the following
two conditions: (1) this device may not cause harmful interference, and (2) this device
must accept any interference received, including interference that may cause
undesired operation.
6 7
How to Use How to Use
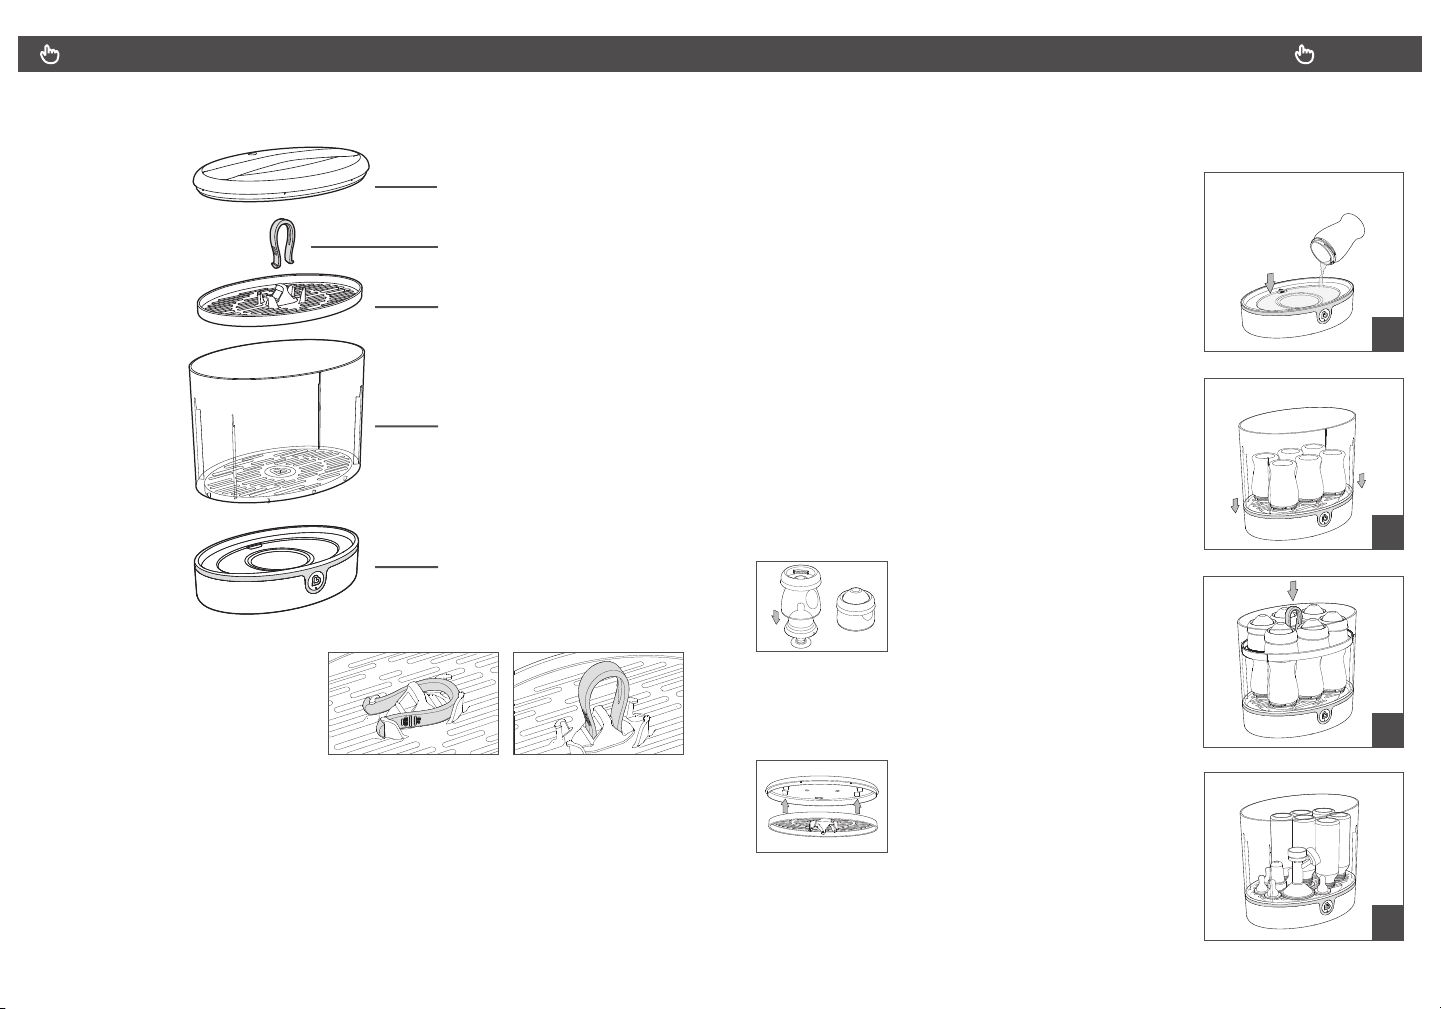
INCLUDED PARTS
TIP: The tongs fi t into the accessory
tray for storage and also for
sterilization.
LID WITH HANDLE
TONGS
ACCESSORY TRAY
BIN
BASE
USING THE STERILIZER
Before fi rst use, please follow the directions below to run the sterilizer once while empty.
1. Use a clean baby bottle to measure 4oz / 120ml of
distilled water.
Pour this water into the center of the sterilizer base up to
the fi ll line. Do not overfi ll. Avoid splashing water over
the sides.
2. Place the bin onto the sterilizer base. Wash bottles and
accessories thoroughly in warm soapy water and rinse
before placing them in the sterilizer.
Arrange bottles upside down. The bin can hold up to 6
wide-mouth bottles or up to 9 standard bottles.
3. Use the accessory tray if sterilizing shorter, wide-mouth
bottles. Place the accessory tray above the bottles.
TIP: Stack accessories on the tray
in this order to optimize space.
4. If using taller, standard-sized bottles, place nipples and
accessories into the bin along with the bottles.
1
2
3
TIP: If not needed, turn the access-
Storage Sterilization
8 9
ory tray upside down and attach to the
underside of the lid.
4

How to Use How to Use
DAILY MAINTENANCE
5. Place the lid onto the bin with the vent near the rear
side of the sterilizer. Plug the power cord into an
electrical outlet.
TIP: Check the voltage that is indicated on the
appliance corresponds to the local voltage before
connecting the appliance.
6. Press the power button 1 time to begin sterilizing.
The power button and light ring will turn on blue
during this cycle.
The items will be sterilized in approximately 6 minutes.
The cycle may take longer if excess water is present or
with a lighter load.
COOL DOWN
7. Once sterilization is complete, the base will beep twice
and automatically begin a 10-minute cool down cycle.
The blue LED on the light ring will pulse on and off
during this cycle.
Once cool down is complete, the sterilizer
will beep 3 times and then turn off.
REMOVING ITEMS
8. Remove the lid after the cool down cycle is complete.
You can use the included tongs to lift the accessory tray
and to remove the bottles and other items.
After each use, make sure the unit is unplugged and cool to touch before wiping off any
excess water. The sterilizer features an easy-pull plug, as well as space on the underside of
the base for cord management. DO NOT pour excess water out of the base. Wipe dry with a
clean cloth.
PLEASE NOTE: Any chalky residue that comes off the heating element is likely lime scale
resulting from mineral content in the water.
5
DO NOT immerse the sterilizer base in water. Only the bin, lid, tongs and accessory tray are
top-rack dishwasher safe.
SELFCLEANING / DESCALING THE STERILIZER BASE
Your sterilizer has an easy-to-clean ceramic heating element. However, as with any appliance
that heats water, scaly deposits such as lime scale or other minerals may build up on
the base.
6
7
Run the self-clean process at least once a week to descale the sterilizer.
1 2
1. Pour 4oz of recommended cleaning
solution into the center of the sterilizer
base up to the fi ll line.
2. Place the bin and lid on the sterilizer
base. Plug the unit into an electrical
outlet. Now you’re ready to clean
and descale.
CAUTION!:Take care when
removing the lid. Hot steam will escape.
10 11
8
How to Use How to Use
RECOMMENDED CLEANING SOLUTIONS
Option 1:
2oz / 60ml distilled water
+ 2oz / 60ml vinegar
Option 2:
4oz / 120ml distilled water
+ 1 tsp citric acid powder
CAUTION!: DO NOT place any items into the
sterilizer during the self-clean cycle.
3. Press the power button 1 time, then double-click the
power button within 5 seconds to begin self-cleaning.
The power button will glow yellow during this
3-minute cycle.
Once self-cleaning is complete, the base will beep twice
and automatically begin a 5-minute cool down cycle.
The light ring will pulse on and off during this cycle.
Once cool down is complete, the sterilizer will beep 3 times and then turn off.
4. Unplug the power cord and wipe off remaining moisture from the sterilizer.
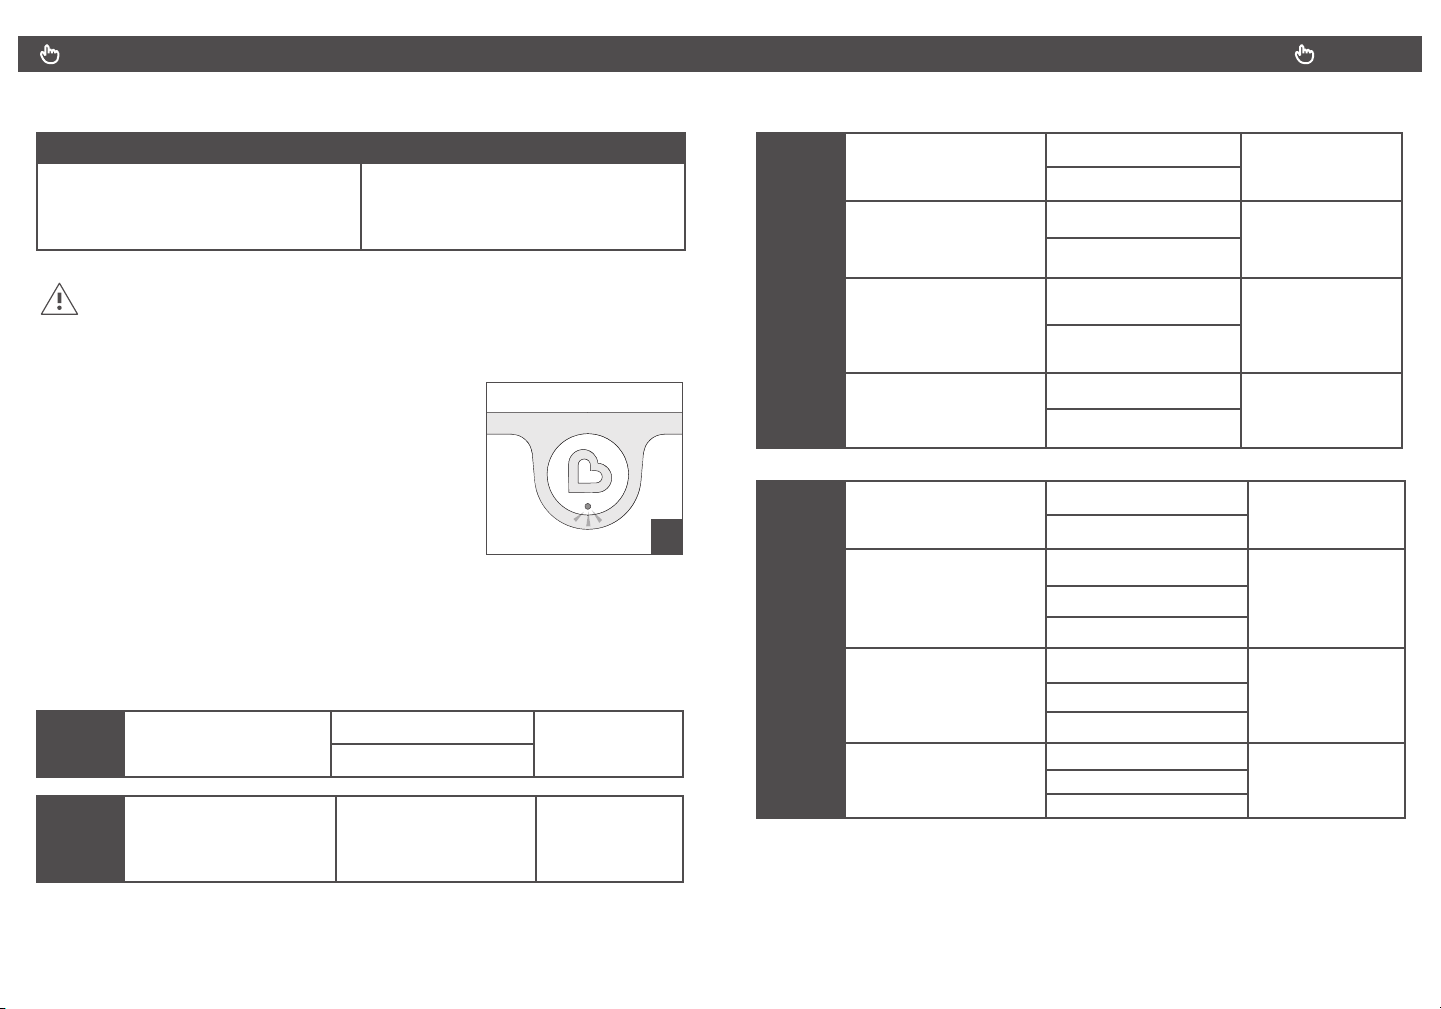
POWER BUTTON OPERATION
ON
OFF
Press 1 time to turn on unit.
Press and hold 1 time to
turn unit o . The unit can be
turned o at anytime during
operation.
Power button blue light on
Light ring blinks 1 time
All lights turn o Beep x 1
Beep X 1
A. Press 1 time to turn on
the unit.
B. A er 5 seconds, the
unit will start Steam Cycle
automatically.
STEAM
CYCLE
3
SELF
C. Once steam cycle is
completed 10 min cool
down starts automatically.
D. A er 10 minute cool
down, the unit turns o
automatically.
A. Press one time to turn on
the unit.
B. Double-click the power
button within 5 seconds to
start Self-Clean cycle (about
3 min).
CLEAN
CYCLE
C. Once Self-Clean cycle is
completed 5 min cool
down starts automatically.
D. A er 5 minute cool
down the unit turns o
automatically.
Power button blue light on
Light ring blinks 1 time
Power button blue light on
Light ring on
Power button light on
Light ring pulse on and o
Power button light o
Light ring o
Power button light on
Light ring blinks 1 time
Power button blue light o
Power button yellow light on
Light ring on
Power button light o
Power button yellow light o
Light ring pulse on and o
Power button light o
Power button yellow light o
Light ring o
Beep x 1
Beep x 1
Beep x 2
Beep x 3
Beep x 1
Beep x 1
Beep x 2
Beep x 3
12 13

Customer Service Customer Service
How to Use
TROUBLE SHOOTING GUIDE
Why is the sterilizer not working?
• Check that the power cord is plugged in to an electrical outlet.
• Use only 120 volt power for North America.
Why is the sterilizer taking a long time to complete?
• Any excess water will increase cycle time. Measure and pour exactly 4oz (120ml)
of water into the sterilizer base. Remove all remaining water after each use.
• Underloading the sterilizer (e.g., only 2 bottles) will increase the cycle
time slightly.
Why is the sterilizer switching off too soon?
• Not enough water is being used. Measure and pour exactly 4oz (120ml) of
water each time.
• Pour the water directly onto the heating plate without splashing over
the surrounding plastic.
Why are there white spots in the base, the bin or the lid?
• Scale build-up is normal and occurs more quickly in hard water areas. We
recommend using distilled water and to use the self-clean mode to help
clean/descale the mineral build up.
ONE YEAR LIMITED WARRANTY
Munchkin’s Clean™ Electric Sterilizer includes a 1-year limited warranty against defects
from the date of purchase. In the event of a malfunction or defect during the in-warranty
period, Munchkin, Inc. at its option, will replace or repair the product under warranty.
Upon receipt of the product and proof of purchase with a valid date of purchase, the
defective part will be immediately repaired or replaced and returned to you free of charge
(USA only). Please send defective unit, proof of purchase and a description of the problem
you have encountered to:
Munchkin, Inc.
7835 Gloria Avenue
Van Nuys, CA 91406, USA
Attn: Clean™ Electric Sterilizer Warranty
NOTE: This warranty does not cover misuse, abuse, abnormal wear & tear, negligence,
environmental exposure, alteration or accident. Any alteration or removal of the product
date code invalidates all claims against the manufacturer.
14
15
 Loading...