

USER GUIDE
FOR ALPHANUMERIC
RECEIVER FLA 870 AND
SECURE PAGING VARIANTS
9261-6366 iss 2 21/11/02 9:04 am Page 1

9261-6366 iss 2 21/11/02 9:04 am Page 2
FCC Statement Of Compliance
This device complies with FCC Part 15 regulations.
Operation is subject to the following two conditions:(1) this device may not cause harmful interference and
(2) this device must accept any interference received,
including interference that may cause undesired operation.
Unauthorised modification to this equipment, will void the
user’s authority to operate the device under the terms of
the above regulations.

Contents
Introduction and Getting Started .................. 1
Switching the Pager On ................................ 1
Status and Operating Symbols .................... 2
Setting the Time and Date ............................ 4
Setting the Alarm .......................................... 6
Selecting the Alert ........................................ 8
Selecting Display Options .......................... 10
Receiving a Message ..................................11
Reviewing Stored Messages ...................... 12
Archiving Messages .................................. 13
Reviewing Archived Messages ....................14
Deleting a Message ....................................15
Deleting all Messages ................................15
Reviewing information Service messages .. 17
Secure Messaging Options ........................ 18
Z-Page: Activation and Protection .............. 19
Reading Z-Page Messages ........................ 19
Z-Page: Notes of Caution .......................... 20
(i)
9261-6366 iss 2 21/11/02 9:04 am Page 3

KeyPage Operation .................................... 21
KeyPage Message Access.......................... 22
KeyPage PIN Changes................................ 23
KeyPage PIN Reset .................................... 24
KeyPage Barred Access ............................ 24
Caring for your Pager ................................ 25
Fault-Finding .............................................. 25
(ii)
9261-6366 iss 2 21/11/02 9:04 am Page 4

Introduction and Getting Started
Congratulations on selecting the FLA870
alphanumeric pager from Multitone. Your
pager has all the features you expect from a
top class product yet it retains simplicity of
operation through the superbly designed user
interface and icon menu selection. This guide
will describe the operation of the product and
ensure that you receive the full benefits of
paging with the FLA870.
On the back of your pager you will find the
battery cover. Slide the cover in the direction
of the arrow to remove. Insert the battery
matching the +to +.
Carefully slide the cover back into position.
Switching the pager ON
To turn the pager ON press and hold the
•
>
button for one second. A short alert will sound
and the pre programmed Switch On message
will be displayed.
1
9261-6366 iss 2 21/11/02 9:04 am Page 5

After one second the time and date will be
shown. This is the standby display.
Standby Screen
Status and Operating Symbols
The standby display shows the current time
and date. It also shows if there are unread
messages, whether audible or vibrate alert is
selected and, if appropriate, gives low battery
and out of Range warnings by displaying the
following symbols:
Status Symbols
14 : 24 20. 02. 00
14 : 26 20. 02. 00
2
9261-6366 iss 2 21/11/02 9:04 am Page 6
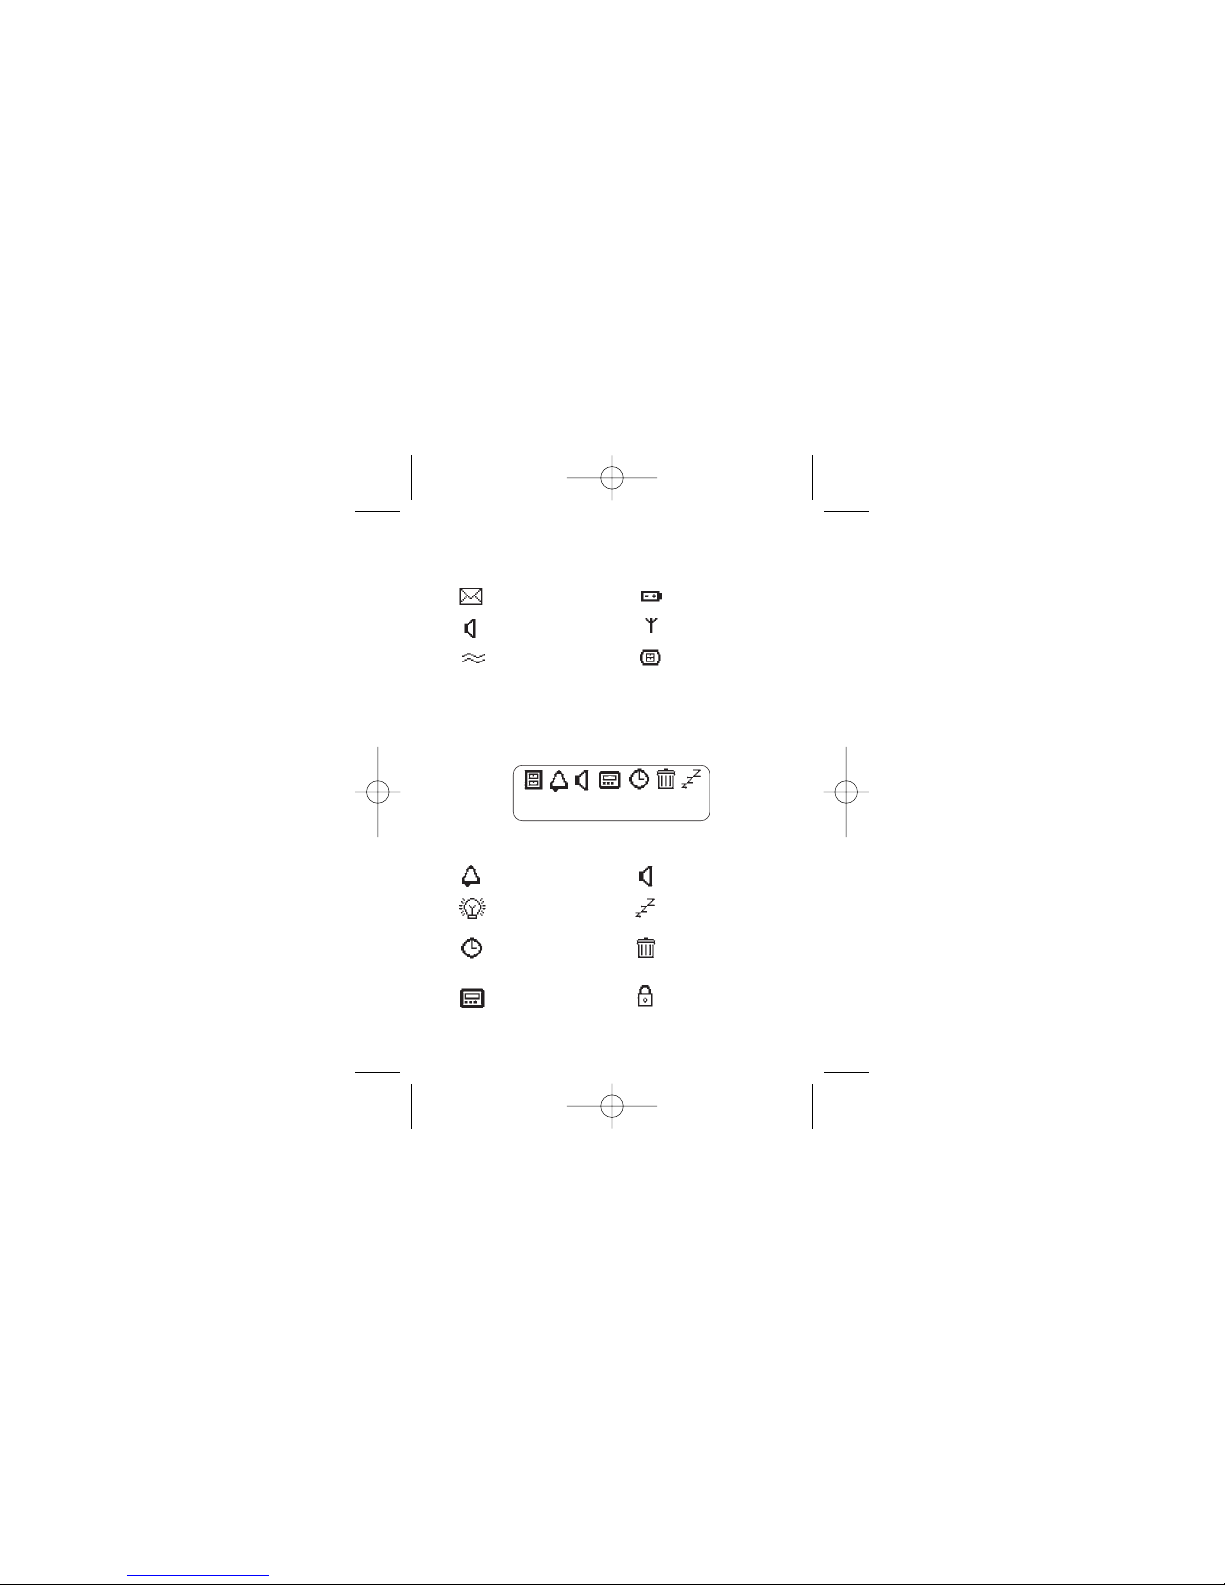
The status symbols are as follows:
Unread Messages Low Battery
Audible Alert Out-of-Range
Vibrate Memory Full
From the standby display press
•
>
to enter
the pager options screen. The following
symbols are displayed:-
Pager Option Screen
Alarm Function Alert Selection
Backlight Off
Time Setting and Delete All
Timed Off Setup Messages
Pager Menu Secure Pin
Options entry
3
9261-6366 iss 2 21/11/02 9:04 am Page 7
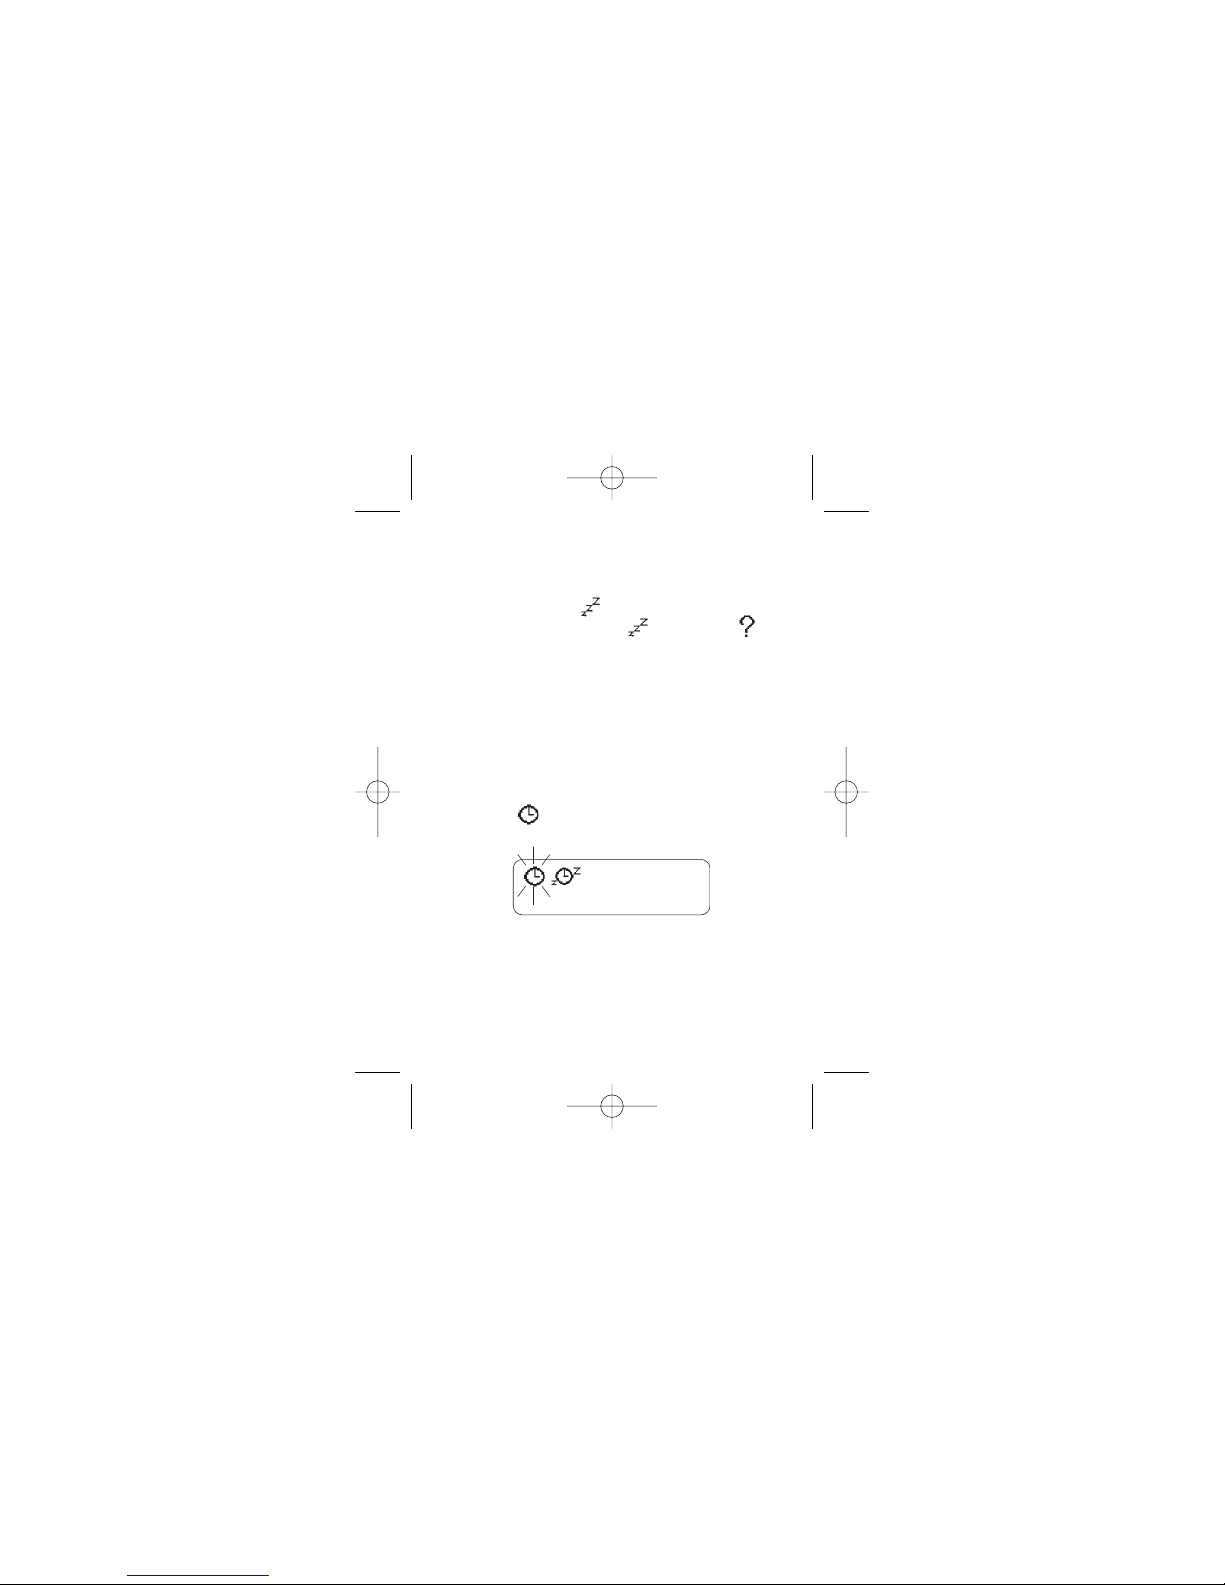
To turn the pager OFF press
•
>
to show the
pager options and then press < or >
several times until is flashing. Press
•
>
and the display will show plus flashing .
Press
•
>
again to turn the pager off.
Setting the Time and Date
The pager standby screen will normally show
the time and date. To set the current time and
date press
•
>
once to display the pager
options and then press < or > several times
until the flashes. Press
•
>
twice to display
the time function edit screen.
Time Function Screen
The clock symbol will flash. To set the clock
press
•
>
and the clock symbol will appear
4
9261-6366 iss 2 21/11/02 9:04 am Page 8
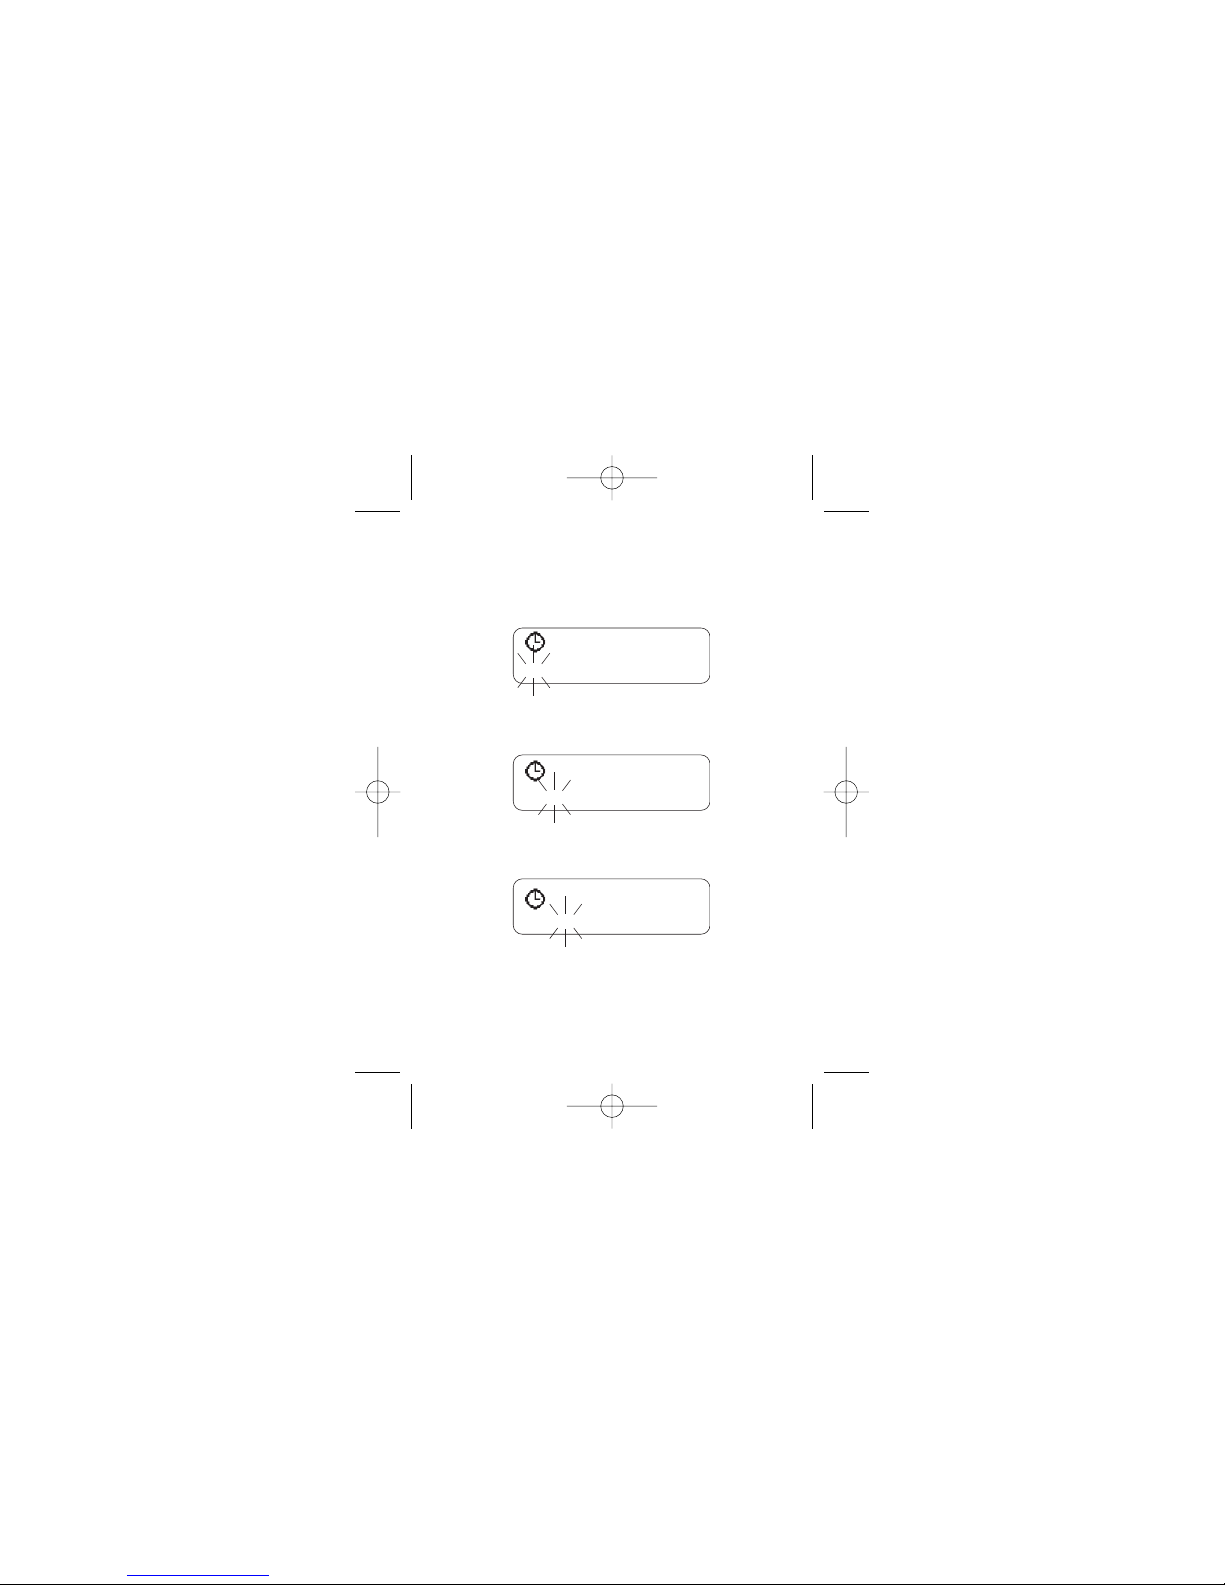
with 12 or 24 hour mode indicated. The hour
will flash and the correct value may be
selected by pressing either < or >.
Once the hour is correct press
•
>
and the
tens of minutes will flash.
Press < or > until the correct number is shown
and then press
•
>
.
Press < or > until the correct number is shown
and then press
•
>
to set the minutes.
5
5 : 27pm 20. 02. 00
12
5 : 27pm 20. 02. 00
12
5 : 27pm 20. 02. 00
12
9261-6366 iss 2 21/11/02 9:04 am Page 9
The date is set with the same method.
Once the display shows the correct time and
date the 12 or 24 hour mode can be selected
by pressing the < or > buttons to change as
required.
Press and hold
•
>
for one second to return
the pager to the standby screen.
Setting the Pager Alarm
The pager has a daily alarm feature and it may
be set by pressing the
•
>
to show the pager
options and then selecting symbol using <
or > buttons.
Press the
•
>
to display the alarm options
screen.
6
24
17 : 27 20. 02. 00
9261-6366 iss 2 21/11/02 9:04 am Page 10

To turn the alarm on press < or > until
symbol shows and the time that the alarm is
set to sound is displayed.
To turn the alarm off press < or > until
symbol shows and the alarm time is turned
off.
To change the alarm time press
•
>
and the
hour will flash. Press < or > to change the
numbers and when the correct value is set
press
•
>
and the tens of minutes will flash.
Press < or > to change the numbers and
when the correct value is shown press
•
>
.
7
07 : 00
9261-6366 iss 2 21/11/02 9:04 am Page 11

Press < or > until the minutes display is
correct and then press
•
>
for one second to
return to the standby screen.
The display will show indicating that the
alarm is set. When the alarm time is reached
the pager standby screen will show the
flashing and the alert will sound for eight
seconds. Pressing any button within the eightsecond period will stop the alert.
Selecting the Pager Alert
To set the alert on the pager press
•
>
to show
the pager options and then press < or >
several times until symbol is flashing.
Press
•
>
to display the alert options screen
which allows you to select the type of alert
that the pager produces when a call is
8
9261-6366 iss 2 21/11/02 9:04 am Page 12

received. The FLA870 has nine possible alert
settings. These are numbered 0 for no alert, 1
for vibrate alert and 2 to 8 for the seven
audible alerts. Press < or > to change the
alert and the pager gives you a sample of the
numbered alert.
To stop the alert press any button.
If the vibrate alert is required then press the <
or > until the symbol is displayed and the
pager will vibrate for one second. The pager
will now vibrate discreetly when a call is
received.
Once the desired alert has been selected
press
•
>
for one second to return to the
standby screen. In the standby screen the
pager will now show the if an audible alert
has been selected.
9
9261-6366 iss 2 21/11/02 9:04 am Page 13

The symbol will be displayed if the vibrate
alert has been selected and the symbol
will be displayed if the no alert option has
been selected.
It is also possible to toggle rapidly between
the chosen alert and no alert by pressing and
holding the
•
>
button for three seconds.
Selecting Display Options
The user may select the character size, enable
the backlight or alter the display contrast on
the FLA870. From the options screen press <
or > buttons to select and confirm by
pressing
•
>
. The will flash. Toggle
between and by pressing < or >
buttons and select regular or double height
characters by pressing
•
>
.
The symbol will now flash and the
backlight can be chosen to be on or off using
10
9261-6366 iss 2 21/11/02 9:04 am Page 14

the < and > buttons. Confirm the selection by
pressing
•
>
.
Finally the symbol will flash. The > button
can be used to darken the display
background and the < button lightens the
background. When the desired contrast is
obtained, press
•
>
briefly to return to the
character selection option or press and hold
•
>
for two seconds to return to the standby
screen.
Receiving a Message
When receiving a message your pager will
either alert you audibly or vibrate as selected.
The alert will continue for 8 seconds or until
you acknowledge receipt of the message by
pressing any of the buttons on the front of the
pager. The received message will also be
displayed during this initial alert. If you are
away from your pager the alert will continue
for 8 seconds after which the symbol will
11
9261-6366 iss 2 21/11/02 9:04 am Page 15

be shown to indicate you have an unread
message. A reminder alert will sound every 5
minutes during the following hour.
To display the message press the > button. If
the message length exceeds one screen you
can scroll through to the end of the message
by pressing
•
>
. A symbol marks the end
of each message. Each message is time and
date stamped when received. This information
can subsequently be seen when the
messages are reviewed.
Reviewing Stored Messages
When the pager has received a new message
the standby display will show the symbol.
To scroll through received messages starting
with the newest message press >. To read a
particular message select it using < or > and if
the message occupies more than one screen
pressing
•
>
allows subsequent screens to be
viewed.
12
9261-6366 iss 2 21/11/02 9:04 am Page 16

To r eturn to the standby display at any time
press
•
>
for one second.
Once the pager has received 40 messages its
memory will be full and the standby screen will
show the . If a new message is received
when the pager memory is full then the oldest
message will be deleted. However, if there are
no read messages then the oldest unread
message will be deleted.
When the end of message block has been
viewed press
•
>
to enter the message options
screen which contains the message
timestamp.
Archiving messages
Archive messages by transferring them to the
pager archive store. To do this press >
followed by < or > several times to select the
message to be archived and then view the
13
9261-6366 iss 2 21/11/02 9:04 am Page 17

complete message by pressing
•
>
so that the
symbol is seen.
Press
•
>
again to enter the message option
screen and press < or > until the is
flashing. Press
•
>
and the display will show
the plus flashing . Press
•
>
to transfer
the message to the archive memory. If the
archive memory is full will flash and a
message must be deleted from the archive
memory before a new one can be archived.
Reviewing Archived Messages
To view the contents of the archive message
memory starting with the most recent
message press the
•
>
twice. Press < or > to
scroll through the messages. To view a long
message press
•
>
to read subsequent
screens.
14
9261-6366 iss 2 21/11/02 9:04 am Page 18

Deleting Messages
To delete messages from either the pager
message or archive memories first select the
message to be deleted using < or > and then
read the message using the
•
>
button. When
the last screen of the message is displayed
press
•
>
and press < or > until is flashing.
Press
•
>
and the display will show plus
flashing . Press
•
>
to delete the message.
Deleting All Messages
The pager message memory (but not the
archive store) may be completely erased by
pressing
•
>
to show the pager options and
then pressing either the < or > until the is
flashing. Press
•
>
again and the display will
show plus flashing . Press
•
>
to
delete all of the messages.
Timed OFF
The pager may be switched off and on at
preset times (e.g. overnight). To set the off and
15
9261-6366 iss 2 21/11/02 9:04 am Page 19

on times press
•
>
when in the standby display
and then press either < or > until is
flashing. Press
•
>
then press the < or > until
the is flashing. Then press
•
>
to display
timed off edit screen.
To disable the timed off feature press < or >
until the off and on times are not shown.
To enable the timed off feature press < or >
until the off and on times are shown.
The off and on times may be set by pressing
•
>
to select the hours or minutes and < or >
to adjust the values. Once the desired times
are displayed press
•
>
for one second to
return to the pager standby display and the
will show indicating that the timed off
feature is active.
16
9261-6366 iss 2 21/11/02 9:04 am Page 20

Reviewing Information Service
Messages
The Information services menu is reached by
pressing the < button when in the standby
display. Each enabled service has a number
symbol.
Press < or > until the number symbol of the
service you require is flashing then press
•
>
to
display the service message.
To r eview other messages received on the
same service press < or > buttons until the
required message is displayed.
The ‘history depth’ of each service has been
programmed at manufacture to optimise the
memory allocation for the services provided.
To r eturn to the information services menu
press
•
>
repeatedly until the information
service menu is displayed.
To archive an information service message use
the same method as described for archiving
messages.
17
9261-6366 iss 2 21/11/02 9:04 am Page 21

Secure Messaging Options
FLA870 is also available as a secure
messaging pager where encrypted incoming
messages are decrypted, so providing security
in transmission. Such messages can only be
read by entering daily passwords and PINs
into the receiver.
Multitone have produced two secure paging
products:-
1. Z-Page, which can be used for the
transmission of HMG traffic to ‘restricted’ level
using a CESG approved algorithm.
2. KeyPage which uses the Digital Encryption
Standard (DES) algorithm and is intended for
commercial use. KeyPage provides effective
protection from off-air message interception.
Secure pagers do not support Information
Services.
18
9261-6366 iss 2 21/11/02 9:04 am Page 22

Z-Page: Activation and Protection
In order to decrypt and display encrypted
messages your secure pager needs to be
‘validated’ or loaded with its decryption key
before being put into service. Unvalidated
pagers can be used for normal paging only.
On the Z-Pager validation is performed using
a pager programming pocket (P669)
connected to the PC which is to be used to
send the encrypted messages.
Z-Pagers require that a password is entered
once each day. The password is generated by
the host PC at the time of validation. To
access encrypted messages an additional PIN
must be entered at the time of viewing.
Reading Z-Page Messages,
An unread Z-Page message is indicated on
the display by the symbol as for normal
messages however pressing the > key will not
access the Z-Page message. To read the
message press the < button. If the pager is
19
9261-6366 iss 2 21/11/02 9:04 am Page 23

being used for the first time that day then the
display will show two blocks of asterisks. The
first block of 6 asterisks is for the message
access password which must be entered
daily. The second group of 4 asterisks is for
the PIN entry. Use the < and > buttons to
select the first digit. Then press
•
>
and the
second asterisk will flash. Use the < and >
buttons to select the second digit and enter
again by pressing
•
>
. Select and enter the
remaining numbers in the same way. If the
password and PIN have been entered
correctly the pager will decrypt and display the
received messages. As subsequent messages
are received during the day, they can be read
by entering the PIN again.
Notes of Caution
On the Z-Pager only three attempts are
allowed at entering the correct password and
PIN. If they are entered incorrectly then the
receiver will immediately delete all security
20
9261-6366 iss 2 21/11/02 9:04 am Page 24

features and messages. The Z-Pager cannot
then be used for secure messaging without
revalidation on the host PC. If the battery is
allowed to discharge fully then all security
feature programming will also be deleted and
the product will revert to non secure pager
operation.
KeyPage Operation
On the KeyPager a randomly generated
decryption key is already programmed during
production and the key material is loaded from
a diskette into the chosen message entry PC.
The encryption key diskettes should be
carefully stored by your KeyPage system
administrator. When KeyPage encrypted
messages are generated from within a
networked environment, the encryption keys
are stored in the network server.
21
9261-6366 iss 2 21/11/02 9:04 am Page 25

KeyPage Message Access
The KeyPager has no daily password and
requires only a PIN to be entered in order to
read encrypted messages. An unread
encrypted message is indicated on the display
by the symbol. To read the message
press the < button to reveal the PIN entry
screen and enter the number for each asterisk
in turn using the < , > and
•
>
buttons.
Up to 4 attempts are allowed to enter the PIN
after which the pager will reset, deleting all
secure messages and further PIN entry is
barred for four hours. If PIN entry is attempted
the pager will display the symbol. The
PIN entry lockout cannot be shortened by
removing the battery. NB: Secure messages
may be received in this period but may not be
read. No revalidation is required on the host
PC following false PIN entry nor is the secure
messaging facility lost when the cell is
discharged.
22
9261-6366 iss 2 21/11/02 9:04 am Page 26

KeyPage PIN Changes
KeyPage offers the additional facility of being
able to enter ones own preferred PIN. To do
so press
•
>
from the standby screen and use
< or > buttons to select . From the sub
menu select the symbol. The security
control screen is displayed containing four
asterisks. Enter the current PIN using the <
and > buttons and confirm each digit by
pressing the
•
>
button. If the PIN is correctly
entered the pager will display four zeros for an
alternative new PIN. Use the < or > buttons to
step each digit to the required number and
confirm it by pressing
•
>
. After confirming the
fourth digit the pager will display the new PIN
with an arrow, symbol and flashing .
Press
•
>
again and the arrow will flash to
confirm acceptance of the new PIN. The
pager will then revert to the standby screen.
23
9261-6366 iss 2 21/11/02 9:04 am Page 27

KeyPage PIN Reset
If the KeyPager PIN has been forgotten it is
possible for the system to remotely reset the
PIN to that which was first programmed in the
factory. This requires that a special control
code be transmitted to the KeyPager to reset
the PIN. A method of verifying the user identity
must be agreed with the system administrator
who will supply an additional authorisation
code which must be entered to restore the
PIN.
KeyPage Barred Access
When the symbol is displayed it is not
possible to change the PIN. If this is
attempted the pager will display and the
symbol.
If the PIN has been incorrectly entered four
times it will not be possible to change the PIN
until the four hour lockout period has elapsed.
If this is attempted the pager will display the
and symbols
24
9261-6366 iss 2 21/11/02 9:04 am Page 28

Caring for your Pager
Protect your pager from strong magnetic
fields, liquids, extreme temperatures and long
periods of exposure to strong sunlight. Clean
the exterior of your pager using a clean, soft,
non-abrasive cloth. If necessary, dampen cloth
with water only. Avoid contact with solvents.
Fault Finding
If your pager appears to have a fault please
check the following:
•
Is the pager switched on?
•
Is the battery dead?
•
Is the battery fitted correctly?
•
Is the +ve sign on the battery aligned with
the moulded +ve sign in the battery
compartment?
If you have checked the above and are still
having problems please contact your Multitone
dealer.
25
9261-6366 iss 2 21/11/02 9:04 am Page 29

9261-6366 iss 2 21/11/02 9:04 am Page 30

9261-6366 iss 2 21/11/02 9:04 am Page 31

© Multitone Electronics plc 1999
Multitone Electronics plc
Multitone House
Beggarwood Lane
Kempshott Hill
Basingstoke
Hampshire
Printed and published in England
9261-6366 iss 2 21/11/02 9:04 am Page 32
England RG23 7LL Part No. 9261-6366 Issue 2
 Loading...